
Experiencing data loss on external hard drives is extremely common due to both human error and some form of corruption due to their sensitive internal parts.
But the good thing about external hard drives in this scenario is that they are one of the easiest storage devices to restore — as long as you have the right tools and know the correct methods to attempt recovery safely.
To help you, we created this in-depth guide with step-by-step instructions on how to use different Mac tools to restore lost or deleted files from an external hard drive. The guide works with any brand!
Table of Contents
Can Data Be Recovered from an External Hard Drive?
Yes, it’s possible to recover data from an external hard drive. However, the success rate of recovery attempts depends on a number of factors, including the cause of data loss and the current state of the external hard drive health-wise.
To give you a better idea of your chances, here’s a quick breakdown of various common external drive data loss scenarios and how certain factors affect their recovery.
| Scenario | Data Recovery Breakdown |
| I accidentally deleted my files or formatted my drive. | Files that were deleted or lost to formatting are not totally eliminated. Their data still remains on the drive but will eventually get overwritten by the data of NEW files. Before that happens, you can still restore the remaining data using the recovery tools we’ll be demonstrating in this guide. |
| My drive is malfunctioning. | If your external drive is causing errors, lagging your system, or is unable to read and write data reliably, it may have been corrupted. This may be due to a virus infection or past interruption while it was reading or writing data. You can restore your files with the right tools (which are featured in this guide). |
| My drive won’t show up in Finder. | Recovery tools can only interact with drives that your Mac detects at least to some degree. As long as your drive shows up in Disk Utility (even if it’s missing from Finder), you can use recovery tools to restore your files. If it’s not, go through the fixes in this section of the guide first. |
| My drive has signs of physical damage. | A physically damaged drive can either prevent access to data or damage the data itself. Either way, we strongly recommend that you send your drive to a professional recovery center if it’s physically damaged. They have special tools and facilities that make recovery not only feasible but also safe. DIY recovery attempts will likely make the issue worse. |
Best Methods to Recover Data from External Hard Drive on Mac
In this section, we’ll go through 4 different methods to restore lost or deleted files from an external hard drive using a Mac. You can start with Method 1 and work your way down the list, but make sure that you don’t accidentally overwrite the remaining file data with new files.
Note that the methods in this section assume that your external hard drive shows up in Disk Utility at the very least. If yours doesn’t, go through the fixes in this section first.
Method 1: Recover Files from the Trash
Whenever a file is deleted from an external drive connected to your Mac, there are cases where its data remains on the drive itself but is moved to a hidden folder called .Trashes.
You can’t access it directly on your drive, but its data is aggregated by the local Trash folder on your Mac (the one on your Dock).
Fortunately, restoring external HDD files from .Trashes via the local Trash folder is as simple as restoring a local file — as we’ll show you below.
Step 1. Securely connect your external hard drive to your Mac.
Step 2. Open the local Trash folder by clicking its icon on your dock.
![]()
Step 3. Select the file or files you want to restore. Then, right-click selection > Put Back.
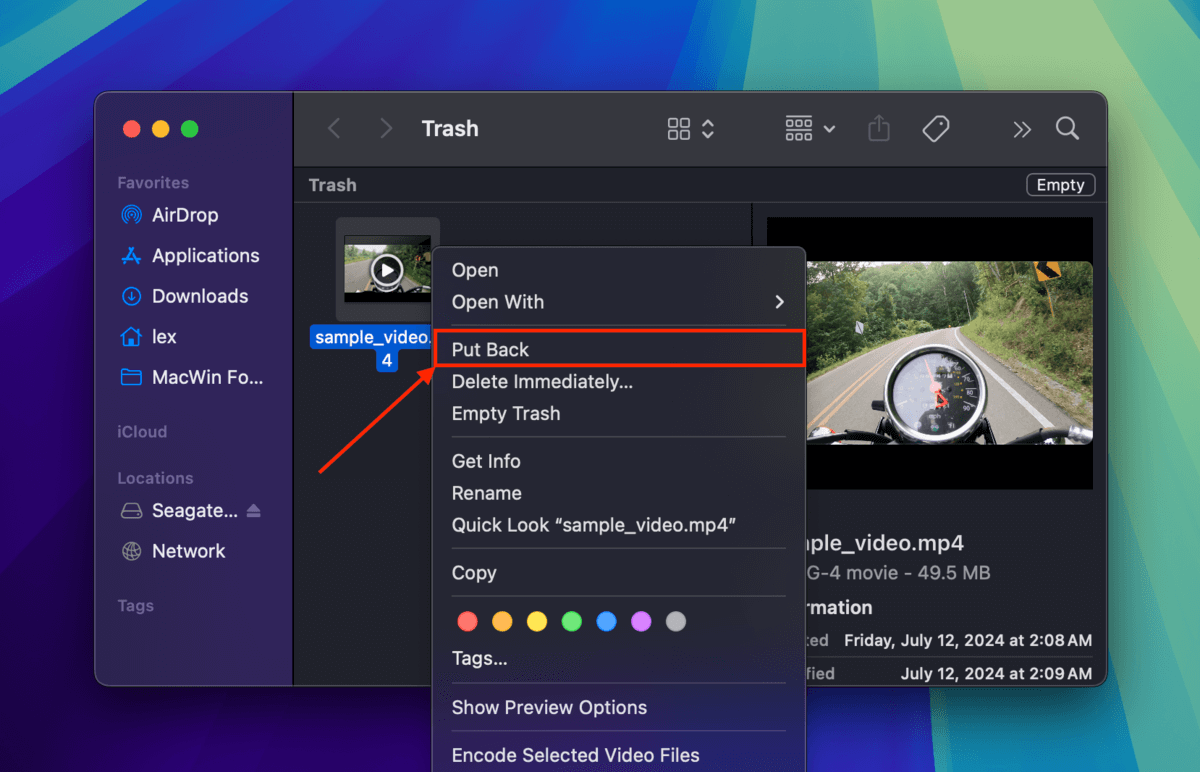
Make sure your drive is securely connected until the restore process is complete. Then, check if your files have been returned to their original locations on your drive.
Method 2: Recover Files Using Time Machine
ETime Machine is a powerful file backup tool built right into macOS by Apple themself. It takes “snapshots” of your files and folders each time they get updated, which allows you to restore different past versions of those files and folders.
Step 1. Plug in your Time Machine backup drive.
Step 2. Launch Finder and then open Time Machine.
Step 3. Once within Time Machine, we can recover files from an external hard drive on Mac by either using the up and down arrows or use the date slider at the lower right-hand side to scroll through different dates and times.
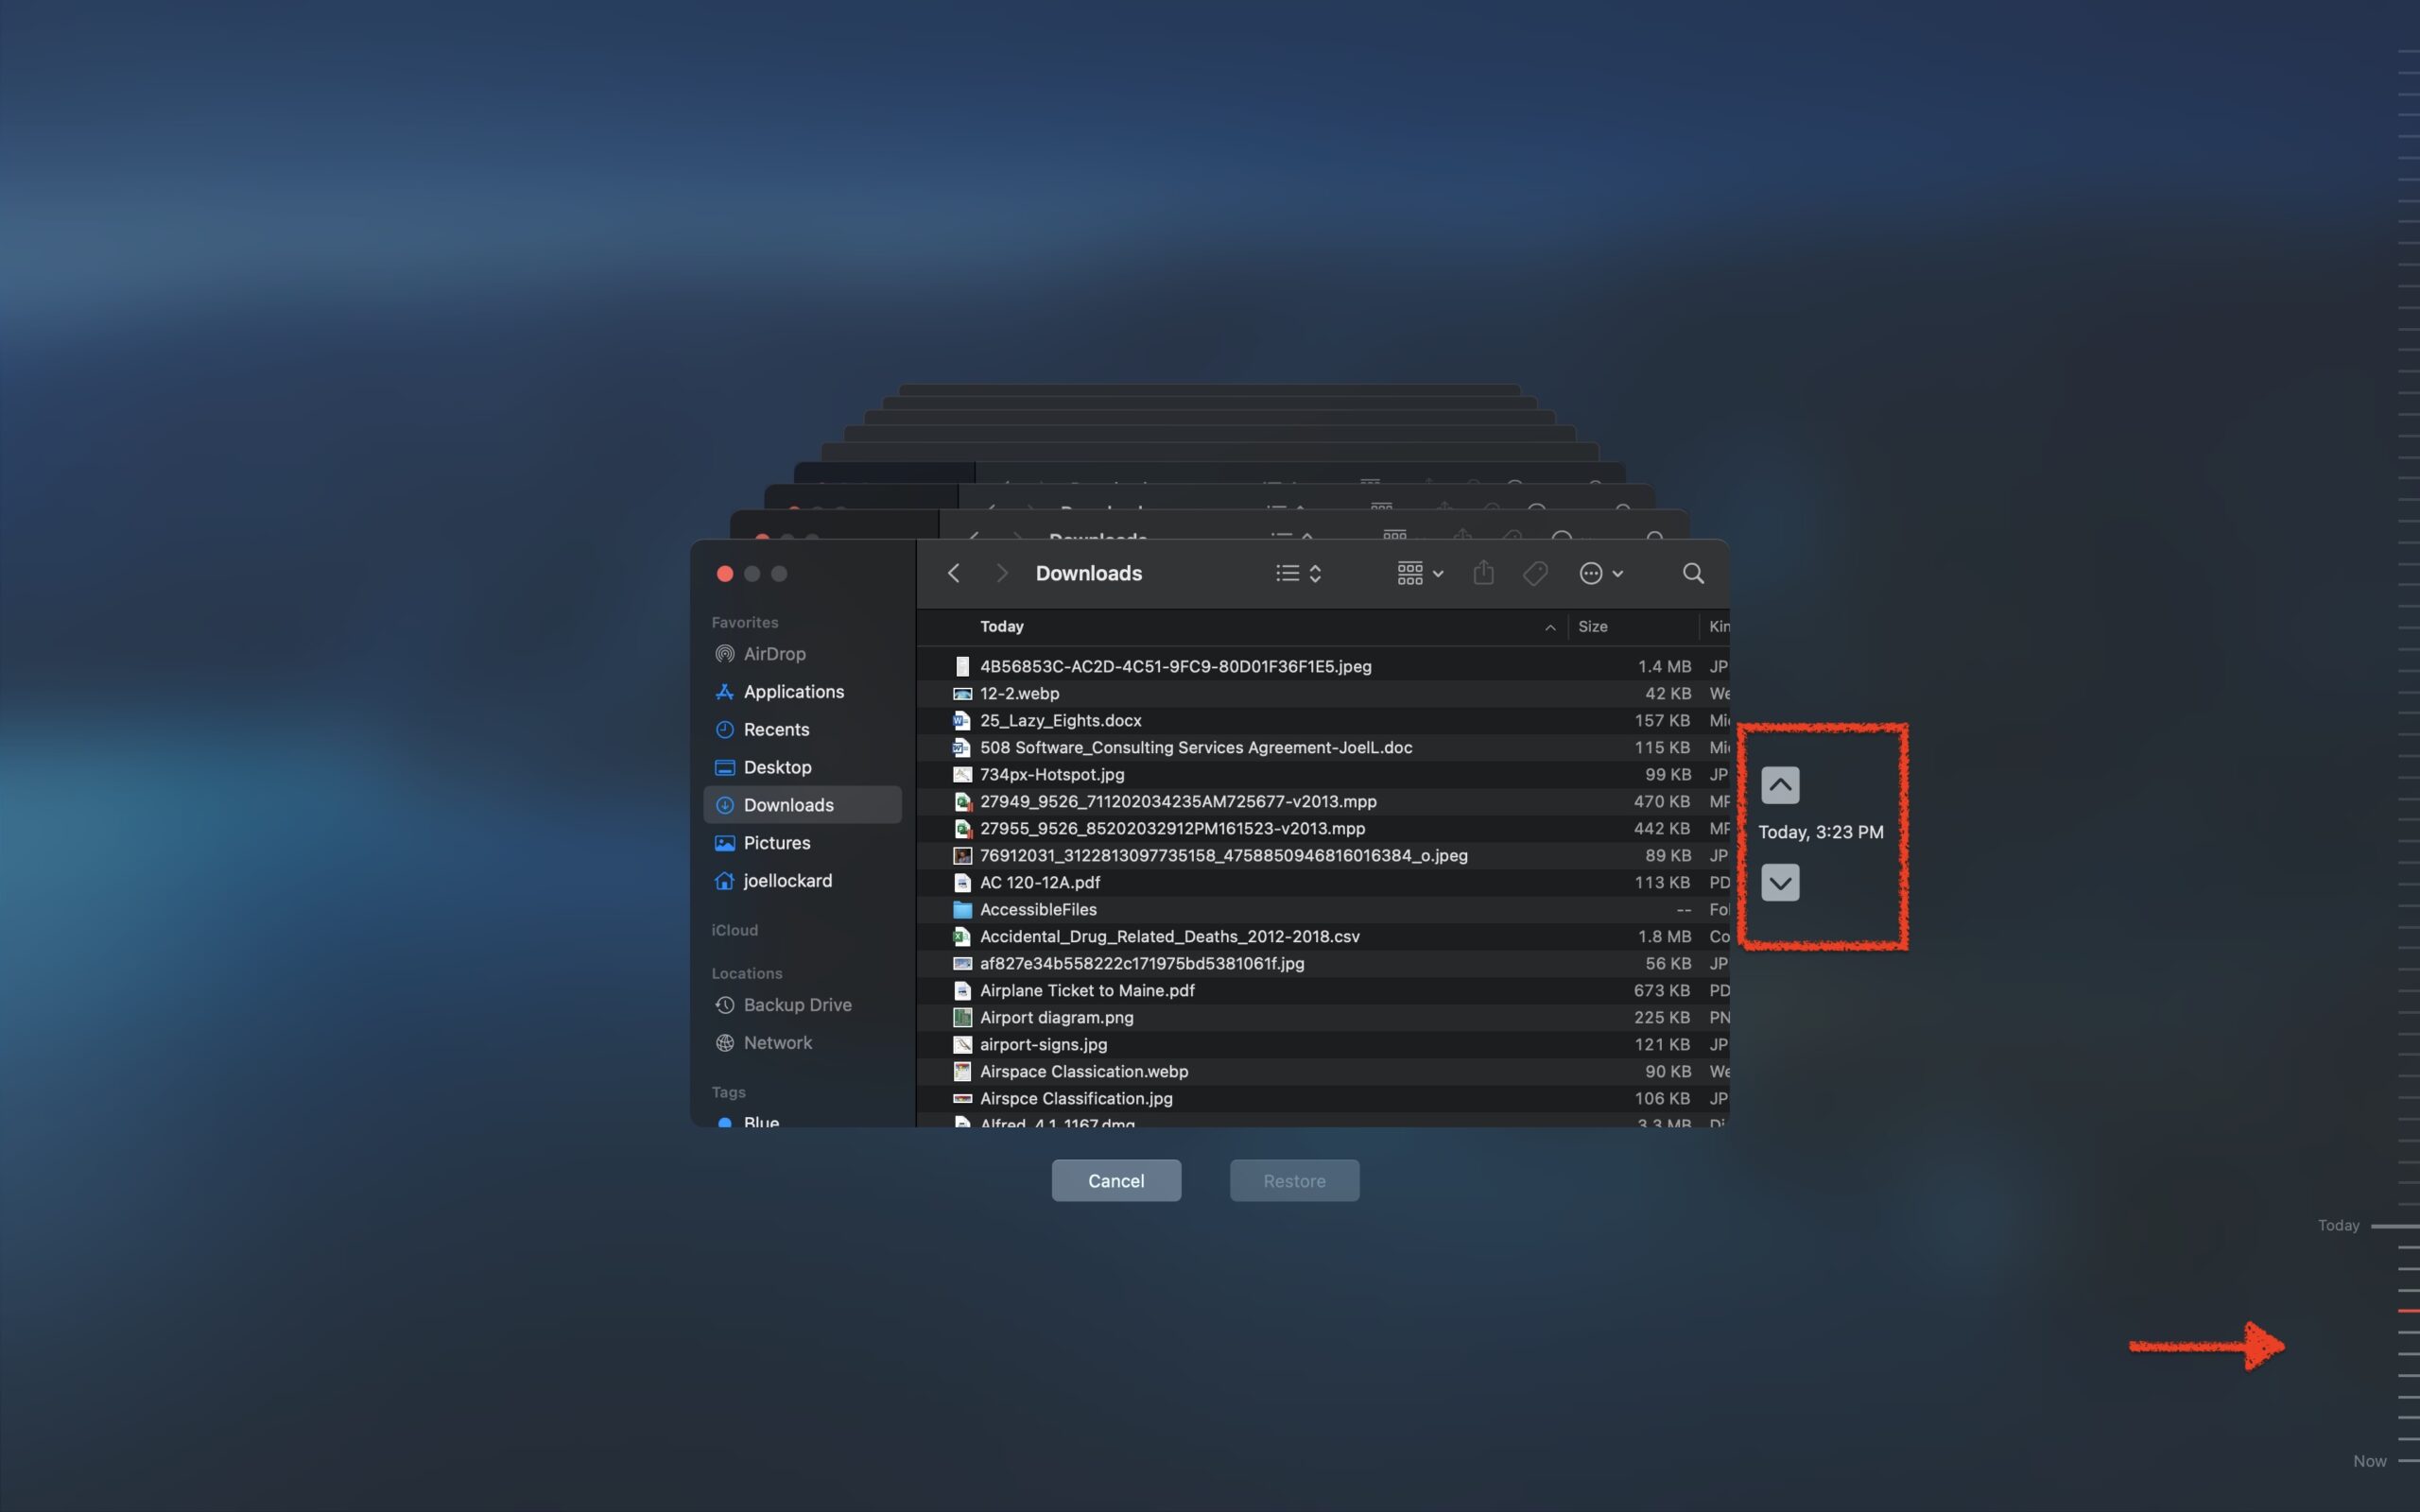
Step 4. Simply find the date that you think that you last had the data that you’re wanting to recover, and then navigate through the Finder and locate the file. You can then click on Restore and put that file back onto your Mac.
Time Machine is great because it’s easy to understand, takes only a few steps, and has a graphical interface that isn’t cluttered with things that don’t need to be there.
The downside of a Time Machine lays in the need to have second drive with capacity of backed up drive or higher which in turn is itslef also can be a subject of data loss.
Method 3: Use Data Recovery Software
If your files are no longer in the Trash folder and you were unable to set up Time Machine beforehand, you can try scanning your external hard drive with data recovery software.
We’ll show you how to use a tool called Disk Drill, which is a data recovery software that can scan your drive for the remnant data of your missing files. We chose it for this demo because it has one of the best interfaces for beginners and it excels at scanning all known file system formats commonly used by external hard drives (namely, ExFAT, FAT32, HFS+, and APFS).
It also has one of the best preview tools among its competitors as it can recognize and open almost all known file signatures, whether they are documents, images, videos, audio files, etc.
Step 1. With your external storage device disconnected from your Mac, download and install Disk Drill.
Step 2. Once Disk Drill has been fully installed on your Mac, connect your external storage device.
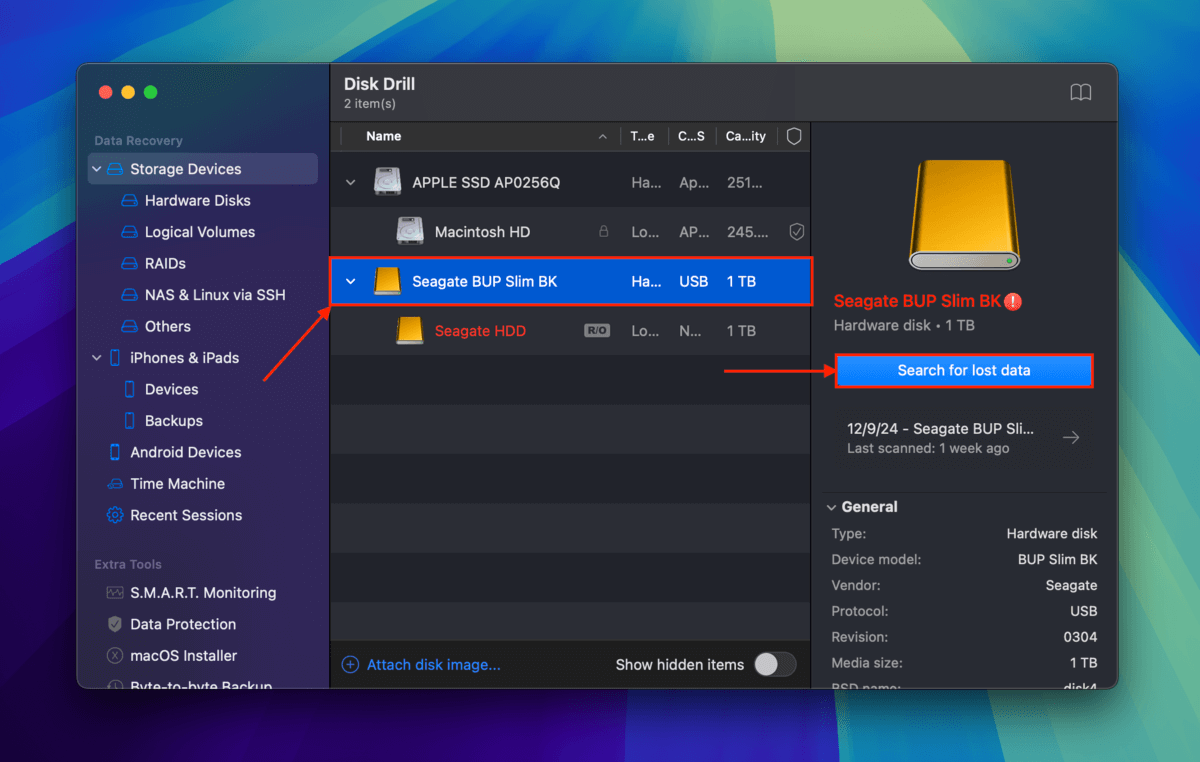
Step 3. Open Disk Drill. Then, select your external hard drive from the source selection list and click Search for lost data.
Step 4. Once Disk Drill is done scanning your external hard drive, click Review found items.
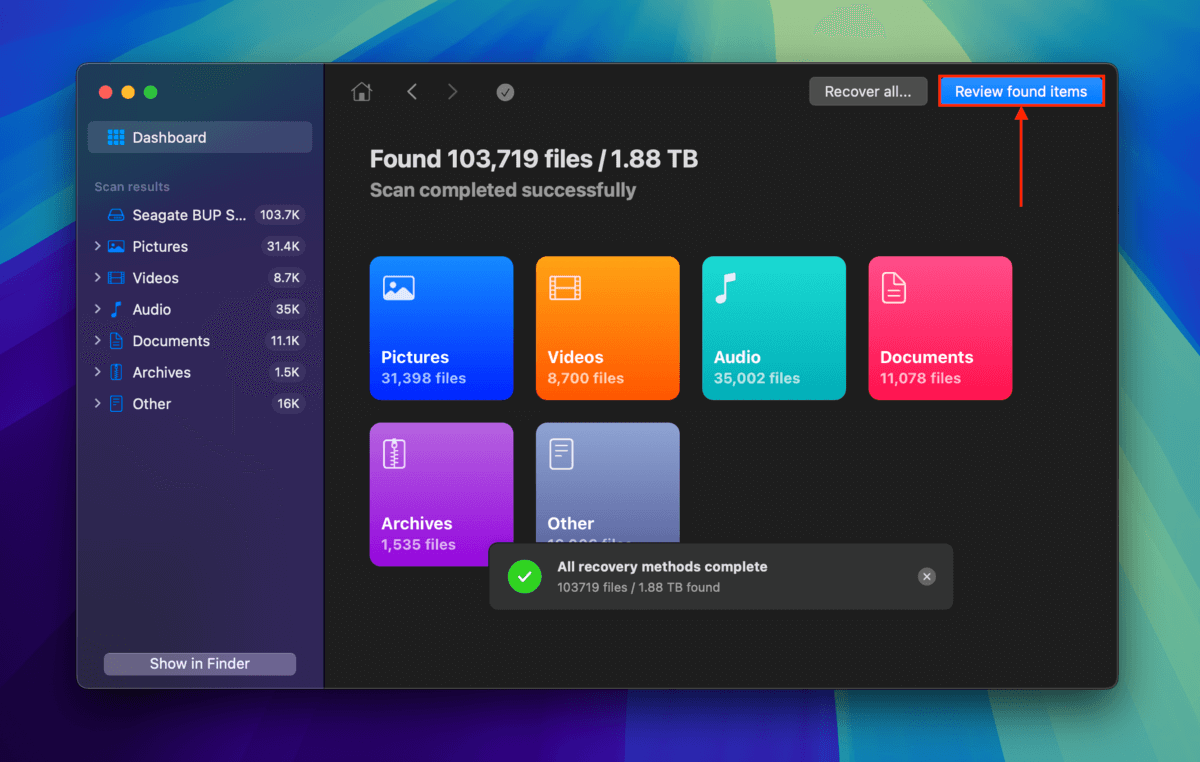
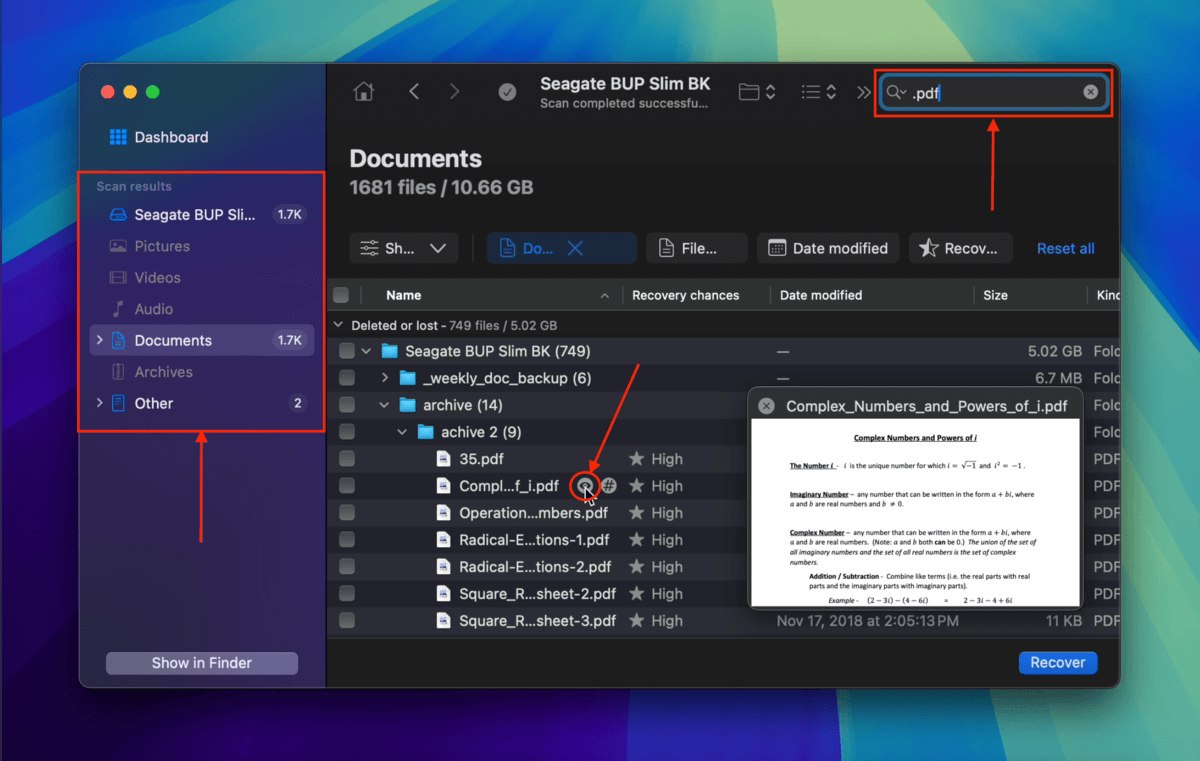
Step 5. If you only want to restore specific files and folders from your external HDD, use the filters in the sidebar and the search tool in the top-right corner to narrow down the list. To preview a file, hover your mouse pointer beside its file name and click the eye button that appears.
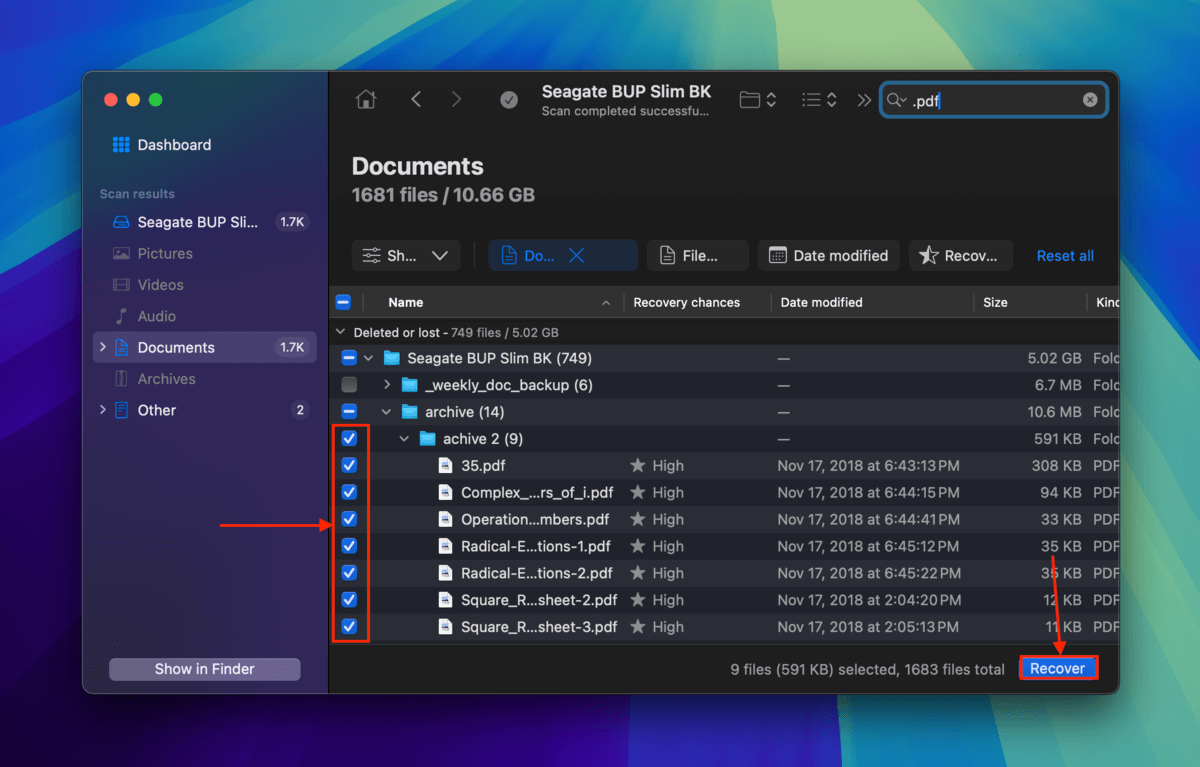
Step 6. After locating the files and folders you want to restore, mark the boxes to their left. Then click Recover.
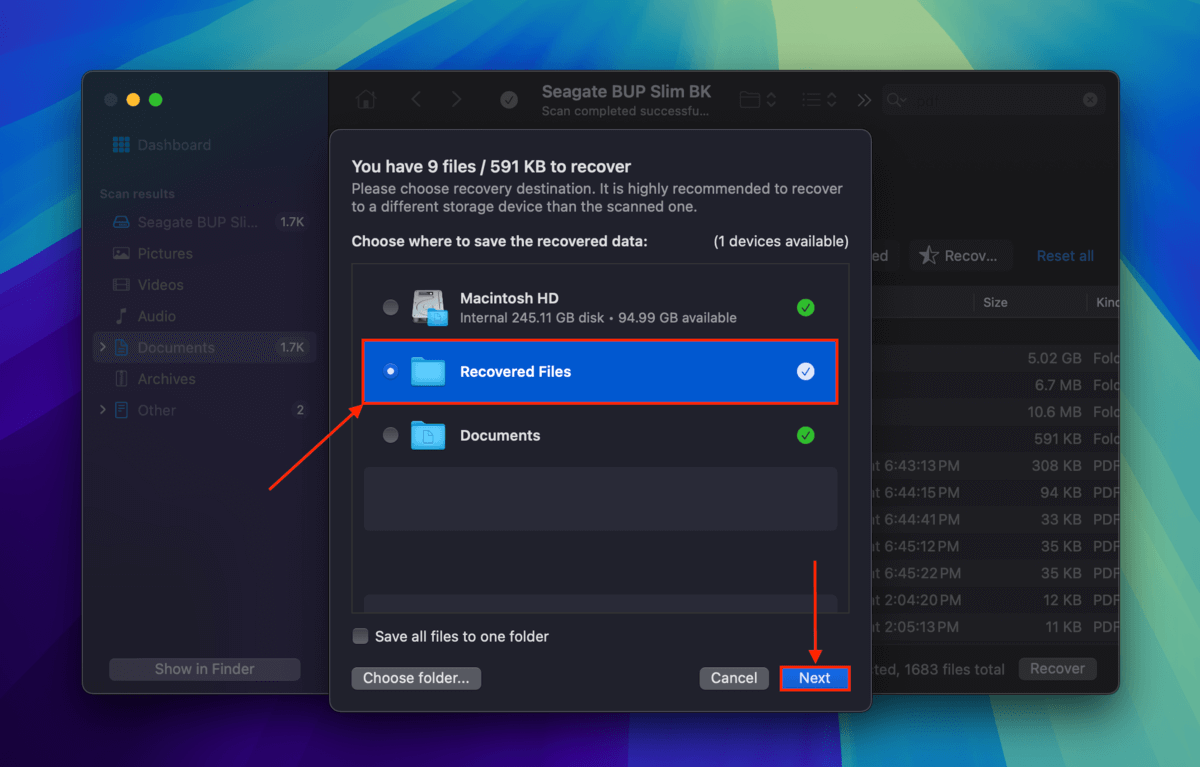
Step 7. In the window that appears, select a location on your Mac (not on your external drive) where you want Disk Drill to save the recovered files. Finally, click Next.
Once Disk Drill is done saving the files you selected, you should find them on your Mac in the folder you chose in step 7. We recommend that you try opening them one by one to verify they all work.
Method 4: Send Your External Hard Drive to a Data Recovery Service
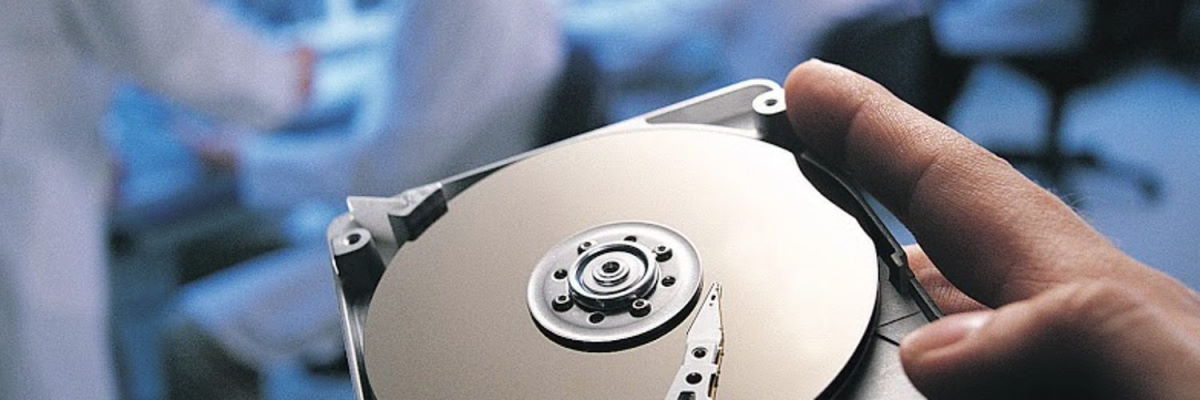
Data recovery services can address both logical and physical data loss, providing a great option for those who are willing to spend some money to get their data back.
In fact, they’re often the only option for recovering data from external hard drives that have been mechanically damaged because only data recovery services are equipped with the kind of cutting-edge equipment that’s necessary to work on modern external hard drives.
To get started, you need to find a suitable data recovery service, and ask for a price quote. If you decide that you’re happy with it, you can go ahead and ship your external hard drive to the data recovery service center of your choice. The best services offer a free evaluation, so you won’t spend any money unless your data is recoverable.
What if My Mac Can’t Recognize My Hard Drive?
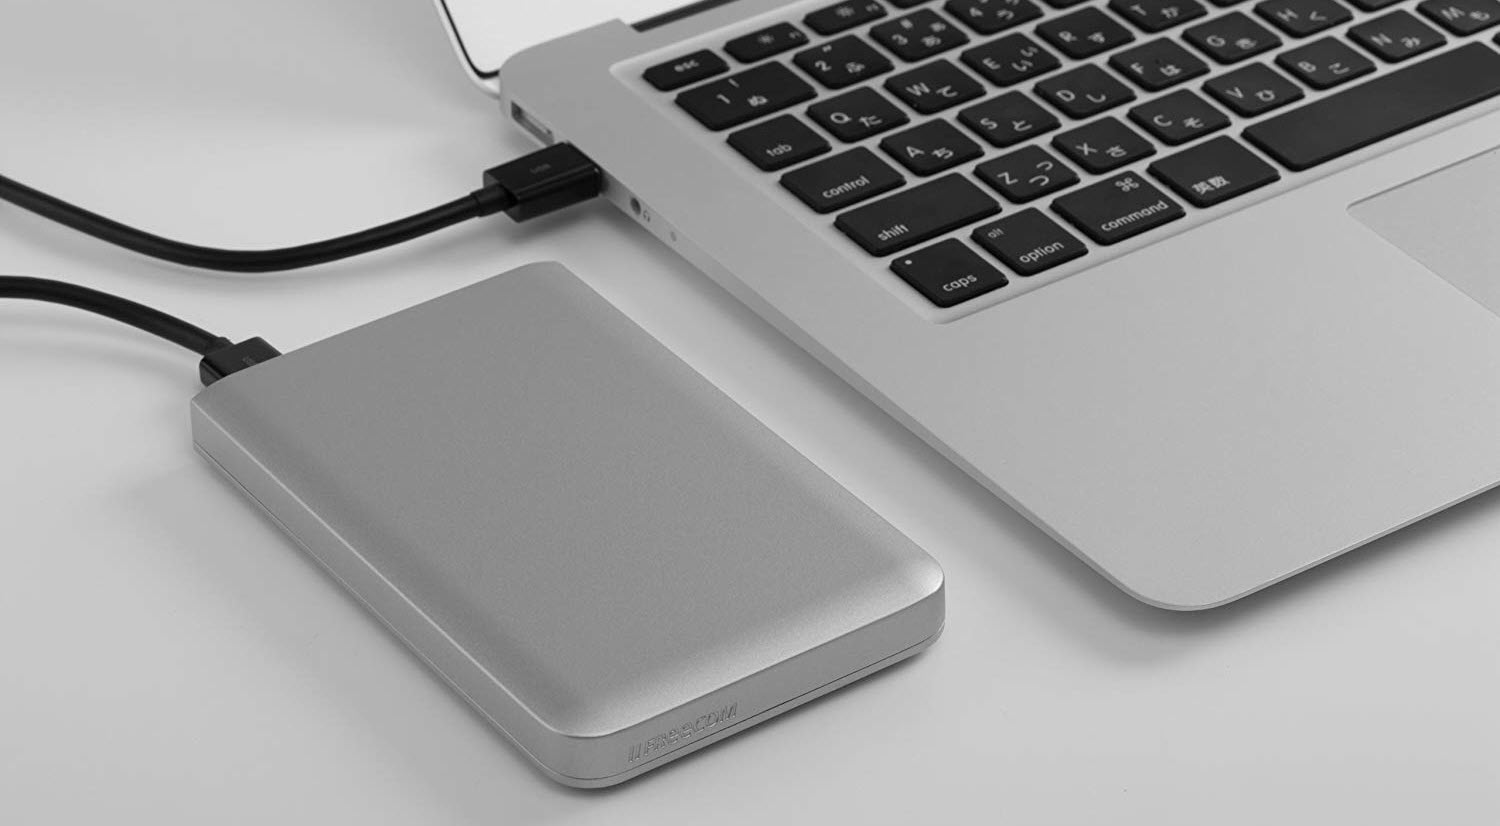
If you plug your external hard drive into your Mac and nothing happens, don’t worry the drive most likely isn’t broken. There are some steps that we can take to try and get the external hard drive to be recognized.
Do keep in mind though, that external hard drives can fail even though it is not likely. They’re mechanical devices with moving parts which over time, can stop working if they have been subjected to damage or have failing components.
Before we come to that conclusion though, here are some ways to try and get your external hard drive to mount to your Mac.
Fix 1: Restart Your Mac
As cliche as it may sound, restarting your Mac can fix a lot of issues on its own. The simple “turn it off and back on again” is a good way to troubleshoot issues and should allow for the hard drive to mount to your Mac.
Step 1. Unplug your external hard drive from your Mac.
Step 2. Restart your Mac.
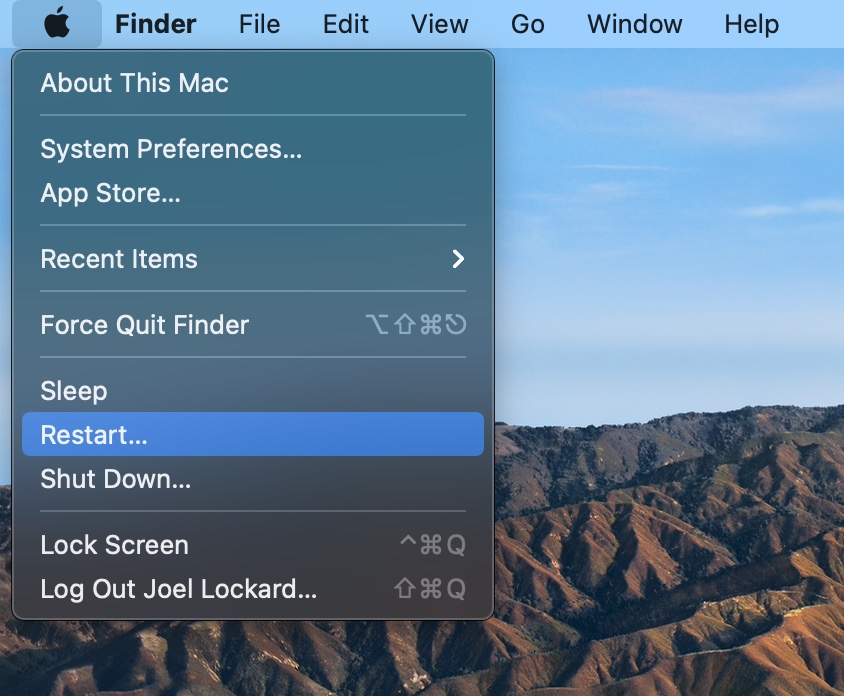
Step 3. Once your Mac has booted back up, plug in the external hard drive and see if it is functioning correctly.
Fix 2: Check Your External Hard Drive’s Connection
The issue could also be something as simple as the cable that you’re trying to use to connect the hard drive to your Mac. Cables do fail, if you have a spare around, try using that instead and see if that fixes the issue.
It could also be the port on your Mac. Try plugging the external hard drive into another port and see if the hard drive mounts to your computer.
Lastly, if you’re using an adapter or dongle try plugging the external hard drive right into your computer and see if that fixes the issue. If you need the dongle due to a connector compatibility issue, try using a different dongle or plug it into another computer.
Fix 3: Reset NVRAM
NVRAM in short, stores settings that you have made on your Mac. It won’t change the configuration of your System Preferences, but it stores things such as sound settings, time zone information, and settings related to hard drives.
Resetting your NVRAM could solve the problem of your hard drive not being recognized by your Mac and it only takes a few steps to reset it.
Step 1. Shut down or restart your Mac.
Step 2. Once your Mac starts back up, immediately press and hold Option, Command, P, and R all together at the same time.
Your Mac will then start back up again and you can let go of the keys at this point. Check and see if the external hard drive is now being recognized by your computer.
When I worked at an Apple Store, this would fix common issues for customers and it is a simple way to troubleshoot why your external hard drive may not be mounted to your Mac.
Fix 4: Repair the External Hard Drive Using Disk Utility
If external drive is present in Disk Utility you can repair it using the First Aid. First Aid can find and repair errors related to the formatting and directory structure of the external hard drive which could increase the chance of external hard drive data recovery on Mac.
Step 1. Plug-in your external hard drive.
Step 2. Launch Disk Utility and find the external hard drive.
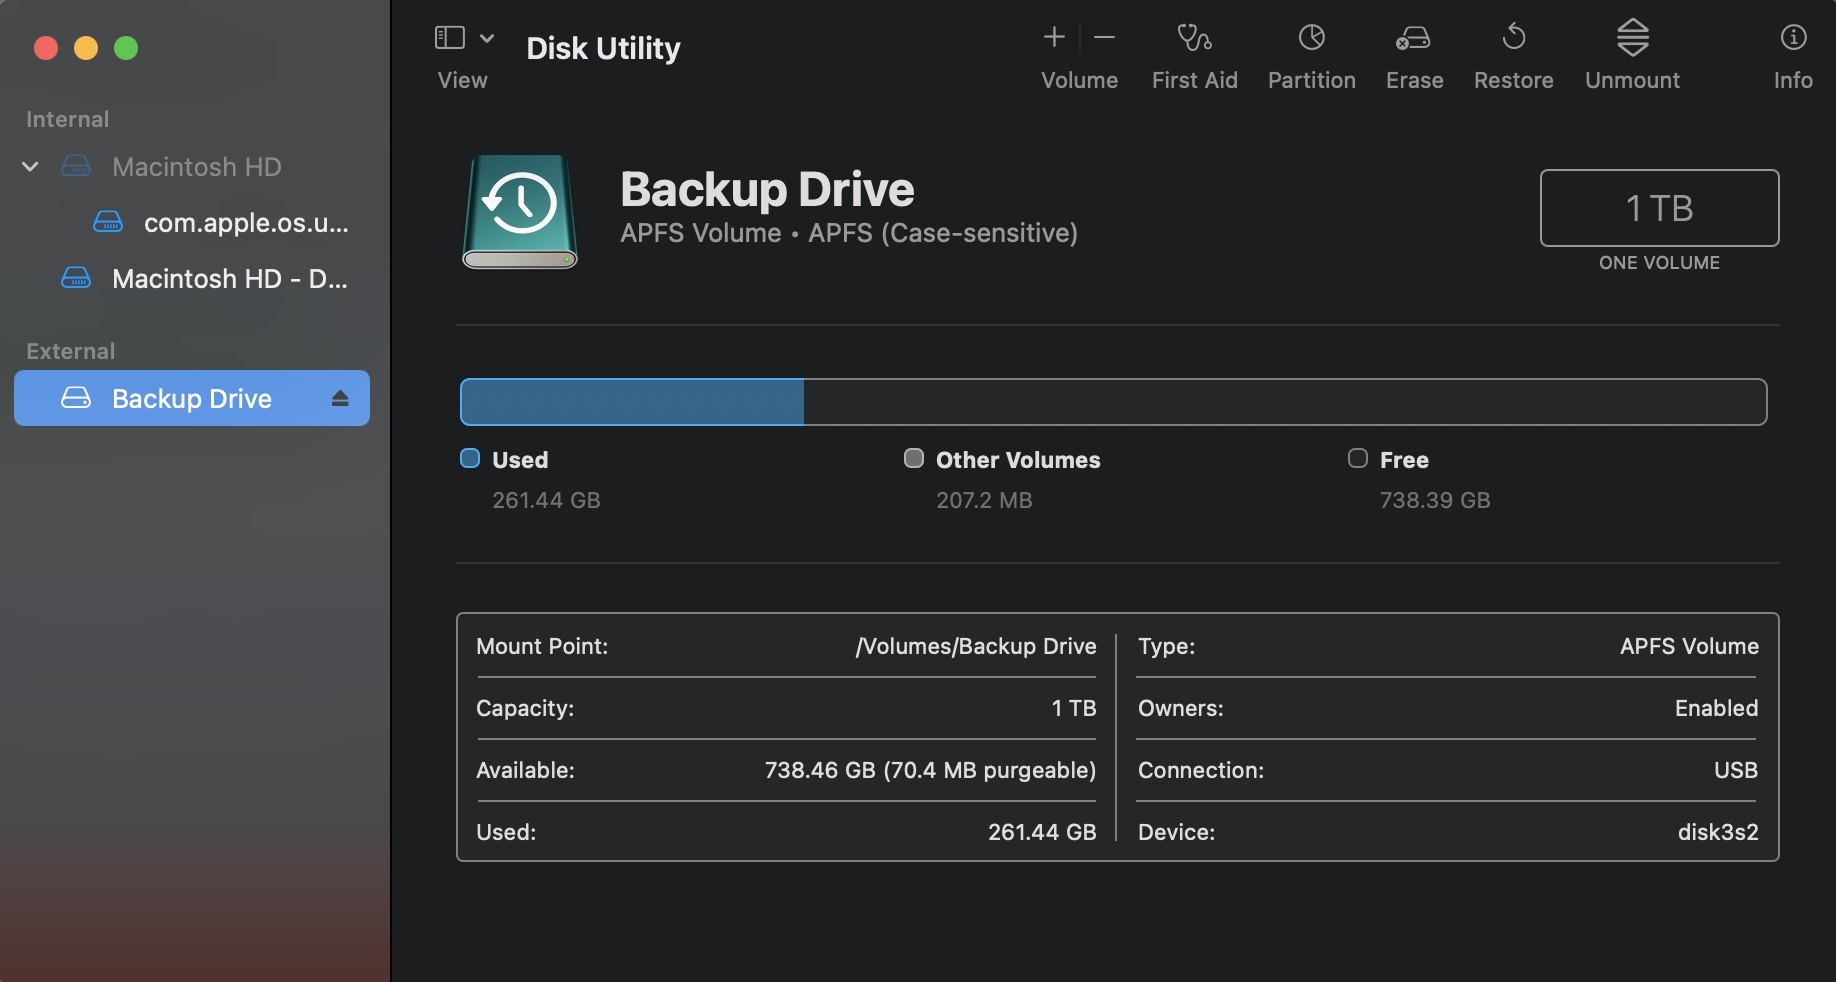
Step 3. Run First Aid on the External Hard Drive.
Fix 5: Format Hard Drive on Other PC
macOS can only recognize the following formats: HFS+, APFS (Apple) and ExFAT, FAT32, NTFS (Windows). If you’re using other formats, like ext3/4, you’ll need to use a Windows PC to format your drive. Just make sure that you choose one of the formats that we mentioned at the beginning. We personally recommend ExFAT for maximum compatibility.
Is Your Hard Drive Showing Corruption Symptoms?
Missing files can be an indication of corruption. If it has happened to your external hard drive multiple times or you’ve noticed other anomalies in its behavior (e.g. intermittent connection, lag, noise from the drive itself), the likelihood is even higher.
We wrote a guide on how to fix corrupted hard drives using a Mac — we recommend you go through it after successfully restoring your data.
FAQ:
You can try the First Aid feature in Disk Utility, which is included for free in macOS. The First Aid feature will analyze the corrupted external hard drive and attempt to fix any issues it encounters.


