
iPhone videos can be highly vulnerable to corruption under the right circumstances; common occurrences like sudden device shutdown or an intermittent network connection can both be a recipe for corruption.
A corrupted iPhone video is fixable in most scenarios – whether it’s playable but visually degraded or whether you’re unable to load the video on your iPhone at all.
And a typical iPhone video is exceptionally high in quality and has specific codec preferences – so generic video repair advice often won’t work. To help you, we created this guide that demonstrates repair methods specifically tailored for corrupted iPhone videos.
Table of Contents
3 Convenient Ways to Copy Your Corrupted iPhone Video to Your Mac
If you want to repair an iPhone video that won’t even play at all, you’ll need to use intermediate tools only available on computers (for the purpose of this guide, Macs specifically). That means you’ll need to copy the video to your Mac — here are 3 easy ways you can do that:
- Cloud synchronization. If you have iCloud enabled for your photos on both your iPhone and your Mac, you’ll find the video file in the Library of the Photos app on your Mac. To save a local copy of your video for repair purposes, drag it from the Photos app to a folder on your Mac. This typically applies to almost any popular cloud storage service.
- AirDrop. As long as you have an iPhone 5 or newer and a mid-2012 Mac or newer (with the latest supported operating system), you can use AirDrop to send the video from your phone to your computer. The option should appear in the Share menu on your iPhone.
- Send as attachment. Aside from cloud sync and AirDrop, you can also send your iPhone video to your Mac as an attachment on a messenger app or via email.
5 Free and Beginner-Friendly Ways to Fix Corrupted Videos on an iPhone
In this section, we’ll show you 5 ways to repair your corrupted iPhone video. Fixes #1 to #4 will help you repair a video that isn’t playable. Fix #5 will help you enhance playable video files that simply degraded in quality due to the corruption.
Fix 1: Re-Download the Corrupted Video from iCloud Photos
If you acquired the corrupted iPhone video by copying it from your Mac’s Photos app and it got there because you enabled iCloud Sync for Photos, it’s possible that the video file wasn’t fully synchronized yet and you actually copied an incomplete file.
Fix 2: Utilize an Online Video Repair Tool
If you no longer have access to a working copy of the video file, the easiest way to actually fix corruption is by using an online video repair tool. It’s a type of application that you can access through your browser, and it can repair your video file with just a few clicks.
For this guide, we’ll be using the website Clever Online Video Repair. It’s completely free for videos up to 5 GB in size, and it provides native support for iPhone video formats and codecs—namely, QuickTime (.mov) and HEVC (H.265). This alone makes Clever Online Video Repair one of the best tools for this task because it has the greatest chance of retaining as much of the video’s original quality as possible.
Moreover, it’s one of the few tools specifically designed to repair files with a missing ‘moov’ atom. This type of error commonly happens during sudden interruptions during capture—such as your iPhone suddenly turning off due to a faulty battery or software glitch.
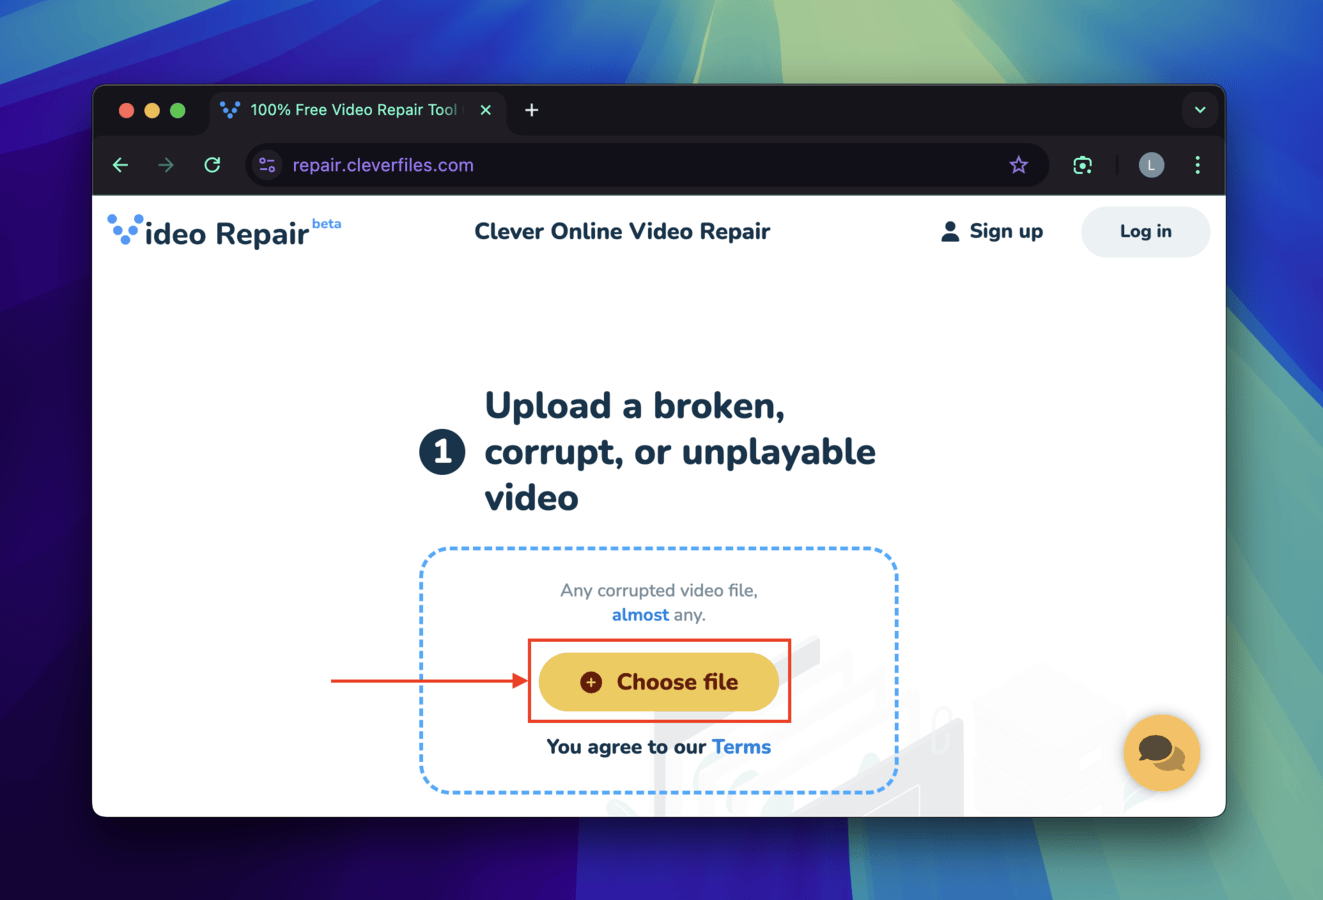
Step 1. Open a browser app on your Mac and navigate to repair.cleverfiles.com. Alternatively, you can also access this tool directly on your iPhone’s browser.
Step 2. Click Choose file.
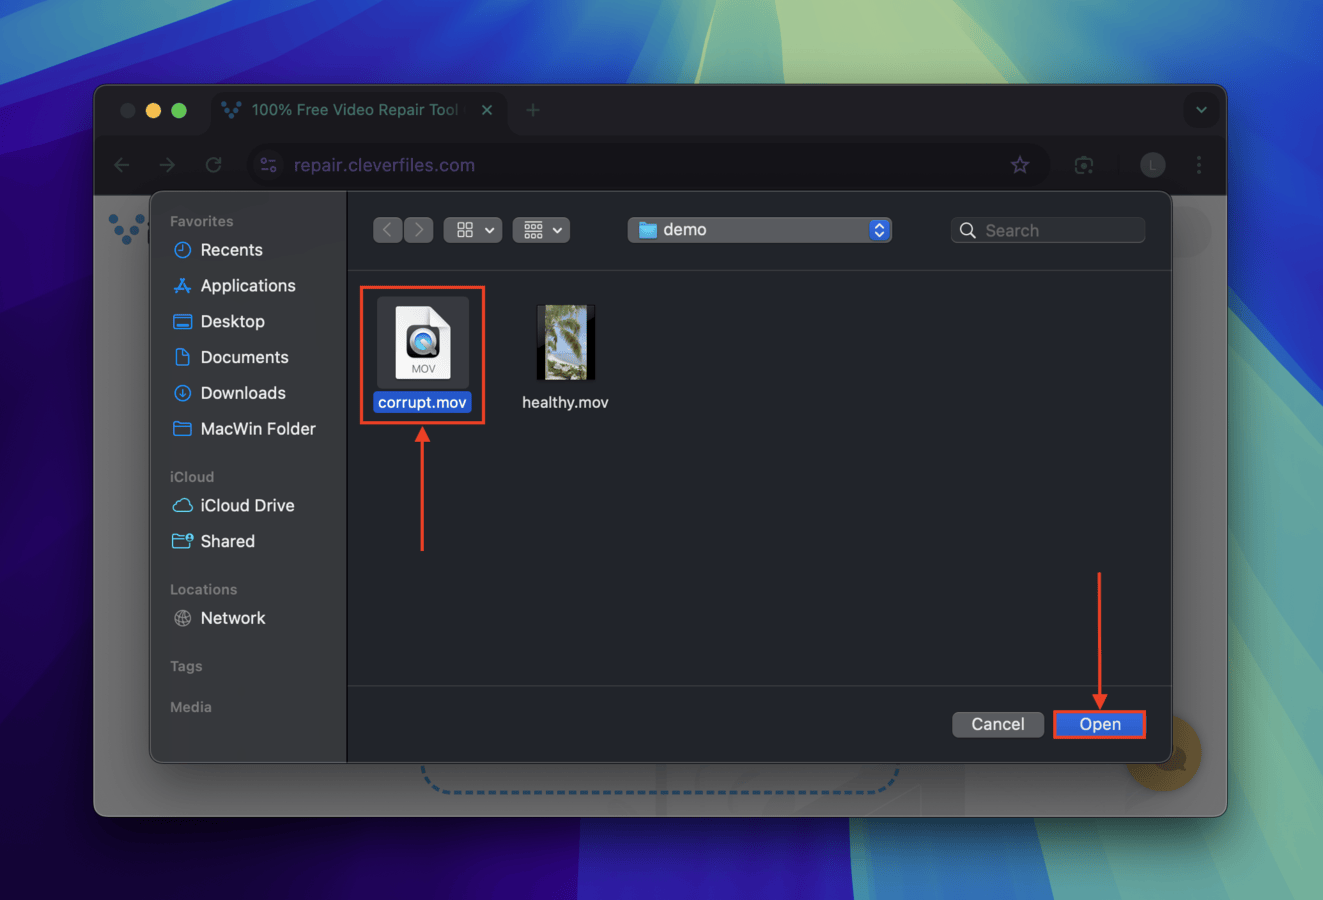
Step 3. In the Finder menu that appears, locate and select your corrupted video file. Then, click Open.
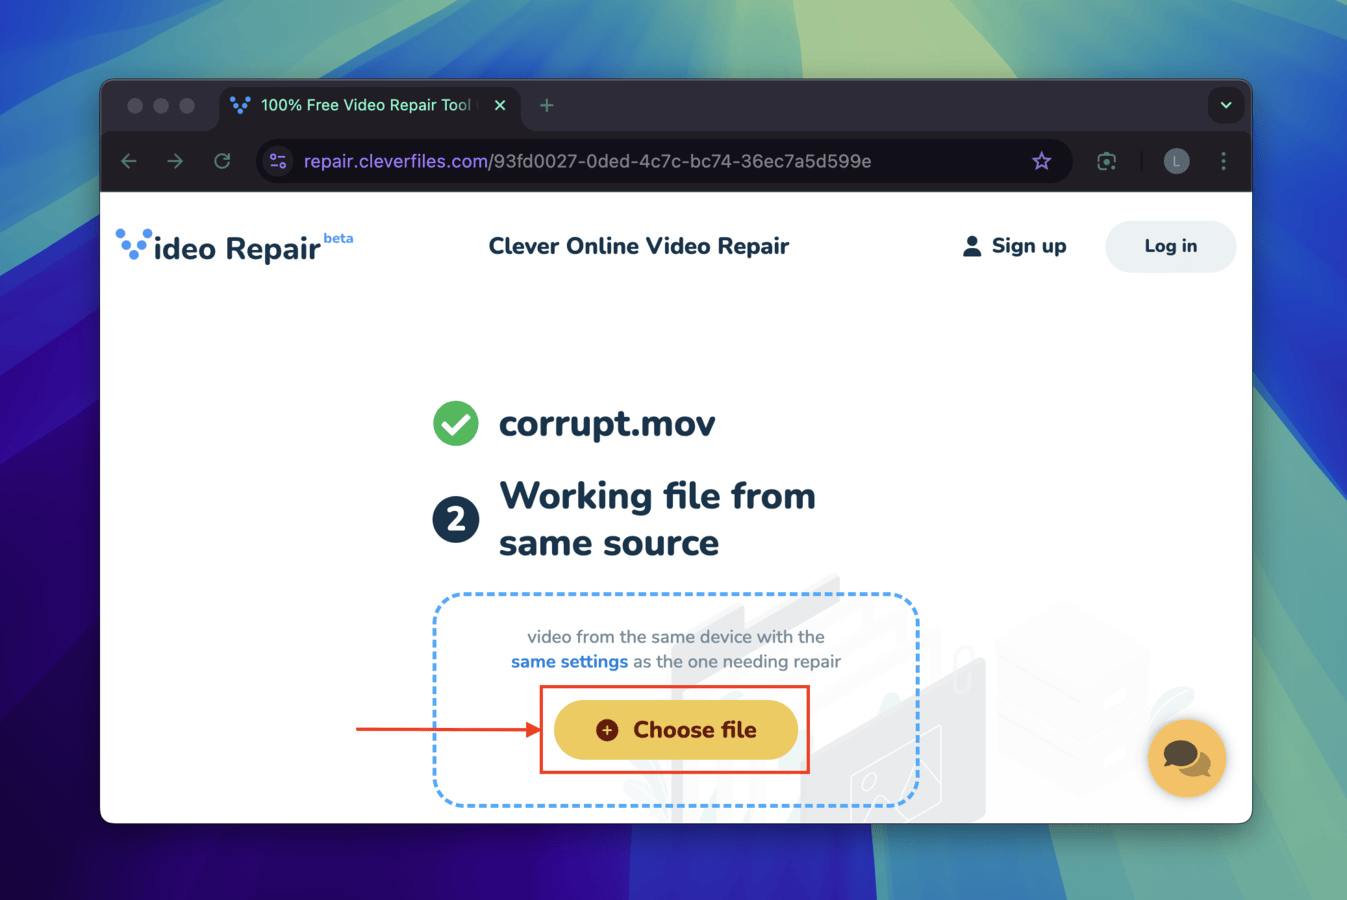
Step 4. Once your corrupted video has been successfully uploaded, a new Choose file button will appear. Click it.
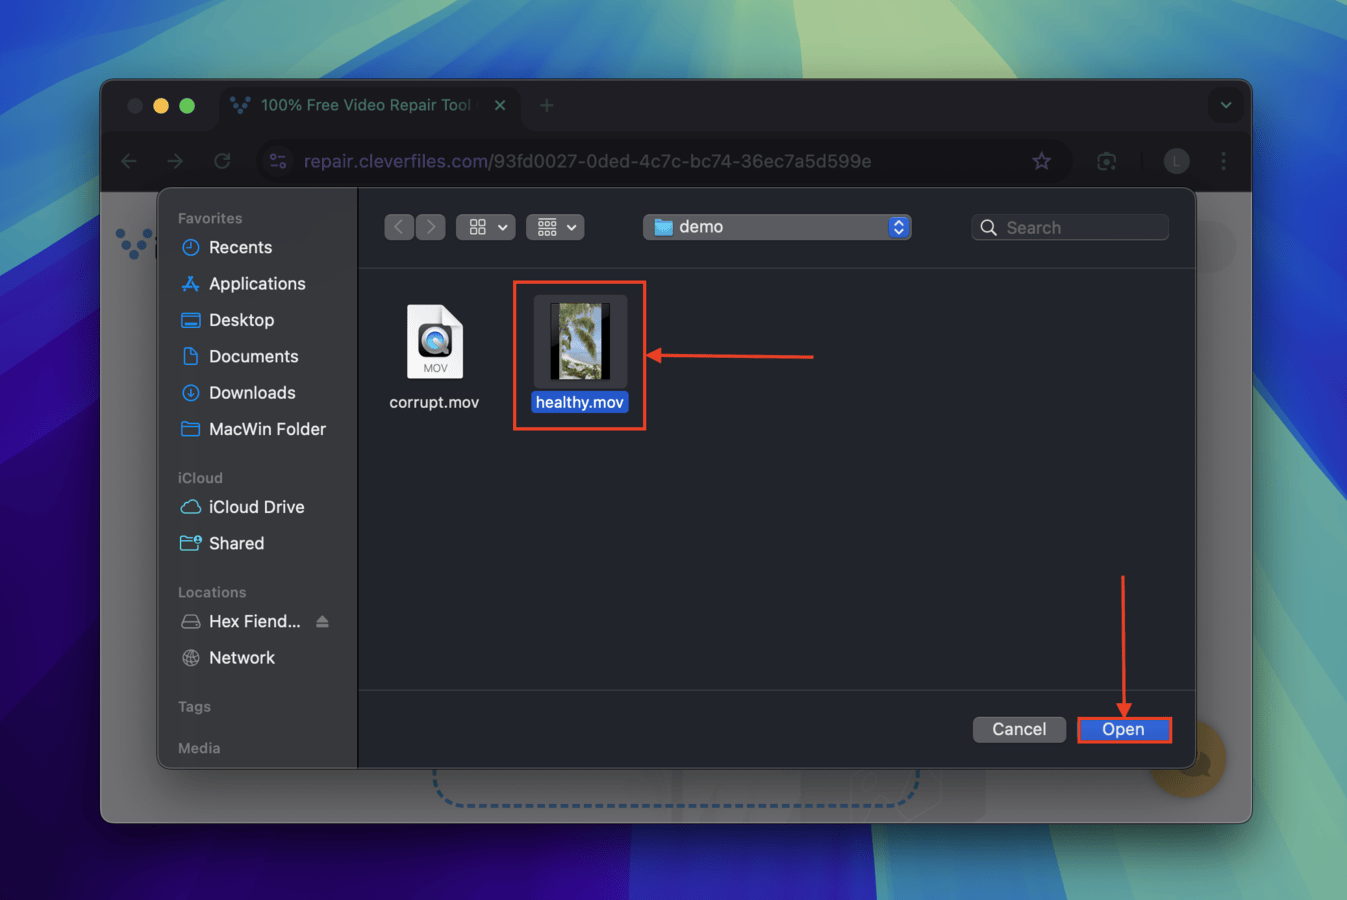
Step 5. Locate and select your healthy file sample. Then, click Open.
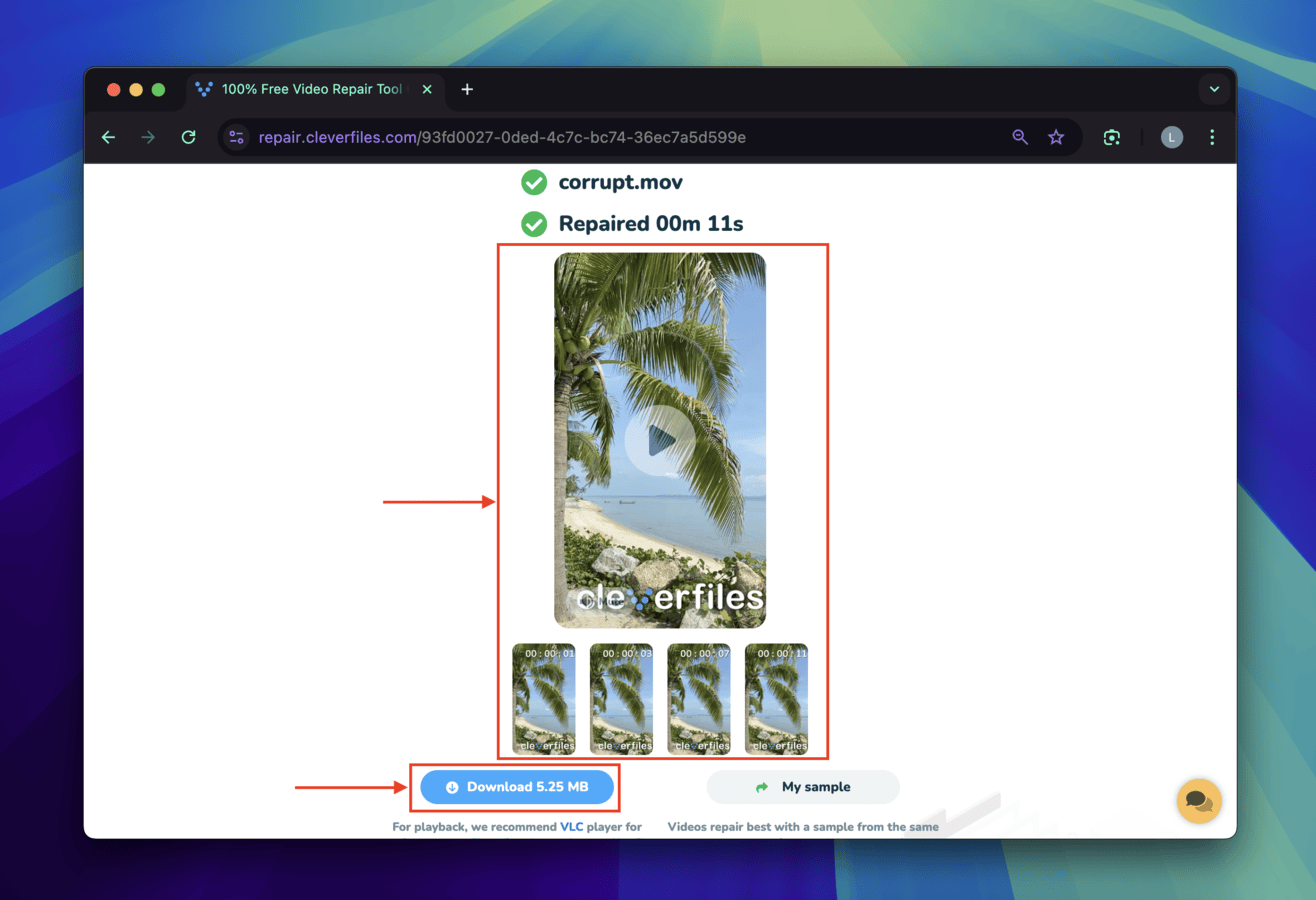
Step 6. Upon uploading the healthy file sample, Clever Video Repair will automatically start attempting to fix it. Once successful, you’ll be able to preview different timestamps of the repaired video. Clicking the Download button to save the file to your Mac or iPhone.
Fix 3: Rebuild the Corrupted iPhone Video’s File Container Using MP4Box
Video files are made up of different components. One of these components is the “file container”, which stores the actual audio and video streams along with important file system structure parameters. When we talk about “file formats” like .mov, .mp4, and .avi, this actually refers to the format used by the container.
When a file container is damaged or corrupted, it leads to a broken video. To repair this particular type of corruption, you can use software to build a completely new container—free from errors—to store exact copies of the audio and video streams.
We’ll demonstrate how to do this using the free and open-source tool MP4Box. It natively supports H.265 codecs (HEVC) so it gives you the best chance of retaining video quality.
Step 1. Open the Terminal app on your Mac (Finder > Applications > Utilities).
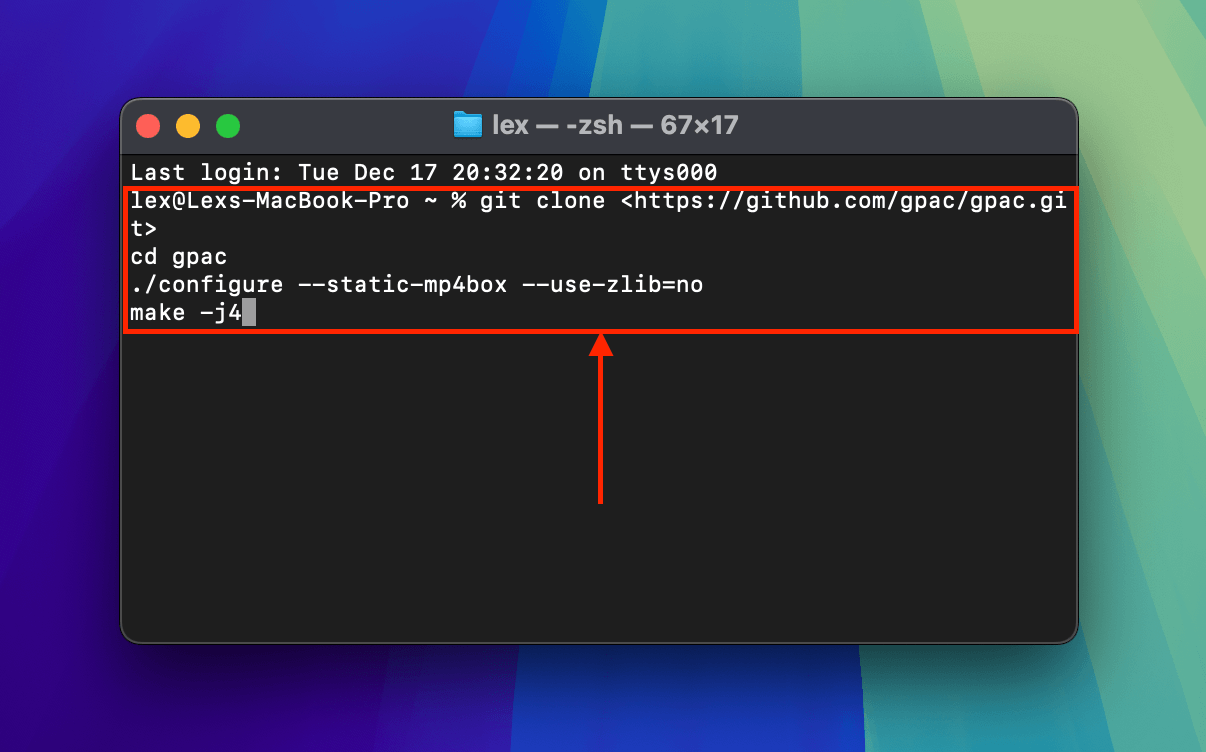
Step 2. To install GPAC on your Mac, paste this entire code block into Terminal (as is) and press Return:
git clone <https://github.com/gpac/gpac.git>
cd gpac
./configure --static-mp4box --use-zlib=no
make -j4
If Terminal displays an error, remove the angle brackets < > from the command.
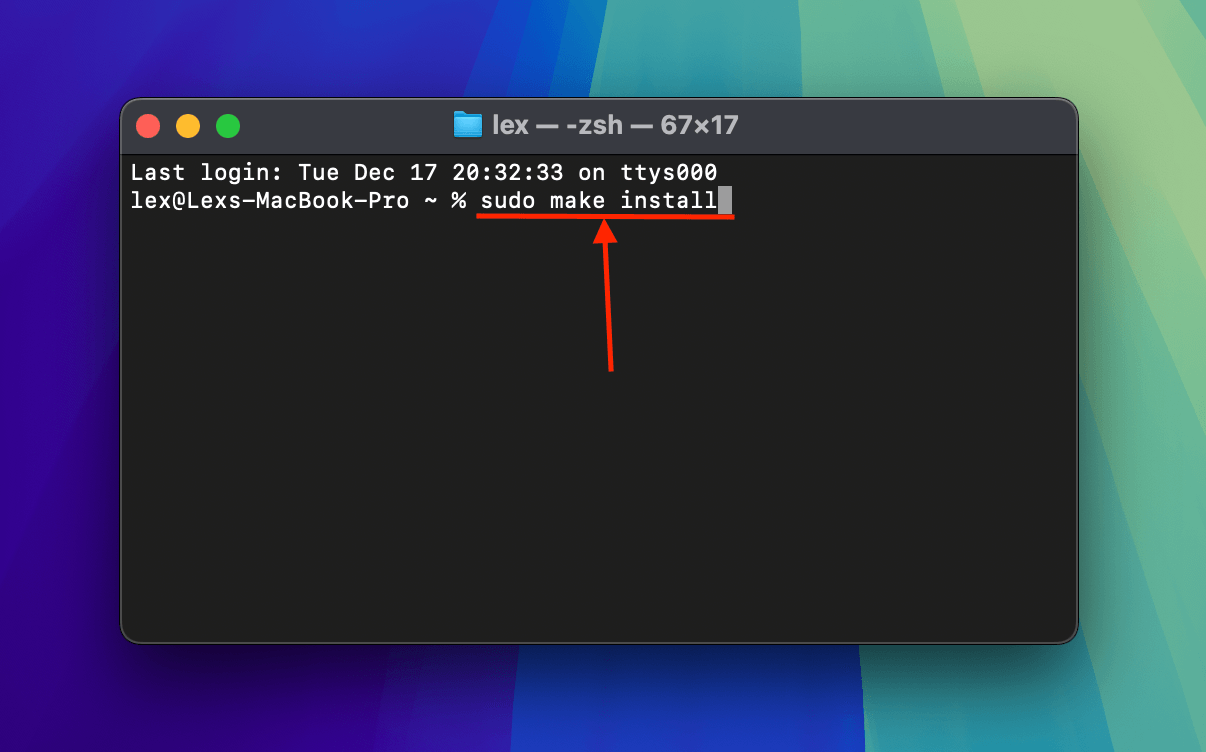
Step 3. Once GPAC’s installation process concludes, use the following command to install MP4Box:
sudo make install
If you’re using an Intel-based Mac, use the following command: sudo xcodebuild -license. Then, type agree when prompted to accept the license.
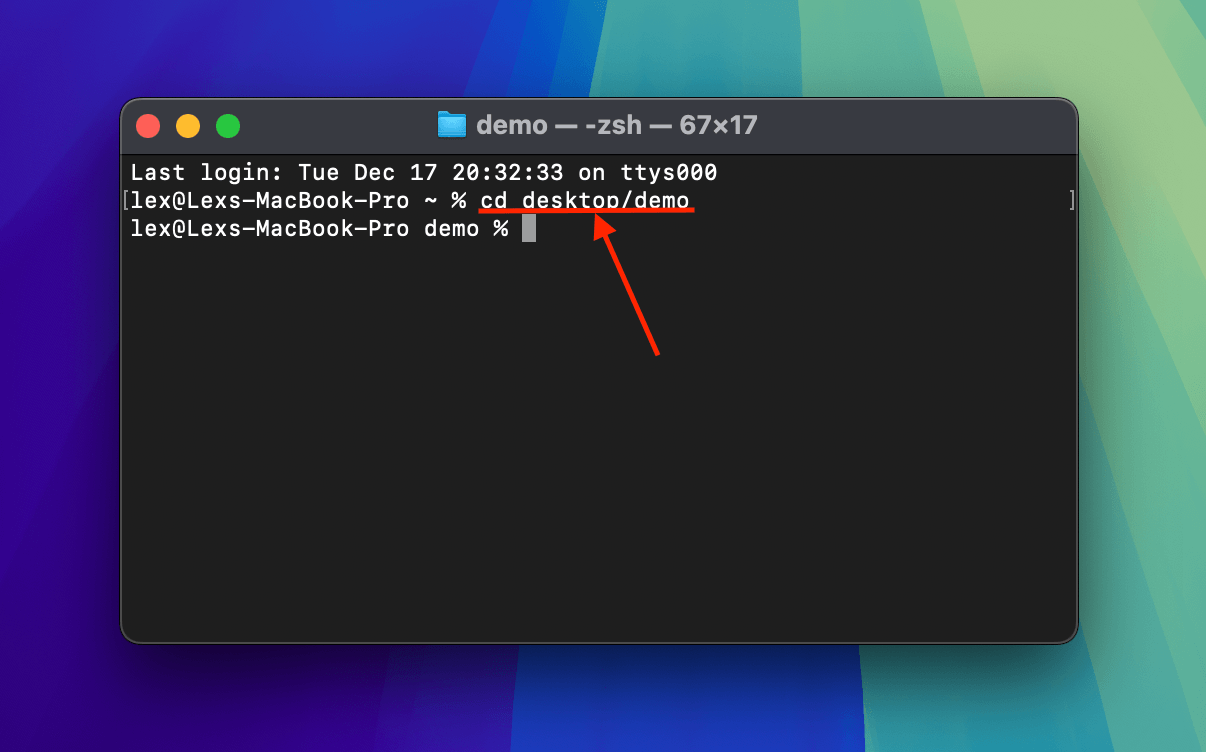
Step 4. Close the Terminal app. Open the Terminal app again. Then, use the following command to change the working directory to the folder where your corrupted iPhone video is saved:
cd desktop/demo
Replace desktop/demo with the appropriate folder pathname on your own system.
Step 5. The next command utilizes MP4Box to extract the video and audio streams from your iPhone video — without any re-encoding — and add them to a newly generated file:
MP4Box -add corrupt.mov -new myvideo.mp4
Replace corrupt.mov and myvideo.mp4 with the appropriate file names and extensions. You can opt to generate a new MOV file but we recommend MP4 for increased compatibility.
If this command triggers an error, use this instead:
../gpac/bin/gcc/MP4Box -add corrupt.mov -new myvideo.mp4.
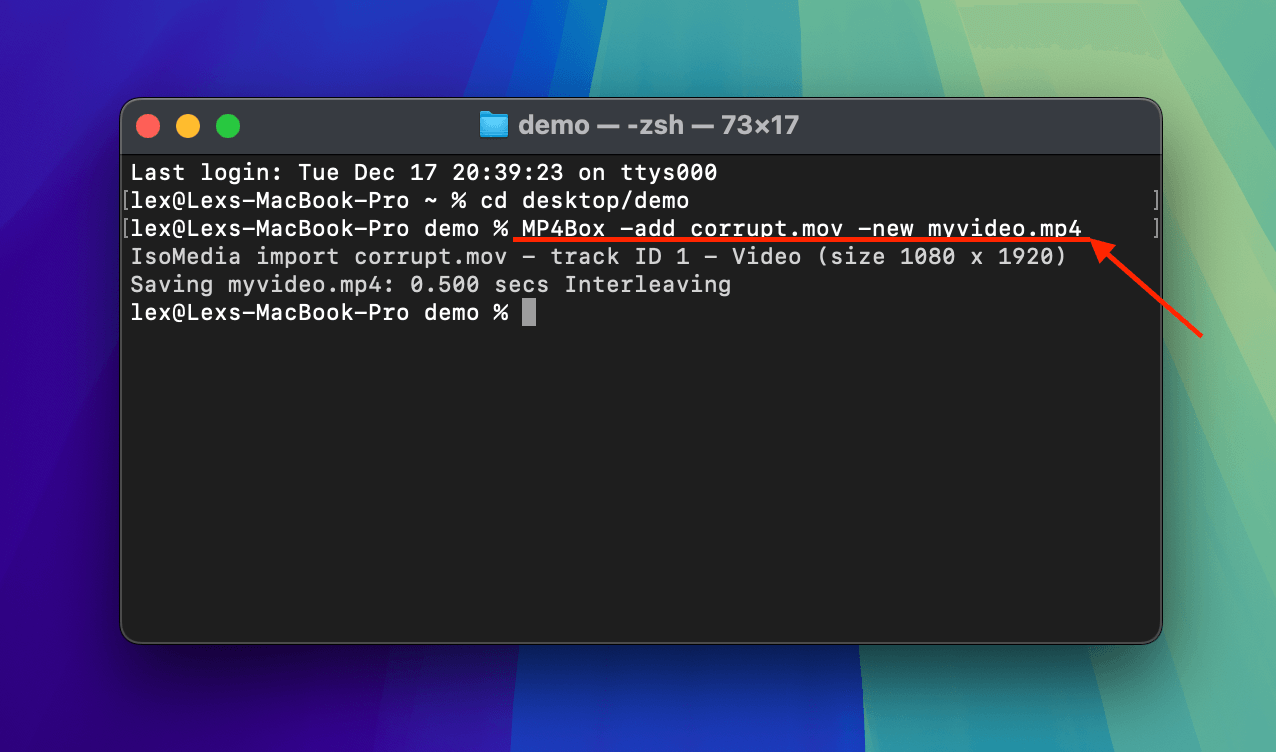
Immediately after running the command in step 5, MP4Box will commence the operation. Once it concludes, you’ll find your version of myvideo.mp4 in the folder where your corrupted iPhone video is saved.
Fix 4: Convert Your iPhone Video Using VLC Media Player
Following the same logic as rebuilding your corrupted iPhone video’s file container, you can also attempt to convert it to another file format.
However, this time you’ll be using another free and open-source tool called VLC Media Player. VLC Media Player’s conversion process handles errors a bit differently than MP4Box, which may potentially lead to successful repair.
Its conversion tool will also change your file’s codec from H.265 to H.264 — while this may cause a slight loss in quality, the minor “downgrade” may allow media players like VLC to ignore certain errors and successfully stream the video.
Step 1. Download and install VLC Media Player on your Mac.
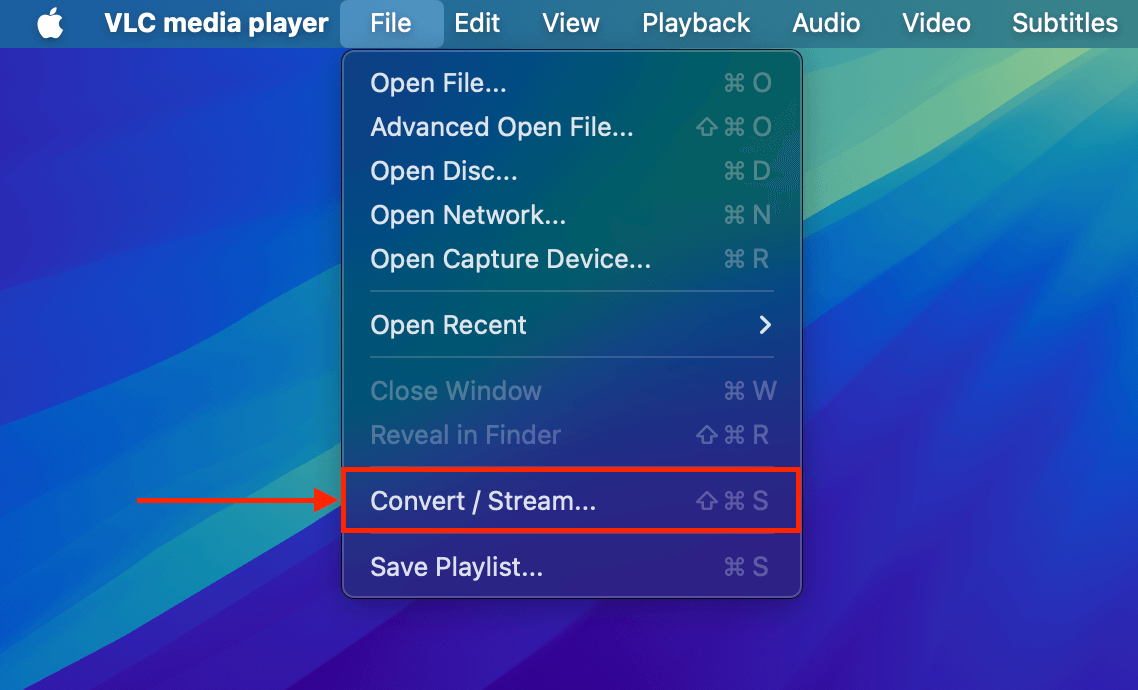
Step 2. Open the newly installed VLC Media Player app (Finder > Applications). Then, on the menu bar, click File > Convert / Stream.
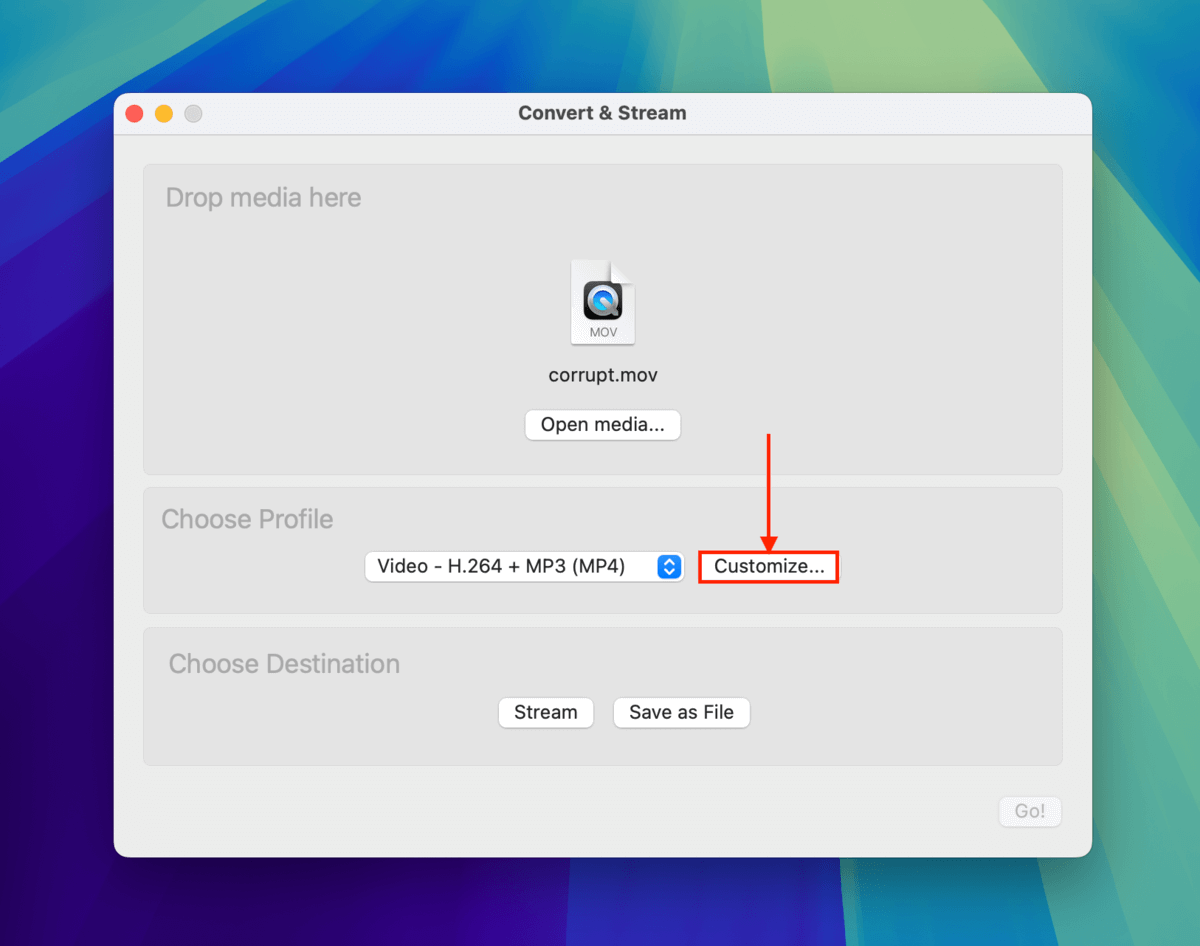
Step 3. Drag your corrupted iPhone file to the middle of the Drop media here section of the conversion window. Then, click Customize…
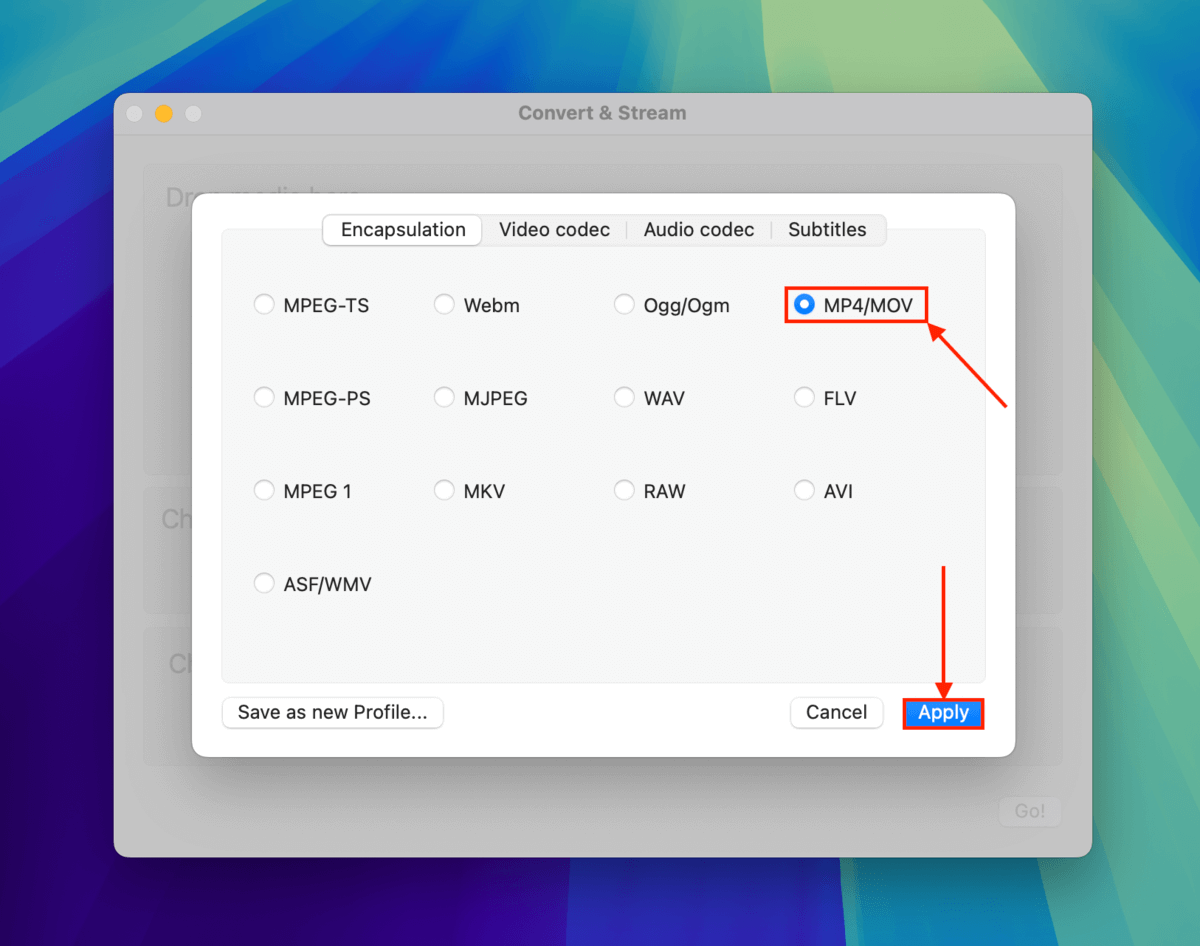
Step 4. Select MP4/MOV. Then, click Apply.
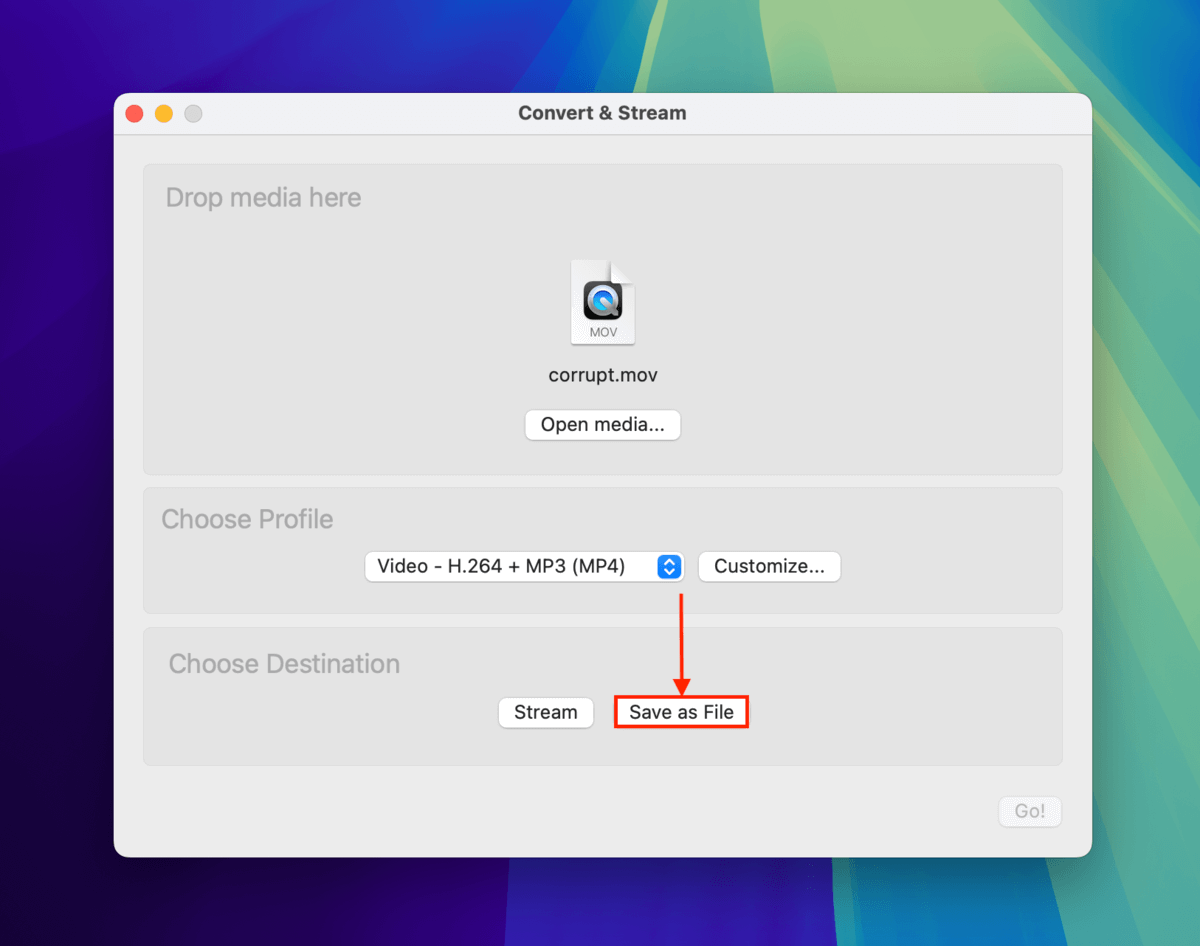
Step 5. Back in the Convert & Stream window, click Save as File.
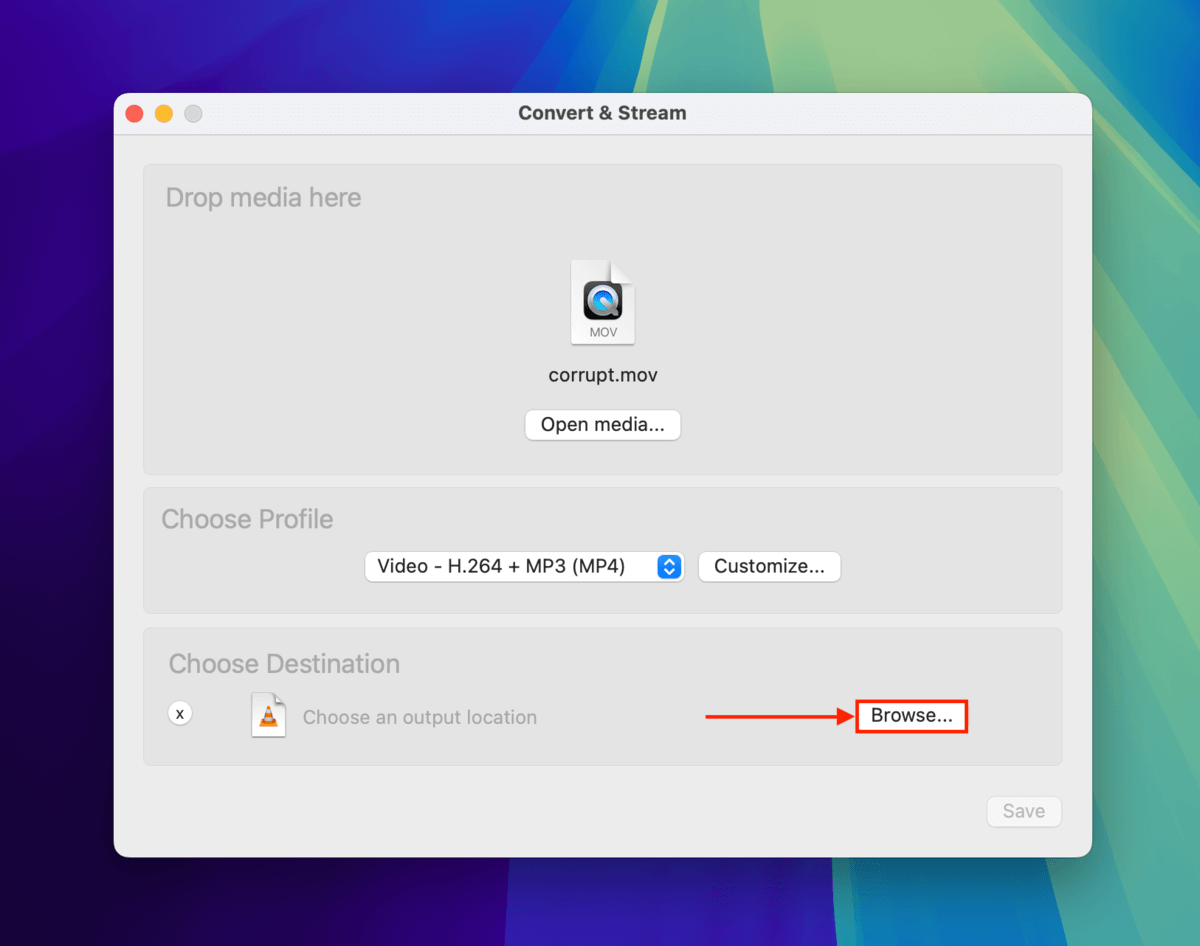
Step 6. Click the Browse… button.
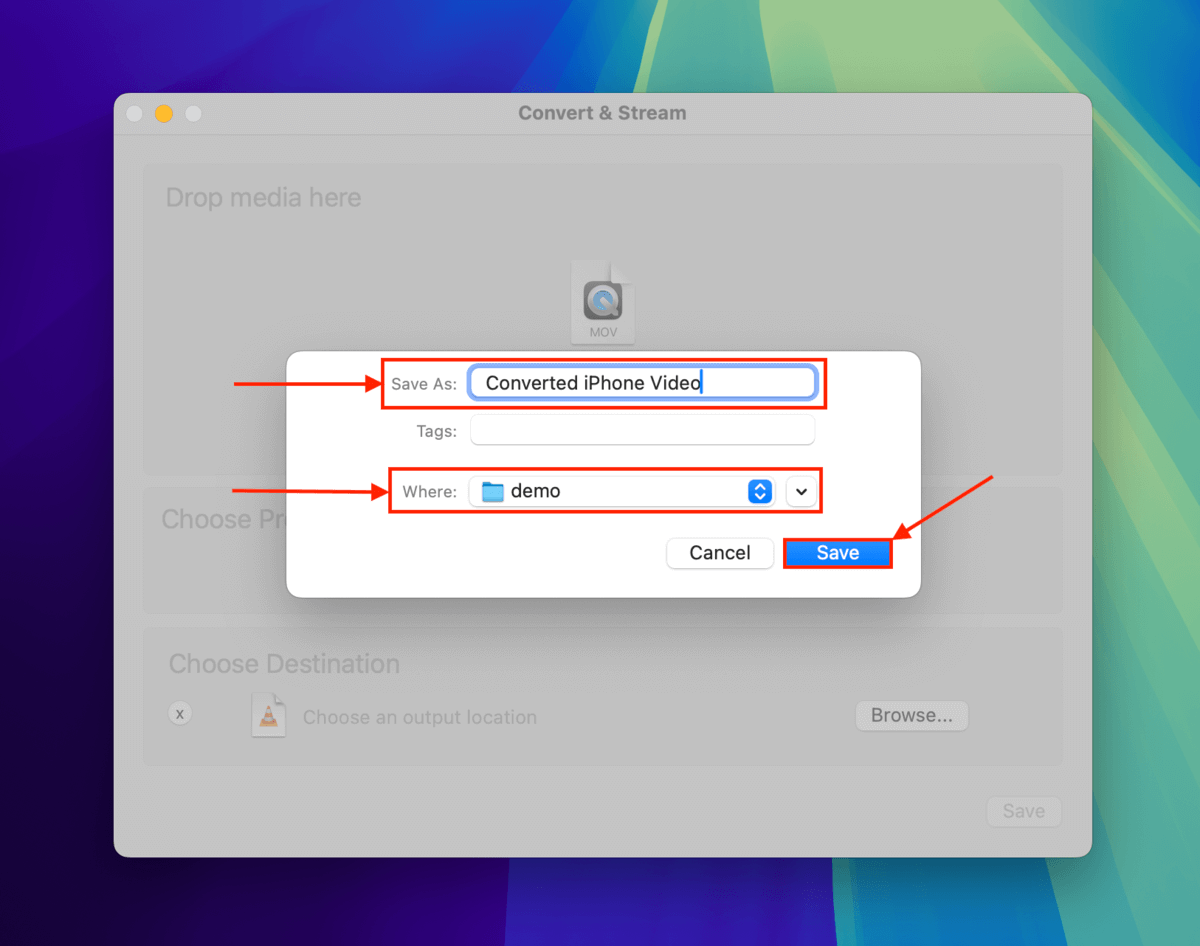
Step 7. Choose a file name for your converted iPhone video and the location where you want to save it. Then, click Save.
Step 8. Back in the Convert & Stream window, click Save again to proceed with the conversion process.
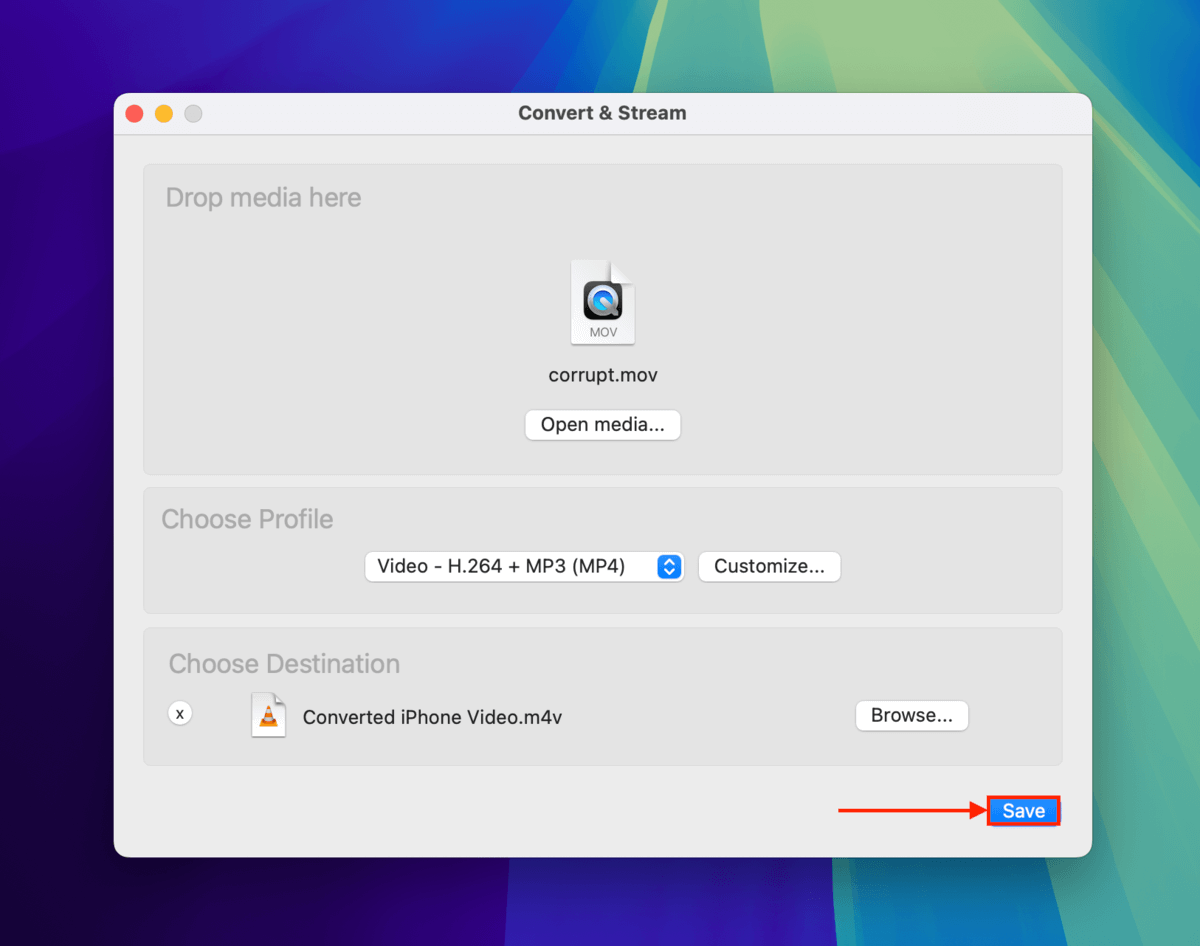
Once VLC Media Player is done saving the converted file, you can locate it in Finder by navigating to the folder you selected in step 6.
Fix 5: Re-encode Your Corrupted iPhone Video With FFmpeg
If you’ve arrived here after following the guide in sequence, you can roughly rule out issues with your iPhone’s movie atom and file container. This method not only rebuilds the container but also re-encodes the video and audio streams in case its codecs or codec information has been damaged.
We’ll be using another free and open-source tool called FFmpeg, which can add a bunch of useful parameters for getting around corruption — such as ignoring certain errors while rebuilding the file and relocating the movie atom to the start of the file for better playability.
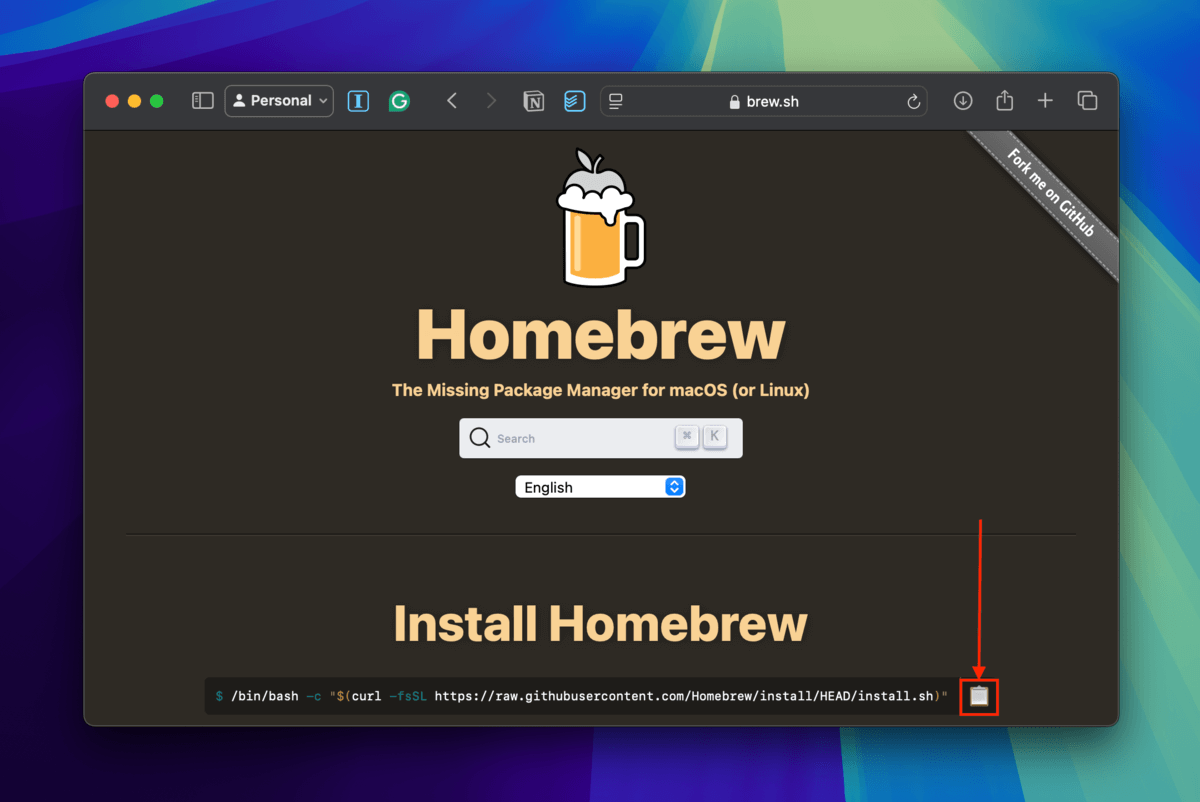
Step 1. Open any browser and navigate to the brew.sh web page. Then. click the clipboard icon to copy the installation code for Homebrew.
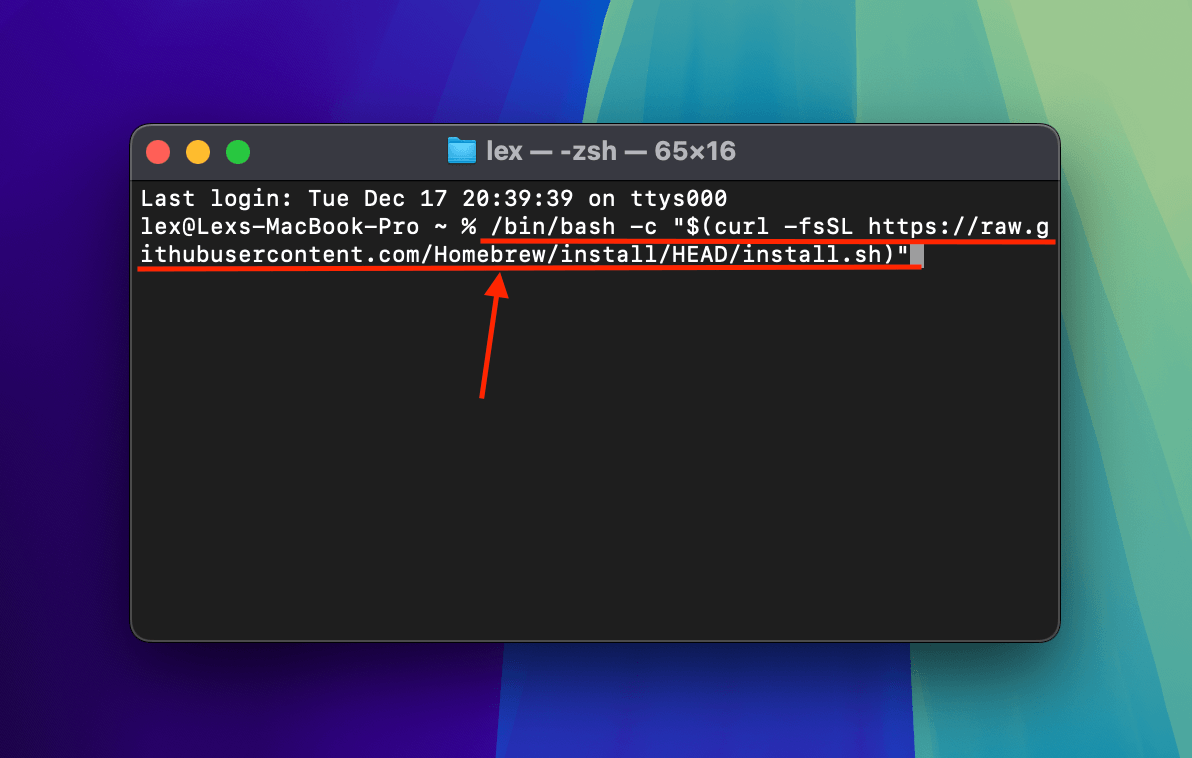
Step 2. Open the Terminal app (Finder > Applications > Utilities). Then, paste Homebrew’s installation code and hit Return.
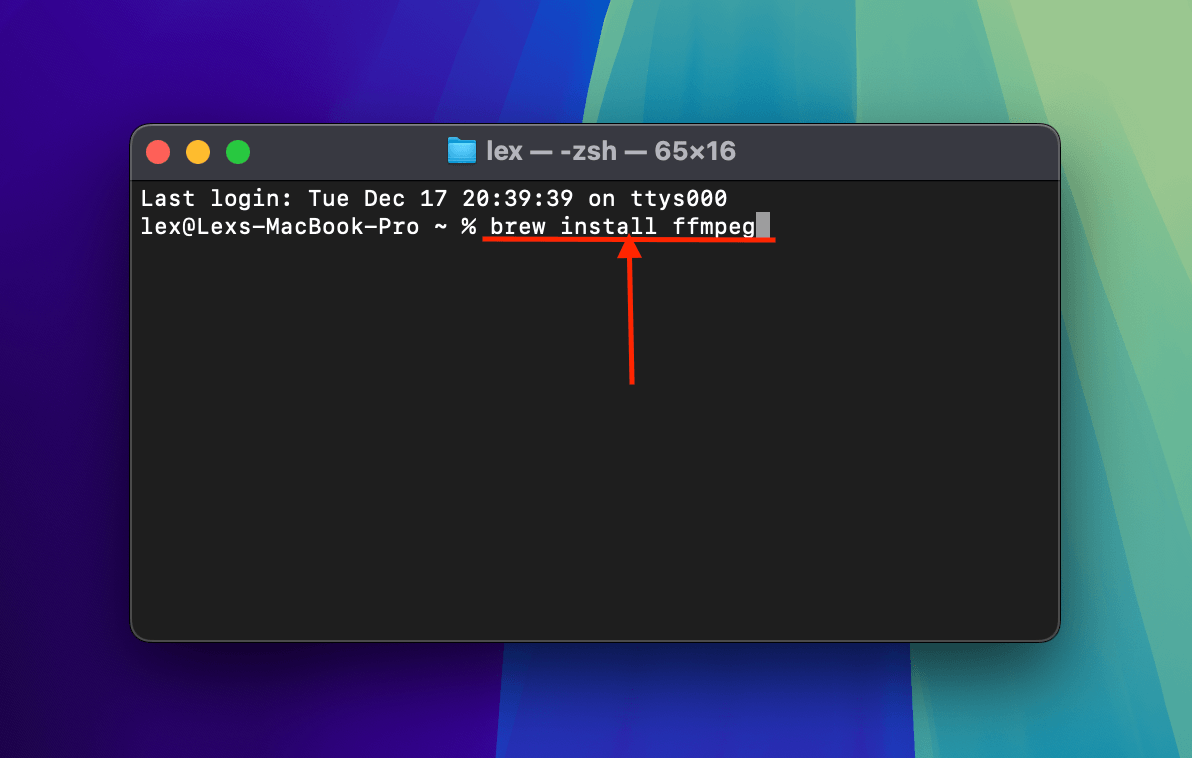
Step 3. After Homebrew is fully installed on your Mac, you can now install FFmpeg by executing the next command:
brew install ffmpeg
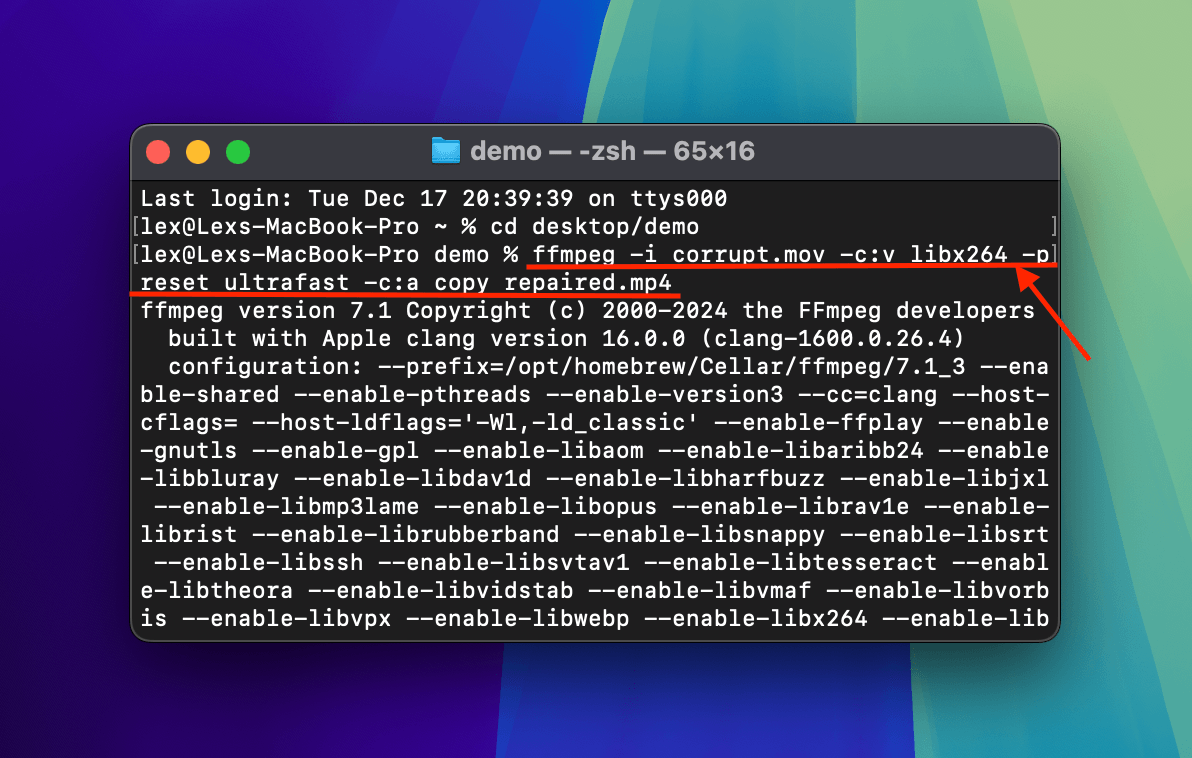
Step 4. When Terminal tells you that FFmpeg has been fully installed on your Mac, use the Change Directory command to navigate to the location where your corrupted MOV file is saved (via Terminal):
cd desktop/demo
Replace desktop/demo with the location where your iPhone video is stored.

Step 5. The next command will re-encode your corrupted iPhone video file to MP4, specifically converting its HEVC codec to H.264. It also moves the video’s movie atom to the very beginning of the file (which enhances compatibility):
ffmpeg -i corrupt.mov -c:v libx264 -preset ultrafast -c:a copy repaired.mp4
Replace corrupt.mov and repaired.mp4 with the appropriate file names.
When FFmpeg is done re-encoding your iPhone video, you’ll find it saved in the same folder the original corrupted video is stored in.
Bonus Tip: Fix Blurry Videos Using AI Video Enhancer Apps
If your videos look blurry or unclear, it’s unlikely to have been caused by corruption. Instead, the video may have been captured in a lower resolution or the camera was out of focus. One way to “fix” this issue is to enhance the video’s quality so the degradation isn’t as obvious.
This can be done a lot more conveniently with AI video enhancer apps that have recently flooded the App Store. Again, these are NOT repair tools – they can simply help you fix the quality of a video on your iPhone by removing visual signs of damage. Here are some recommendations to get you started:
- PowerDirector (Mac, iPhone) – Popular all-in-one video editing app packed with both correction and stylistic effects that you can easily apply with AI like color control and video stabilization. PowerDirector also has a Mac app with an AI Upscaler that can help you sharpen blurry videos (which can often occur due to corruption).
- Pictura Video: AI Enhancer (Mac) – Focused and minimalist app that does one thing only: enhance the resolution of your videos and eliminate grainy images with the use of AI.
- Sharpen Video: Enhance Quality (iPhone) – Beginner-friendly and all-in-one video enhancement tool that gives you control over sharpness, contrast, exposure, and much more.
What About Missing or Deleted iPhone Videos?
Before you go, did you notice if any of your iPhone videos have also gone missing? That may be another sign of corruption or iCloud sync issues (or, well, human error). We wrote another guide to help you recover lost or deleted iPhone videos – note that it’s possible to restore corrupted files. You’ll need to repair them using the methods in this article before they become viewable.


