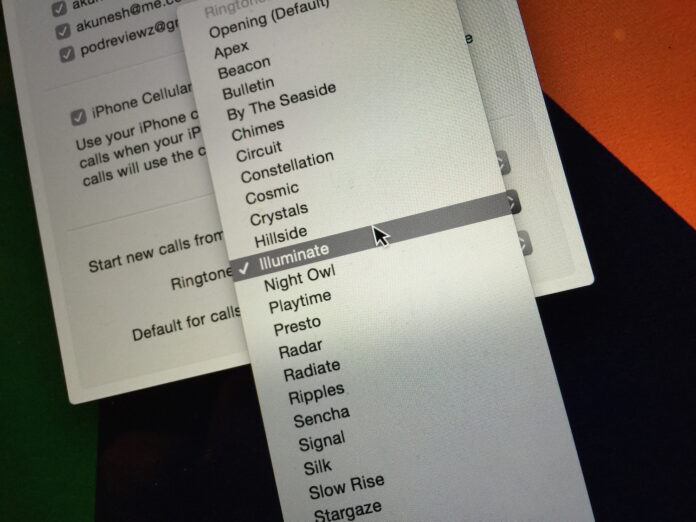
FaceTime calls on the Mac are great, but the standard ringtone can get old—especially if you use the same ringtone on iPhone. Luckily, you can change said ringtone in just a few clicks.
Launch the FaceTime app on your Mac and look towards the right-hand side of your Mac’s menubar. Click FaceTime and select Preferences from the drop-down menu, then change your ringtone from the Ringtone pop-up menu—it’s near the bottom of the Preferences window.
Using Custom Ringtones In FaceTime
Things get a bit more difficult when you try to set a custom ringtone since it requires you to hunt down and modify the ringtones folder on your Mac. Still, it isn’t insurmountable.
To start, find a replacement ringtone and convert it to an Apple ringtone file format (.m4r). You can use applications like Free Ringtone Maker to do this in a pinch. After converting the file, right-click on it, select Get Info, and change the file’s name to harp.m4r from the Name and Extension pane.
Now, right-click on the Finder icon in the dock, then select Go To Folder… from the menu that appears. Paste the following into the text box, then press Go:
/System/Library/PrivateFrameworks/ToneLibrary.framework/Versions/A/Resources/Ringtones/
You’re tinkering with your Mac’s System folder here, so be careful not to overwrite any other files. You may also be asked to enter an administrator password.
Find harp.m4r from the list of files and copy it to another folder for backup purposes. Then, drag and drop your newly created ringtone into the file structure, replacing the original copy of harp.m4r.
Now, go back to the FaceTime Preferences window and select “Harp” from the Ringtone pop-up menu (mouse over “Classic” then select “Harp” from the resulting list). Your custom ringtone will now be set in place of the standard Harp ringtone. If you’d like to restore Harp to its original ringtone, just follow the above steps again, dragging the backed up copy of harp.m4r into the Ringtones folder.


