
Have your SDHC card files been deleted or gone missing? As long as you act quickly, you still have a good chance of getting them back. We’ll help!
For this article, we created step-by-step guides showing you how to use well-known tools to recover deleted files from SDHC cards. We’ll also briefly go over the 3 root causes for data loss on SDHC cards specifically, considering their common use cases.
This way, you learn how to address data loss scenarios directly related to your device. Good luck!
Table of Contents
Common Reasons of Data Loss From SDHC Cards
SDHC memory cards and their microSDHC counterparts are designed to have above-average fast read and write speeds and ample storage capacity, making them a common choice for DSLR, mirrorless, and digital cameras, as well as mobile devices.
However, this also makes them exceptionally prone to user errors and device malfunctions that lead to data loss. To help you diagnose your case (and avoid the same scenario in the future), here are the 3 main reasons for SDHC card data loss:
| Reason | Summary |
| Accidentally deleting files or formatting your SDHC card | Accidental deletion can occur not only due to user error but also because of third-party apps like photo album organizers. Similarly, formatting can be mistakenly initiated by the user or prompted by a computer’s operating system for some reason. |
| SDHC memory card corruption | SDHC cards often get corrupted because of usage-related issues. For example, corruption can occur if you don’t safely eject your memory card. Or the device it’s inserted into suddenly loses power. Or your drone crashes mid-recording. All of these and similarly interruptive occurrences can cause corruption, which can prevent you from accessing your data or cause deletion or formatting indirectly. |
| Physical damage | Though light and robust, SDHC cards still have sensitive parts that contain their memory cells, store electrical charges, and help them communicate with the devices they are inserted into. If any of these parts get damaged, the data stored on your SDHC card is immediately at risk (plus, it may also be time for a replacement). |
How to Recover Data Deleted From SDHC Card
When a file is deleted from an SDHC card, its data is not actually “erased.” The data block that file data is stored in gets marked as “empty” so that the operating system knows that it can save new files to that block. When it does, the file data inside gets overwritten by new file data.
However, as long as the data hasn’t been overwritten, you can use a tool called data recovery software to extract it. We’ll demonstrate this exact process step using two popular data recovery tools that you can download and follow along with.
Option A: Disk Drill
Disk Drill is a popular data recovery software known for its combination of power and accessibility. It has one of the most beginner-friendly GUIs among its competitors yet its results are on par with more complex tools.
It can reliably scan different types of memory cards with all known file systems (ExFAT, FAT32, HFS+, APFS) and it has one of the biggest file signature databases among its peers.
We also chose this app specifically for SDHC recovery because it has historically had one of the best preview features available. It can display pretty much every popular image file signature (including RAW) and it can also play entire video files from start to finish. Both features are pretty rare and they can help you determine whether or not your files are even recoverable.
You can download Disk Drill for free, scan your SDHC card, and preview your files before you commit to purchasing a license.
Step 1. With your SDHC disconnected from your Mac (to make sure you don’t overwrite any data accidentally), download and install Disk Drill.
Step 2. Connect your SDHC card to your Mac and open Disk Drill.
Step 3. Select your SDHC card from the list of drives and click Search for lost data.

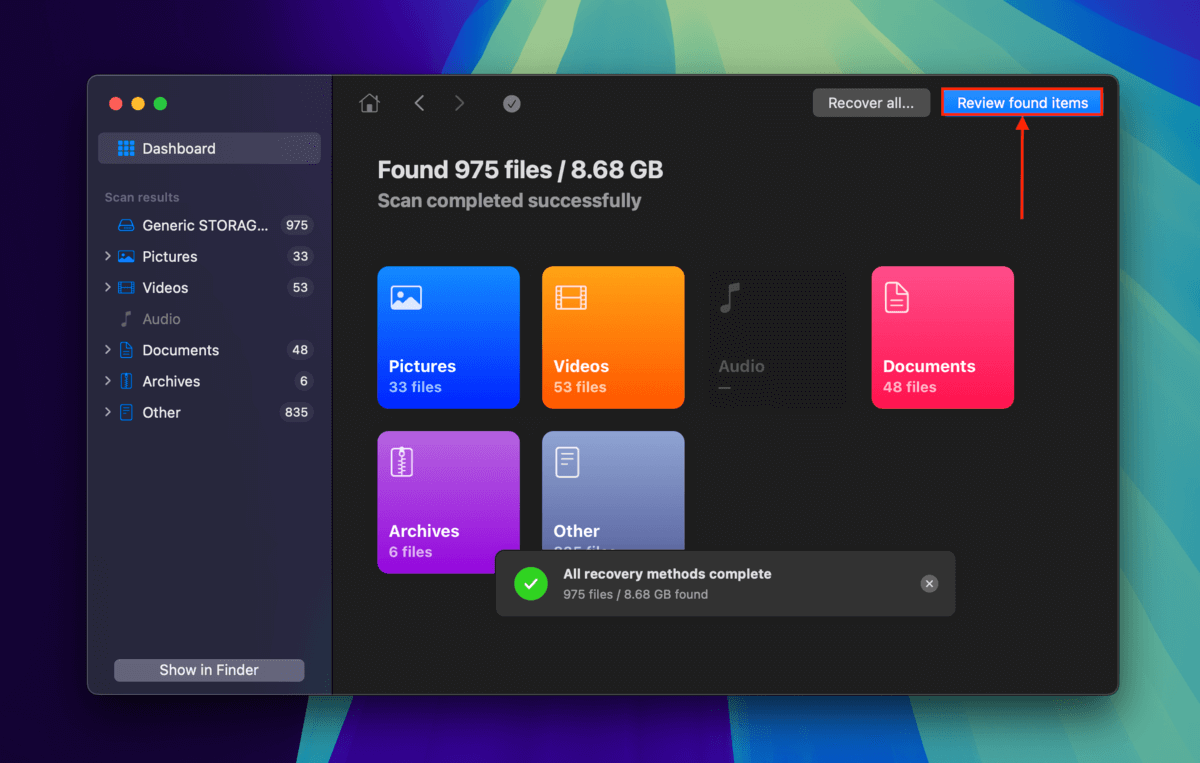
Step 4. Once Disk Drill is done scanning your SDHC card, click Review found items.
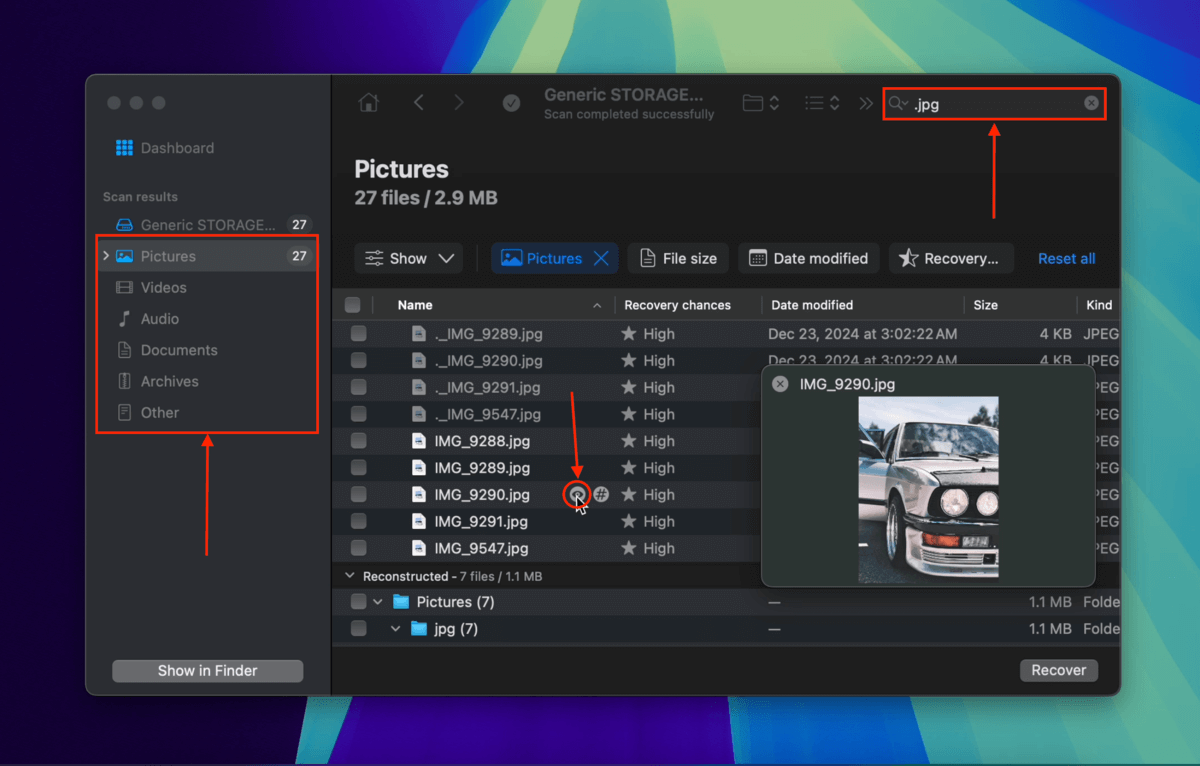
Step 5. If you only want to restore specific files or file types from your SDHC card, utilize the filters in the left sidebar (e.g. Pictures) or enter a specific file name or file extension in the search tool (e.g. .jpg). Once you spot the files you’re looking for, hover your mouse pointer beside each of their file names and click the eye button that appears to open the preview tool.
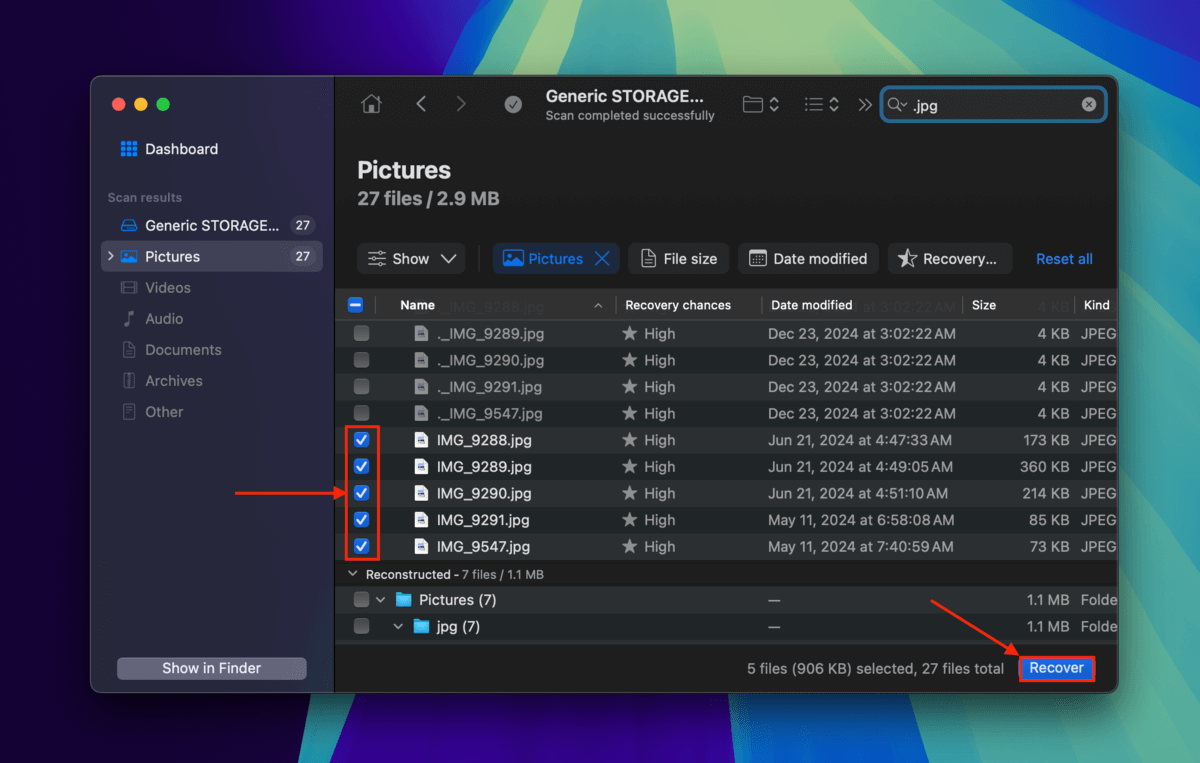
Step 6. Mark the boxes beside the files and folders you want to restore from your SDHC card. Then, click the Recover button.
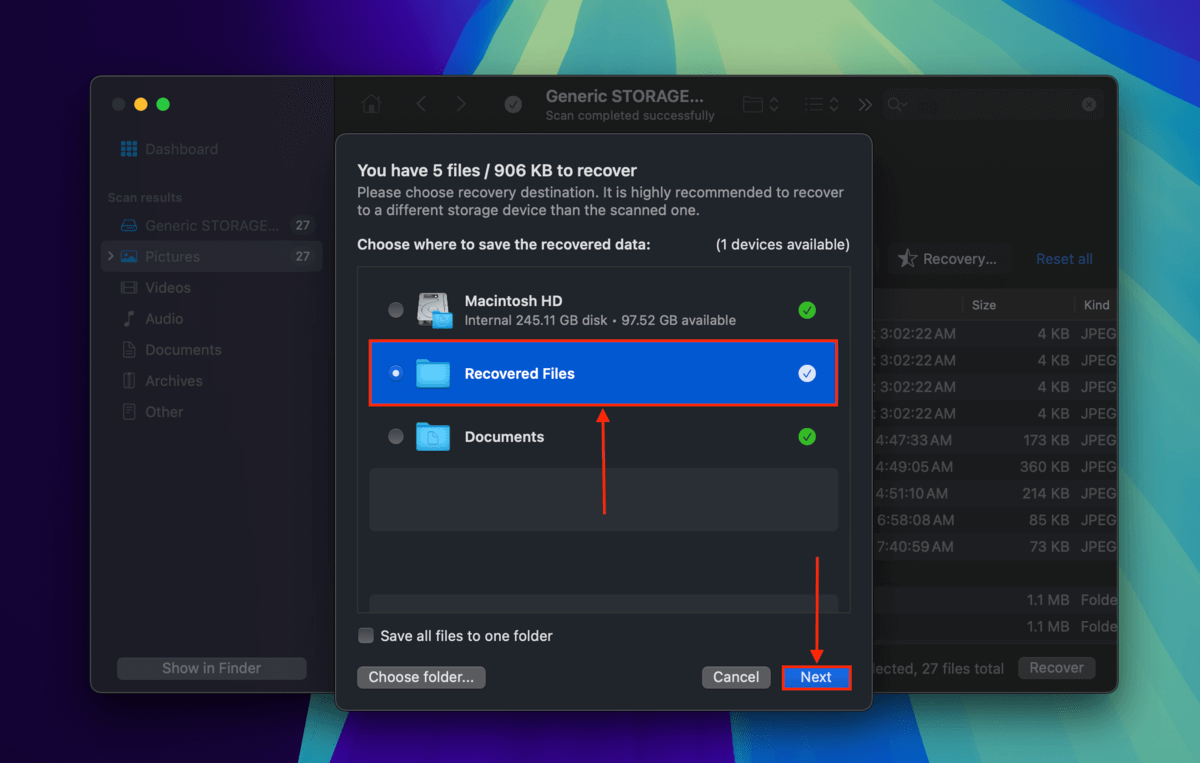
Step 7. Choose a folder on your Mac (not your SDHC card) where you want Disk Drill to save the restored files. This ensures that you don’t accidentally overwrite the data you’re trying to restore in the first place. Finally, click Next.
Disk Drill will let you know once it’s done restoring and saving your files. You’ll find them in the location you selected in step 7. We suggest checking all your files to make sure they work.
Option B: PhotoRec
PhotoRec is a powerful and well-respected open-source data recovery software that is 100% free to use. It provides reasonable coverage of well-known file signatures including minimal RAW (incl. CRW, DSC, MRW, and more).
However, PhotoRec does have a few glaring weaknesses. First, it has no GUI — you’ll be operating a Terminal-like interface using keyboard inputs. There are no preview or file browsing tools either. It also has not had any significant updates since 2019. Finally, PhotoRec only makes use of one type of recovery algorithm (Disk Drill uses 3).
However, PhotoRec is powerful enough that it’s still recommended today for users on a tight budget with moderately straightforward data loss cases (e.g. recent accidental deletion vs. corruption).
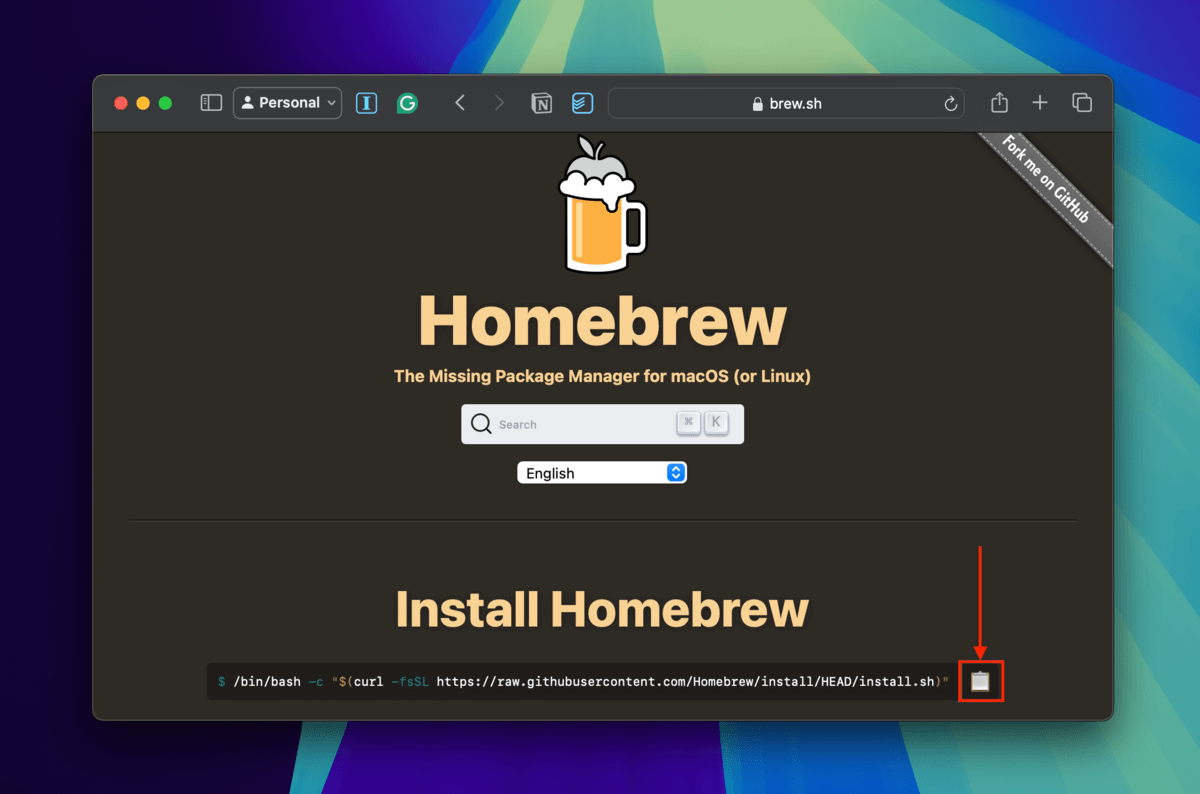
Step 1. Open any browser and navigate to Homebrew’s home page. Then, click the clipboard icon to copy the installation code.
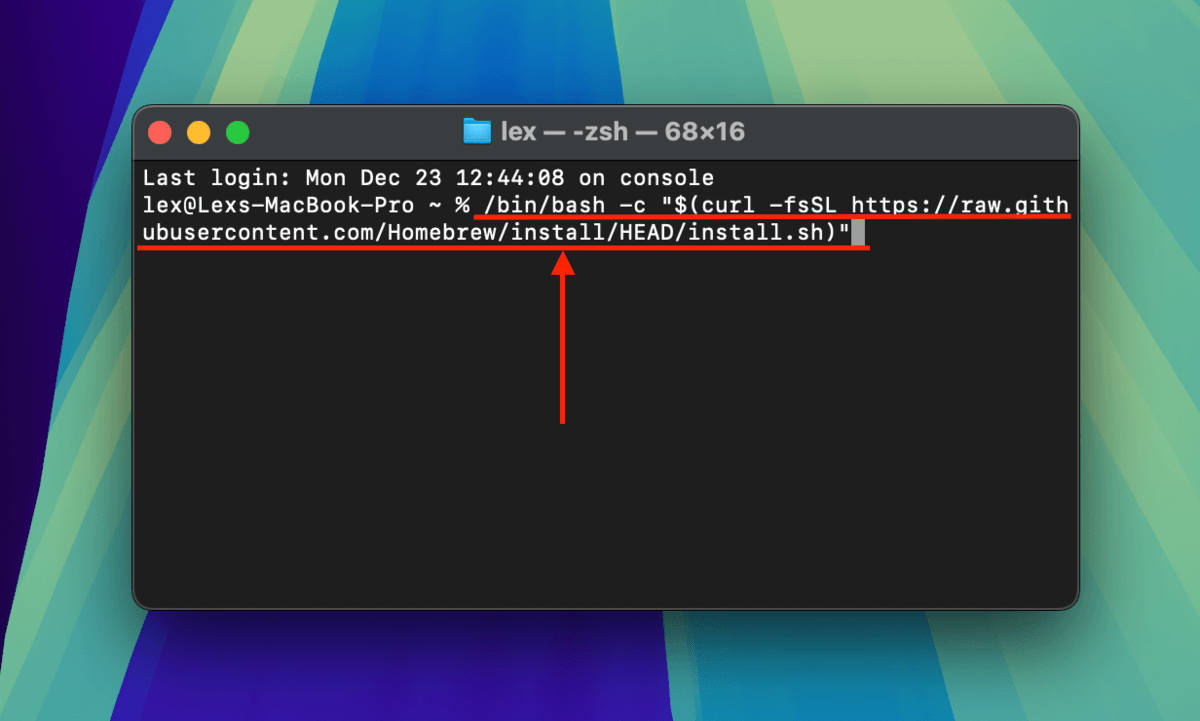
Step 2. Launch the Terminal app (Finder > Applications > Utilities). Then, paste the code you copied in step 1 and press Return to proceed with installing Homebrew.
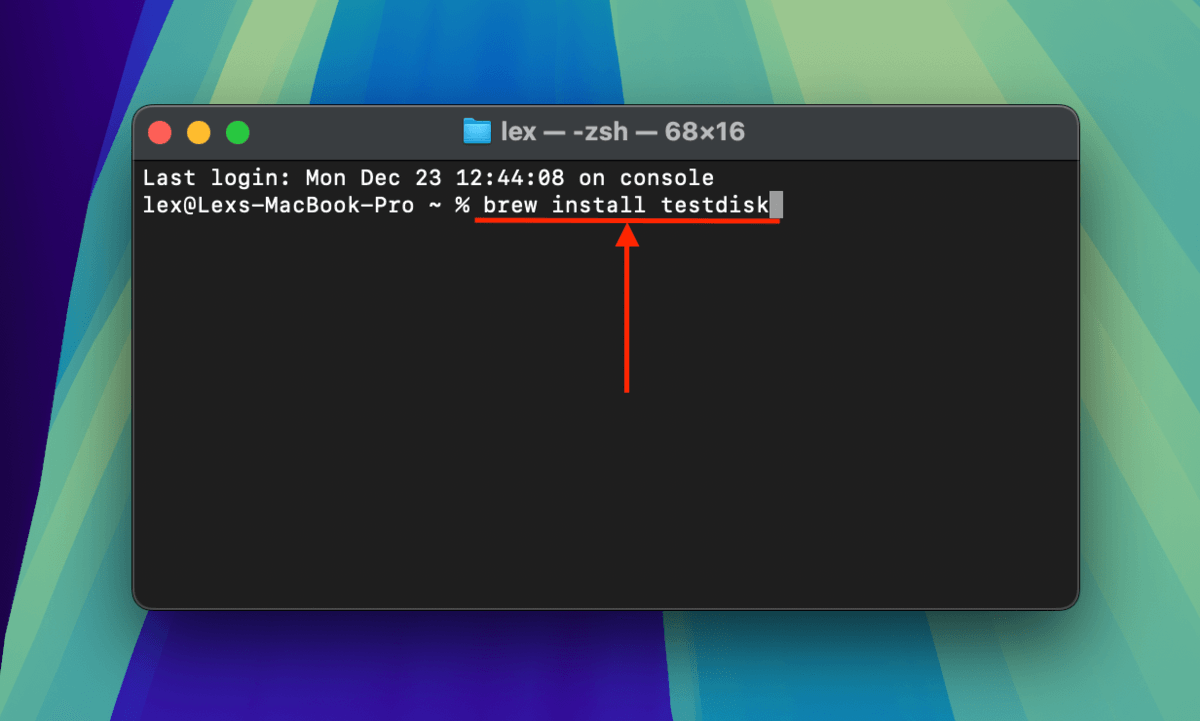
Step 3. Once Homebrew has been installed on your Mac, you can proceed with installing PhotoRec. Use the following command to do so:
brew install testdisk
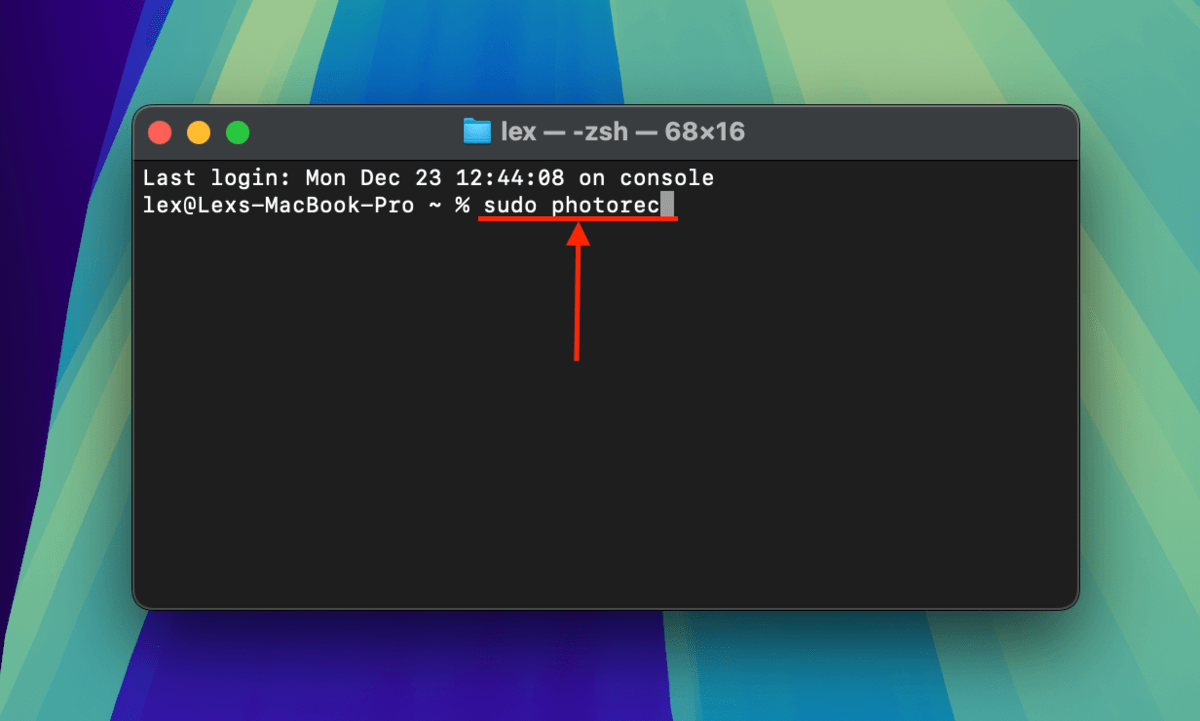
Step 4. Once TestDisk has been installed (and, along with it, PhotoRec), execute this next command to launch the PhotoRec tool:
sudo photorec
Enter your password if prompted.
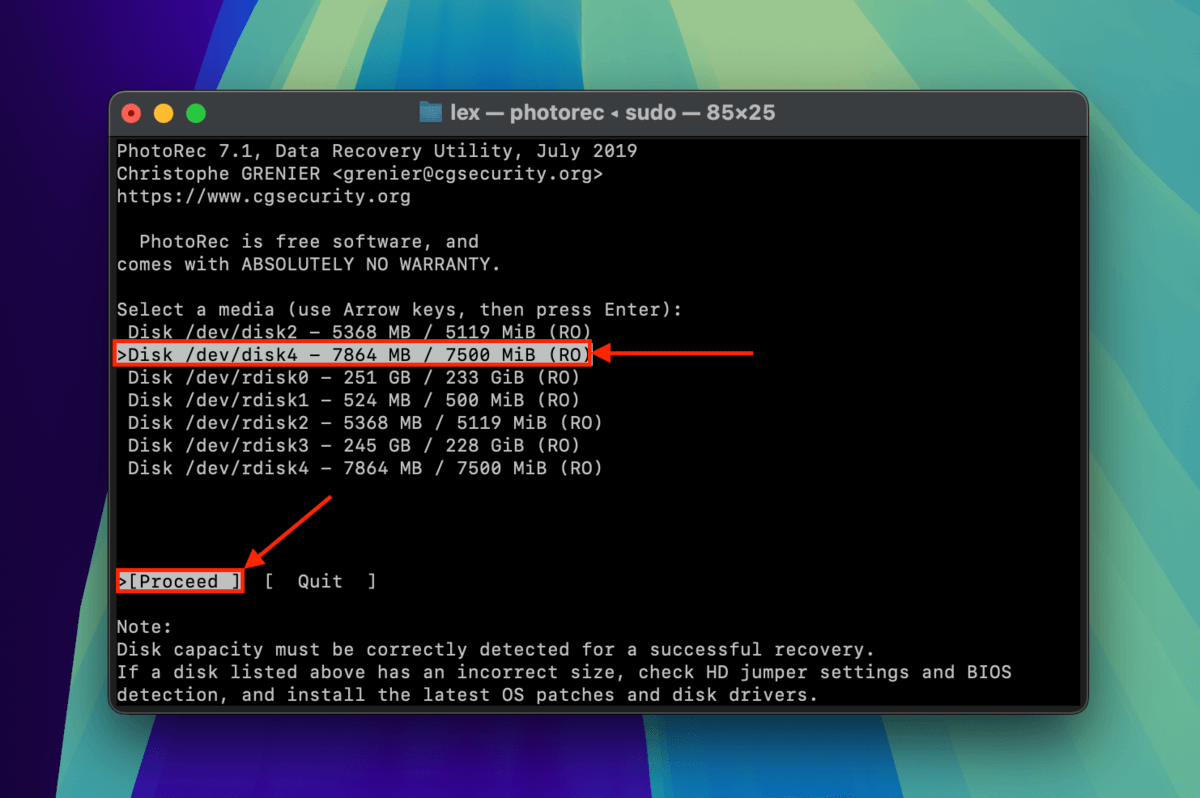
Step 5. Use your up and down arrow keys to select your SDHC card from the list of disks. Then, use your left and right arrow keys to select the Proceed option at the bottom. Press Return.
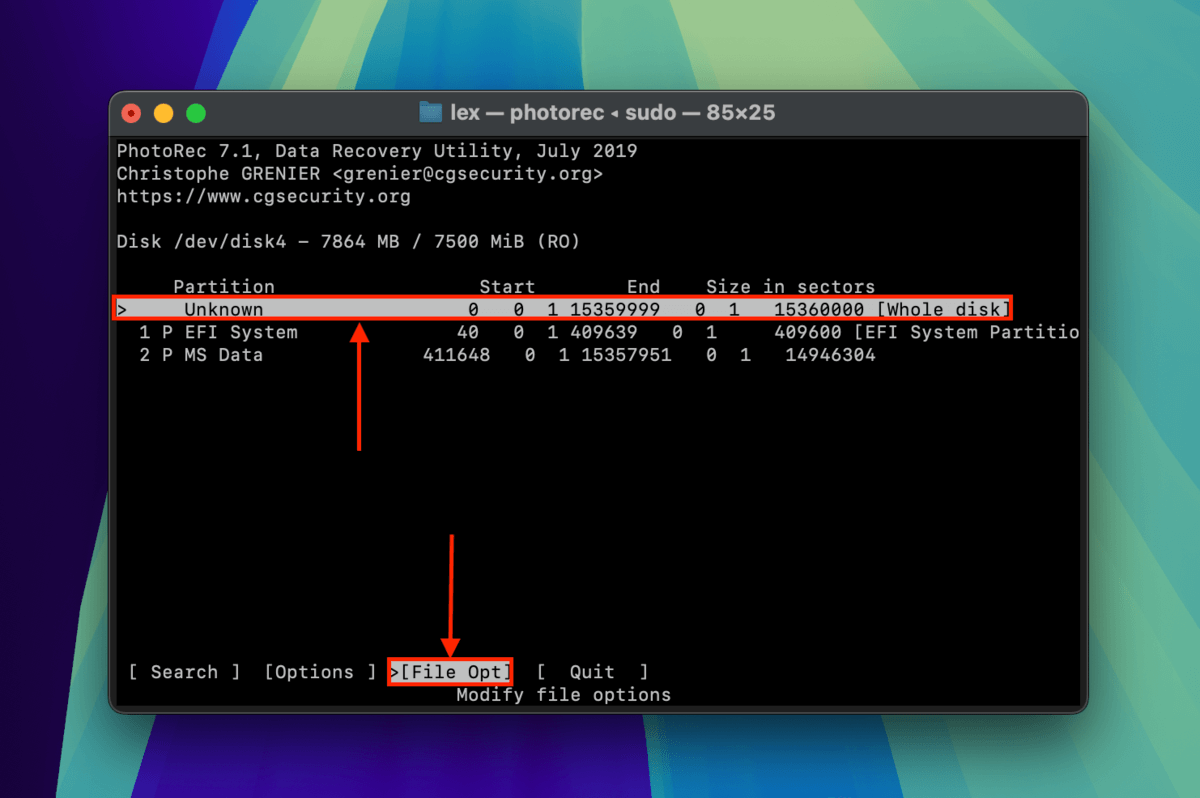
Step 6. Select the partition of your SDHC card that you want to scan first. Then, select the File Opt option and press Return.
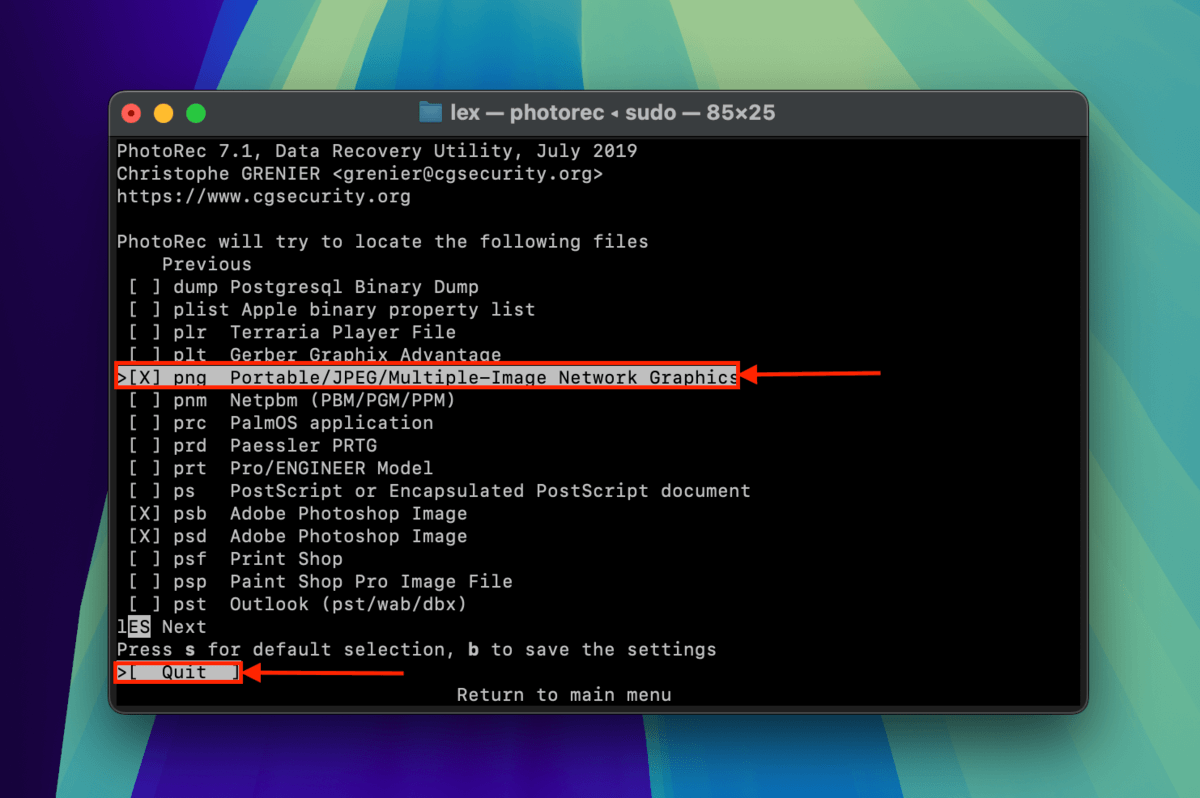
Step 7. In the File Opt menu, you can use your up and down arrow keys to browse and select file extensions you want PhotoRec to focus on during its scan. Press the right arrow key to select a file extension and press the left arrow key to unselect it. Once you’re satisfied with your selection, press Return to Quit.
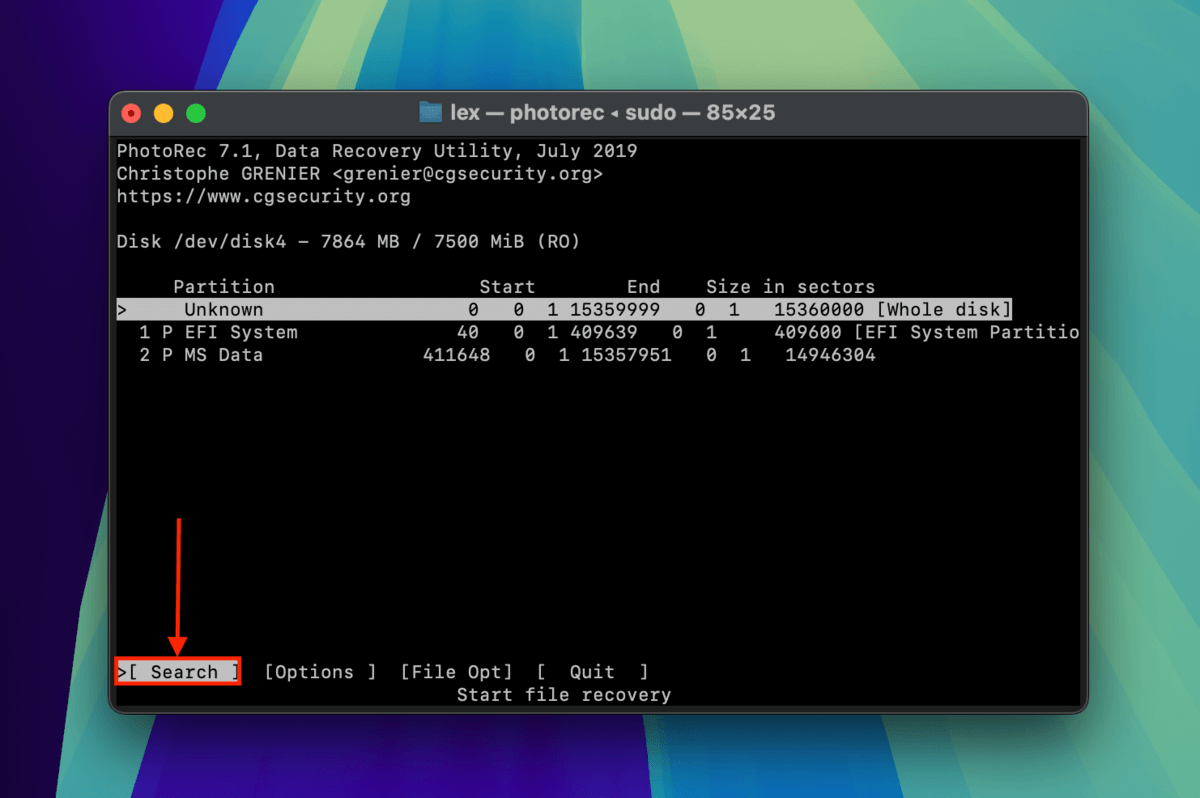
Step 8. Keep the partition selection you made in step 6. Then, press your left arrow key twice until the Search option is highlighted. Press Return.
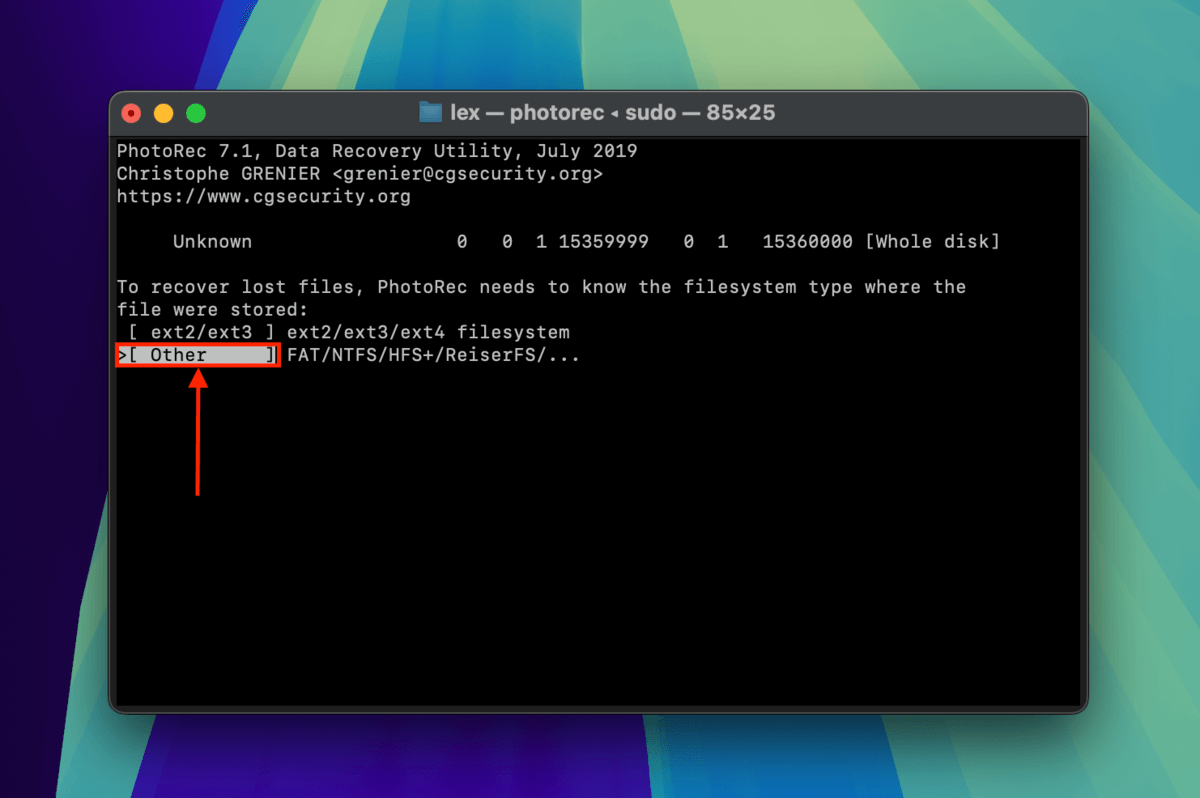
Step 9. Choose your SDHC card’s file system format. PhotoRec does a pretty good job of identifying it for you and will automatically highlight its best guess. Make your choice and press Return.
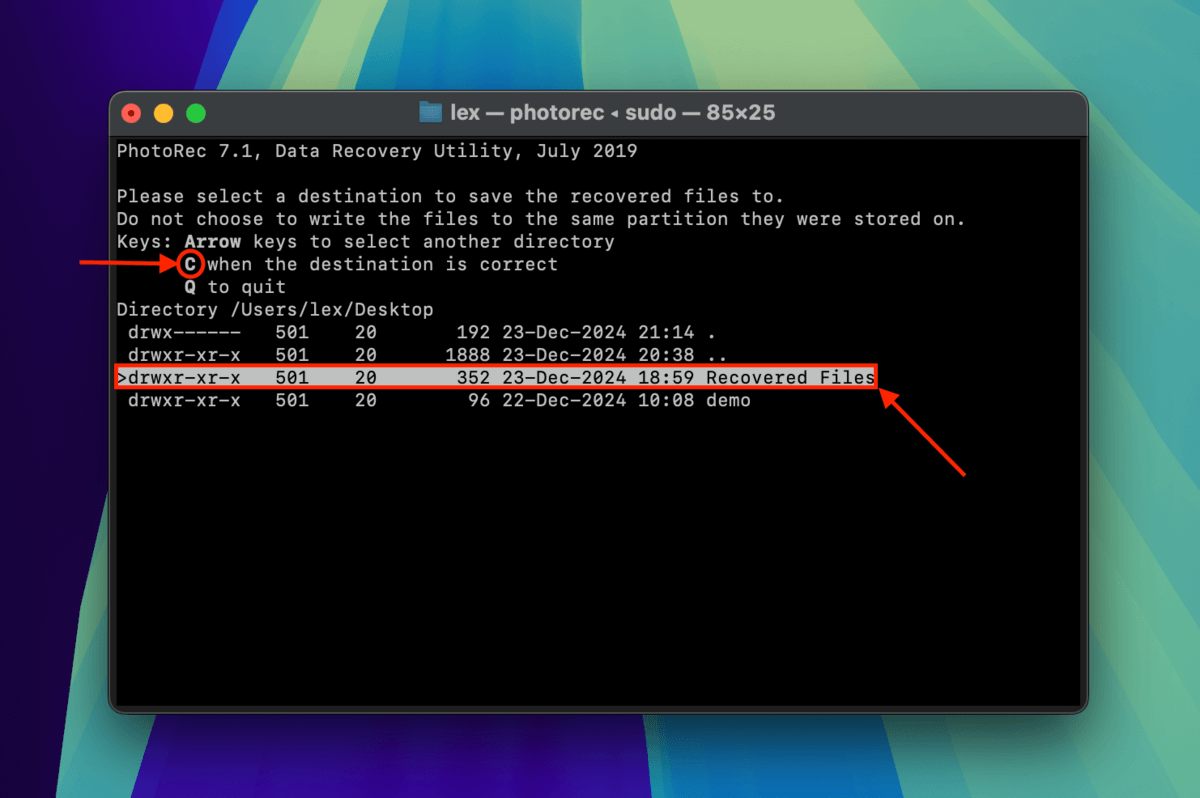
Step 10. Use your up and down arrow keys to select folders. Use your left and right keys to enter and exit folders. Once you find a suitable location for PhotoRec to save the recovered files, press the C key.
Unfortunately, PhotoRec doesn’t reveal much information during the recovery process itself. Wait for it to finish. Once it’s done, check the folder you selected in step 8 if your files are complete and working properly.
Before You Go, Take These Data Preservation Tips With You
Data loss risk is an unavoidable threat to SDHC card files, especially because of their common use cases. To avert that risk, here are 3 simple best practices to keep in mind: (1) back up your files every single time you use your SDHC card extensively. Data loss-related issues like corruption can occur due to forces outside your control.
(2) Make sure that you purchase original products from certified sellers. Most well-known brands have knock-offs that are much less robust than their original counterparts. (3) Finally, always safely eject your SDHC card from your device – this ensures that all read and write processes are concluded properly, which is key to preventing corruption.
FAQ
You can easily format your SDHC memory using Mac’s native disk management tool, Disk Utility Here’s how:
- Launch Disk Utility by opening Finder > Applications > Utilities > Disk Utility.
- Select your SDHC memory card from the left sidebar.
- Click the “Erase” button near the top-right corner of the window.


")
