
Are you unable to play the videos on your SD card? File corruption is extremely common, especially when it comes to videos — considering that drone crashes, dead batteries during takes, and large file sizes can be the norm.
Fortunately, there are a number of solutions that can fix the issues that cause video corruption — most importantly, they’re all free and doable for users of any level. We will be demonstrating step-by-step how to use these solutions to fix corrupted files on your SD card.
Table of Contents
Important Tips to Aid the Repair Process
No tool can 100% guarantee that it can repair the corrupted files on your SD card. However, most cases have decent odds and there are ways you can improve those odds even more. Before proceeding with the rest of this guide, here’s what you do (or don’t do):
- Don’t save anything new. Depending on how the corruption affected your files and the SD card itself, some of your file data may be prone to being overwritten if you save new files to the memory card.
- Safely eject your SD card. Safely ejecting your SD card will trigger a PROPER “shut down” of any running processes (like reading and writing data). This prevents further corruption and data loss by ensuring that those processes don’t get interrupted mid-way.
- Don’t format! The corrupted videos on your SD card may potentially trigger macOS to prompt you to format it. Don’t do it! Formatting will completely wipe the data on your SD card. Cancel any reformatting prompts that appear until after you finish this guide.
- Back up ALL your SD card files. Save a copy of all your SD card files — including the corrupted video. You want to have multiple copies of the corrupted video that you can test with different solutions. At the same time, you may need your other SD card videos to improve the repair success rate of one of the methods we will be demonstrating below.
6 Ways to Fix Corrupted SD Card Videos
In this section, we’ll demonstrate 6 different methods to repair corrupted video files on your SD card. Given how difficult it is to accurately diagnose corruption and pinpoint the exact solution (especially across different video file formats), you may just need to start with Method 1 and work your way down the list.
Method 1: Use Online Video Repair Tool
Online video repair tools are the easiest way to fix a corrupted video. They are web applications that can identify and patch up known corruption-related issues on different types of videos.
For this guide, we’ll be using a tool called Clever Online Video Repair. It’s 100% free and it supports almost all popular video file types, like MP4, MOV, 3GP, M4A, FLV, and more.
We also chose this tool because it covers many case scenarios that other tools in this article aren’t equipped to handle — specifically when critical metadata is missing. It is best used when you’re unable to open or play your video in various media players (as the video may have just been incompatible, and this tool doesn’t solve that problem).
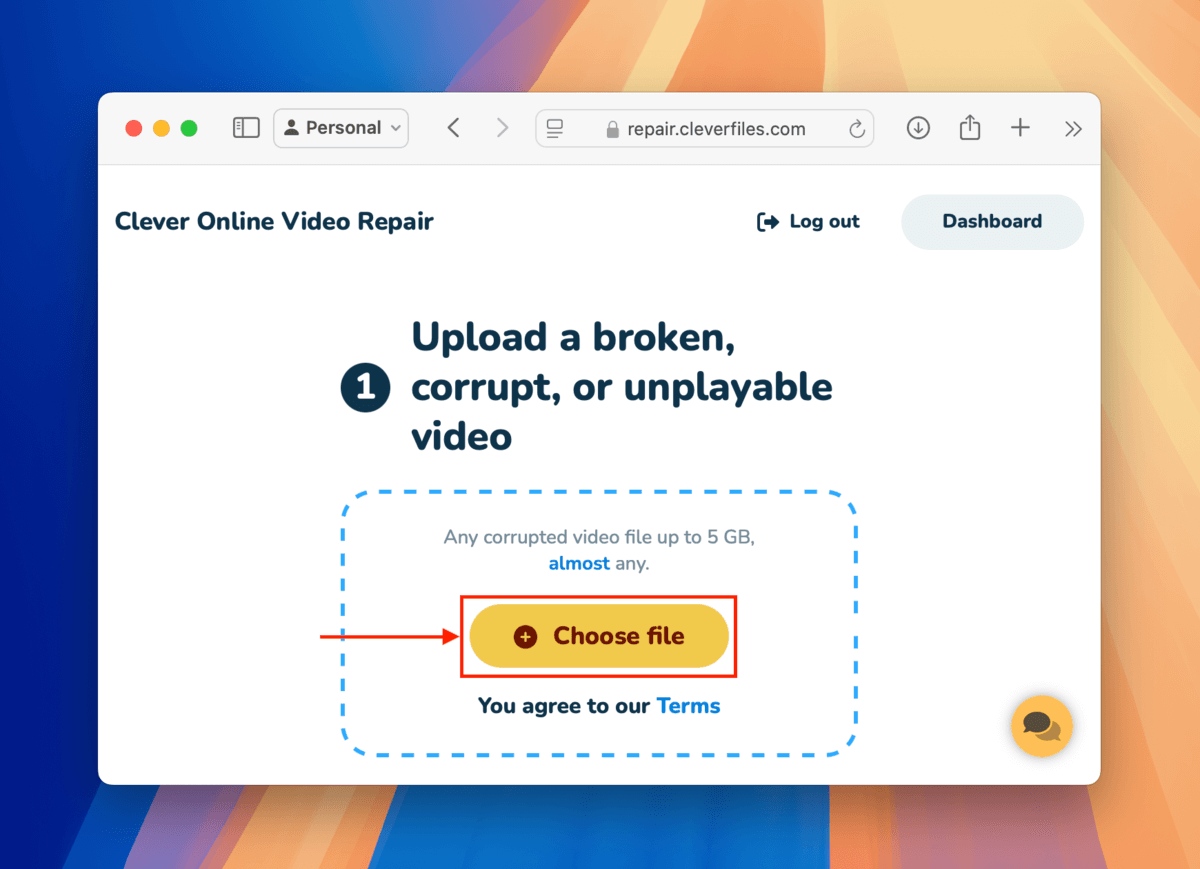
Step 1. On any browser, open repair.cleverfiles.com. Then, click Choose file.
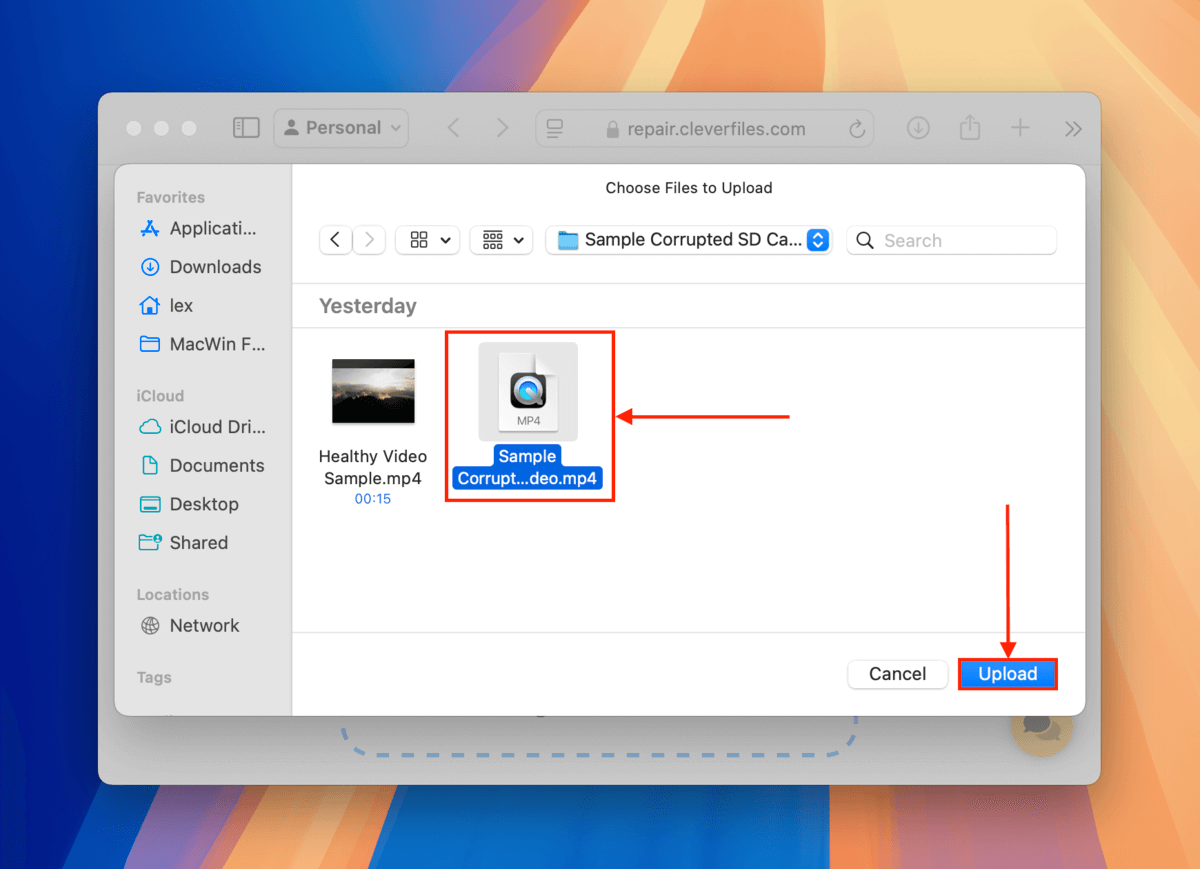
Step 2. Use the dialogue window to locate your file. Select it and click Upload.
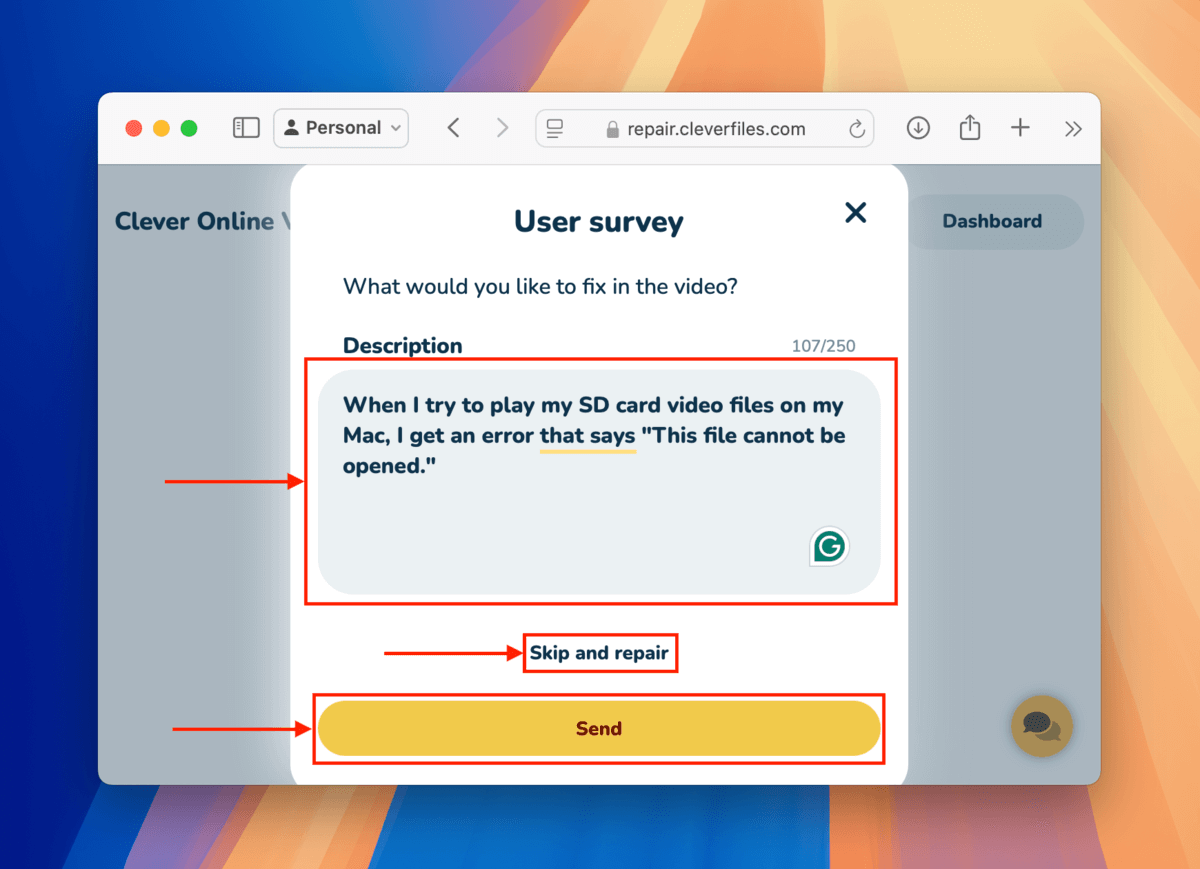
Step 3. In the Description box, include details like what happens when you try to open the video and what actions or events you think led to the corruption. Then, click Send. If you prefer not to share this information, click Skip and repair.
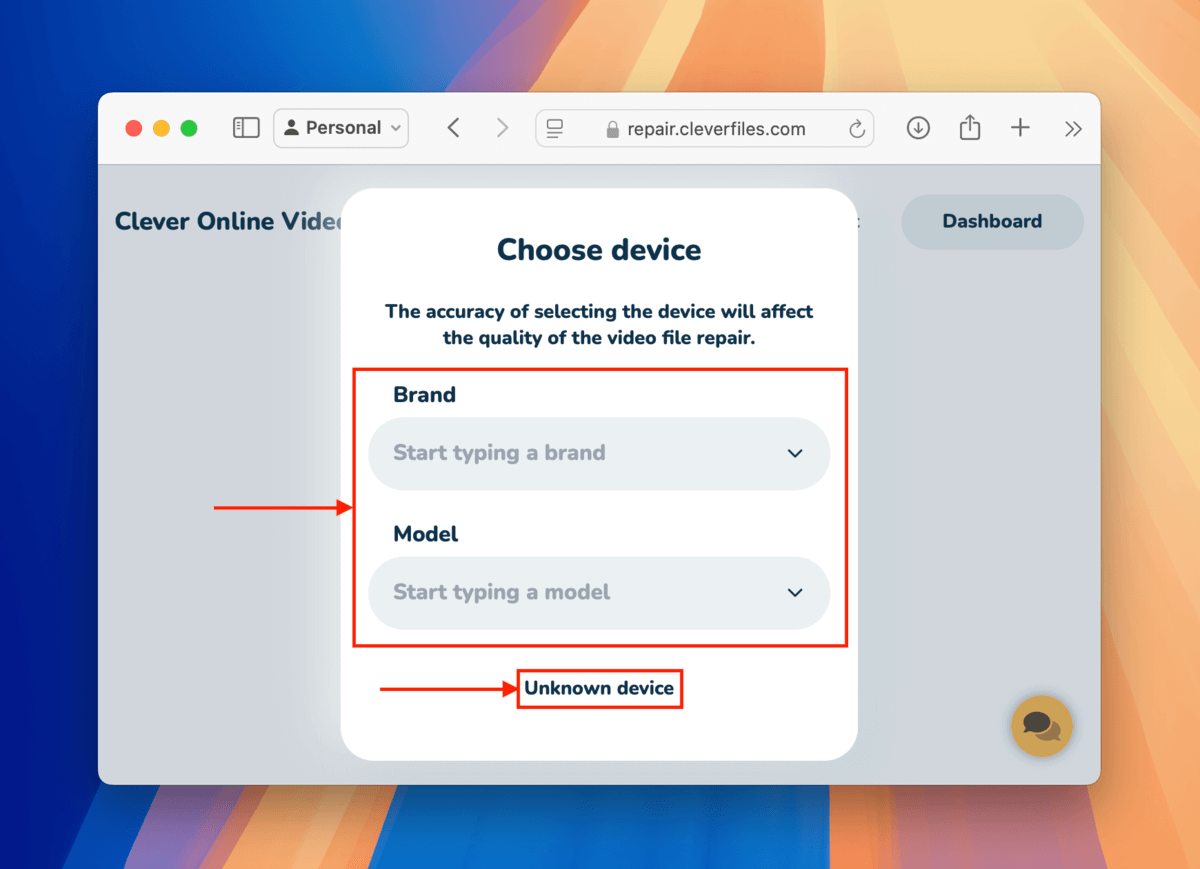
Step 4. Using the dropdown menus to select the Brand and Model of the devices you used to record the videos on your SD card. If you’re unsure, click Unknown device instead.
Step 5. Once your corrupted video has been uploaded, click Choose file.

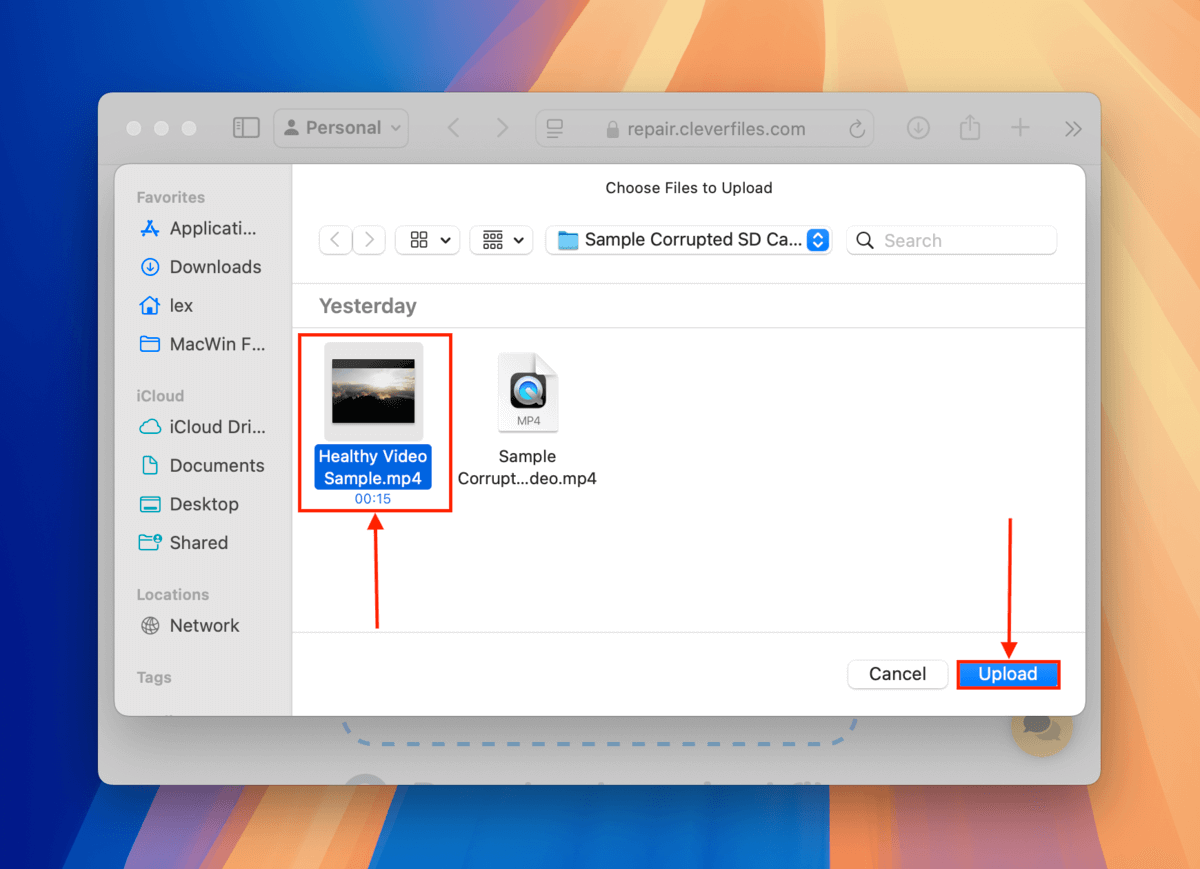
Step 6. In the dialogue window, select your healthy video sample. Then, click the Upload button.
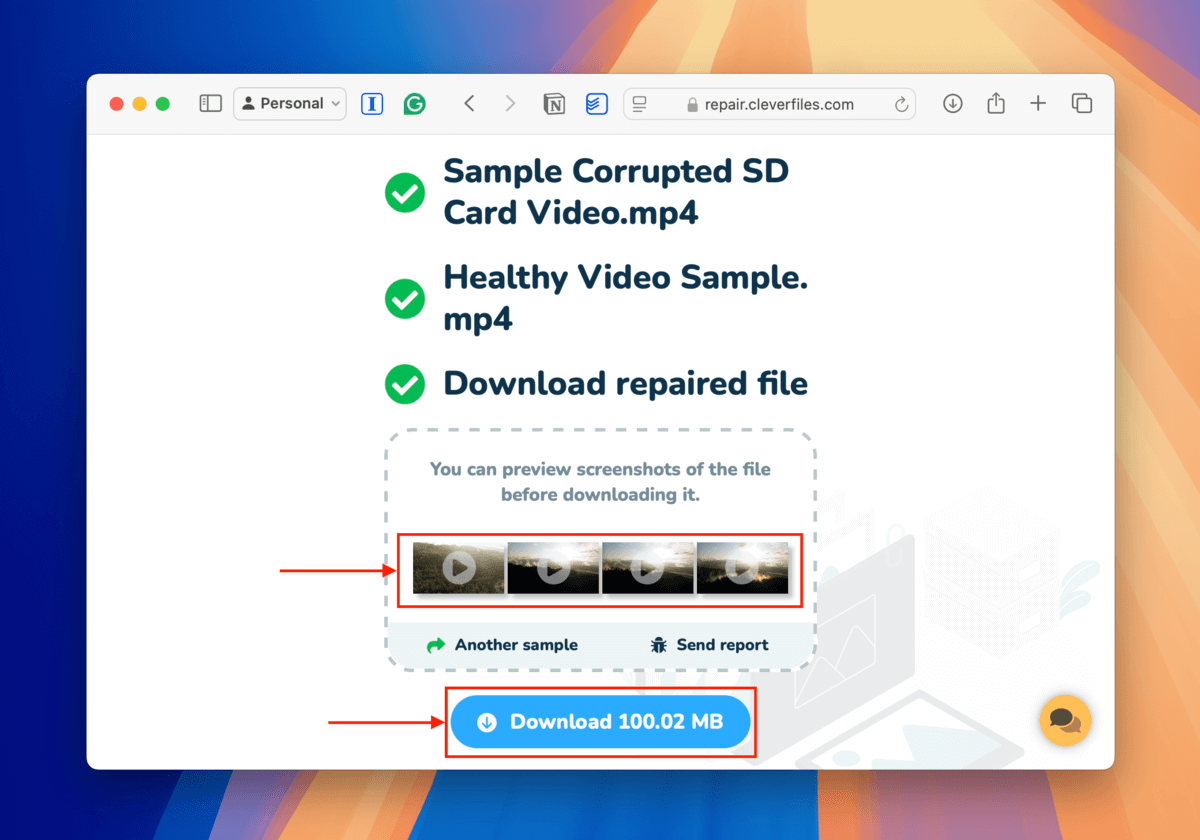
Step 7. Once both your corrupt and healthy SD card videos have been uploaded to Clever Online Video Repair, you’ll be able to preview screenshots of the repaired video. Make sure everything looks good, then click Download.
Method 2: Open MOV Files With QuickTime Player
QuickTime Player is a multimedia app that comes pre-installed on your Mac. QuickTime Player doesn’t have a dedicated file repair tool, but it will automatically try to perform minor repairs if it detects corruption – you just have to try opening your video with the app.
Step 1. Open Finder > Applications and launch QuickTime Player.
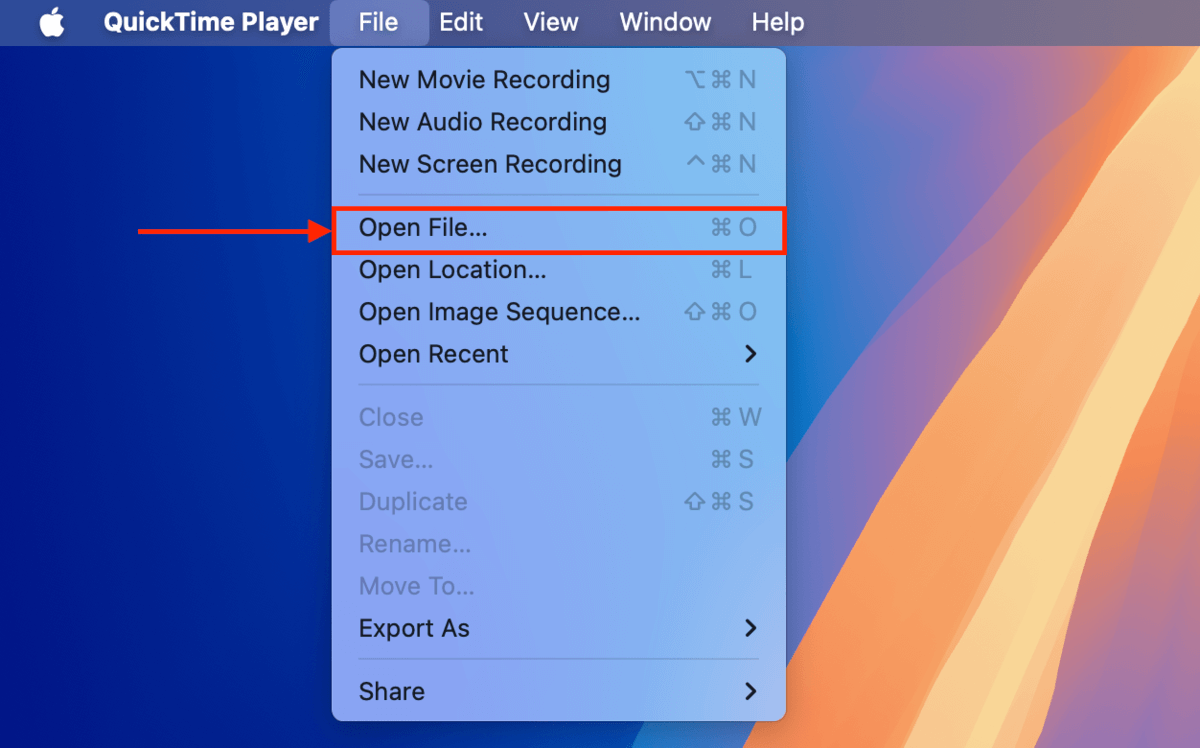
Step 2. If the dialogue window appears, locate and select your file. If not, click File > Open File…
Method 3: Use VLC’s AVI Auto-Repair Feature
VLC Media Player is a free and open-source multimedia application that can play, stream, convert, and edit media files like music and videos. It also has a built-in auto-repair feature for videos that use the AVI format.
Rather than a tool that you actively operate, it’s a setting you can enable in the app settings so it automatically runs every time you try to open an AVI video.
Step 1. Download and install VLC Media Player.
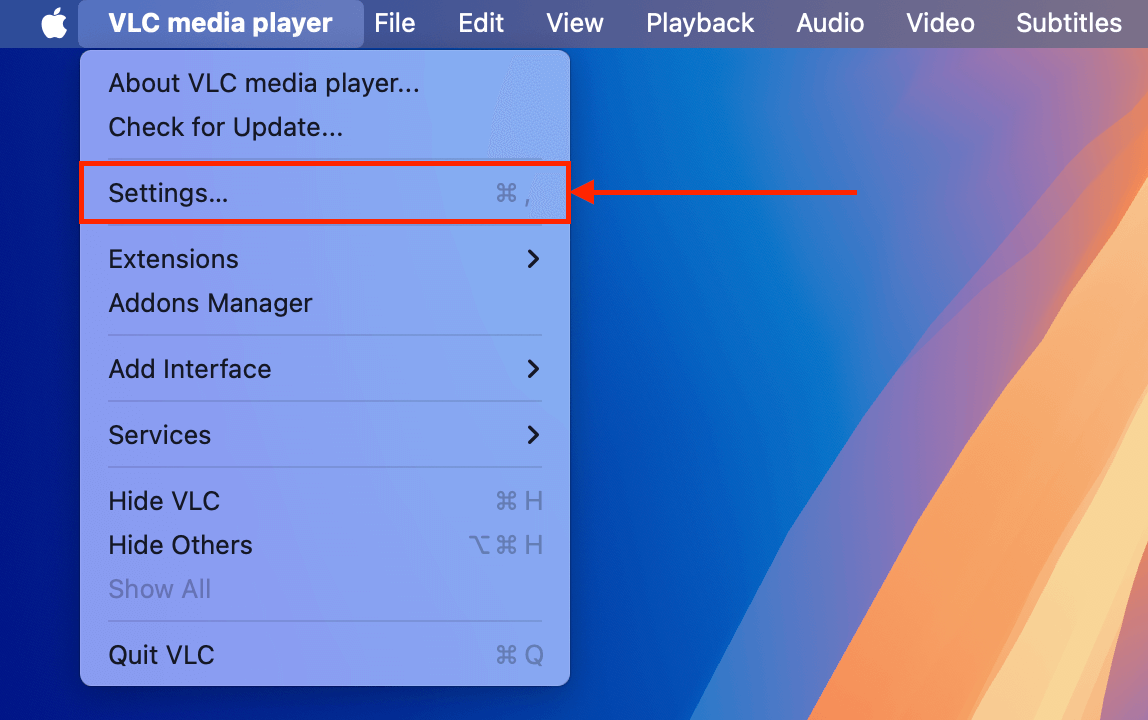
Step 2. Launch the VLC app (Finder > Applications). Then, on the menu bar, click VLC media player > Settings…
Step 3. Open the Input / Codecs menu. In the Codecs / Muxers section, click the dropdown menu button beside Repair AVI Files and select Always fix. Then, click Save.
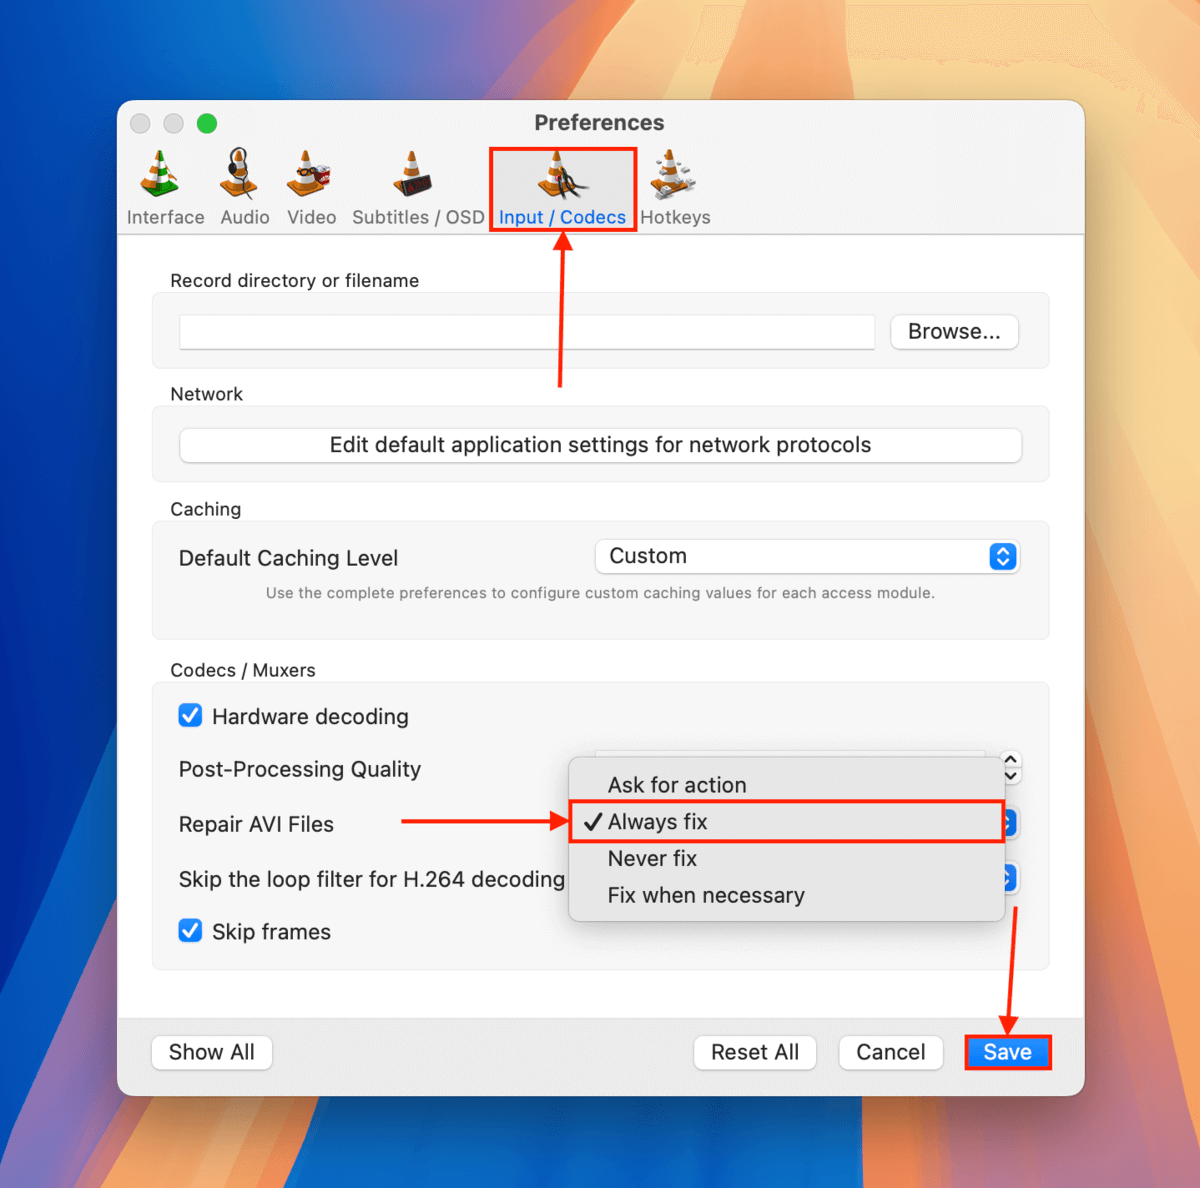
After saving these settings, try opening your video file with VLC (File > Open File…) and see if it plays.
Method 4: Convert Your Videos Using VLC
VLC Media Player has a media conversion tool that allows you to change your video’s file format (e.g. MOV to MP4). The reason conversion MAY repair your corrupted video is because the file’s data structure gets rebuilt from the ground up.
This process replaces any corrupted data related to the file’s data structure that could be preventing you from accessing the actual video streams. And in certain cases, conversion can also help bypass certain format-specific error flags and simply make the video playable again.
Step 1. Download and install VLC Media Player.
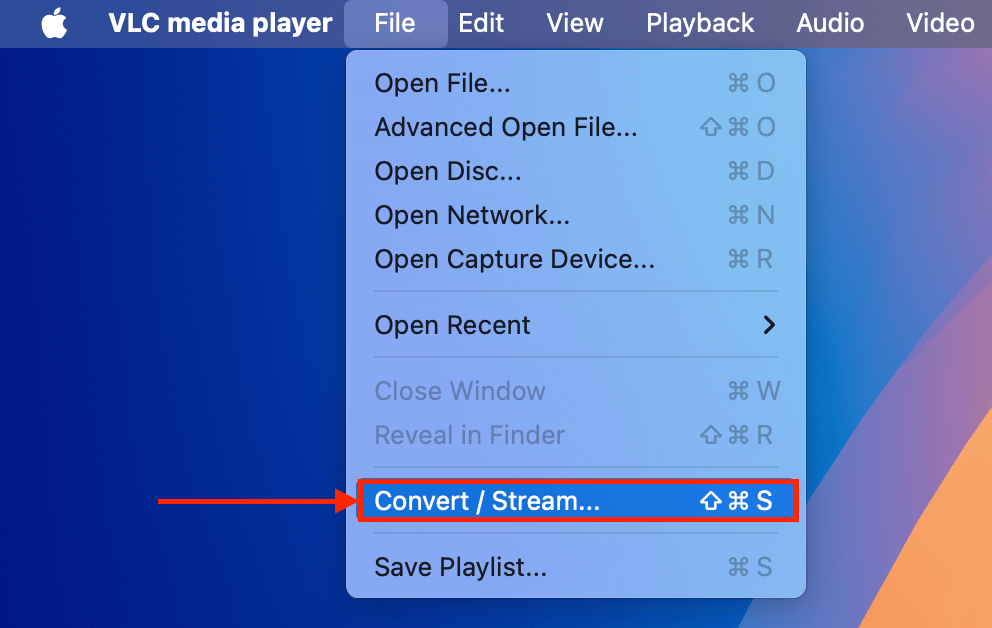
Step 2. Open VLC Media Player and click File > Convert / Stream.
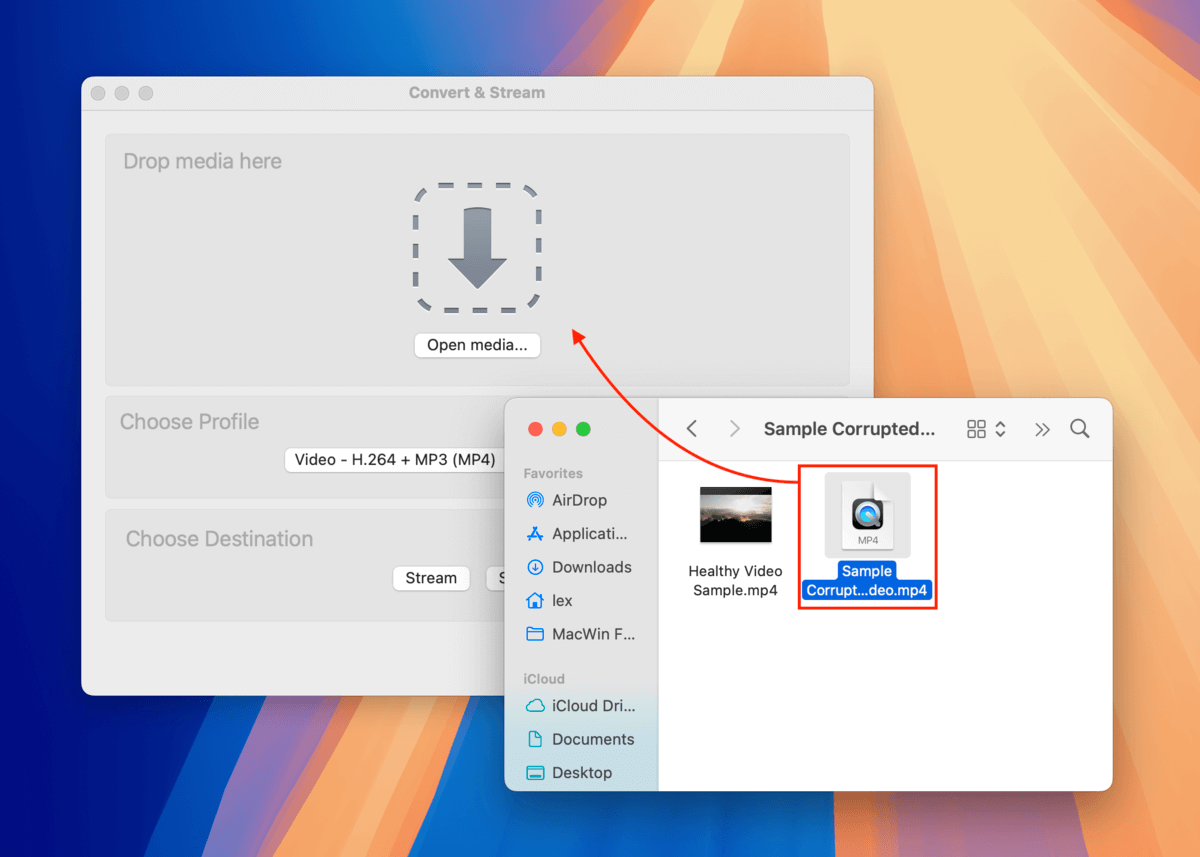
Step 3. You can drag your corrupted MOV file from Finder into the Drop media here section. Or click Open media… and select it through a dialogue window.
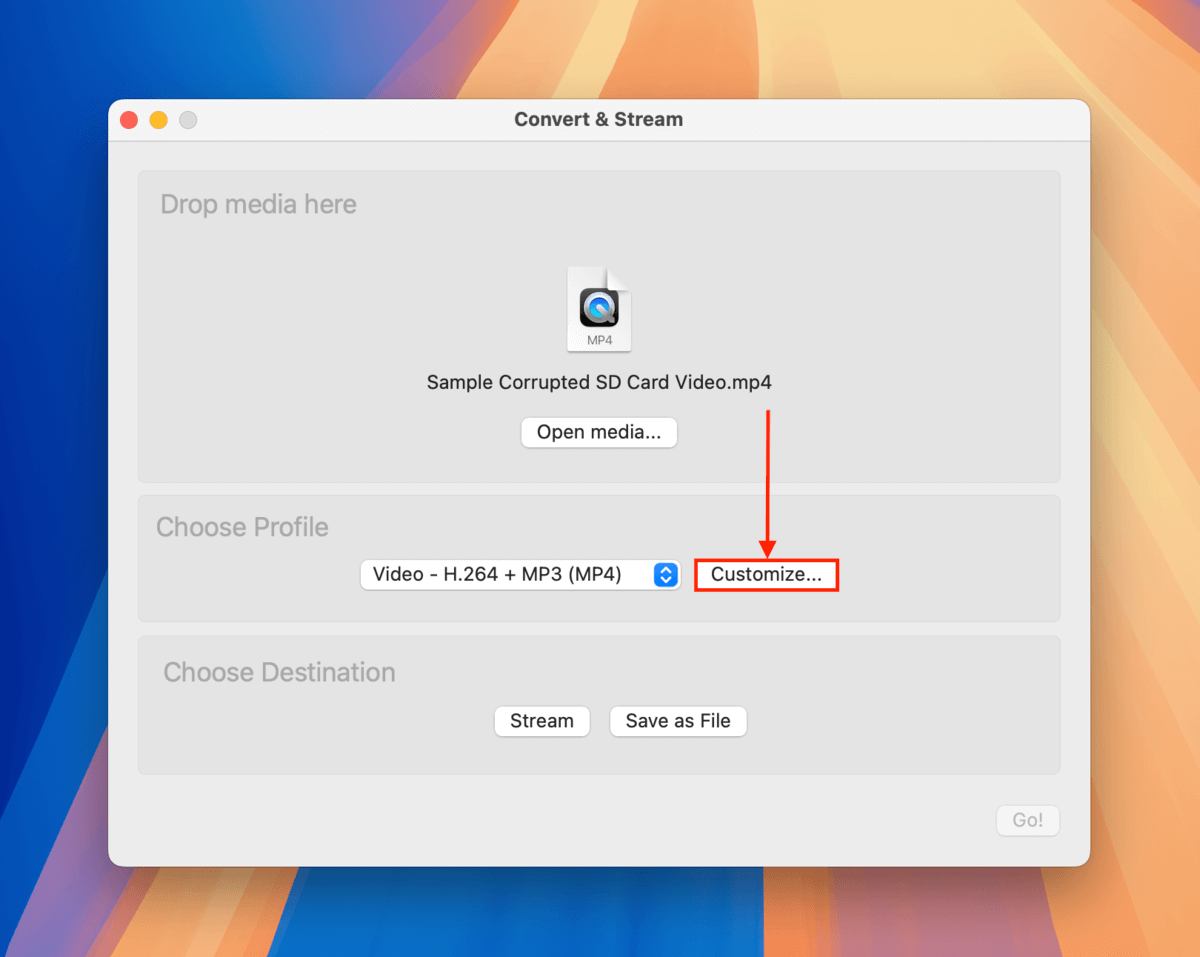
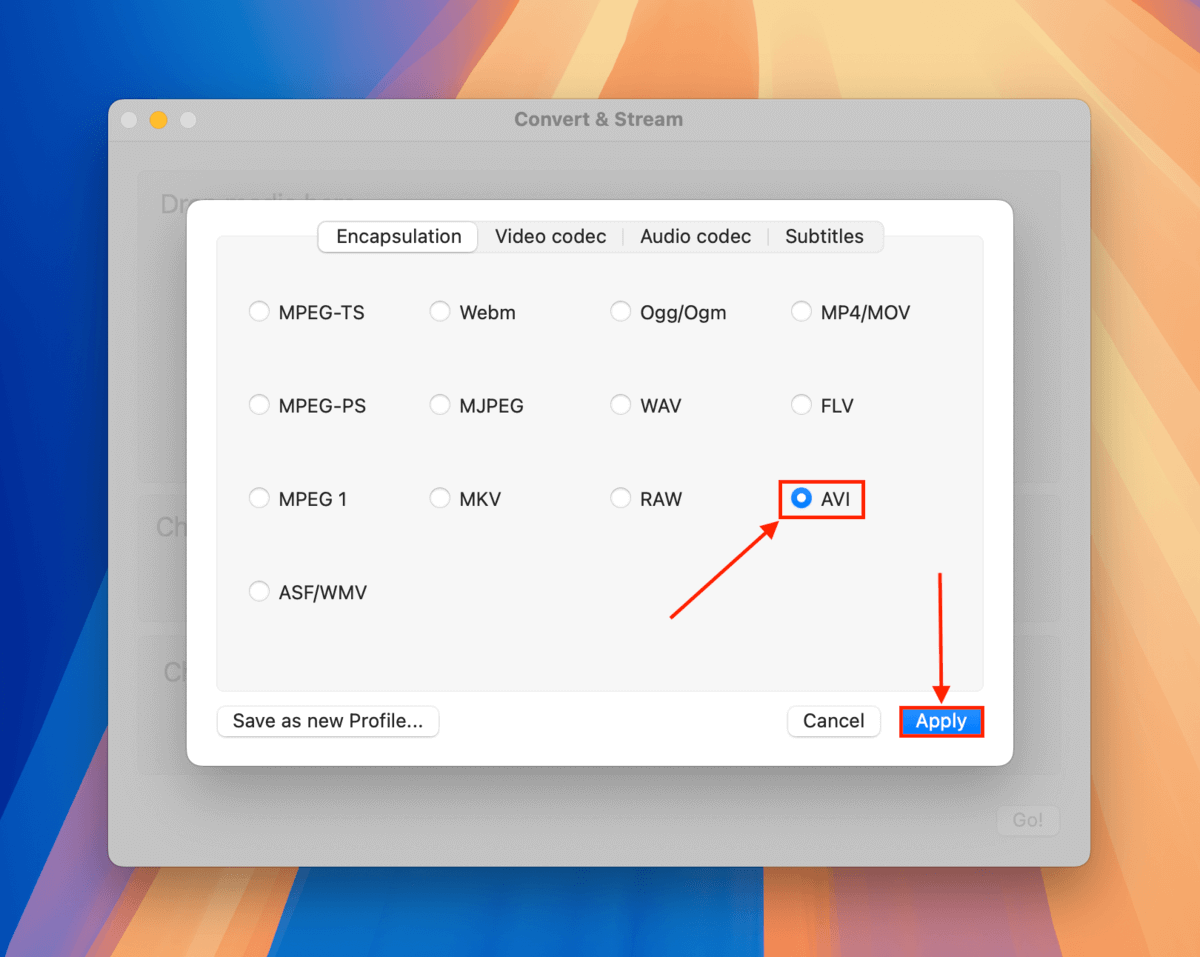
Step 4. In the Choose Profile section, click Customize…
Step 5. In the Encapsulation menu, choose your corrupted video’s new file format. We suggest trying MOV or AVI so you can utilize QuickTime and VLC Media Player’s auto-repair tools (Methods X and Y) in case the conversion itself isn’t enough to fix your video. Once you’ve selected a format, click Apply.
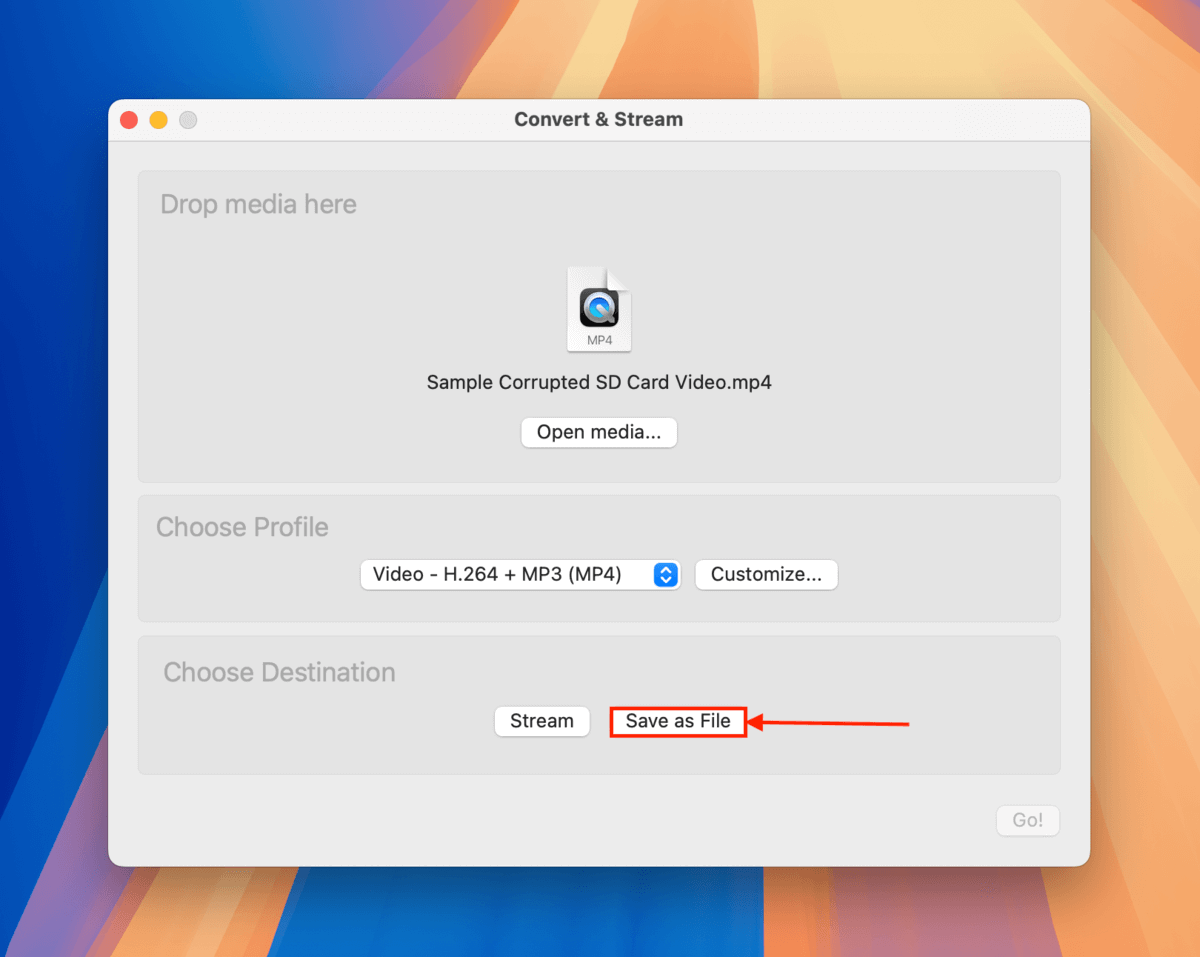
Step 6. In the Choose Destination section, click Save as File.
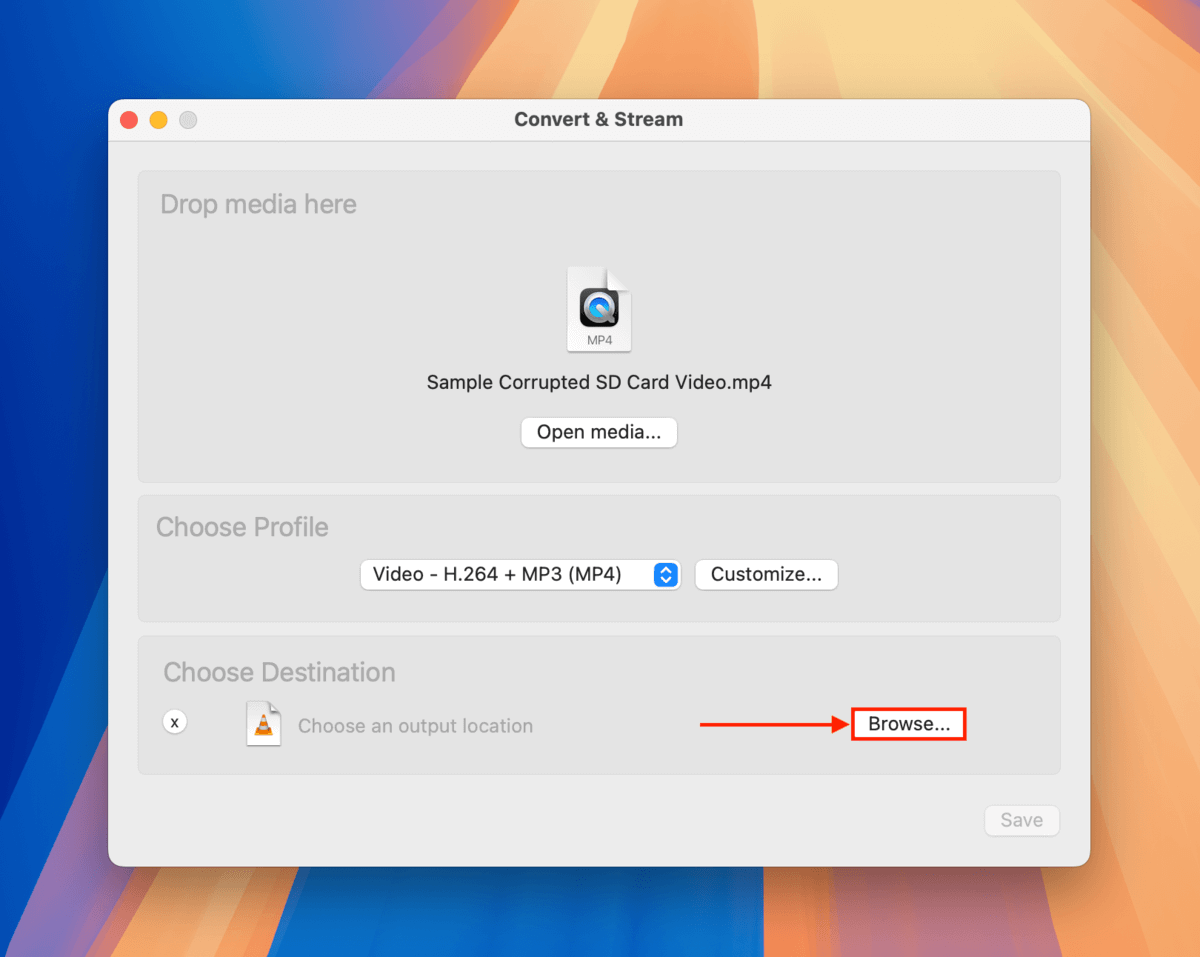
Step 7. Click Browse…
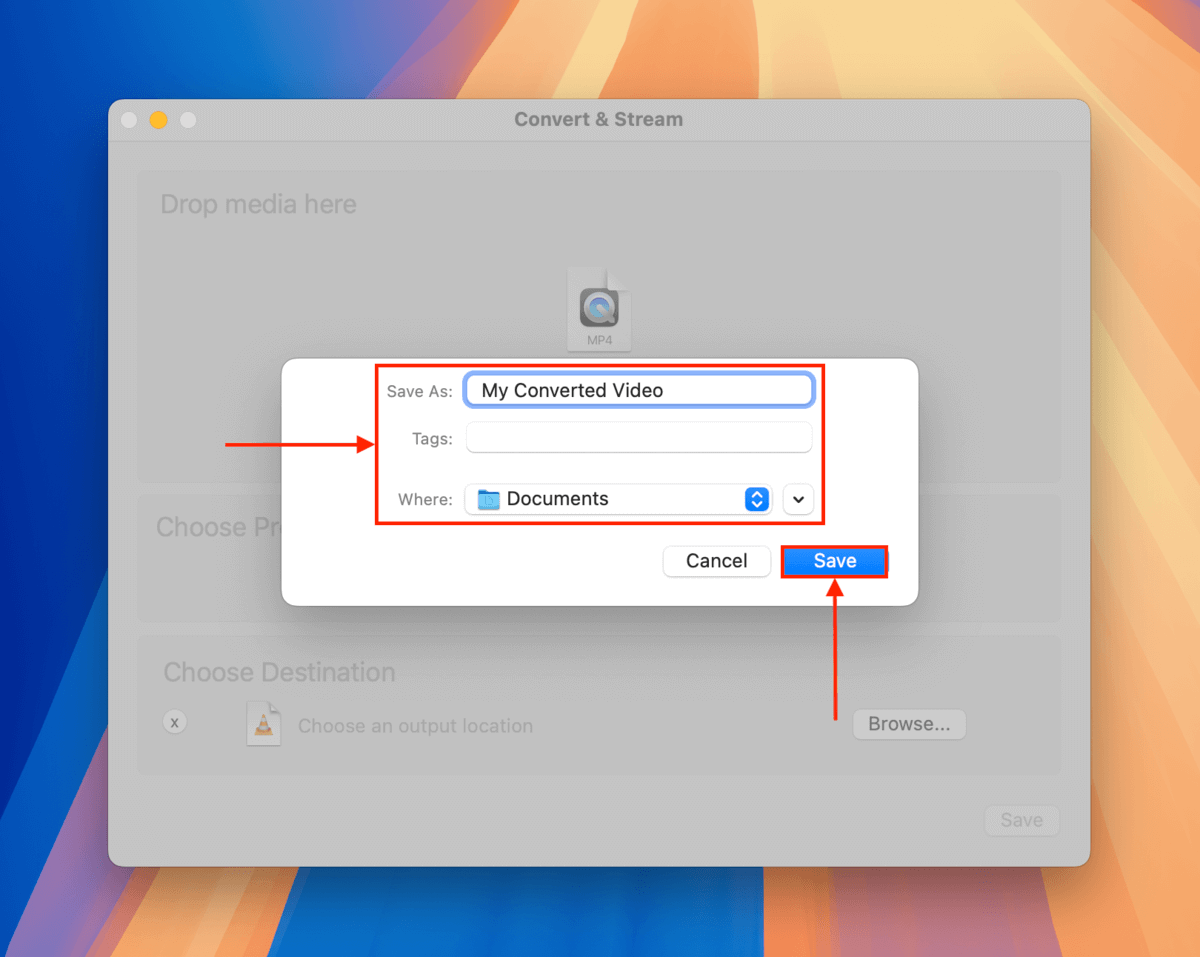
Step 8. Name your converted video and give it tags (if you want to). Then, use the dropdown menu beside Where to choose where you want to save it. Click Save.
Step 9. Finally, click Save (in the Convert & Stream window).
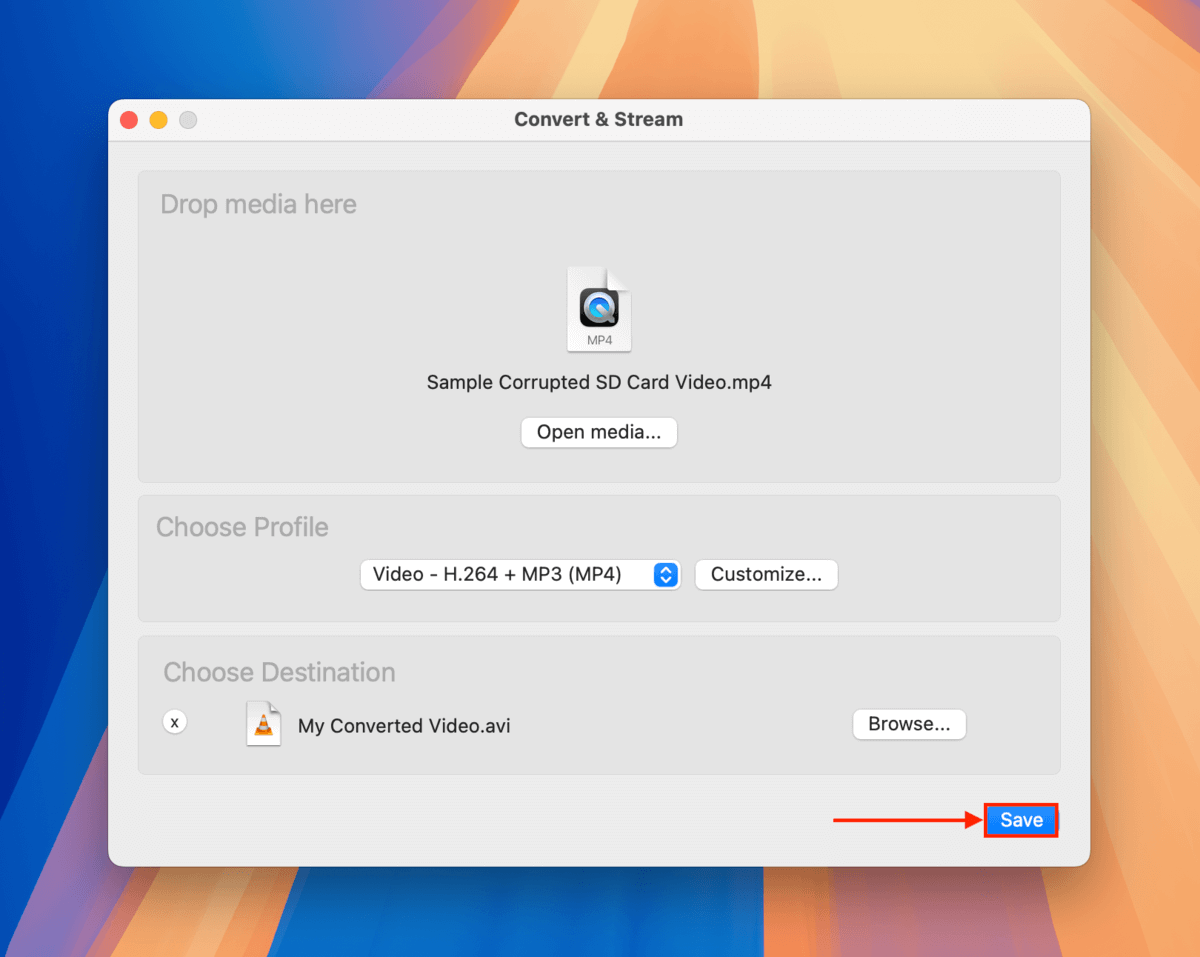
Once the new video format has been saved, you can try opening it immediately in VLC Media Player (File > Open File…).
Method 5: Change Your Video’s Codec Using VLC (H.265/HVEC to H.264)
Similar to why converting a video’s file format works, changing its codec to one that is less complex can bypass certain error flags and make it easier for apps like VLC Media Player to rebuild it.
However, this only works if you are converting a video using the HVEC or H.265 codec to H.264 — not the other way around.
Step 1. Follow steps 1-4 in Method 4, then come back to this section.
Step 2. Navigate to the Video codec menu. Click the dropdown button beside Codec and select H.264 from the list. Then, click Apply.
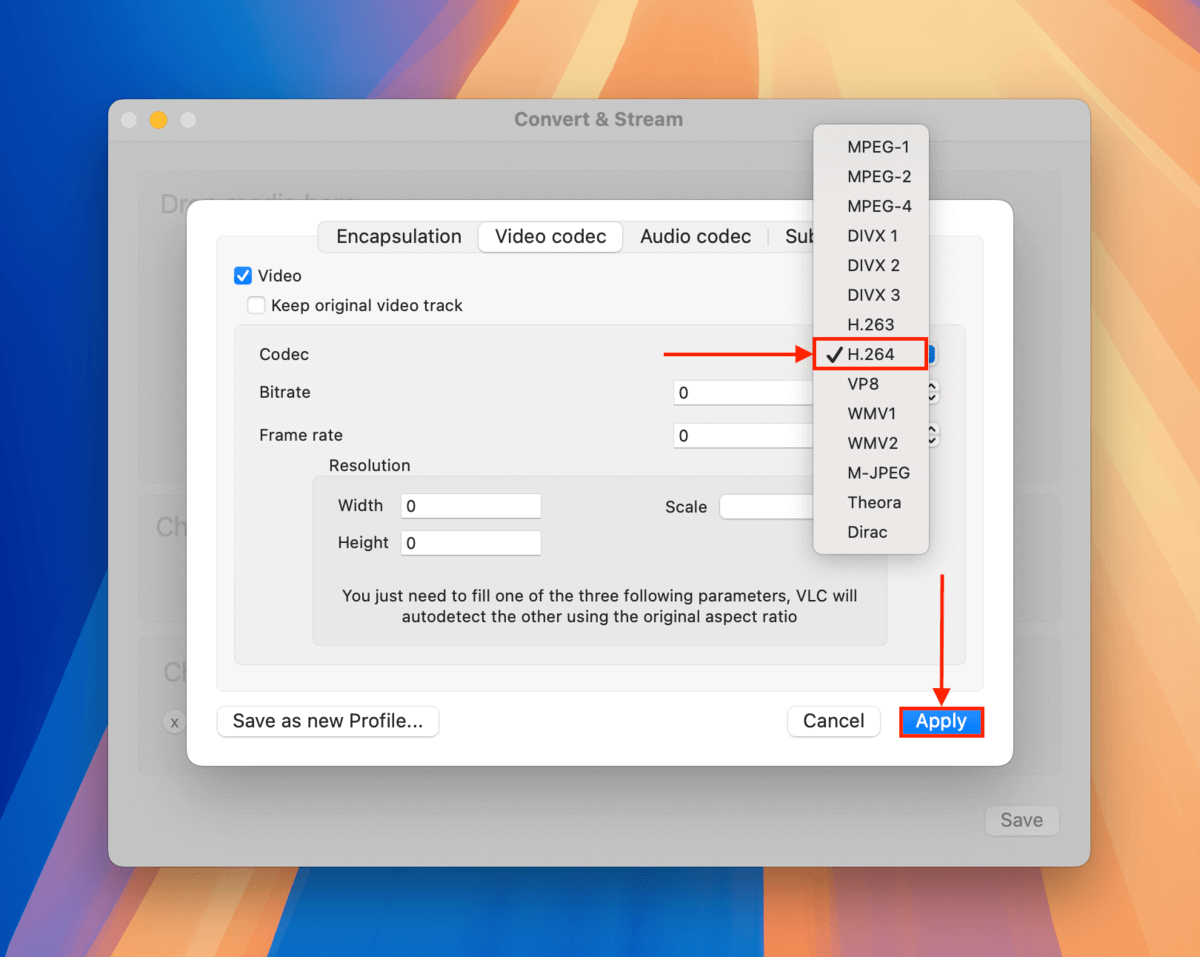
Step 3. Back in the Convert & Stream window, click Save as File > Browse…
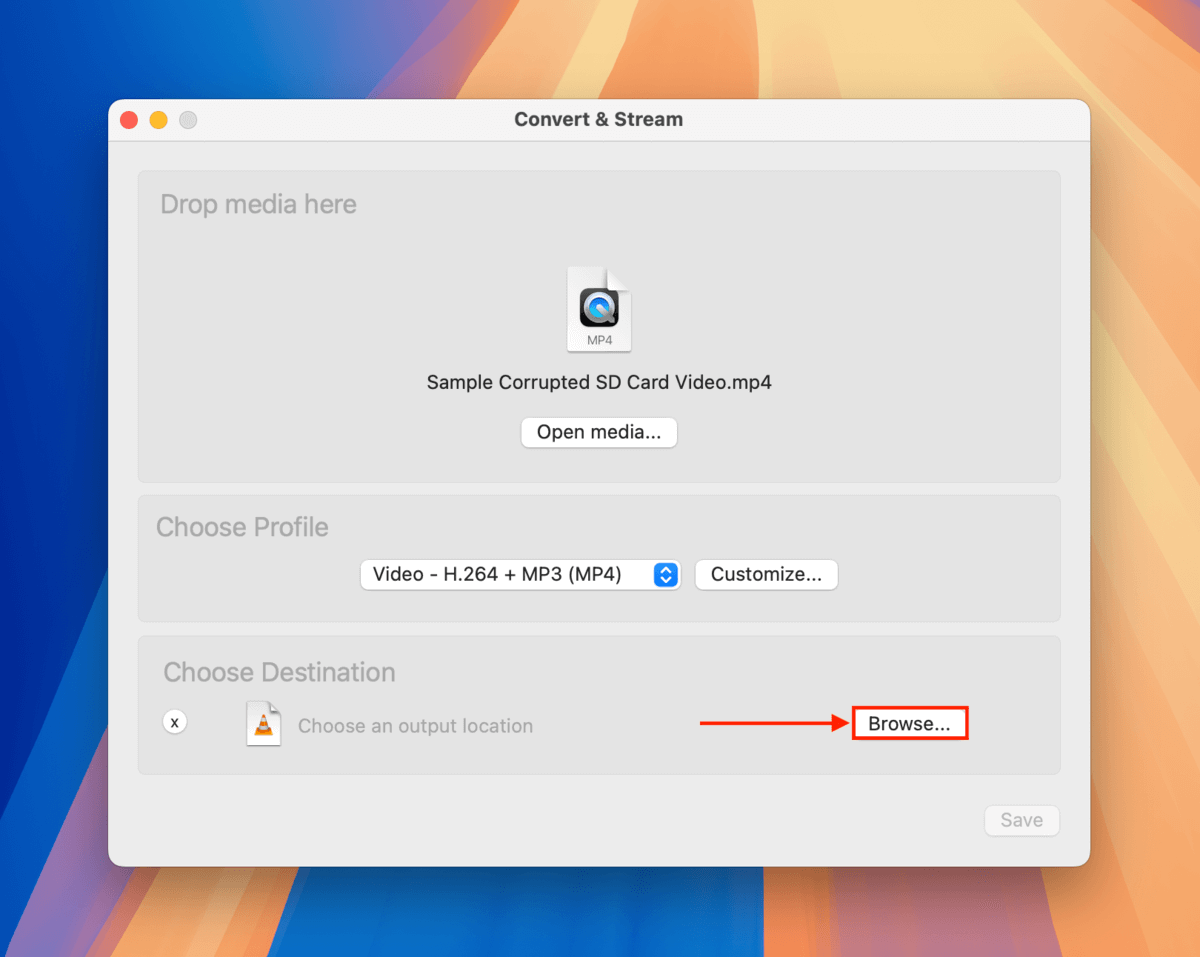
Step 4. Give your converted video a name, tags, and save location. Then, click Save.
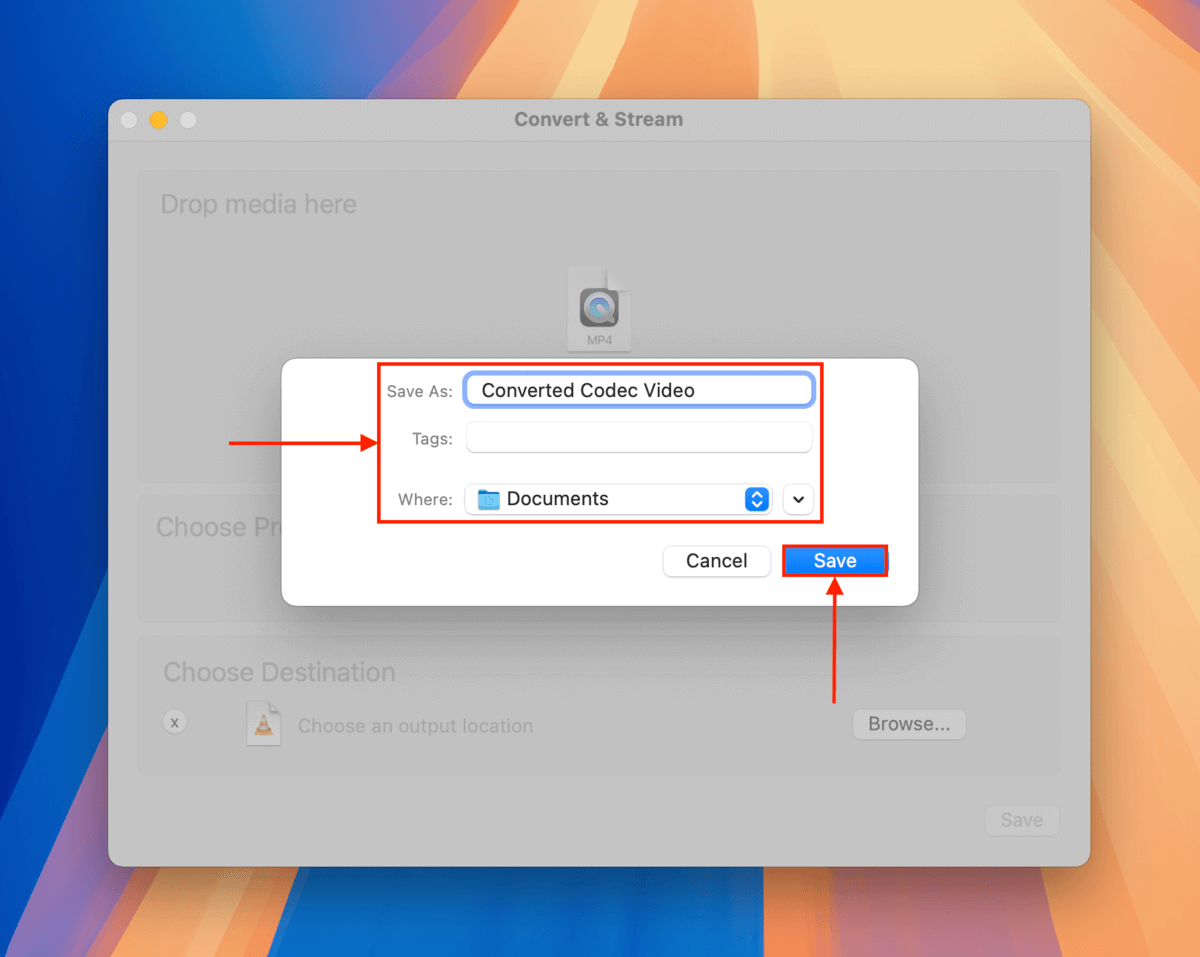
Step 5. In the Convert & Stream window once more, click Save.
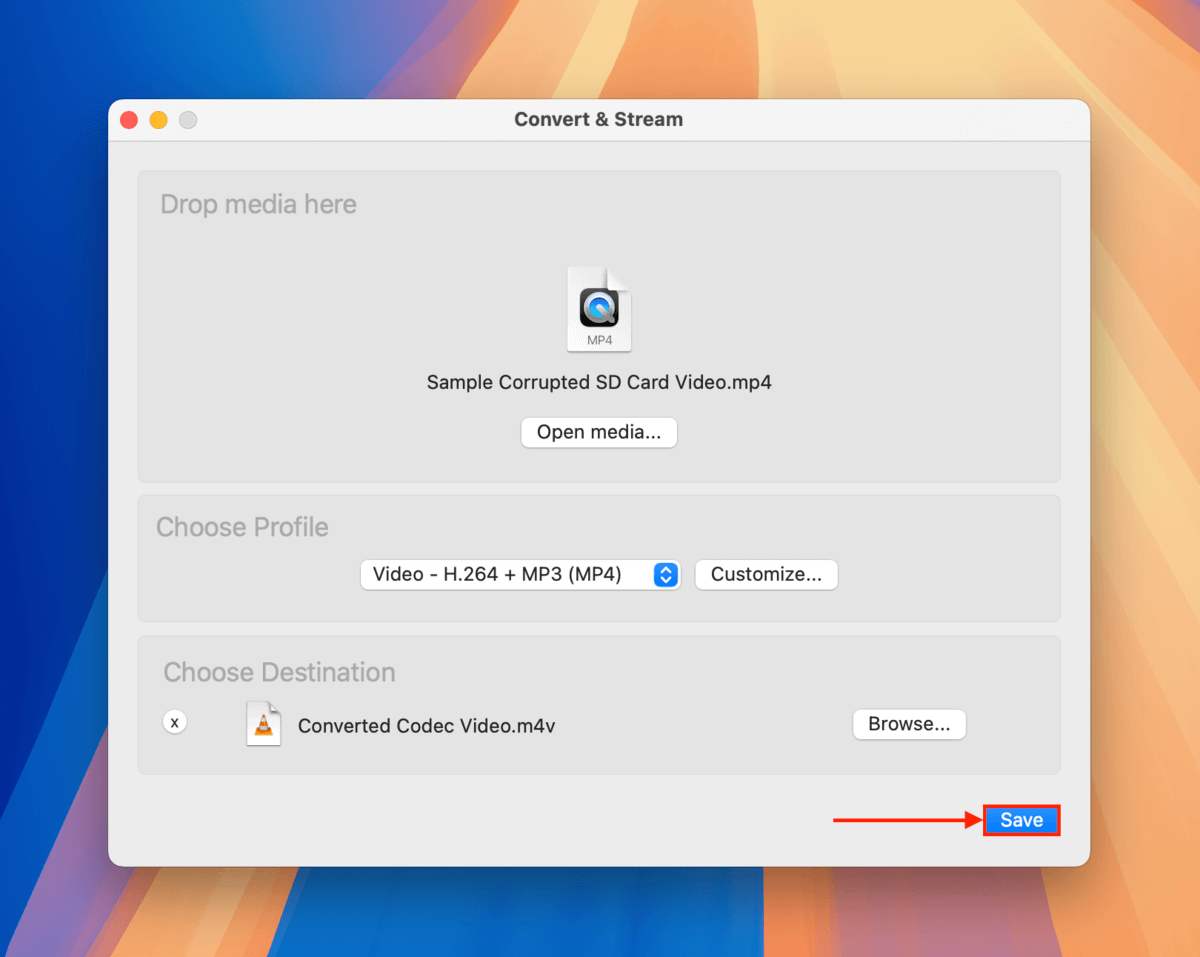
Once your video has been saved with its new codec, try opening it in VLC Media Player (File > Open File…).
Method 6: Utilize Device Manufacturer Tools
The device you used to capture the video (e.g. camera, drone, smartphone) may have built-in repair capabilities. Make sure to check your device’s manual as well as the manufacturer’s official site.
What if your SD card is corrupted?
Has this issue been happening repeatedly on that same SD card, even if you properly eject it and don’t interrupt the recording session? If not, have you noticed other weird behaviors? For example, maybe you can’t delete the corrupted file on your SD card or your SD card isn’t showing up on your Mac.
The memory card itself may be corrupted – which is also likely why your videos have been corrupted. Unfortunately, storage device corruption can happen just as easily as file corruption and for similar reasons (sudden shutdown, improper ejection, etc.). It only gets worse the more you use it in this state.
We recommend following our guide on how to recover data from corrupted SD cards, then try methods 2-4 in our corrupted hard drive repair guide.


