First Kickstater announced an intrusion had compromised user passwords, then Comixology announced a similar breach. Every week there seems to be another company announcing user data loss, usually prompting people to head out and change their passwords. I had been putting off using LastPass for awhile now, but decided that it was finally time to get serious about using a password manager. You don’t have to use LastPass to use this guide, though the specifics of this guide are tailored to this particular service.
Let’s get to it.
Table of Contents
1. Get Organized
Though many sites have changed over time to use Google or Facebook authentication, you likely still have a huge number of accounts that you’ll need to change passwords on. The best way to do this is to fire up Google Docs (or your spreadsheet program of choice,) and begin making a list. It might be easier to break them out by categories. I used Web Services, Stores, Bills, and Other. Not only will this help you think of all the various accounts you need, this will help you start setting up groups when you move the accounts to LastPass.
2. Sign Up For LastPass

If you choose you can use an offline program like Password Safe, or even one time purchase apps like 1Password. If you’re an all Apple user, you can use Keychain for iCloud for free, though it will not save some passwords. These are all pretty good, but they don’t offer quite as many options as LastPass. In addition to being the most flexible when it comes to platforms, LastPass is free for Desktop users. If you don’t want to do anything but get a Chrome, Firefox, or Safari extension and use it on only Macs and PC’s then you can use LastPass for nothing. This version is supported by ads and has limited options for two-factor authentication, but that’s a simple way to manage passwords. The premium version is twelve bucks a year, removes ads, and allows you to use the mobile apps. That then means you can set up all of your passwords and copy them into apps on your iPhone and iPad. (If you’re platform promiscuous, there’s apps for Android, Blackberry, and Windows Phone.) Once you’ve signed up, you have an add-on in your browsers. Click on the LastPass icon in the toolbar, and log in to begin using the app.
3. Importing Your Accounts

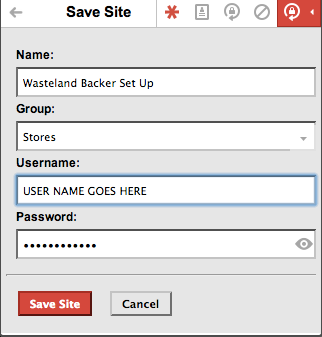
So I made a big list of my accounts in a spreadsheet, and now it’s time for the most tedious part of this exercise. You have to log into every account you have and create a LastPass entry for it. If I were smarter I would have just done this passively over a few weeks. You could simply just choose to save accounts into LastPass as you use them, accumulating a list and then organize your categories. You need to work through each account, changing passwords and using LastPass to generate your new ultra secure passwords. It’ll be worth it. We promise.
4. Updating Devices
Once you’ve got LastPass humming away on your main machine, you’ll need to update the email client on your iPad, iPhone, and any other computers you use. This may be a good time to set up two-factor authentication on your more serious accounts. You can also use Google Authenticator to set up two-factor on LastPass itself. It is important that you keep LastPass secure, as this is now the key to your online identity.
5. What To Keep Out Of LastPass
It isn’t to say that these passwords should be kept out of LastPass, you can include them for autofill once you’ve logged in with your LastPass accounts; but there are passwords that you should remember. Big email accounts, like iCloud, Outlook, and Gmail. These are used as logins on several platforms and you should work to find a secure password you can remember for them.


