Thanks to its Unix-based core, Mac provides multiple ways to accomplish most common tasks, including recovering deleted files, which can be done using Finder or Mac Terminal commands. This article focuses on the latter method and describes everything you need to know about Mac Terminal when it comes to data recovery.
Table of Contents
How Does Terminal Work?
You can think of Terminal as the gateway to the Unix underbelly of Mac computers. It provides a command line interface to the operating system, allowing you to interact with your computer by typing commands on your keyboard, instead of using your mouse to interact with the regular graphical interface.
Most regular users never use Terminal because Mac’s graphical user interface is good enough for most computing needs.
If you’ve never used Terminal on Mac before, it’s completely natural to feel somewhat intimidated by it, but there’s really nothing to be afraid of. All you need to do is follow our instructions on how to use the undelete command to recover deleted files using Mac Terminal.
How to Recover Deleted Files Using Mac Terminal?
When you delete a file on a Mac, the file is either moved to Trash or permanently deleted. In this section, we explain how you can recover both files that are in Trash and files that are permanently deleted using Mac Terminal.
Recover Files from Trash Using Mac Terminal
Recovering files from Trash via the command line is easy because Trash is really just a special folder from which you can copy any file with a simple command.
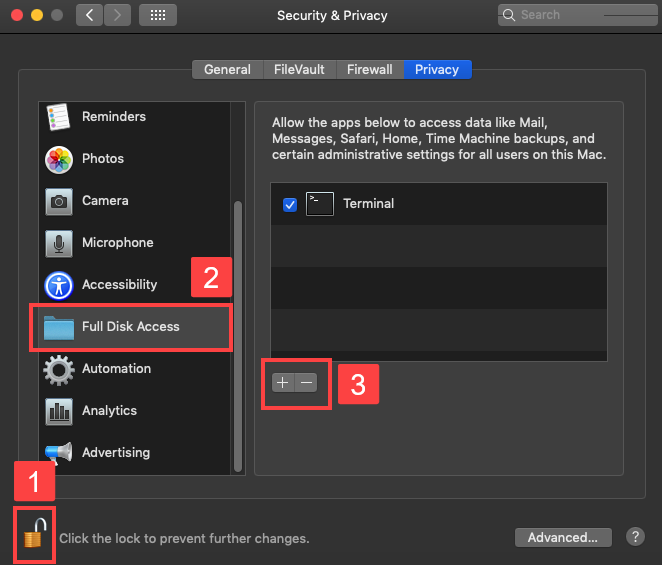
Step 1:Open the Security & Privacy Preferences pane of System Preferences and select the Privacy tab.
Step 2:Unlock the interface by clicking the lock icon, choose Full Disk Access from the list of services on the left, and drag and drop the icon for Terminal into the list.
Step 3:Launch Terminal.
Step 4:Type cd .Trash and hit Enter to navigate to the Trash folder.
Step 5:Type ls -al ~/.Trash and hit Enter to view the content of the Trash folder.
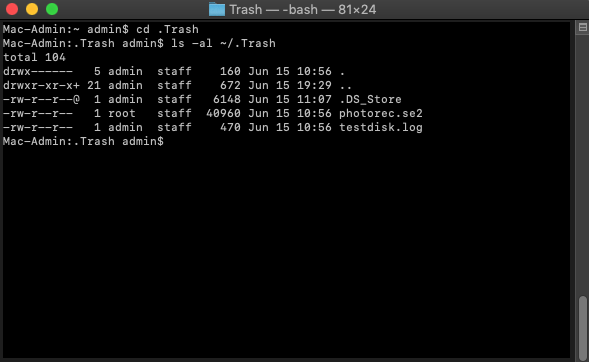
Step 6:Type mv filename ../ and hit Enter to move a specific file to your home folder (replace filename with the name of the file you want to recover).
Step 7:Type Quit and hit Enter to close Terminal.
Recover Files Deleted with “rm” Command
The rm command can be used to delete any file directly from Terminal. Because files deleted using the rm command don’t go to the Trash folder, you can’t recover them using the above-described method.
You can, however, recover them using a data recovery application for Mac like PhotoRec, which runs in Terminal and can be installed using Homebrew.
Notice: If you want to scan your internal system drive (the drive where macOS is installed), you need to complete the following steps before you can use a data recovery application:
- Reboot the Mac and hold down Command + R keys simultaneously to boot into Recovery mode.
- Open the Utilities menu at the top of the screen and choose Terminal.
- Type csrutil disable and press Enter to disable System Integrity Protection.
- Restart your Mac.
- Launch Terminal.
Keep in mind that disabling System Integrity Protection comes with certain risks since it helps protect your Mac from malicious software.
Step 1:Install Homebrew by pasting the following command in Terminal:
/bin/bash -c "$(curl -fsSL https://raw.githubusercontent.com/Homebrew/install/master/install.sh)"
Step 2:Type brew install testdisk and hit Enter to install TestDisk (PhotoRec is included in the TestDisk package).
Step 3:Type sudo photorec and hit Enter to launch PhotoRec.
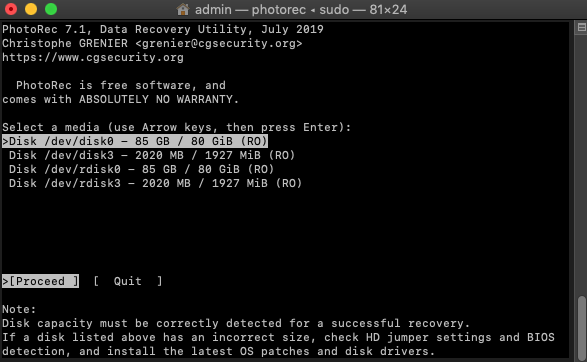
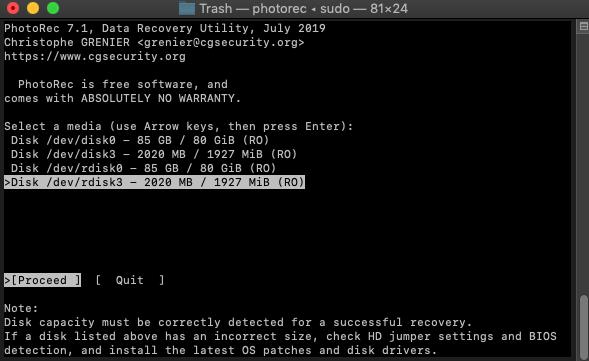
Step 4:Select your hard drive.
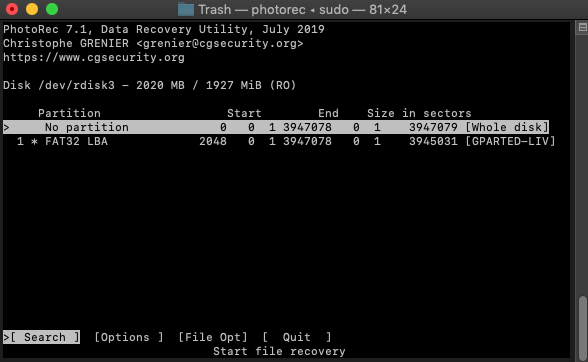
Step 5:Select your partition. Choose the No partition option to scan the whole drive.
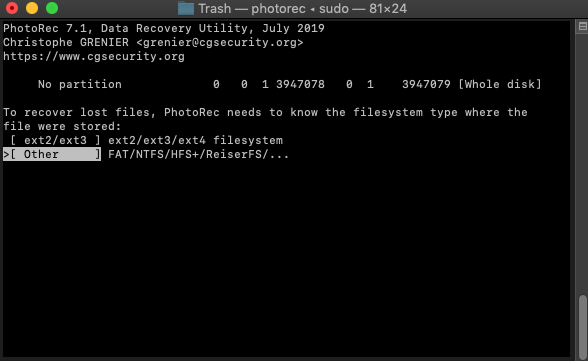
Step 6:Select the right file system and press Enter. PhotoRec will automatically suggest what it believes to be the right option.
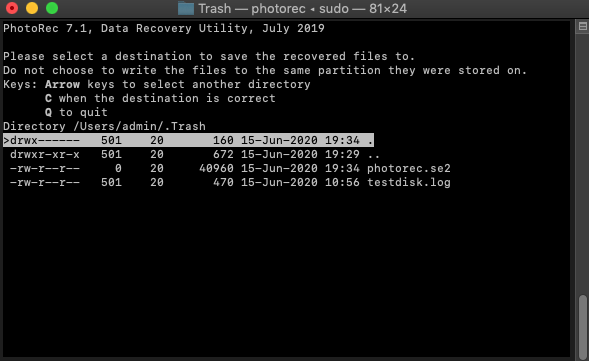
Step 7:Select a destination to save the recovered files to and press C on your keyboard when done.
If you find PhotoRec too difficult to use, and you just want to get your permanently deleted files back as quickly and painlessly as possible, you can recover them with Disk Drill, and easy-to-use data recovery application with a modern graphical user interface and support for hundreds of file formats.To recover permanently deleted files with Disk Drill:
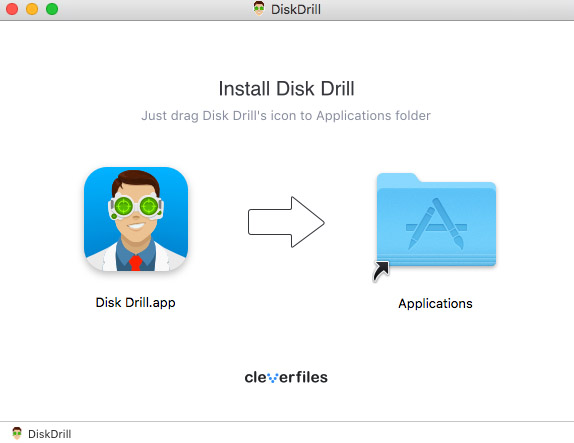
- Download and install Disk Drill.
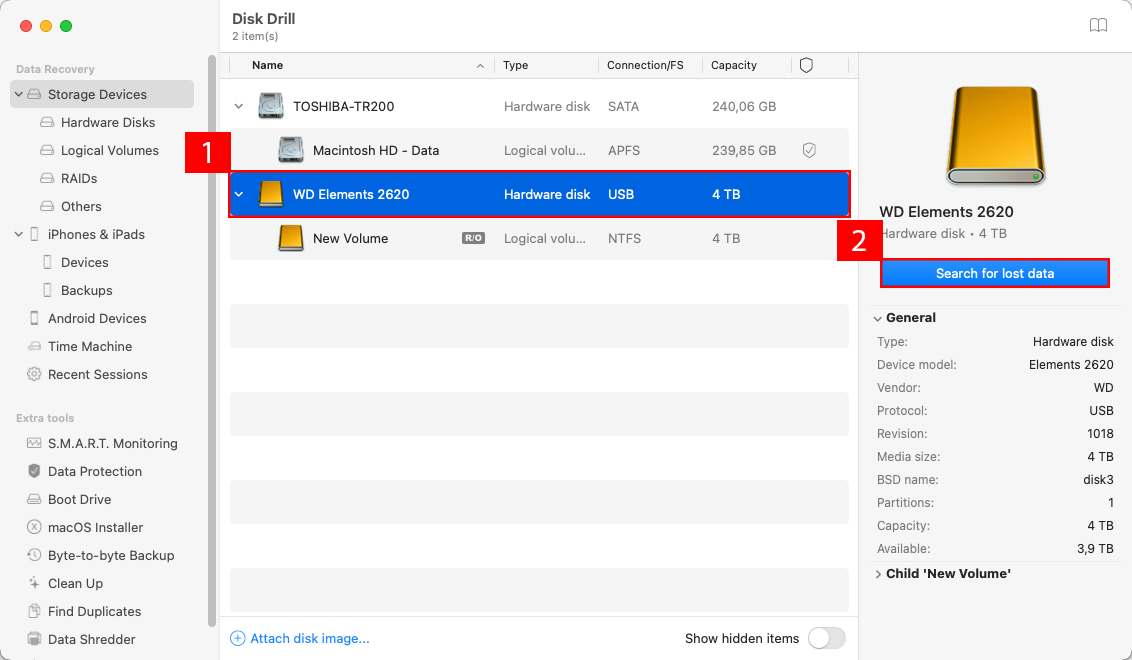
- Click the Recover button next to the drive on which your files were stored prior to deletion.
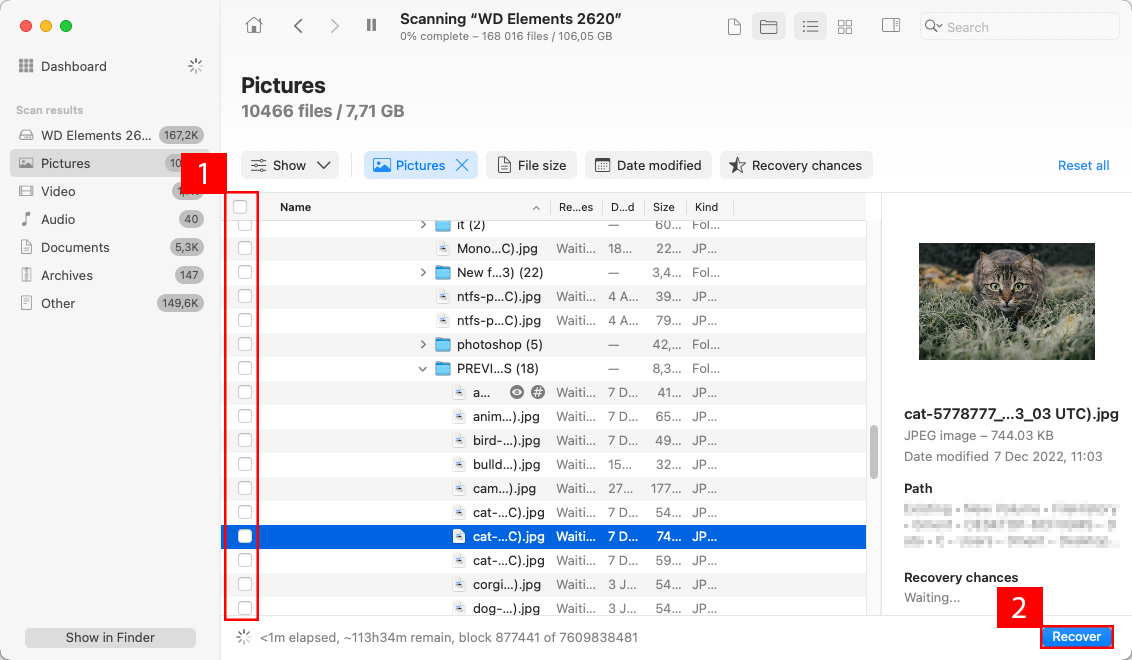
- Select the files you want to recover, specify the recovery directory, and click the Next button.
That’s how simple data recovery is with Disk Drill.
Recover Files from a Time Machine Backup
You can actually recover deleted files from a Time Machine backup without using the graphical interface, which may come in handy in situations when you can’t use your touchpad or mouse or interact with the graphical user interface for some other reason.
Step 1:Use the Privacy tab in the Security and Privacy preference pane to add Terminal to the list of applications with Full Disk Access like we explained in the first solution.
Step 2:Launch Terminal.
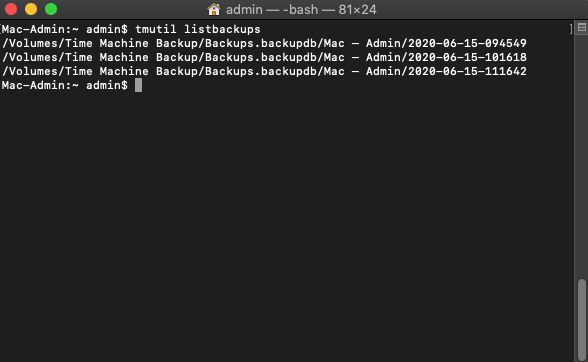
Step 3:Type tmutil listbackups to list all available Time Machine backups.
Step 4:Type
tmutil restore '$BACKUP_PATH/$ORIGINAL_PATH' '$DESTINATION'
to restore your file.
- $BACKUP_PATH = the location of your Time Machine backup.
- $ORIGINAL_PATH = the location of the deleted file.
- $DESTINATION = the place where you want to recover the deleted file.
Conclusion
As you can see, it’s possible to recover deleted files using Mac Terminal but only in certain situations. Because undeleting files from Terminal is far from easy, regular Mac users should first try a data recovery application with a graphical user interface and experiment with undelete commands only if it doesn’t work.
FAQ:
Terminal is just another app on Mac computers which means that you can launch it like any other app:
- Open Finder, go to /Applications/Utilities, double-click Terminal.
- Press Command-Space to open Spotlight, type “terminal”, and hit Enter.
- Invoke Launchpad (from the Dock or by pressing F4), type “terminal”, click Terminal.
To recover a delted folder using the Terminal on a Mac, follow these steps:
- Open Terminal
- Navigate to the Trash using the cd command: cd ~/.Trash
- If you want to see the contents of your Trash use the ls command to do that: ls -l
- Once you’ve identified the folder you want to recover, use the mv command to move itfrom trash: mv DeletedFolder ~/Documents/ – this command will move whole DeletedFolder folder to the Documents


