
Can you recover Tesla dashcam footage? In most cases… Yes! However, you need to act fast – the more time passes, the harder it will be to restore your files. Fortunately, there are more ways to restore files from the USB or memory card that you used for your Tesla’s dashcam compared to that of regular storage devices. This guide covers them all – here are 5 different methods to recover Tesla dashcam footage. Read on!
Table of Contents
2 Tips to Immediately Increase Your Recovery Success Rate
While there are aspects of data recoverability that you can’t control, you can improve your chances of getting your dashcam footage back by preserving as much of the data left on the disk as possible. There 2 ways to do this:
- Pause recording ASAP. If your deleted videos get overwritten by new footage, data recovery becomes 100% impossible. On your Tesla’s Center Console, navigate to the Controls menu and your dashcam. You don’t have to disable Sentry Mode specifically because it will only work if your dashcam is enabled.
- Safely eject your USB. Don’t just yank it out! Follow the instructions in Step 1 to pause recording on your dashcam. (except the Cabin Camera, which we can’t do anything about). Note that you will have to press and hold the camera icon until the dot turns grey. Once your dashcam is turned off, you can safely pull out your USB stick.
How to Recover Lost Tesla Dashcam Footage
In this section, we’ll demonstrate five different ways to restore deleted videos from your Tesla dashcam via its USB or memory card. We start with the easiest method and work our way up – so we recommend starting with method 1.
Method 1: “Put Back” Dashcam Video Files From Your Mac’s Trash Folder
When a file that is stored on a USB drive gets deleted, it’s not erased from the disk immediately. Instead, it’s usually sent to a hidden folder on the USB called .Trashes. At the same time, references to the deleted files are stored in your Mac’s local Trash folder. By deleting these references, you can also delete the files hidden in .Trashes.
Step 1. Connect your Tesla Dashcam USB to your Mac. Otherwise, the references to your deleted files won’t appear in the local Trash folder.
Step 2. Open your Trash folder by clicking its icon on your Dock.
Step 3. Check if your dashcam footage appears in the Trash folder. If it does, highlight the video files and hit right-click > Put Back. 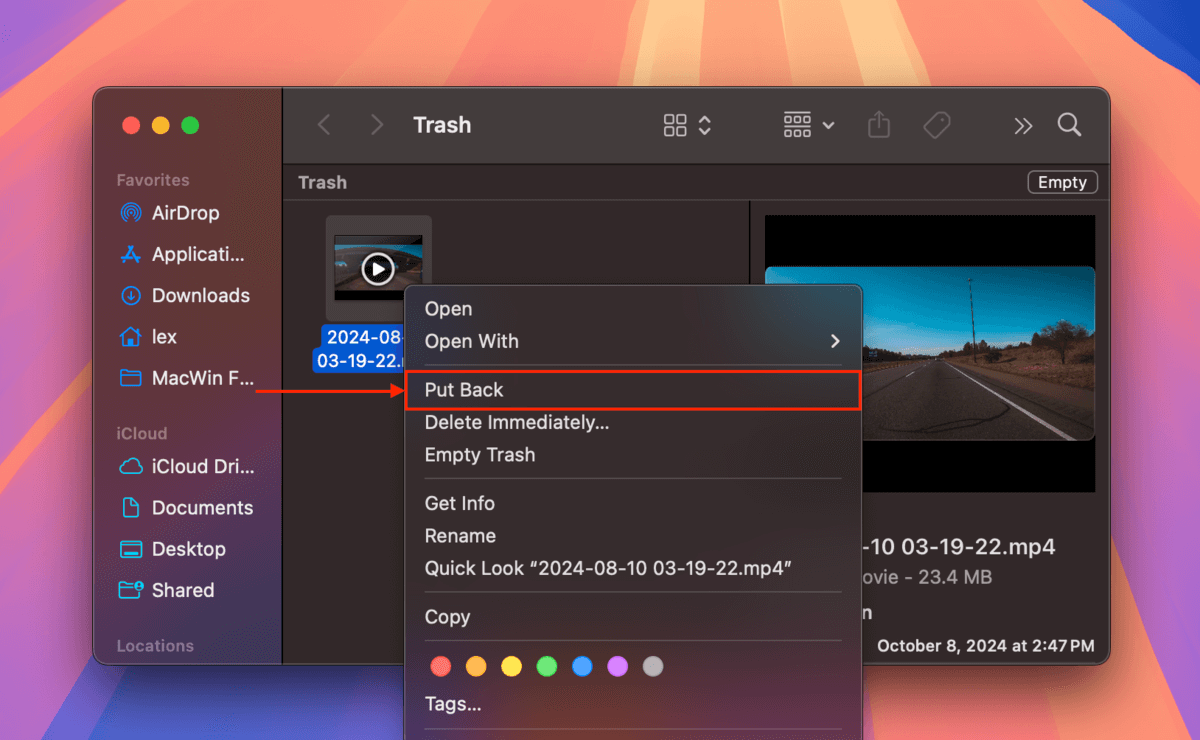
Method 2: Check Cloud Services
Do you have any cloud storage services enabled on your Mac? You may have copies of your dashcam footage uploaded to the server. You can download them from the cloud to your Mac (or back to your USB), even if the original files have been permanently deleted. One of the best examples of this method is the popular cloud service, Dropbox. Depending on how you first set up the app, Dropbox can automatically upload photos and videos for you every time you connect a storage device to your computer.
Step 1. Open any browser on your Mac and login to Dropbox.com.
Step 2. Navigate to the Camera Uploads folder. Then, select the videos you want and click the Download button. 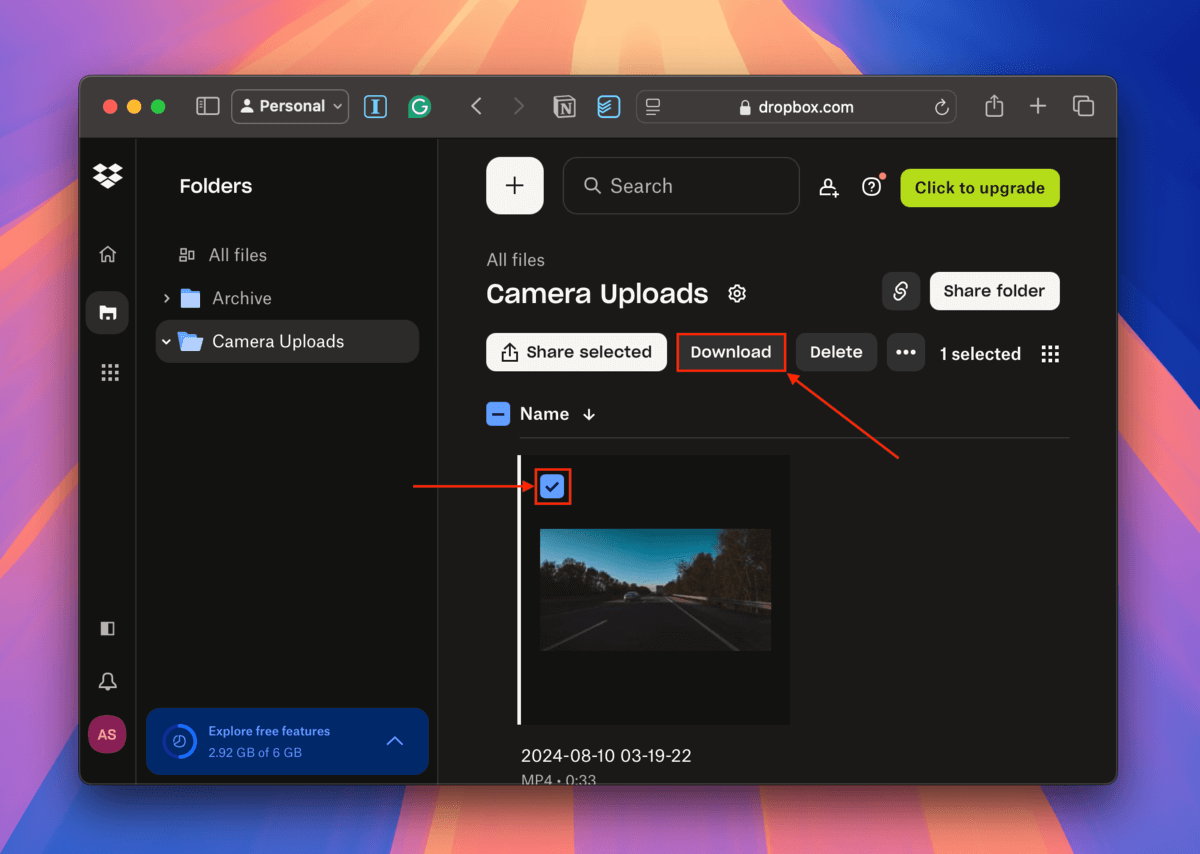
Method 3: Recover Tesla Dashcam Video Using Data Recovery Software
If you don’t have copies of your footage in the Trash folder or backed up to the cloud, your next best option is to use data recovery software. It’s a type of software tool that retrieves data from storage devices and rebuilds it into usable files.
For this demonstration, we’ll be using an app called Disk Drill. It’s fully compatible with dashcam USB devices and their file systems, including ExFAT, MS-DOS FAT, and ext3/ext4. Disk Drill is also especially good at restoring MP4 videos, which is the format that Tesla Dashcams use.
Most importantly, Disk Drill has a feature called Advanced Camera Recovery. It’s a unique scan type that is designed to locate the scattered video file data fragments, which it uses to rebuild the file during the recovery process. This greatly improves the chances of your recovered footage actually being playable.
Step 1. Download and install Disk Drill on your Mac.
Step 2. Securely connect your Tesla Dashcam USB to your Mac. Then, open Disk Drill.
Step 3. Select Advanced Camera Recovery (left sidebar) and choose your USB from the source list. Leave the Camera type setting on Auto. Then, click Search for lost data to initiate the scan. Note that you can also utilize the Universal Scan in the Storage Devices menu (left sidebar) if ACR is unable to recover your files.

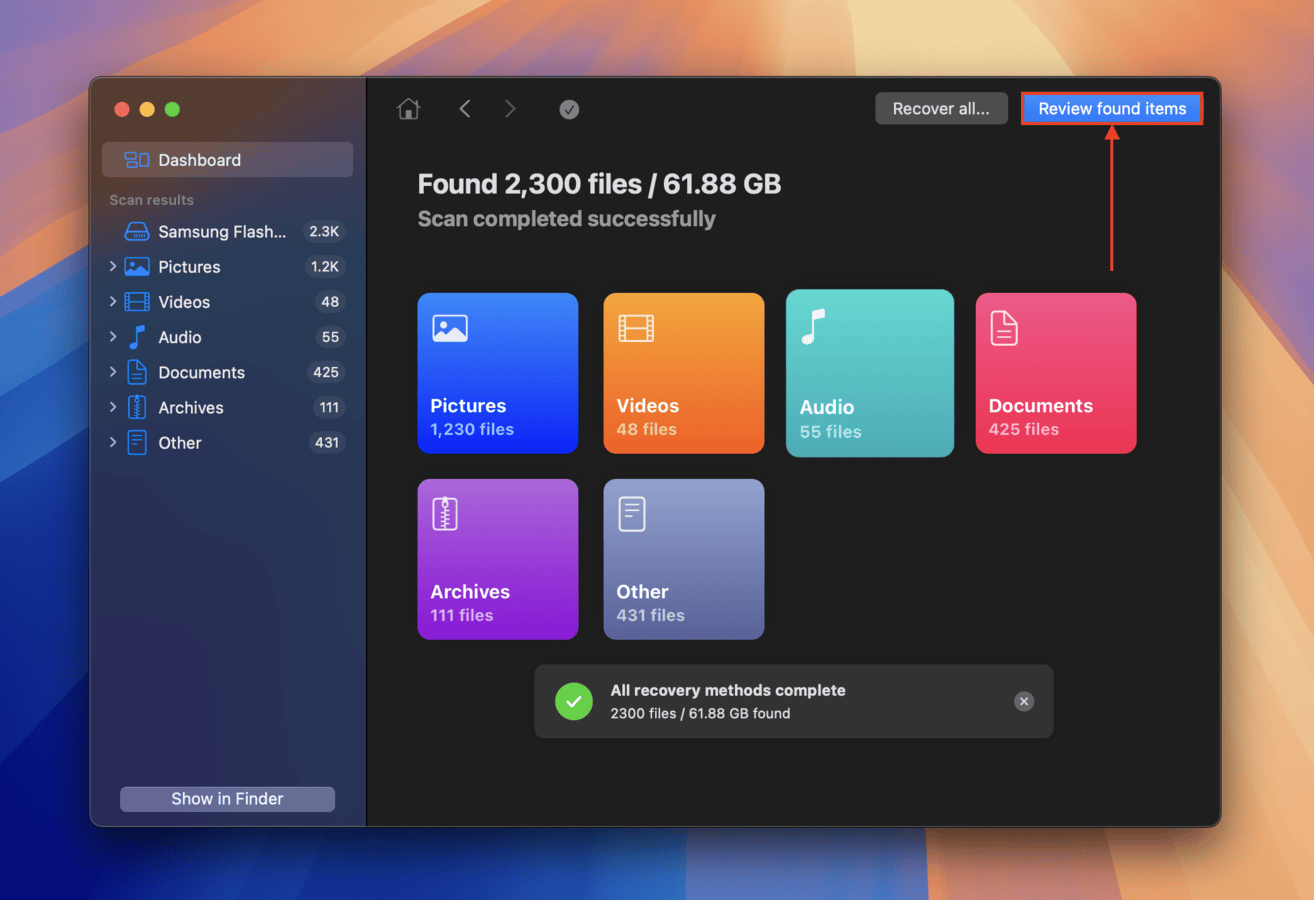
Step 4. Once Disk Drill is done scanning your USB, click the Review found items button in the top right corner of the window.
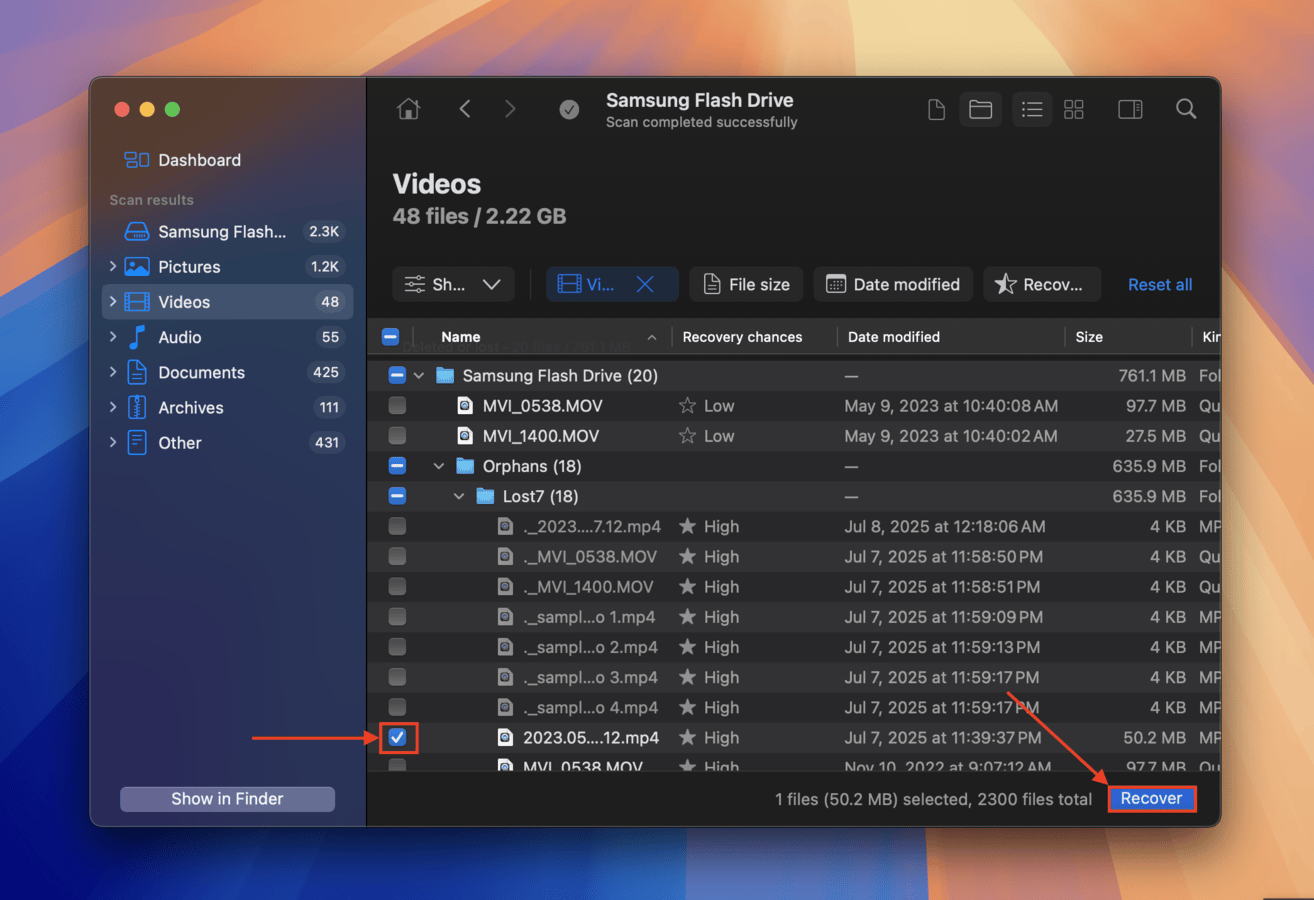
Step 5. In the left sidebar, select Videos to filter the list of files. Make sure to preview files so you know they work; hover your mouse pointer beside any file and click the eye button that appears. Disk Drill is capable of previewing full videos, so check it from start to finish.

Step 6. Next, select the files you want to restore by clicking the checkboxes. Note that Tesla Dashcam footage typically use dates and time stamps in their file names (but it’s possible for original file names to be lost during deletion so check unnamed files with the preview tool as well). Then, click the Recover button.
Step 7. In the dialogue menu, select a destination folder on your Mac for the recovered files. Do not save them to your Tesla Dashcam USB to avoid overwriting data. Finally, click Next to proceed with recovery.
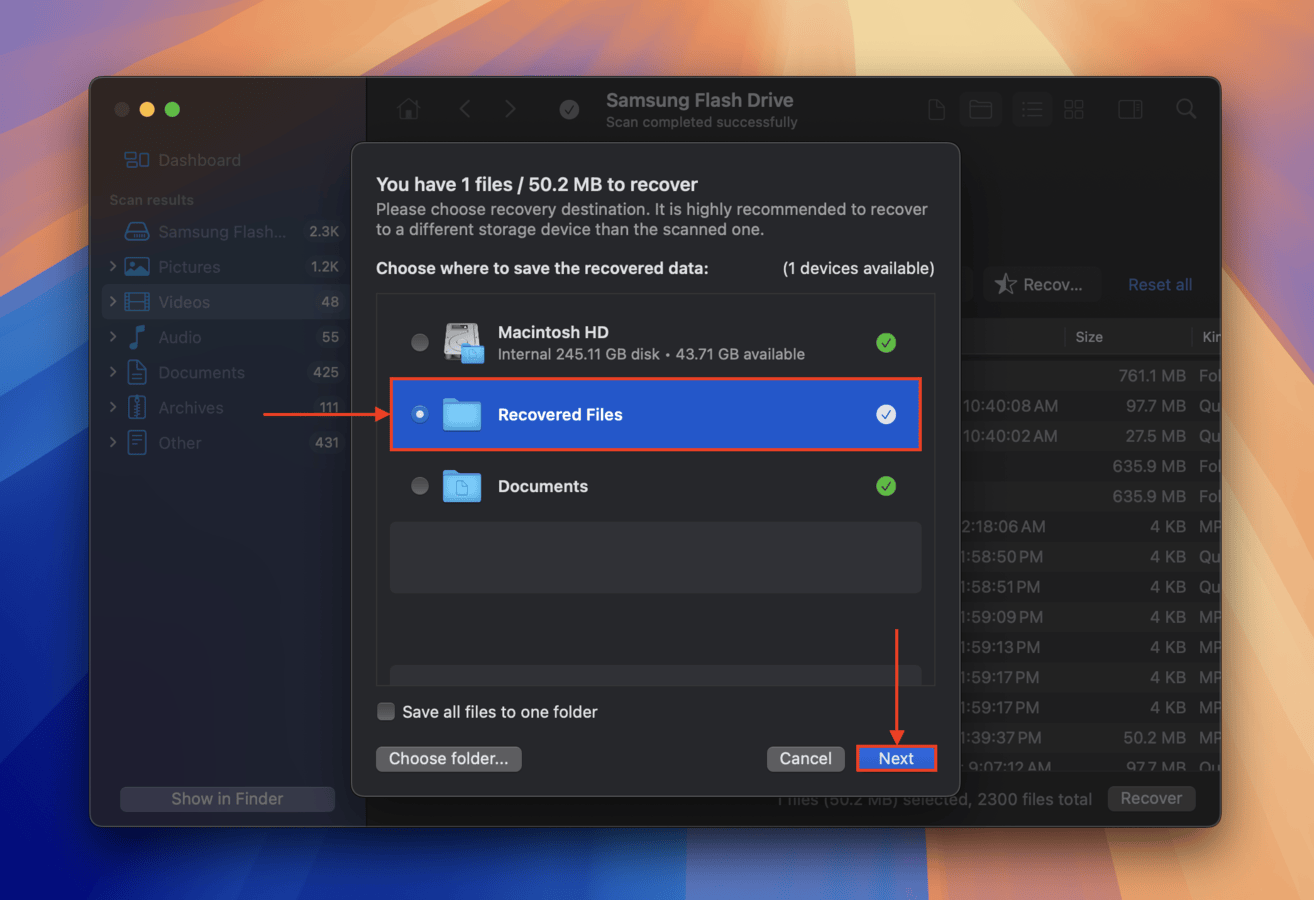
Once Disk Drill is done recovering your video files, you will find them in the folder you selected in step 7.
Method 4: Retrieve Your Videos From Tesla
The likelihood of this method working is a bit of a stretch, and there’s no official way to get your actual dashcam footage from Tesla. However, you may be able to acquire your Cabin camera data and Autopilot camera recordings. The Cabin camera records activity inside your car, while the Autopilot camera takes footage of the road in relation to your Tesla’s neural network (so the latter is closer to what you’re looking for).
But for you to get that footage, the following conditions MUST be true:
- You opted in through Tesla’s Data Sharing system, which allows the company to collect information from your vehicle
- In the case of Autopilot camera recordings, only clips taken during a “safety-critical event” will be saved
If this scenario applies to you, you can request a copy of your data by signing in on Tesla’s contact page. 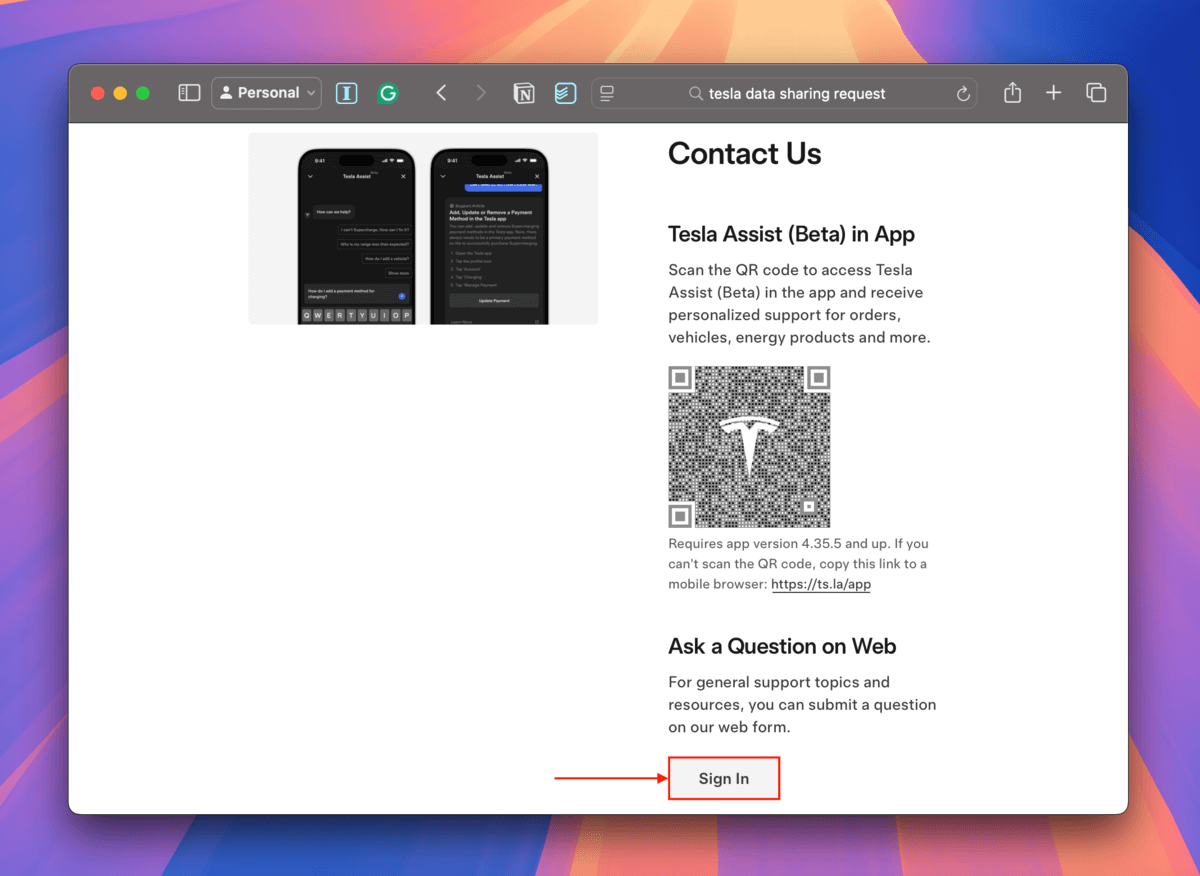
Method 5: Professional Data Recovery Services
If methods 1-4 don’t work or you prefer to hire a specialist from the beginning, consider sending your USB or memory card to a professional data recovery service. These are businesses that restore files from various storage devices for a fee. Not only are they capable of handling more complex data loss scenarios, but they also have a much higher success rate for standard cases because of their skills and technologies. If you’ve never used a professional data recovery service in the past, here’s what to look for:
- No Data – No Charge: Several labs offer a guarantee that exempts you from paying the recovery fee if they fail to restore the data you specifically wanted (which would have been agreed upon beforehand).
- Free estimate: Most labs will give you a free estimate over the phone, while others will quote you after an in-lab evaluation for no cost. You may still have to pay for shipping, depending on the company.
- Discounted or free shipping: Many labs offer discounted or even free shipping, but mostly only for inbound shipments. Expect to pay for at least return shipping in most cases.
- Class 100 cleanroom: A cleanroom is a sterile lab that protects hardware components from air particles. For typical deletion and formatting scenarios, it’s not really required. But if your Tesla was recently in an accident and you suspect your USB was physically damaged, a cleanroom can make a difference between successful recovery and permanent data loss or corruption.
- Authentic and up-to-date user reviews: Make sure that you check recent reviews about the lab you’re considering for the job. Browse reviews from all-star ratings and try to identify “bot” reviews 🤖 (usually has 5 stars, generic name, no photo, vague positive comments that don’t reveal much, etc).
Is your Tesla dashcam USB or memory card corrupted?
If you find that your dashcam footage is corrupted, there was likely a disruption while your Tesla’s dashcam was writing data to the storage device. Not only is your storage device now unusable for capturing footage, but it’s also likely that all of its existing footage isn’t playable. Don’t lose hope! Check out the data recovery section of our guide on how to fix and recover a corrupted USB drive. Once you’ve secured your data, you can proceed with the repair section.


