
All modern Macs store data on solid-state drives (SSDs) instead of traditional hard disk drives (HDDs). While SSDs offer superior performance, they make data recovery more challenging compared to older HDDs. That said, recovering deleted files from your Mac’s SSD isn’t impossible—it just requires a quick execution of the right approach. In this comprehensive guide, I’ll explore the most effective methods for recovering lost data from your Mac’s SSD so that you can achieve the best possible results.
Table of Contents
When is It Possible to Recover Data from SSD on Mac?
The main factor that makes data recovery from SSDs more challenging than from traditional hard drives is the TRIM command. This feature, which isn’t exclusive to Mac computers, improves performance by physically cleaning up deleted files and thus preparing the storage area occupied by them for subsequent writes.
Once this clean-up process is complete, the data that occupied the storage space is effectively erased and can no longer be recovered.
As such, successful data recovery from a Mac SSD is only possible if TRIM hasn’t been executed on the deleted data. In practice, TRIM is guaranteed to not be executed only if it was disabled before the data loss occurred.
However, there’s theoretically a small window of opportunity between file deletion and TRIM execution that you could use to disable TRIM and attempt recovery. Unfortunately, the size of this window is impossible to predict—it could be seconds, minutes, or even hours. That’s why I recommend you don’t waste any time and promptly follow the instructions in the next section to disable TRIM.
Even if TRIM isn’t an issue in your specific data loss situation, the deleted files can still become overwritten with new data, so you need to minimize or completely avoid the use of the storage device until you’ve attempted data recovery. Every write operation to the drive could potentially overwrite your deleted files and make them permanently unrecoverable.
How to Disable TRIM on a Mac SSD
Before disabling TRIM, you should first check if it’s enabled on your system. To check your Mac’s TRIM status:
Step 1. Click on the Apple menu and hold down the Option key.
Step 2. Click on System Information.
Step 3. In the left sidebar, scroll down and click on NVMExpress. Look for TRIM Support in the information panel – it will show either Yes (enabled) or No (disabled).
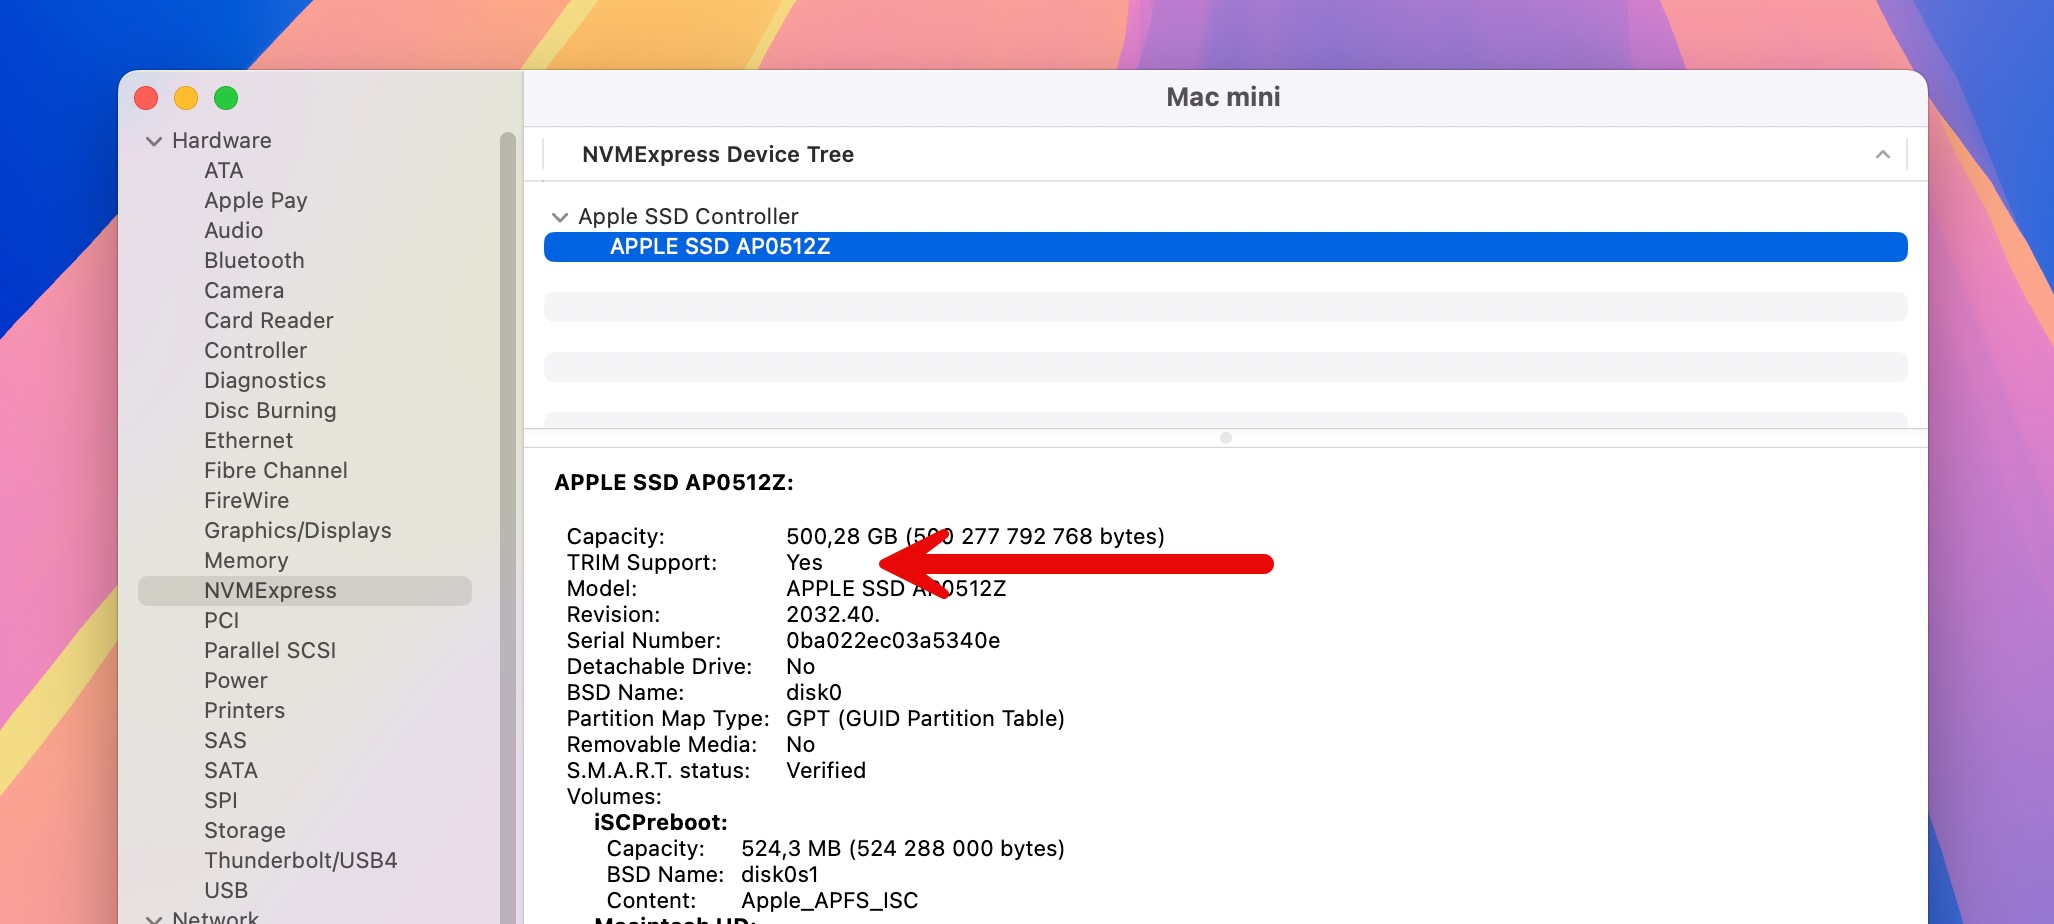
If TRIM is enabled and your files were only recently deleted, you can disable it to prevent further data wiping. Here’s how to disable TRIM on your Mac:
Step 1. Open up the Terminal app.
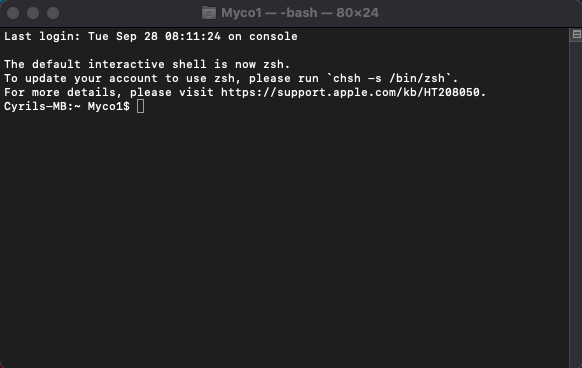
Step 2. Copy and paste the command “sudo trimforce disable” and press Enter.
Step 3. Several warning messages about the potential impact on your SSD’s performance will appear. While you can skip reading them, be aware that disabling TRIM can affect your drive’s longevity. Type Y and press Enter to proceed.
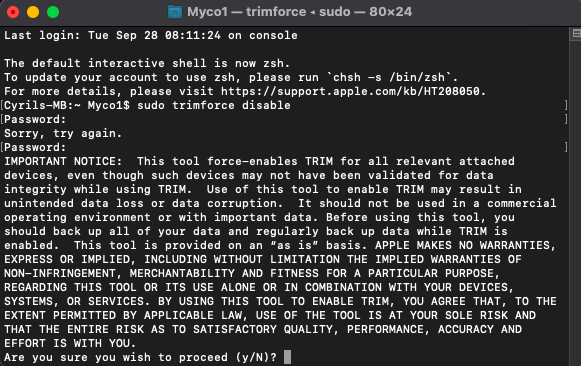
To enable TRIM again after recovery, just repeat the steps above but use “sudo trimforce enable” instead.
How to Recover Deleted Data from SSD on Mac
When your deleted files are no longer in the Mac’s Trash, specialized data recovery software is your best option for their recovery on macOS, so that’s the first method I’ll cover. I’ll also discuss recovery from backups for cases where you’ve been diligent about backing up your data and professional data recovery services, which can help when physical damage is involved.
Method 1: Use Data Recovery Software
Disk Drill is my favorite SSD recovery software for Mac because it supports all file systems Mac users might encounter, including APFS, HFS+, FAT32, and more. It can recover files using existing file system information and, if that fails, based on their signatures (over 400 file signatures are recognized at the time of writing this article).
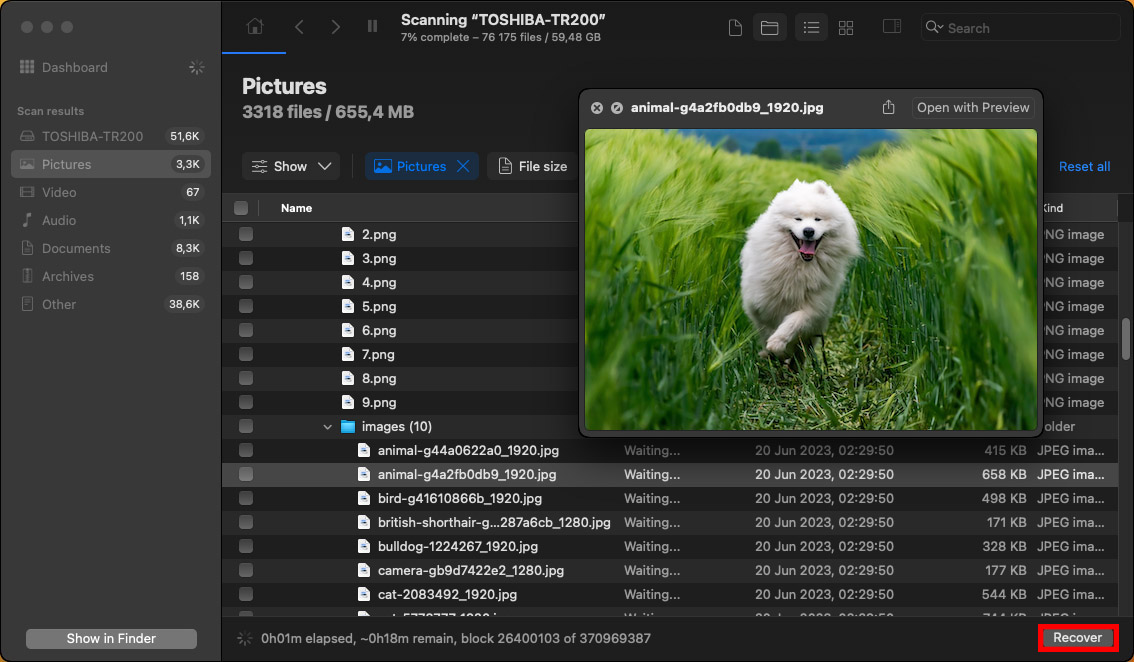
What’s more, it’s incredibly easy to use thanks to its intuitive interface and powerful preview capabilities that let you check file contents before recovery to verify that you’re selecting the right files and that the files you’ve selected are recoverable.
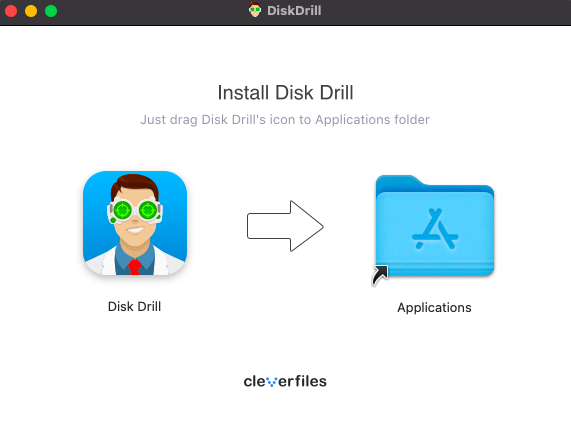
Step 1. Start by downloading Disk Drill from the official website. Then, open the downloaded installer and drag the Disk Drill icon to your Applicaton’s folder.
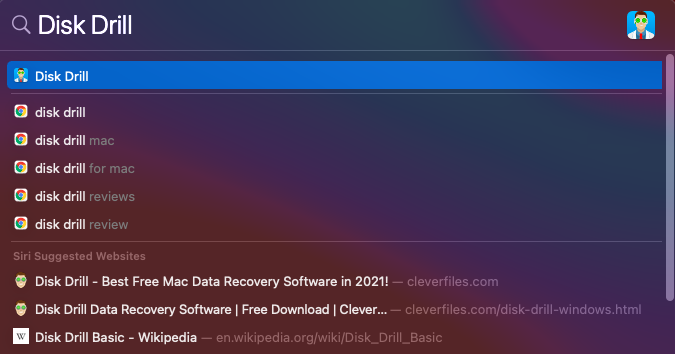
Step 2. Launch Disk Drill using your preferred method, such as by clicking on the app in the Applications folder or using Spotlight.
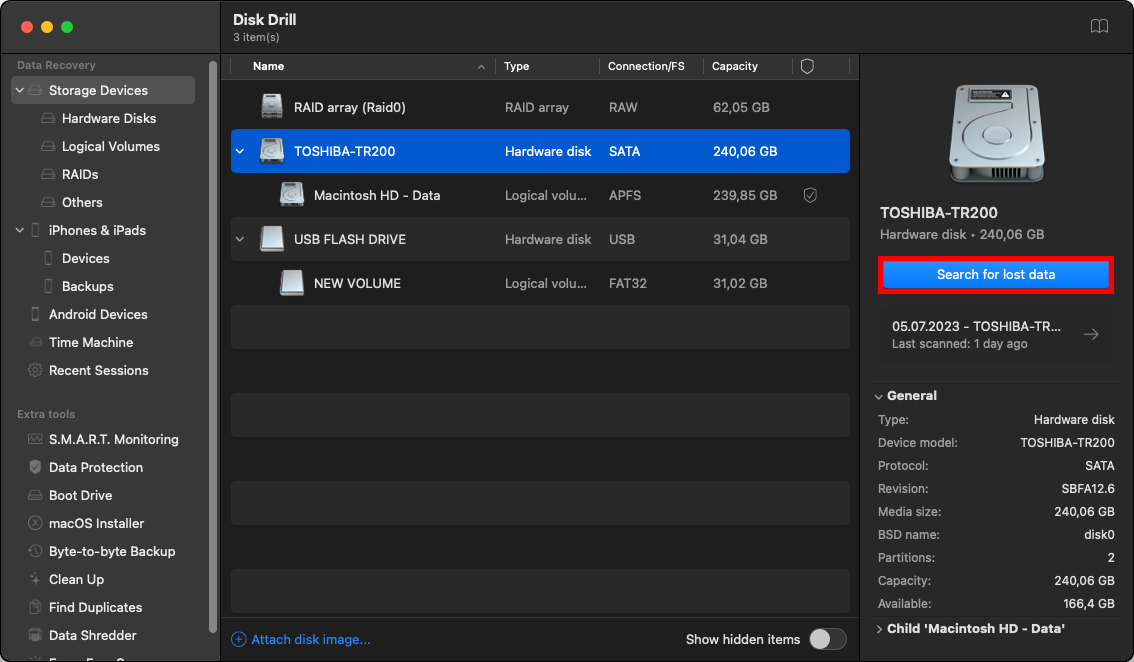
Step 3. Select the SSD on which the deleted files are located and click the Search for lost data button to initiate the scanning process. The length of the scanning process can range from several minutes to about half an hour, depending on your SSD’s size and Mac’s speed.
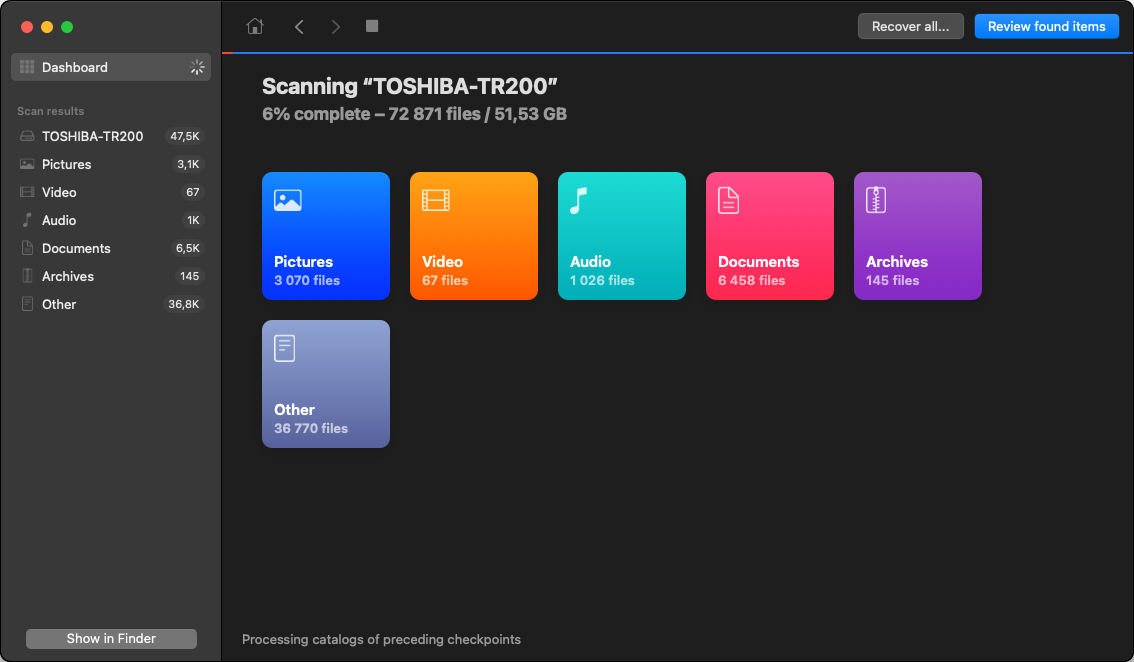
Step 4. You can either let scanning finish completely or click Review found items to instantly see all files that have already been found.
Step 5. Select the files you want to recover by clicking on the checkboxes next to them. If you’re looking for a specific file format, then you can narrow down the scan results by applying the filters in the left sidebar or the top toolbar. When you’re done, click the Recover button and choose a destination folder on a different drive to avoid overwriting.
Disk Drill’s free version lets you scan and preview all recoverable files, but limits actual recovery to 500 MB. For unlimited recovery, you’ll need the PRO version, which is available as a one-time purchase, so there’s no costly recurring subscription to add to your already long list of subscriptions.
Method 2: Restore Files from Backup
In situations where data recovery software fails to deliver results—perhaps because the TRIM command executed before recovery attempts—backups can be your saving grace. Of course, this method only works if you had already set up and maintained regular backups before the data loss occurred.
Time Machine
The primary backup tool for macOS users is Time Machine, a native application that, when enabled, automatically creates incremental backups of your system and files. To recover lost SSD files using Time Machine, you need:
Step 1. Connect the external drive that stores your Time Machine backups to your Mac.
Step 2. Open the folder where your lost file was originally stored.
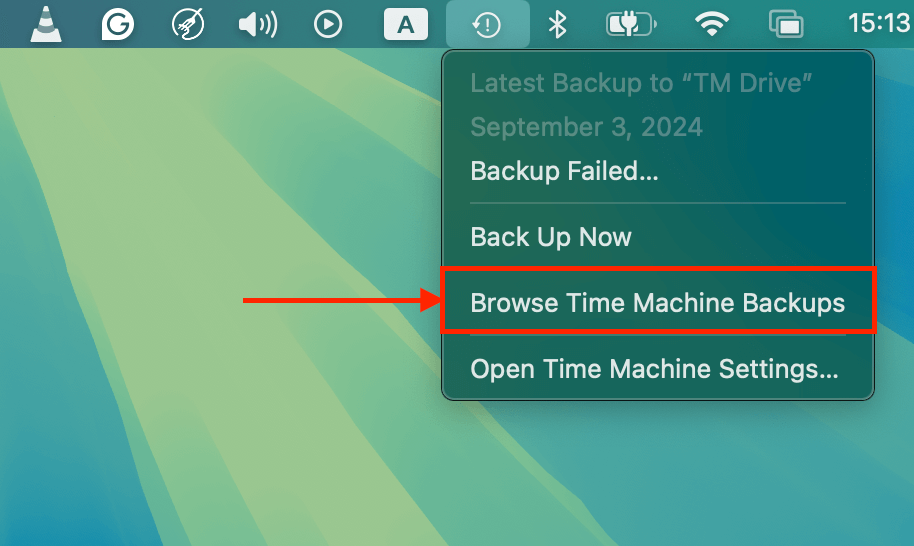
Step 3. Click the Time Machine icon in the menu bar (or go to Applications > Time Machine) and choose Browse Time Machine Backups.
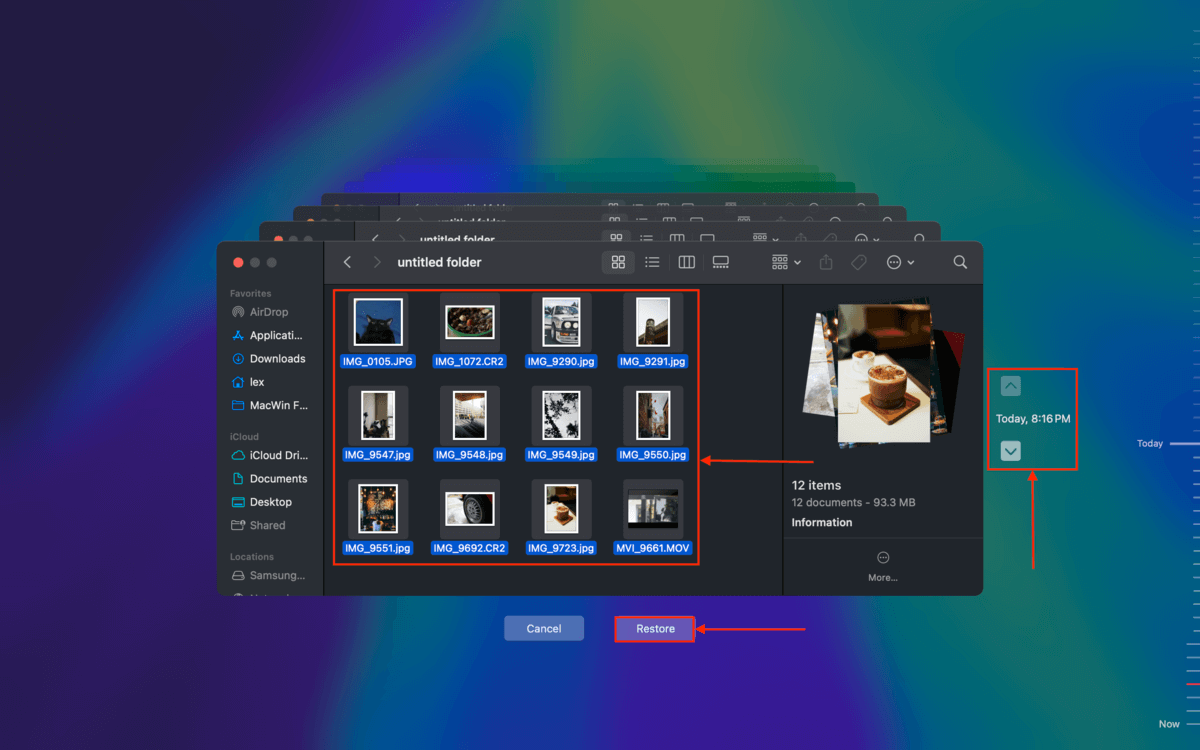
Step 4. Use the timeline on the right side of the screen or the arrows to navigate to a date and time before the file was deleted.
Step 5. Locate the file, select it, and click Restore to recover it to its original location.
iCloud
If you use iCloud Drive, Apple’s cloud storage solution, you might also be able to recover deleted files through iCloud.com. The biggest advantage of iCloud is that you can recover your files from any device and any location with an internet connection. Here’s what you need to do:
Step 1. Open a web browser and visit iCloud.com, then sign in with your Apple ID and password.
Step 2. Scroll down and click on iCloud Drive.
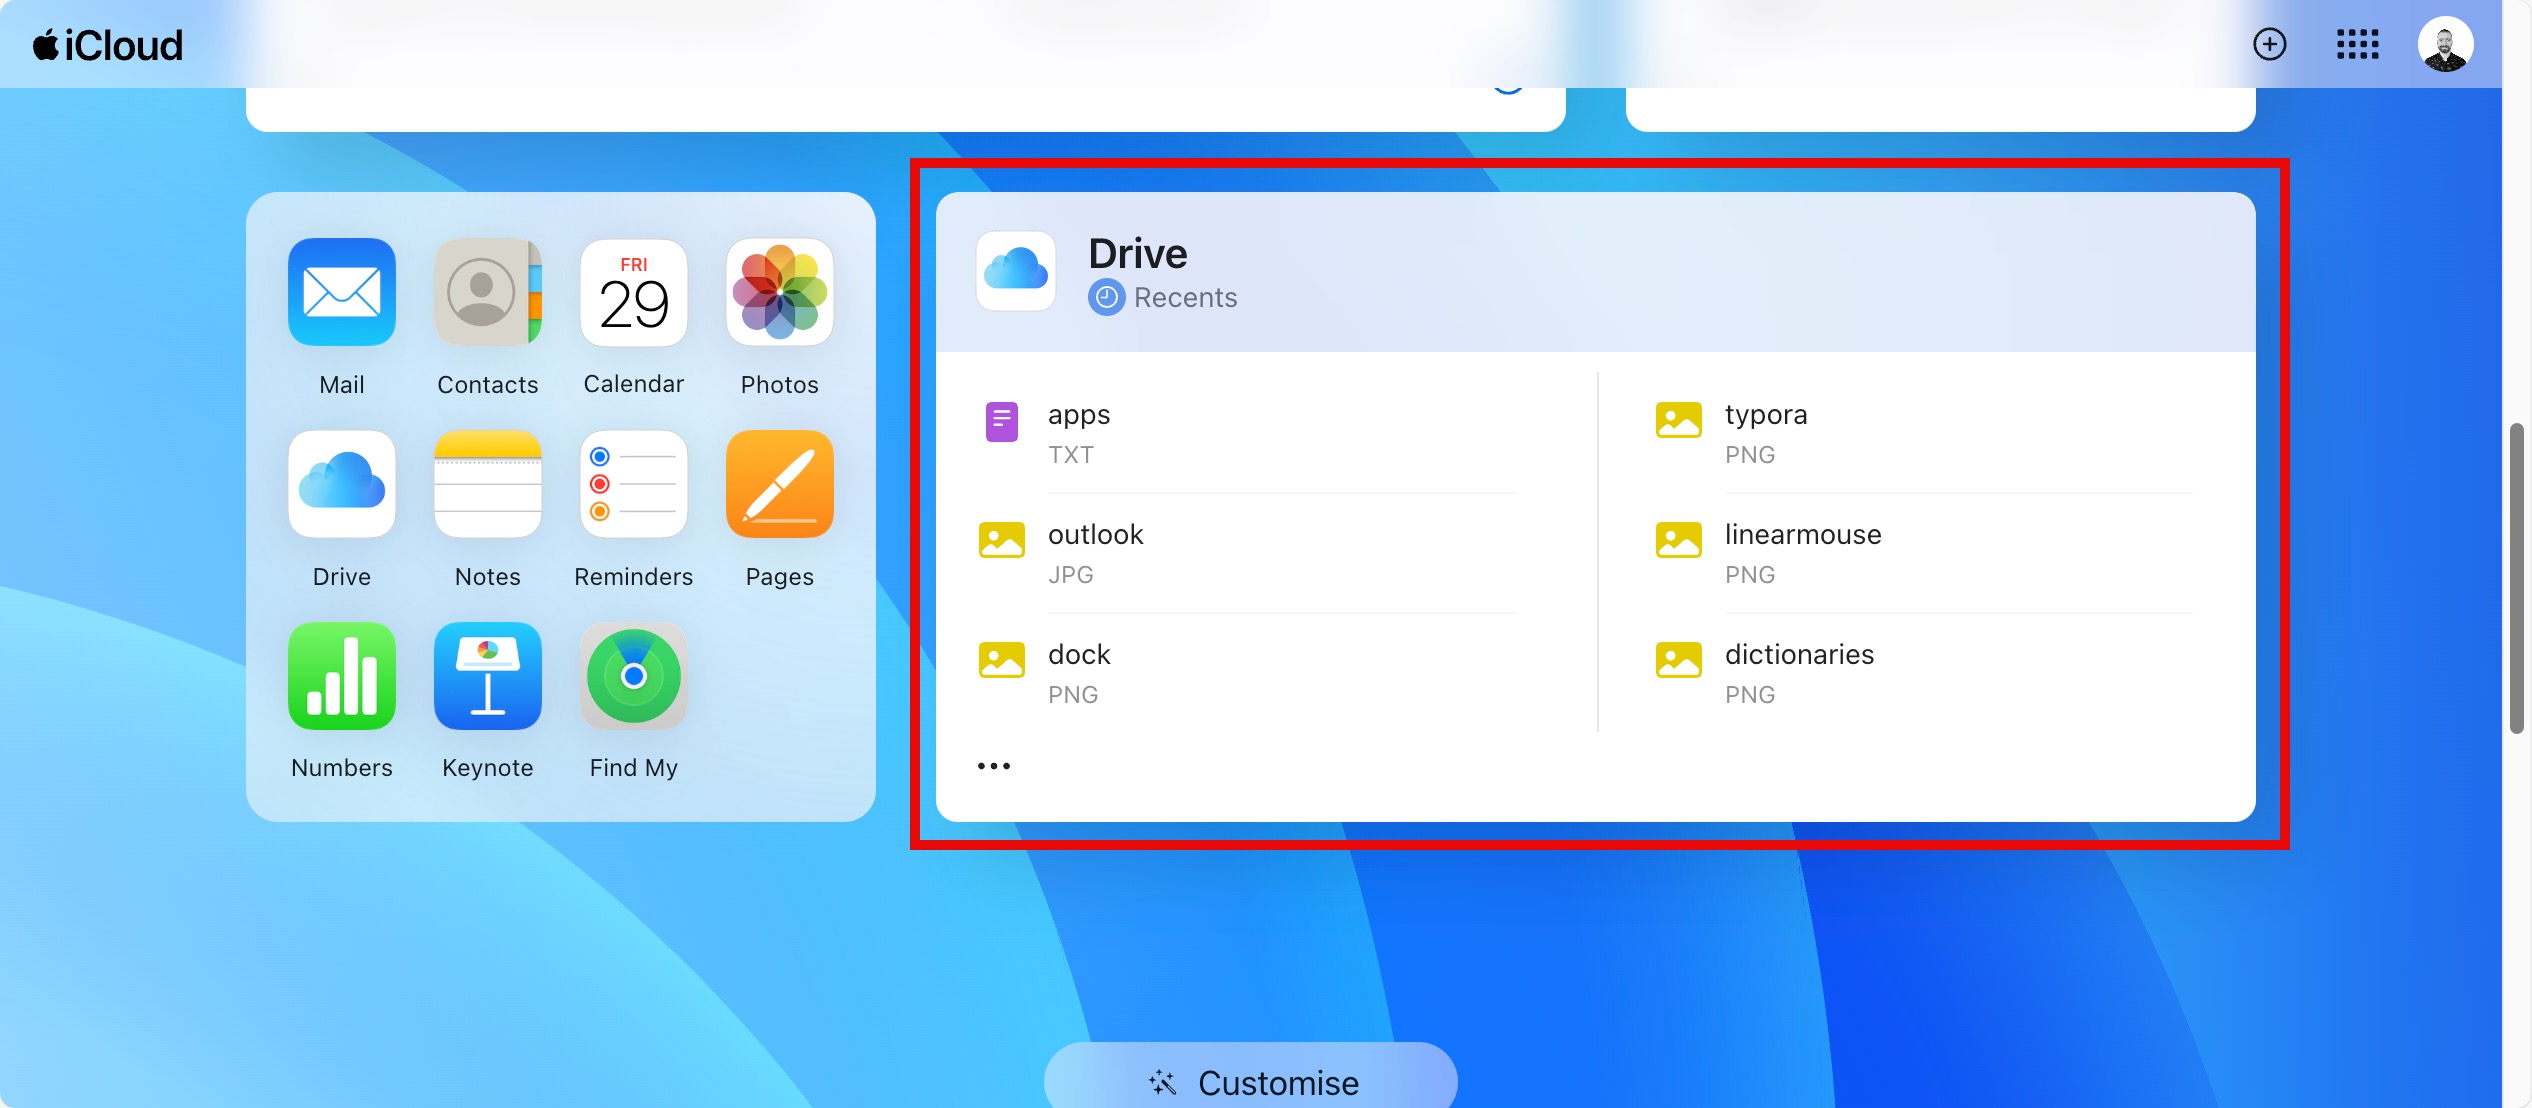
Step 3. Select the files you want to recover and download them to your computer by clicking the Download icon. Note that files remain in the Recently Deleted folder for 30 days.
![]()
Method 3: Contact Apple Data Recovery Services

If software-based solutions and backups fail to recover your deleted data—or if your SSD has sustained physical damage—then you can still turn to professional Apple data recovery services, which can be divided into two major categories based on how they operate:
- Local Apple data recovery centers: Allow you to bring your Mac or SSD directly to their facility, so they can typically offer faster turnaround times.
- Mail-in Apple data recovery centers: Operate remotely and require you to ship your Mac or SSD to their facility for diagnosis and recovery. Because they usually serve more customers than local data recovery centers, you can expect them to have the best equipment and the most experience.
Regardless of which type of service you choose, make sure they meet these essential criteria:
- Certified by Apple to work on Mac devices.
- Won’t void your Mac’s warranty.
- Only charge if they successfully recover your data.
While professional recovery can be expensive, it’s often worth the investment for irreplaceable data.
Conclusion
While recovering deleted files from a Mac SSD is more challenging than from HDDs due to TRIM, you still have several effective options: use data recovery software like Disk Drill for recently deleted files, restore from backups if available, or turn to professional Apple-certified services for physical damage cases. If you act quickly and luck is on your side, then there’s a good chance that you’ll be able to achieve the desired recovery results.
FAQ
You can use Disk Utility to repair logically damaged SSD on Mac. Follow the steps below:
- Open Disk Utility from Applications > Utilities.
- Select your SSD from the left sidebar
- Click First Aid and then Run.


