
Backing up your Mac is one of the essential steps you can take to preserve your valuable data. The best way to back up your data on Mac is to use Time Machine—a reliable, easy-to-learn tool from Apple that keeps your data backed up automatically on a regular schedule when activated. In this guide, I will explain what Time Machine is and how you can use it like a pro.
Table of Contents
What Is Time Machine?
Time Machine is Apple’s built-in backup solution for macOS that you can use to automatically back up your entire Mac, including system files, apps and their settings, music, photos, emails, documents, and more. In fact, the only thing that’s not backed up by Time Machine is the system partition, and that’s only because there’s no real reason to do so (there are other ways to reinstall macOS).
Where Time Machine gets its name from is its incremental nature. When you use it for the first time, it takes a complete backup of your Mac. After that, it only backs up the files that have changed since the last backup. This approach saves space and time, and it also allows you to “travel back in time” to any point where a backup was made.
Time Machine keeps hourly backups for the past 24 hours, daily backups for the past month, and weekly backups for all previous months. I have personally been saved by these automatic backups many times in the past, never losing more than one hour of work—much better than losing the entire project.
How to Use Time Machine to Back Up and Recover Data?
Now that you know what Time Machine is and how it can protect your data against loss, you’re probably wondering how you can use it. I have good news for you: by the end of this section, it will be up and running on your Mac!
To get started, you need to prepare a suitable backup disk. I highly recommend using an external fast SSD for this purpose. Not only will it give you speedy backups, but it’s also more reliable than traditional hard drives because they don’t contain any moving parts.
As a best practice, your setup should use an external HDD with 150% of the capacity your internal storage offers. That means an iMac with a 1 TB HDD setup would want to use a 1.5 TB external drive to manage the compressed files. You can also pick whatever number best suits your needs, but it should be equal to or greater than what you already have.
Set Up Your Time Machine Backup Drive
If your disk is prepared, you can launch Time Machine settings. Here are two ways to do that:
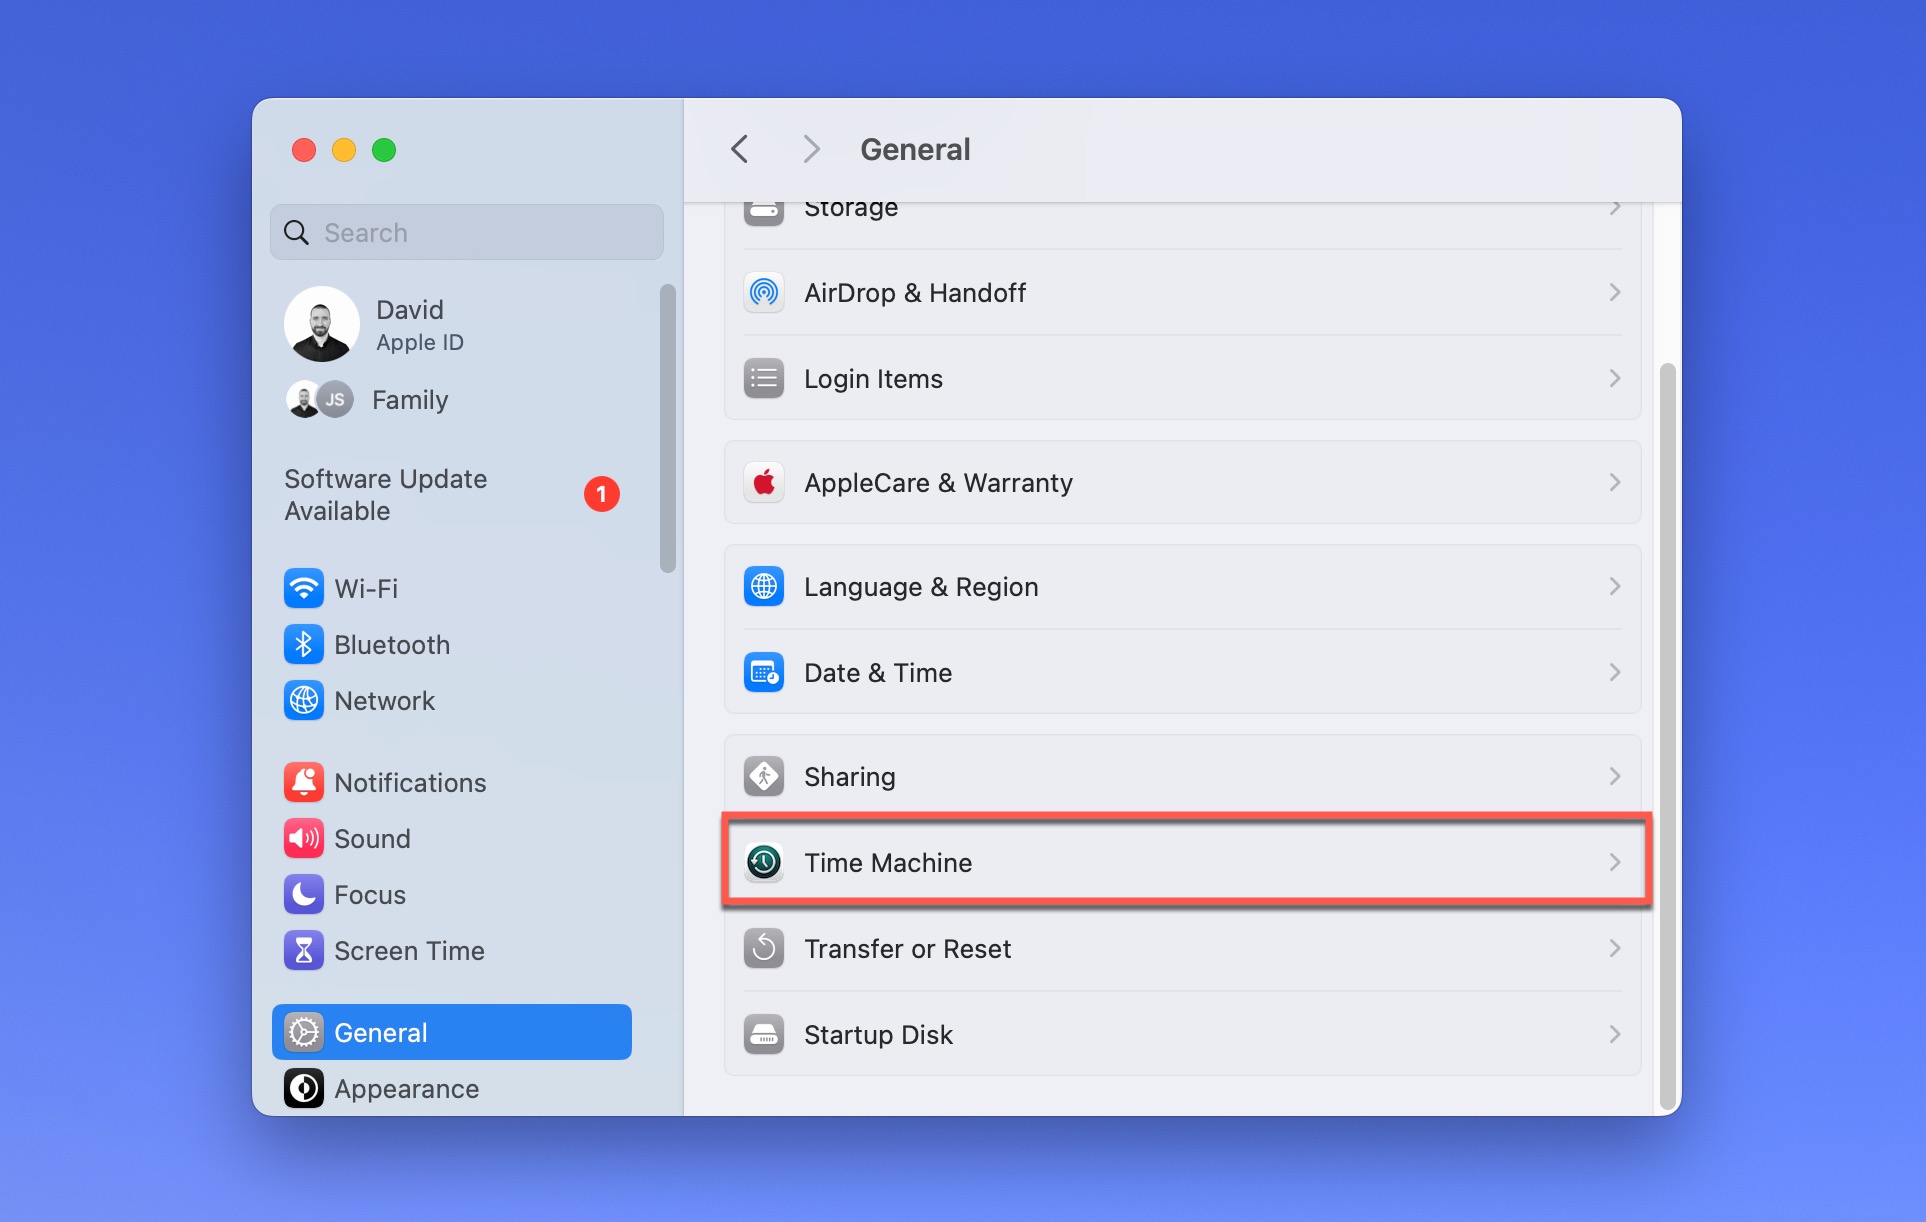
- Open the Apple menu in the top-left corner and select System Settings. In System Settings, navigate to General and then Time Machine.
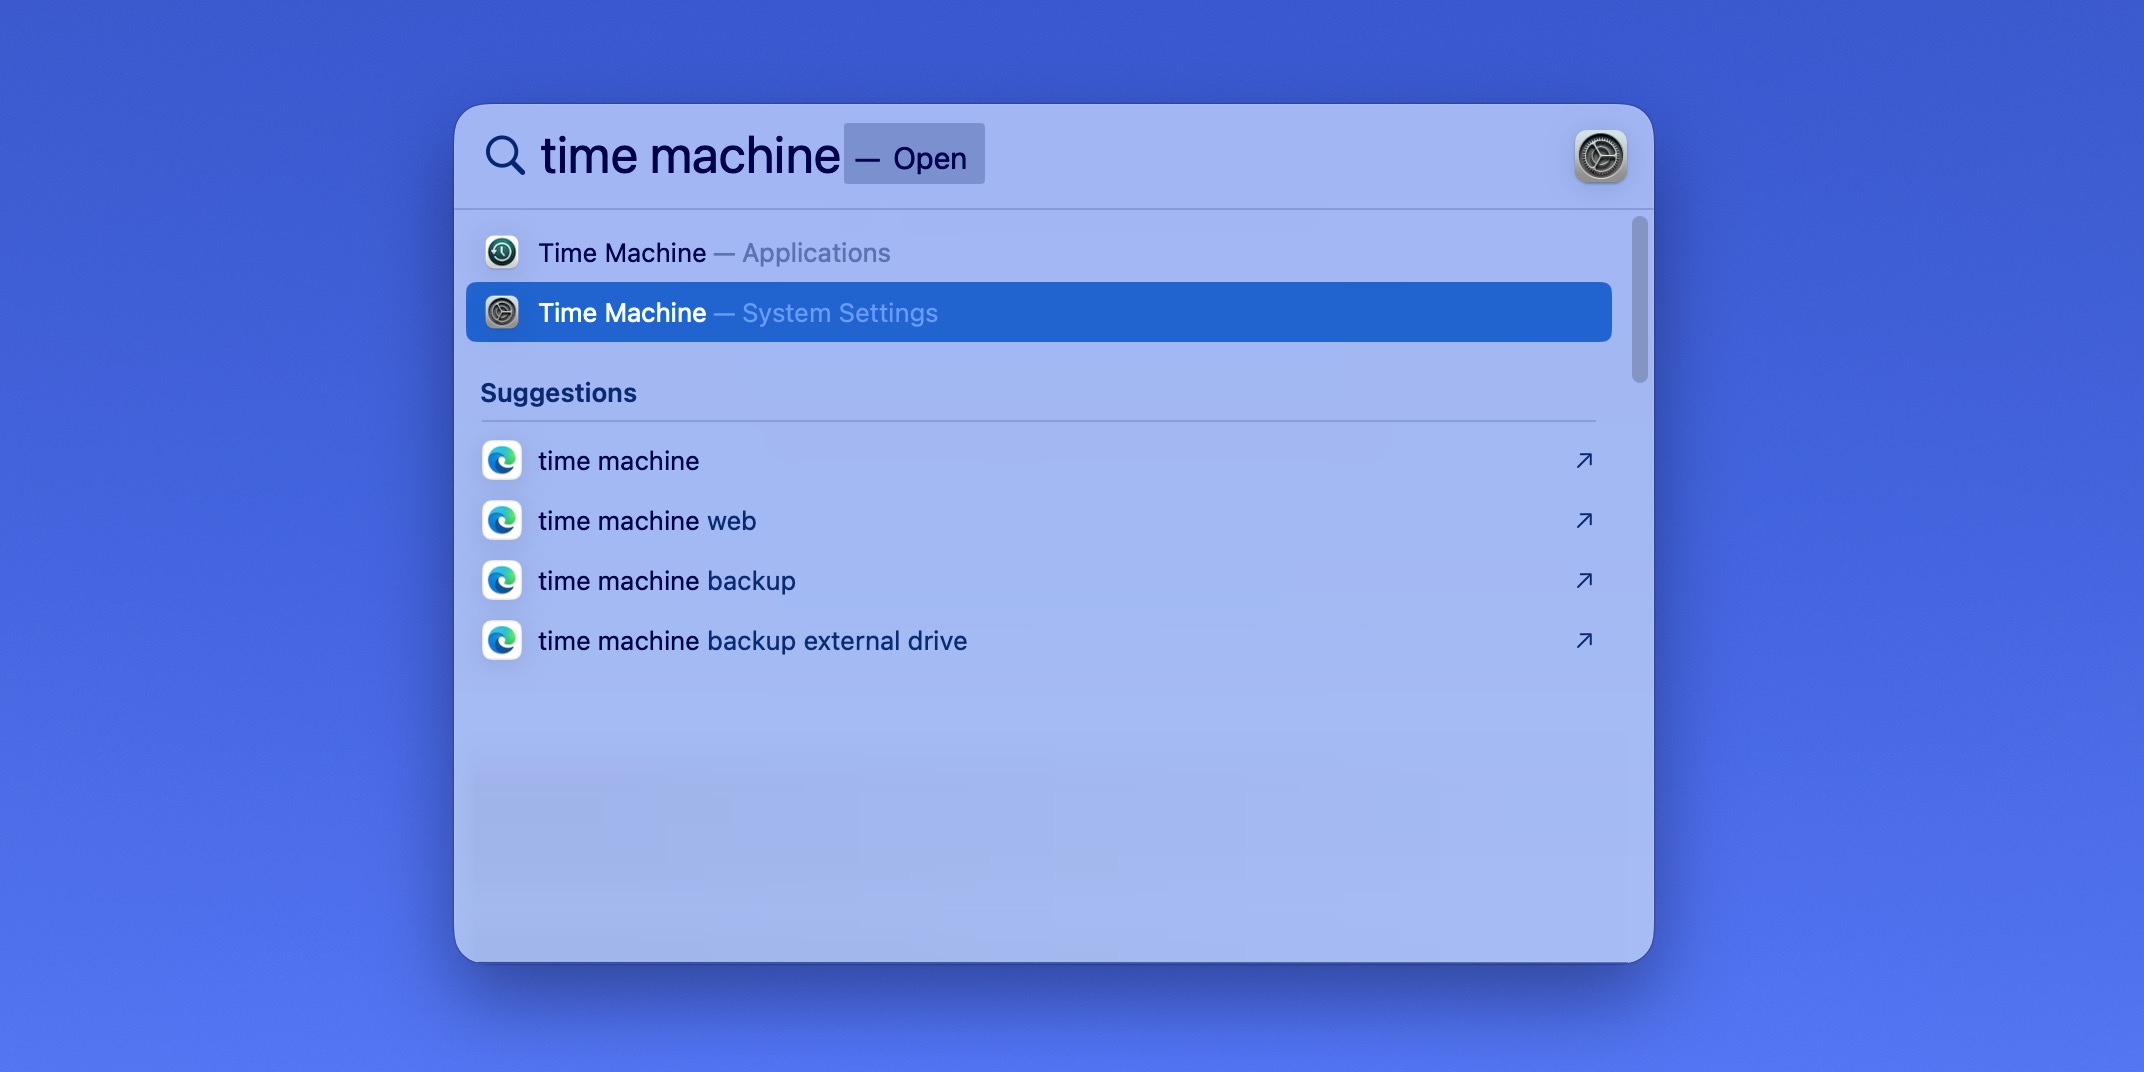
- Launch Spotlight (Command + Space) and enter “Time Machine.” Select the Time Machine settings search result and pres Enter/Return on your keyboard.
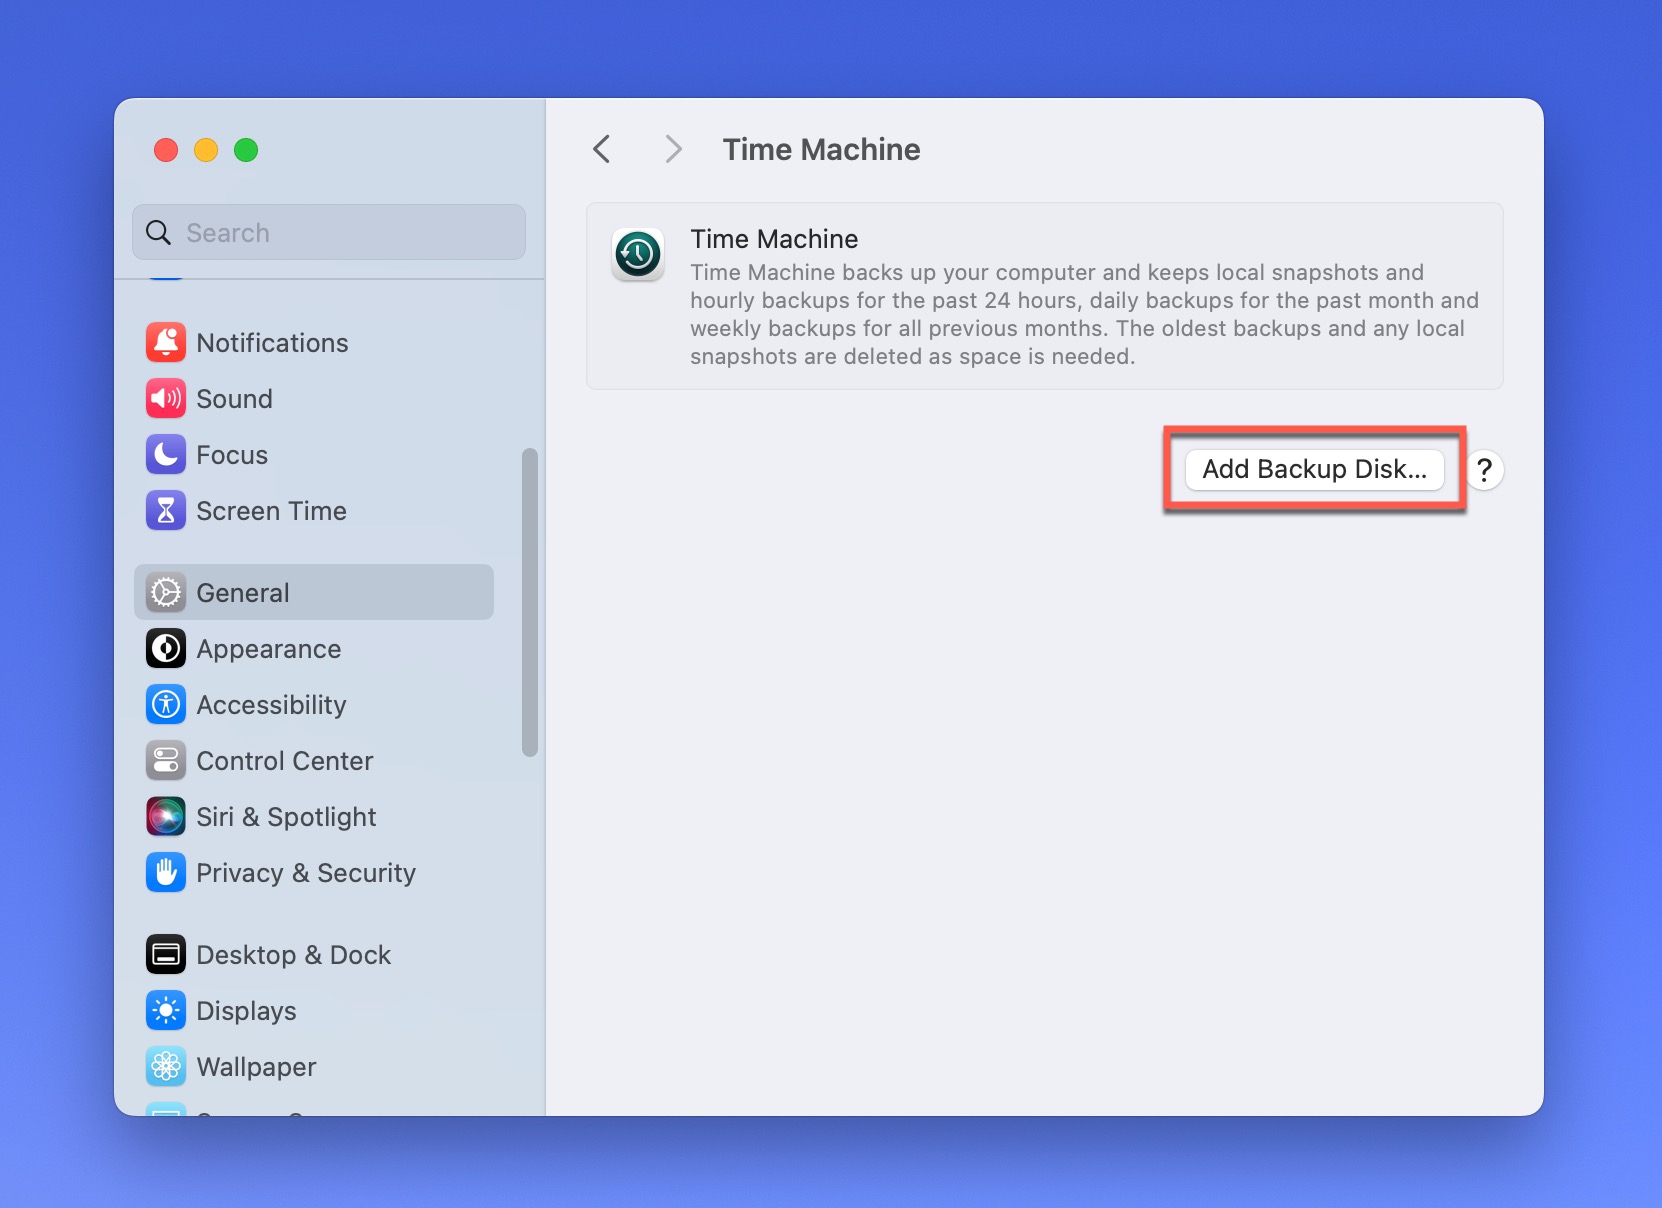
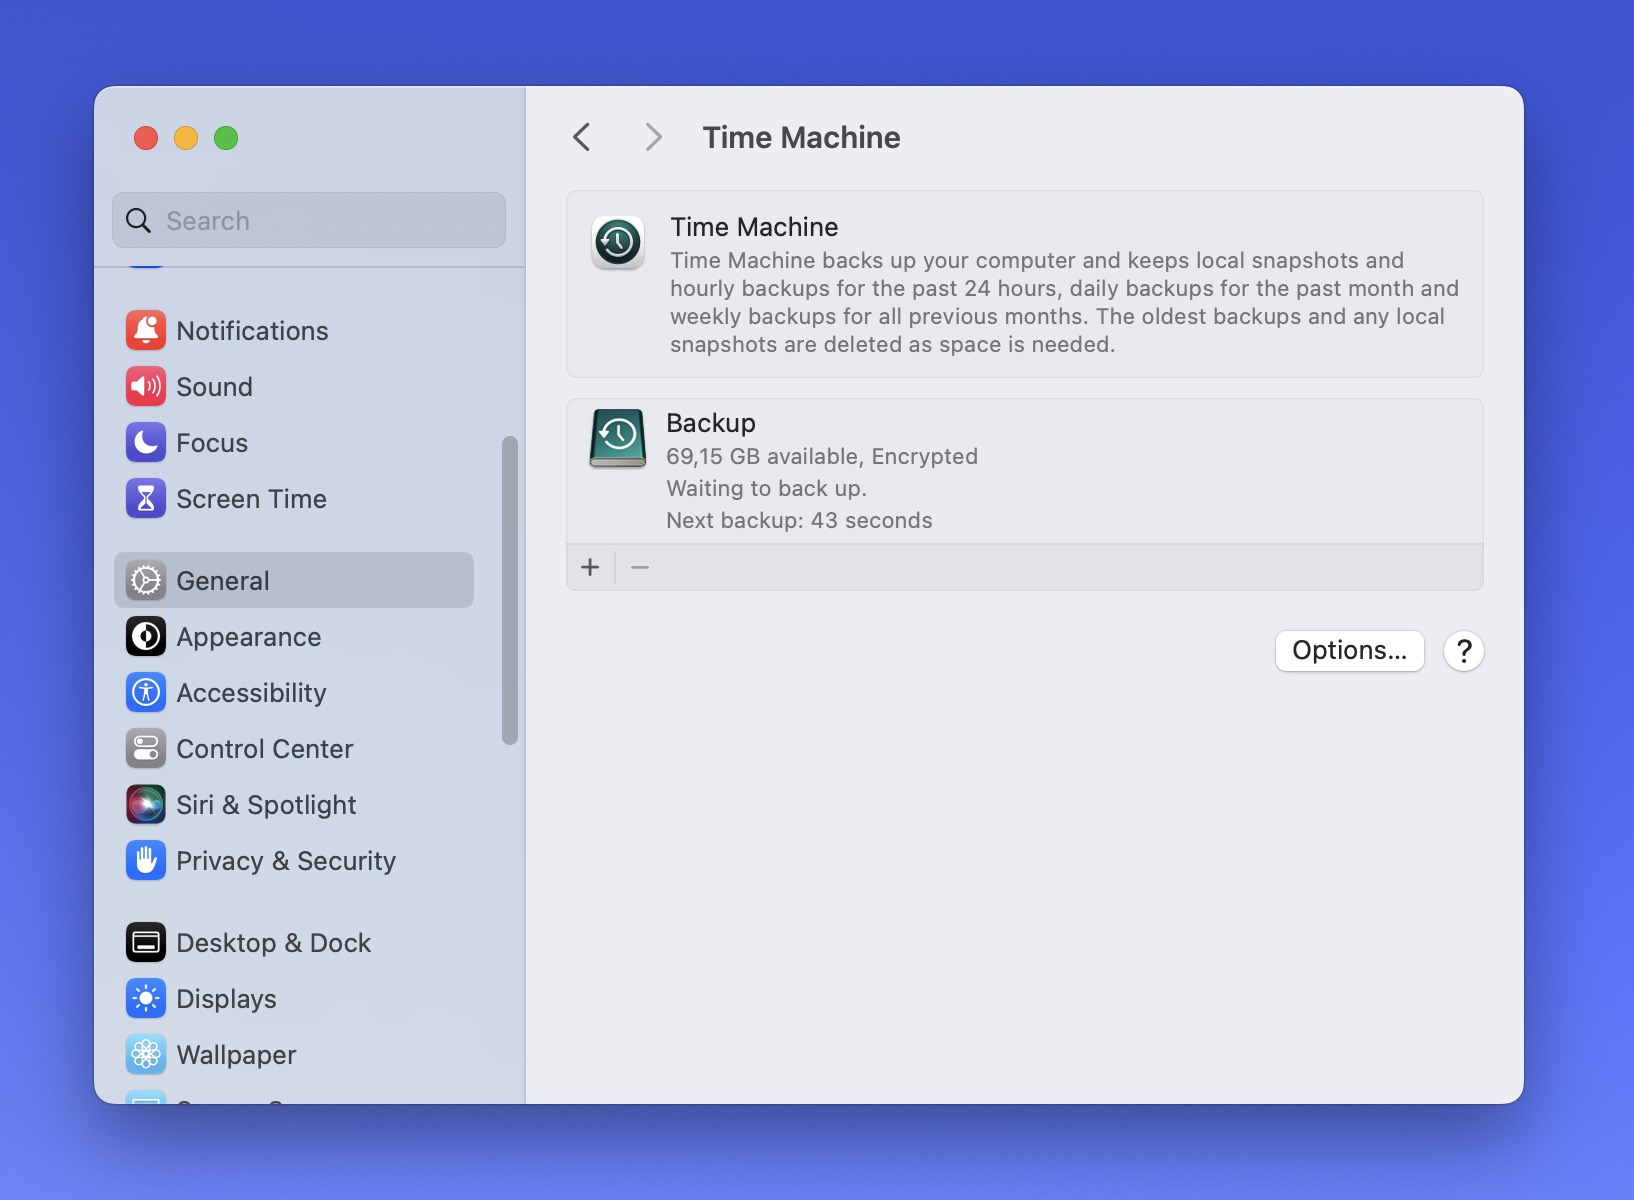
You should now see the Time Machine configuration window, which means you’re just a few clicks away from adding your backup drive. This is what you need to do:
Step 1:Click on the Add Backup Disk button.
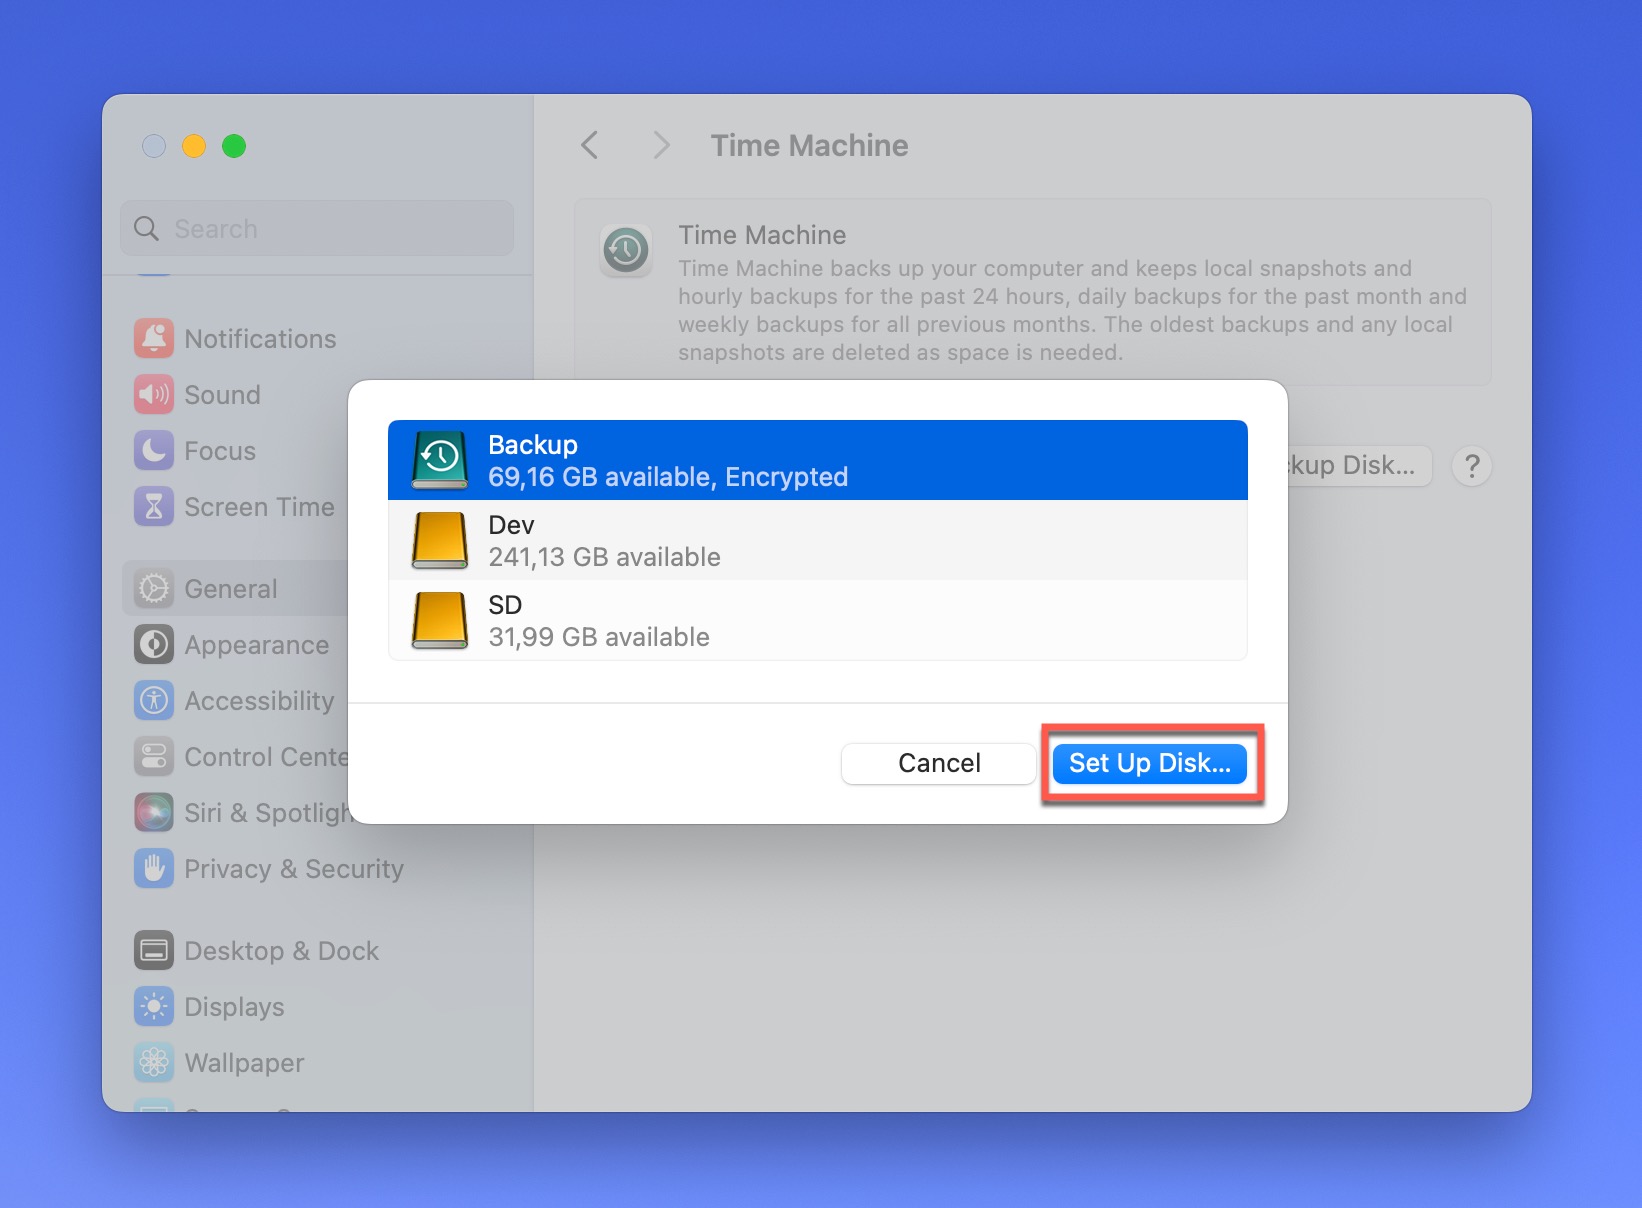
Step 2:A new window will pop up showing all available disks. Select your prepared external SSD from the list and click the Set Up Disk button.
Step 3:If you want to encrypt your backups (and I strongly recommend you do for added security), click the slider next to Encrypt Backup and enter a password. You can also specify a disk usage limit, which allows you to stop Time Machine from using up the entire available disk space—useful if you would also like to use the backup disk for something else. Finnally, click the Done button.

Time Machine will now start preparing your disk for backups. This might take a few moments, so sit tight. From now on, Time Machine will run in the background, automatically backing up your data according to its schedule. You don’t need to do anything else!
To change the default backup frequency to something else, select your Time Machine backup disk in the Time Machine settings menu and click the dropdown next to the “Backup Frequency” label. You can then choose between the following options: Manually, Automatically Every Hour, Automatically Every Day, and Automatically Every Week.
Recover Lost Data With Time Machine
Let’s say you’ve lost important files and want to recover them (hopefully, you haven’t, but it’s always better to prepare for the worst-case scenario beforehand). First, you need to open the Time Machine recovery interface (not the settings menu). Again, you have several options:
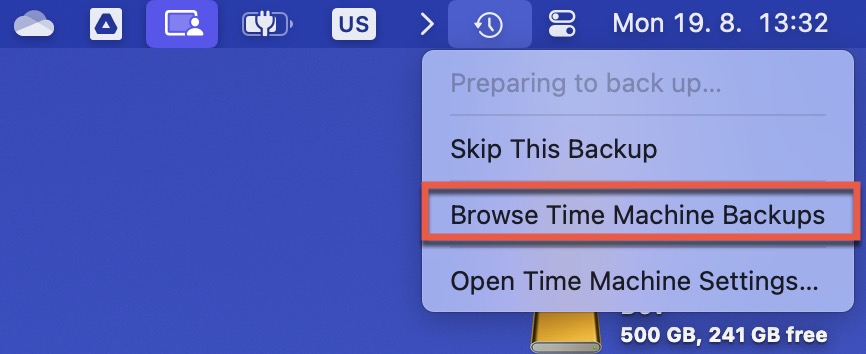
- Click the Time Machine icon in the menu bar and select Browse Time Machine Backups.
- Open the folder where your lost file was located. Then, click on the Time Machine icon in the menu bar and select Browse Time Machine Backups. This will take you directly to the right location.
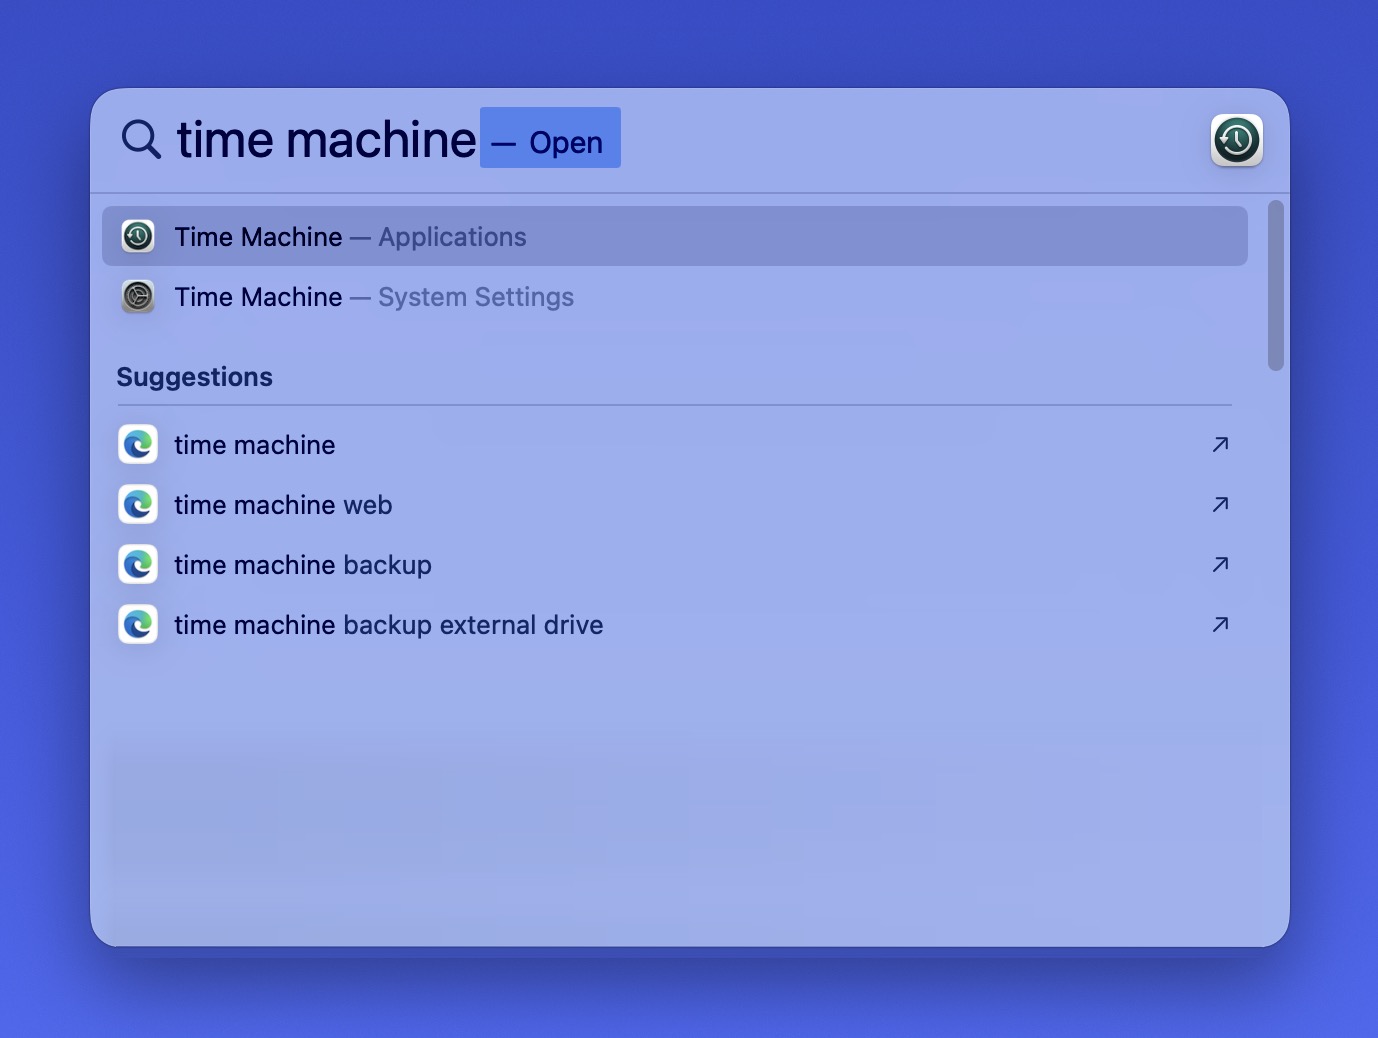
- Hit Command + Space, type “Time Machine,” and select the Time Machine application.
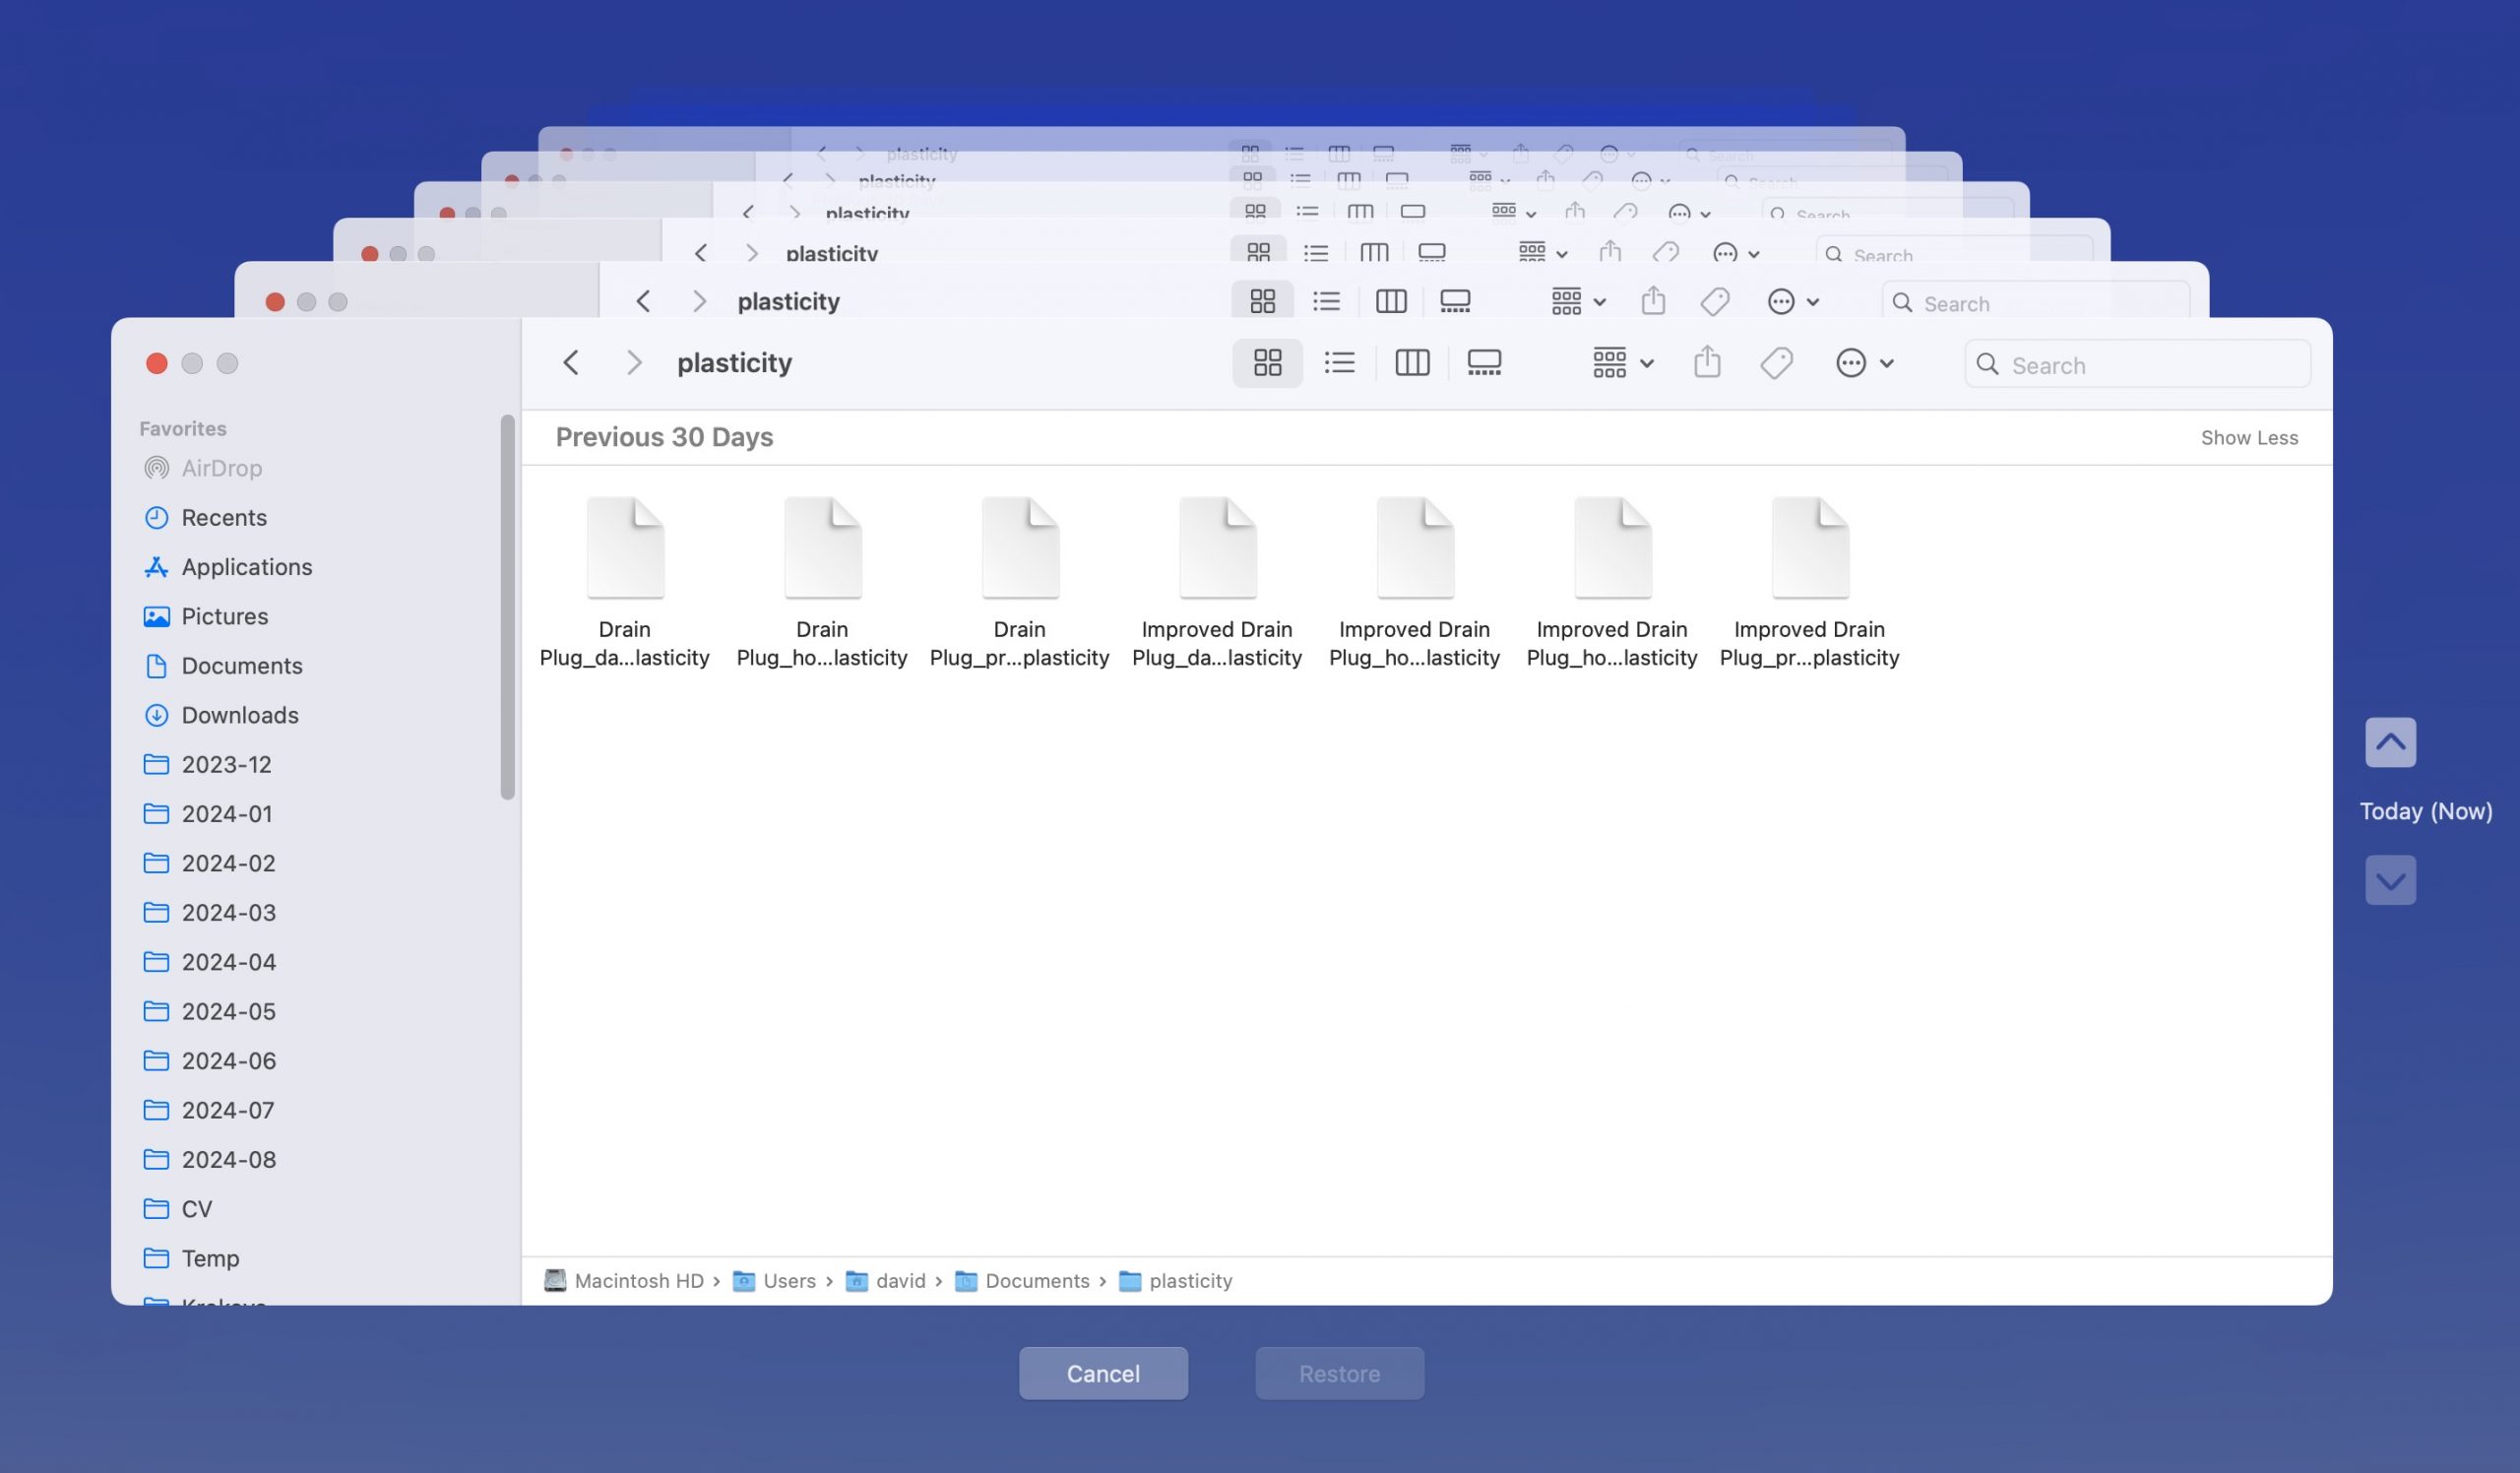
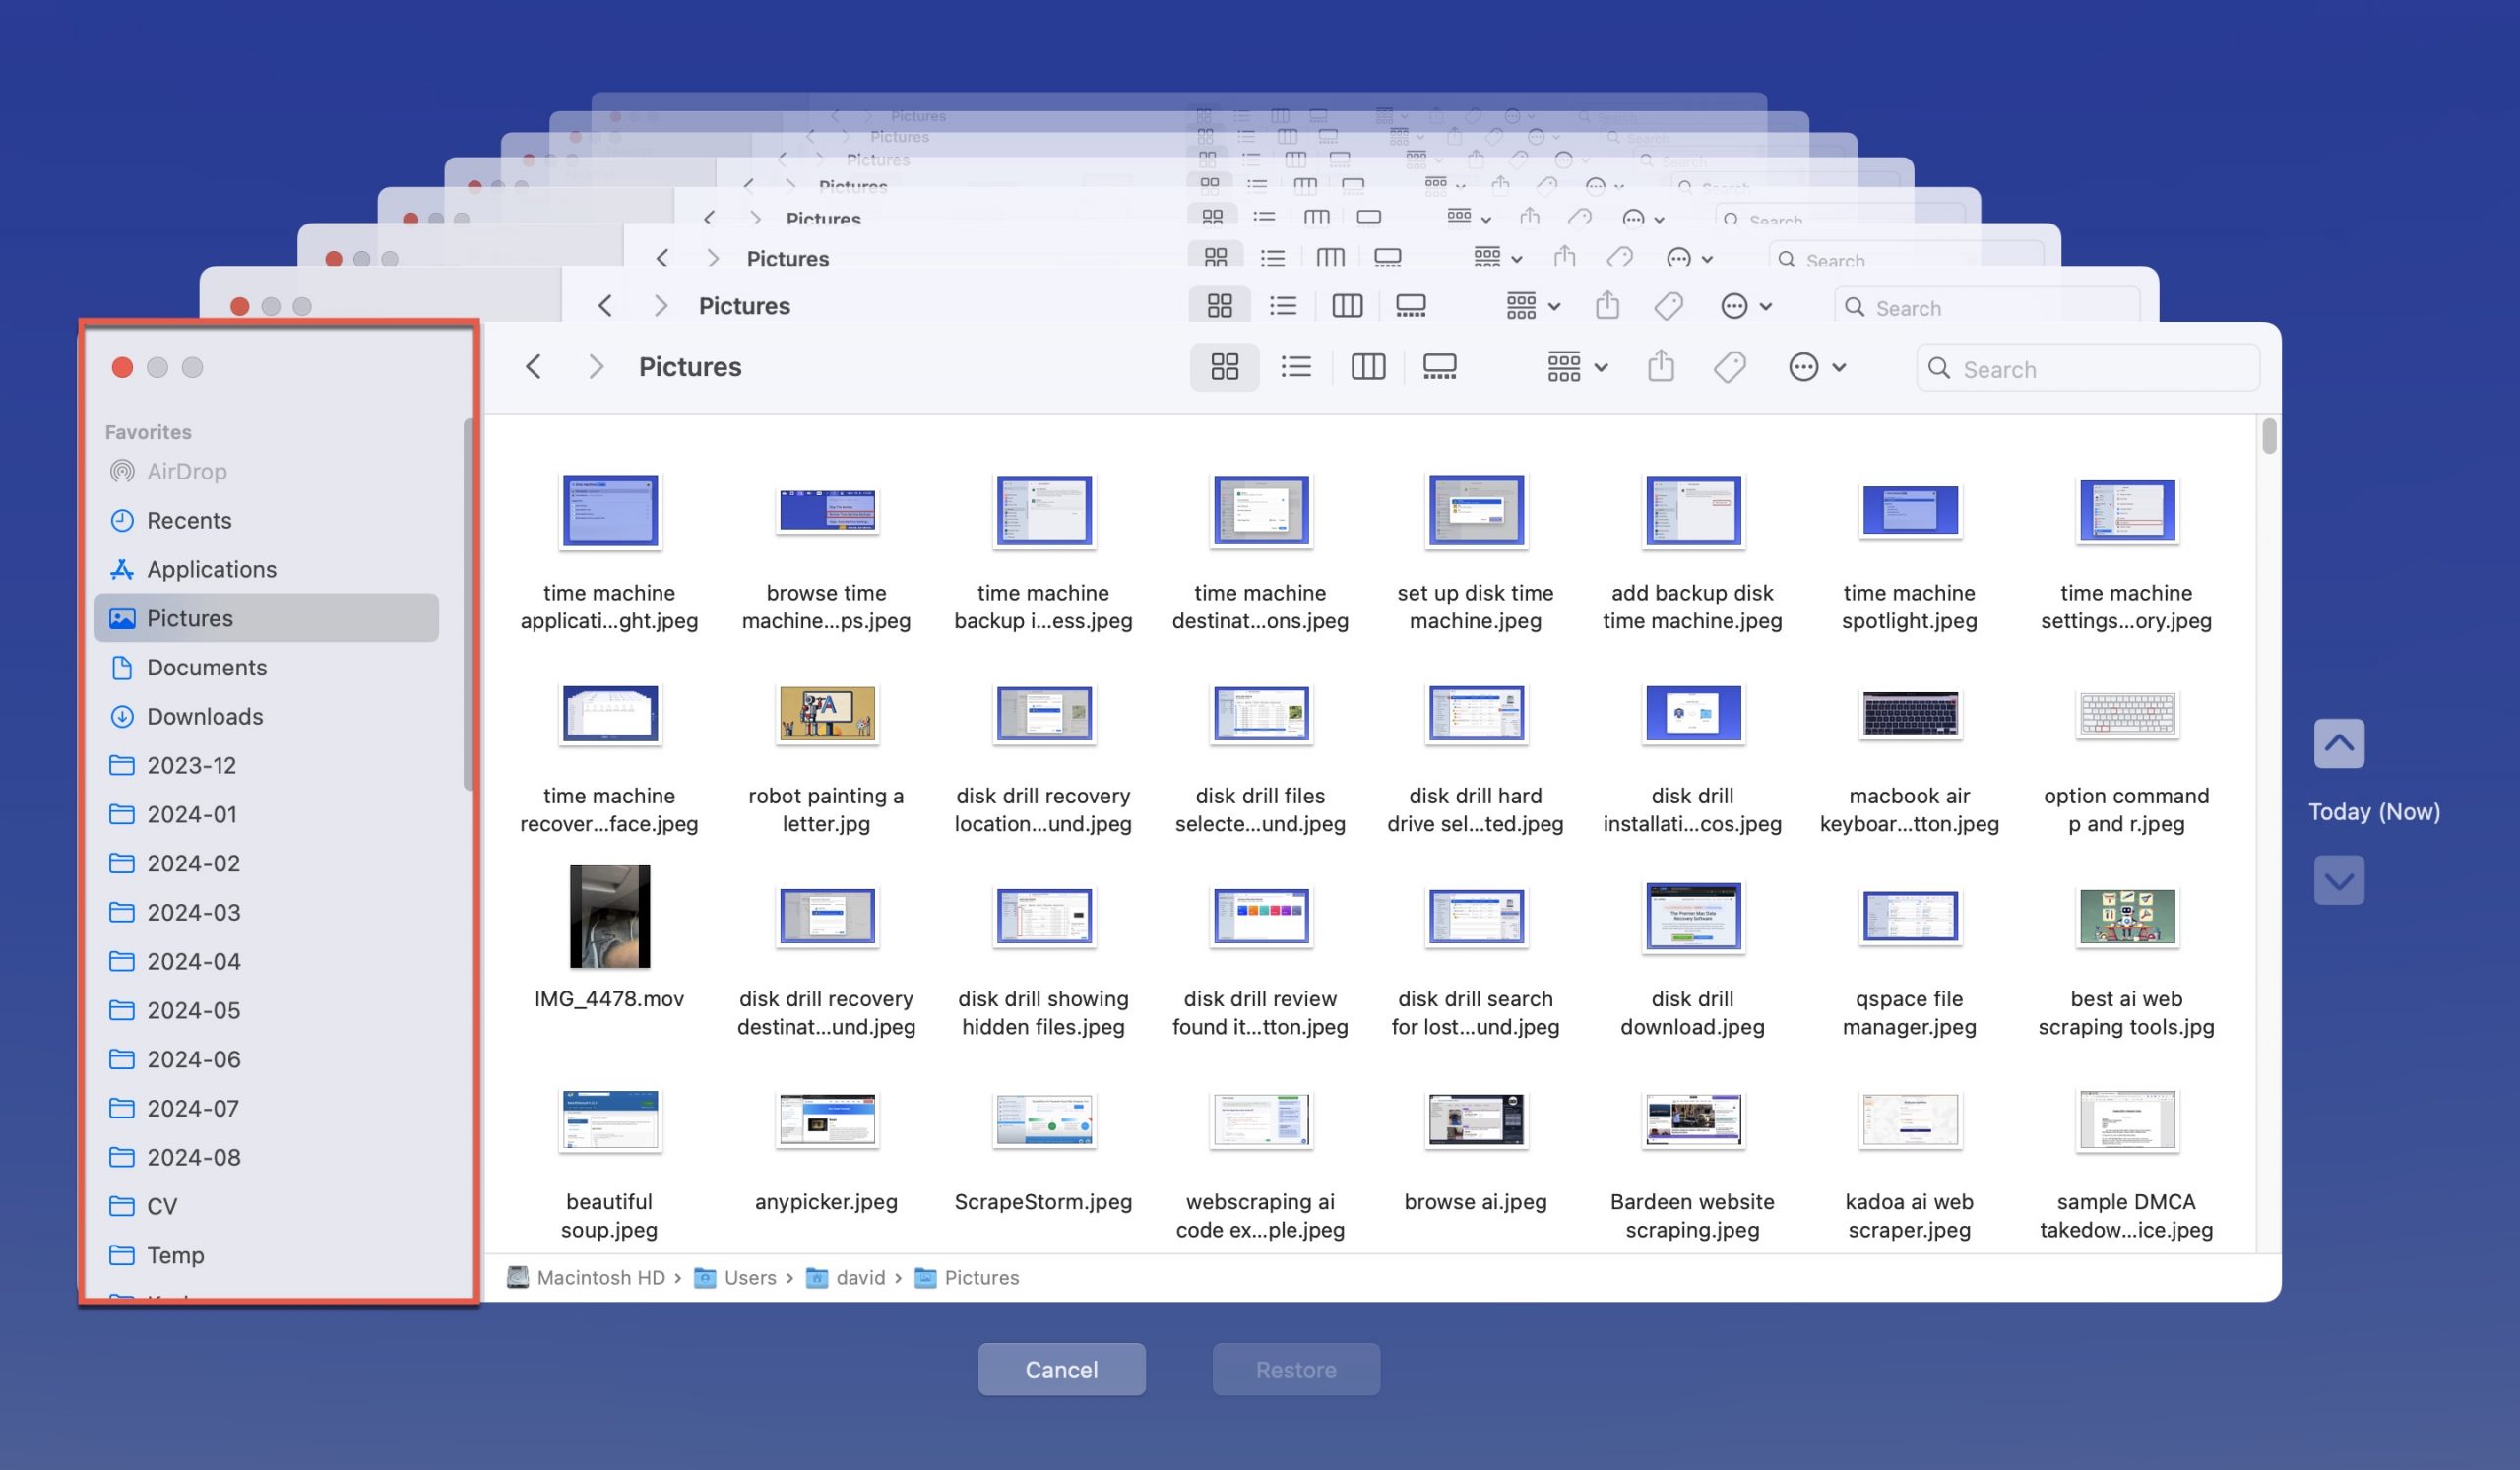
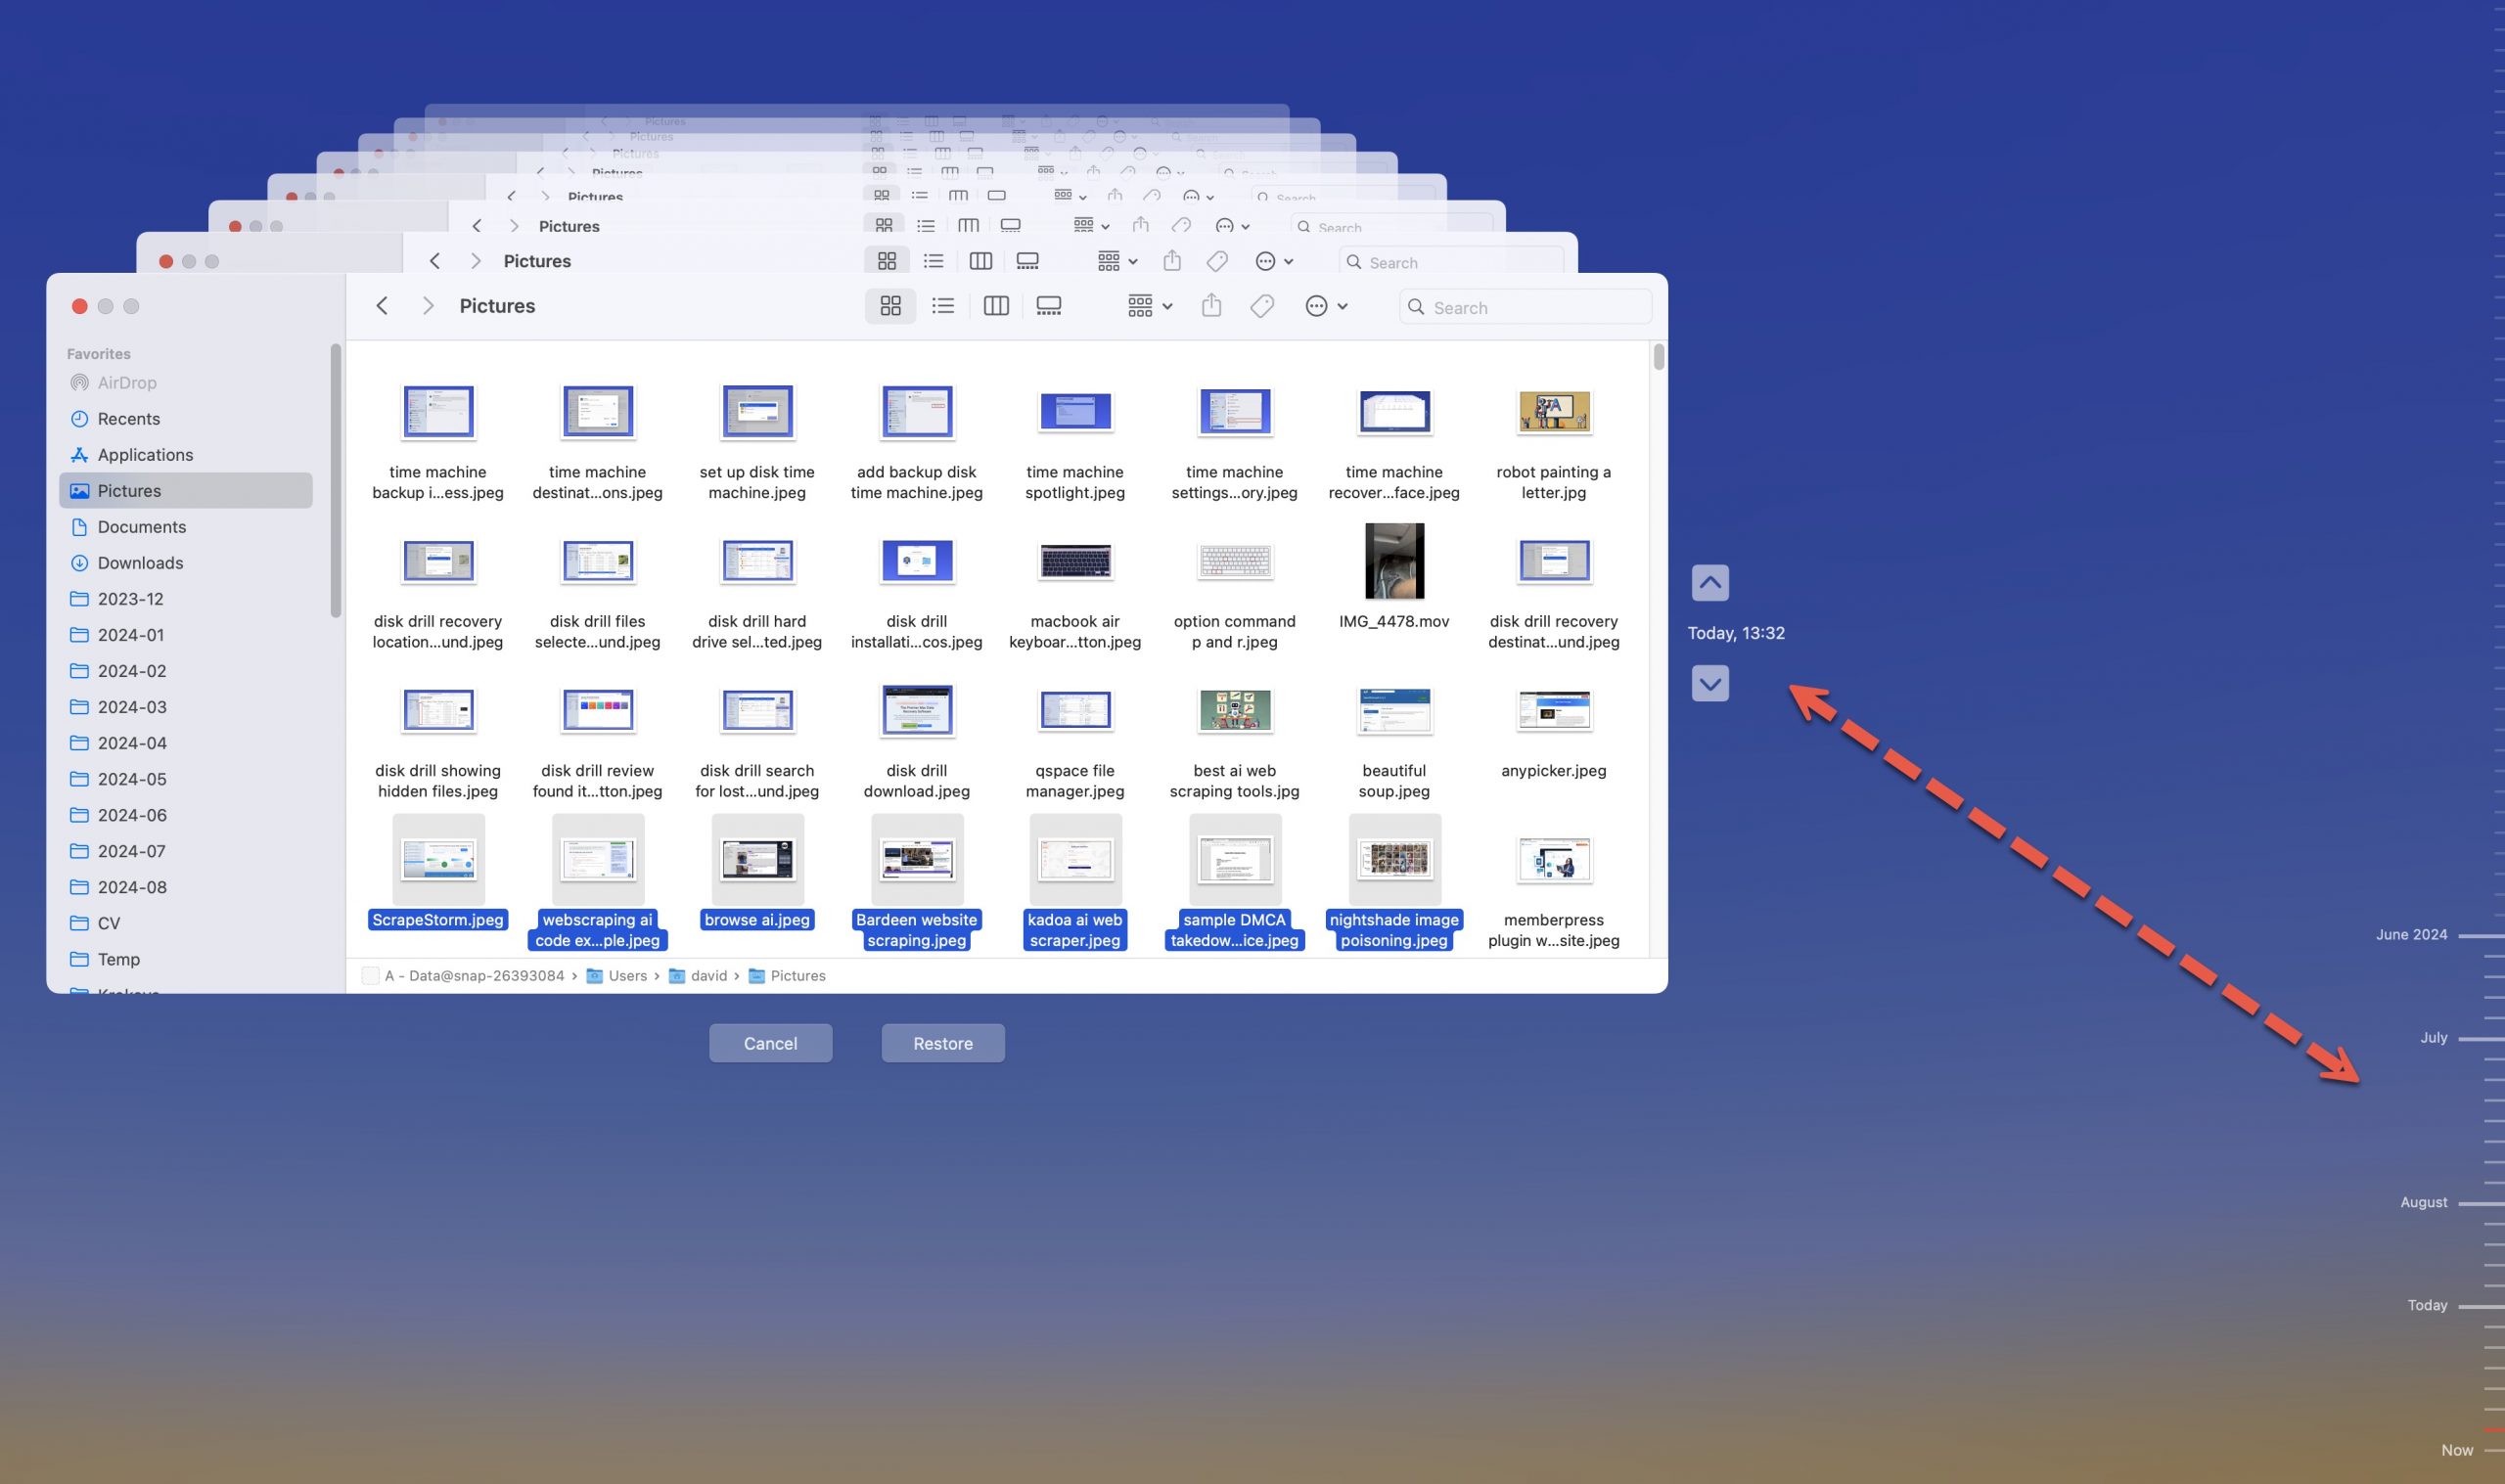
Once you’re in, you’ll see a familiar Finder window, with a timeline on the right edge of the screen. The timeline shows all your backups, with the most recent at the botoom. You can click on any tick mark to jump to that backup or the up and down arrows to move between backups. As you move through the timeline, you’ll see your files and folders change to reflect how they looked at each backup point.
To actually recover your lost files, you need to:
Step 1:Navigate to the folder where your lost file was located.
Step 2:Use the timeline to go back to when the file still existed.
Step 3:Select the file or folder you want to recover.
Step 4:Click the Restore button.
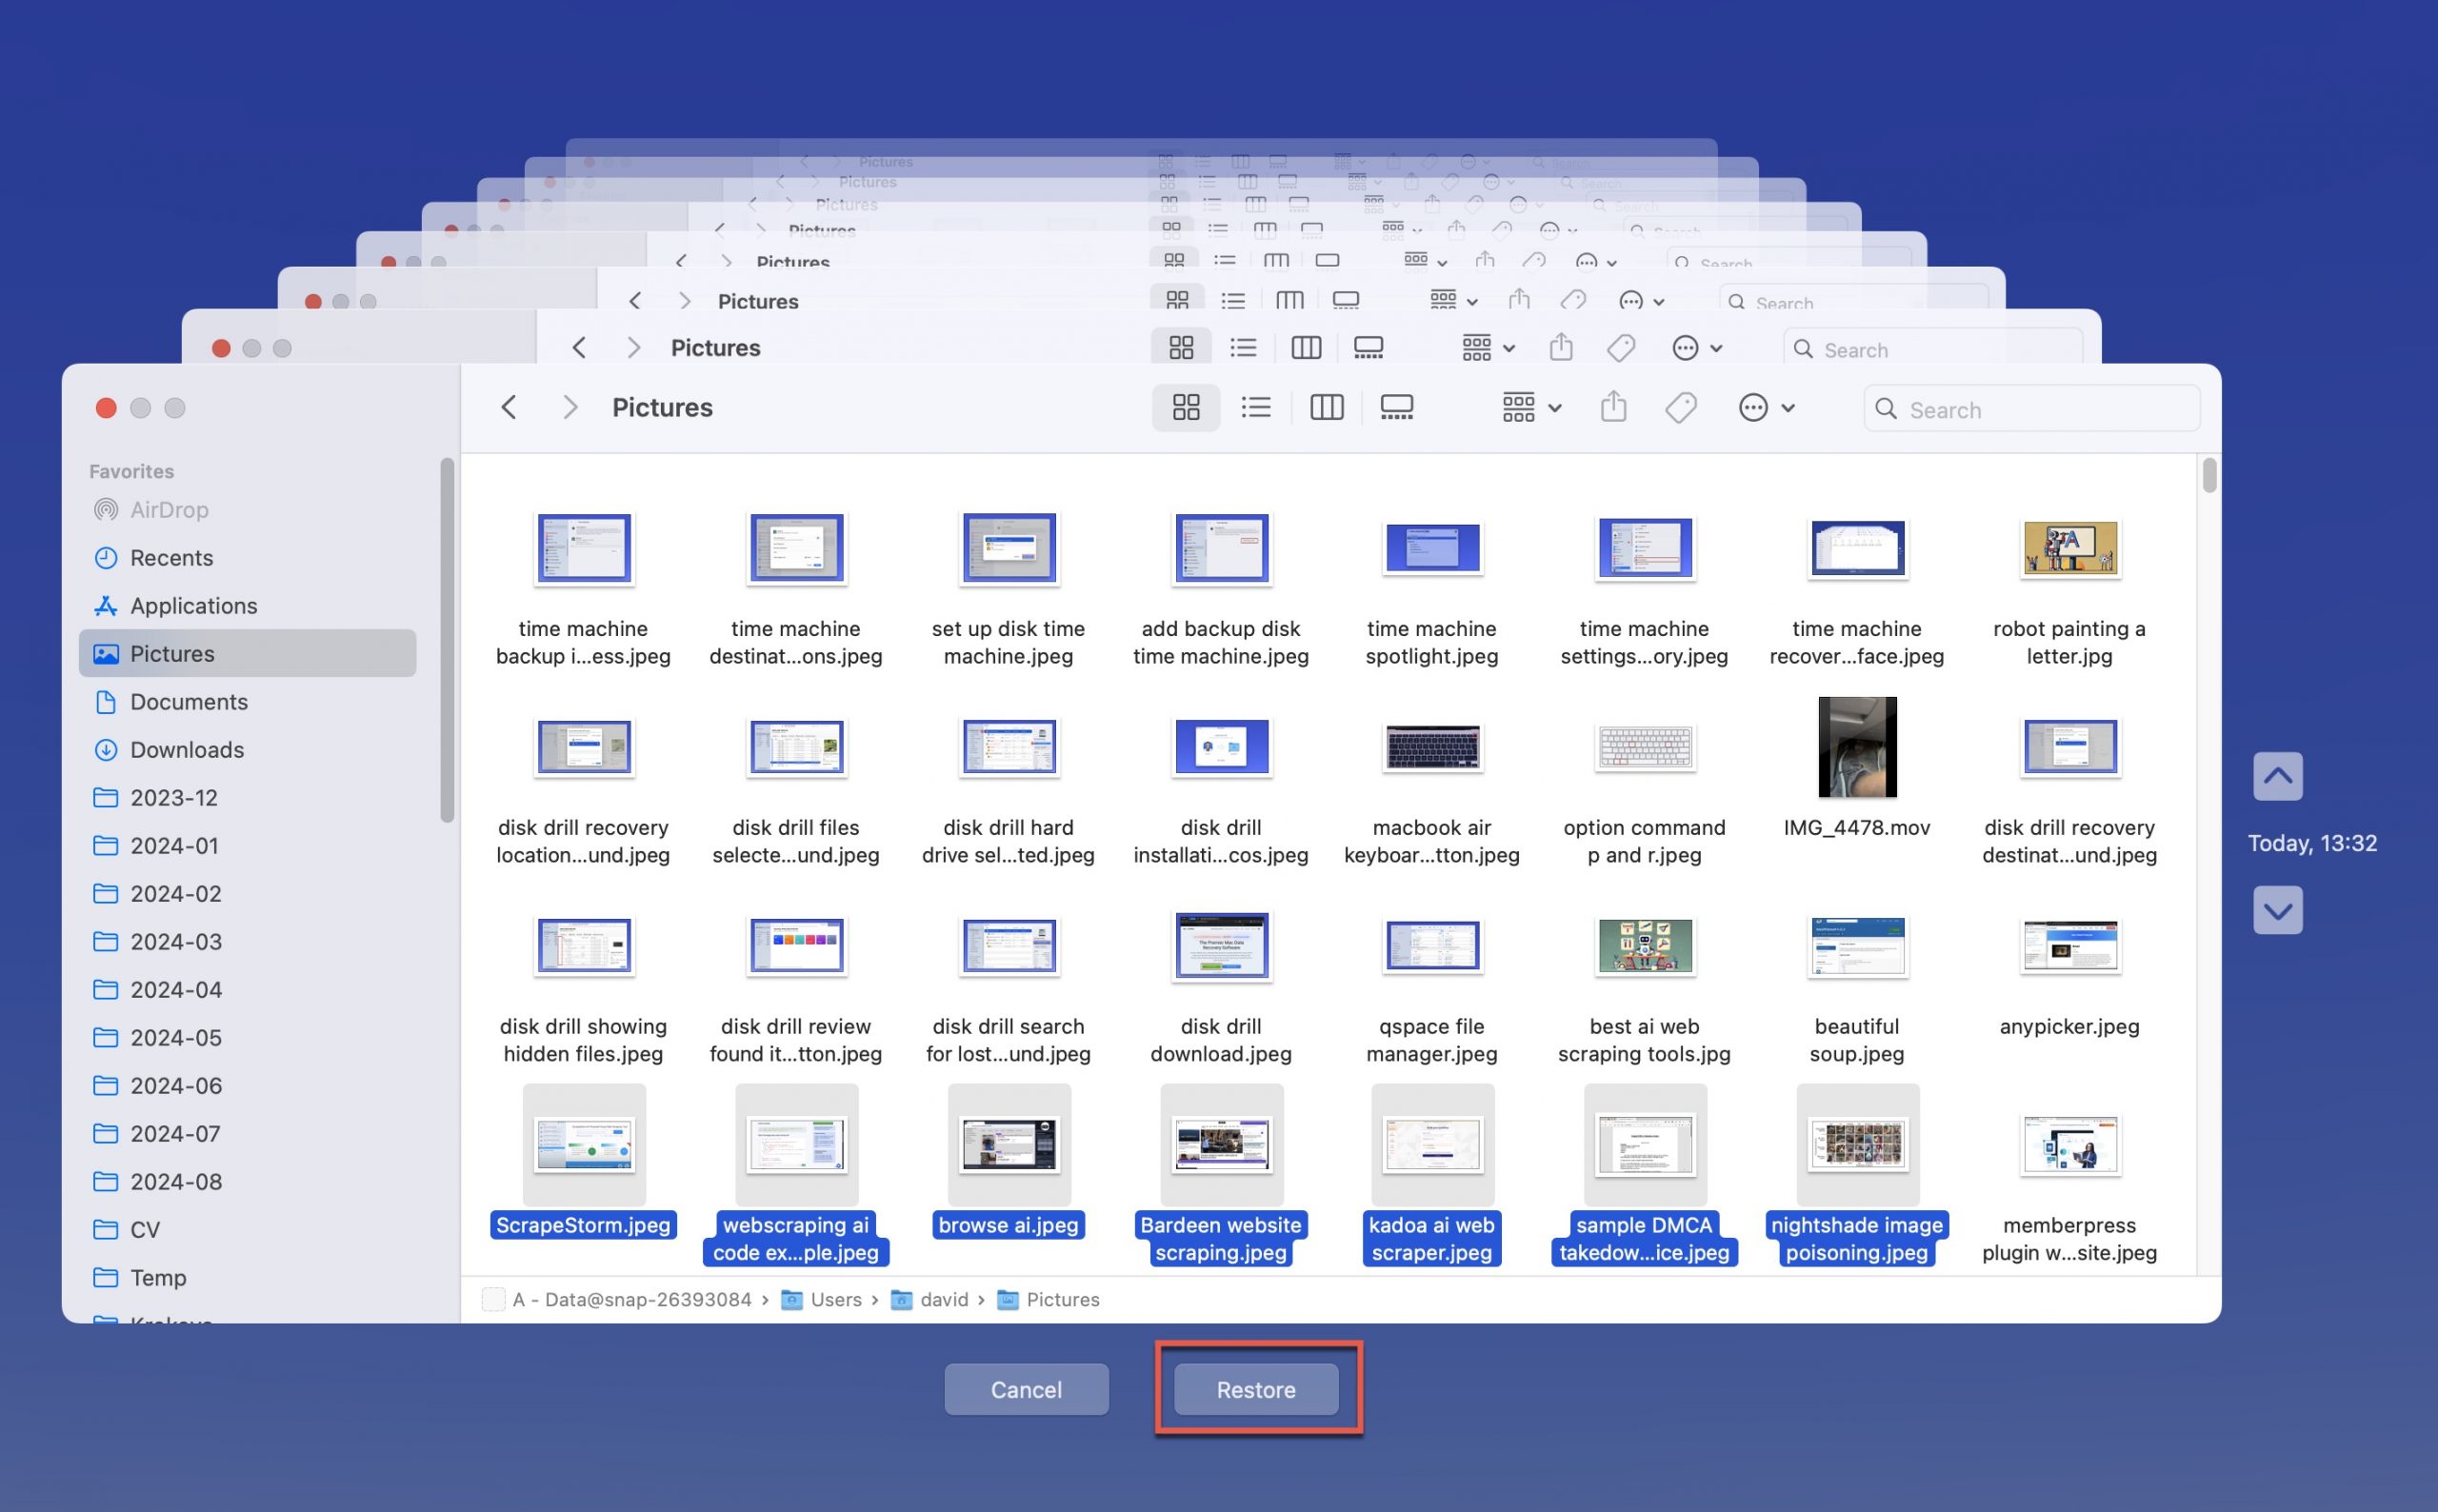
Your file will be copied back to its original location on your Mac.
Recover Entire System Using Time Machine
If you need to complete a Time Machine restoration, you can follow these steps.
Step 1:Connect the external HDD with the Time Machine backup to the Mac that requires restoration.
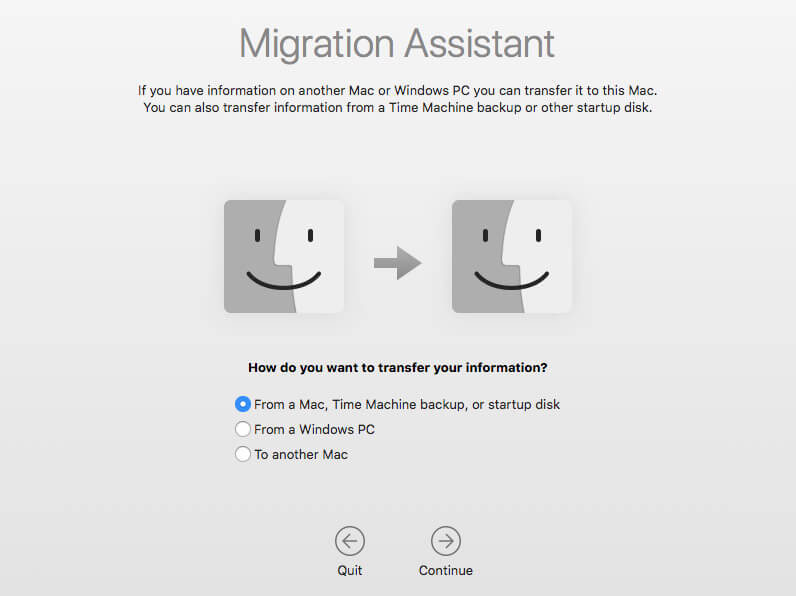
Step 2:Open the Migration Assistant.
Step 3:Choose to transfer the information from a Time Machine backup when asked.
Step 4:You’ll get asked to choose the backup disk you want to use for this process. You must select the HDD with a compressed image of the disk you want to use.
Step 5:Once you’ve selected the information to transfer, click on the Continue button.
This process defaults to the most recent backup when using Time Machine to restore your Mac. If you need to go back further, open the utility to select the boot image you prefer. You’ll find a list of the available options.
Although you can’t define the folders or files except for large exclusions, it will give you the information access you need in an emergency.
Boot a New Mac from Time Machine
If you recently purchased a new Mac and want access to your previous information, Time Machine offers a straightforward solution.
You can follow these steps to start restoring from Time Machine to your new computer.
Step 1:Connect the backup disk to your new Mac.
Step 2:When you start the computer setup process, select the option that says From Time Machine Backup to initiate the process. You might see a command for a startup disk or From a Mac instead. All three solutions will start the process.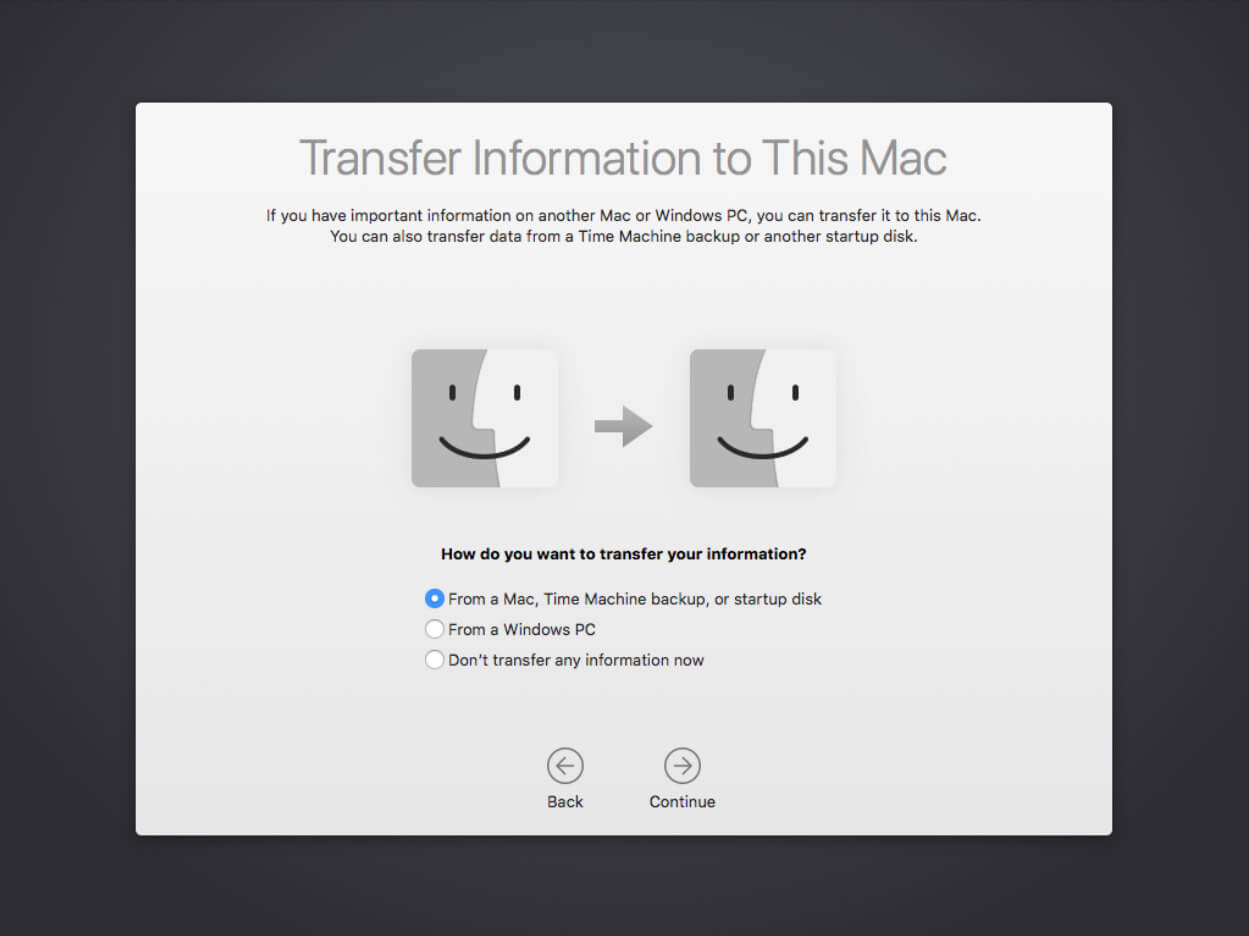
Step 3:The Mac will ask you to select the backup disk you want to use. You’ll choose the external HDD from the listed options.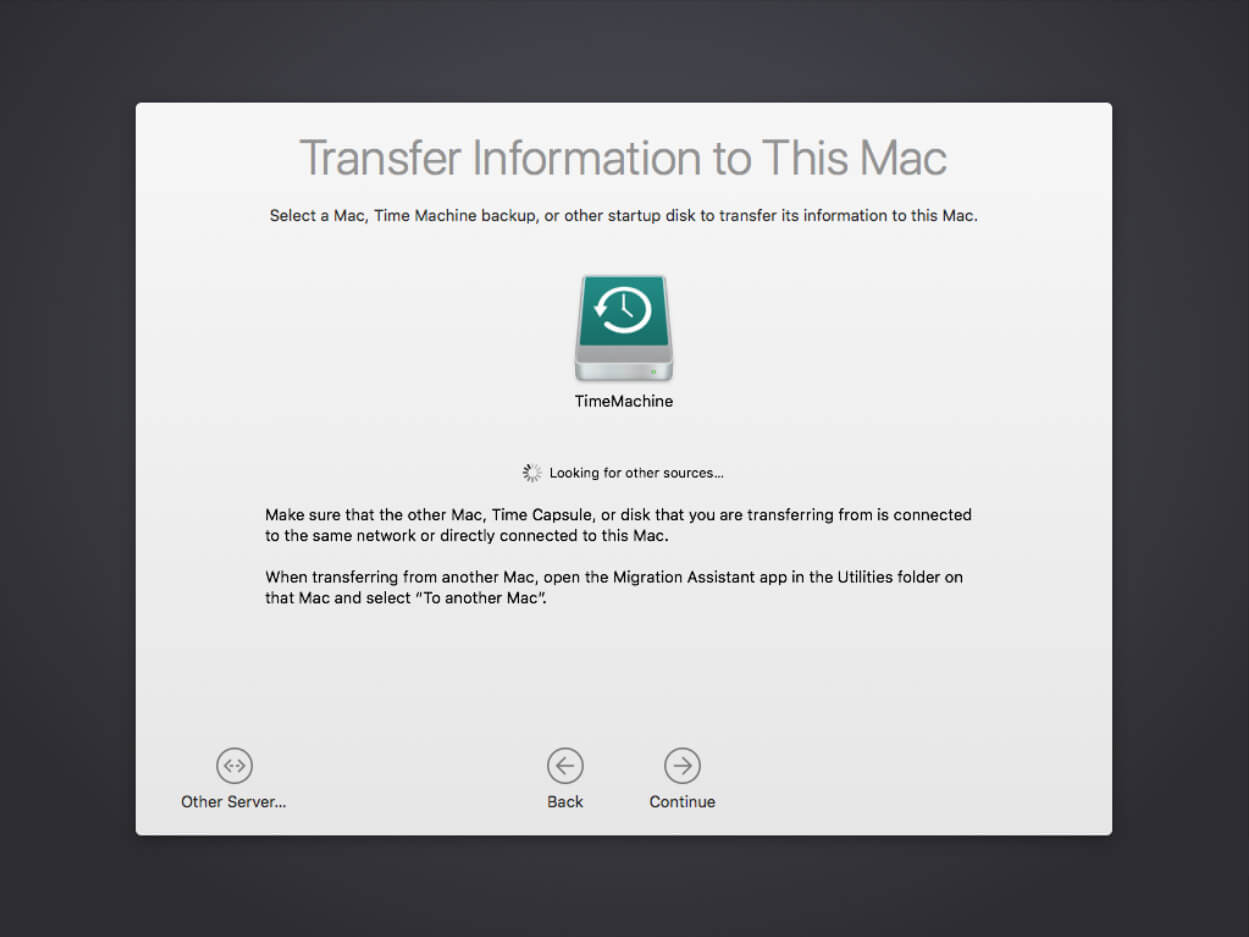
Step 4:Click on the Continue button.
Step 5:You’ll be asked to confirm the data you want to transfer. After selecting the items, you’ll need to click on Continue again.
Once you complete those five steps, your Mac will start the process of transferring data from Time Machine on your behalf.
Turn Off Time Machine and/or Change Your Backup Disk
If you need to pause the backup process for any reason (maybe you’re doing something very computationally expensive on your Mac and need all available processing power), then you can do so with ease:
Step 1:Click the Time Machine icon in the menu bar.
Step 2:Select the Skip This Backup option.

To prevent the backup process from firing up again automatically in the near future, you should also change the default backup frequency in the Time Machine settings window to the manual option.
There may also come a time when you need to use your Time Machine backup disk for something else. In that case, you can fire up that familiar Time Machine settings window, select your current disk, and click the “-” icon. This will allow you to remove the current disk, and you can then click the “+” icon to use a different one.
Tips for Using Time Machine Like a Pro
Time Machine is already a powerful tool, but with the following pro tips, you can take your backup game to the next level.
Don’t Rely Solely on Time Machine
As useful and reliable as Time Machine is, it’s never a good idea to have all your eggs in one basket. That’s why I recommend all Mac users complement Time Machine with at least one extra recovery solution.
My personal pick is Disk Drill, a data recovery application that can recover all deleted, hidden, and existing files that are physically present on your storage device without requiring you to create a backup beforehand. Just last week, I used Disk Drill to recover an accidentally deleted document that Time Machine didn’t manage to back up quickly enough.
What I love the most about Disk Drill is its user-friendly interface and powerful recovery capabilities. It can recover hundreds of file types, including document, image, and video file formats, and you can preview most of them directly in the application before recovery.
Here’s a quick guide to using Disk Drill for basic recovery of your deleted, hidden, or misplaced files:
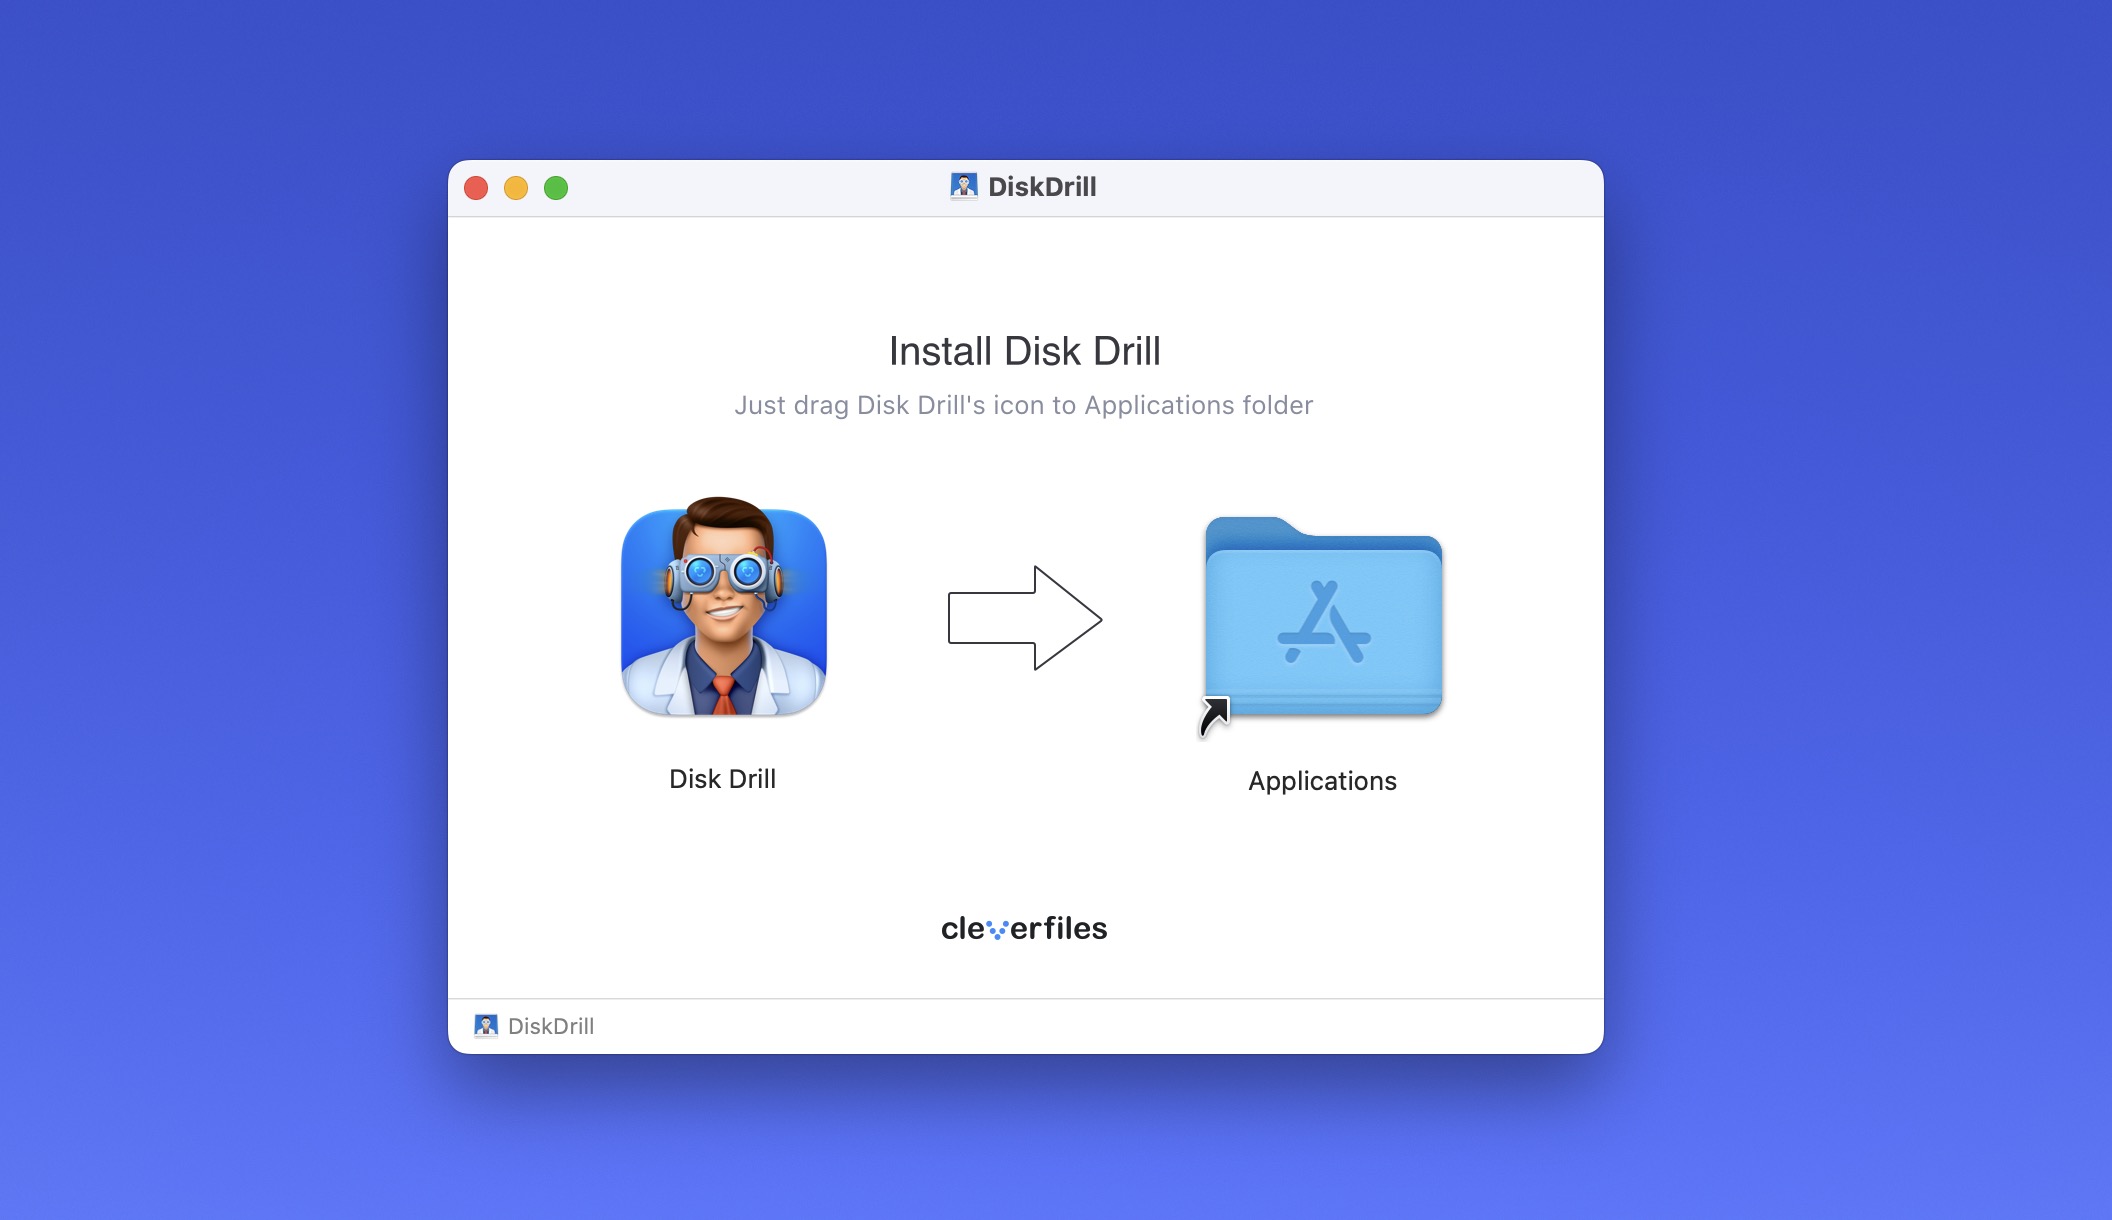
Step 1: Download and install Disk Drill from the official website.
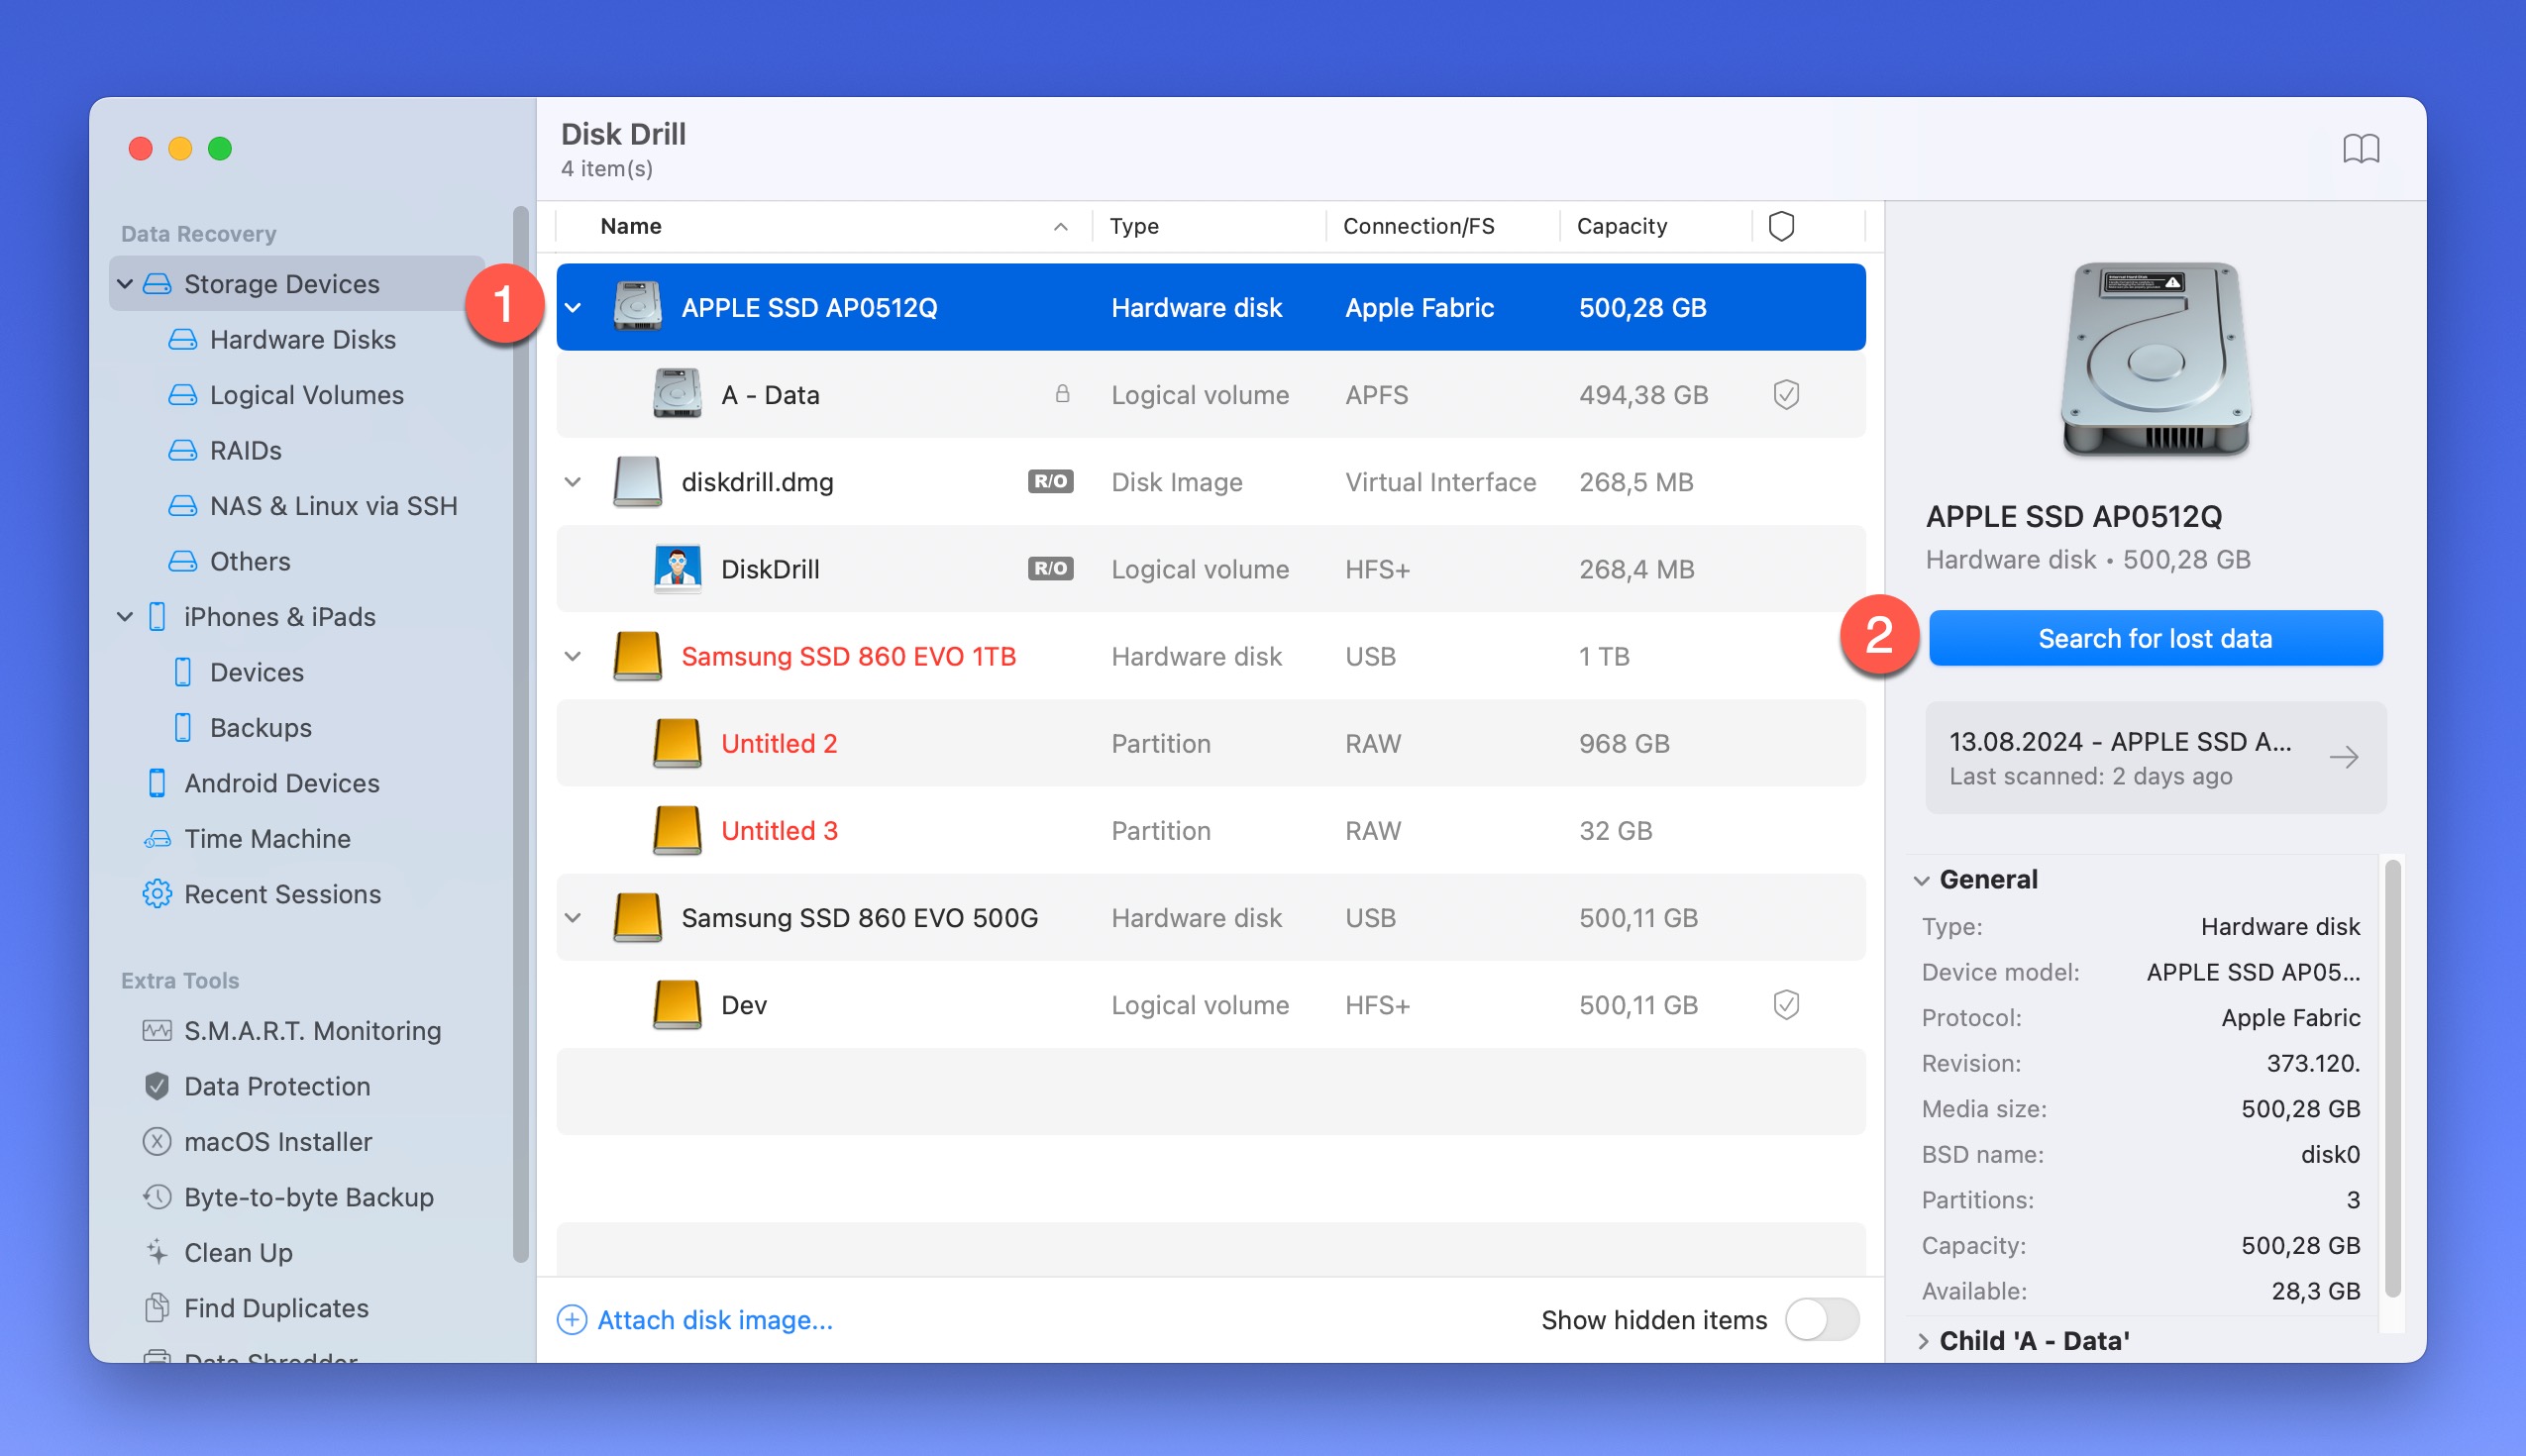
Step 2: Launch Disk Drill and select the drive you want to recover files from.
Step 3: Click Search for lost data to start the scanning process.
Step 4: Once the scan is complete, preview the files Disk Drill has found.
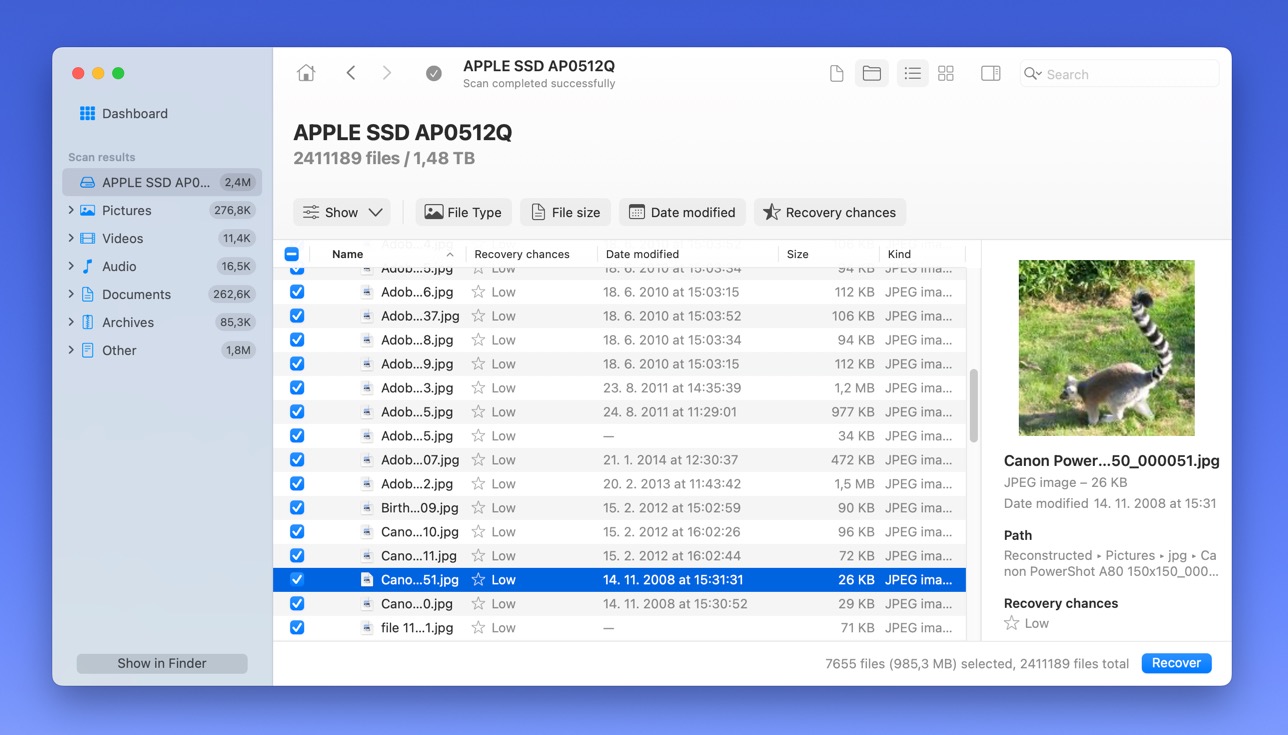
Select the files you want to recover and click Recover to save them to a safe location (don’t select the drive they were located on it and don’t recover to your Time Machine backup disk unless you have an extra partition on it).
The free version of Disk Drill for Mac can recover up to 500 MB of data, and it can preview an unlimited number of files.
Exclude Specific Items from Your Backups
Time Machine is thorough, but sometimes it’s a bit too thorough. You might not want to back up everything on your Mac, especially temporary files or something else you wouldn’t want to recover in the first place.
The good news is that Apple made it easy to exclude specific items from your backups:
Step 1: Open System Settings (or System Preferences on older macOS versions) and go to General and then Time Machine.
Step 2: Click the Options button.
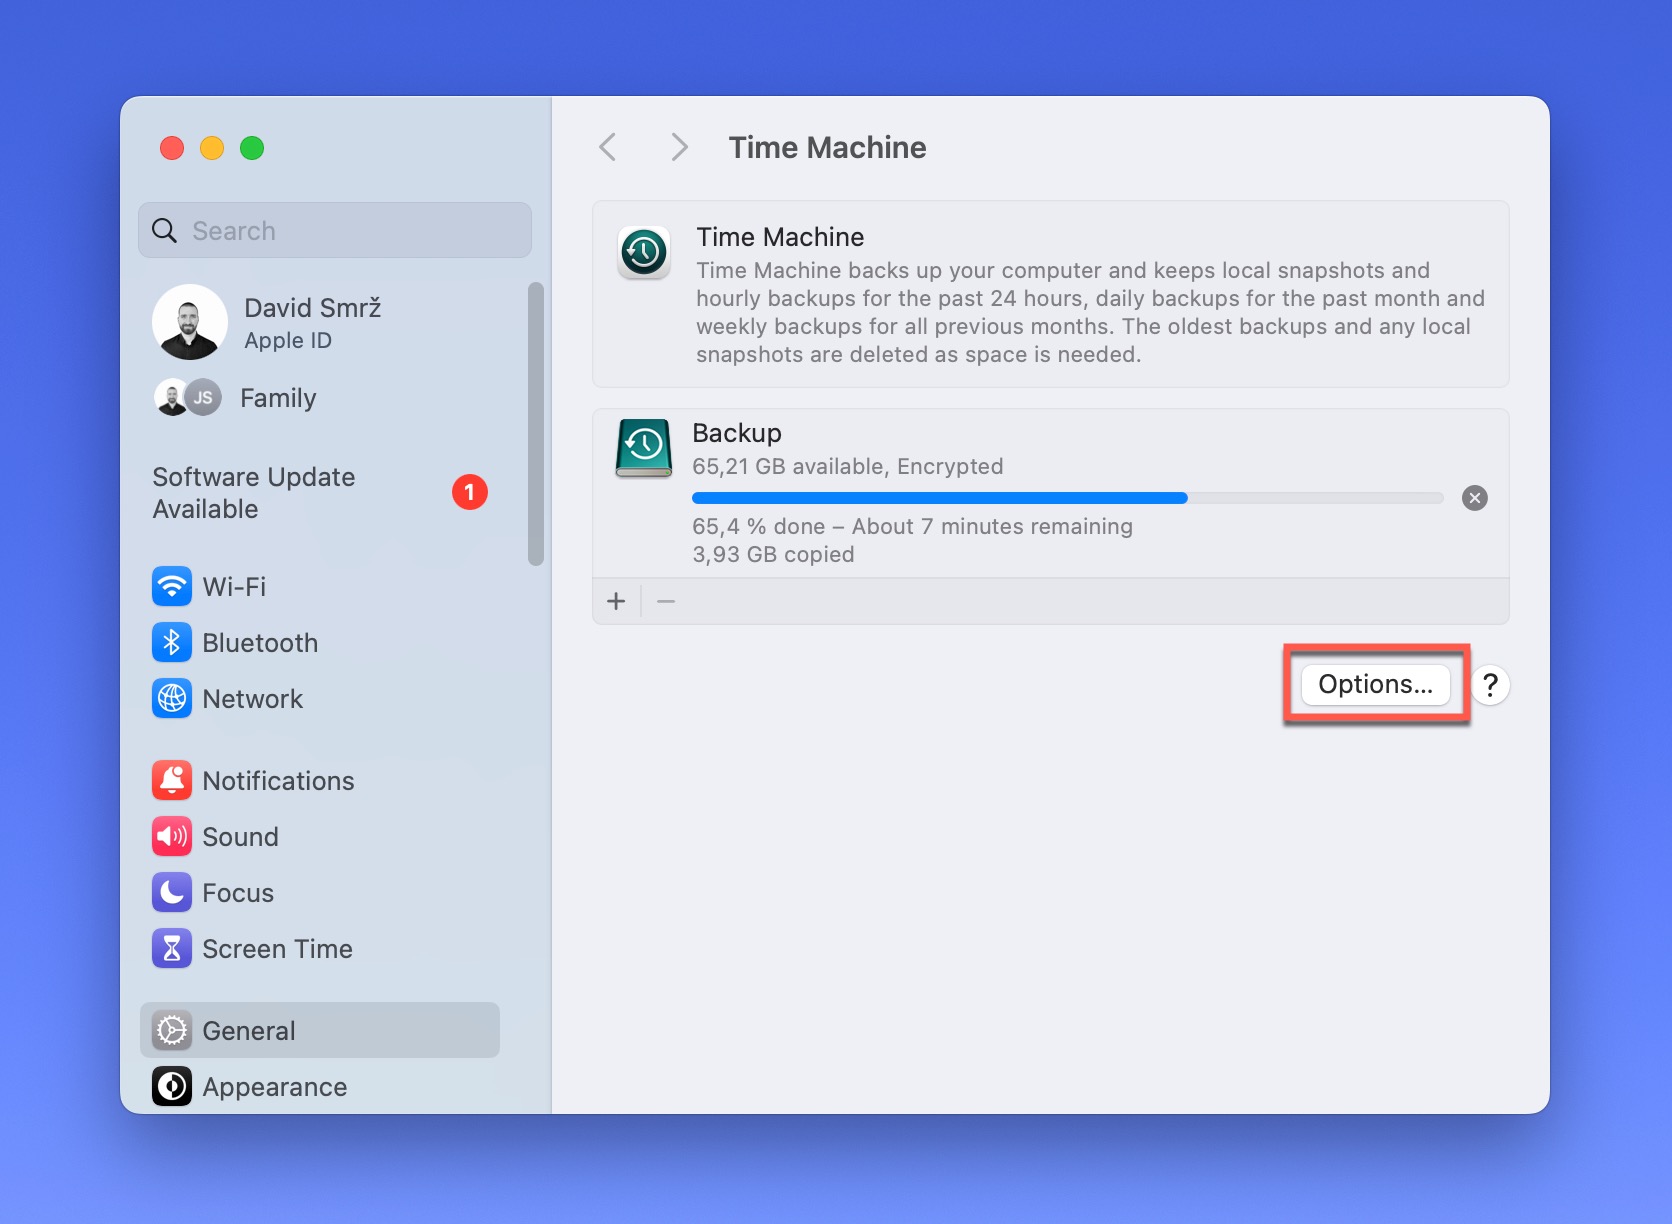
Step 3: Click the “+” icon under “Exclude from Backups.”
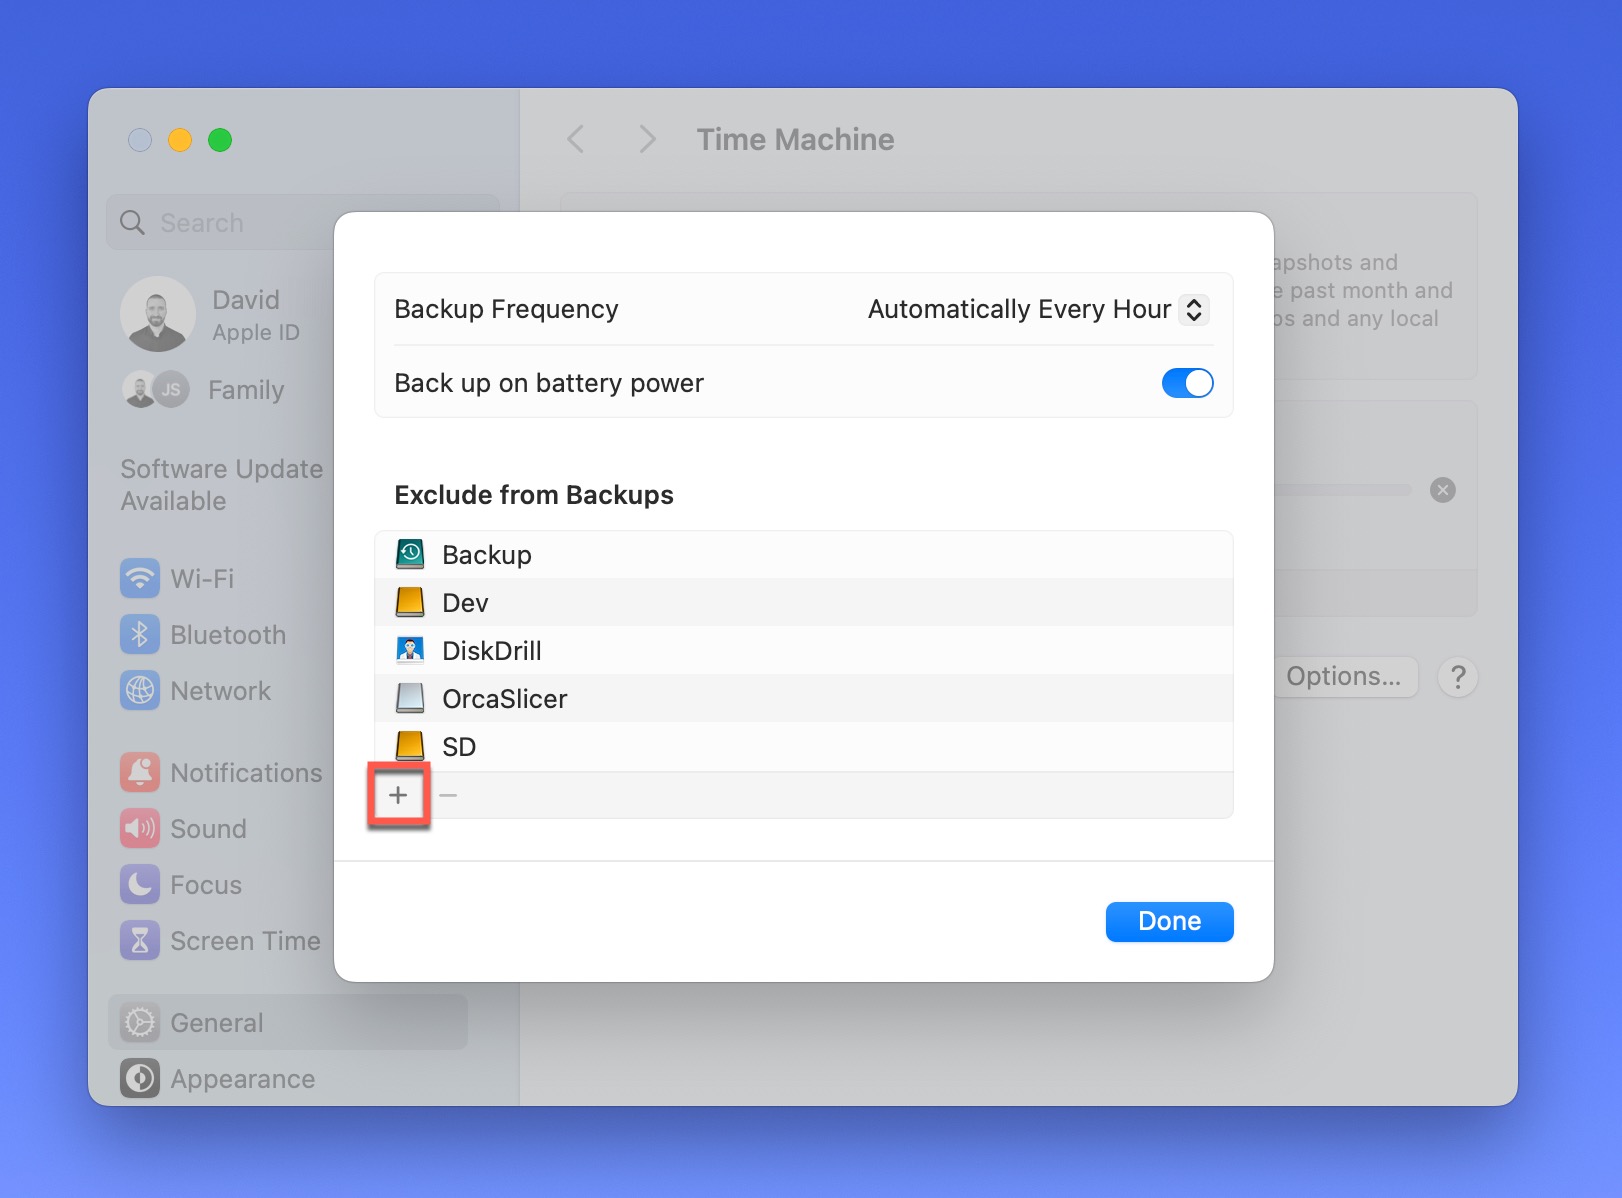
Step 4: Specify the location you want to exclude from your backup.
Step 5: Click Done to confirm.
The more items you exclude, the faster and leaner your backups will be, but make sure you don’t overdo it by excluding something that’s actually important.
Disable CPU Throttling for Faster Backups
If you’re unfamiliar with using the Terminal on your Mac, you may want to use the primary set up Time Machine offers with automatic functions. These instructions require specific commands that might produce variable outcomes. If you don’t have a Time Machine backup available, create one before starting to reduce the risk of data loss.
Step 1:Use the spotlight function of your Mac to locate the Terminal. Once it pulls it up, click on it for access.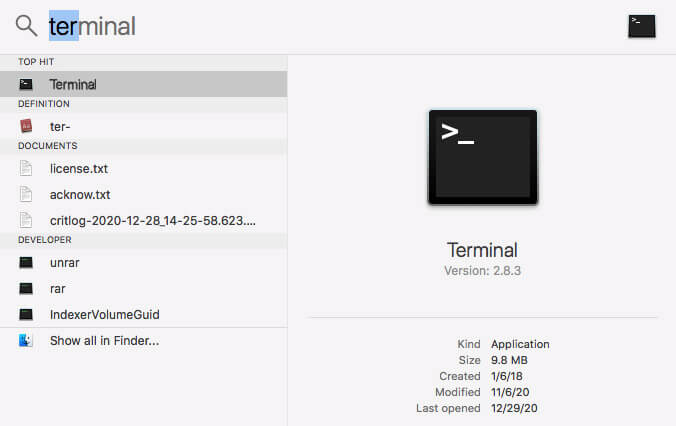
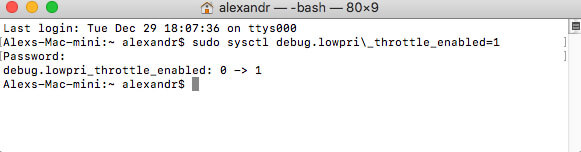
Step 2:Type this command in its entirety and verbatim:
sudo sysctl debug.lowpri\_throttle_enabled=0
Step 3:Hit Enter.
Step 4:Your Mac will ask for your password because of this system change, so you’ll need to provide this information to do a time machine backup faster.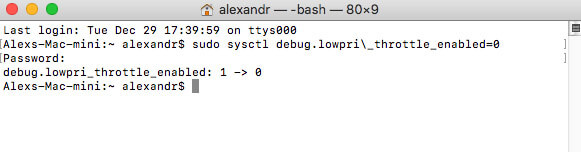
Step 5:After entering the password, you can close Terminal.
This command disables your processor’s throttle. It’s nice to have for a Time Machine backup, but you don’t want this issue around all of the time.
Once the backup is complete, you’ll want to enable the CPU’s throttle. That means you’ll need to go back to the Terminal.
After you get to the command prompt, type this command precisely:
sudo sysctl debug.lowpri\_throttle_enabled=1
and hit Enter.
You’ll get asked to enter your password again. After you do, the changes will restore from Time Machine backup efforts to create the previous system environment.
Additional Ways to Speed Up the Time Machine Backup
If Time Machine is taking longer than expected to create the compressed disk image you want, you can take the following steps to improve your speed and overall experience.
| Method | Description |
|---|---|
| Check for Large Files | Some Mac apps store unusually large files that get frequently updated. Instead of adding these to your disk image, exclude them from the backup. You can find this feature under the Time Machine preferences under Options. Click the + button to select the folders or files. |
| Upgrade to the Latest Version of macOS | Running the latest macOS version on your Mac can improve Time Machine’s performance dramatically. Since Big Sur, Time Machine supports APFS-formatted drives, which offer faster and more efficient backups. You can use Disk Utility to reformat your backup disk to APFS, but be aware that this will erase all existing backups on that drive. |
| Check for Apps that Keep the Backup Busy | If you use the external HDD for needs other than a Time Machine backup, the speed rises and falls based on use. Keep any utilities, including antivirus software, on other disks to maximize performance. |
| Review Your Network Performance | Some users operate Time Machine across a network. If your speed is unusually slow, it could be due to poor Wi-Fi performance. This issue is typically resolved by connecting the secondary drive to the Mac that requires a backup. |
| Inspect Your External HDD for Problems | If your external HDD has corrupted sectors or other problems, the Time Machine data won’t save. You’ll need to use the Disk Utility to examine the drive to determine if a repairable issue is present. |
In Conclusion: How to Use Time Machine Like a Pro
Most people don’t think about having a backup disk available until they need one. By then, it is already too late! That’s why you should activate Time Machine now to protect your Mac.
When you know how to use Time Machine on Mac correctly, you’ll keep your disk images stored on an external drive so that you have portable access to your information. This utility allows you to create or restore macOS computers to a previous state when you experience unexpected errors, faults, or possible corruption.
Please remember to keep this guide saved for future reference so that you can use Time Machine like a pro.


