
Are the files on your SD card not showing up on your Mac? There are several possible reasons why this happened and it can be tough to pinpoint if you’ve never encountered it before.
And while the issue isn’t always alarming, but there’s a risk that you’ll lose your data if you don’t use the right solution.
To help you, we wrote this in-depth guide that covers every possible scenario related to this error, as well as each of their appropriate solutions (while also addressing the potential data loss).
Table of Contents
Warning: If You Suspect Corruption, Secure Your Data FIRST
If your SD card is saying it’s full when it’s empty on your Mac, that doesn’t always mean that it’s corrupted. However, if corruption is indeed the case, any files saved on your SD card are at risk of being lost forever. The corruption itself can cause data loss and so can the process of repair.
If the data on that memory card is important to you, it’s critical that you secure it ASAP. We have a short list of app recommendations that are designed to handle data loss on corrupted SD cards:
- Disk Drill – Beginner-friendly data recovery app for Mac with powerful scanning tools that can extract files, original file names, and folder structures (except for severe cases). It also provides good browsing and preview tools, which are critical for extracting salvageable data ASAP. Finally, Disk Drill has a massive file signature database; it can recognize standard and proprietary file signatures – even RAW! Some examples include JPG, PNG, CR2, NEF, GIF, MP4, AVI, MOV, and many, many more.
- R-Studio – One of the most affordable yet powerful data recovery apps on the market, but it has a slight learning curve. It also lacks elegant file browsing and preview tools, but it makes up for that in advanced scanning features, like custom parameters and learning unknown file signatures.
- DMDE – The most affordable and hardest to use on the list; you can recover up to 4,000 files at a time with DMDE’s free version. It’s also very good at restoring data from corrupted storage devices and performs consistently well in general. However, it has a very cluttered interface and the overflow of advanced features and parameters will likely overwhelm a novice user.
Why Your Memory Card Says “Full” But There’s Nothing On It
There are several potential ways to fix an SD card that’s empty but says “Full” on your Mac. However, each fix is appropriate only for their specific issues. Here’s a quick rundown of the common reasons why this error occurs, as well as handy jump links so you can quickly proceed to the right guide section.
| Causes | Diagnosis |
| You haven’t emptied your Trash. | If you tried to delete files to reclaim space, it’s possible that they weren’t erased from your Mac – they may have been sent to a hidden Trash folder. Solution: Method 1 |
| Your files and folders are Hidden. | You or another user may have set your SD card’s data to be “Hidden”, which prevents them from appearing in Finder. Solution: Method 2 |
| Your Mac can’t detect or recognize your SD card. | Debris, wear and tear, or other mechanical issues may be preventing your Mac from communicating with your SD card, mounting it, and accessing its data. Try following our guide on how to fix an SD card that isn’t detected by your Mac, then come back to this article if the error still occurs. |
| Your SD card may be corrupted. | Corruption may occur due to read/write interruptions (due to power outages, etc.), malware infections, software errors, and other software-related issues. There are several ways that corruption can affect file visibility and storage, as it can impact your SD card’s file system, directory structure, partitions, metadata, and more. Try one or more of the following solutions: Method 3, Method 4, Method 5 |
| Your SD card is infected with malware. | Malware may have corrupted your SD card or its data, preventing it from functioning as intended. Follow our guide on how to remove a virus from your Mac using anti-malware tools – their scanners might be able to detect malicious elements in your external drives. And if it’s a Windows-based virus, you should be able to copy your files to your Mac without issue. However, we still strongly recommend that you scan the copied files for viruses. Alternatively, you can attempt to format your SD card (Method 5) and recover the deleted files from your SD card instead. |
5 Methods to Fix an SD Card That Says It’s Full but Looks Empty
In this section, we’ll cover 5 different methods to resolve the error where your SD card or micro SD card says full when there’s nothing on it on your Mac. Each method resolves a specific issue, so analyze your diagnosis carefully.
Method 1: Empty Your Trash Folder (While Your Memory Card is Connected
When you delete files from your SD card while it’s connected to your Mac, in some cases, those files aren’t eliminated from your SD card yet. Instead, they are sent to a hidden folder on your Mac, called .Trashes.
References to those files are then stored in your Mac’s LOCAL trash folder. To delete the files in .Trashes, you need to delete their references from macOS’ Trash folder.
Step 1. Ensure your SD card is securely connected to your Mac using a USB card reader. Otherwise, its file references won’t be available for deletion in the local Trash folder.
Step 2. Right-click the Trash folder’s icon on your dock and click Empty Trash.
![]()
Step 3. In the popup that appears, click Empty Trash again to confirm the action.
Method 2: Show Hidden Files and Folders on Your Memory Card
Hidden is a file or folder attribute that a user or app can enable to prevent the file or folder from showing up in Finder. With a simple key combination, you can make all hidden items appear so you can interact with them.
Step 1. Open Finder.
Step 2. In the left sidebar, click your SD card’s directory. Then, press the Command + Shift + > keys simultaneously.
Method 3: Fix Minor Disk Errors on your SD Card Using the First Aid Tool
First Aid is a feature that you can access via the built-in disk management tool, Disk Utility. First Aid is capable of resolving file system inconsistencies, repairing partition table errors, and fixing other minor disk issues.
Step 1. Connect your SD card to your Mac.
Step 2. Open Disk Utility (Finder > Applications > utilities).
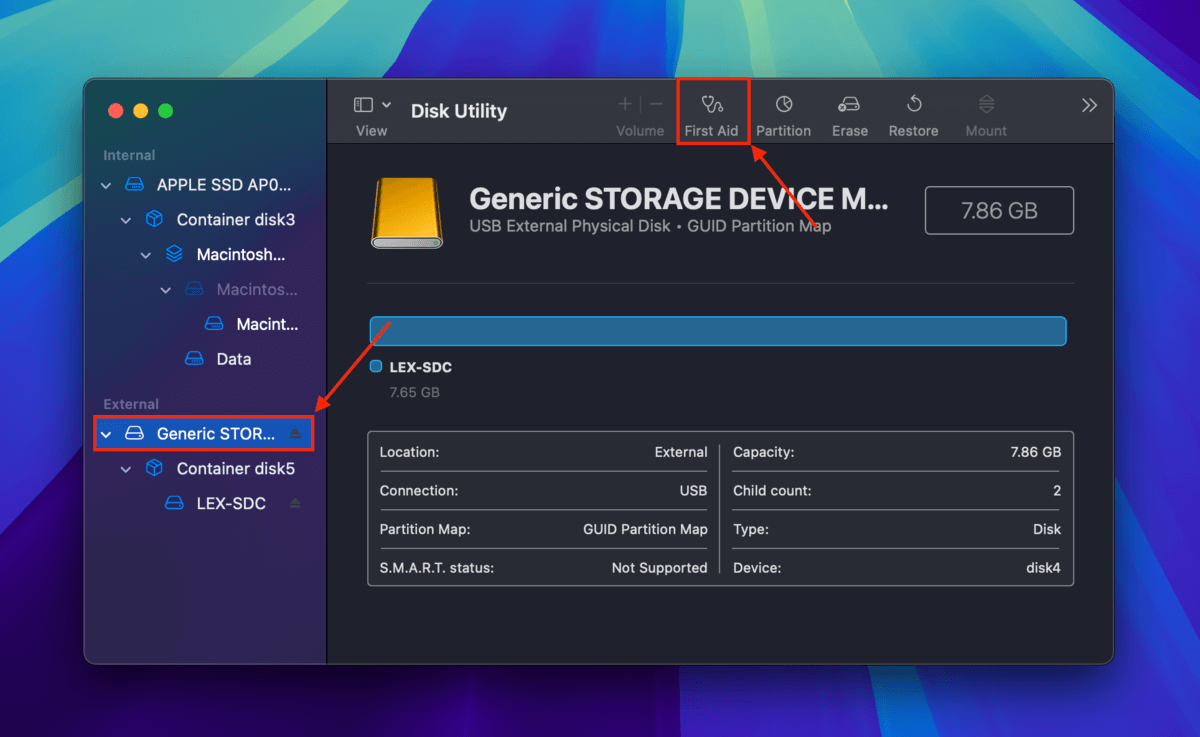
Step 3. On the left sidebar, select your SD card. Then, click First Aid.
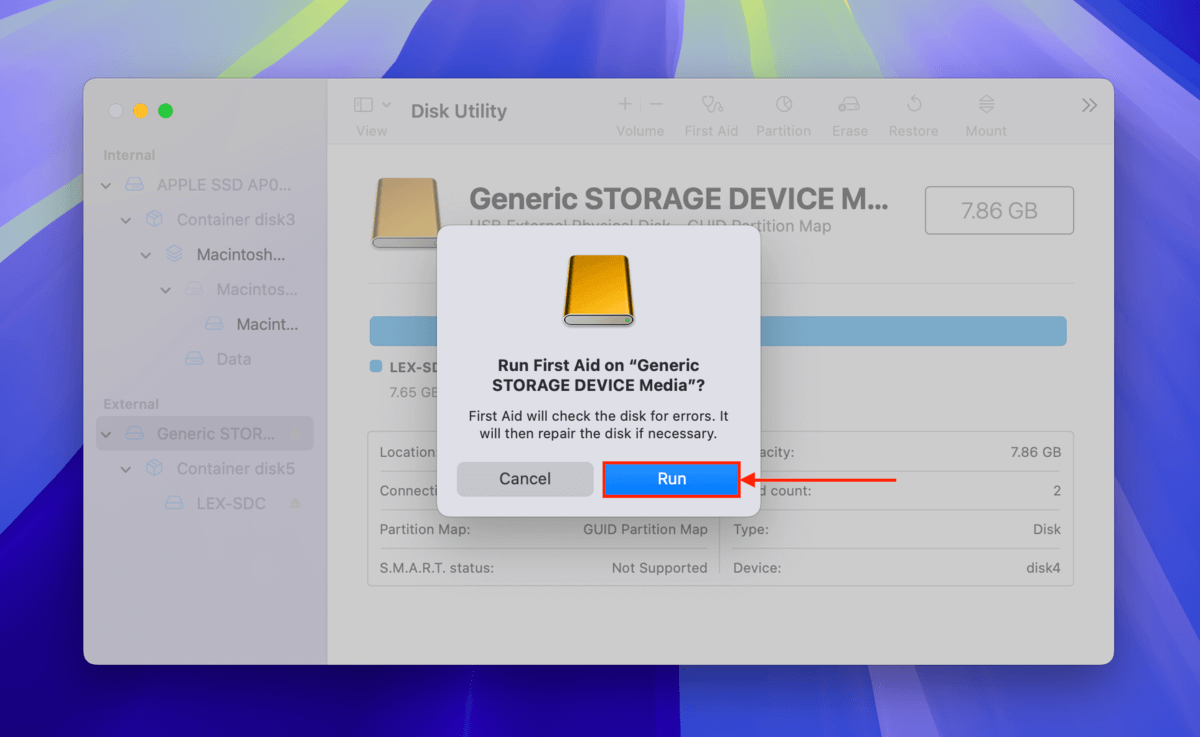
Step 4. When prompted, click Run to confirm the action.
Method 4: Repair Filesystem Errors on Your SD Card Using the FSCK Command
FSCK is a more powerful repair tool than First Aid; it can perform deeper file system repairs and handle more severe instances of corruption. It can also identify issues that First Aid might miss, so it’s a good idea to run this tool if you notice any problems after using First Aid.
You can access FSCK using simple Terminal commands. Here’s a step-by-step guide:
Step 1. Connect your SD card to your Mac.
Step 2. Open the Terminal app (Finder > Applications > Utilities).
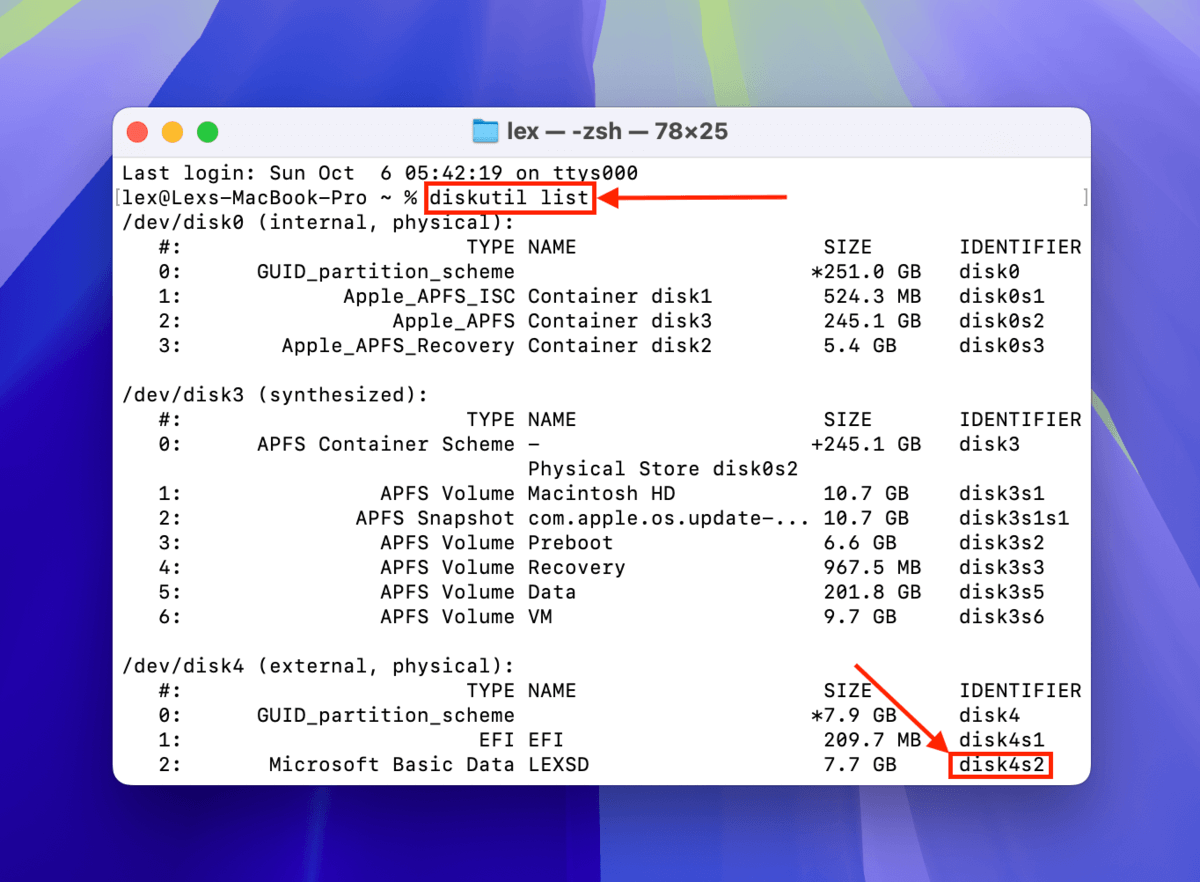
Step 3. Locate your SD card’s IDENTIFIER. Type the following command and hit Return:
diskutil list
Step 4. The following command to run the FSCK tool:
sudo fsck_exfat -fy /dev/disk4s2
Replace disk0 with your own SD card’s IDENTIFIER.

Method 5: Format Your SD Card or Micro SD Card
If none of the methods discussed above were able to help, or if you simply want the fastest and cleanest fix possible, you can format your SD card. Formatting your SD card will completely wipe everything on it – including its file system and your personal data. On the positive side, this means you’ll get rid of the corruption as well.
Step 1. Connect your SD card to your Mac.
Step 2. Open Disk Utility (Finder > Applications > Utilities).
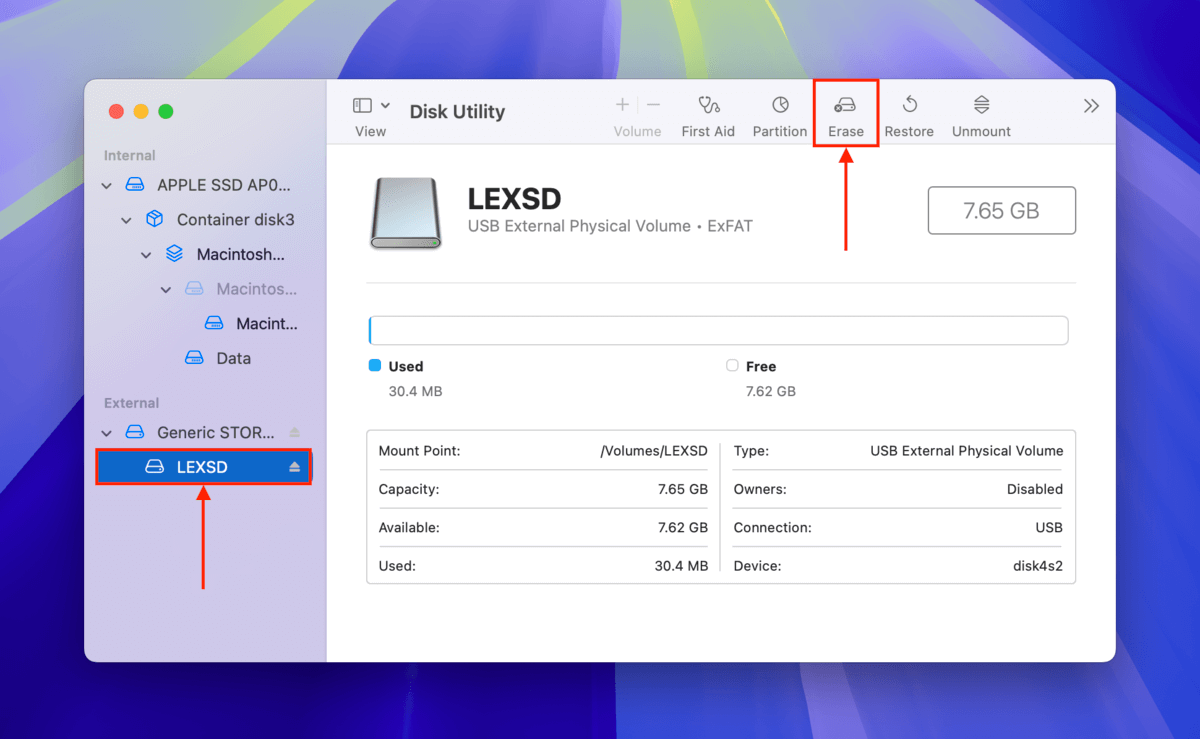
Step 3. Select your SD card from the left sidebar and click the Erase button.
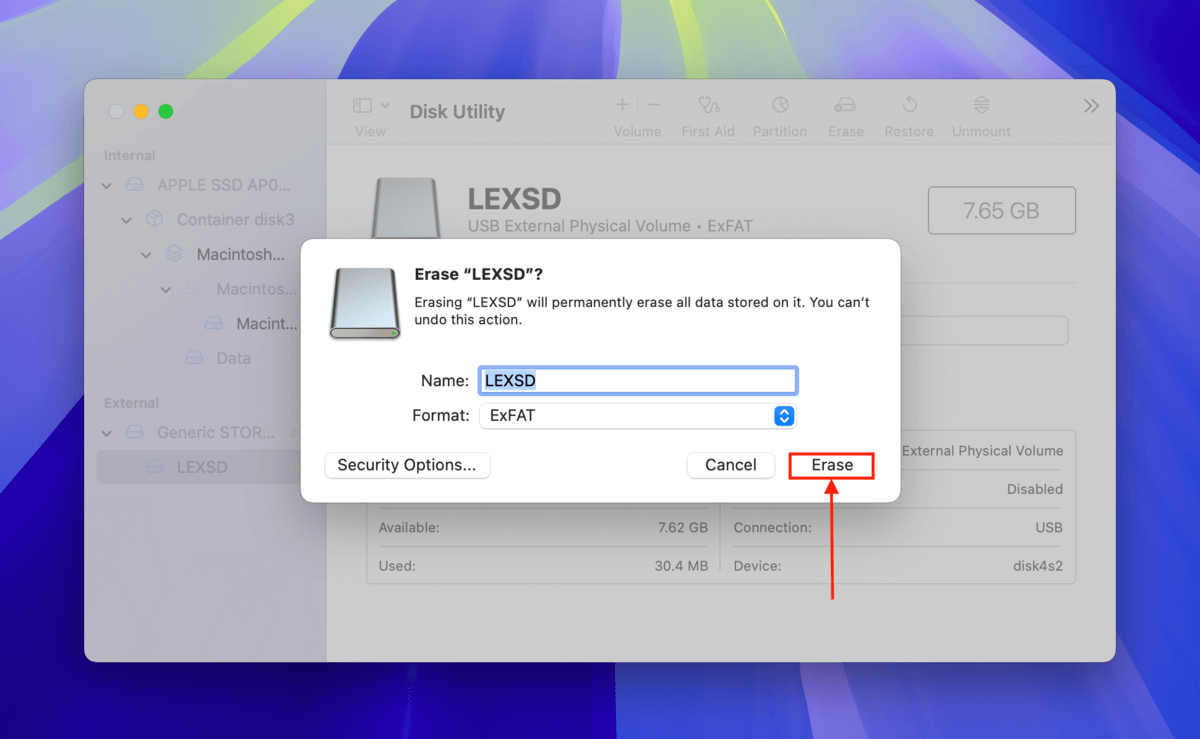
Step 4. When prompted, click Erase again to confirm the action.
Are you missing RAW SD card photos?
SD card corruption – and even the repair process itself – are very likely to cause data loss. If your SD card stores RAW photos, such as .cr2, .nef, etc., you’ll need to use specific tools to restore them.
If this is the case for you, read our guide on how to restore RAW files from an SD card. We also recommend that you prepare to replace your corrupted SD card ASAP once your data has been secured.


