
This guide will walk you through multiple methods to help you recover unsaved or deleted QuickTime recordings of your screen or a video. We’ll explore built-in Mac recovery options as well as third-party solutions so that you can choose the right recovery approach for your specific situation.
Table of Contents
Where Does QuickTime Save Screen and Movie Recordings?
QuickTime Player offers multiple ways to save your recordings, with different default locations depending on how you initiate the recording.
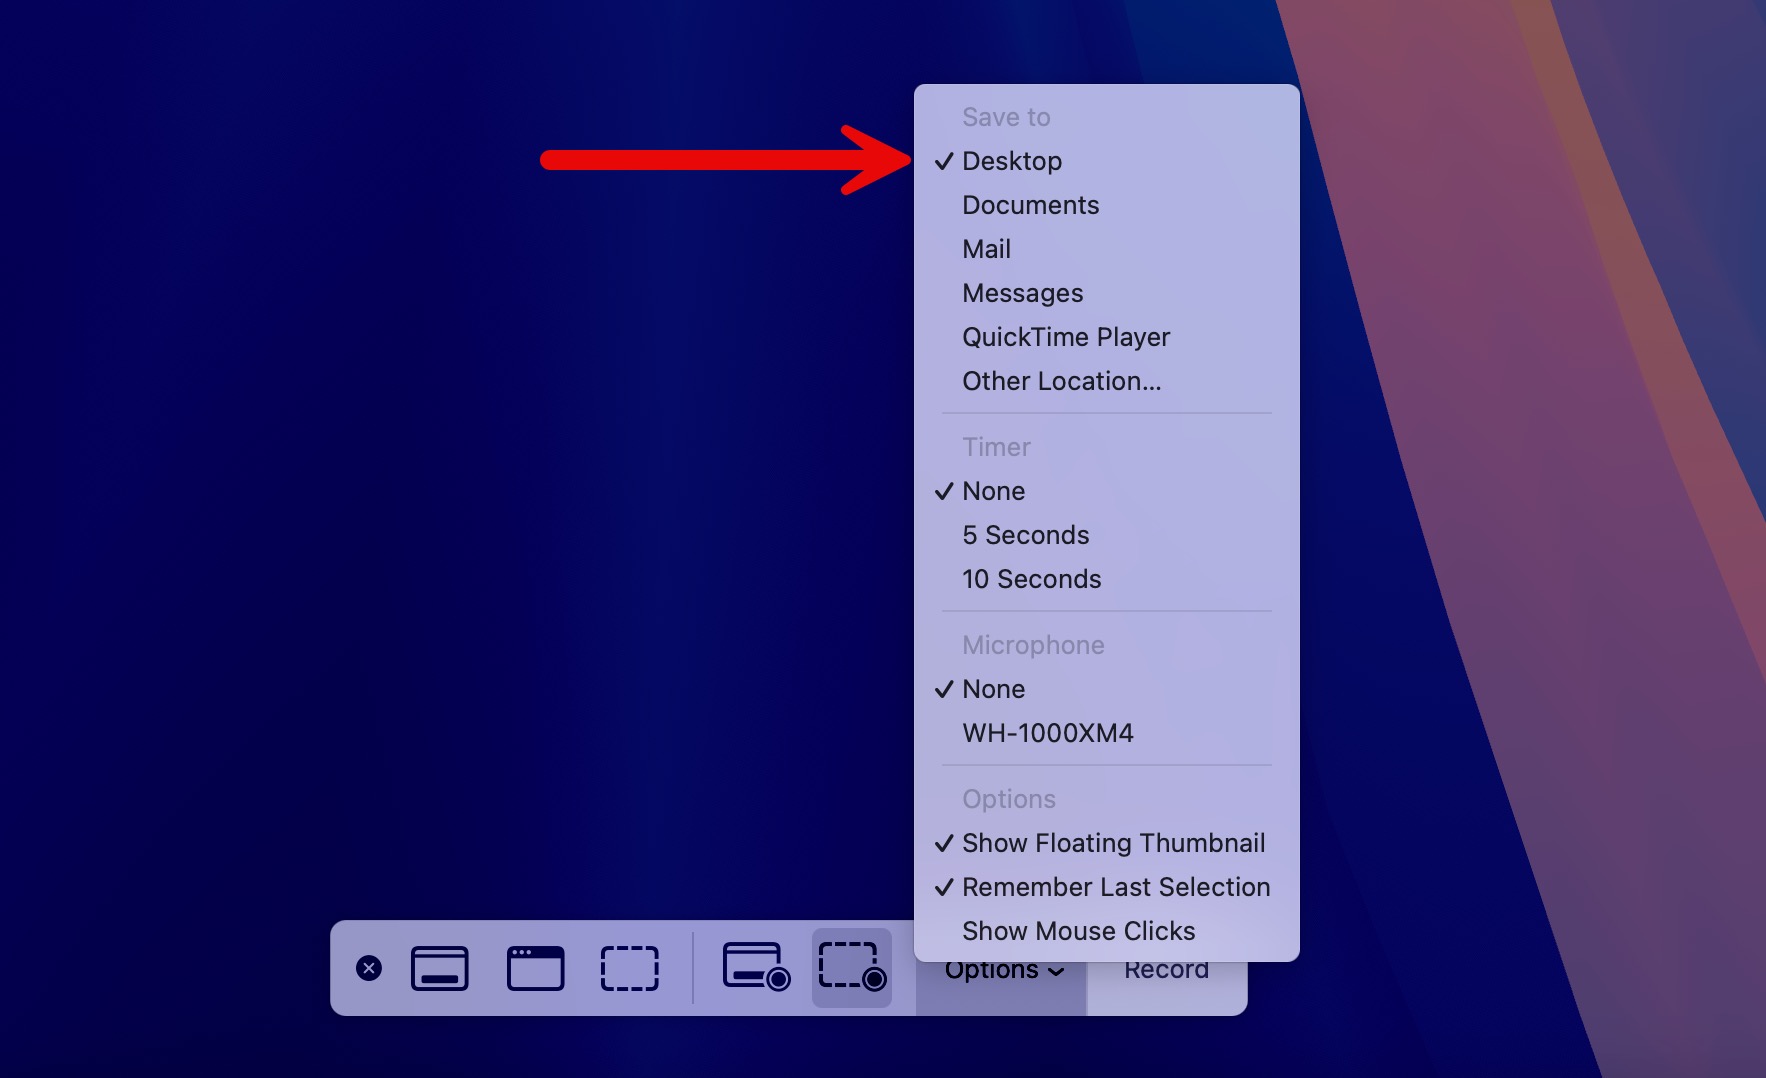
When you create a screen recording using File > New Screen Recording (or the Command-Shift-5 shortcut), QuickTime defaults to saving recordings to your Desktop.
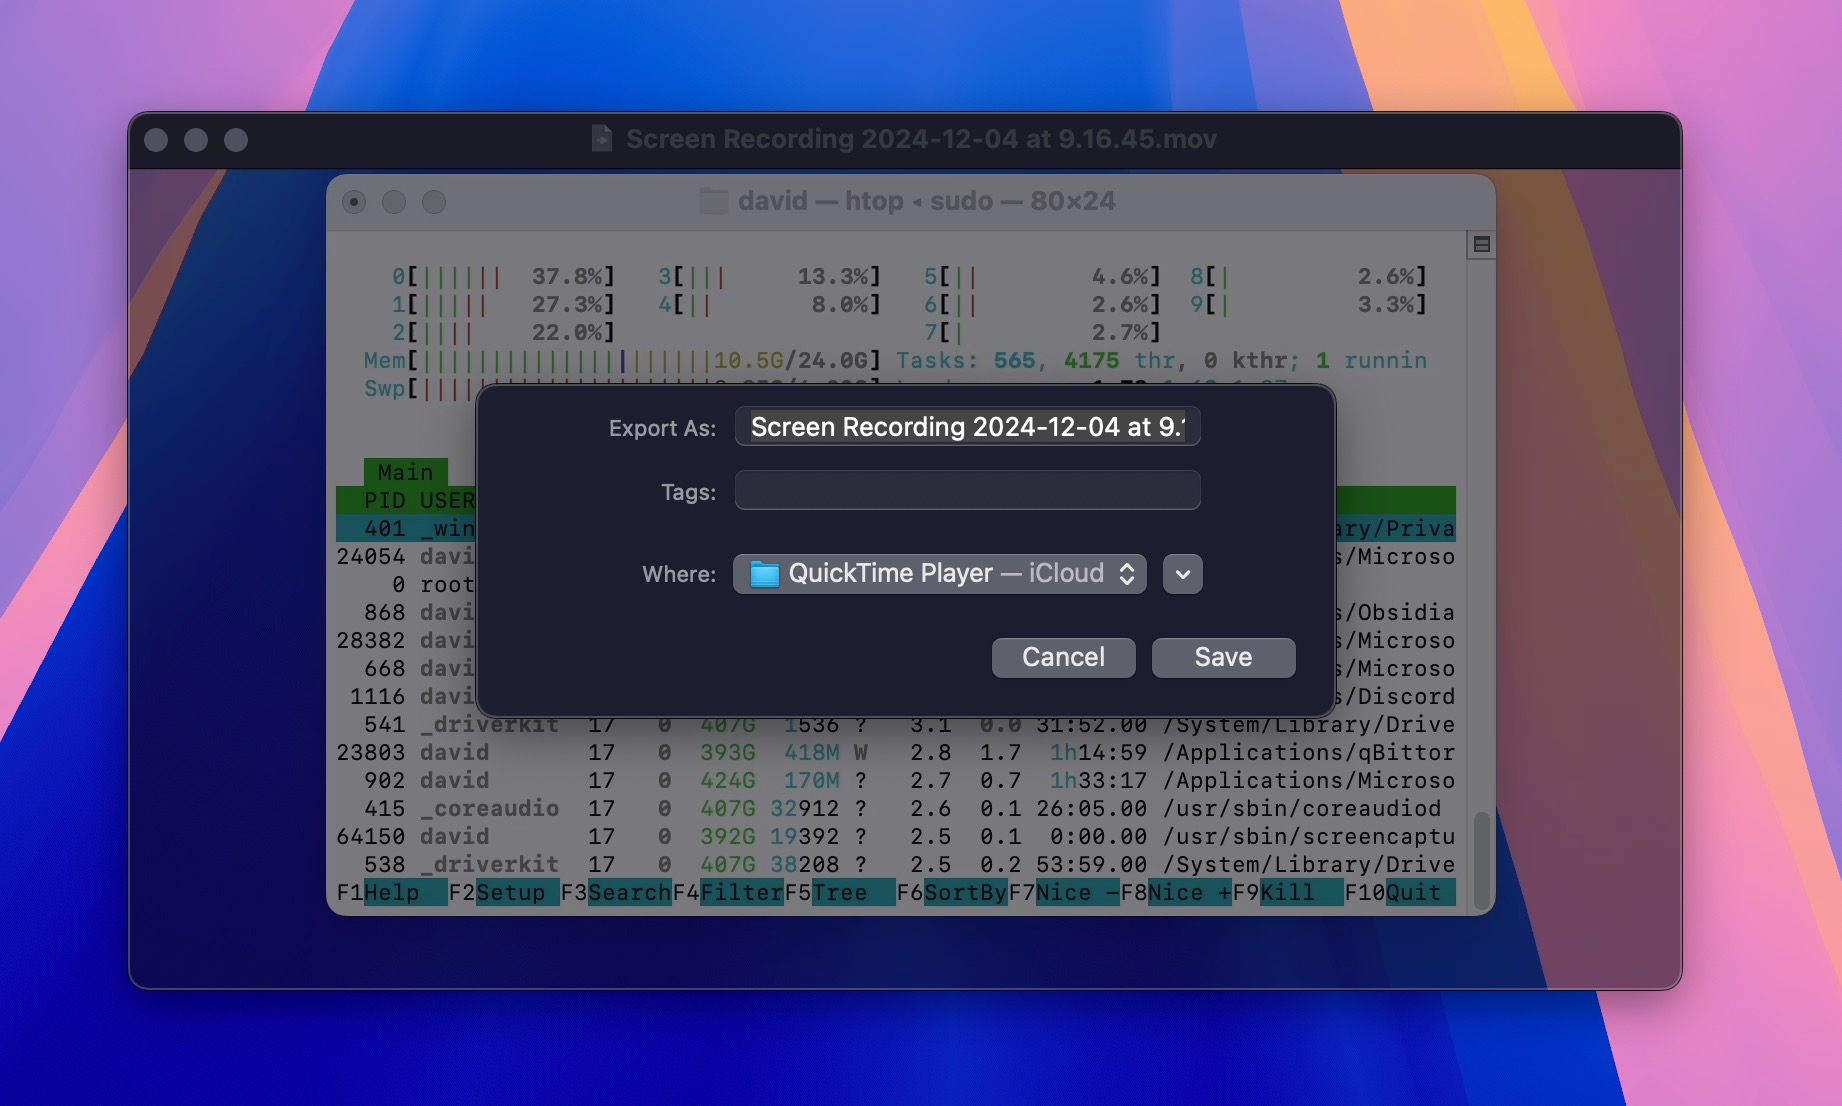
If you use File > Save (or Command-S) after recording, QuickTime will suggest saving to the QuickTime Player folder in iCloud Drive, assuming you have iCloud Drive enabled. If you don’t use iCloud Drive, it will default to your system’s standard save location.
If you can’t find your recordings in any of these locations, then two main things might have happened:
- The files were somehow moved to a different location. QuickTime recordings might have been automatically saved to a different folder if your default save location changed, or they could have been moved during a cleanup or organization session. Try using Spotlight Search (Command-Space) and searching for “.mov” or the recording’s name if you remember it.
- The files were accidentally deleted. If you can’t find your QuickTime recordings anywhere on your computer, then it’s confirmed that they were somehow deleted. Accidental deletions often happen when clearing out space on your Mac or during bulk file deletions.
The good news is that even deleted QuickTime recordings can often be recovered using native macOS tools or third-party software.
Methods to Recover QuickTime Recordings on Mac
Let’s explore several reliable methods for recovering your unsaved or deleted QuickTime recordings, starting with the simplest solutions and progressing to more advanced recovery options. If you’ve already tried some of these methods, such as checking the Trash, feel free to skip ahead to the first method you haven’t attempted yet.
Method 1: Move QuickTime Recordings Back from Trash
The first place I always check for missing QuickTime recordings is the Trash. It’s the quickest and most reliable way to recover recently deleted files, and in my experience, it solves the problem about 80% of the time. Here’s what you need to do:
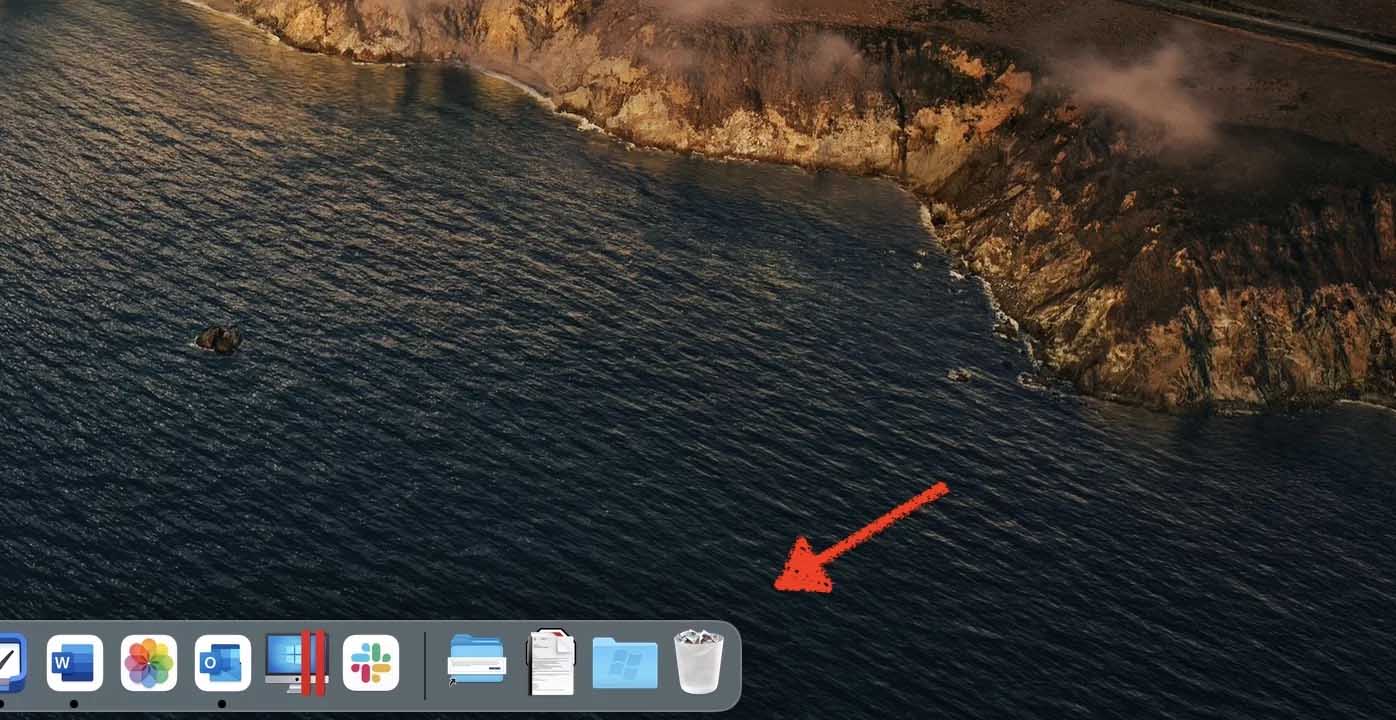
Step 1. Launch the Trash by clicking its icon in the Dock.
Step 2. Once inside the Trash, look for files that end in .mov, as this is the standard formats for QuickTime Player movies and screen recordings. You can use the search function in Finder to filter for these extensions if you have many files in your Trash.
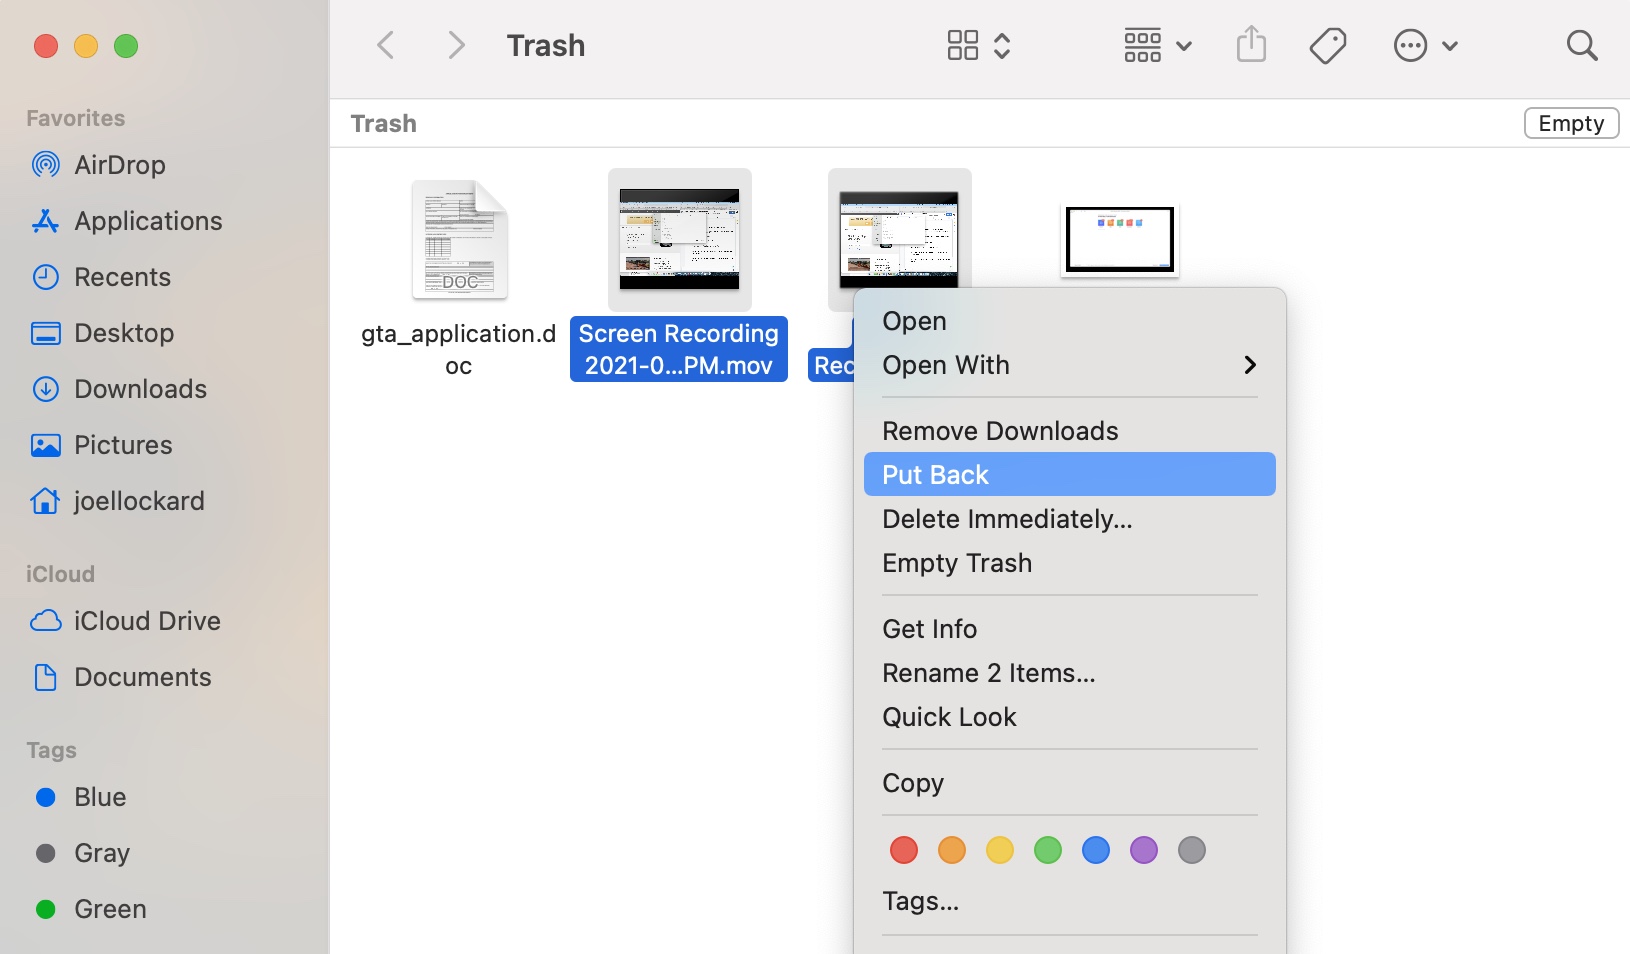
Step 3. After locating your deleted QuickTime videos, highlight the ones you want to recover and choose Put Back from the right-click menu. This will restore the files to their original locations on your Mac. Alternatively, you can drag the selected files to a different location on your Mac, such as your desktop.
If you can’t find your recording in the Trash, don’t worry. We still have more methods to go through.
Method 2: Retrieve QuickTime Recordings from a Time Machine Backup
Time Machine is one of macOS’s most powerful built-in data recovery features, and I’ve learned its value the hard way, which is why I always enable it on every Mac I use so that it automatically backs up my data in an incremental fashion.
If you have Time Machine already set up on your Mac, you can easily recover your lost QuickTime recordings from your backup drive:
Step 1. Connect your Time Machine backup drive to your Mac.
Step 2. Launch Time Machine. You can find it in your Applications folder or use Spotlight (Command-Space) to search for it.
![]()
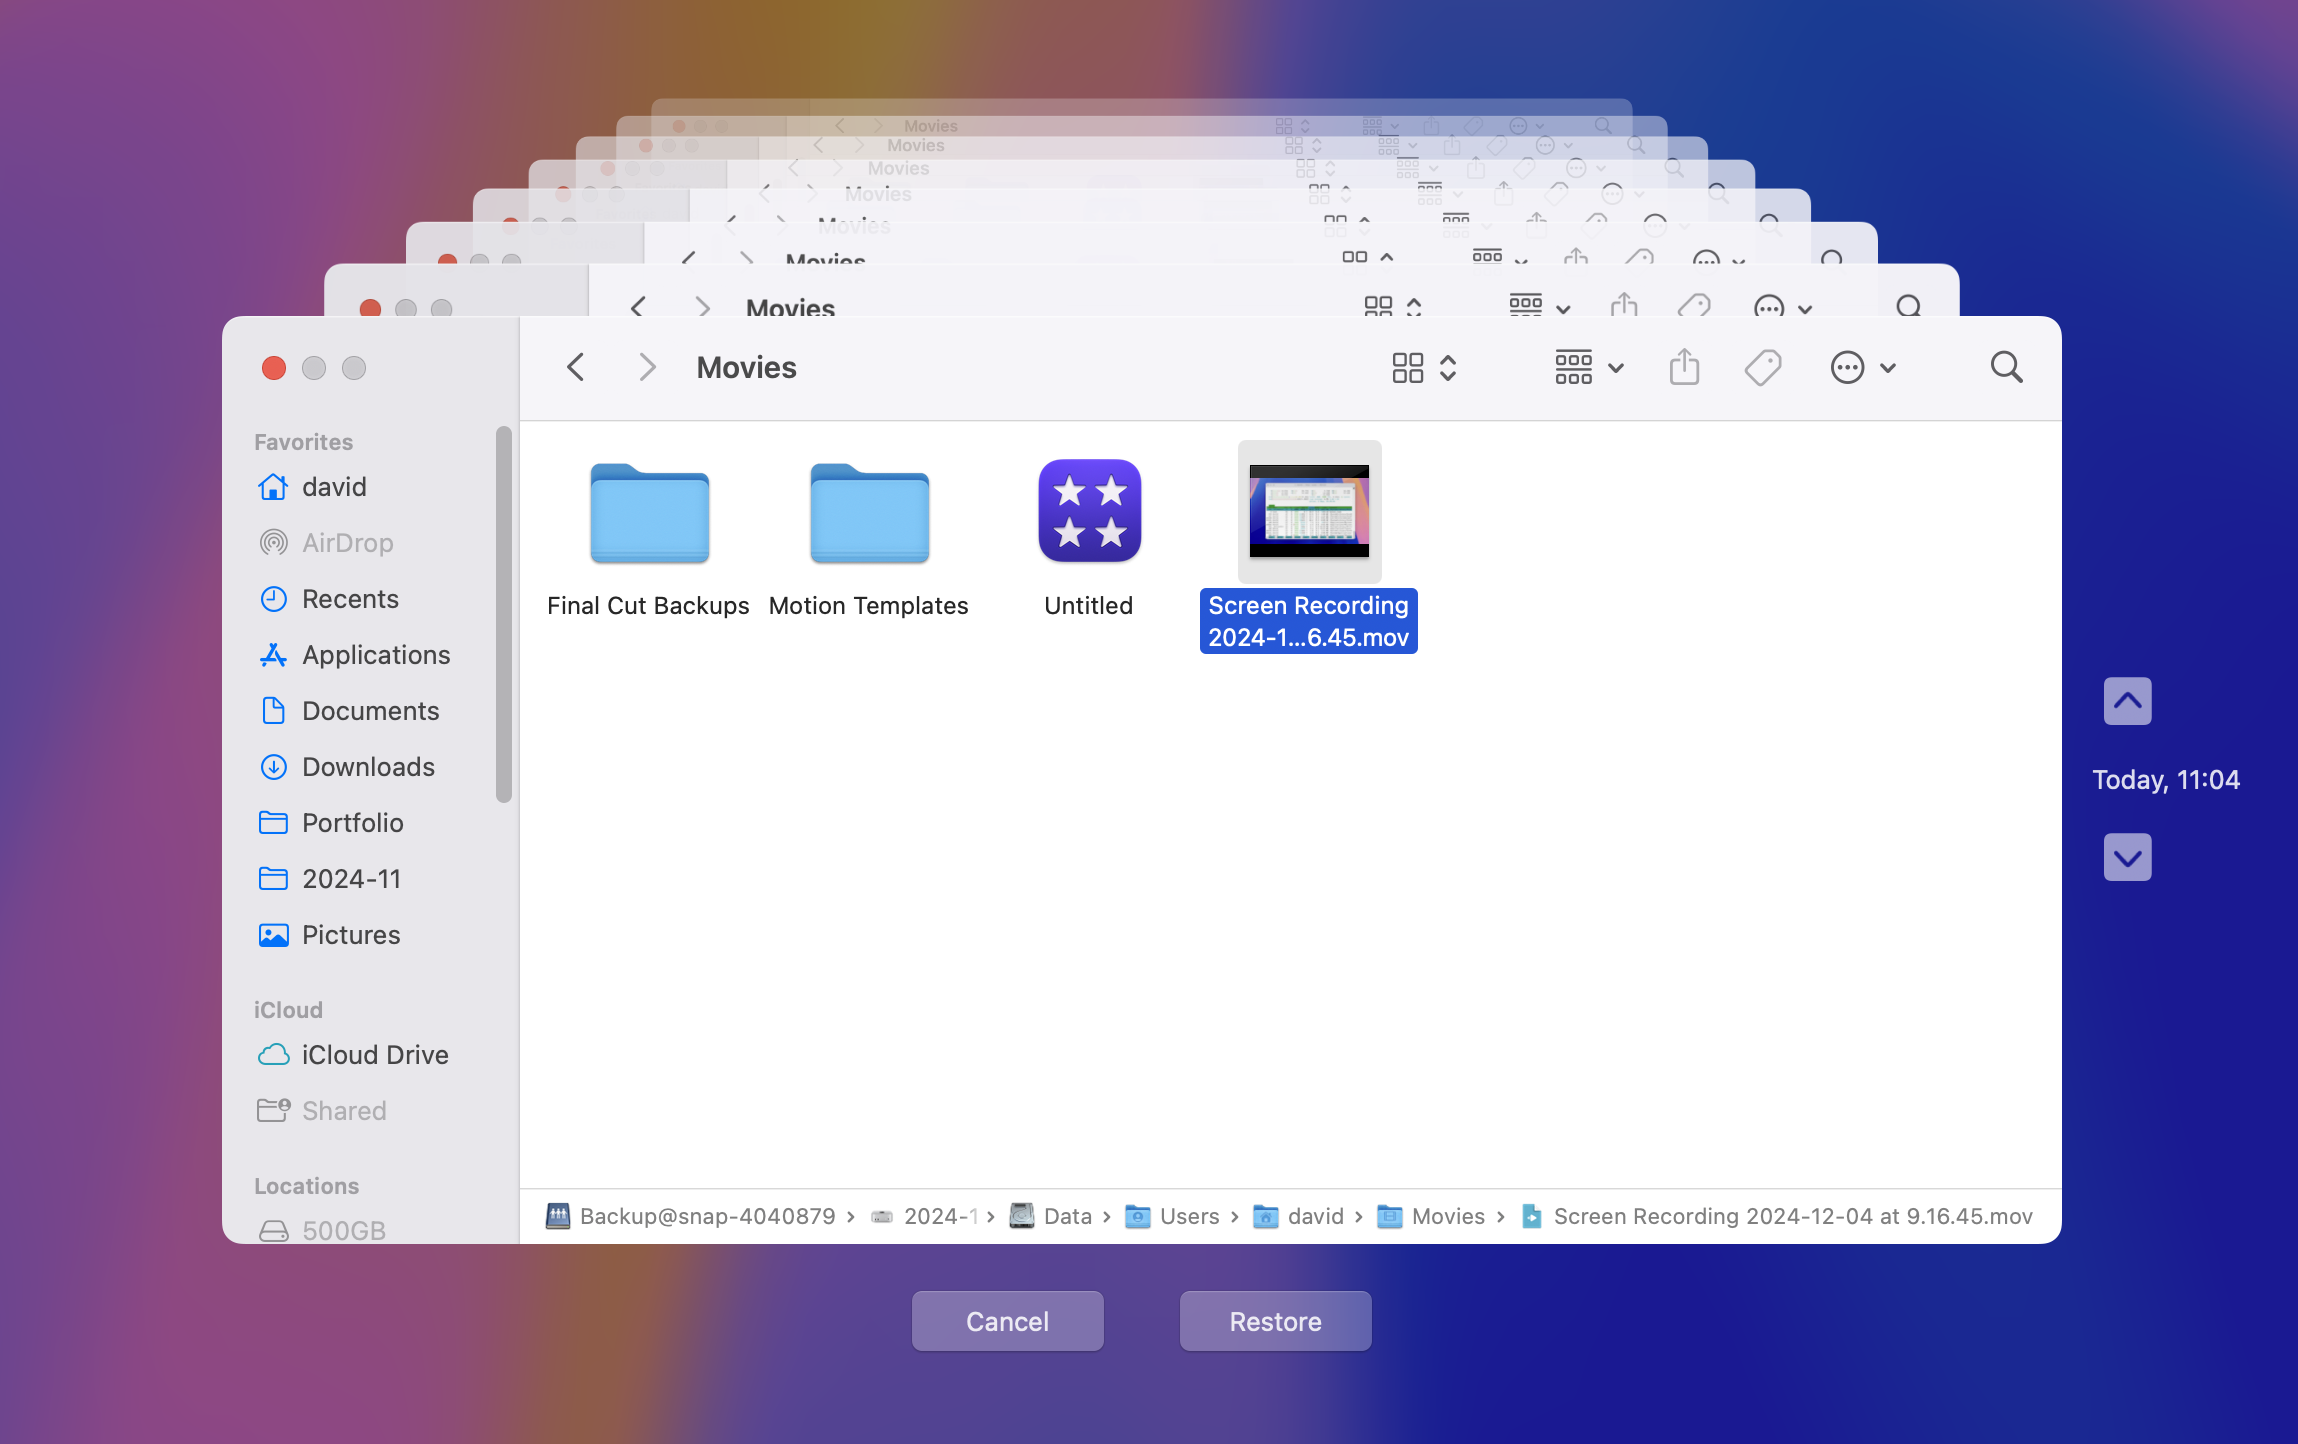
Step 3. Use the timeline on the right edge of your screen to navigate to when your QuickTime recording still existed. Browse to the file’s location, select it, and click Restore. Time Machine will copy the file back to its original location on your Mac.
Method 3: Recover QuickTime Recordings Using Data Recovery Software
Even if your QuickTime recording has been permanently deleted from the Trash and isn’t included in any backup, recovery is often still possible using specialized data recovery software.
Disk Drill is my go-to choice because it excels at recognizing QuickTime recordings based on their file signatures and file system information. What’s more, its intuitive interface and powerful preview capability let you verify file recoverability before proceeding with recovery.
What’s more, Disk Drill can also locate recordings that aren’t actually deleted but have merely become inaccessible—whether they’re lost somewhere deep in your drive’s directory structure or hidden due to file attribute changes.
Follow these steps to recover your lost QuickTime recording using Disk Drill:
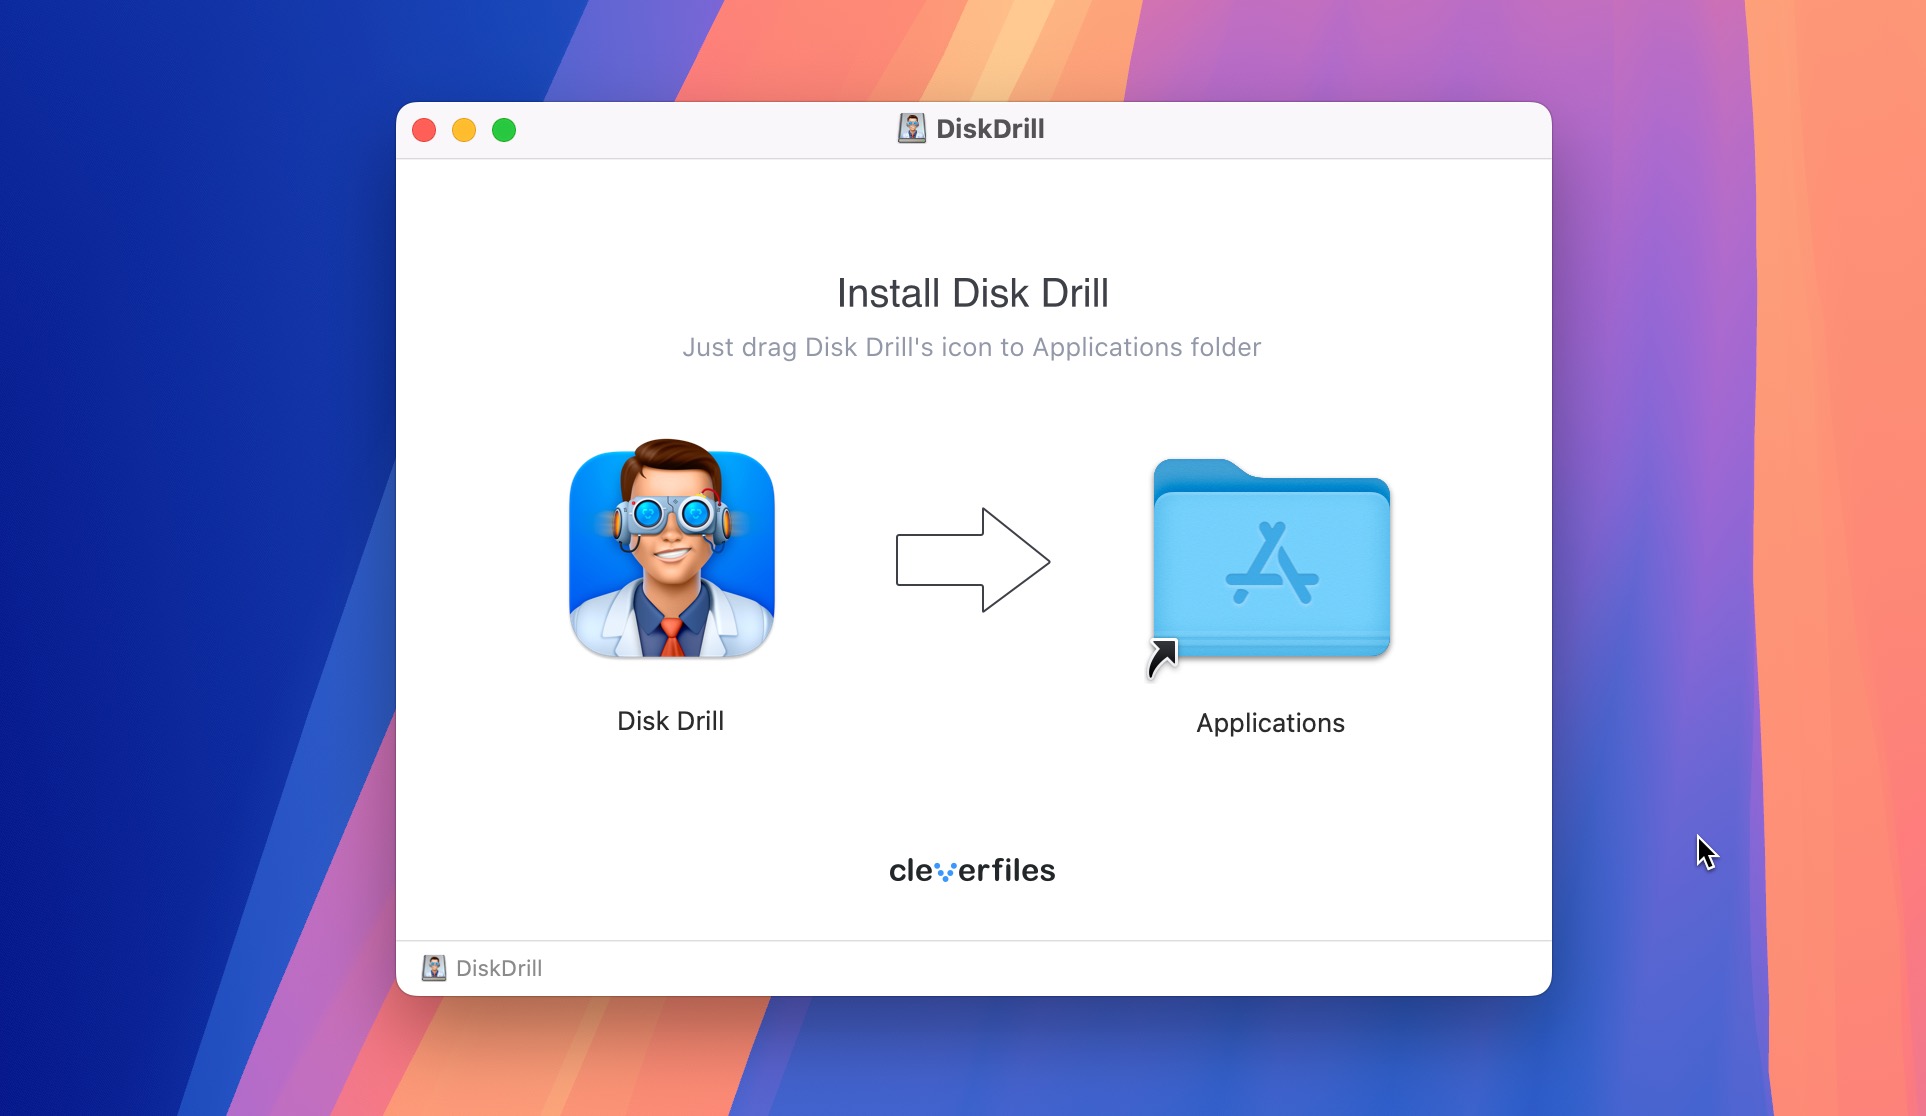
Step 1. Download Disk Drill from its official website and launch the downloaded installer file.
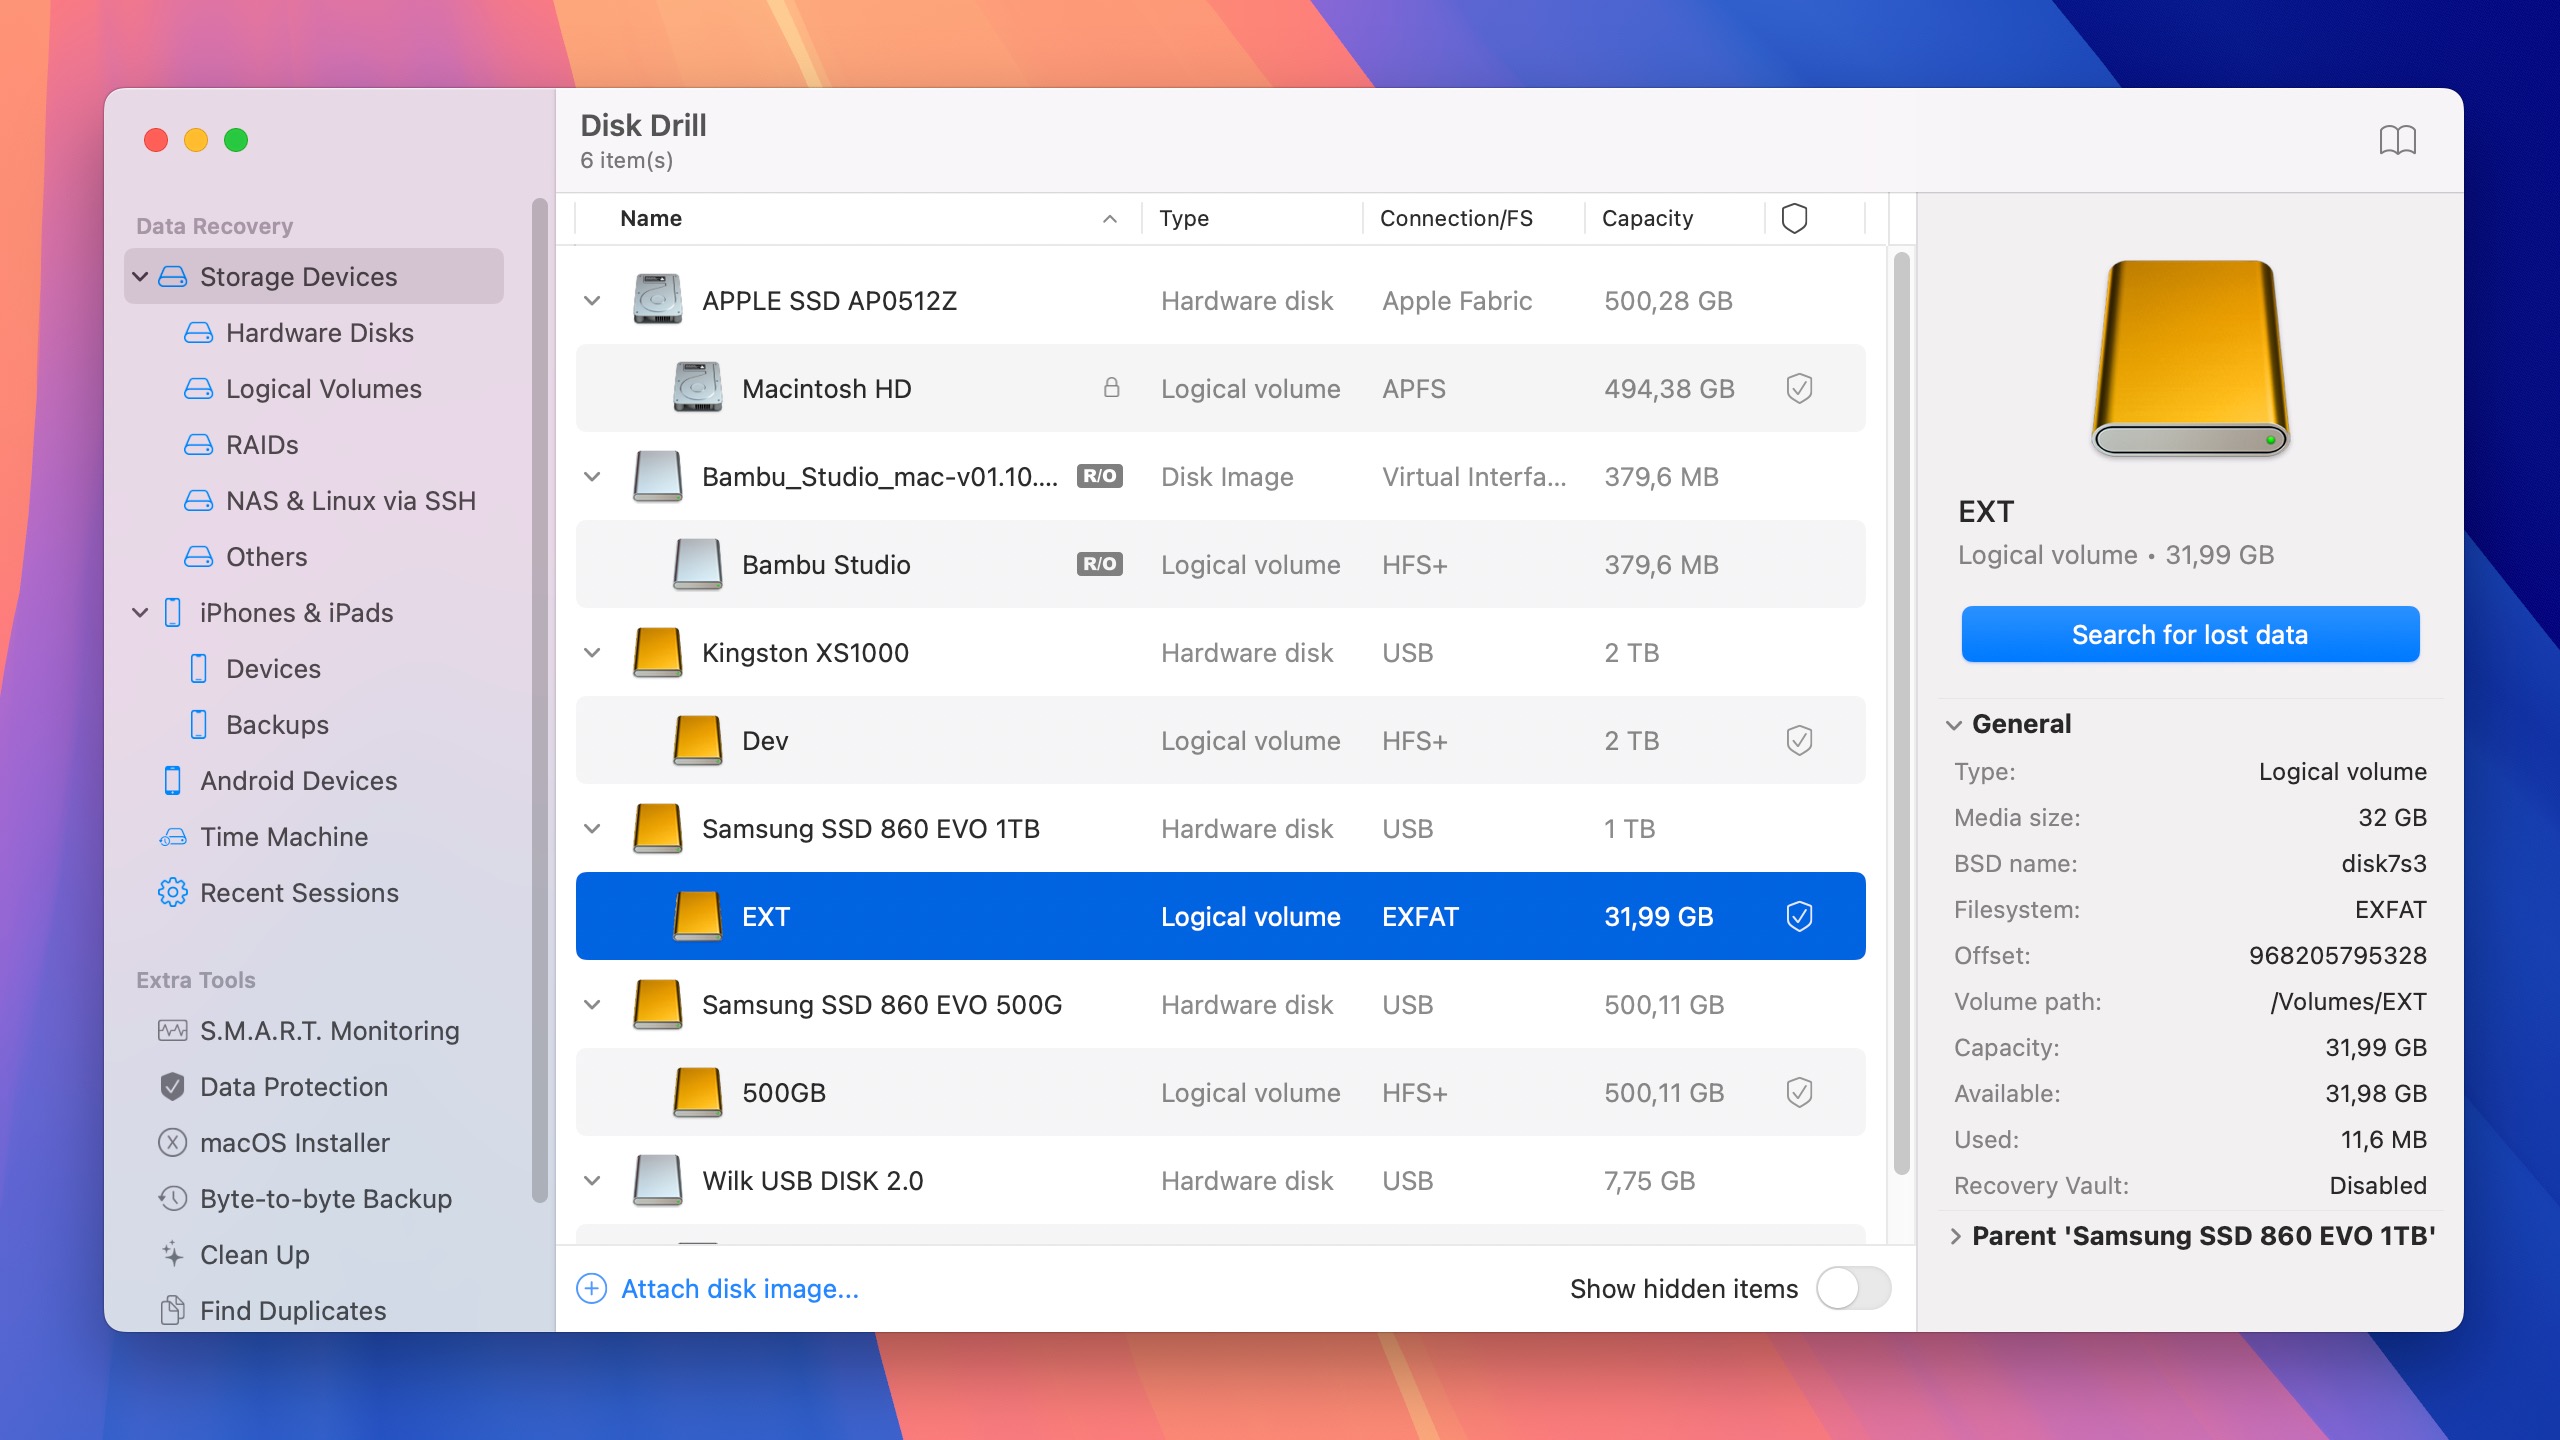
Step 2. Launch Disk Drill and select the storage device where your QuickTime recording was stored. Then, click Search for lost data to begin scanning.
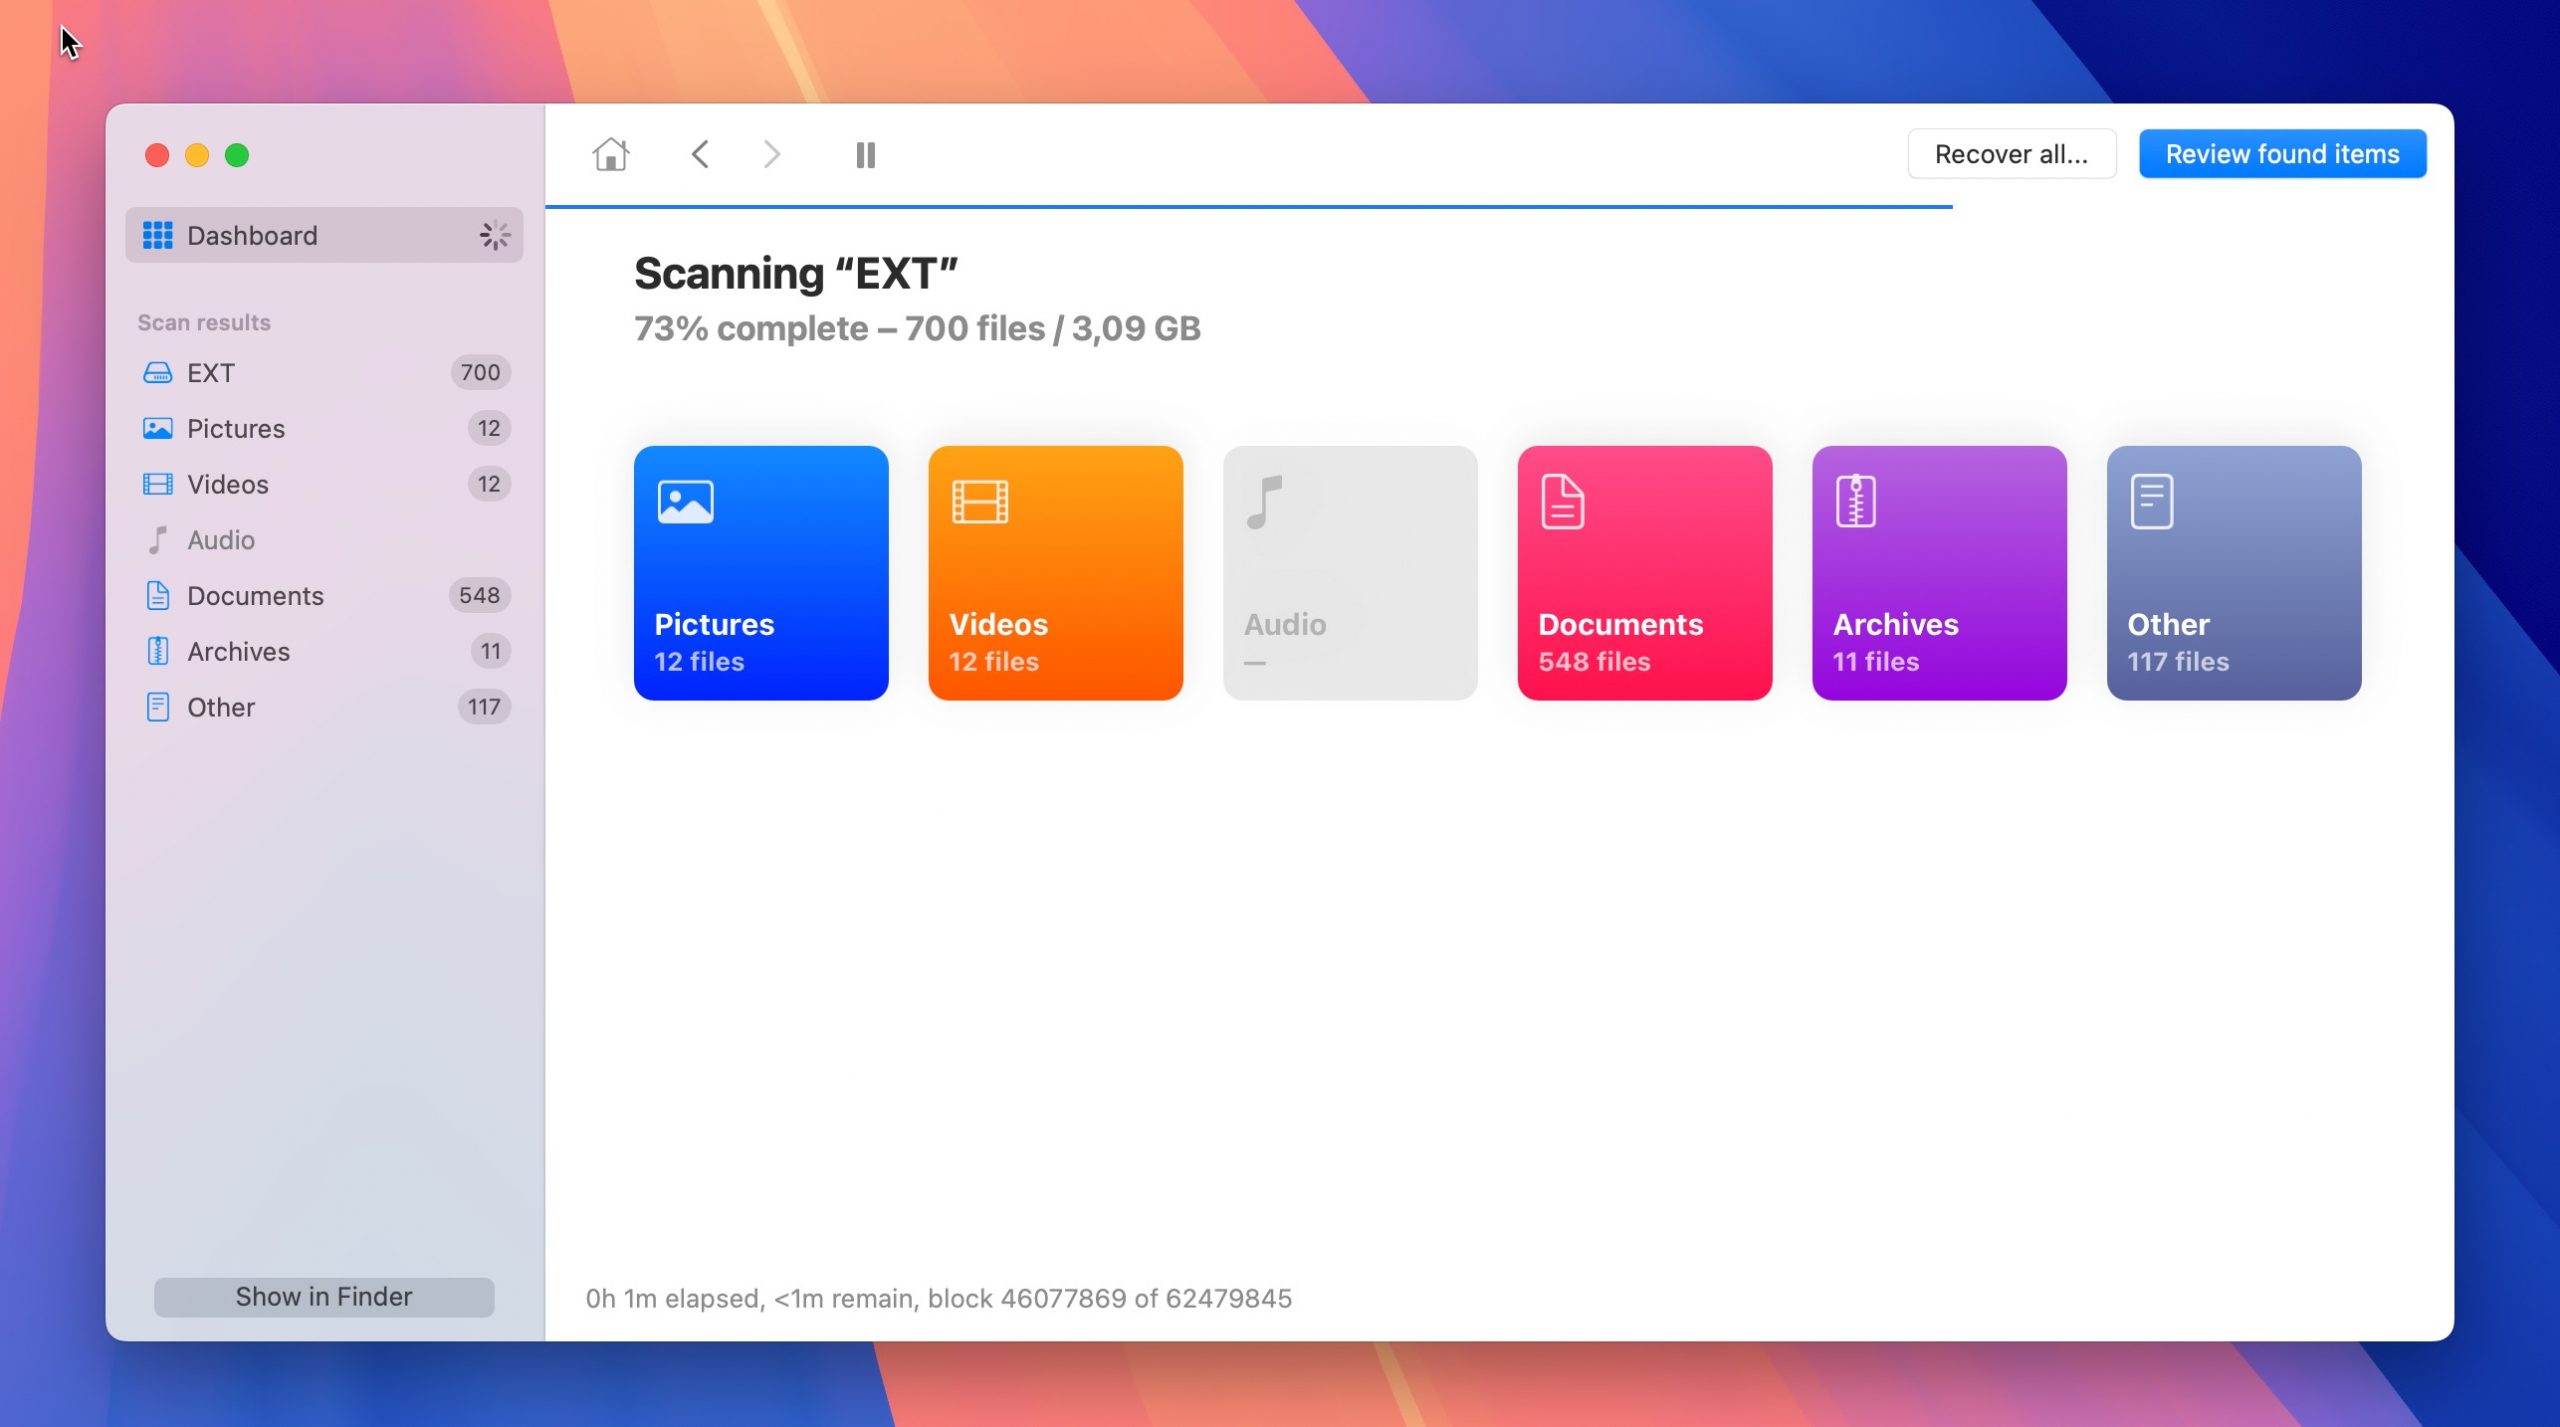
Step 3. Wait for scanning to finish. The scan duration depends on your storage device’s size and speed. If you don’t want to wait, you can choose to display found files immediately, with scanning continuing in the background.
Step 4. Go through the found files and look for your missing QuickTime recording. You can filter the results to show only video files or use the search box in the top-right corner to look for specific filenames. Once you have found your recording, click the checkbox next to it to add it to your recovery queue. You can preview it in Disk Drill to verify that it’s the right recording and that it’s playable.
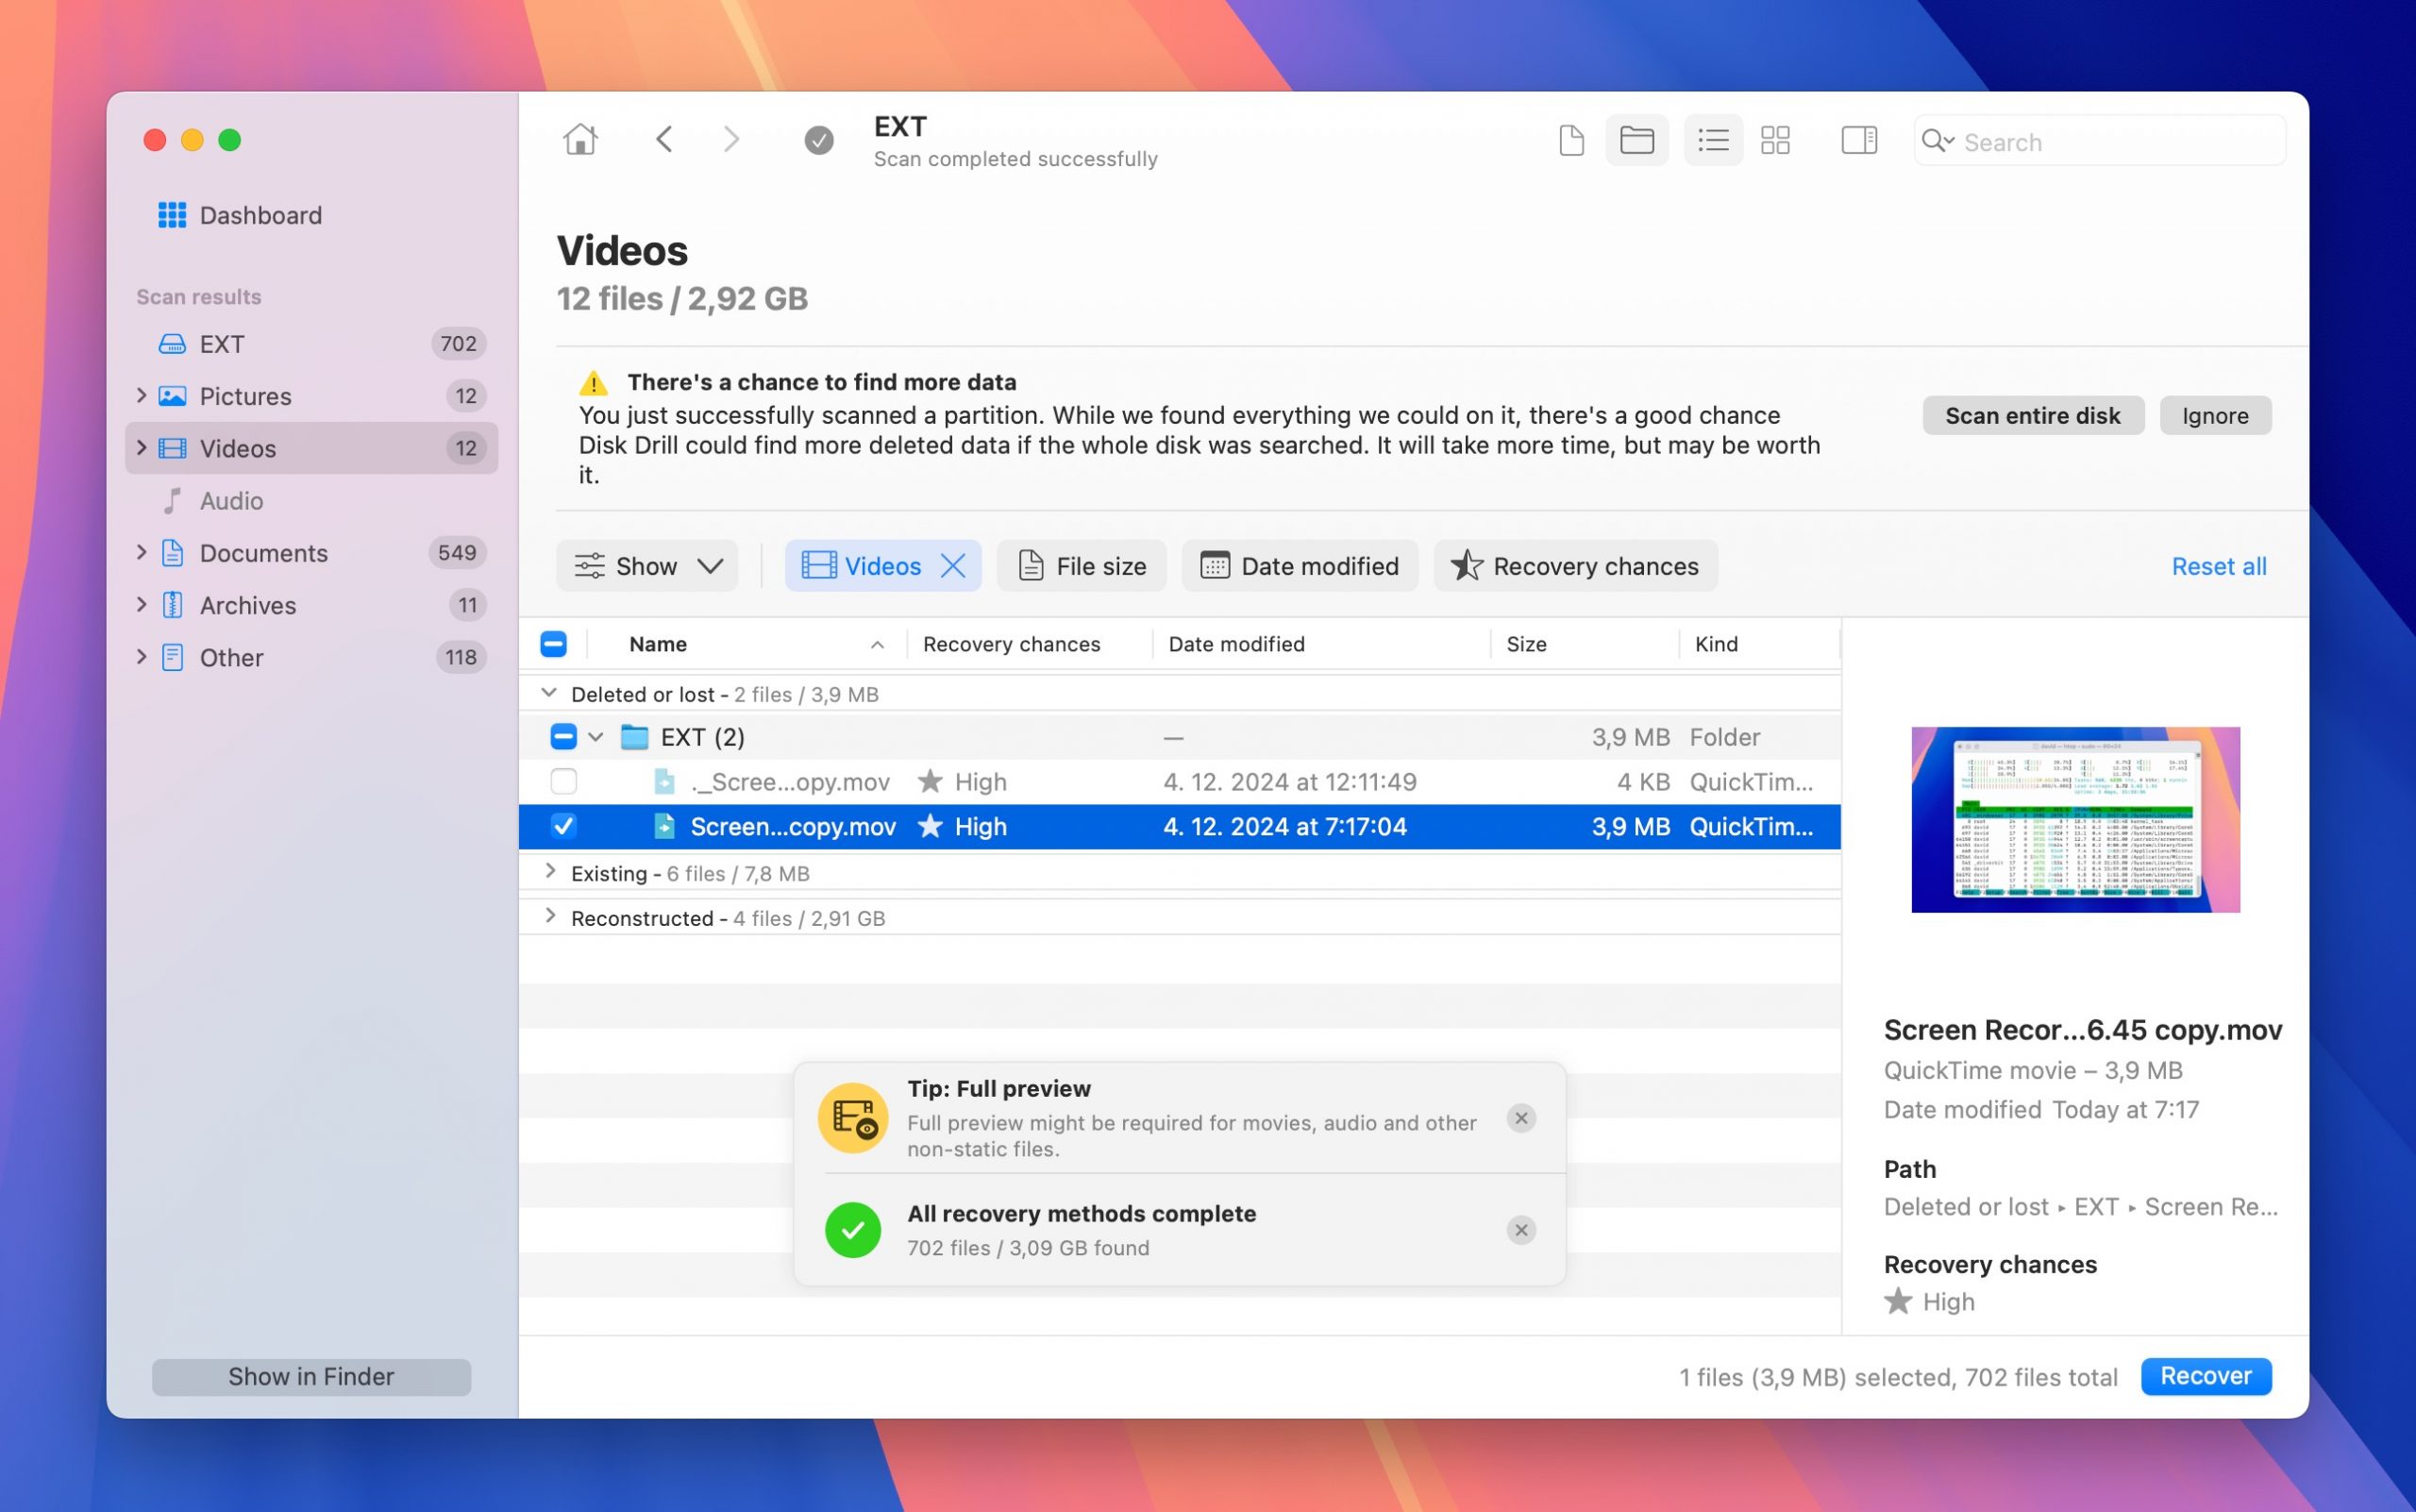
Step 5. Finally, click on the blue Recover button and choose a suitable recovery location (never recover to the same drive where the lost files were originally stored, as this could overwrite the very data you’re trying to recover).
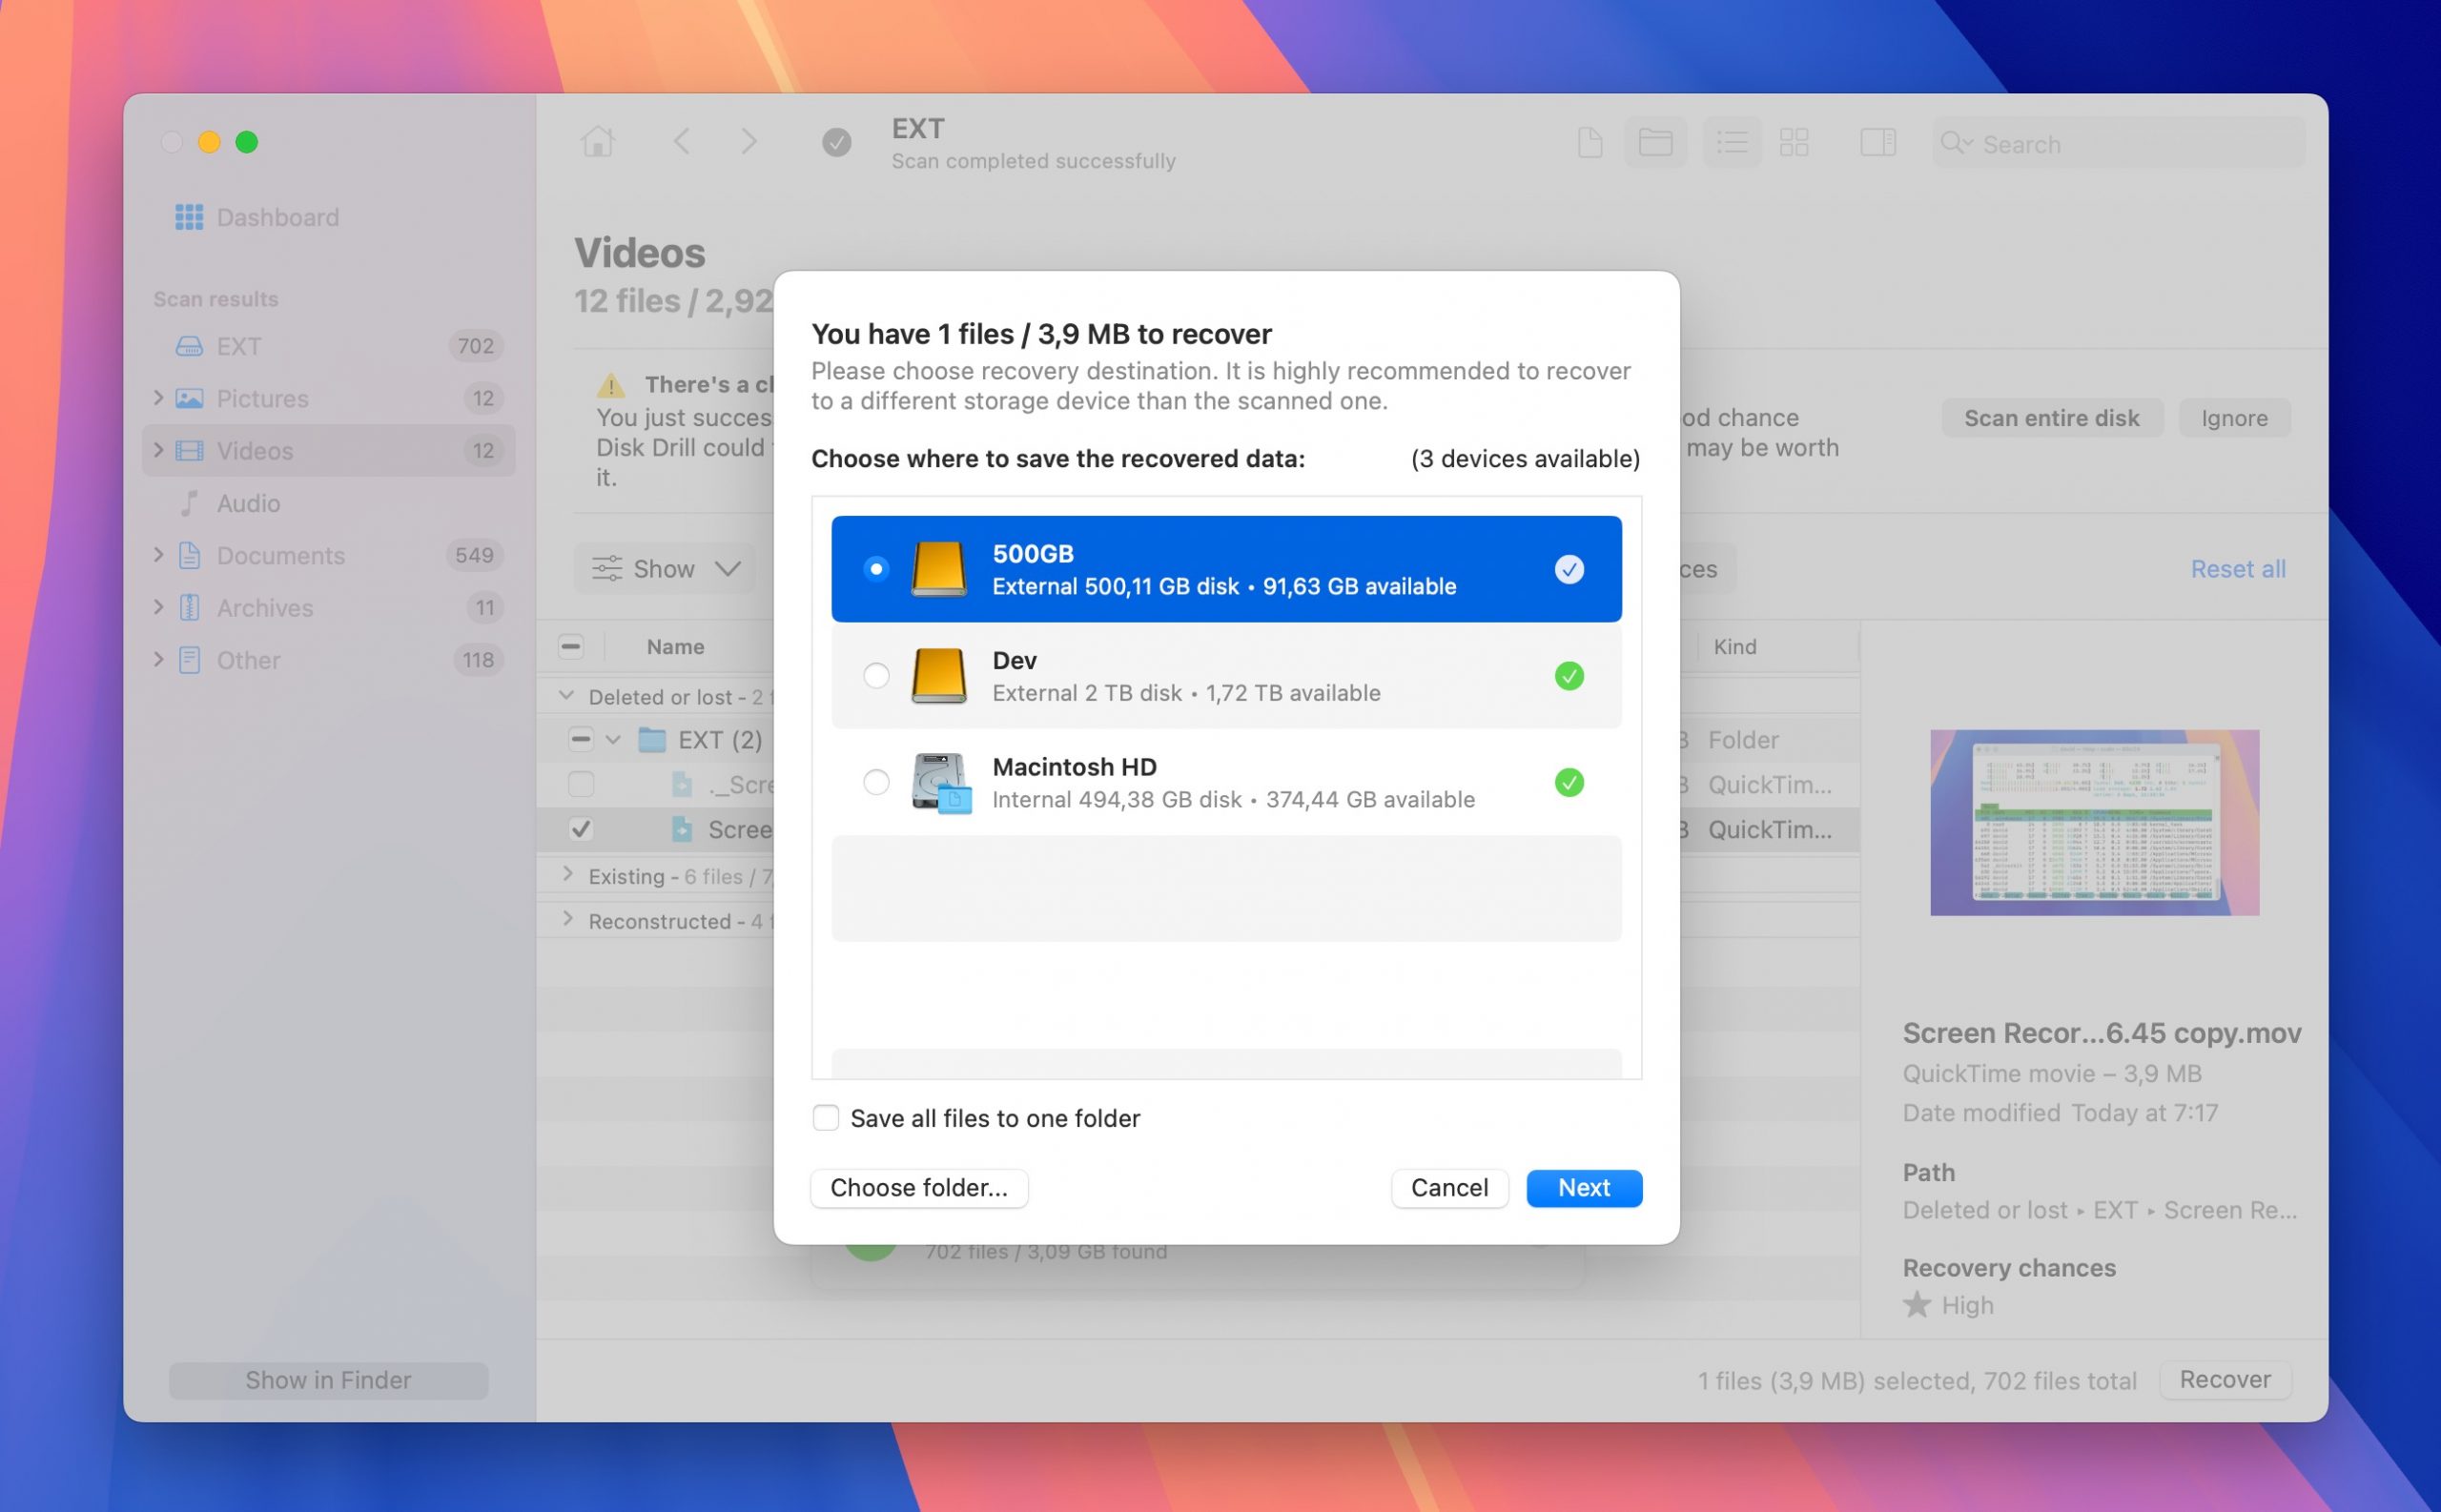
You’re done! Keep in mind that the free version of Disk Drill lets you preview unlimited QuickTime recordings, so you can verify that your files are recoverable before making a one-time purchase to obtain a Pro license. The software can also recover other types of files from your Mac, iPhone, or external drives, making it a valuable tool for any data loss situation.
How to Repair a Corrupted QuickTime Recording
Even if you manage to locate or recover your QuickTime recording, it might still be unplayable due to corruption (Disk Drill makes it easy to determine if the file is corrupted before recovery thanks to its preview feature).
QuickTime recording corruption can happen for many different reasons, including unexpected system crashes during recording, file system damage, malware interference, and incomplete file transfers. Fortunately, you can often repair corrupted QuickTime recordings using a tool like Clever Online Video Repair, which is:
- Completely free
- Cloud-based and thus compatible with all major platforms
- Capable of repairing up to 5 GB large QuickTime recordings
- Fully compatible with Apple’s video formats
- Straightforward to use
Here’s how to repair your corrupted QuickTime recording with it:
Step 1. Visit repair.cleverfiles.com and click Choose file to upload your corrupted QuickTime recording, or simply drag and drop it onto the designated area.

Step 2. When prompted, upload a “healthy” video recorded with the same settings. This sample helps the tool understand how your corrupted video should be structured.
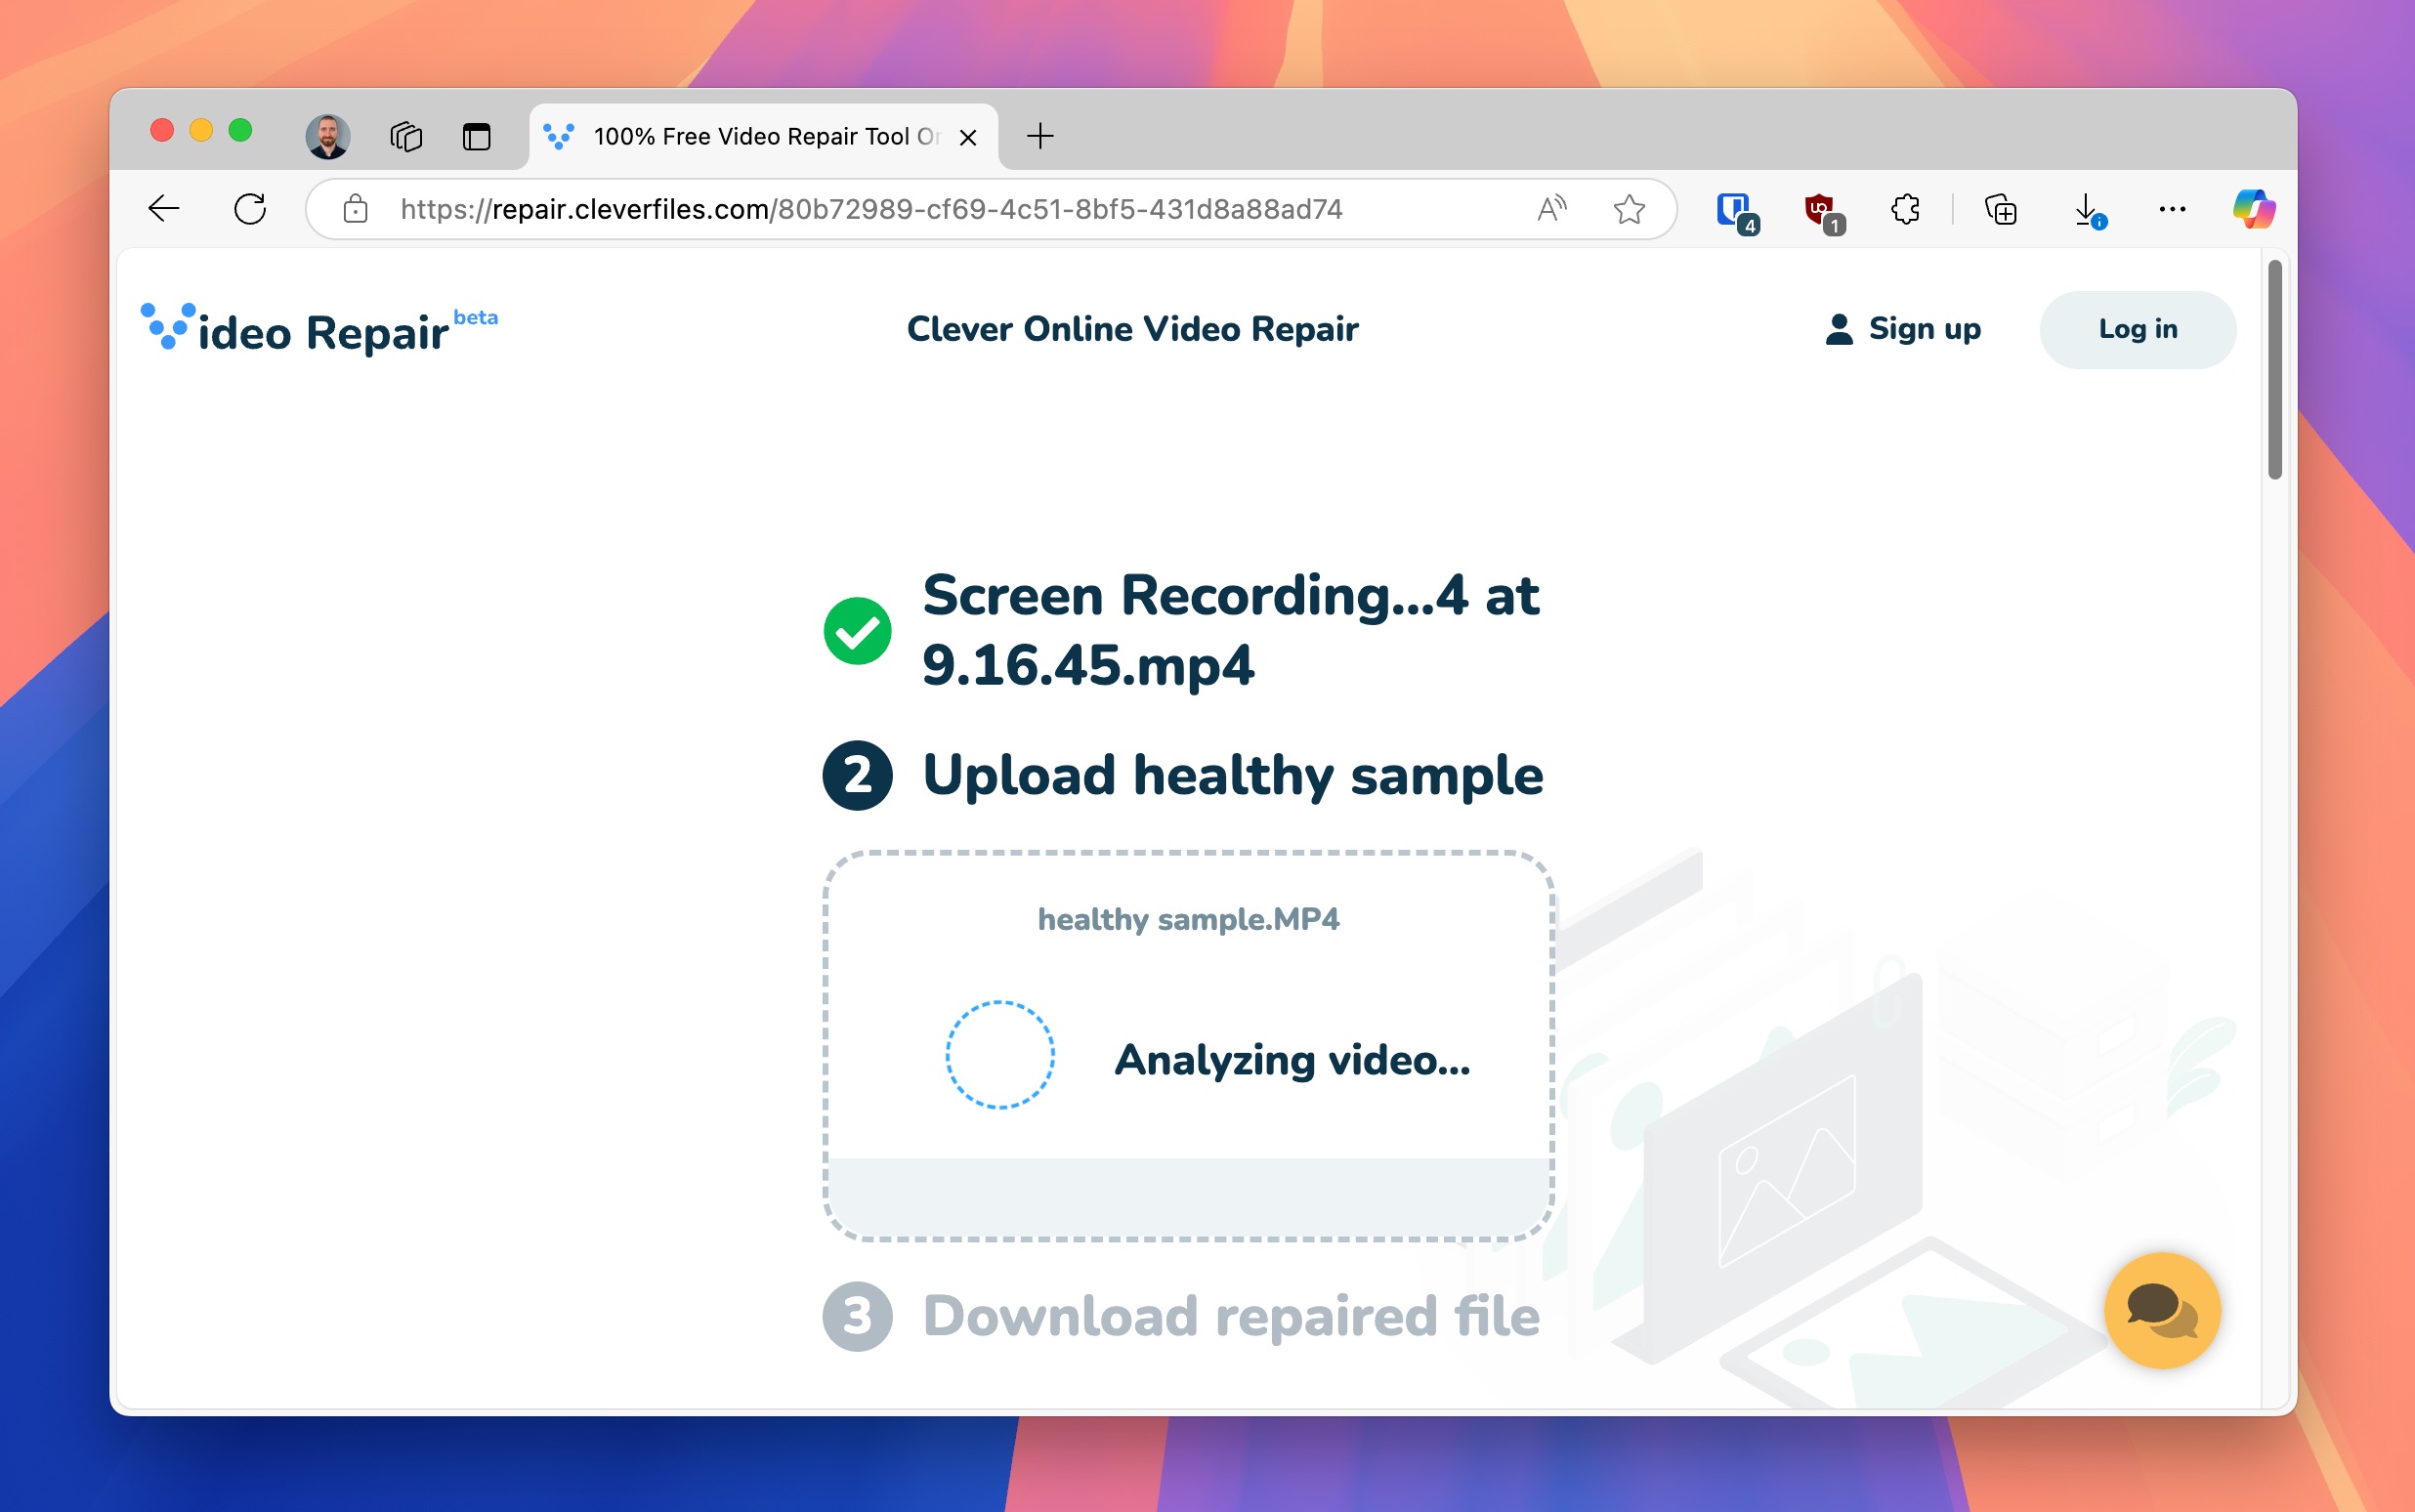
Step 3. Wait while the tool analyzes and repairs your video. The process is usually quick, with the upload time typically taking longer than the actual repair (depending on your internet connection, of course).
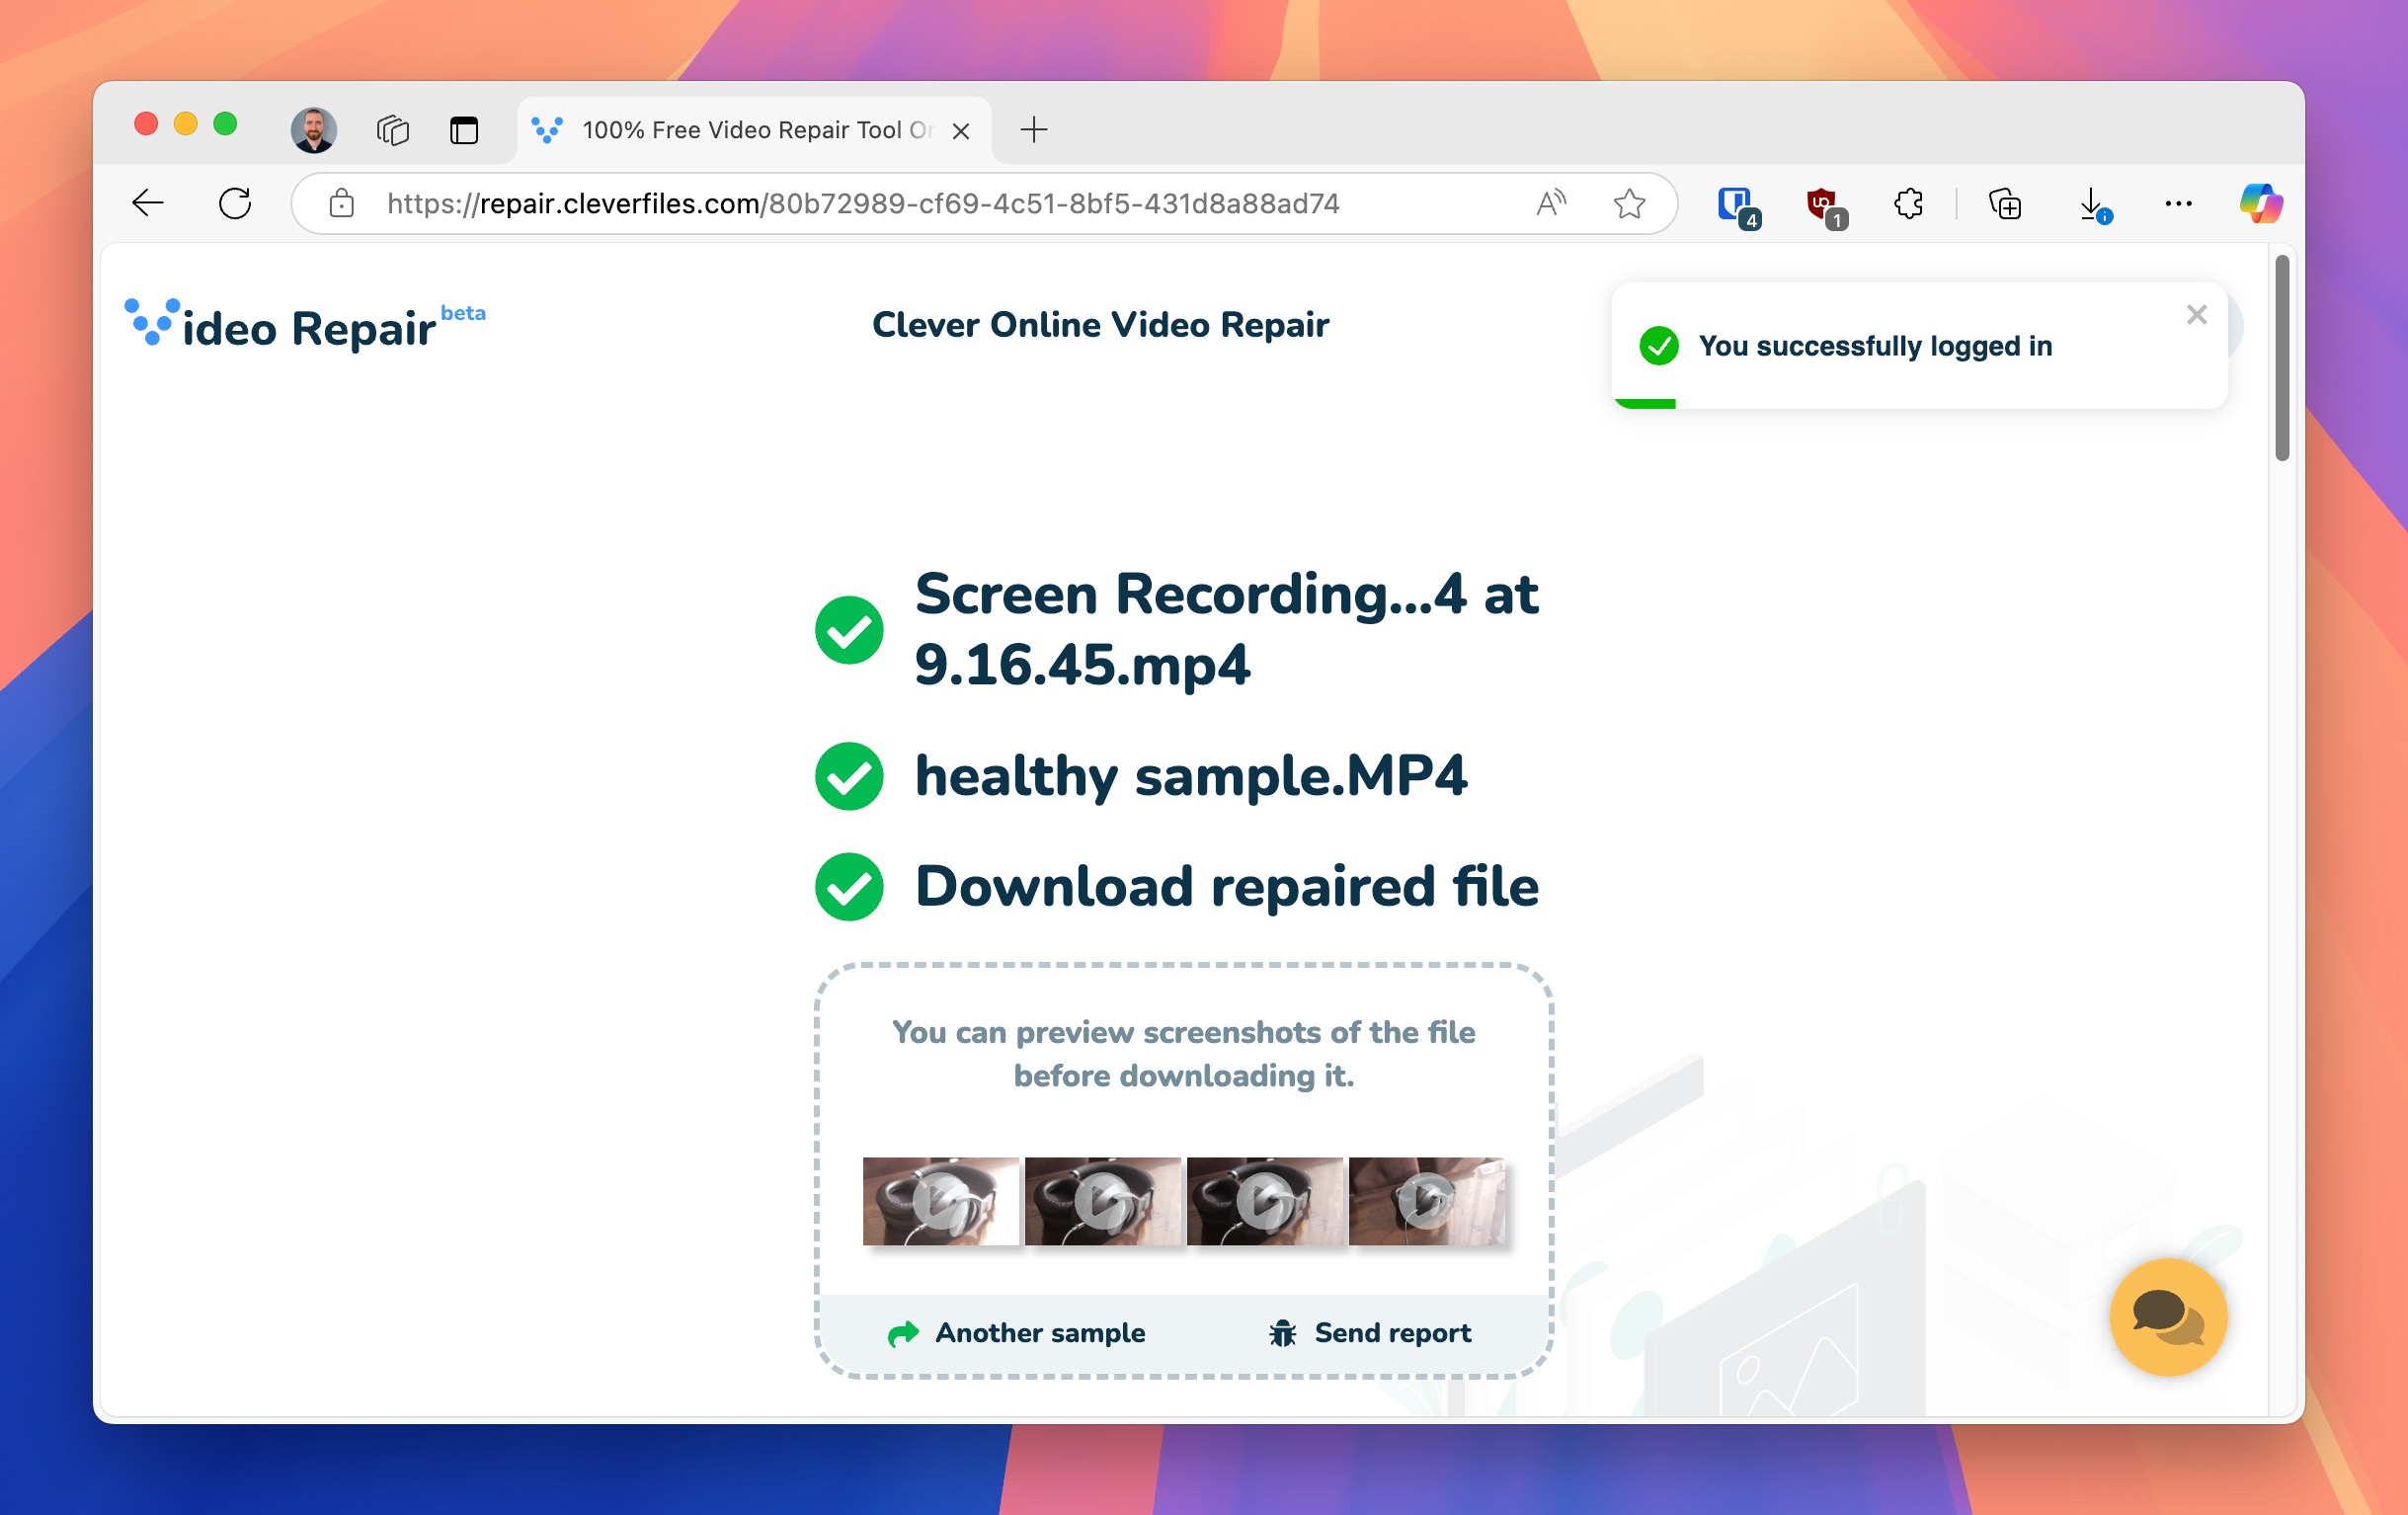
Once the repair is complete, create a free account to download your repaired video.
Conclusion
As I’ve demonstrated in this guide, unsaved or deleted QuickTime recordings can be recovered using several different methods. They can also be repaired using free online tools, so there’s no reason to lose hope even if your important recordings seem to be lost or corrupted. Just remember to act quickly when you notice missing files and always make backups of your most important recordings to prevent future data loss.


