
Does Disk Utility show an unintialized disk on your Mac? A brand-new drive might appear this way the first time you plug it into your Mac, but if this is happening to a drive that was previously in use – it’s a sign of malfunction.
And when your drive malfunctions, any data saved on it is in the danger zone. So make sure that you follow our guide closely to prevent the potential annihilation of your files. We’ll show you, step by step, how to fix and secure your data from an uninitalized disk on your Mac.
Table of Contents
What Does Initialize Disk Mean?
“Initializing” a disk means preparing a completely blank drive to be used as a system drive or storage device by setting the partition style and identifying boot partitions. Once a disk is initialized, only then can you format it with a file system (like APFS or HFS+) and use it to boot your Mac or store your data. Most drives are already initialized before you buy them.
What Causes Disks to Go Uninitialized on Mac?
If your drive was previously working and only recently showed up as initialized, your drive is likely malfunctioning in some way. Here are the most common issues that lead to an uninitialized drive:
- Malware: Malware can corrupt your drive’s file system or partition table, making it unrecognizable to your Mac. In this case, your drive appears uninitialized because your Mac cannot interpret the corrupted data.
- Bad sectors: Like malware, bad sectors can result in the corruption of your drive’s file system or partition information. Your Mac needs to interpret this data to properly communicate with your drive – otherwise, your drive will not show up and work as expected.
- Corrupted partition: Your Mac needs to recognize your drive’s partition information to properly identify and access the partition in the first place. If that data gets corrupted, your drive may show up as uninitialized, not display its partitions properly, etc.
- Unsupported file systems: macOS also needs to recognize the file system itself. If you plug in a drive using an unsupported file system like ext2/3/4 (Linux) or NTFS (Windows), you’ll likely face the error described in the last section.
How to Recover Data from Uninitialized Disk
Before attempting to repair your drive, we highly encourage you to secure your data first. This is because the methods used to fix an uninitialized drive may lead to permanent data loss. You can recover an uninitialized hard drive or even an uninitialized internal disk on Mac by retrieving your data directly from its file system using data recovery software. To demonstrate this process, we’ll be using a tool called Disk Drill.
You can technically use any data recovery software you want, but Disk Drill will also allow us to create an image backup of the drive in the same app. We can then use Disk Drill’s data recovery tool to extract data from the backup file instead of from the drive itself – which greatly increases our chances of recovering 100% of the lost data.
Disk Drill Basic for Mac does not offer free data recovery. However, its Byte-to-byte backup tool is 100% free. So we recommend making a backup, whether or not you end up using it. In case any of your repair attempts result in data loss due to any number of possible reasons, you’ll be able to recover your files.
Step 1. Download and install Disk Drill by double-clicking the installer file and moving Disk Drill to the Applications folder.
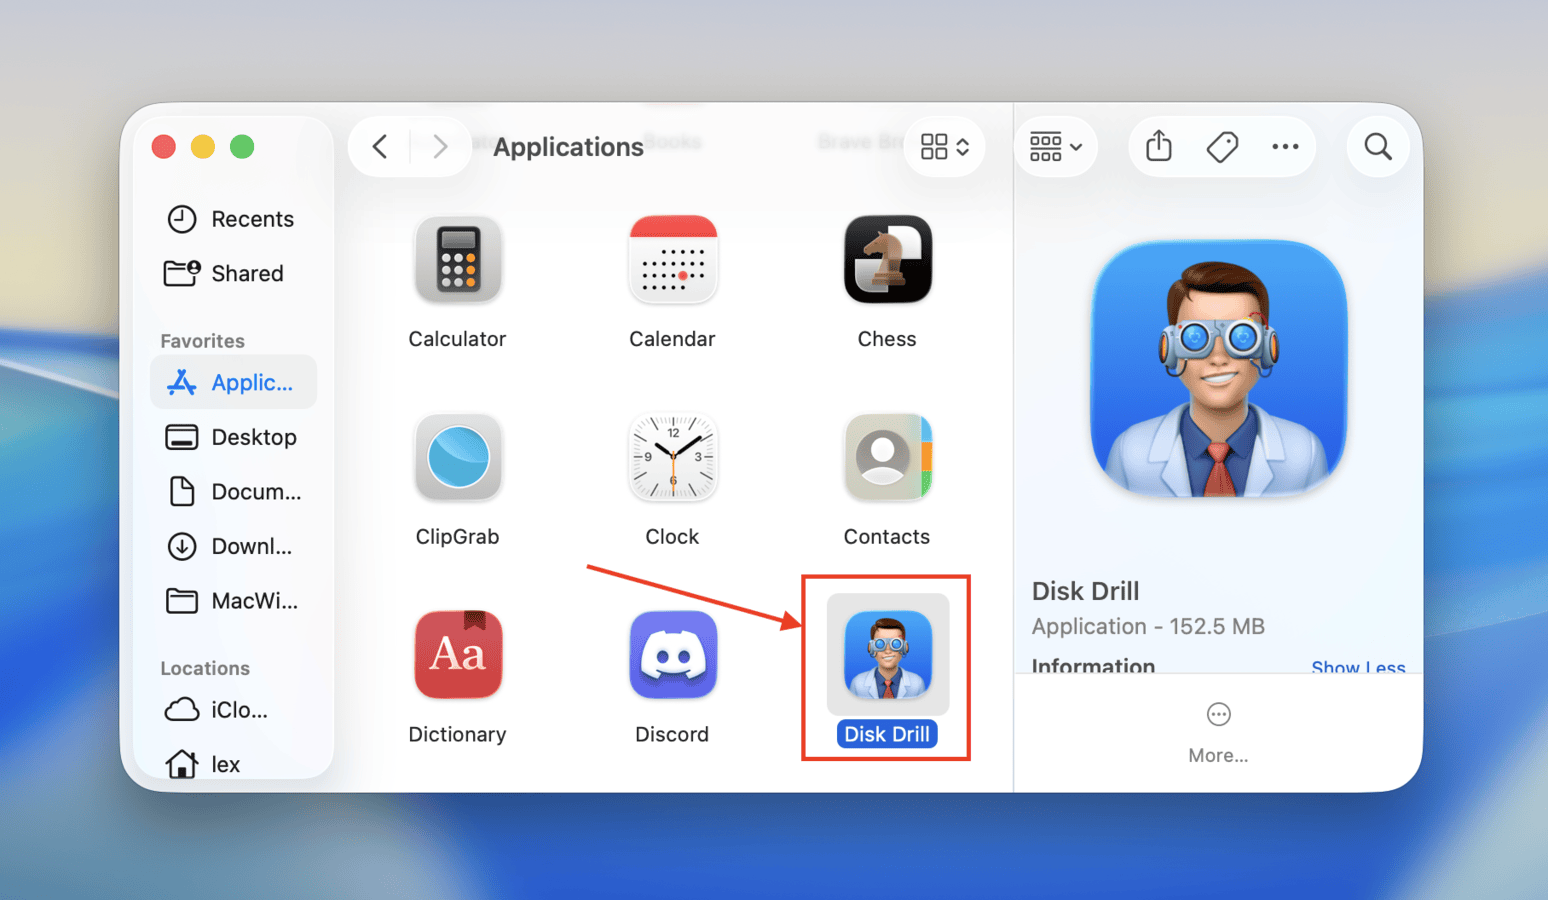
Step 2. Connect your drive to your Mac and launch Disk Drill (Finder > Applications).
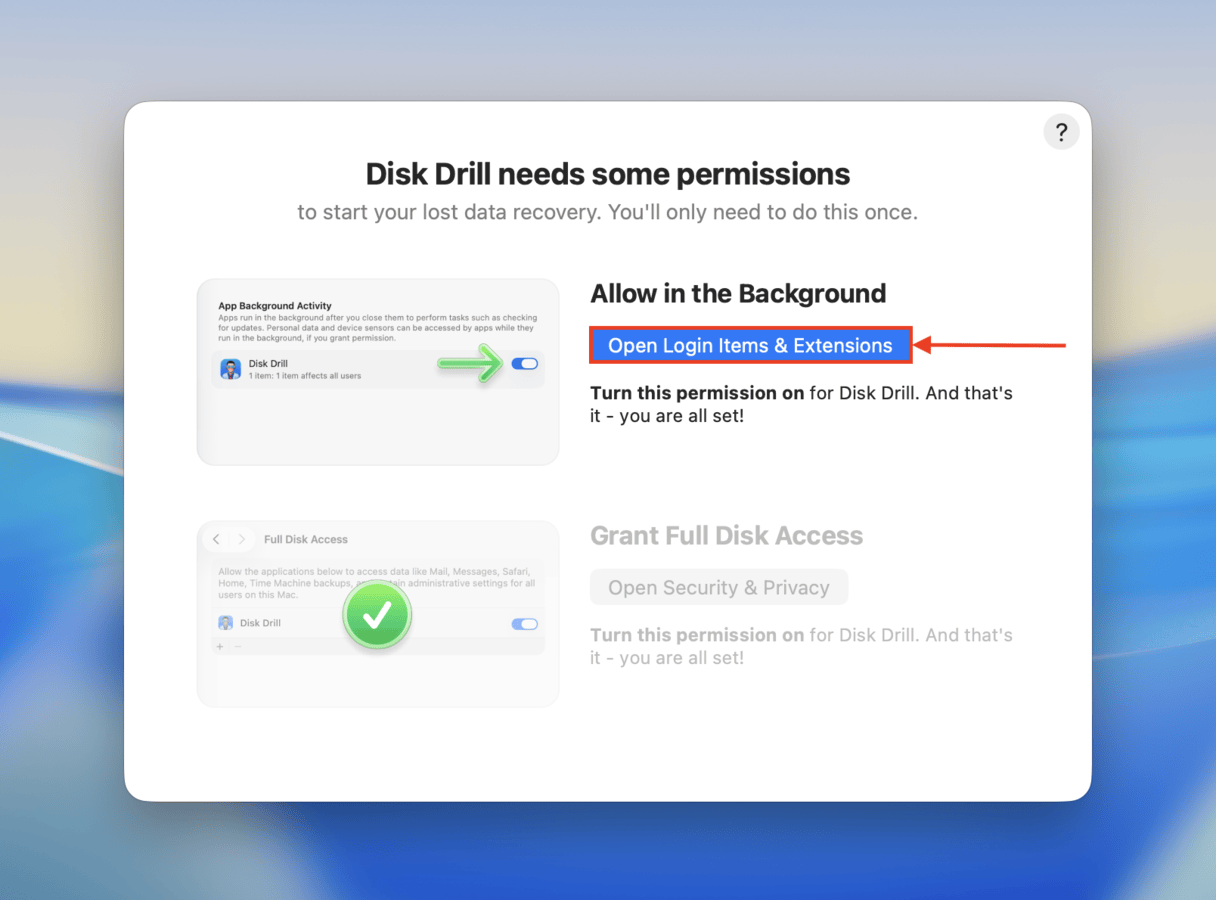
Step 3. In the window that appears, click Install now. Disk Drill will then instruct you on how to grant it Full Disk Access. This step is required for accessing your drive disk–don’t worry, it’s safe!
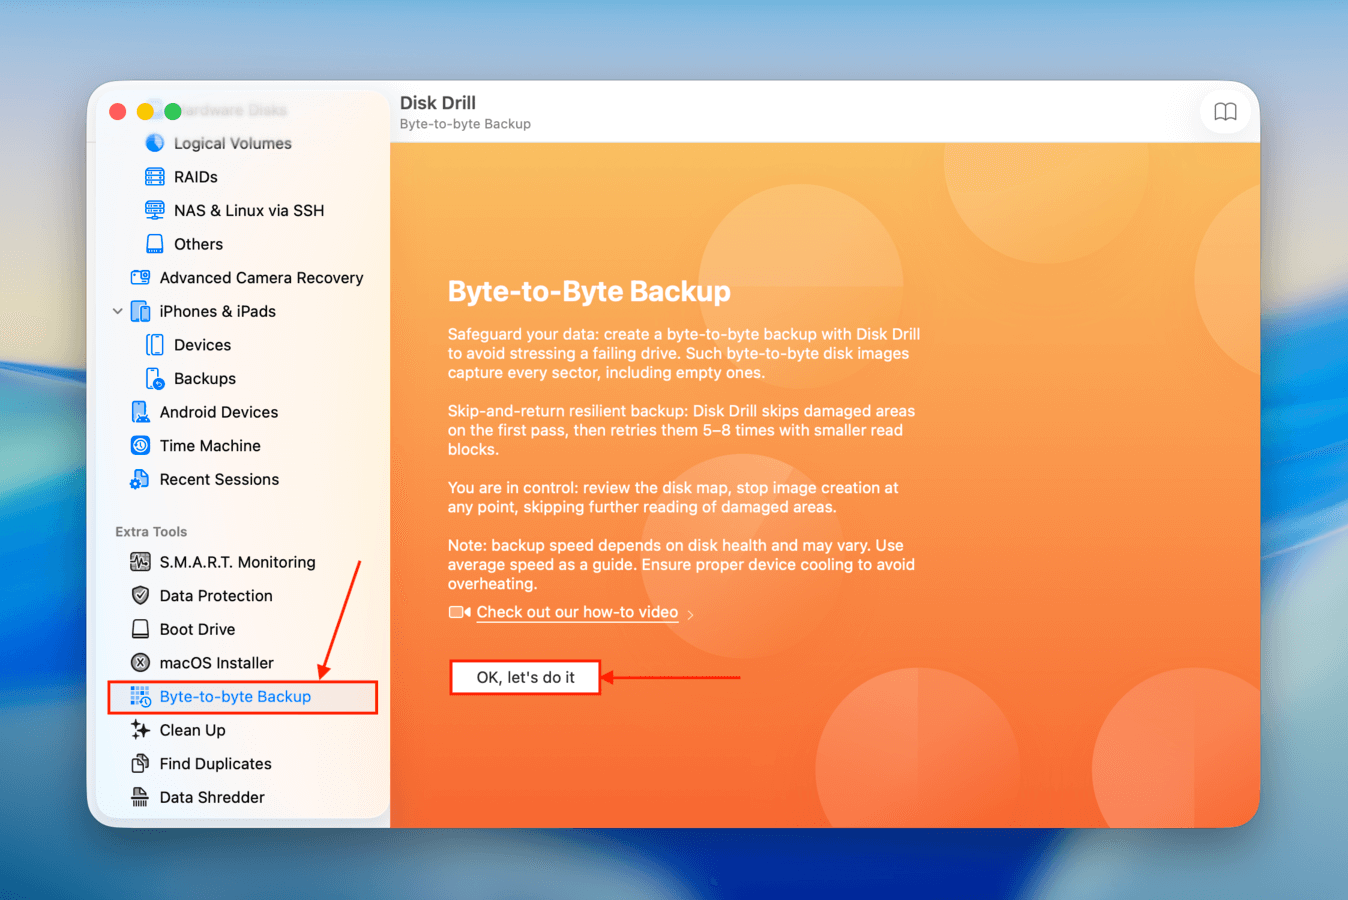
Step 4. Once you get to Disk Drill’s main menu, select Byte-to-byte Backup in the left sidebar (under the Extra tools section). Click OK let’s do it.
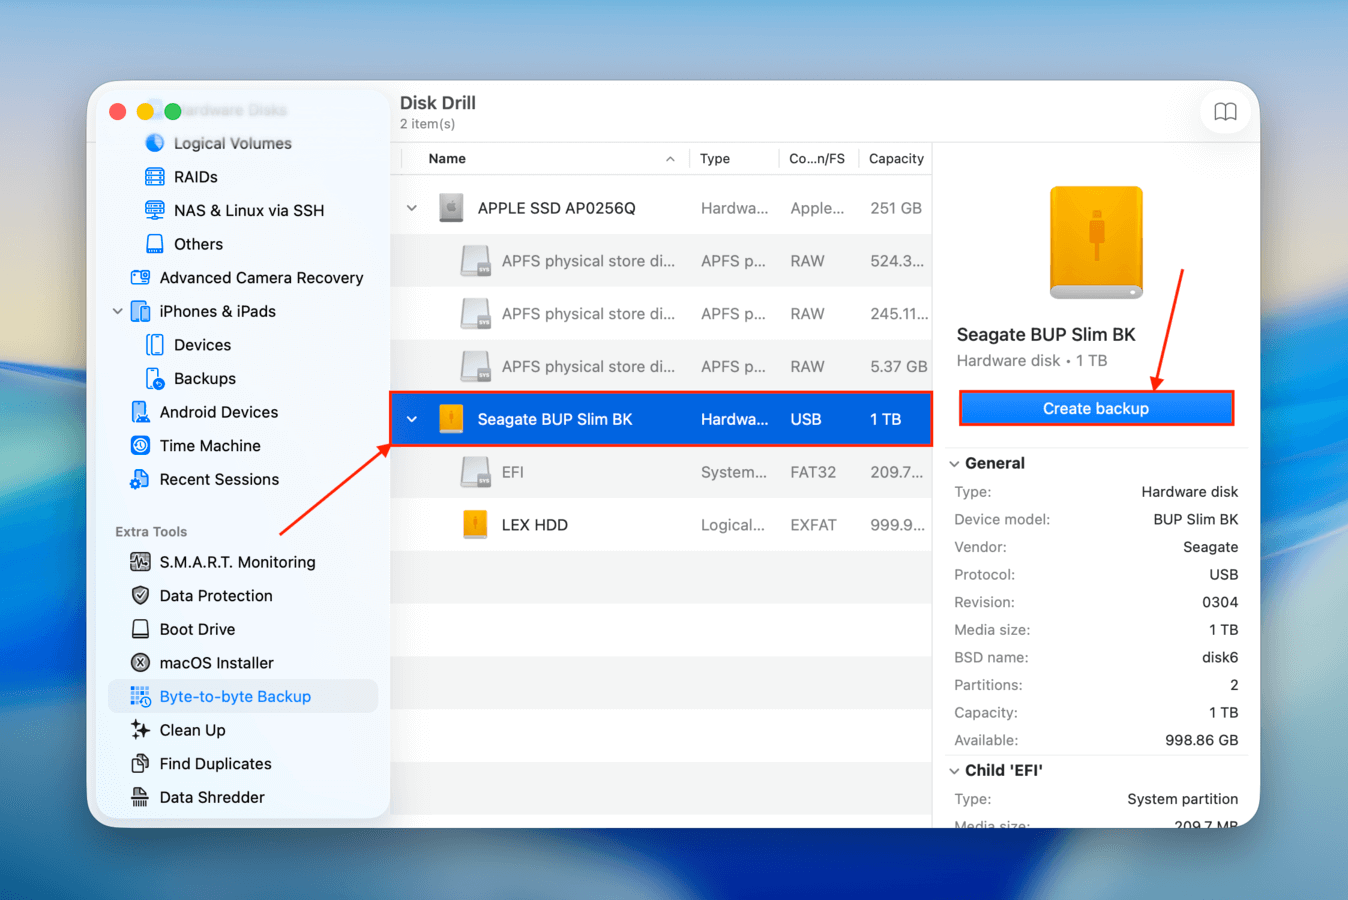
Step 5.Select your drive and click Create backup.
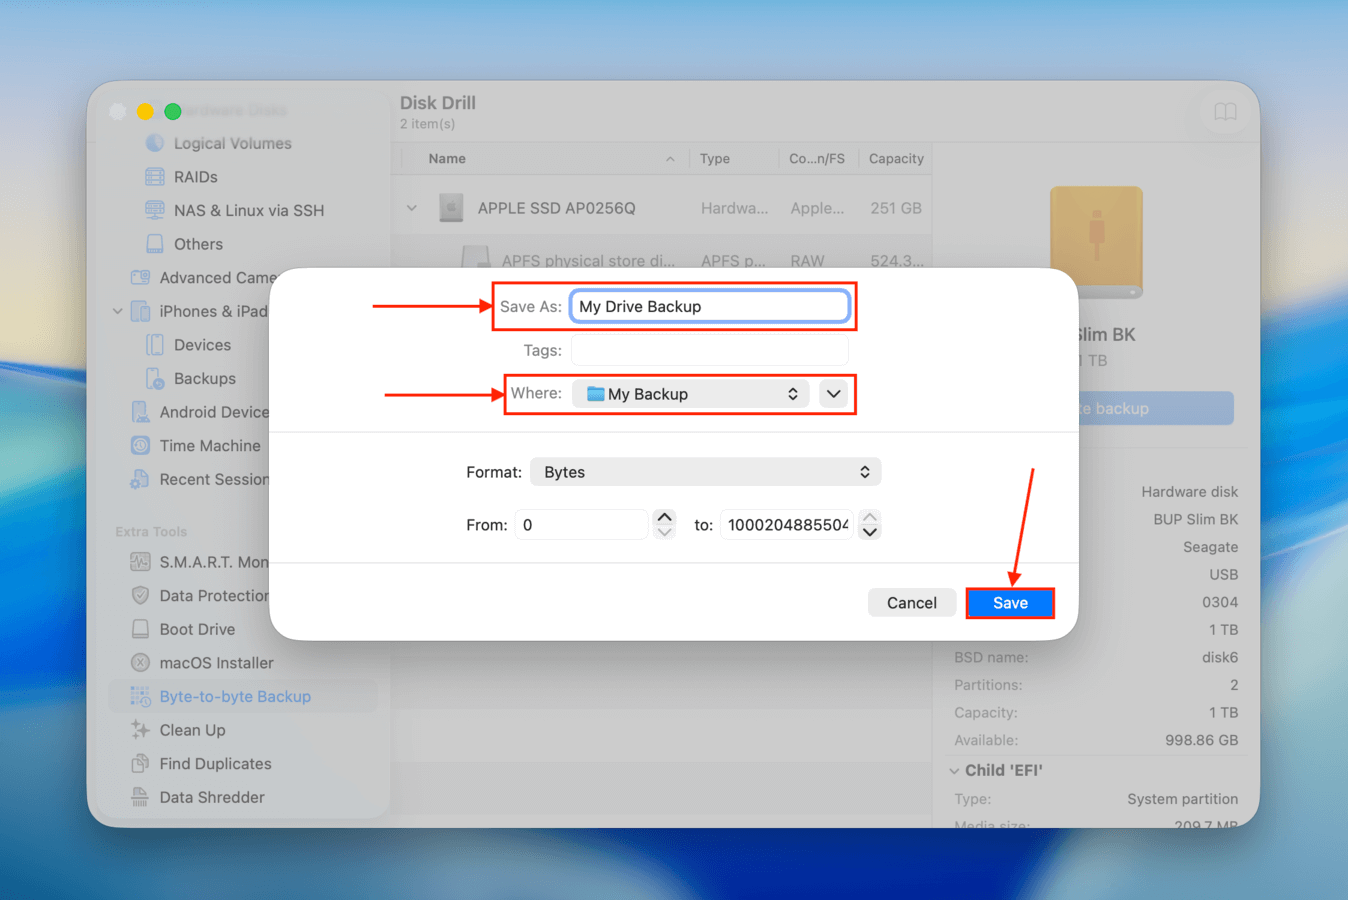
Step 6. In the dialogue box that appears, name your image backup file and save it to a folder on your Mac. You can also save it to another external drive, but make sure its free storage space is bigger than the problem drive’s total storage. At this point, you can safely eject your uninitialized drive or keep it in and proceed to attempting repair (since your data is already backed up).
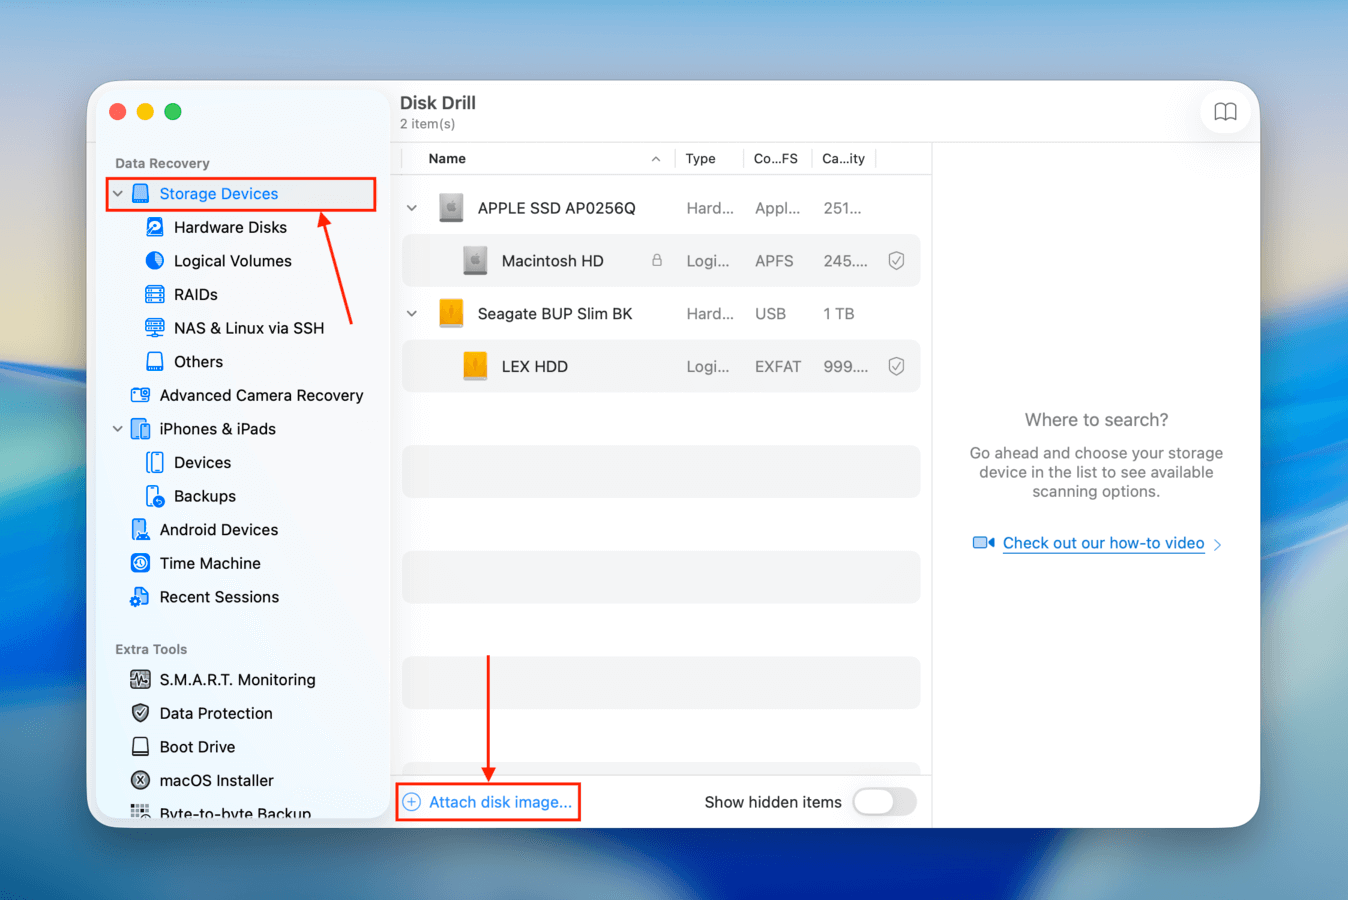
Step 7.Click Storage Devices in the left sidebar under the Data Recovery section and click Attach disk image… near the bottom of the window.
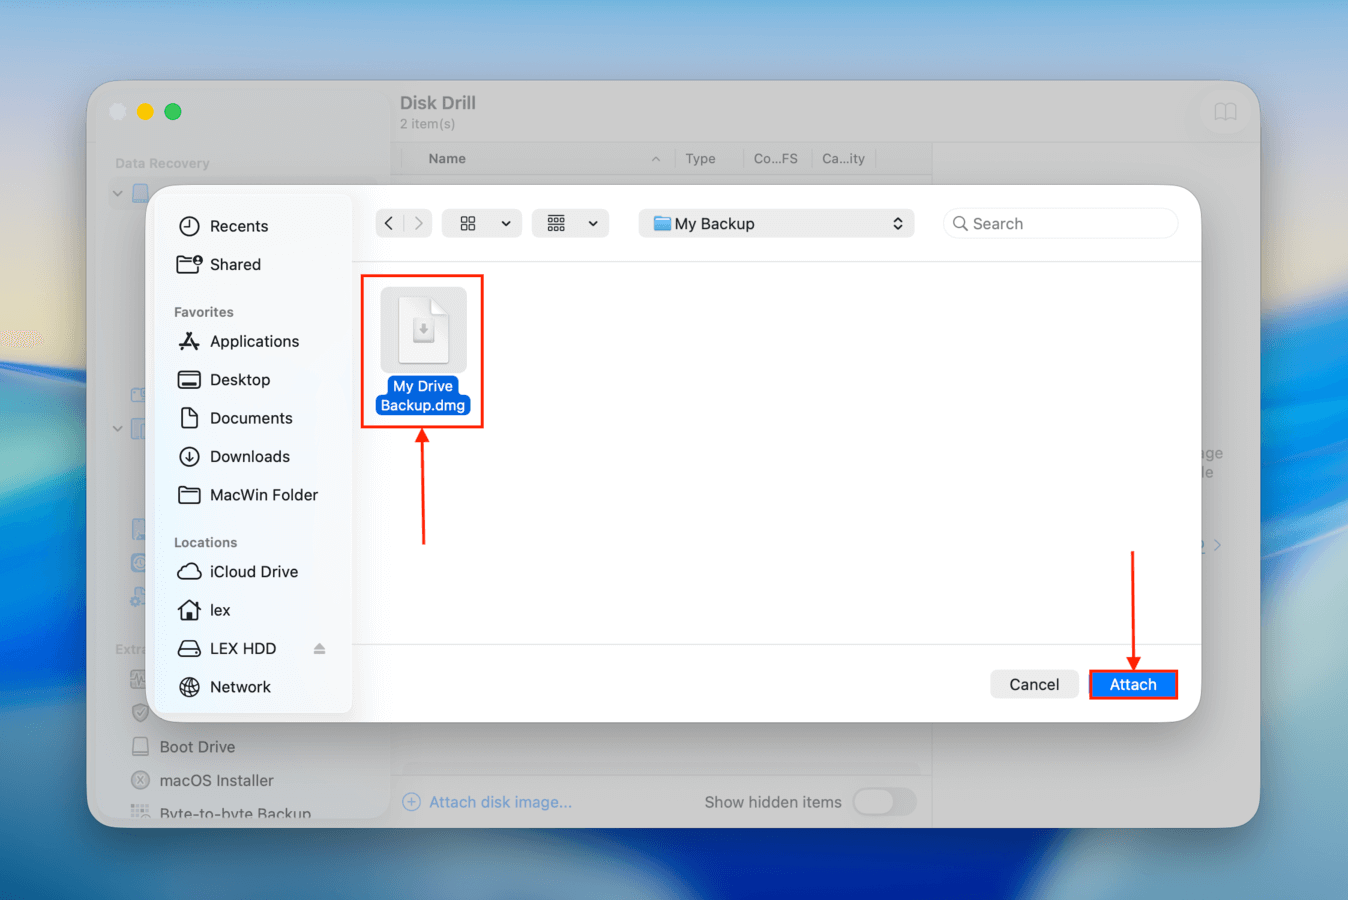
Step 8.Locate your image backup, select it, and click Attach to add it to the list of drives.
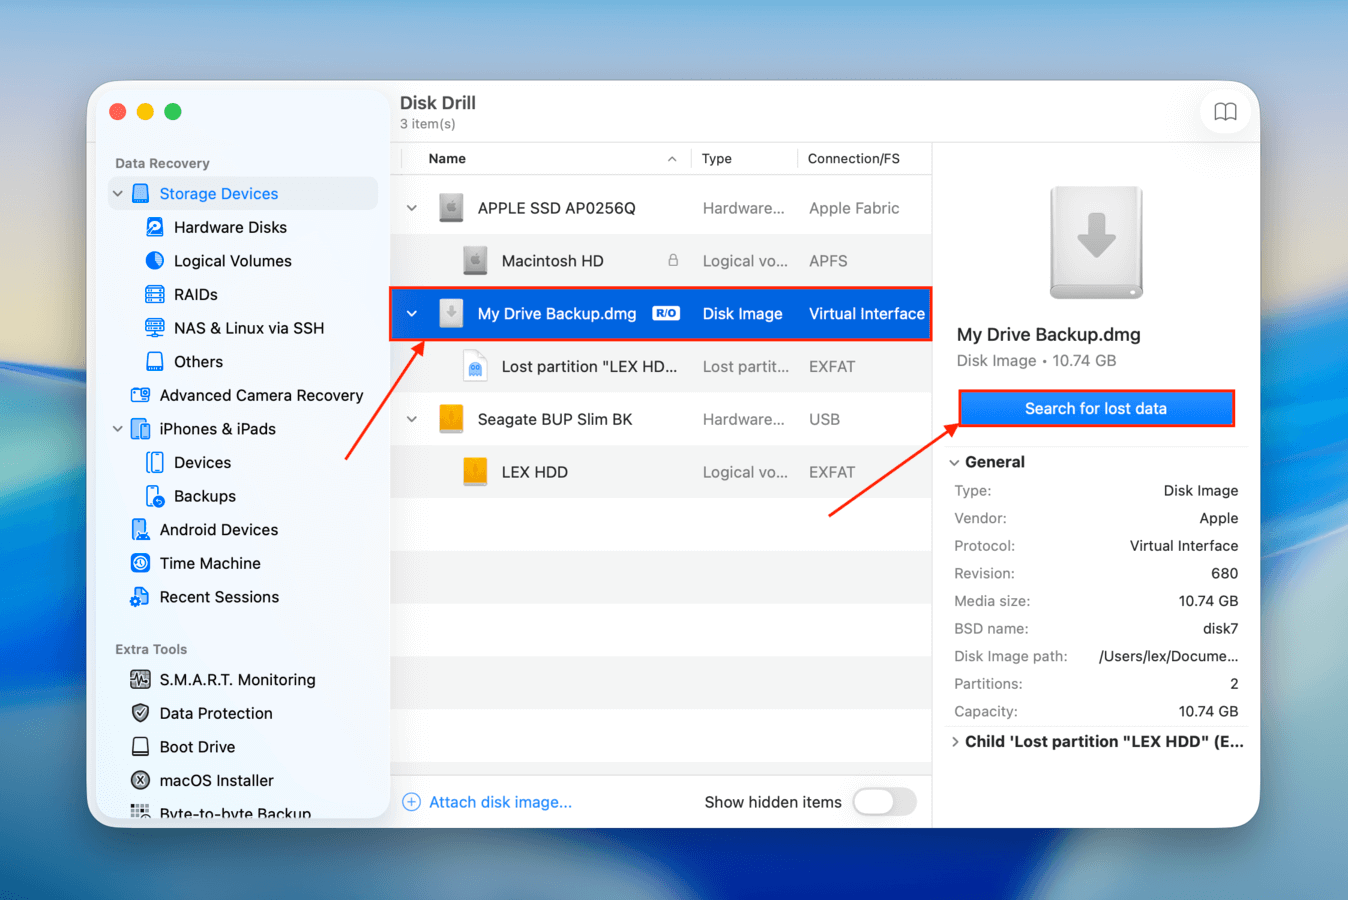
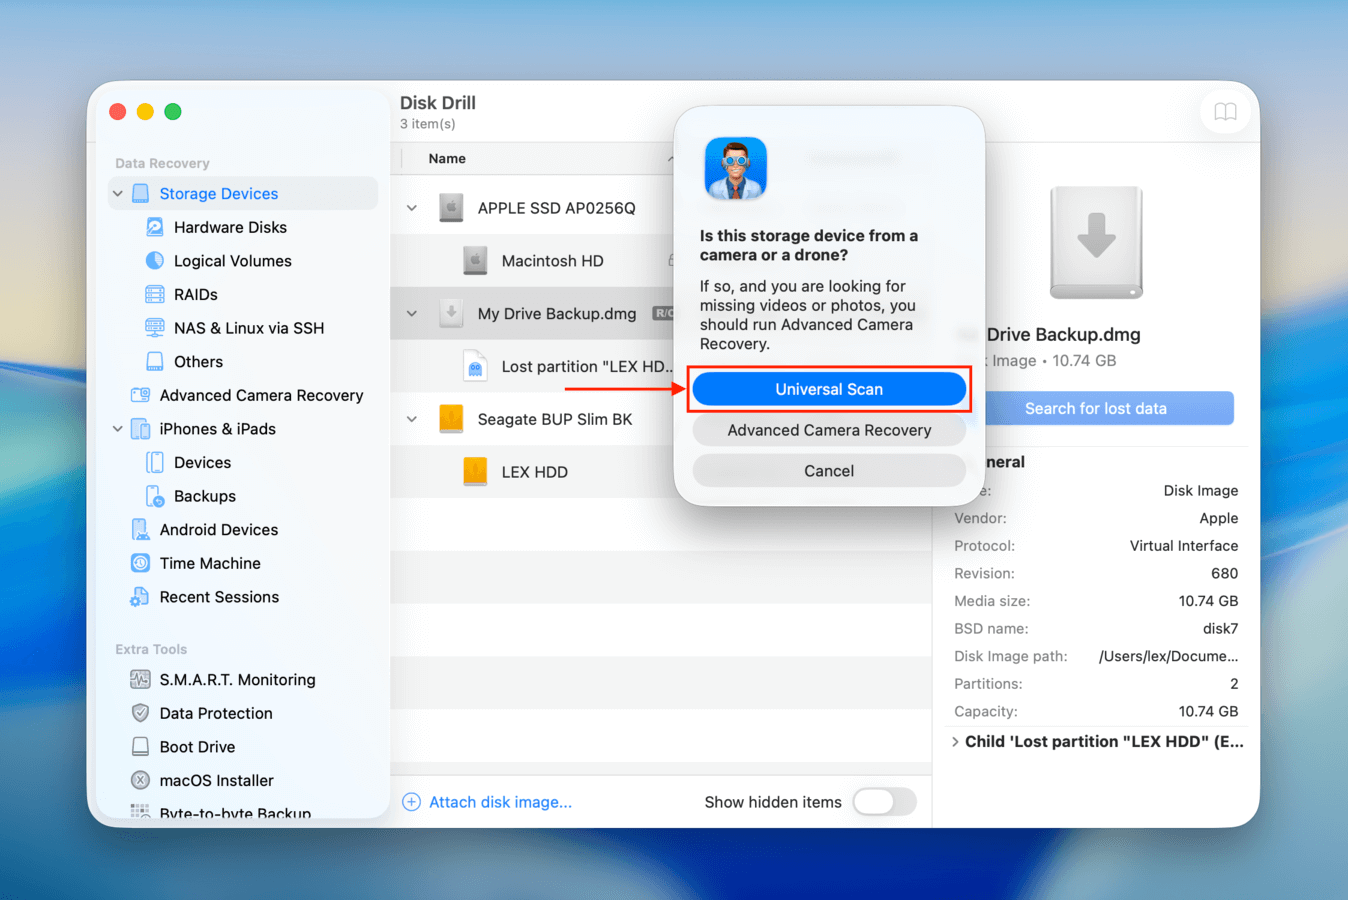
Step 9.Select backup disk image from the list of drives and click Search for lost data.
Step 10. In the pop-up that appears, select Universal scan (better for scanning uninitialized drives).
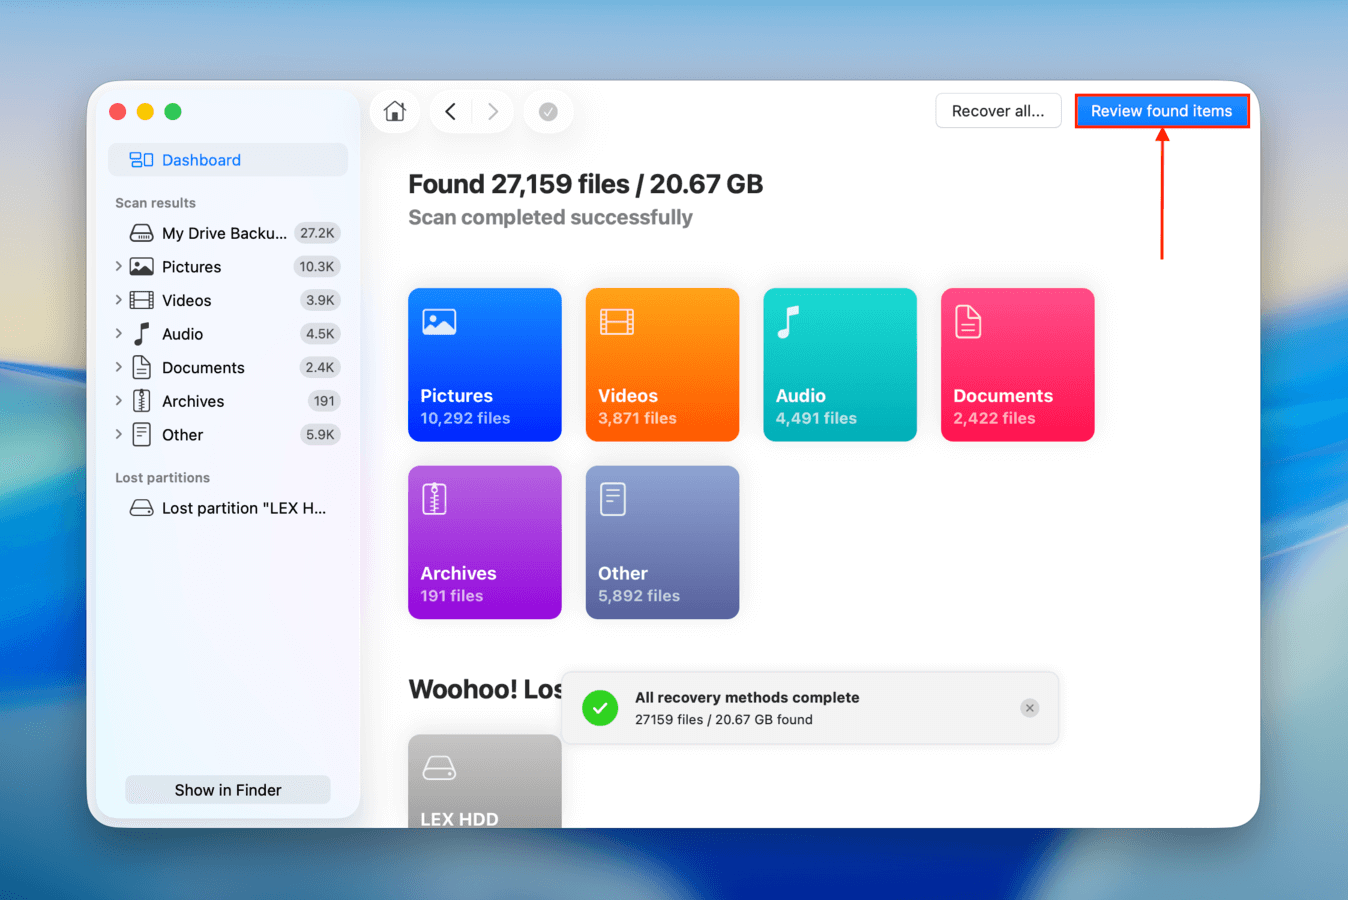
Step 11.Wait for the scan to complete, then click Review found items.
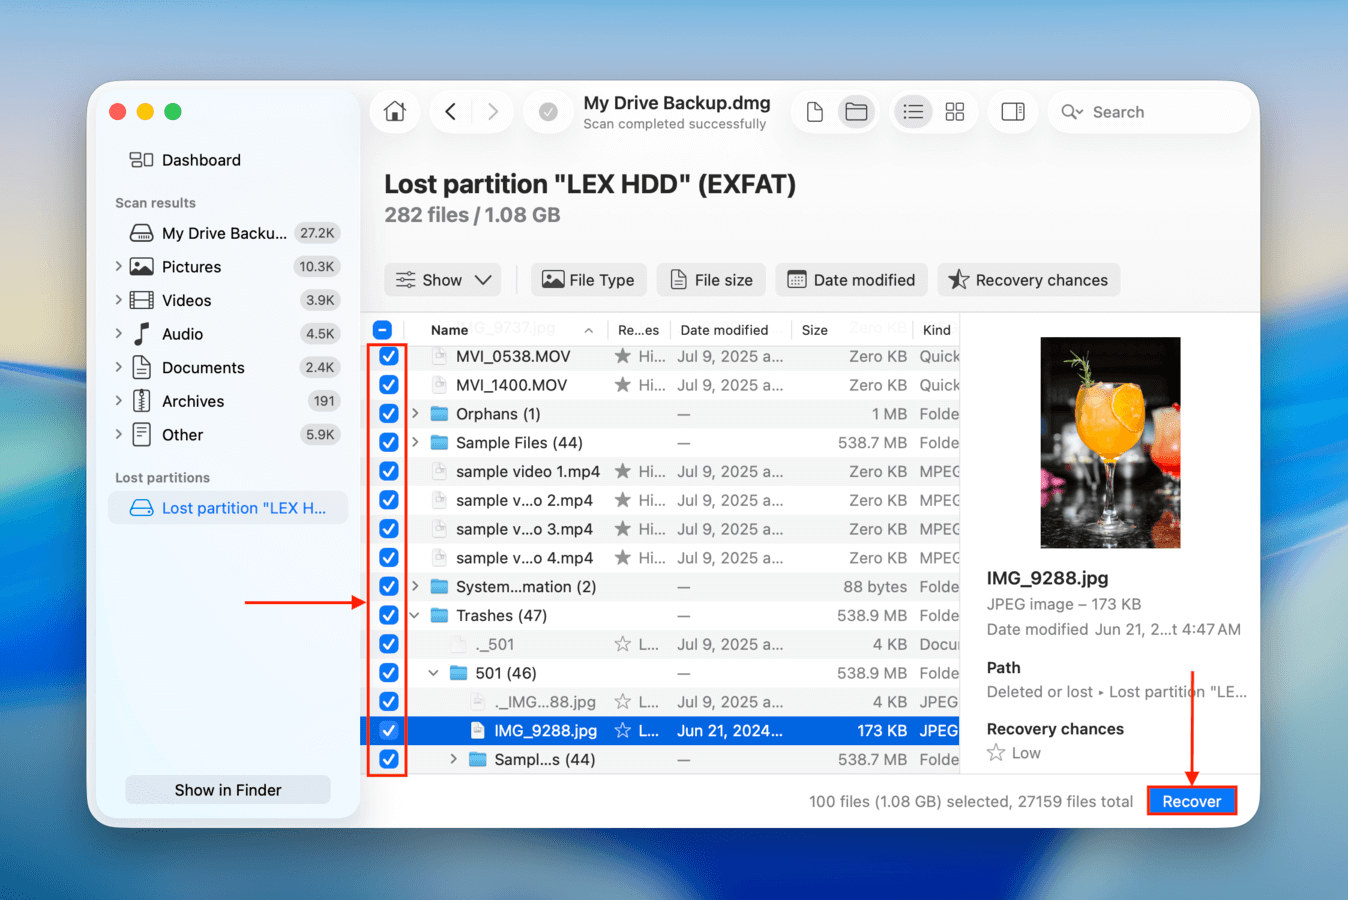
Step 12.In this window, you can use the search for specific files by name or extension or you can filter found files by type. You can also preview files by clicking on it once, which is a great way to confirm that a file is recoverable. Disk Drill can even sometimes restore data from lost partitions, as shown in our demonstration.

Step 13. Use the boxes in the leftmost column to select the files you want to restore and click Recover. You can restore all your files by not selecting anything and clicking Recover all.
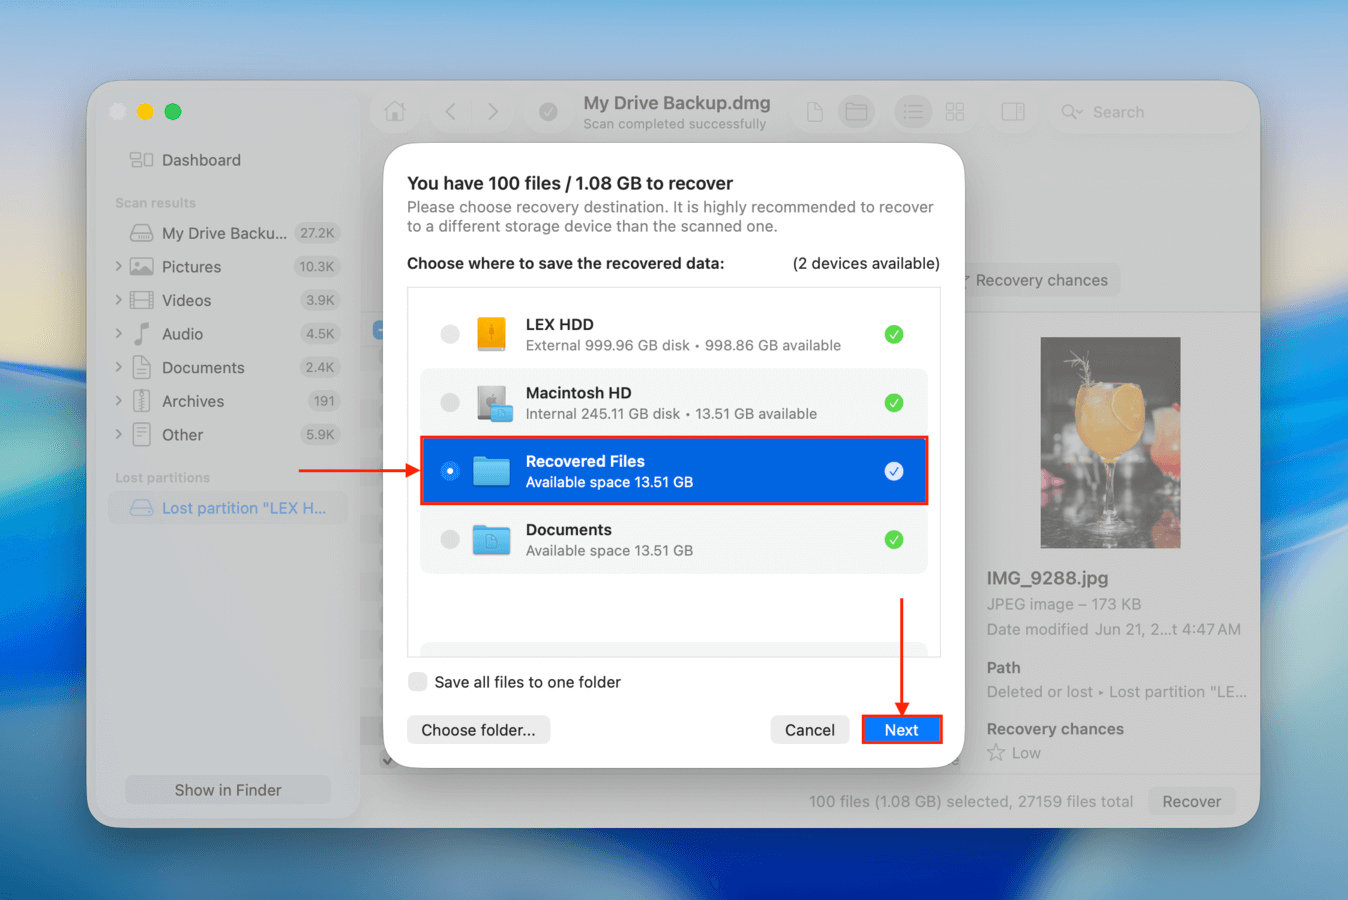
Step 14. Choose a location on your Mac where Disk Drill will save the recovered files. Then, click Next to proceed with the recovery.
After restoring your data and saving it to a secure location, you can delete the backup file. Alternatively, you can also store it somewhere secure and keep another copy of your data.
How to Fix an Uninitialized Drive Error (Without Data Loss)
In this section, we’ll show you different ways to fix a drive that appears uninitialized or is giving the relevant errors. In other words, use these fixes to repair a drive that was already working beforehand. If you want to learn how to actually initialize a disk, see this section.
Fix #1: Check Your Drive’s Connection
Before any software-related repair attempts, the first step is to make sure nothing is impeding your drive’s connection to your Mac. If the connection itself is secure, try different ports and connectors. If you’re using a USB hub, try connecting it directly instead.
Any issues with these mechanical parts can prevent macOS from recognizing your drive, causing the initialization error.
Fix #2: Use First Aid On Your Drive
The first actual “repair” operation you should attempt is using the First Aid feature in Disk Utility. While it’s not capable of fixing severely corrupted or damaged drives, it can fix minor damage that may be preventing macOS from interacting with the file system (thus, asking for initialization).
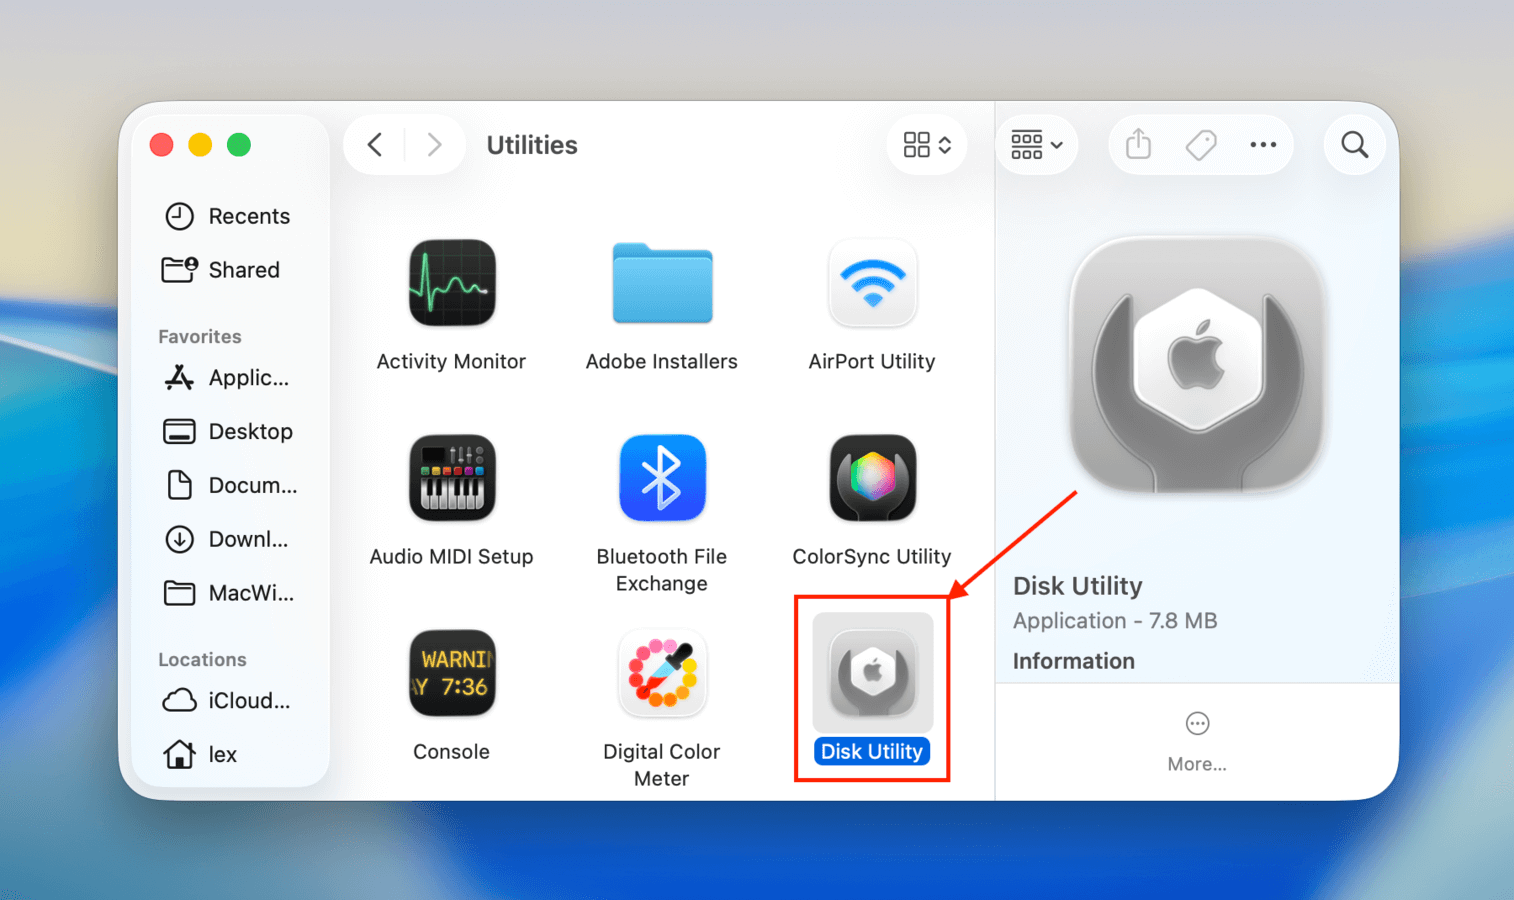
Step 1. With your drive securely connected to your Mac, open Disk Utility (Finder > Applications > Utilities).
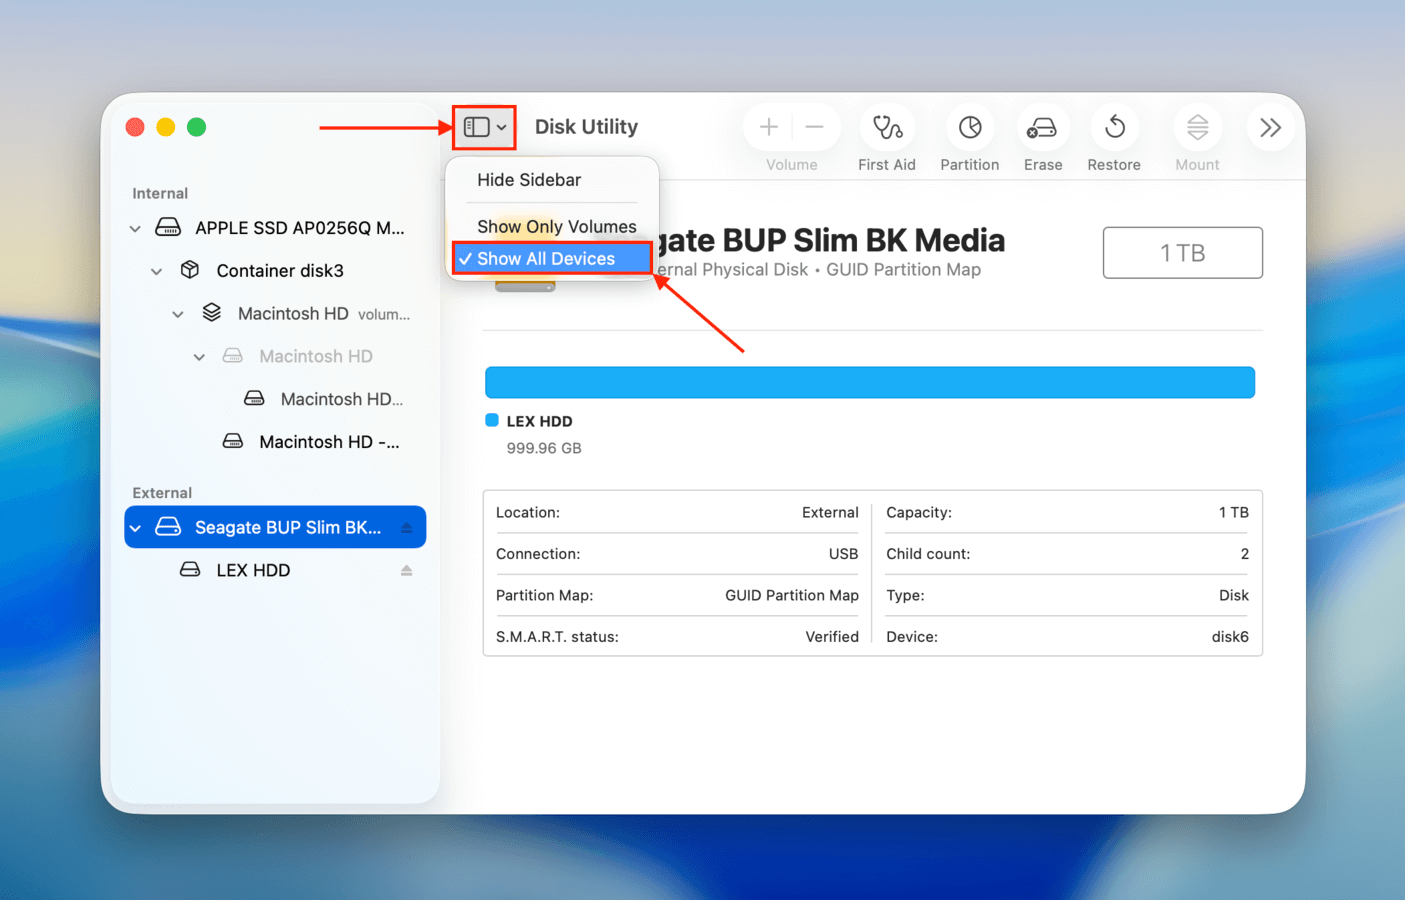
Step 2. At the top of the window, click the View button and select Show All Devices.
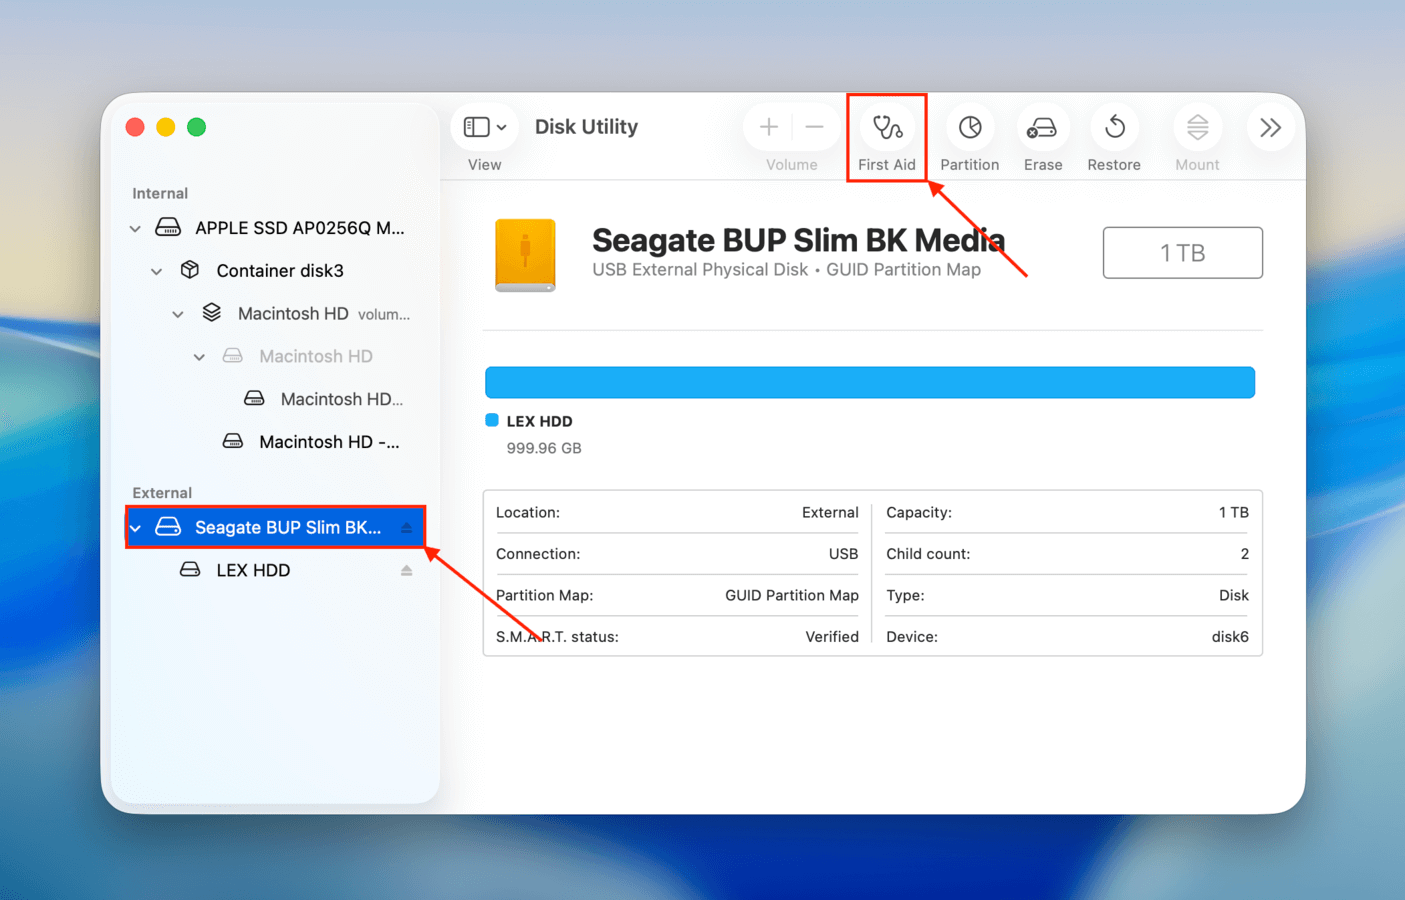
Step 3. On the left sidebar, select your drive. Then, click the First Aid button at the top of the window.
Step 4. Finally, in the confirmation dialog that appears, click Run to confirm the action.
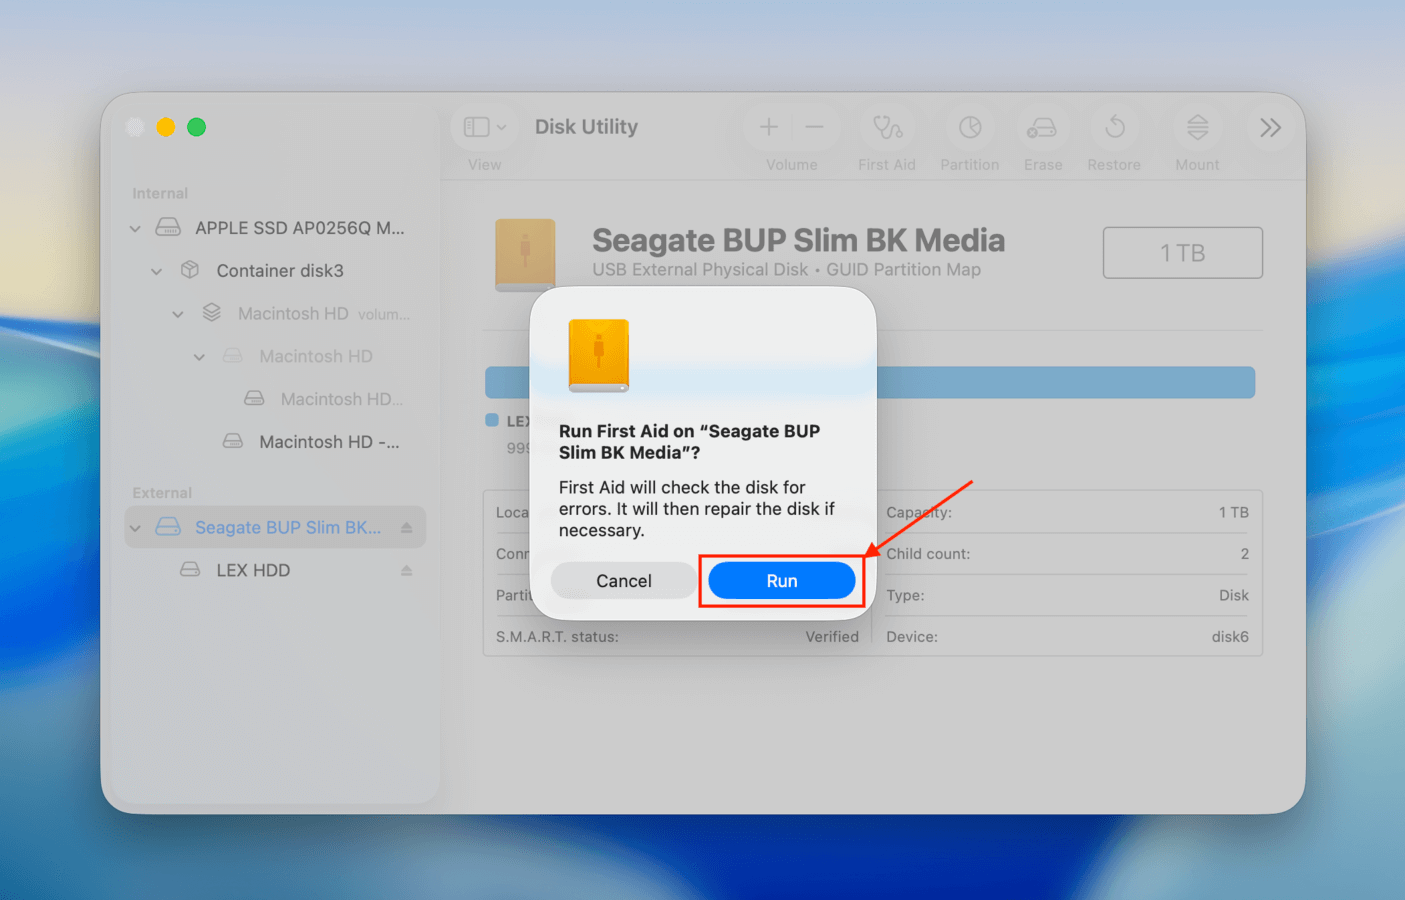
Disk Utility will let you know once First Aid is done repairing your drive. At this point, you can attempt to Mount the drive using Disk Utility (if it doesn’t mount itself).
Fix #3: Run Disk Repair Commands in Terminal
If First Aid doesn’t work to repair your drive, the next repair tool you can use is the fsck command, which translates to File System Consistency Check. It’s a command you can run in the Terminal app that automatically finds and resolves issues with a drive’s file system structure. If you’ve never run commands in Terminal before, don’t worry! The steps are short, and the commands are simple.
Step 1. Open the Terminal app (Finder > Applications > Utilities).

Step 2. Run the following command to find out your drive’s identifier:
diskutil list
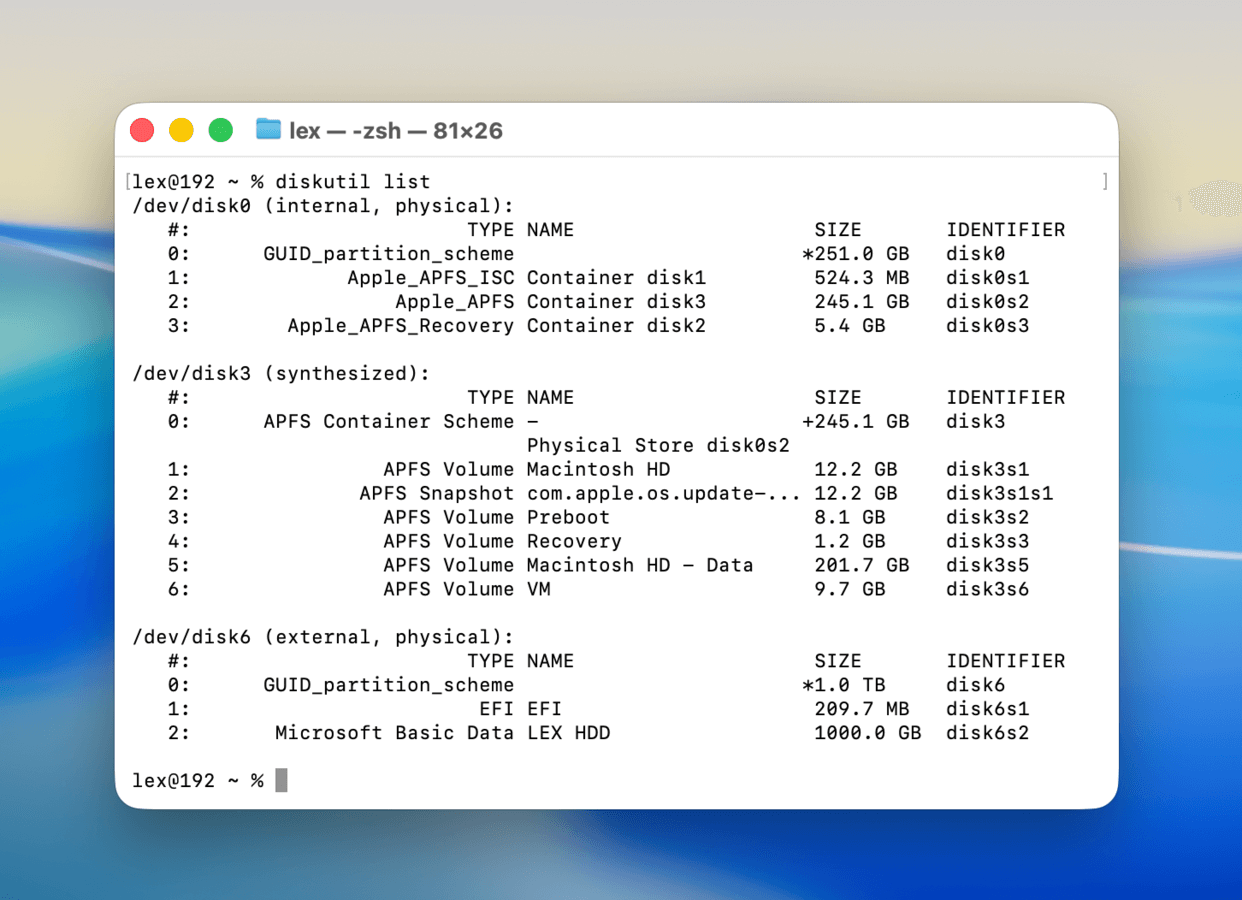
Step 3. Next, you’ll run the repair command. If your drive uses the APFS format, type and execute the following (replace /disk6s2 with your own drive’s identifier):
sudo fsck_apfs -y /dev/disk6s2
If your drive uses HFS+, run this command instead (follow the same structure for other formats):
sudo fsck_hfs -y /dev/disk6s2
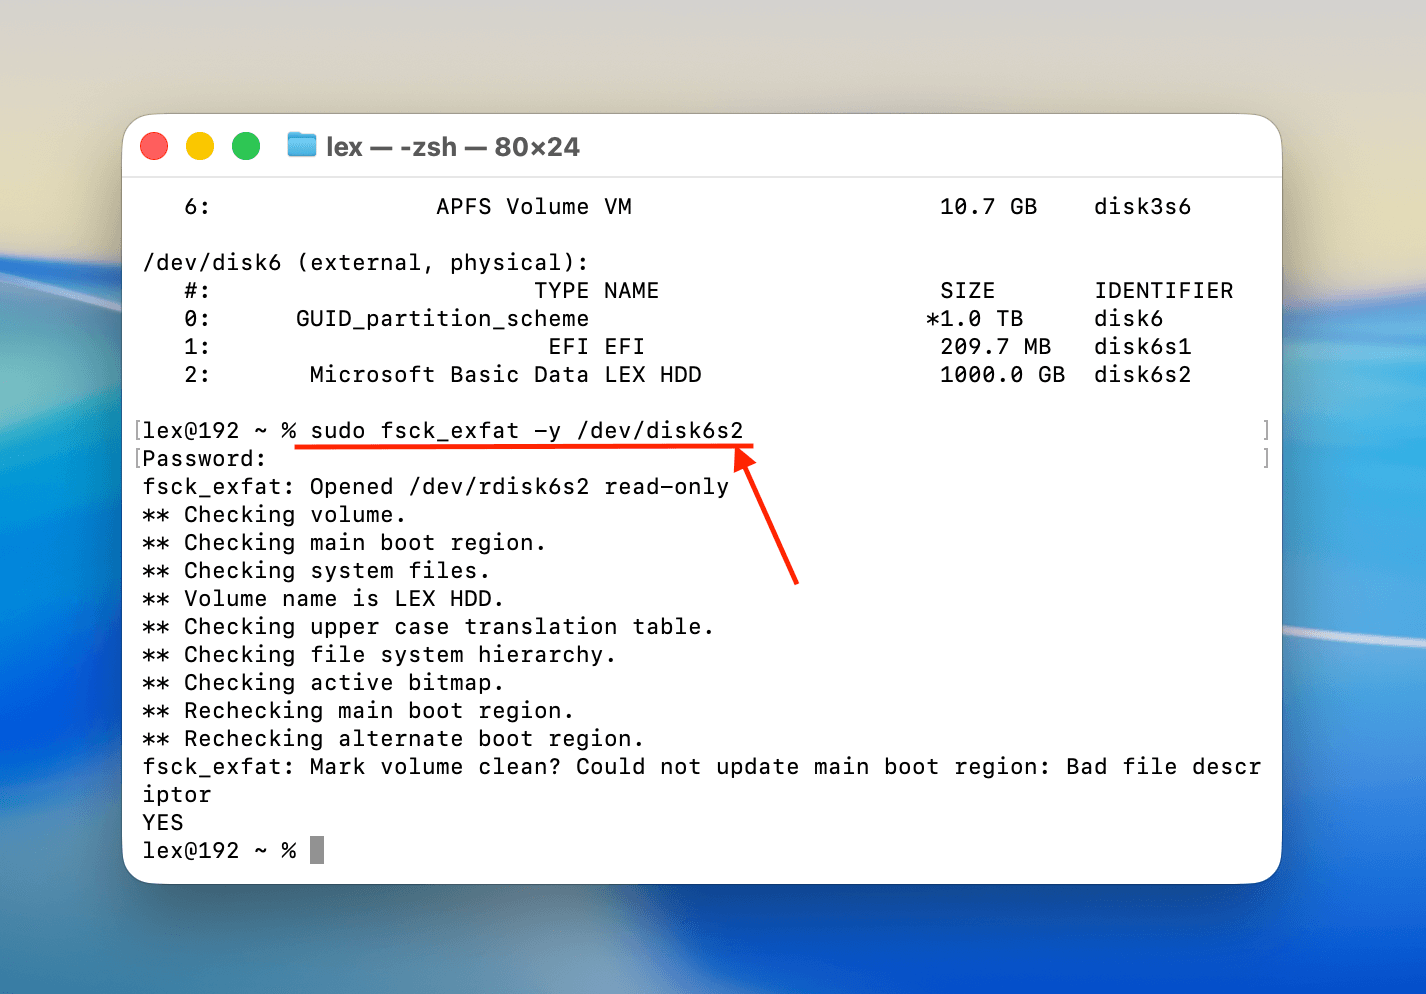
Make sure to keep your drive securely connected to your Mac to avoid interruptions, which will cause further issues. Terminal’s logs will let you know if the repair operation was successful.
Fix #4: Use TestDisk for Partition Recovery and Repair
The last resort for repairing a stubborn drive is to use an app called TestDisk. It’s a completely free and open-source application that can find and restore lost or missing partitions, then write them back onto the disk.
TestDisk can be a bit intimidating for new users because it lacks a graphical user interface–its UI resembles the Terminal app, but you use keyboard keys to navigate it (you don’t need to know any commands). But don’t worry–we’ll show you how it works.
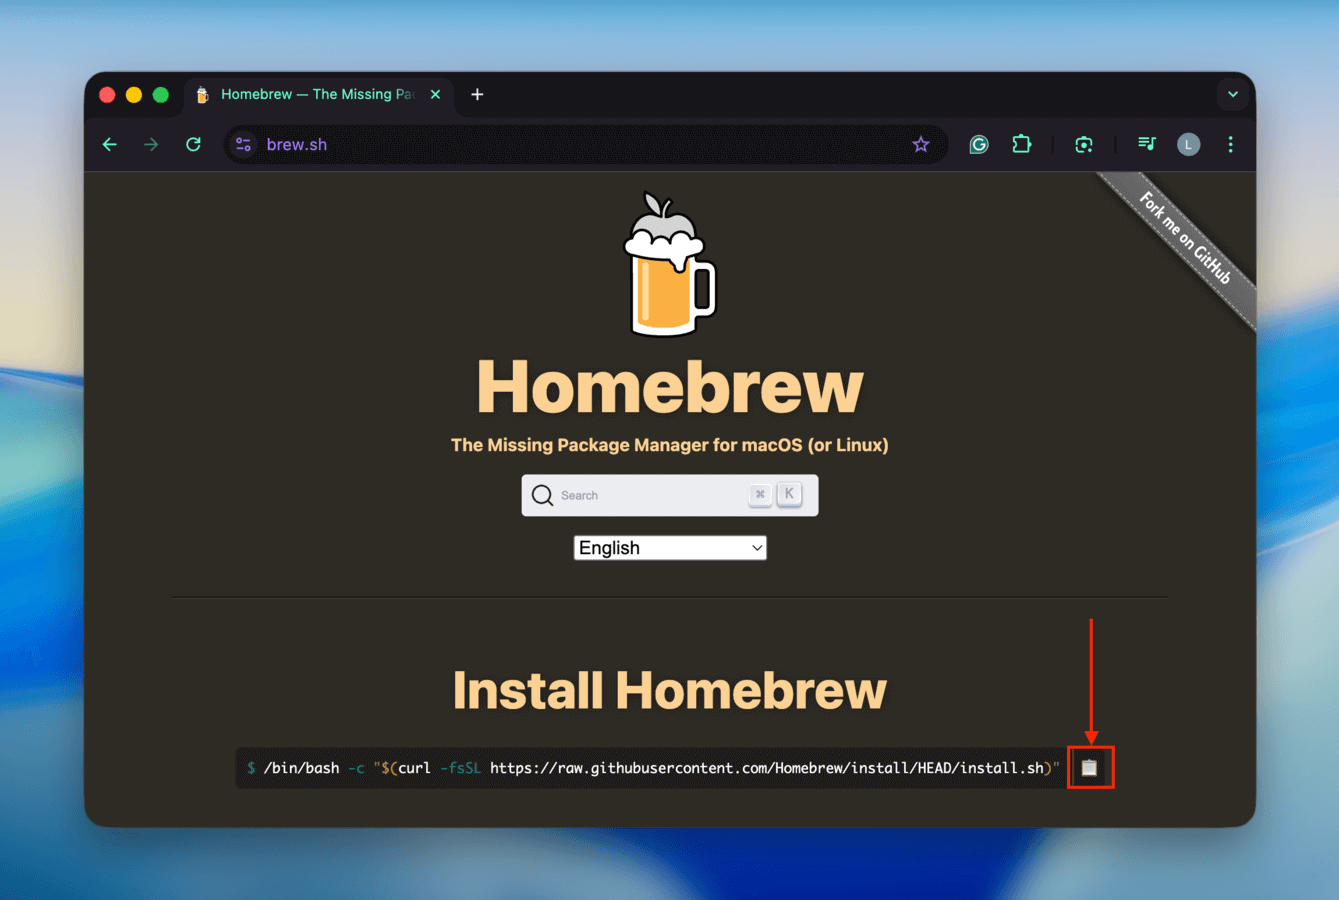
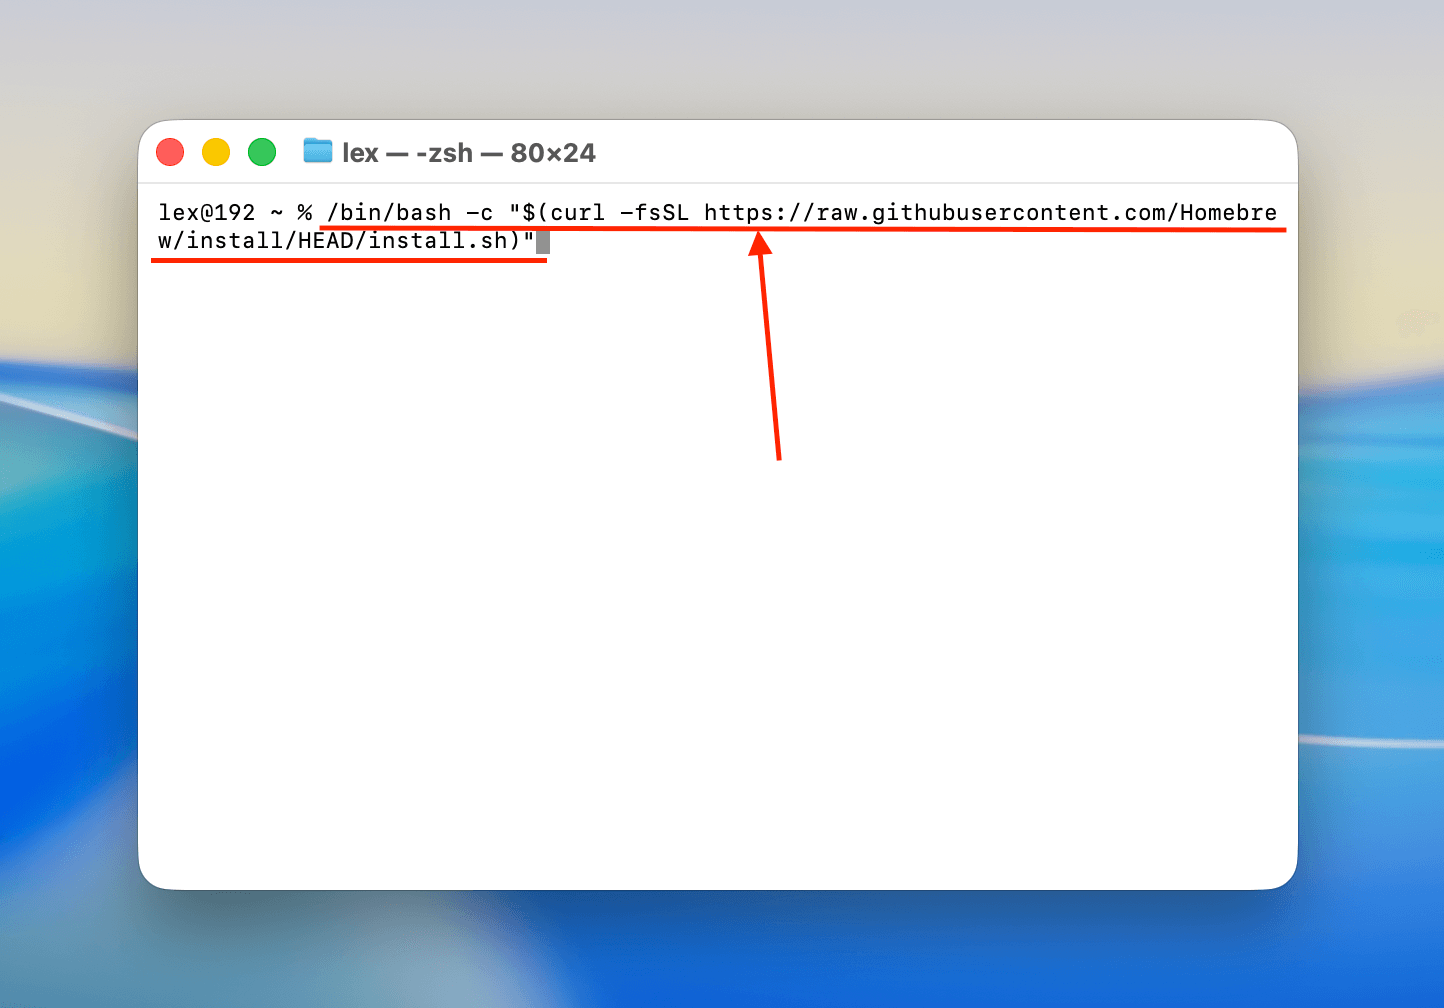
Step 1. If you don’t have Homebrew installed yet, navigate to brew.sh and copy its installer command.
Step 2. Open Terminal and paste the command you copied in step 1.
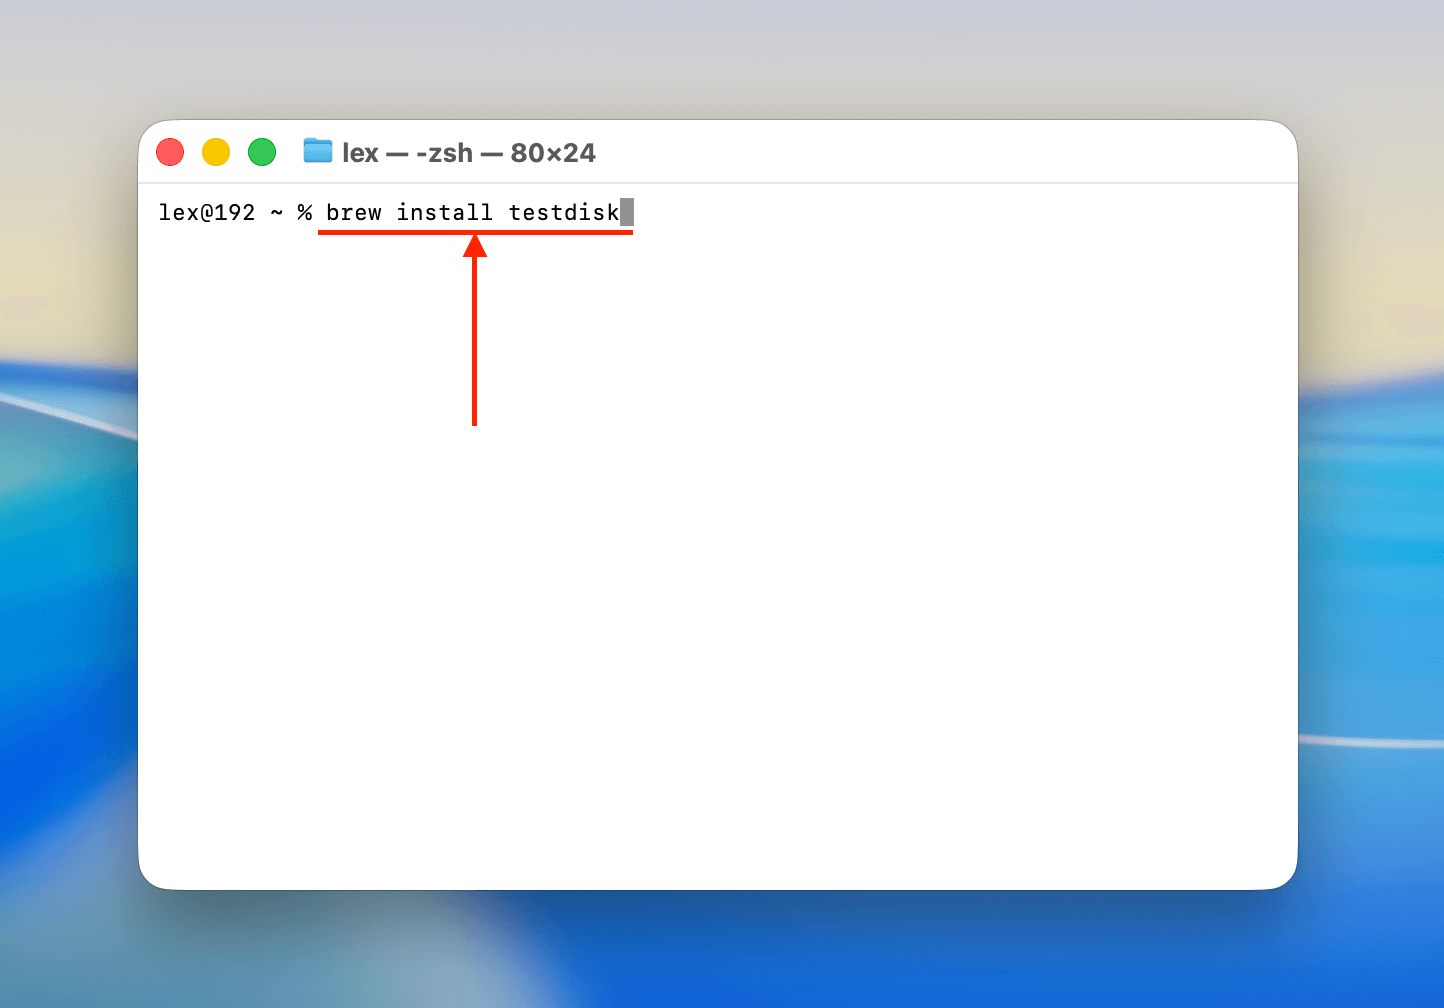
Step 3. After installing Homebrew, run the following command to install TestDisk:
brew install testdisk
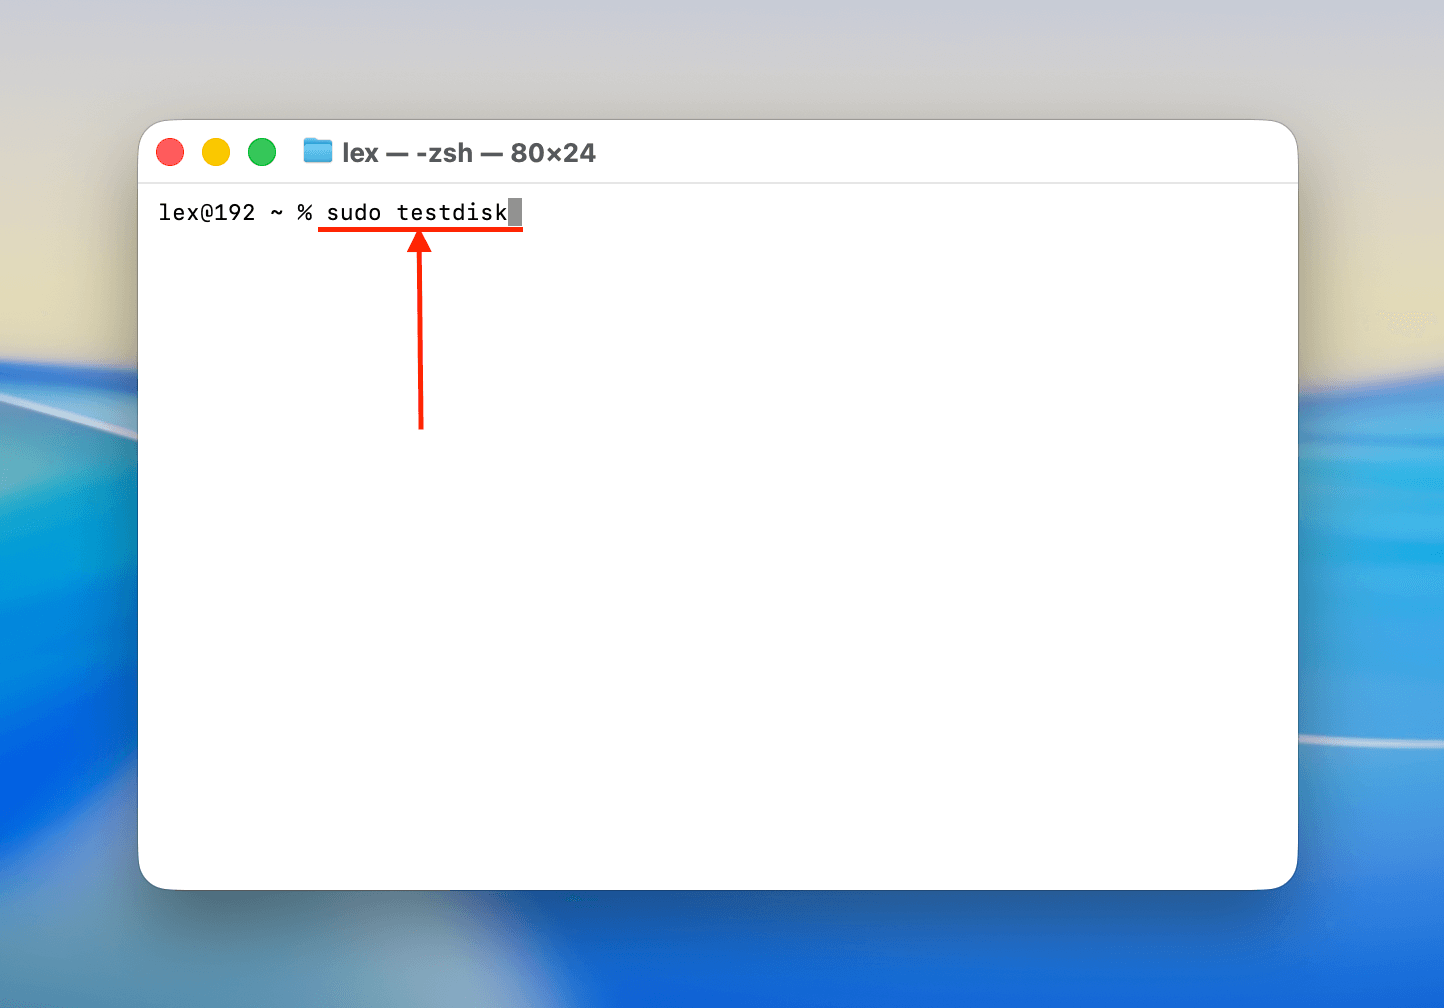
Step 4. Next, run the following command to run TestDisk (you may be asked to enter your password):
sudo testdisk
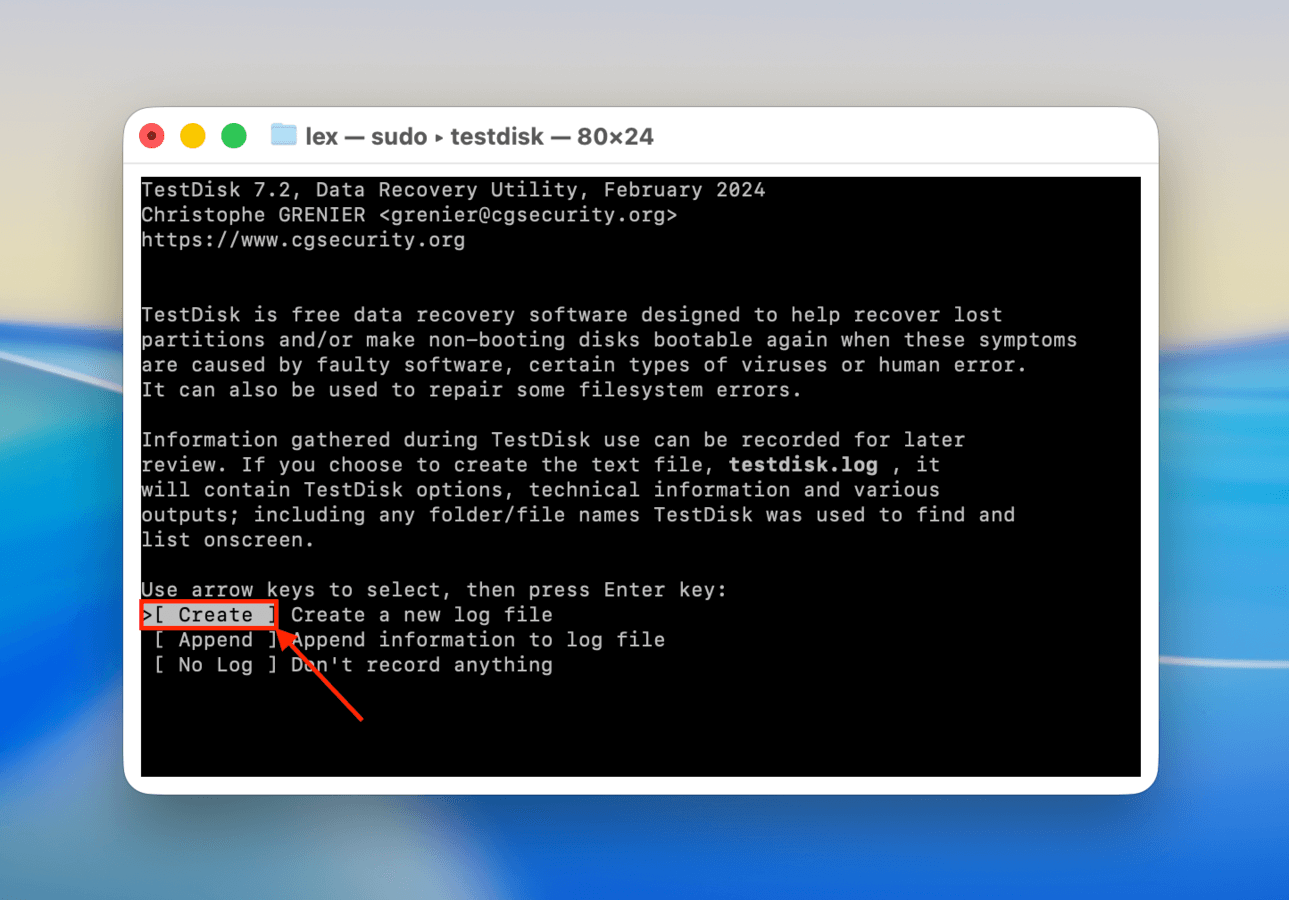
Step 5. Once you’ve arrived at TestDisk’s main menu, use the arrow keys to select Create (it’s usually selected by default) and hit Return.
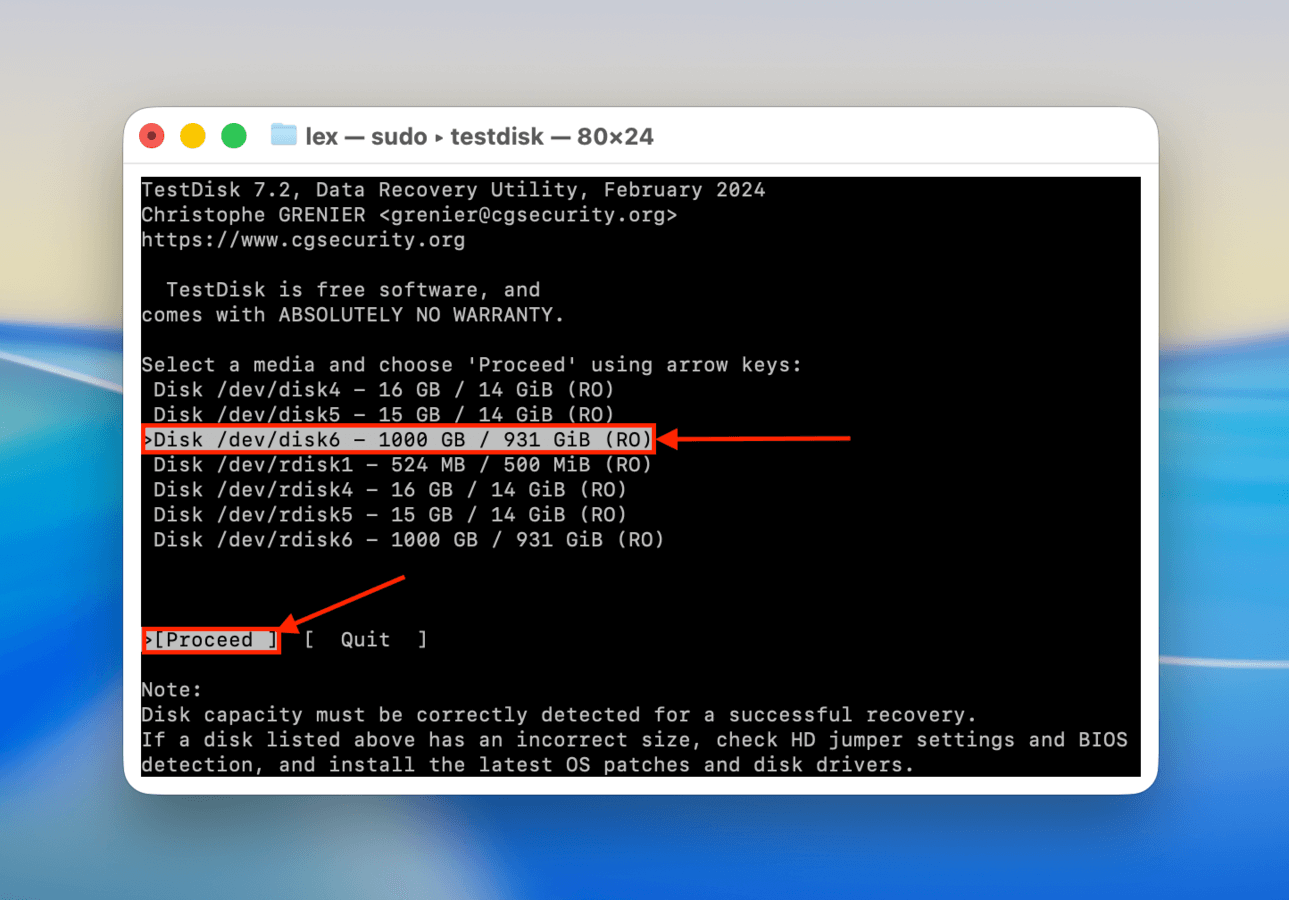
Step 6. Use your arrow keys to select your drive from the list. Then, select Proceed and hit Return.
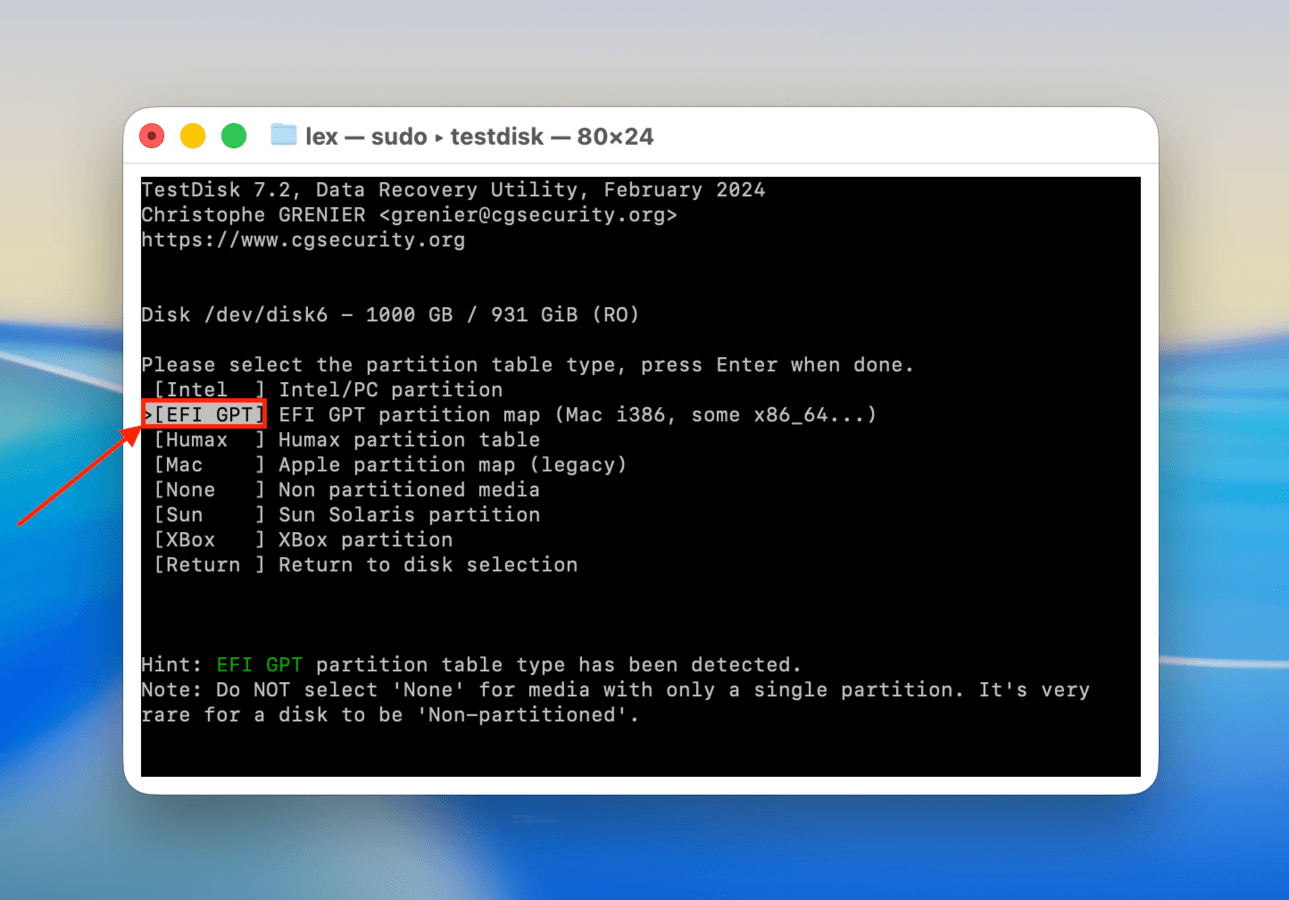
Step 7. Select your drive’s partition table type–TestDisk will automatically try to select the best one for you, and it’s usually right! Hit Return to confirm your selection.
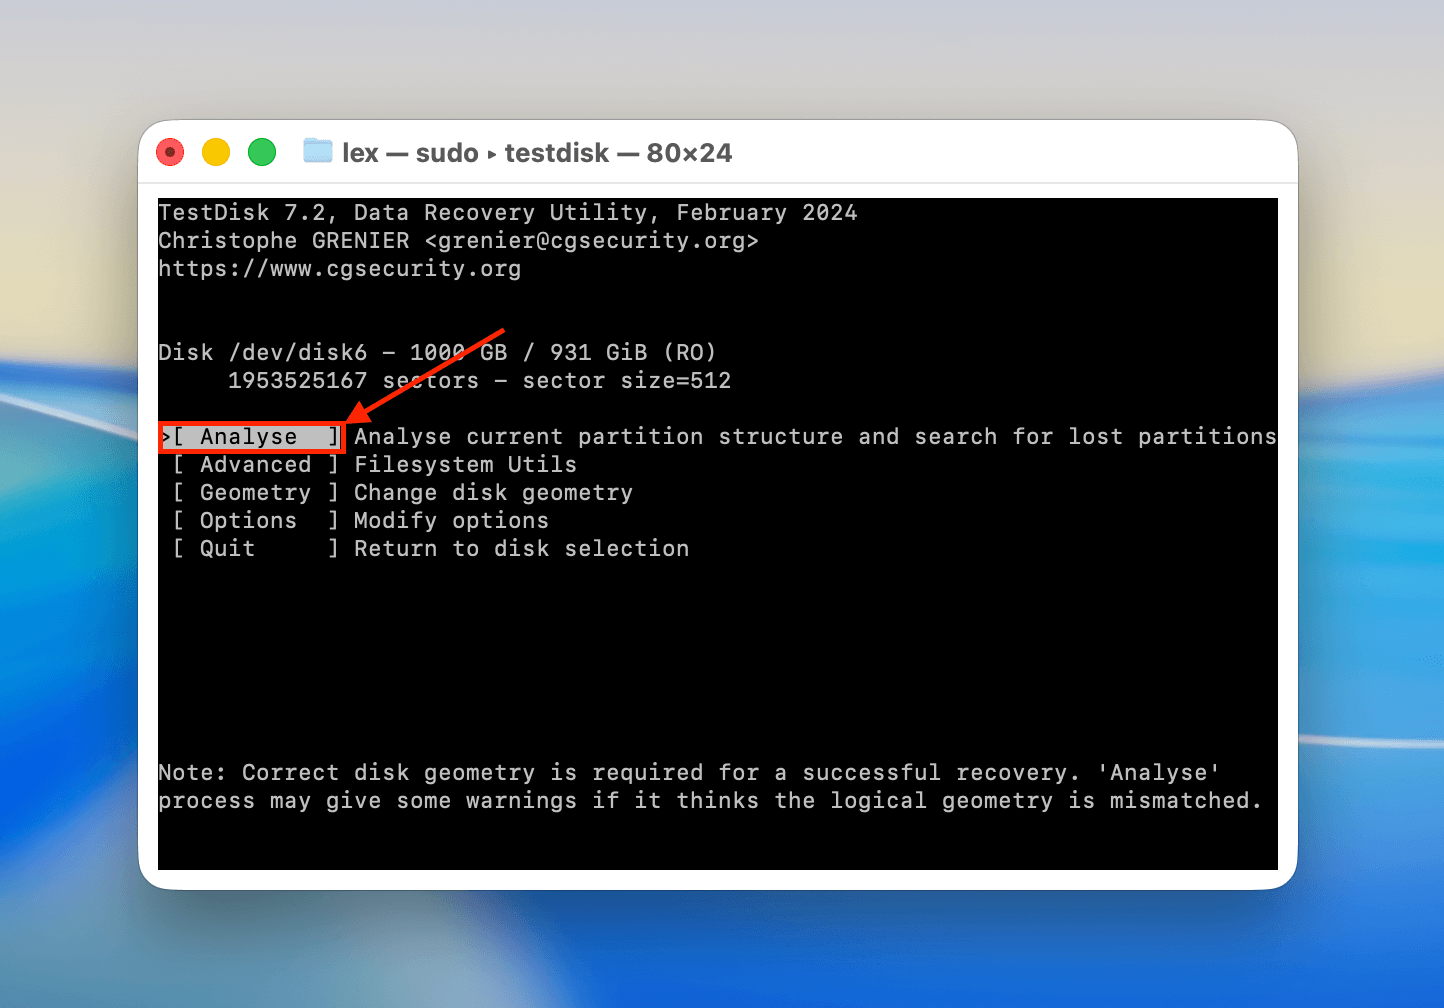
Step 8. Choose Analyse and hit Return.
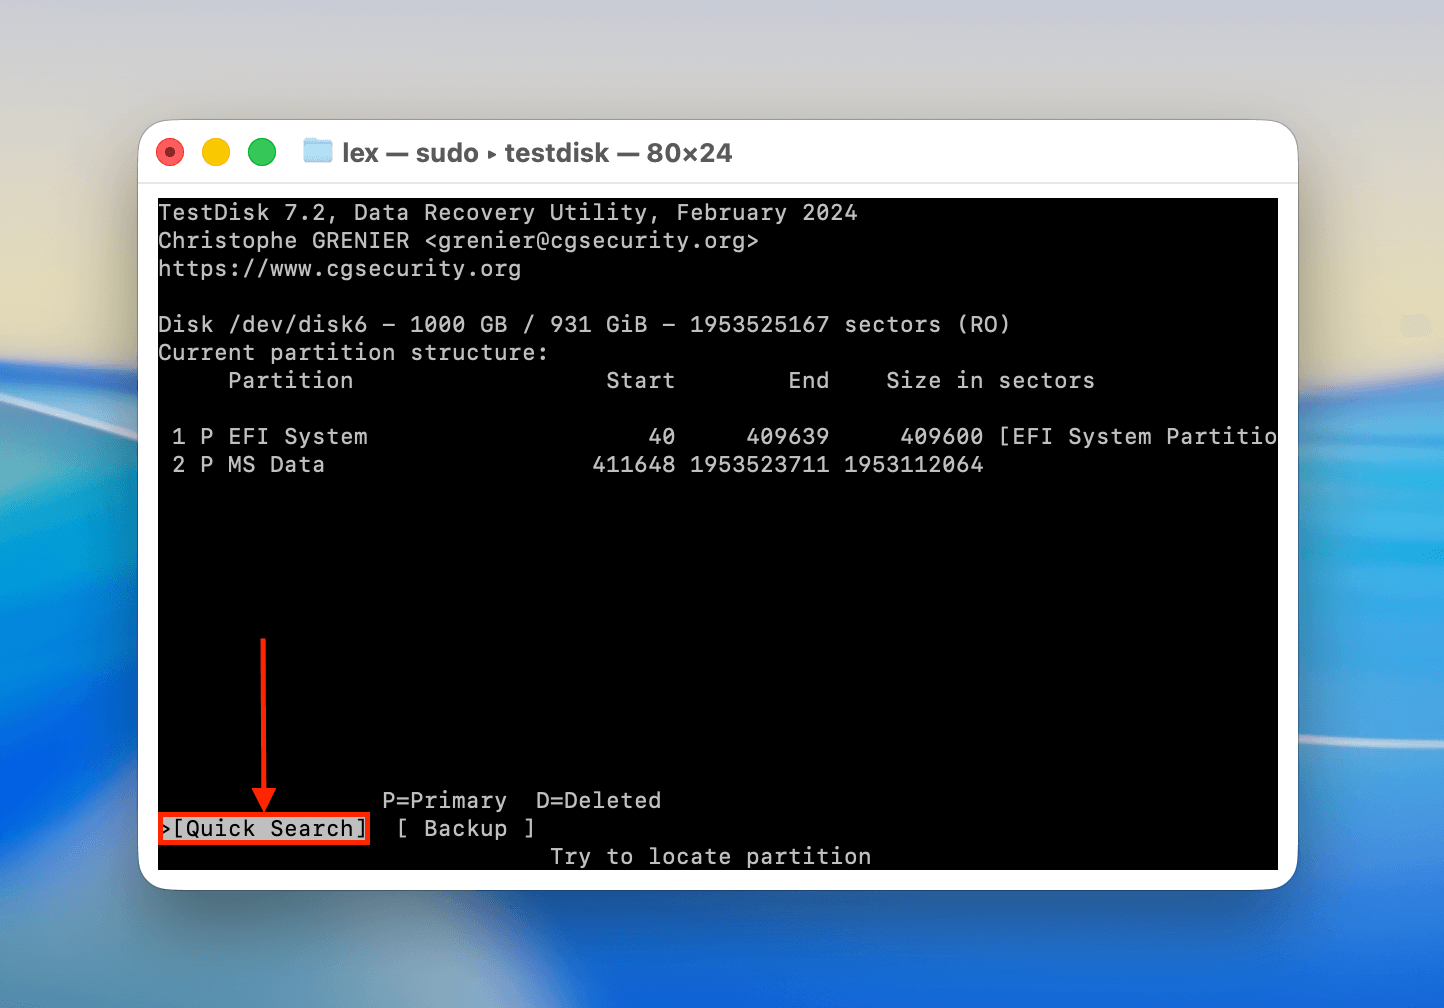
Step 9. Next, choose Quick Search and hit Return.
Step 10. Select the partition you want to review. Press Return again.
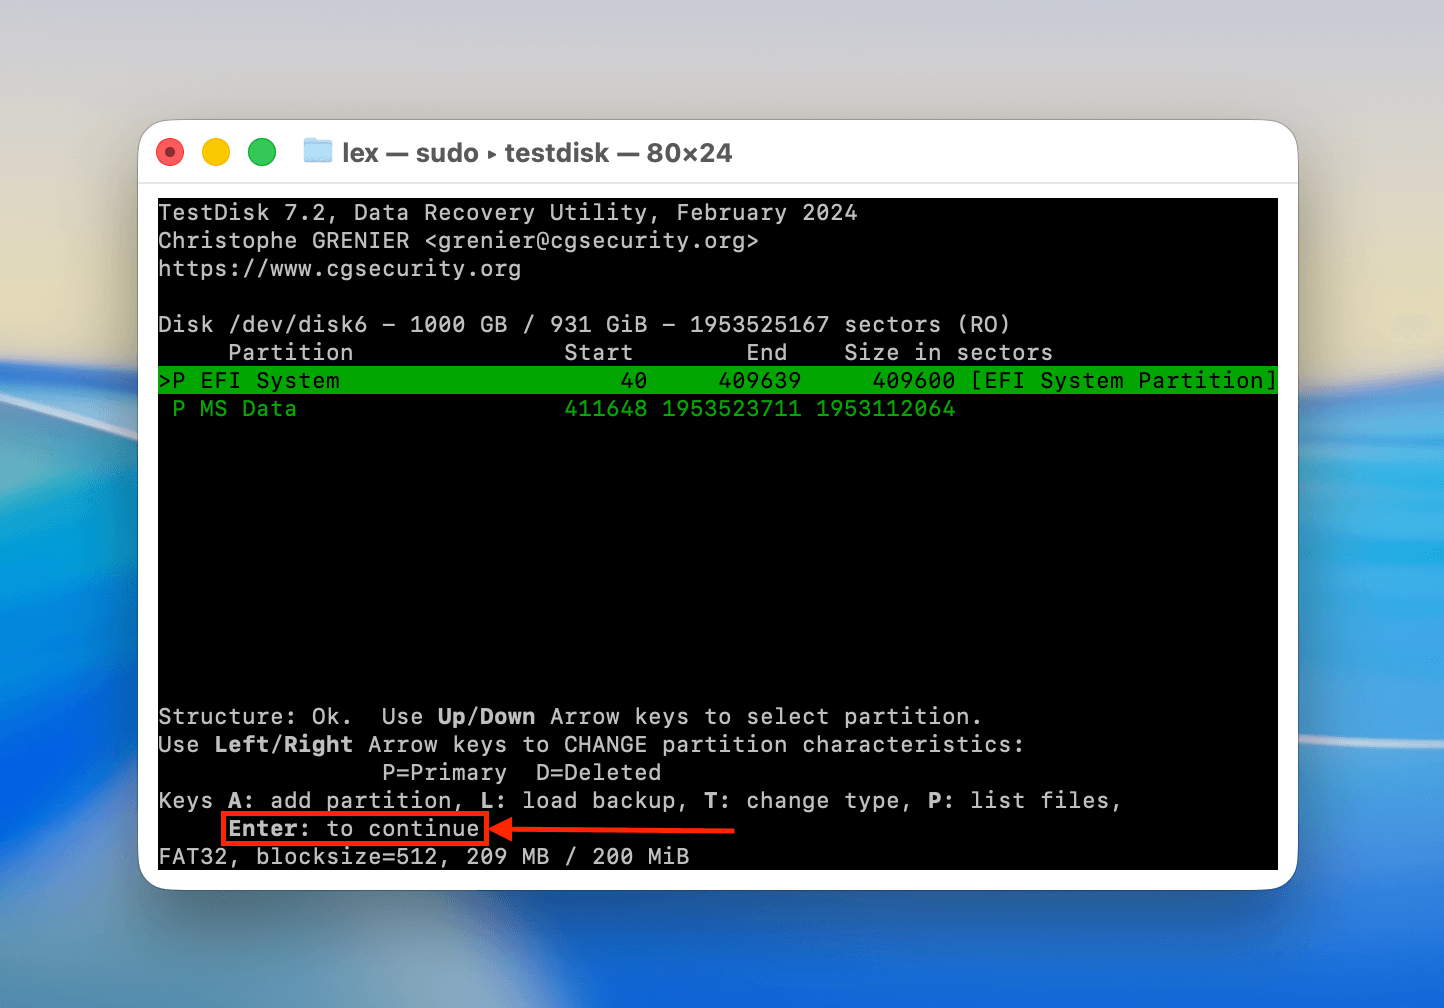
Step 11. Finally, you can either choose to run the Write function to restore the partition, or you can opt to run a Deeper Search if TestDisk found the partition you want.

After the operation is complete, disconnect your drive and reboot your Mac. Then, plug your drive back into your Mac once it restarts, so it can run a fresh scan of your drive’s partition table. If the repair attempt was successful, it should mount normally.
How to Initialize a Hard Drive on Mac Using Disk Utility
If your drive is truly uninitialized (due to damage or a virus, because it’s brand new, etc.), you can manually initialize it on your Mac using the Erase tool in Disk Utility. Erase wipes your drive completely in order to prepare it for usage. During the process, it asks you to choose the Format (reformats your drive), then also asks you to choose the Scheme (initializes your drive).
Step 1. Make sure your drive is securely connected to your Mac, then launch Disk Utility (Finder > Applications > Utilities).
Step 2. At the top of the window beside the words “Disk Utility”, click the View button. Then, in the dropdown menu that appears, select Show All Devices.
Step 3. In the left sidebar, select your drive. Then, click Erase at the top of the window.
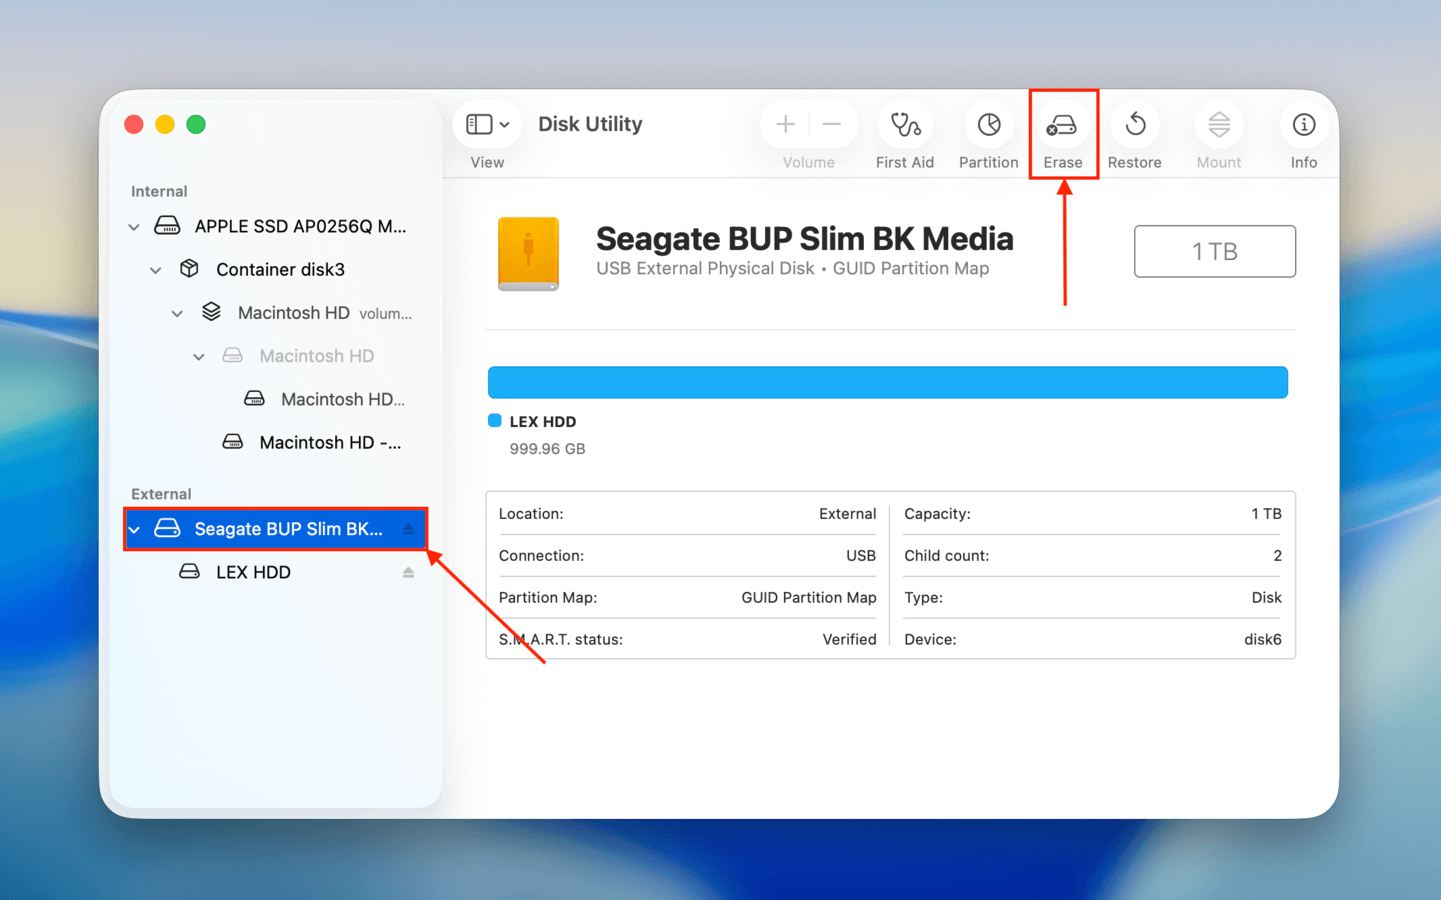
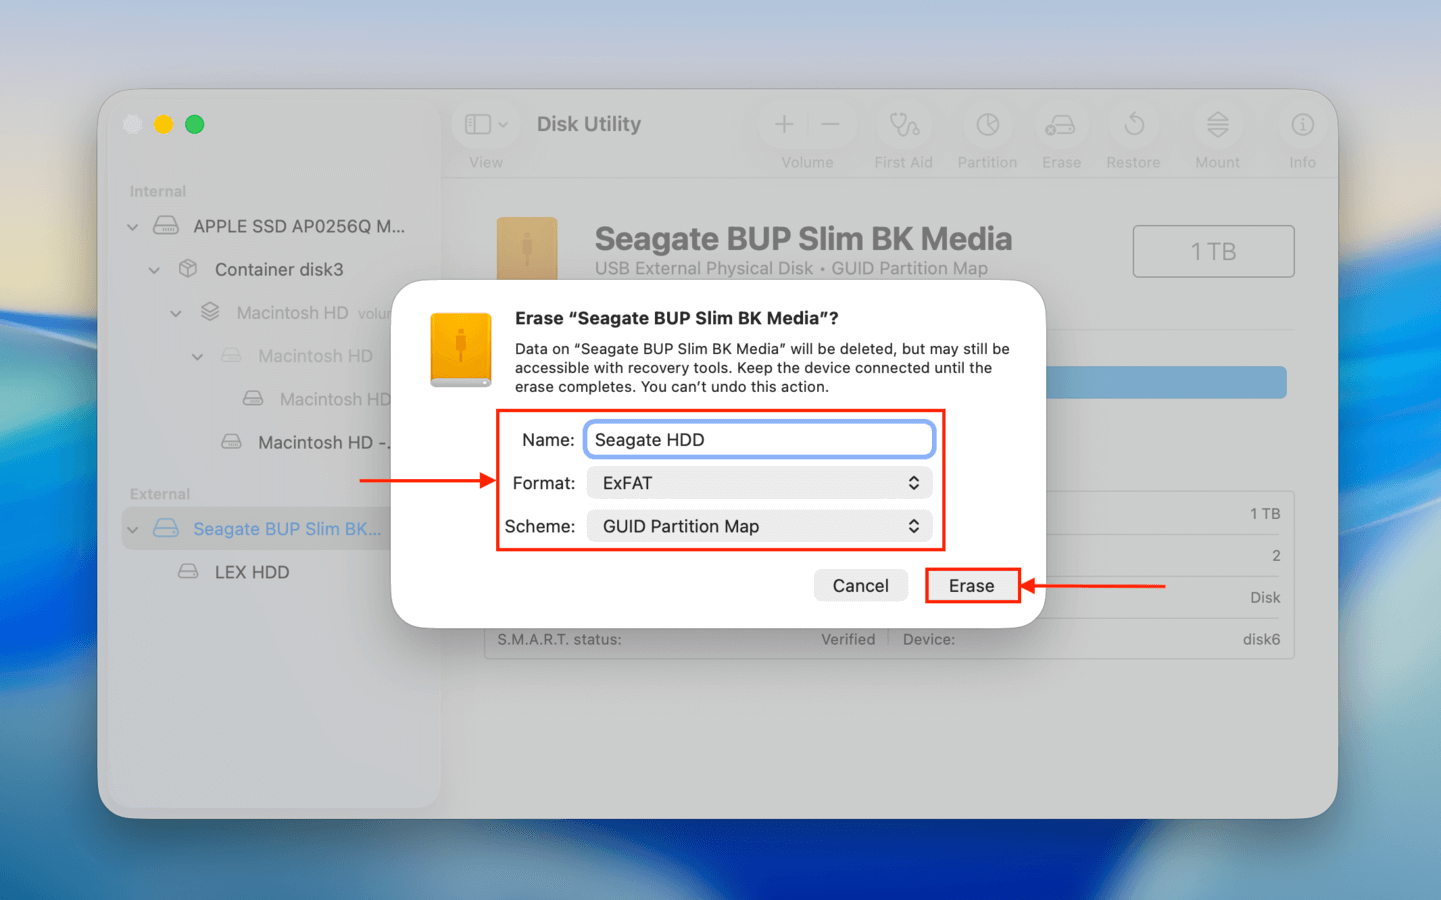
Step 4. In the pop-up menu, name your drive, select its format (ExFAT for general storage and APFS for Mac-exclusive drives), and choose a scheme. After making your selections, click OK to begin the formatting process.
Once your drive has been formatted, it has now become initialized as well. You should be able to use it immediately with your Mac to store data or boot macOS.
Conclusion
Disks appearing as uninitialized is common, especially with older drives. It’s not completely avoidable, but you can decrease the chances of it happening with a few good practices. First, make sure that you always “Safely Eject” your drive before physically disconnecting it. This ensures all processes are properly closed.
If you’re using a hard disk drive, wait 5-10 seconds after using “Safe Eject” before removing the cable. This allows the spinning disk to completely stop before the drive is moved, avoiding minor scratches. Finally, avoid low-quality USB hubs that can randomly lose power while your drive is connected. This can leave data critical to the file system incomplete, which can cause the error.
FAQ
To fix a hard drive that can’t be initialized, try the following fixes:
- Check your drive’s connections.
- Use the First Aid tool in Disk Utility.
- Run the File System Consistency Check command in Terminal (sudo fsck_apfs -y /dev/disk3s1). Make sure to replace the sample disk identifier (disk3s1) with yours.
- Restore lost or missing partitions using TestDisk.
Even though these fixes won’t erase your data, we still recommend restoring your files and saving them to another storage device before proceeding. Or, at least create an image backup of your drive.
Initializing a hard drive prepares it to be used by macOS by setting partition styles and boot information. To fully initialize a drive, it also needs to be formatted – which erases any data still present on the disk.


