The “disk you inserted was not readable by this computer” error message can be alarming, but it doesn’t mean the drive is now useless. In most cases, the error is fixable through simple troubleshooting steps. Let’s explore why this error occurs and what you should do about it.
Why My Drive is Unreadable?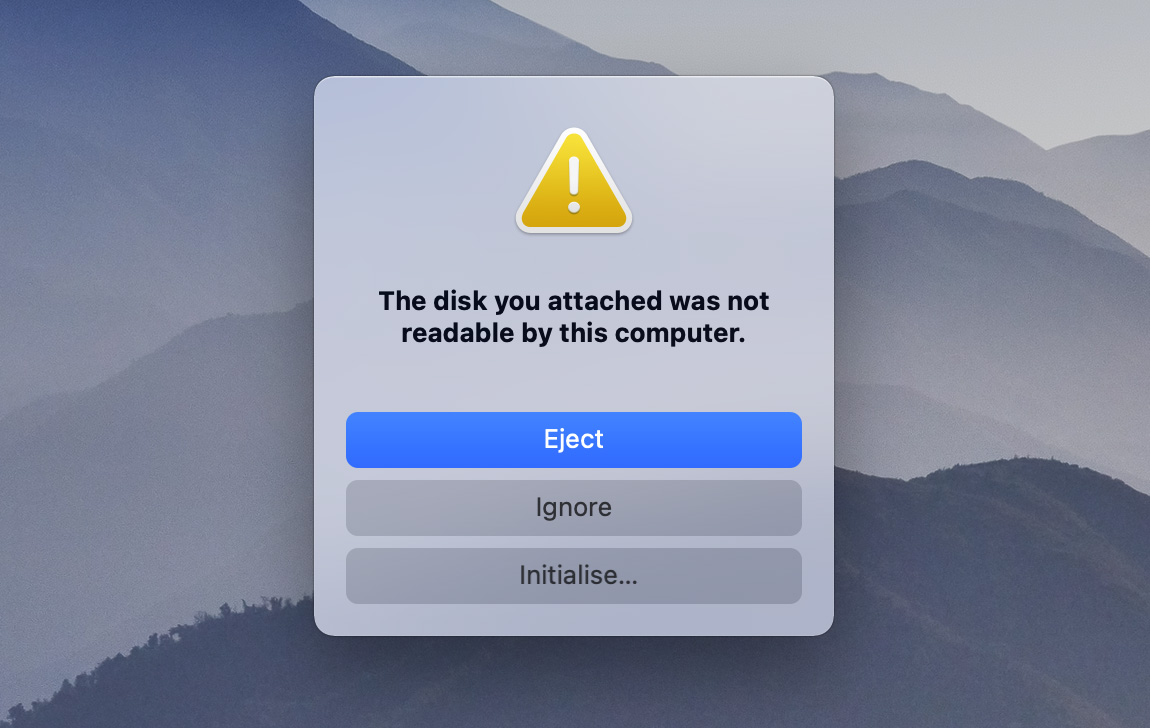
Your Mac has a good reason to display the “disk you inserted was not readable by this computer” error message even though it won’t tell you what the reason is. In most cases, one of the following causes is to blame:
- 💿 Complete drive failure. Sometimes the drive has experienced serious damage, either to its internal components (physical failure) or to its data structure (logical failure). In these cases, while your Mac can detect that a drive is connected, it can’t access any data on it, so it displays the error message to let you know that something has gone terribly wrong.
- 🔗 Connection problems. Your storage device needs to reliably communicate with your Mac to work as intended. Something as simple as a slightly loose or damaged cable can lead to intermittent data transfer errors, which then trigger the error message. Other common connection issues include damaged USB ports, faulty adapters, or insufficient power supply to the drive—especially with portable drives that rely on USB power alone.
- 🗃️ Corrupted file system. Every drive needs a healthy file system to organize and access data. If this file system becomes corrupted, your Mac won’t be able to read the drive’s contents, even though the physical drive is fine. This often happens when drives are removed without being properly ejected first or when they’re accessed from different operating systems.
- 🍏 Unsupported file system. The macOS operating system supports specific file systems like APFS, HFS+, FAT32, and exFAT. If your drive uses a different format (like EXT4 from Linux), your Mac might detect the drive but won’t be able to read it without additional software.
- 🗄️ Drive initialization issues. Every drive needs proper initialization and a partition table to work with macOS. New drives often appear as “unreadable” because they haven’t been initialized for your Mac yet. If a previously working drive suddenly needs initialization, its partition table might be damaged, but your data is likely still there.
The good news is that if your Mac can detect the storage device (evident by its appearance in the Disk Utility tool), there’s usually a way to recover your data and fix the drive. The only exception is severe physical damage, which may require professional repair services if it’s so extensive that the device doesn’t function anymore.
How to Recover Data from a Disk that Isn’t Readable
Before attempting any repairs on a drive that shows the “disk you inserted was not readable by this computer” error, I strongly recommend recovering your data first. Why? Because repair attempts can sometimes make the situation worse, potentially making some data unrecoverable—especially if the drive is already failing or severely corrupted.
Since your Mac can’t read the drive normally, you’ll need specialized third-party software to recover your files. I always recommend Disk Drill for the following reasons:
- Comprehensive file system support (APFS, HFS+, FAT32, exFAT, and more), including the ability to recover data from RAW drives with no file system.
- Recognition of over 400 file signatures for reliable recovery even when the file system is damaged.
- An intuitive interface with built-in file preview that makes it easy to verify file integrity before recovery.
Follow these steps to locate all recoverable data using the free version of Disk Drill for Mac:
Step 1.Download and install Disk Drill from the official website.
Step 2.Connect your unreadable drive to your Mac. Make sure to use a reliable cable and port to achieve and maintain a stable connection during recovery.
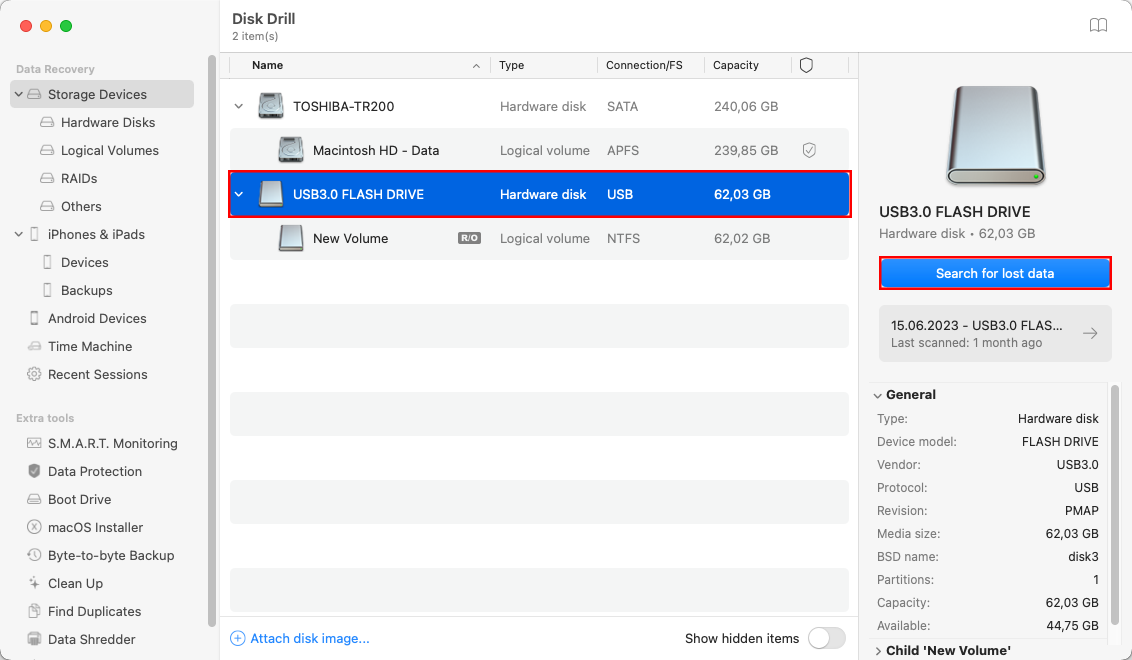
Step 3.Launch Disk Drill and locate your drive under Storage devices in the main window. Select it and click Search for lost data to begin scanning.
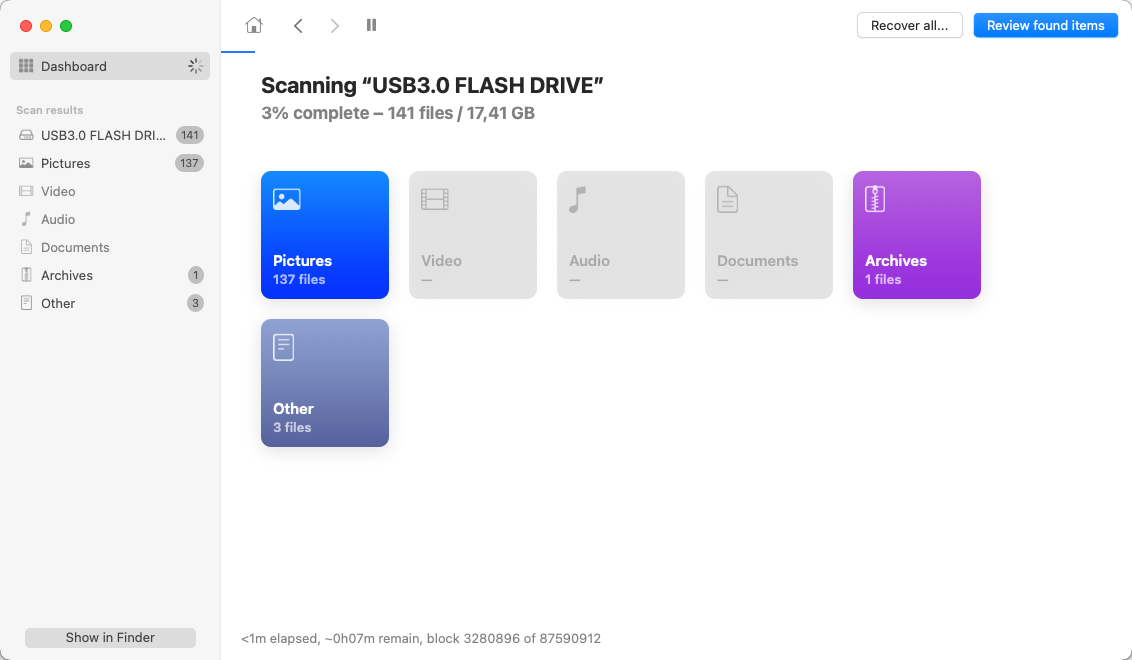
Step 4.Wait for the scan process to complete.
Step 5.Once the scan has been completed, review the results and click the checkboxes next to the files you want to recover. Use the built-in preview feature (click the thumbnail or eye icon) to verify the integrity of the files you wish to recover. You can then click the Recover button and specify a suitable recovery location (must be on a different drive then the one triggering the error).
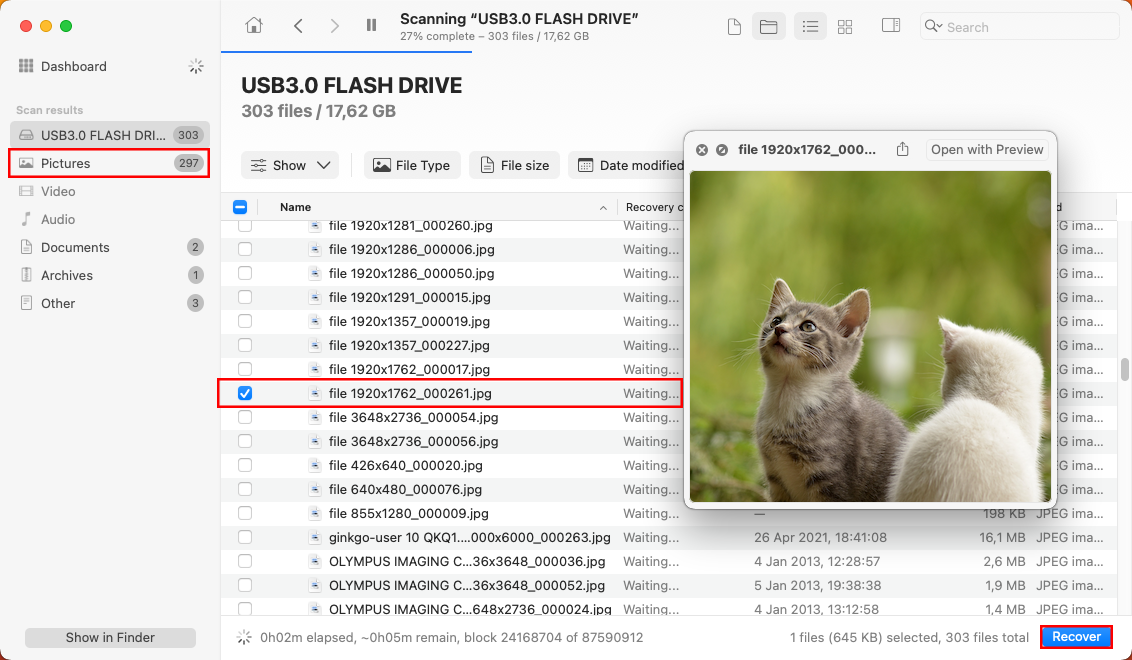
Keep in mind that the free version of Disk Drill for Mac allows you to scan and preview recoverable files, but you’ll need to upgrade to the Pro version to actually recover them.
How to Fix “The Disk You Inserted Was Not Readable”
Now that I’ve demonstrated how to recover important data from the problematic storage device, we can safely fix the “disk you inserted was not readable by this computer” error message itself.
Method 1: Double-Check the Connection
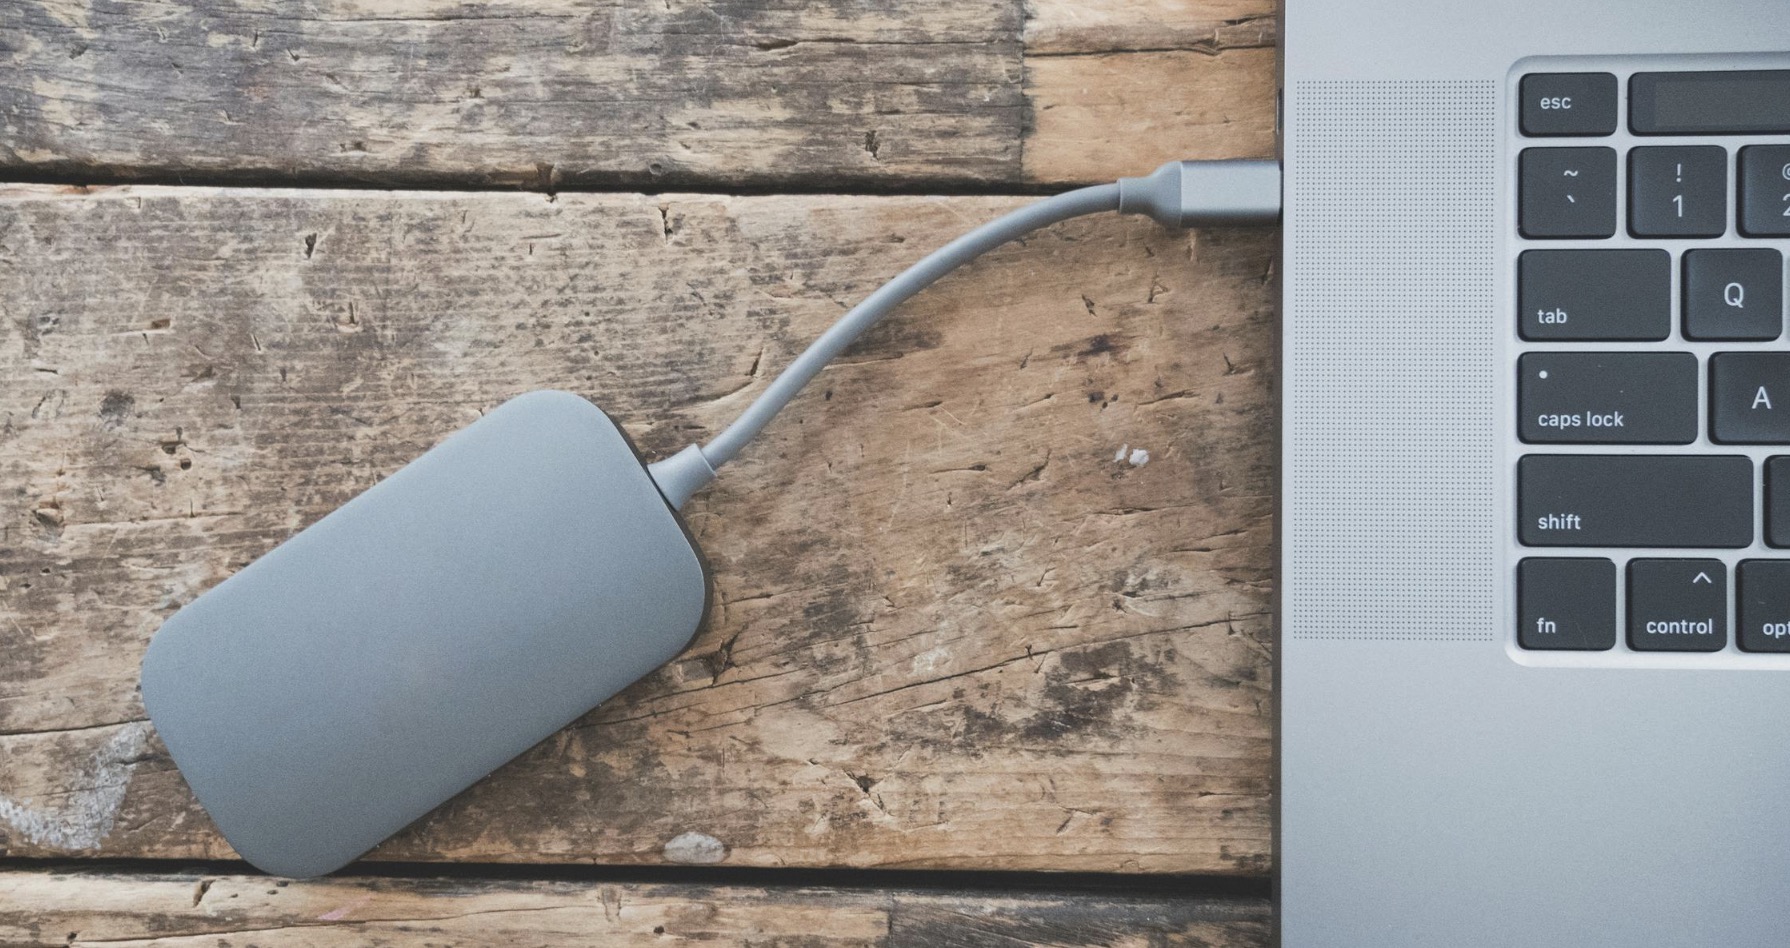
As I’ve explained earlier in this article, a loose or faulty connection is often the simplest explanation for the “disk not readable” error. Before trying more complex solutions, thoroughly examine both the drive’s connector and your Mac’s ports for any visible damage or debris. Even a small amount of dust or a slightly bent connector can prevent proper communication between your Mac and the storage device.
If possible, try connecting your drive to a different USB port on your Mac, preferably directly rather than through a hub or adapter (USB hubs can sometimes cause connectivity issues, especially if they’re not providing enough power to the drive). Also, try a different cable if you have one available—cables can develop internal damage that isn’t visible from the outside but still affects their performance.
If the drive still isn’t readable, restart your Mac while the drive is connected. This legendary fix can resolve temporary communication issues by resetting the USB ports and clearing any system processes that might be interfering with the drive.
Method 2: Use First Aid to Repair External Device
First Aid is a repair utility that can fix common drive issues by checking and repairing the file system structure, directory hierarchy, and other disk-related problems.
The best thing about First Aid is that it’s developed by Apple and included with macOS, which means it’s completely safe to use and specifically designed to work with Mac-formatted drives.
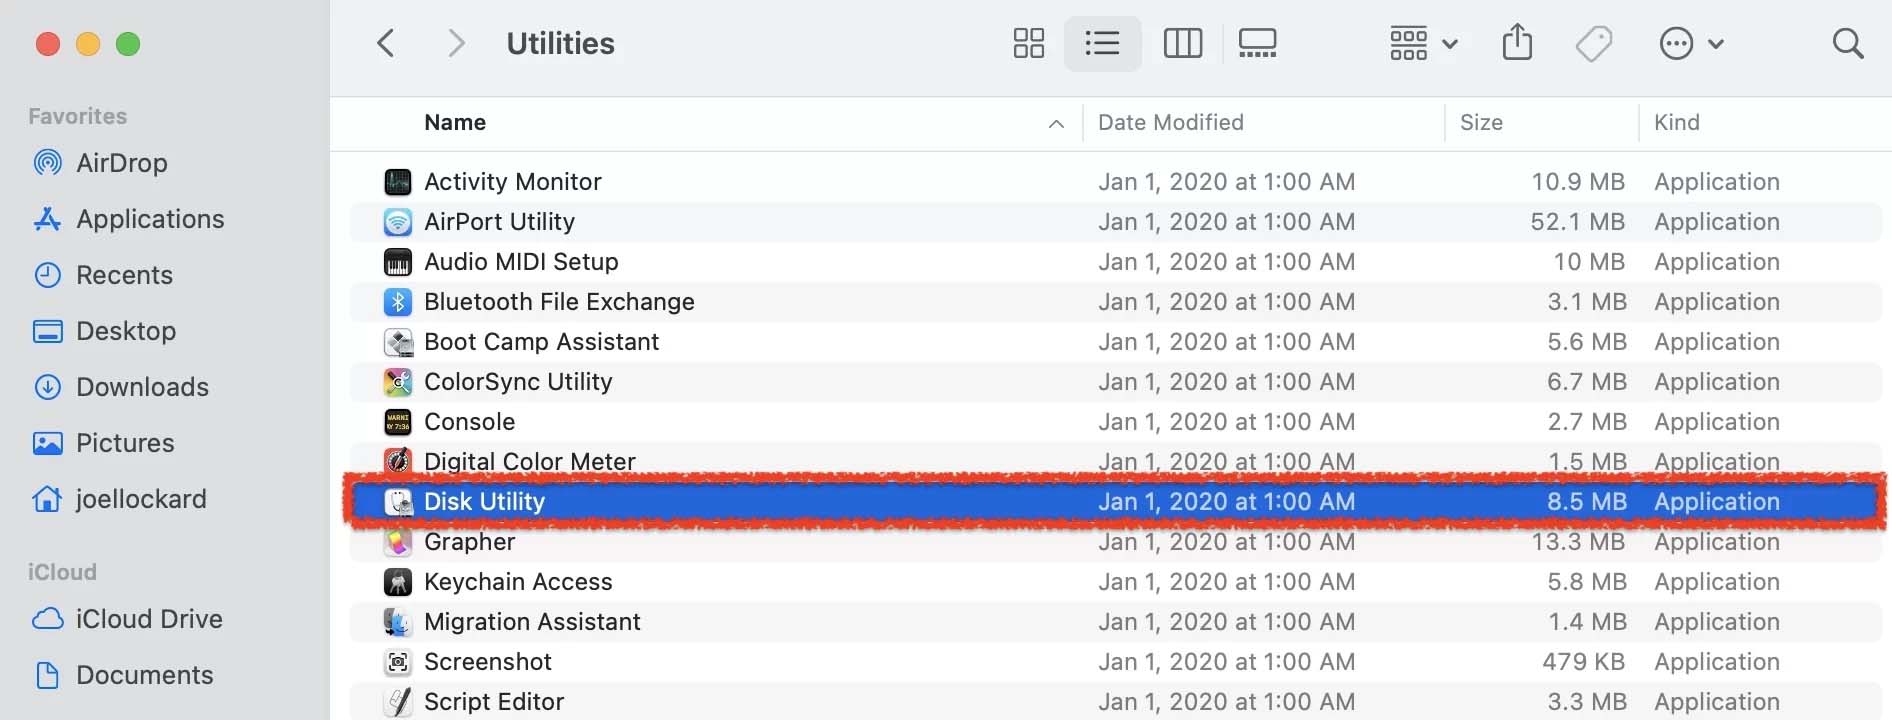
Step 1.Launch Disk Utility from the Utilities subfolder inside the Applications folder.
Step 2.Once you have launched Disk Utility, select your problematic storage device in the left pane and click on First Aid.
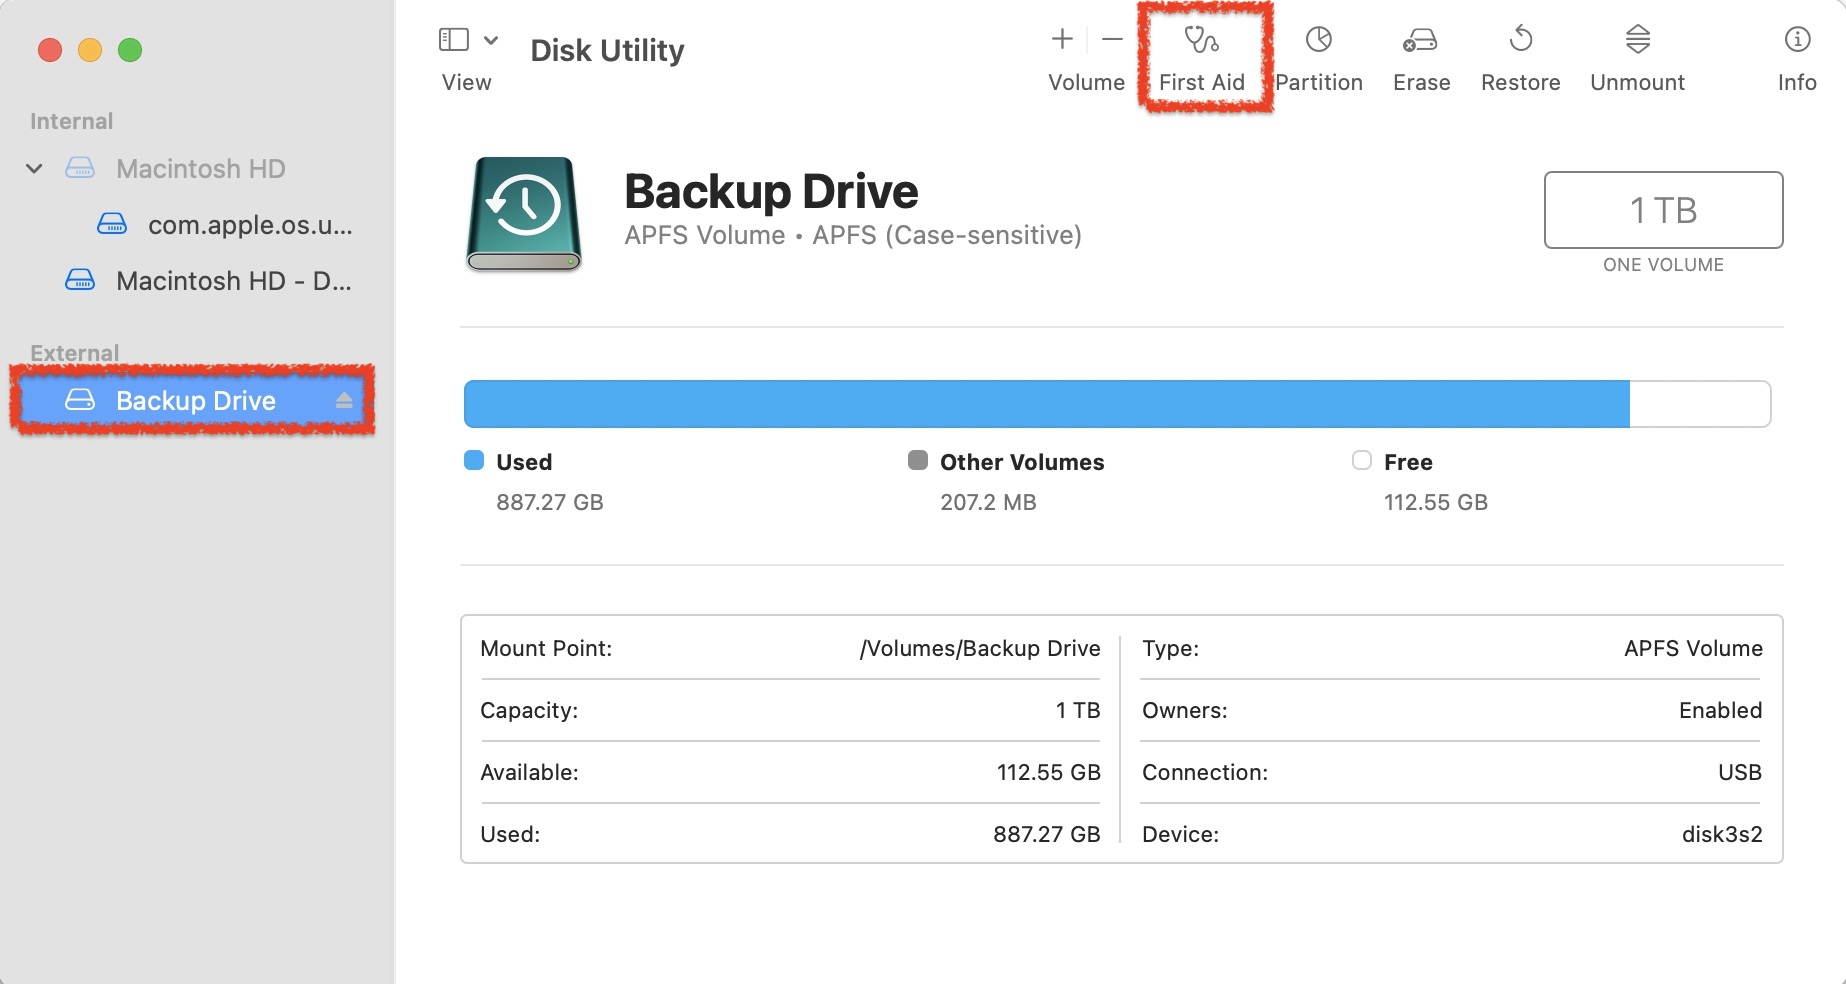
Step 3.Run First Aid on the external device.
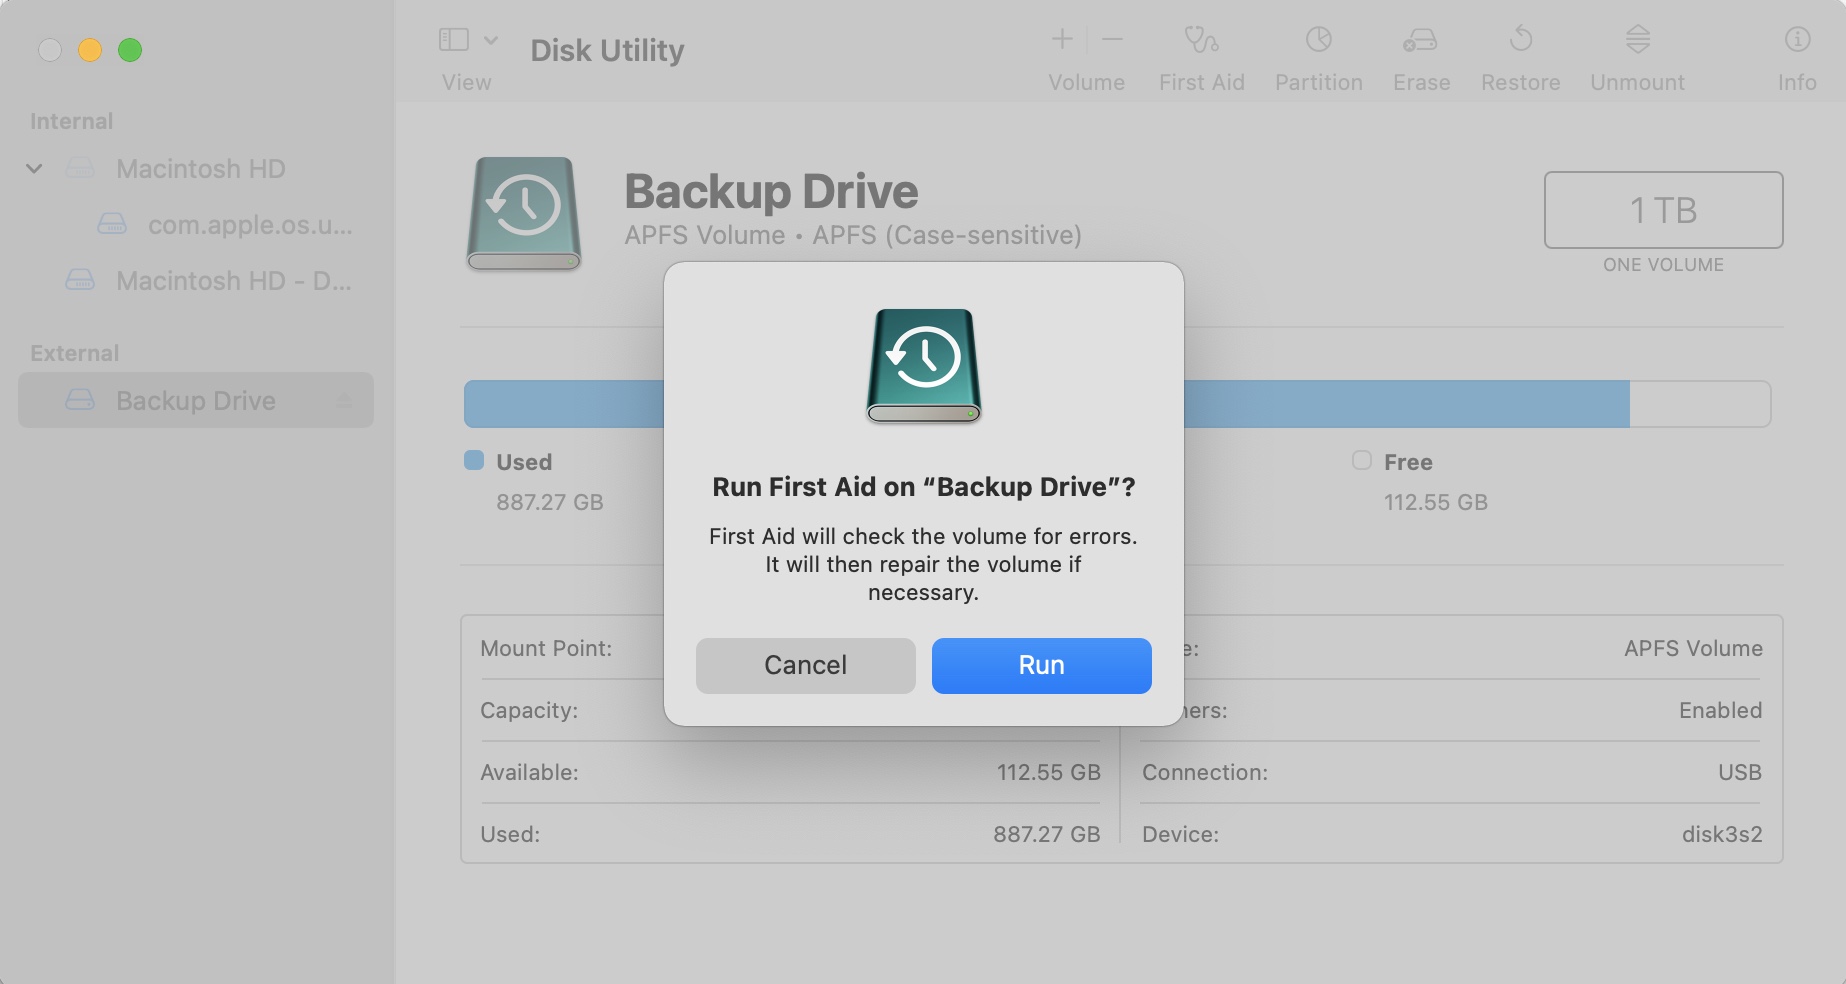
Step 4.Check and see if the device is working correctly.
Method 3: Perform Terminal Verification/Repair
While First Aid provides a graphical interface for disk repair, macOS also offers powerful Terminal commands that can be used to fix the “disk you inserted was not readable by this computer” error message.
Step 1.Open Terminal from the Utilities folder inside Applications.
Step 2.Type diskutil list and press Return to display all connected drives. Note your drive’s identifier (e.g., disk10).
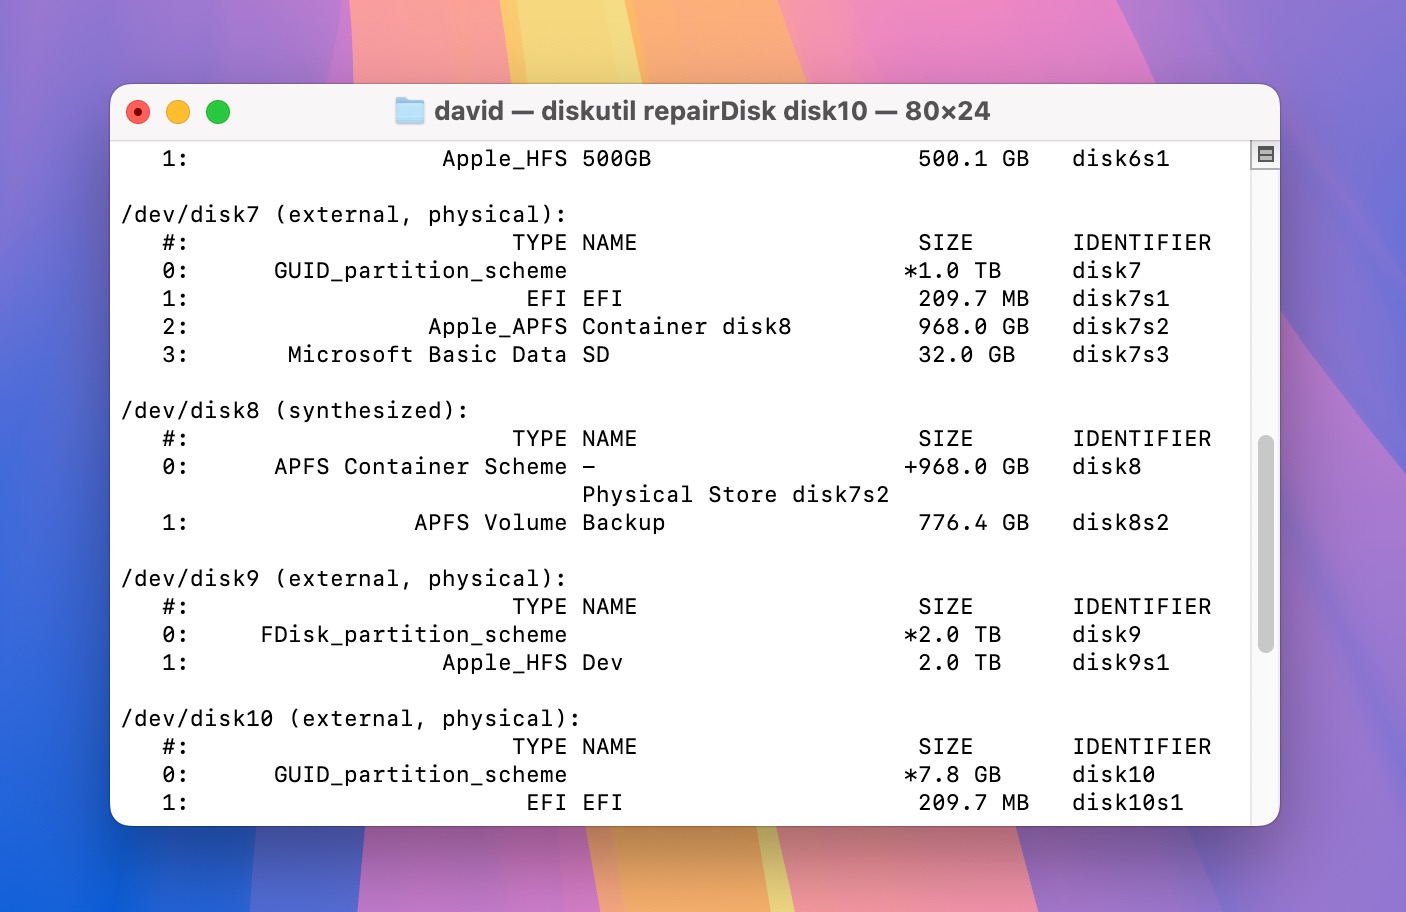
Step 3.Verify the disk’s condition by typing diskutil verifyDisk diskX (replace “diskX” with your drive’s identifier).
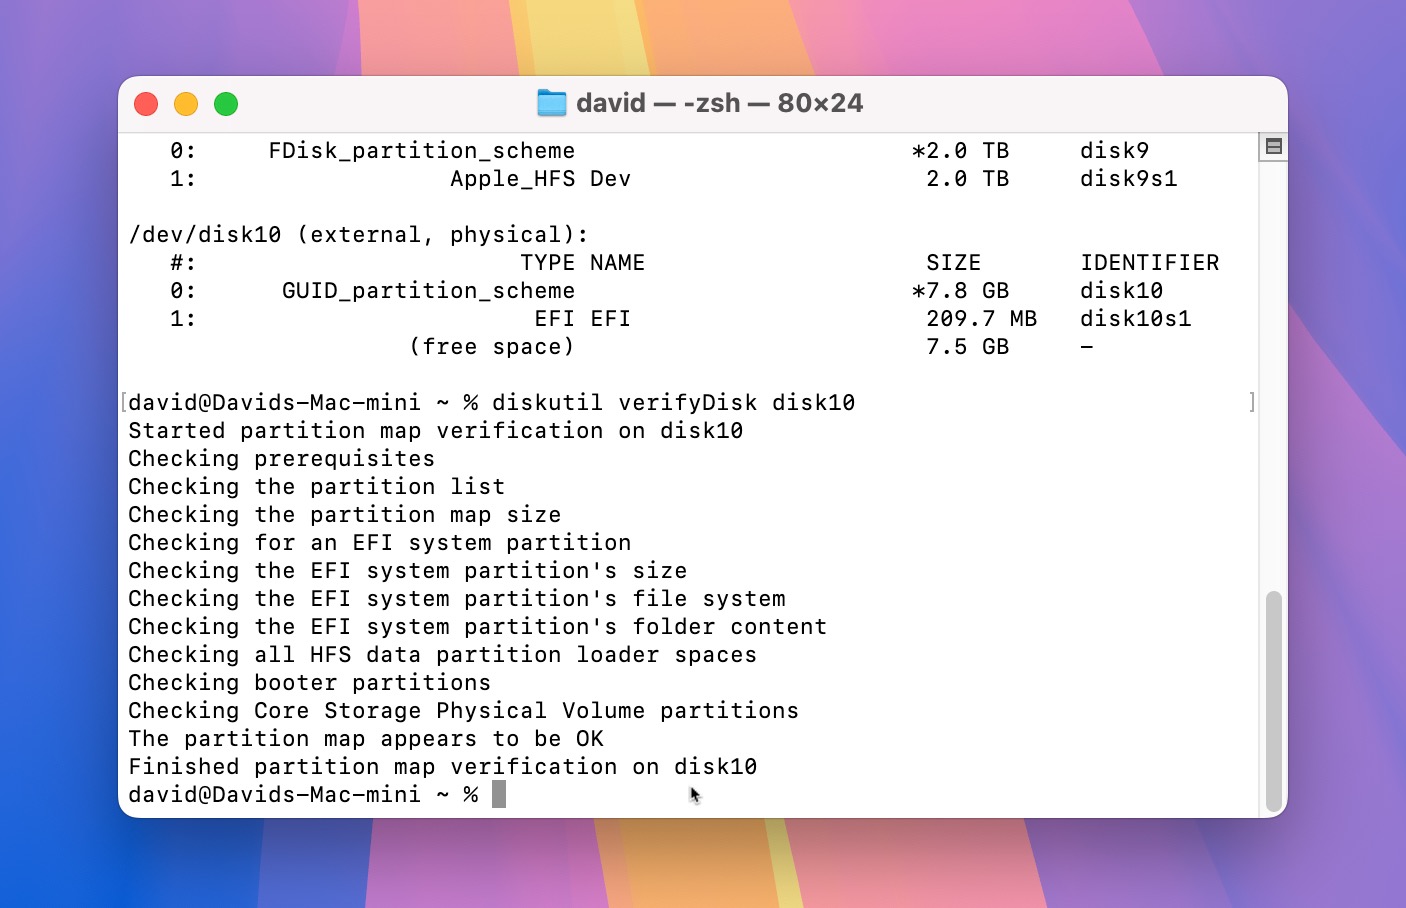
Step 4.If verification finds issues, repair the disk by typing diskutil repairDisk diskX (again, replace “diskX” with your identifier).
If Terminal reports that it cannot repair the drive, or if the repair doesn’t resolve the “disk not readable” error, it’s time to try the next method.
Method 4: Install Missing File System Driver
Sometimes your Mac displays the “disk not readable” error simply because it doesn’t have the necessary software to read the drive’s file system. This is particularly common when trying to write data to drives formatted for Windows (NTFS) or read data from Linux (ext2/3/4) drives.
To resolve this issue, you can install third-party file system drivers. Here are two reliable solutions:
- Microsoft NTFS for Mac by Paragon Software (enables full read-write access to Windows NTFS-formatted drives)
- extFS for Mac by Paragon Software (provides complete access to ext2, ext3, and ext4 drivers)
Keep in mind that while these drivers are commercial software, they offer free trials so you can verify they solve your problem before purchasing. You can also opt for open-source alternatives like Mounty for NTFS or ext4fuse, but you may sacrifice some usability and extra features compared to the commercial solutions.
Method 5: Format Your External Drive
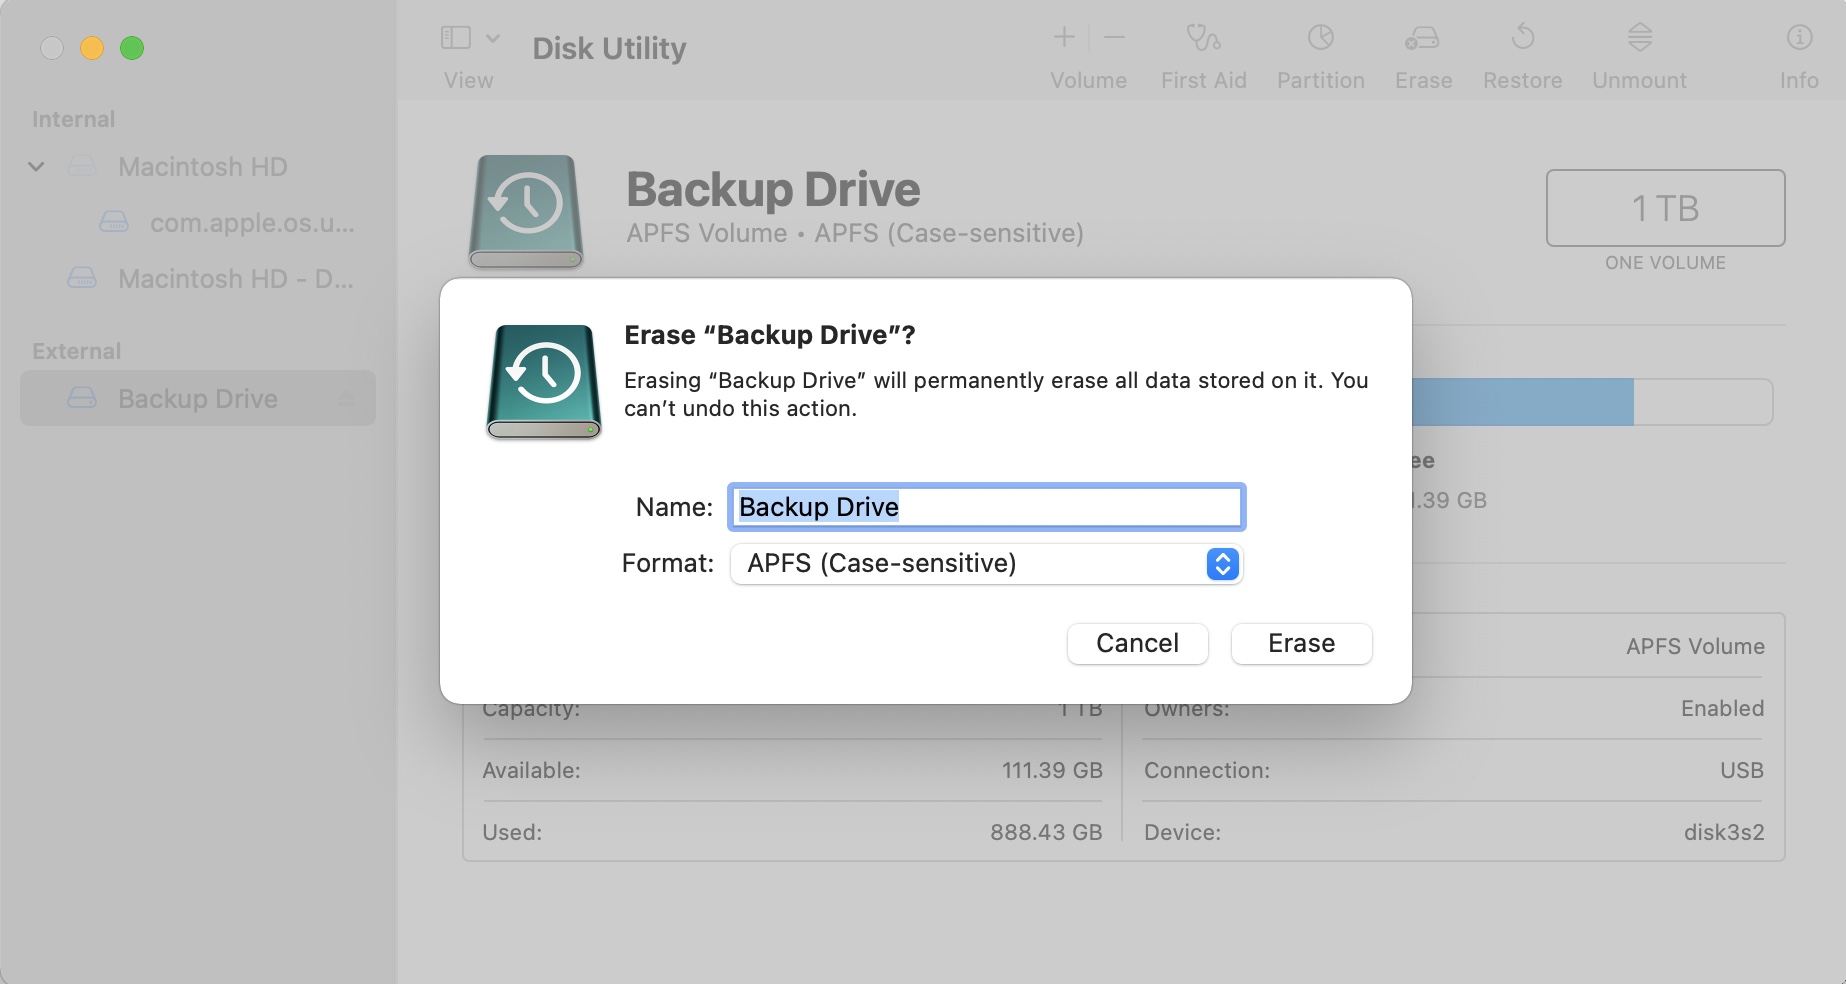
If all previous troubleshooting methods have failed, formatting the drive remains your last resort. This process will erase all data on the device but can often resolve persistent “disk not readable” errors by creating a fresh file system.
Step 1.Open Disk Utility from the Utilities folder (Finder > Applications > Utilities > Disk Utility).
Step 2.Inside Disk Utility select your external hard drive from the list of devices on the left-hand side. Then, click on Erase.
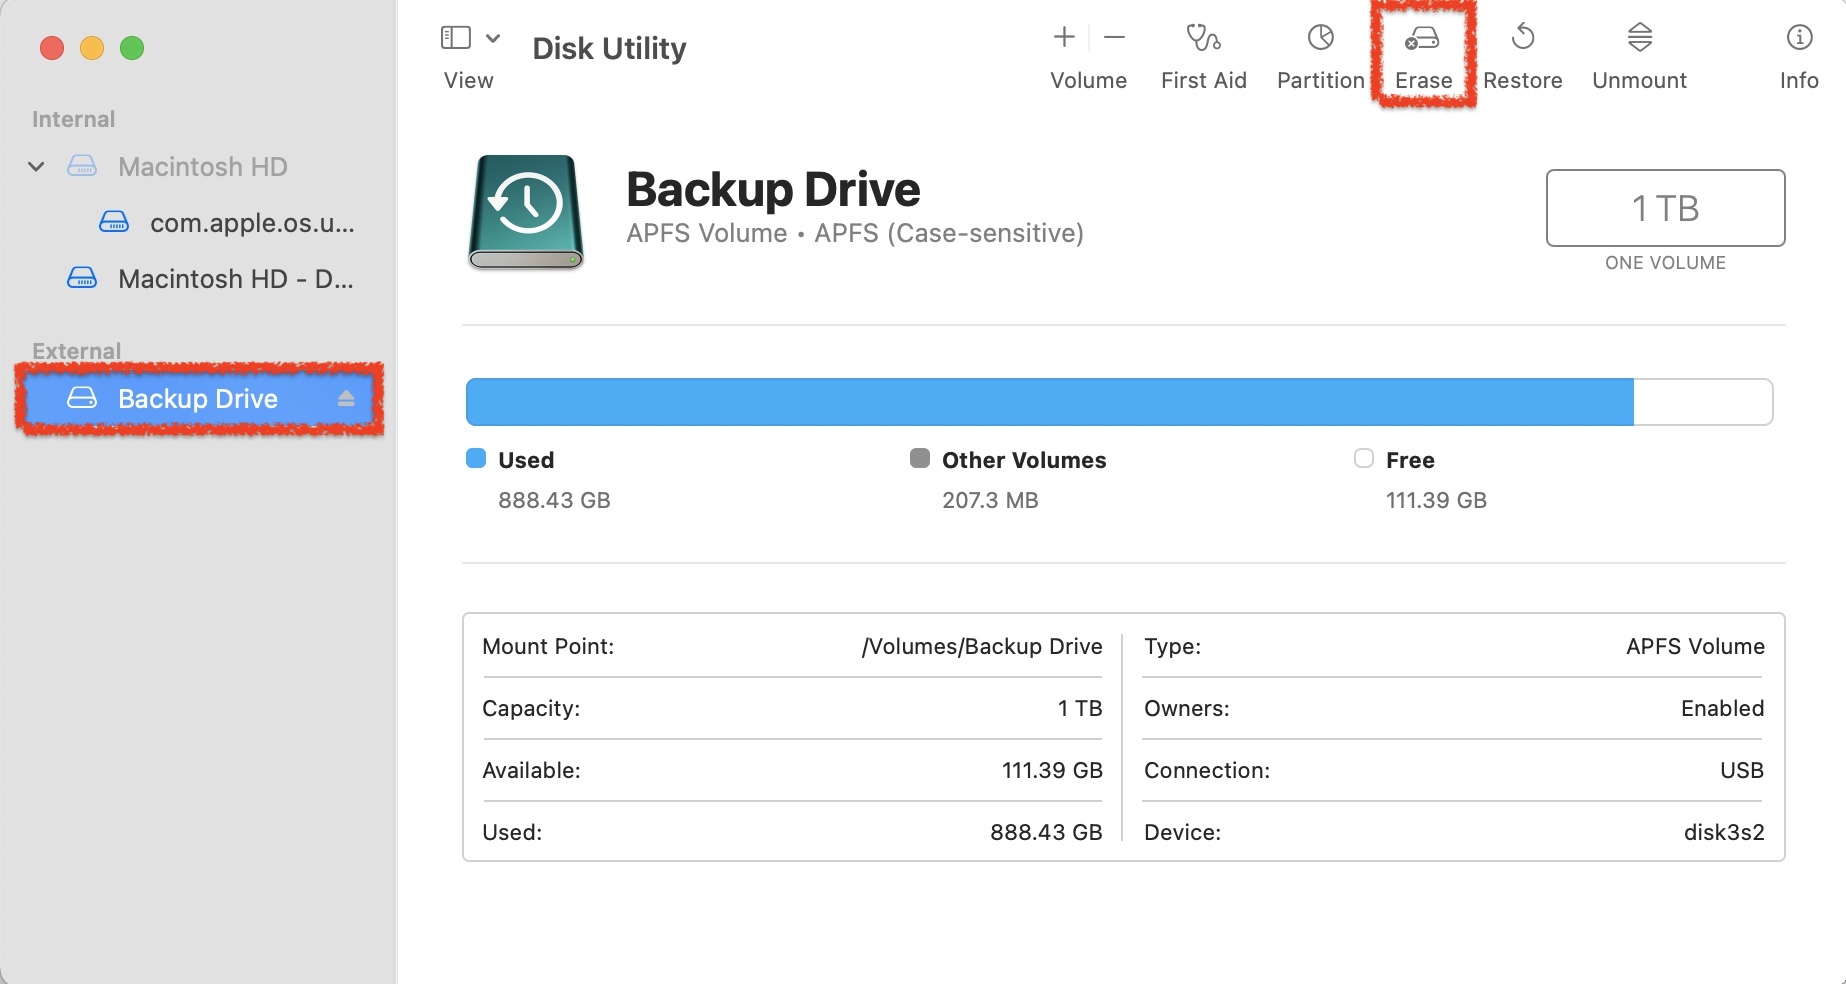
Step 3.Choose the format that you would like to format the external device to:
- APFS: Best for SSDs and flash drives used only with Macs.
- exFAT: Best for drives that need to work with both Mac and Windows computers.
Conclusion
The “disk not readable” error can sometimes be fixed just by using a different data cable or port. If that doesn’t work, you can scan the drive using First Aid, a native tool that’s included with macOS. As your last resort, you can always format the storage device to create a new file system. Just make sure that you have recovered all important data beforehand using data recovery software like Disk Drill, since formatting will permanently erase everything on the drive.
FAQ:
To format an unreadable external hard drive on macOS, follow these steps:
- Launch Disk Utility. You can find it in Finder > Go > Utilities.
- Select the external hard drive from the sidebar.
- Click on Erase.
- Choose the format parameters and click Erase.


