
When files appear to be missing on your Mac, they might not be lost—they could just be hidden. The macOS operating system hides certain files and even folders from users to maintain system stability and prevent accidental modifications, and users themselves have the option to hide their own files if they wish to do so. In this article, we’ll explore various methods to reveal hidden files on your Mac to help you locate everything from configuration files to important personal data.
Table of Contents
What Are Hidden Files on Mac?
Hidden files on Mac are system, application, and user files that are concealed from regular view in the file directory. This is often done to prevent accidental modification or deletion.
Hidden files and folders exist on your operating system but are not visible by default in Finder or other file management tools unless certain steps are taken. Once you reveal hidden files on Mac, you can interact with them like normal files—you can copy, modify, and even delete them.
The most common reasons why Mac users want to reveal hidden files and folders include:
- Troubleshooting system or application issues.
- Accessing application data or preferences that are not available through the user interface.
- Modifying system configurations for advanced users.
- Recovering lost data that may be stored in hidden folders.
- Cleaning up unnecessary files to free up disk space.
How to Show Hidden Files in Finder
While users, by default, are not able to view hidden files on Mac, it has a couple of built-in functions that let you reveal those hidden files in Finder.
Method 1. Keyboard Combination
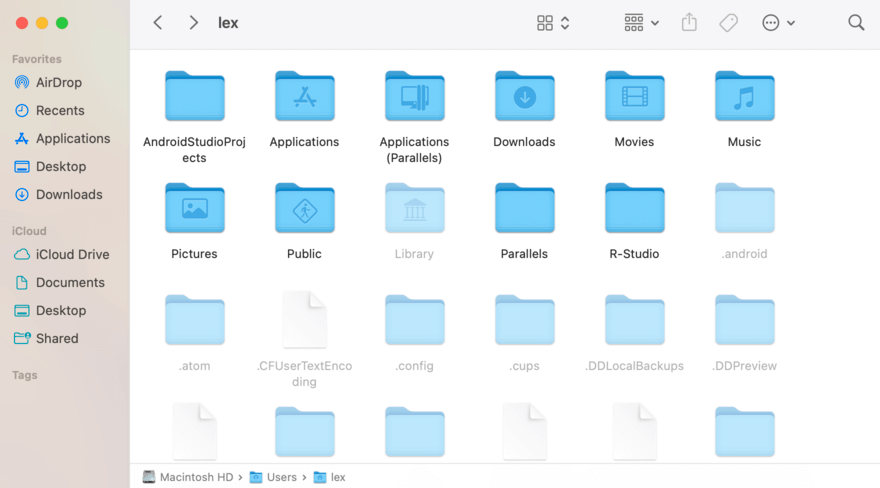
The first method is a keyboard shortcut to show hidden files on Mac. If you want to display hidden files in a specific folder on your Mac, navigate to that folder and press (CMD + Shift + .) – that’s (CMD + Shift + Period).
Files that were marked to be hidden will appear in a slightly lighter shade as regular folders, and the text beneath will appear greyed out. But you should be able to access them now.
Method 2. Show the Home > Library folder
The Library folder nested in your Home folder is typically hidden by default. It contains files that handle application settings, user settings, and more. Sometimes, however, there are good reasons to access them – such as when you need to modify apps with custom settings. For example, the Application Support folder is where custom MIDI mappings have to be stored for DAWs to be able to use them. Here’s how to unhide them:
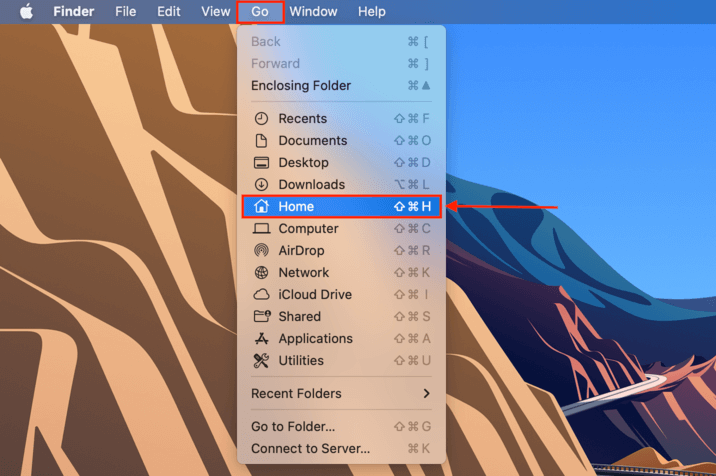
Step 1. Open Finder. On the Apple menu bar, click Go > Home.
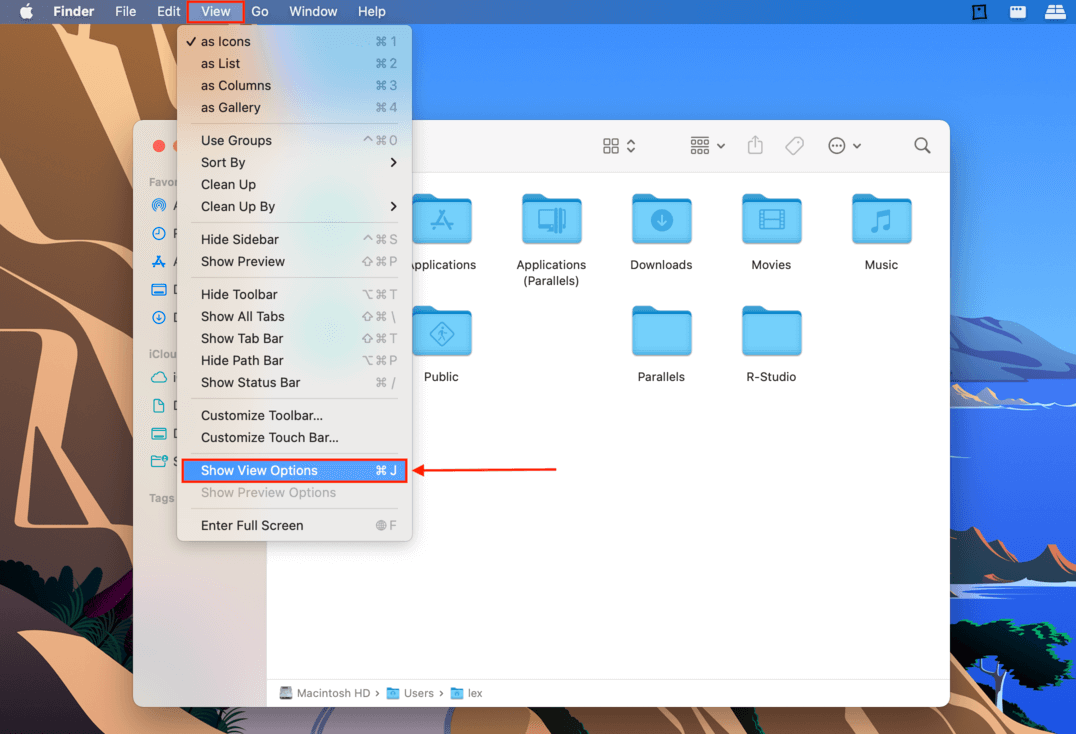
Step 2.Once in the Home folder, on the Apple menu bar, click View > Show View Options.
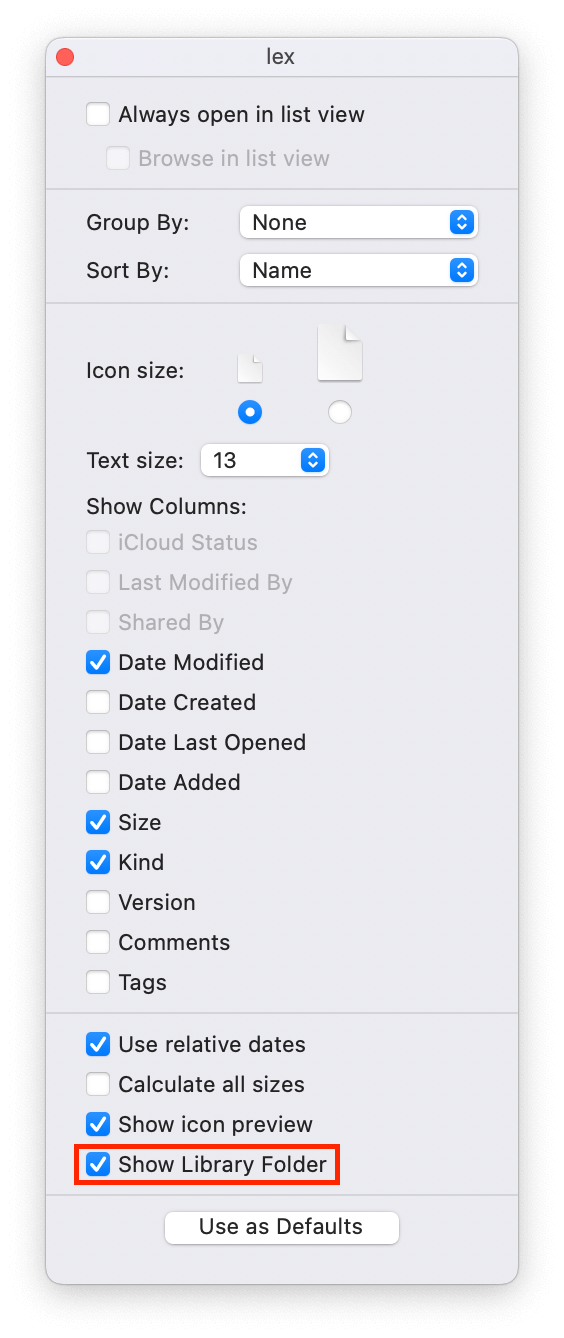
Step 3.On the window that appears, check the box beside the “Show Library Folder” option. You should find the Library folder in your Home folder.
Alternative:
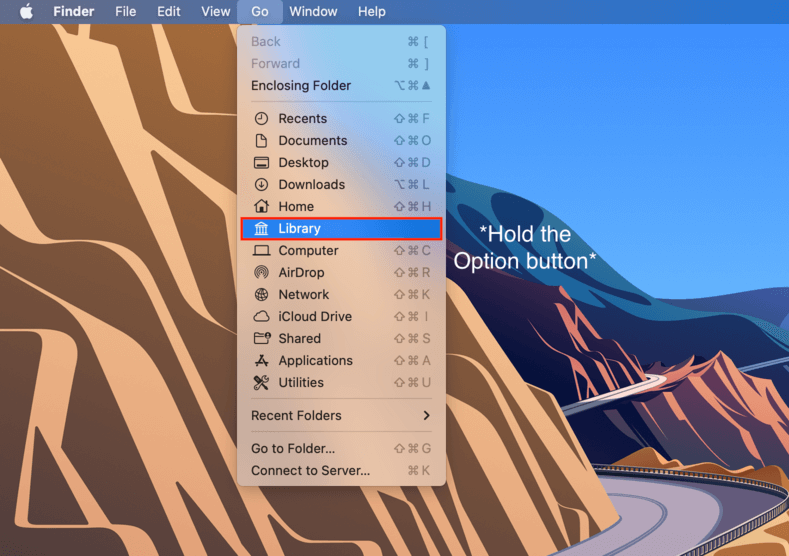
You can also go straight to the Library folder by opening Finder and clicking “Go” on the Apple menu bar. Hold the Option button on your keyboard to reveal the Library folder in the Go dropdown menu.
Method 3. How to Show Hidden Files Using Terminal
If you want to permanently show hidden folders on Mac in any location, you can use a Terminal command that affects the whole file system. Here’s how:
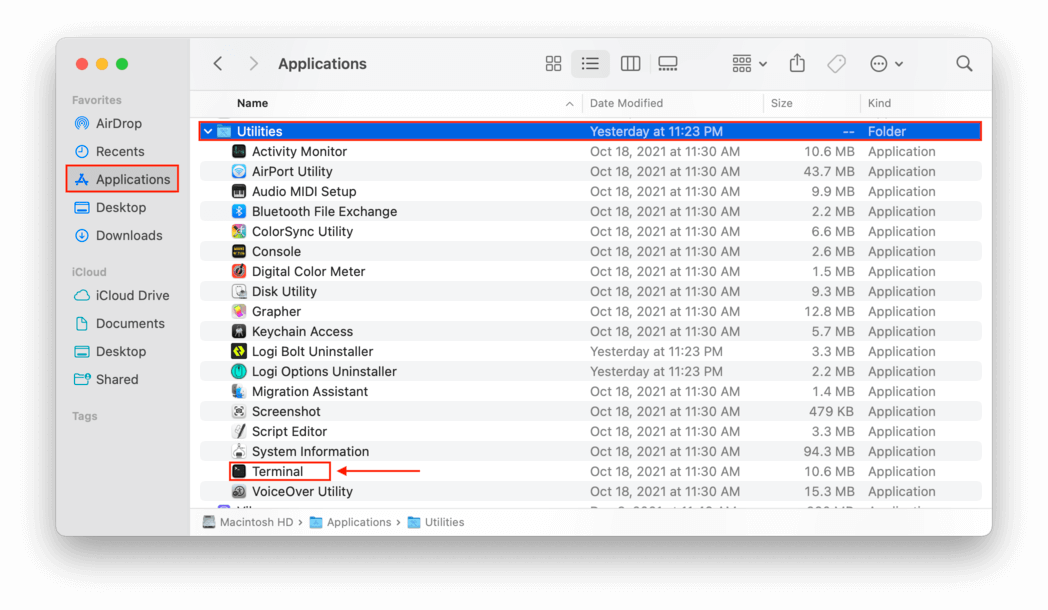
Step 1.Open the Terminal app by opening Finder and navigating to the Applications folder > Utilities > Terminal.
Step 2.Type the following command and press enter:
com.apple.Finder AppleShowAllFiles true
Step 3.To restart Finder and apply the command, type the following again and press enter:
killall Finder
Step 4.To enable hidden files on Mac again, type the following command and press enter:
com.apple.Finder AppleShowAllFiles false
Step 5.Finally, to confirm the command we just used, type the following again and press enter:
killall Finder
Method 4. Install A Third-Party File Manager to See Hidden Files
While macOS Finder is capable of showing hidden files, you can also install and use a third-party file manager app. Here are my recommendations:
- QSpace: This is my personal favorite due to its ability to display up to four folders in one window. QSpace also integrates MacZip for browsing archives as folders, can connect to various cloud services and network protocols, and supports workspace saving for quick restoration of your working state.
- Commander One: With its dual-pane interface, Commander One simplifies the handling of files and directories. Its capabilities extend to compressing and extracting files directly within the app, previewing files without opening them, and conducting advanced searches across local and cloud storage.
- Forklift 4: I recommend Forklift to users who frequently interact with FTP servers or utilize SSH because it allows for efficient management across networks, offering features like multi-server connections, synchronization capabilities, and a comprehensive preview panel for multimedia files and documents.
With my personal third-party file manager of choice, QSpace, you can simply press Command + Shift + “.” on your keyboard, and other file managers make it similarly straightforward.
Of course, there’s no need to limit yourself to my recommendations. Here are three Reddit threads where the best file managers for macOS are discussed:
- What’s the best file manager/explorer for Macs?
- What is the best file manager for Mac (Finder alternative)?
- What file manager app do you use?
I’m sure that you’ll be able to find a third-party file manager that meets your needs perfectly well in one of the above-linked discussions.
How to See Hidden Folders
The methods to see hidden folders on a Mac are the same as those used to reveal hidden files.
- Use the keyboard shortcut Command + Shift + . in Finder.
- Access specific hidden folders through the Go to Folder option, which you can find by launching Finder and opening the Go menu.
- Enter the “defaults write com.apple.Finder AppleShowAllFiles true” command in Terminal and then enter “killall Finder” to restart Finder.
- You can also install a third-party file manager that provides an option to display hidden folders.
Commonly accessed hidden folders on Mac include:
- ~/Library: Contains user-specific application support files, preferences, and caches
- /.Trash: The system-level trash folder
- /.ssh: Stores SSH keys and configuration files
- /.bash_history: Contains the command history for the Bash shell
- /.fseventsd – Contains logs that keep track of changes to each volume’s file system, used mainly by backup software to determine which files have been changed since the last backup.
If you would like to permanently unhide a hidden folder, let’s say the ~/Library/ folder and show hidden directories found there, this is what you need to do:
Step 1.Open the Terminal app by opening Finder > Applications > Utilities > Terminal app.
Step 2.Type the following command and press enter:
chflags nohidden ~/Library/
Step 3.To reverse this setting, type the following command into Terminal and press enter:
chflags hidden ~/Library/
What to Do If Hidden Files Weren’t Found
If you’ve gotten this far into the article and you still can’t find your files on your Mac, there are several possible reasons why:
- The files might have been moved to a different location on your Mac.
- There might be something wrong with your system, and the normal methods described above don’t work.
- The files might have been deleted or lost by accident.
Regardless of which of these reasons applies, your next step should be to use data recovery software capable of finding all files that are still present on your hard drive
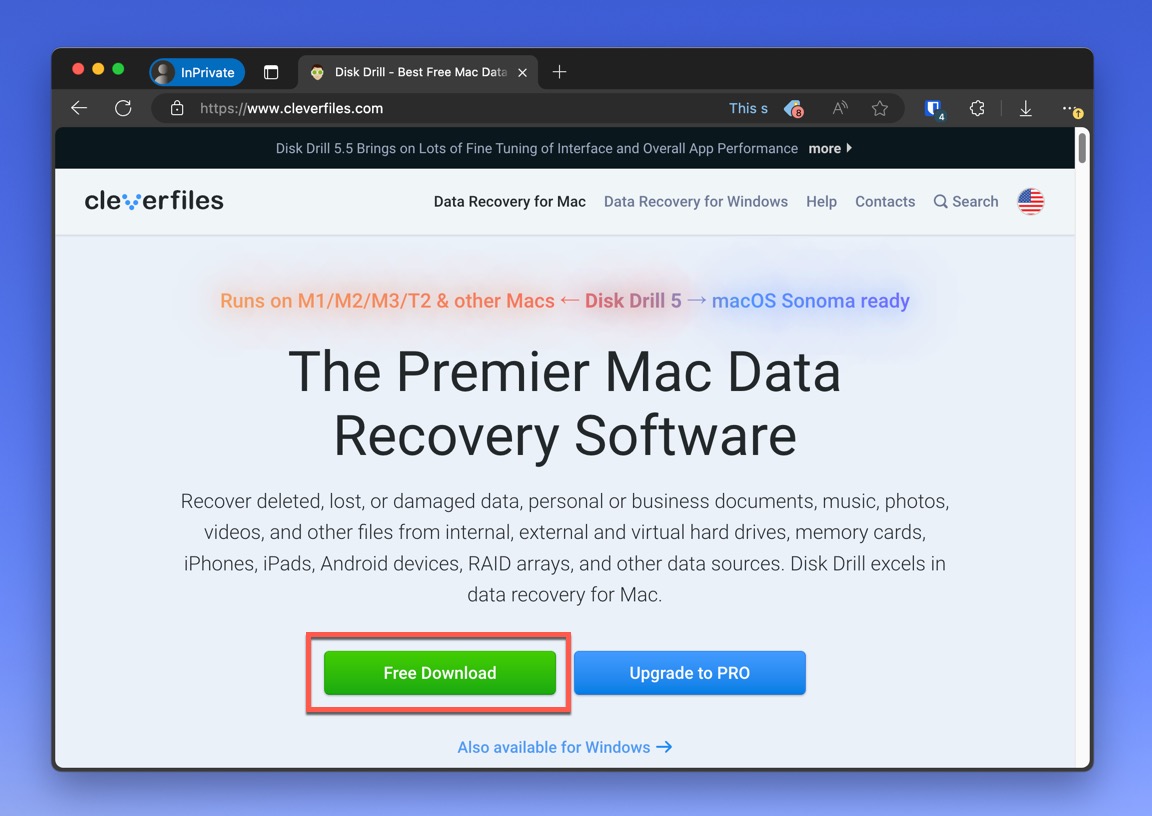
I recommend Disk Drill thanks to its extremely convenient user interface and impressive performance. Disk Drill lists all found files in three categories:
- Deleted or Lost: Files that have been deleted from your system but are still recoverable.
- Existing: Files that currently exist on your system but might be hidden or inaccessible.
- Reconstructed: Files that have been partially recovered from fragments found on your disk.
Here’s how to use Disk Drill to find and recover your files:
Step 1.Download and install Disk Drill from the Cleverfiles official website. You can then Launch Disk Drill by opening Finder > Applications and double-clicking Disk Drill. Alternatively, you can launch Spotlight (Command + Spacebar), enter “Disk Drill,” and press Return/Enter on your keyboard.
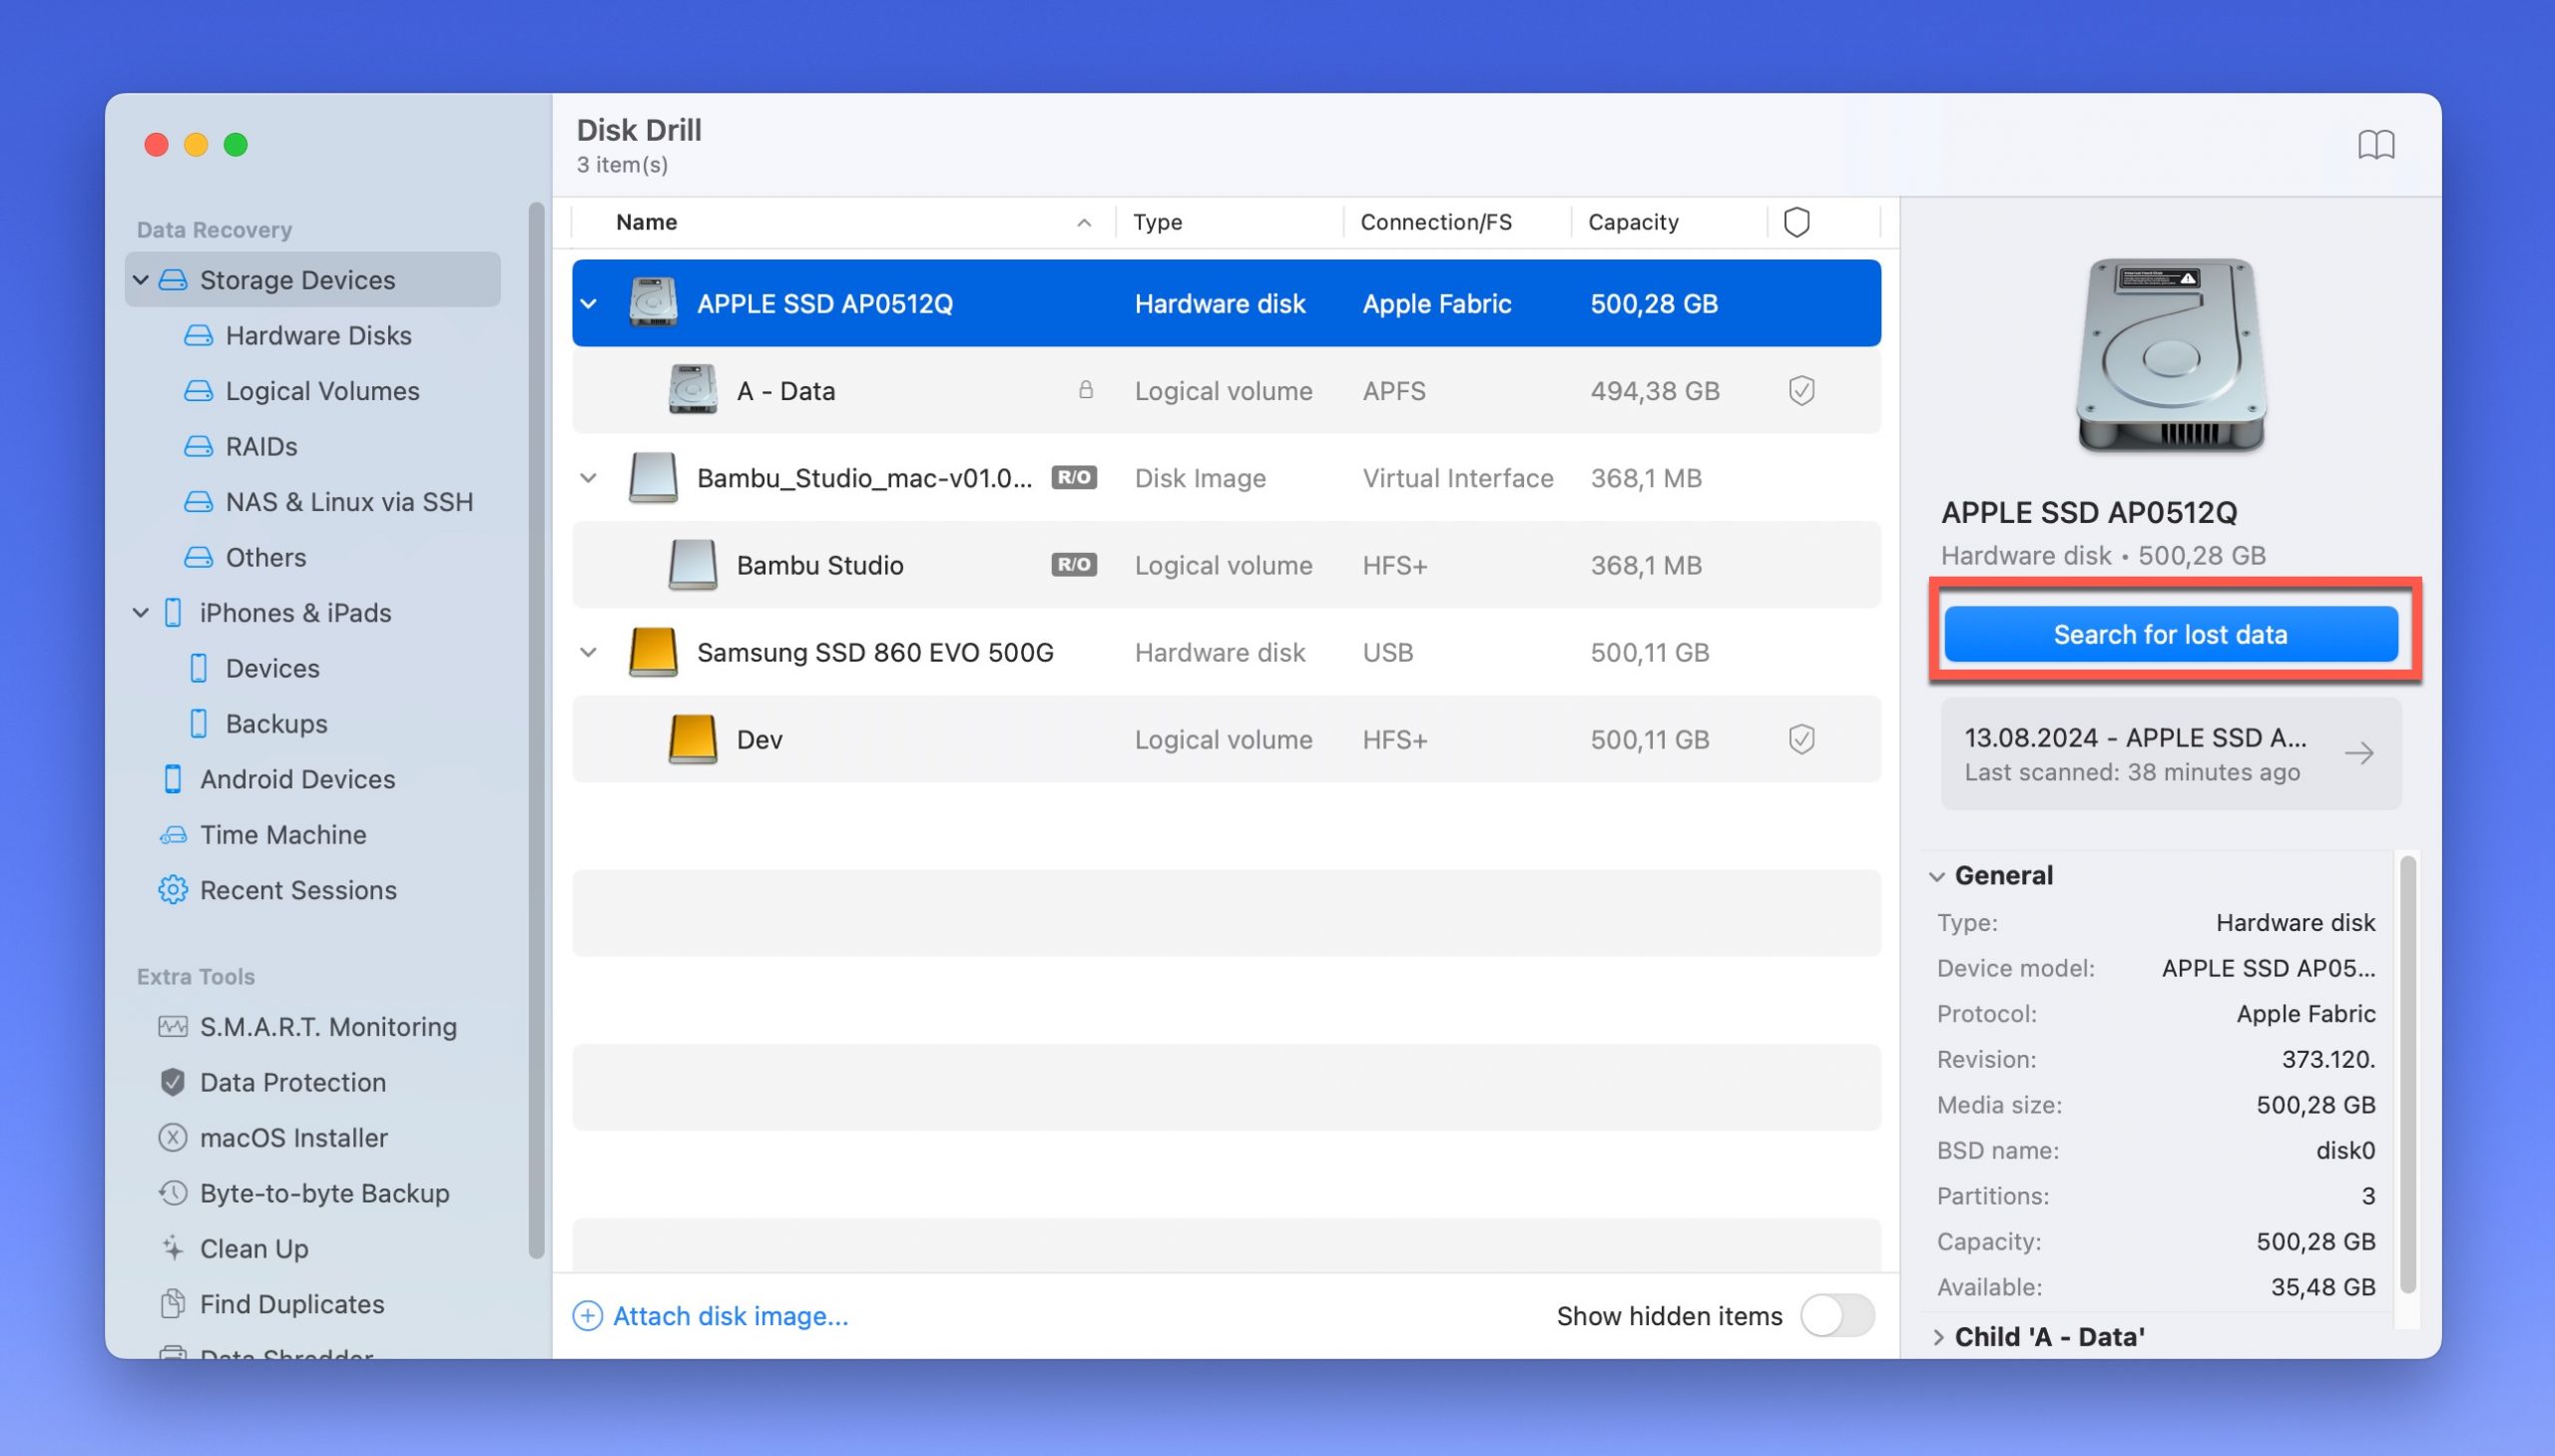
Step 2.Select the disk where you suspect your files to be located. Click the Search for lost files button to start the scanning process.
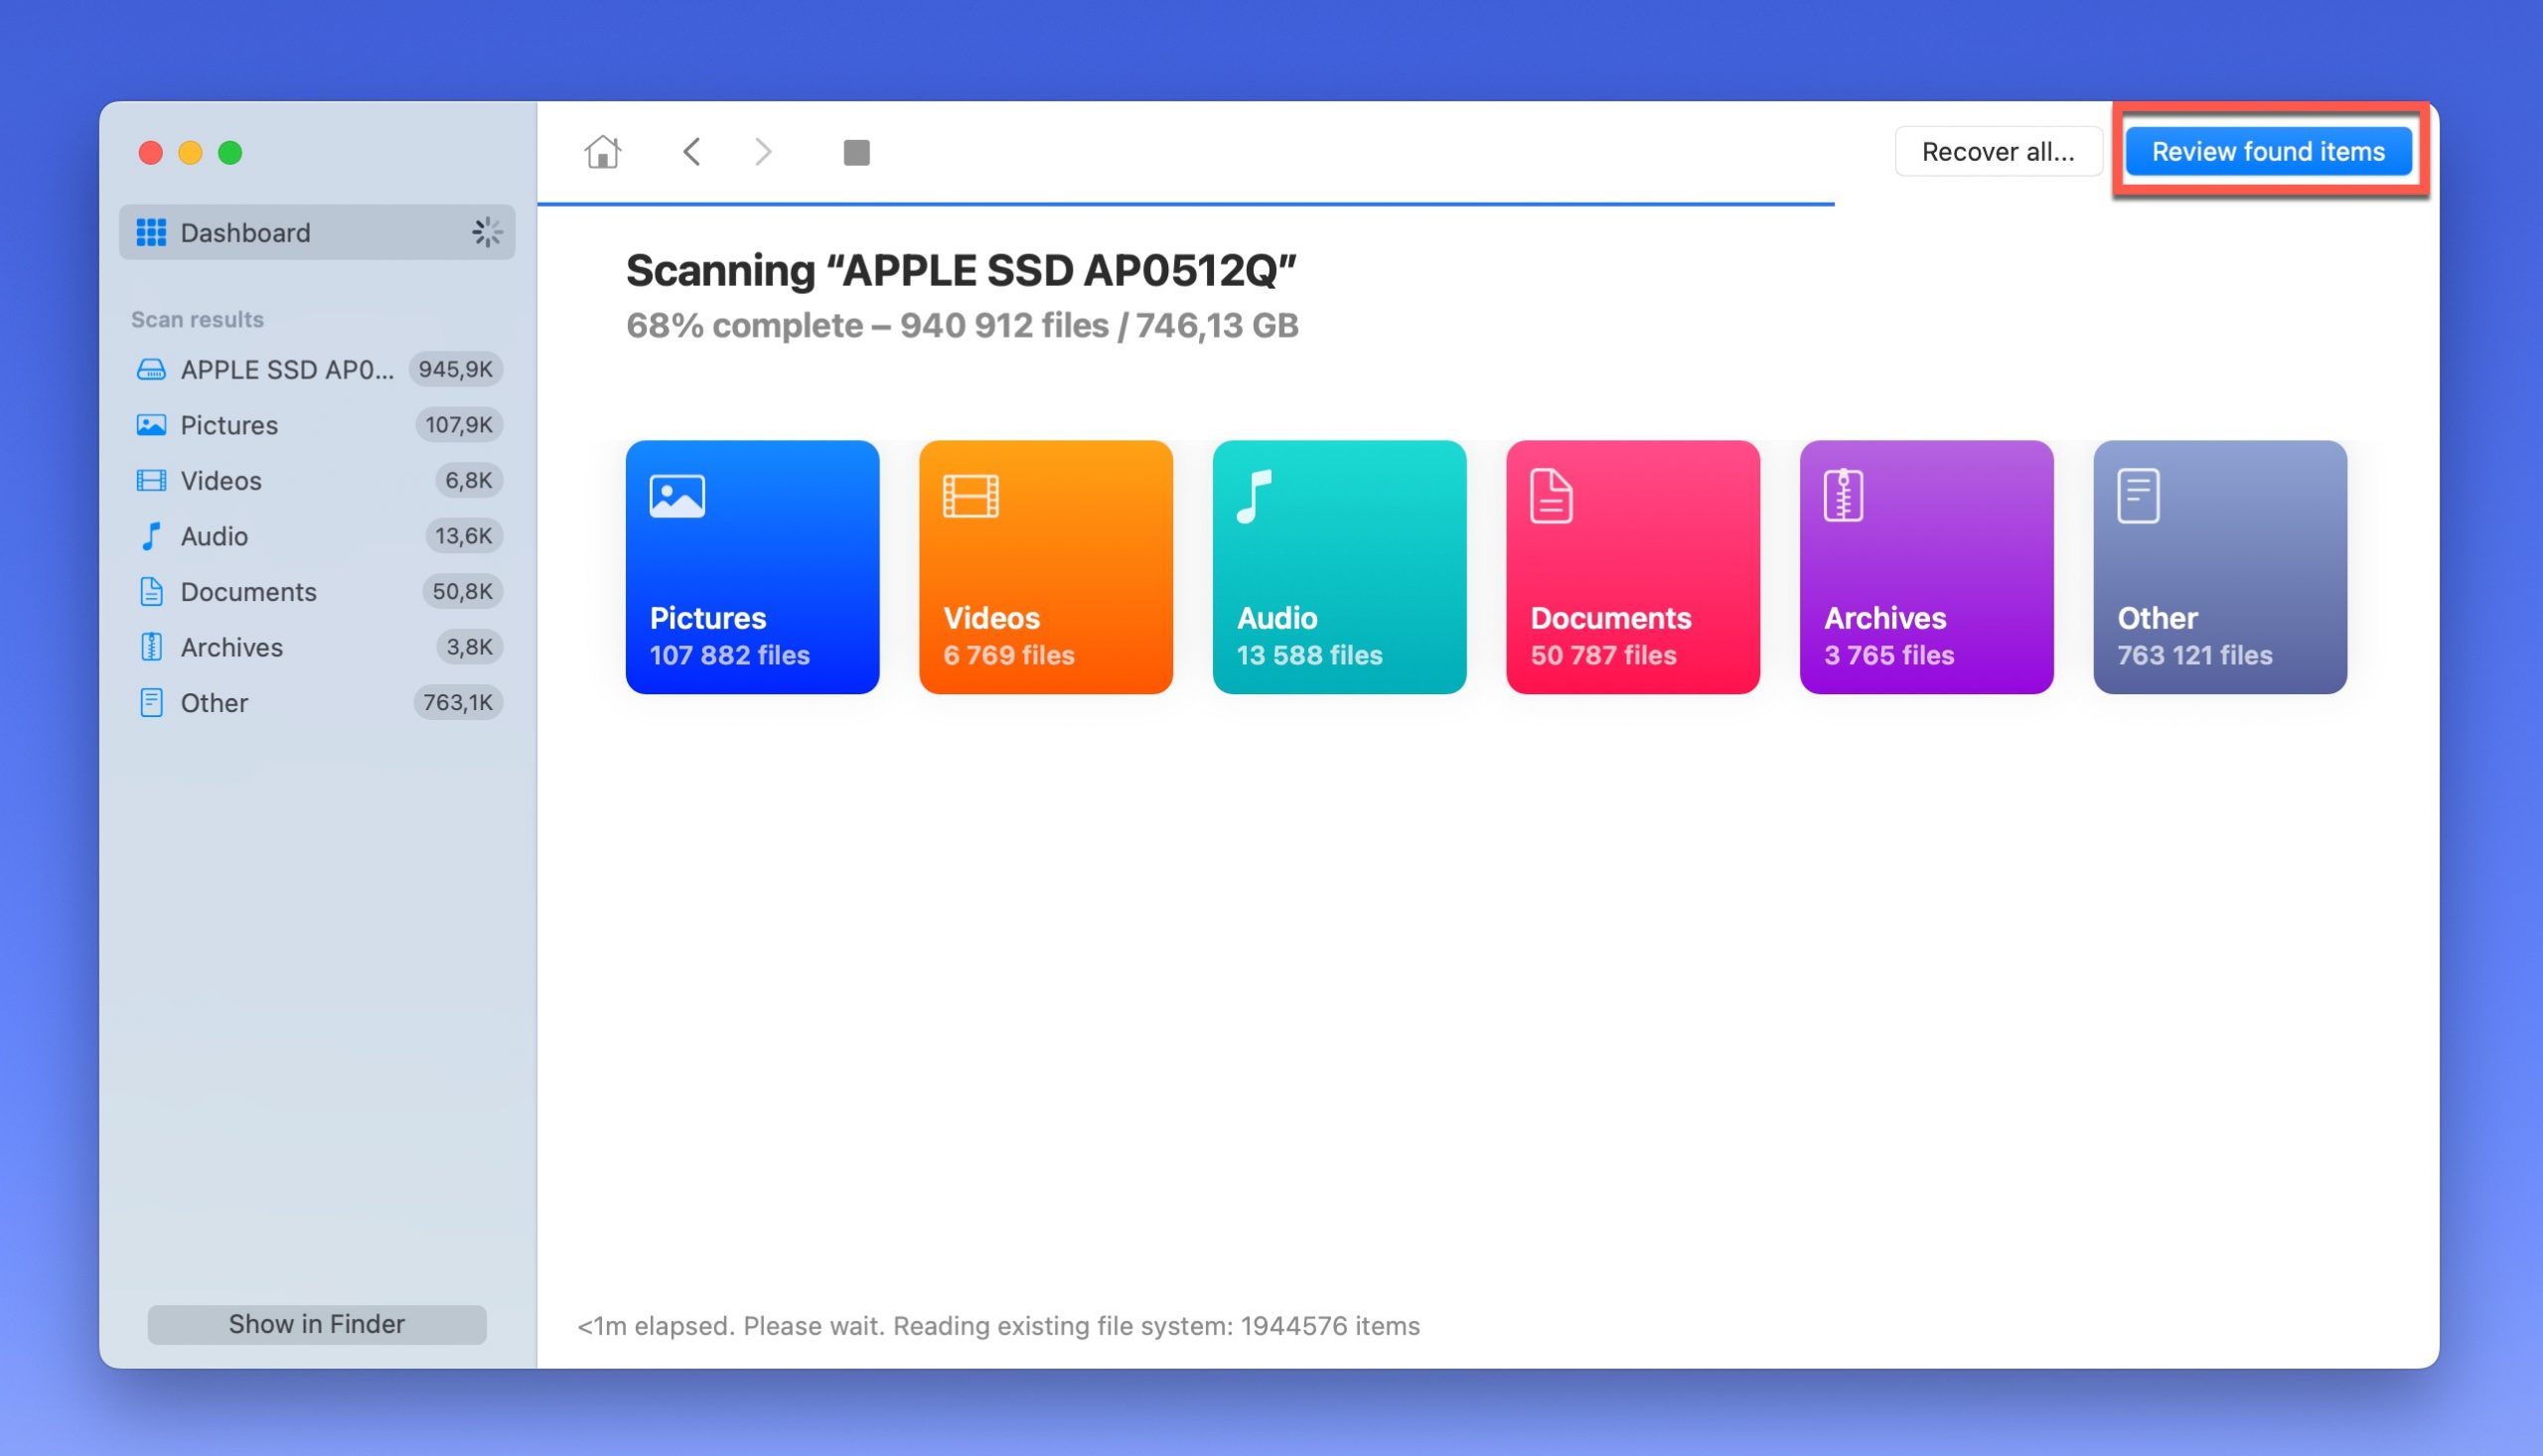
Step 3.Let Disk Drill complete the scan. Depending on the size of your drive, it should only take a couple of minutes. You could also click Review found items to see scan results in real time, but I don’t recommend this if you’re looking for hidden files that you suspect have been deleted because their metadata (including their names) possibly doesn’t exist anymore.
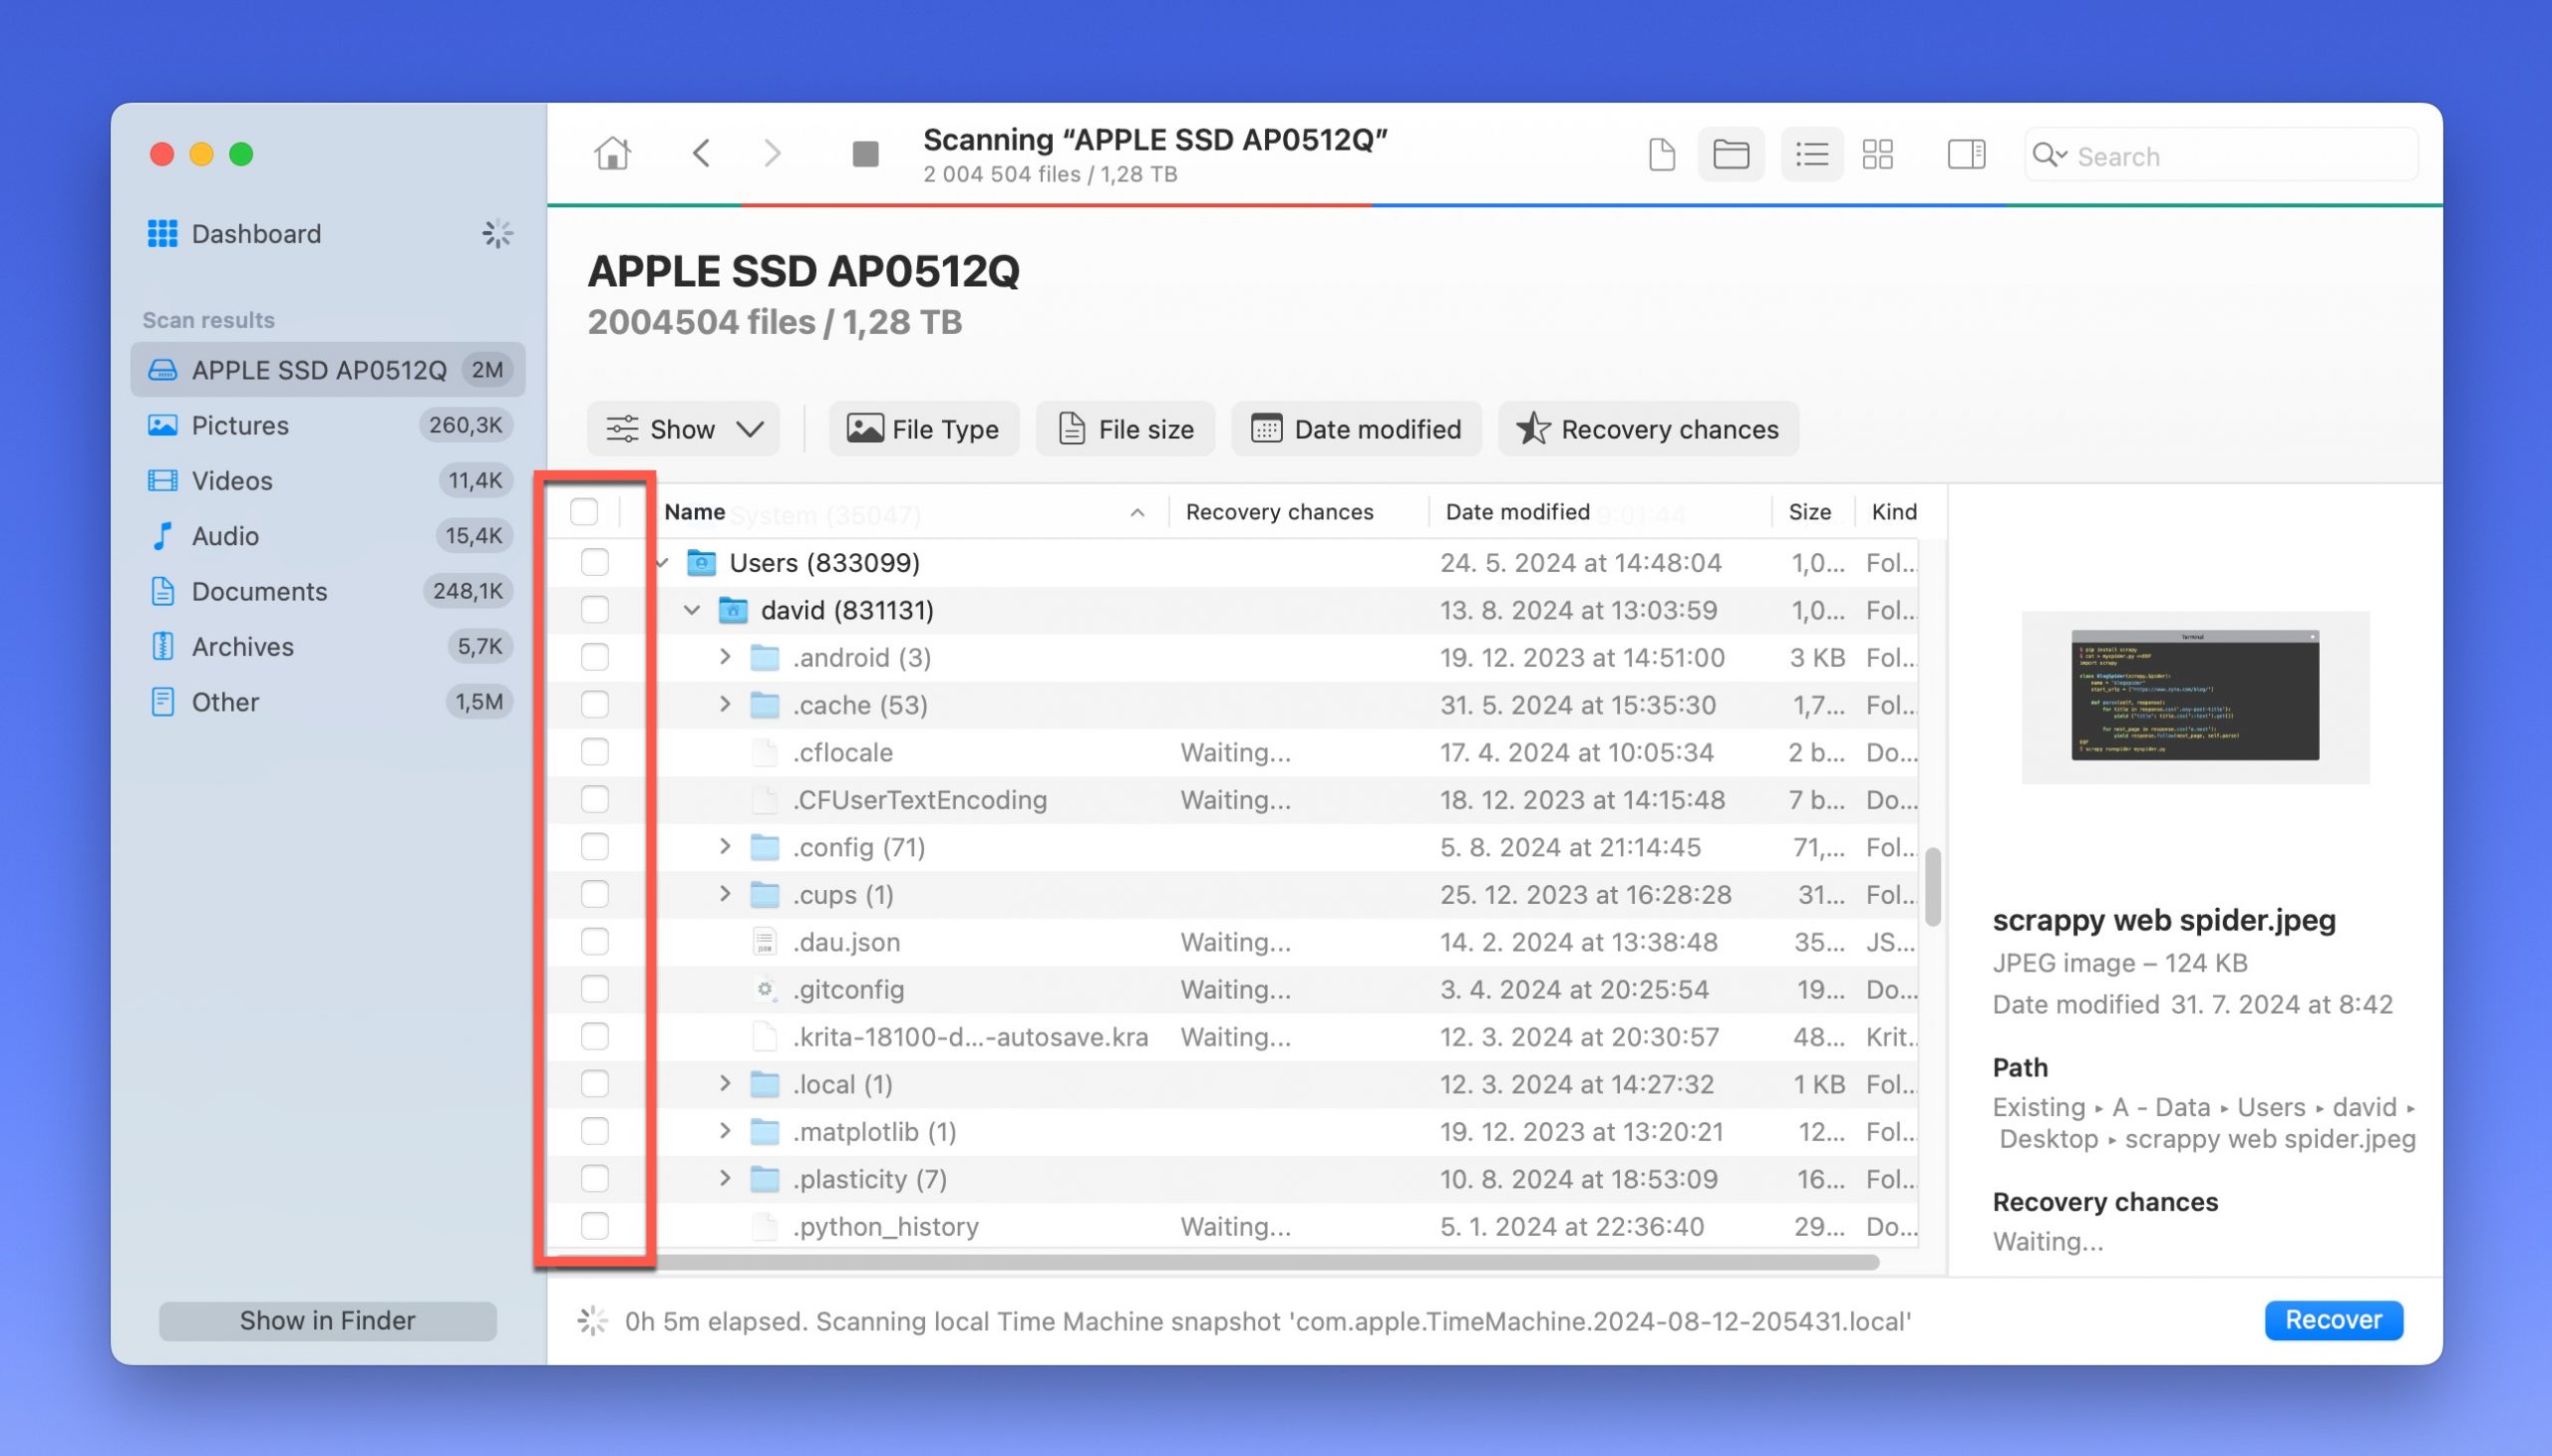
Step 4.You now need to find your files and click the checkboxes next to them. If you know the file type you’re looking for, you can filter the list using the options on the left sidebar. You can also preview your files directly in Disk Drill, but this works only with popular multimedia file types—don’t expect Disk Drill to preview your CAD drawings, for example.
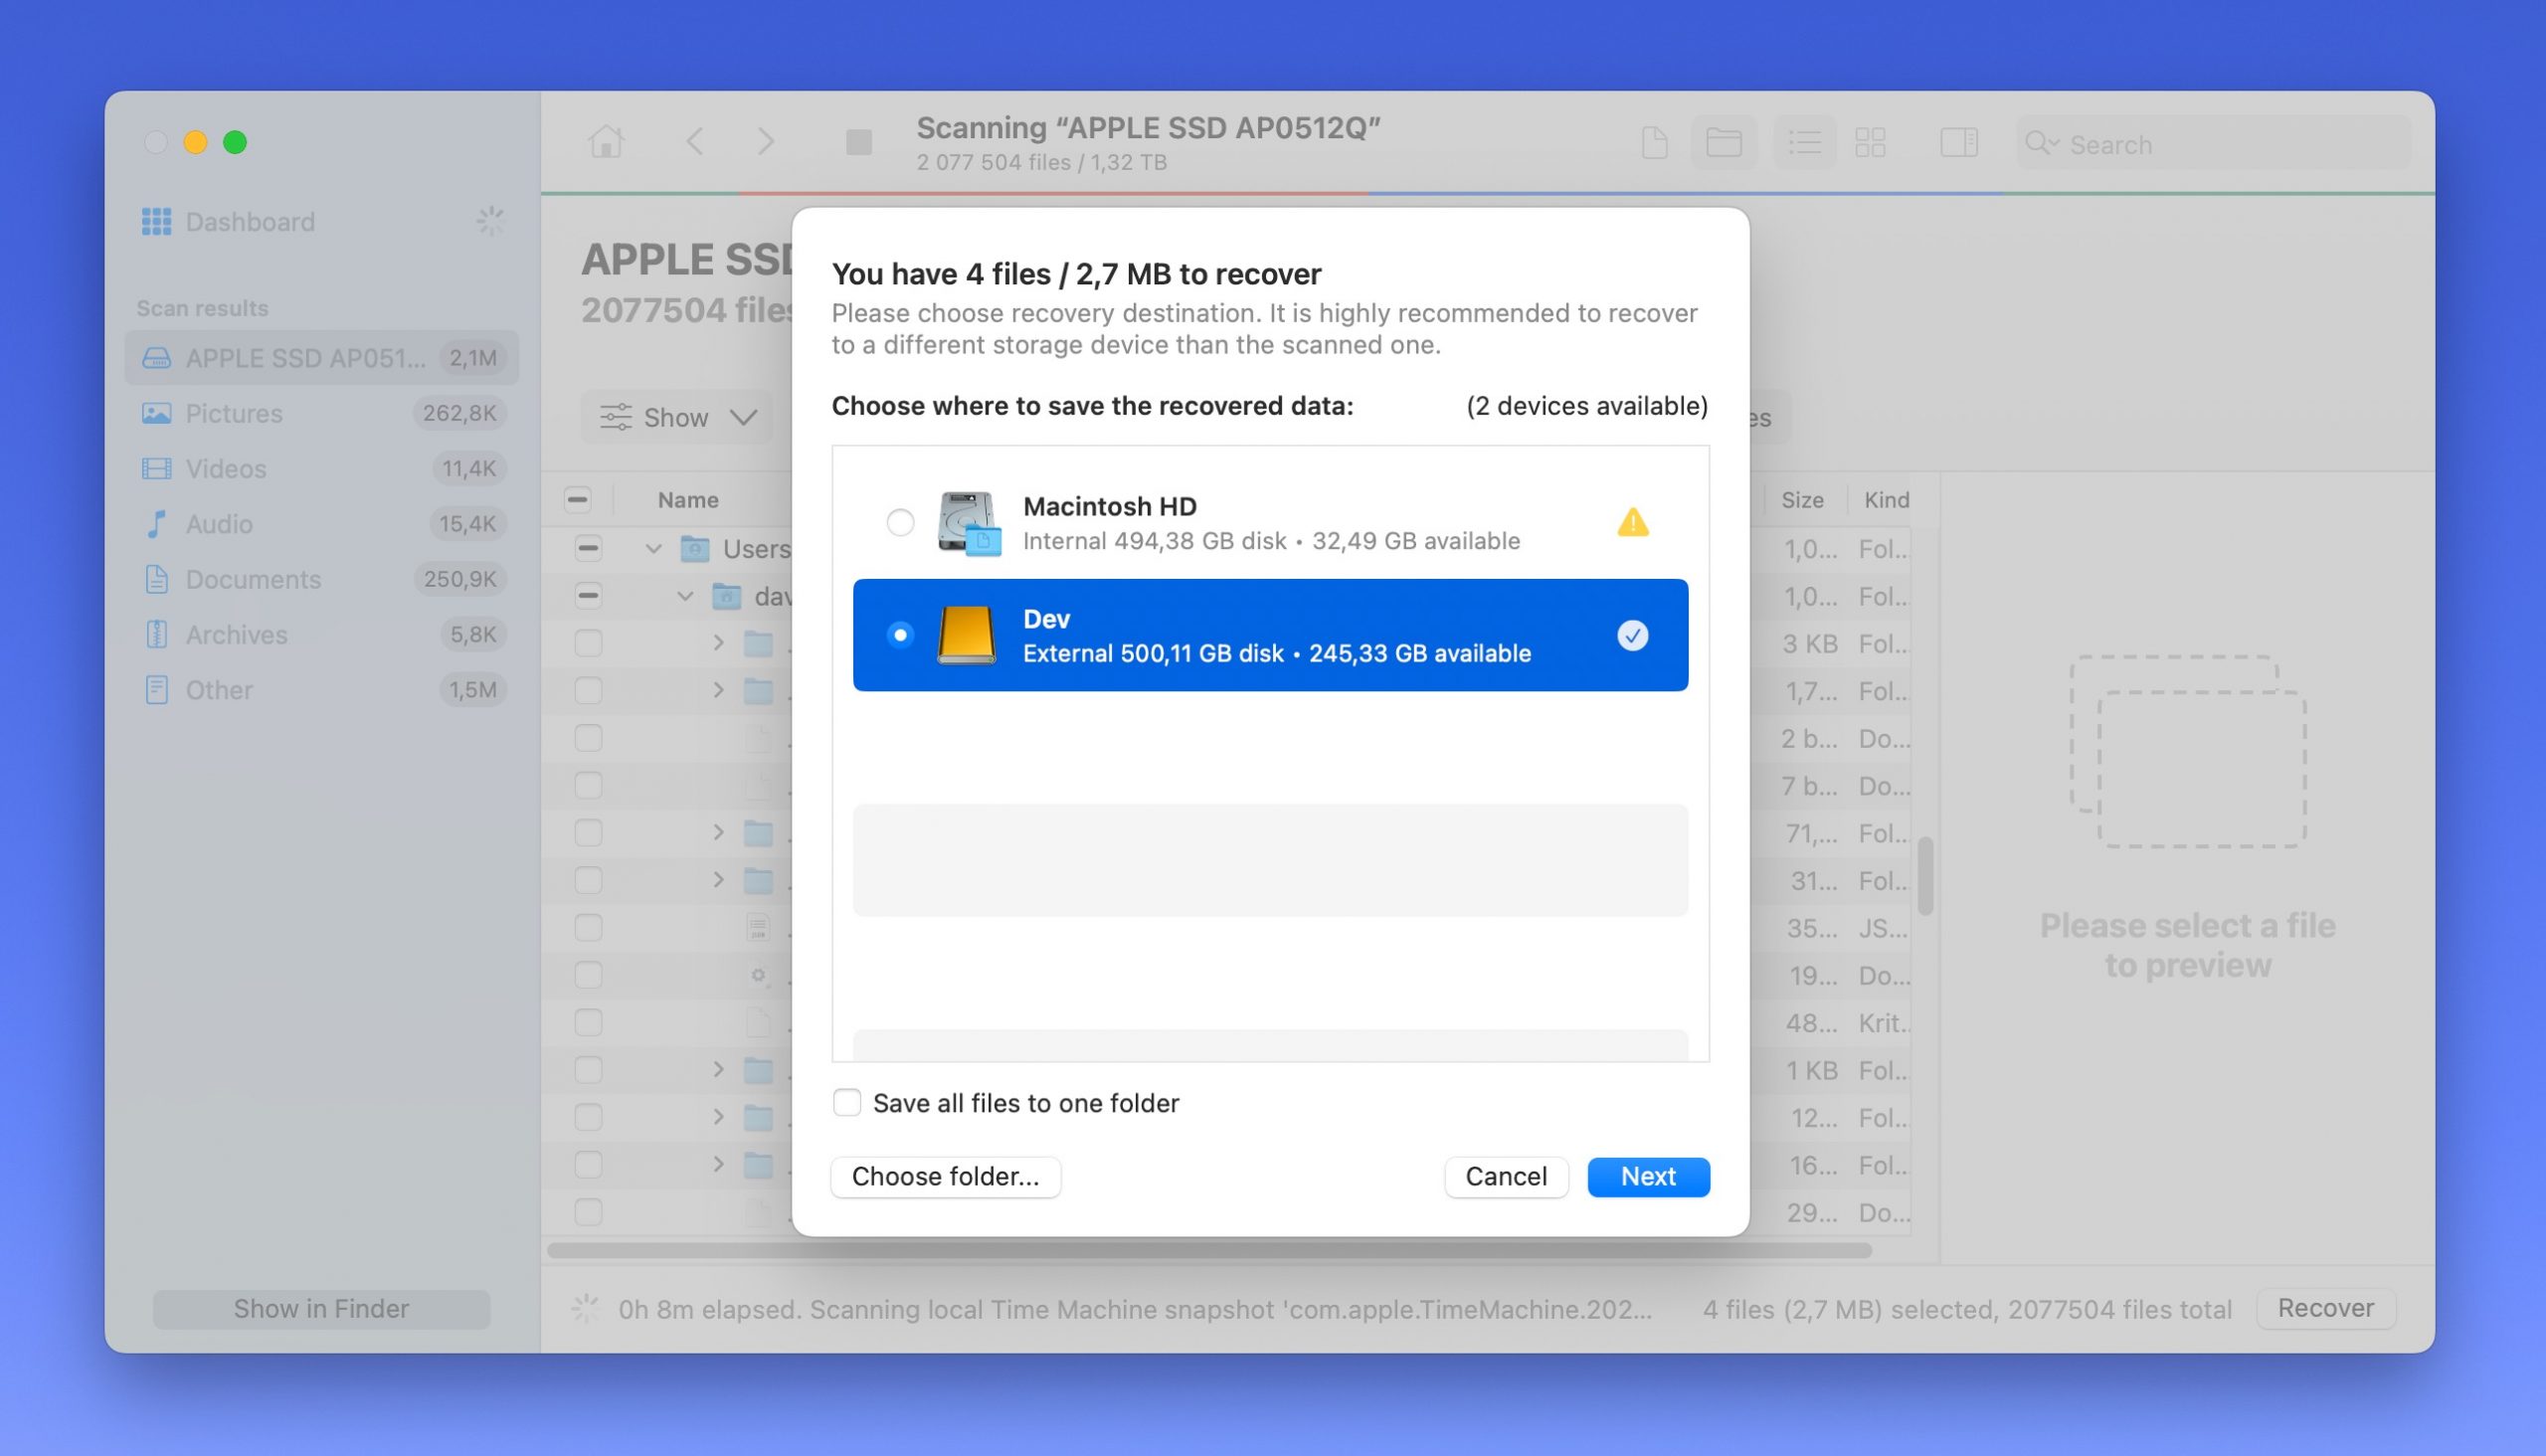
Step 5.To recover your selected files, click the Recover button. Then select the destination folder for the files you want to recover. Make sure to pick a different storage device than the one on which your files are located.
Conclusion
Mac’s hide and unhide features are extremely useful not only for protecting the operating system from getting disrupted, but also for giving users more flexibility over their device. However, always remember to regularly back up your data before handling sensitive files.
We recommend reading our article on how to use Time Machine’s backup feature for a free and easy way to secure your files before diving into Mac hidden folders.
FAQ
Mac systems allow you to hide photos and videos to a Hidden album, making them disappear from your Library, albums, or even the Photos widget if you enabled it on your Home Screen. You can even turn off the Hidden album if you want that extra security.
- Open the Photos app by opening Finder > Applications > Photos.
- On the Apple menu bar, click the View button and click the “Show Hidden Photo Album” option on the dropdown menu.
- In the sidebar that appears, click “Hidden.”
- Select the items you want to unhide, then on the Apple menu bar, select Image > Unhide Photo.
To find the Hidden album, which is off by default, do the following:
- Open the Photos app by opening Finder > Applications > Photos.
- On the Apple menu bar, click View > Show Hidden Photo Album.
The CoreServices folder contains the hidden utilities folder that houses a lot of useful system applications on your Mac. This folder is different from the Utilities folder in your Applications folder. To access it, do the following:
- Open Finder, then on the Apple menu bar, click Go > Computer.
- Open the Macintosh HD folder and navigate to the Systems folder, and then open the nested Library folder. This is where you’ll find CoreServices.
iPhone does not let you view hidden system files as they can disrupt the phone’s ability to function. There aren’t even any third-party tools that can accomplish this. However, you just want to unhide photos from your iPhone, do the following:
- Open the Photos app, and navigate to Albums.
- Scroll down until you find the “Hidden” option below the Utilities section.
- Tap it, then tap the photos you want to unhide.


