
Did your camera give you a corrupted Canon DAT file instead of an MP4 video? This means that your recording was likely interrupted part of the way through and you’re left with a file that media players can’t open.
Because media players are unable to interact with DAT files the same way they do with valid file formats, common video repair methods you find online likely won’t work.
That said, fixing a corrupted DAT file is still possible with the right methods, which are covered in this guide.
Table of Contents
How to Improve Your Chances of Repairing Corrupted DAT File
It can be tricky to repair a DAT file because it hasn’t even fully developed into a video file yet. However, there are a few simple ways you can improve your chances of successfully repairing your file:
- Stop recording immediately! Data from the new footage may end up overwriting your .dat file’s data which is crucial not only for repairing your video but also for data recovery, should you need it.
- Safely eject your memory card. Use your camera’s “safely eject” feature to ensure that all data writing processes are concluded properly. Then, remove your memory card from your camera to prepare for backup and repair.
- Back up your SD card. Insert your memory card into your Mac using the appropriate USB adapter. Then, use an app like SuperDuper! or Carbon Copy Cloner to back up your memory card. This step is optional but highly recommended.
4 Reliable Ways to Repair a Corrupted DAT Video File
In this section, we’ll demonstrate 4 ways to repair a corrupted .dat file from your Canon camera (specifically, your camera’s memory card). Each method deals with corruption in unique ways, so it’s worth trying them all. We arranged them in order from easiest to most difficult, so we recommend starting with Fix 1.
Fix 1: Reinsert the SD Card into Your Camera
Some cameras will automatically scan newly inserted memory cards for corrupted files and attempt to fix them. This works even for memory cards that your camera was *just* using, as long as you physically reinsert it into the device (which triggers the feature).
Do it in this sequence:
Step 1. Safely eject your SD card from your Canon camera.
Step 2. Turn off your Canon camera.
Step 3. While your camera is turned off, reinsert your SD card.
Step 4. Make sure your SD card is securely inserted into your camera’s memory card slot. Then, turn your camera back on.
Fix 2: Fix Your DAT File Using FIle Repair Websites
The most convenient way to fix corrupted videos is by using online file repair tools, which are web apps that can fix your files entirely from within the website itself.
You can find many of them online, but we’ll be using a site called Clever Online Video Repair for this demonstration. It’s 100% free for files up to 5 GB in size and support for .dat files specifically was recently added to the web app.
In fact, this app is marketed especially for cases like drone crashes, sudden shutdowns, and other instances where video recording is abruptly interrupted. These are situations that commonly result in .dat files in the first place.
Step 1. Open your browser and paste repair.cleverfiles.com into the search bar.
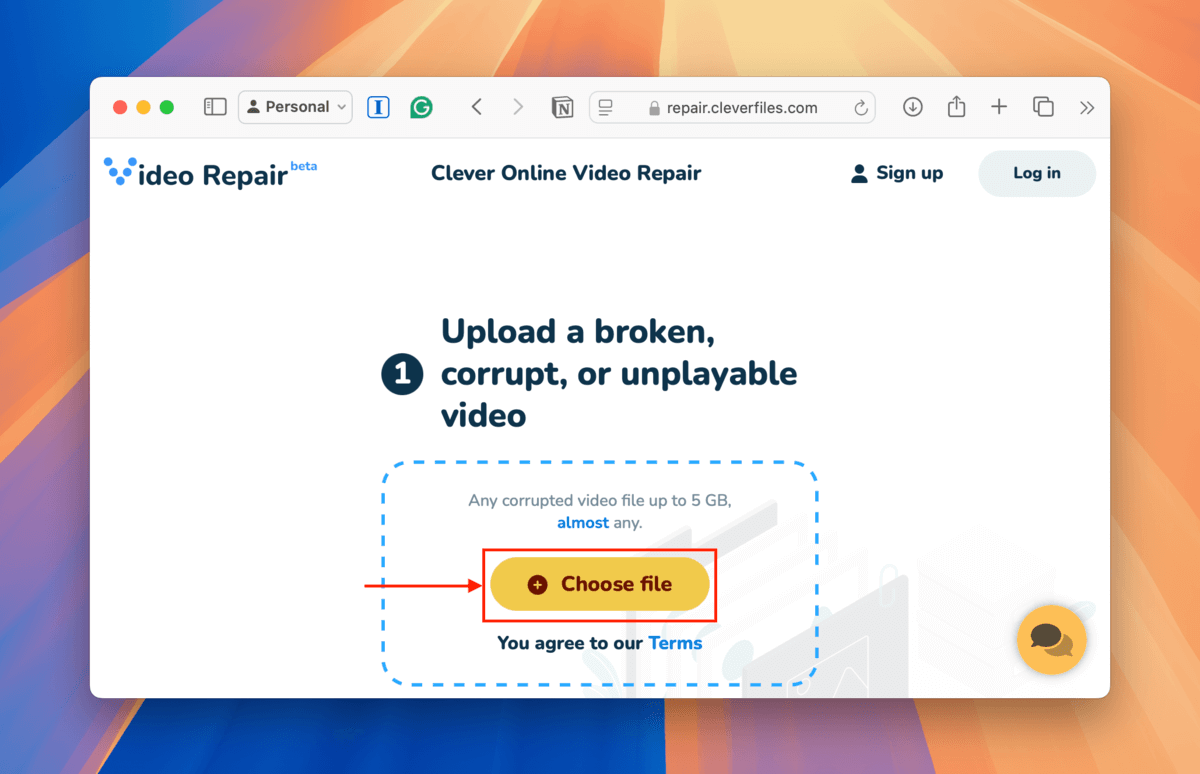
Step 2. Click Choose file.
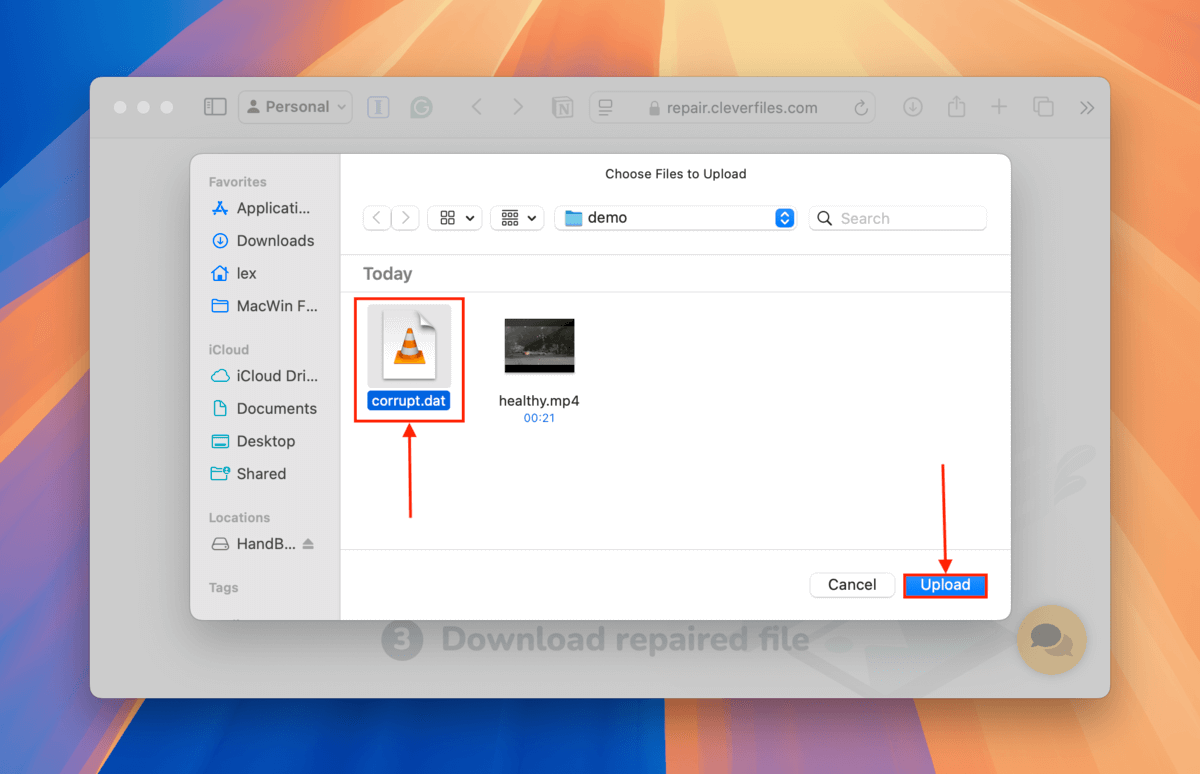
Step 3. Select your corrupted .dat file in the Finder window. Then, click Upload.
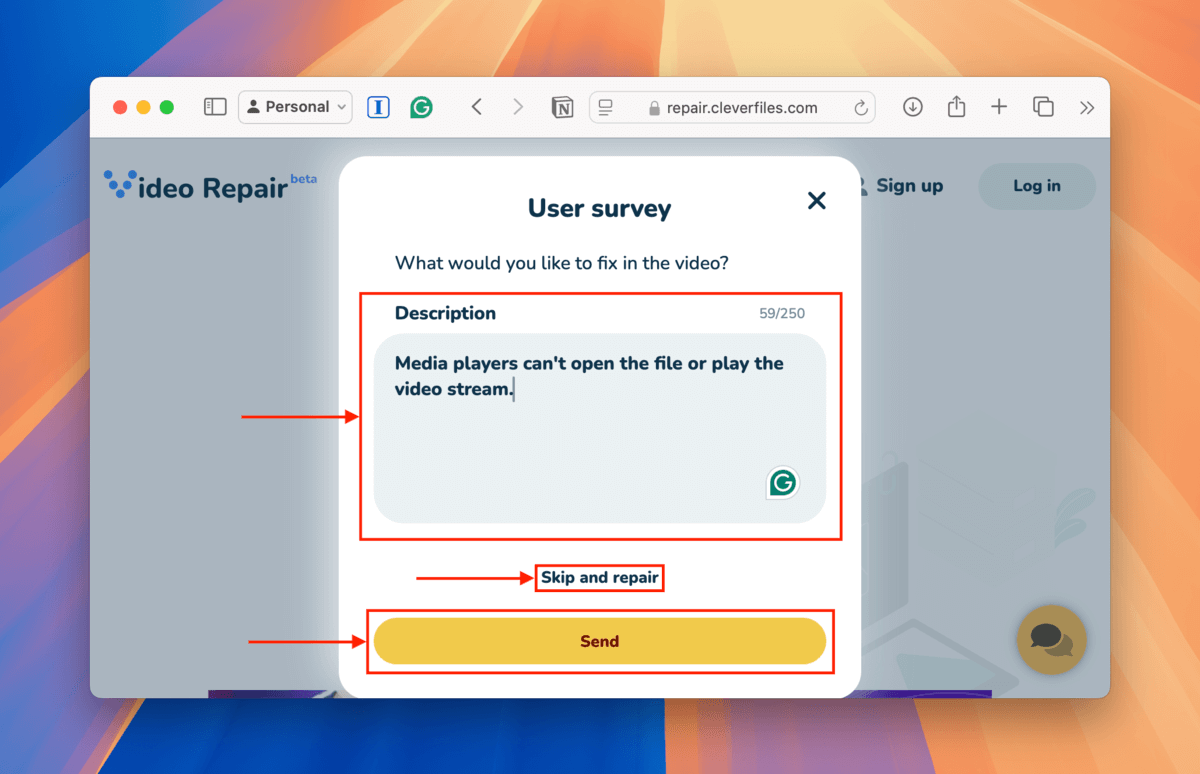
Step 4. In the Description box, give as much information as you can about the video file — such as what happens when you try to play the video and what events led up to the corruption. Then, click Send. You can click Skip and repair if you’re rushing or you prefer to keep the details private.

Step 5. In the next dialogue window, click the dropdown menu buttons under Brand and Model to specify which device captured the video you’re trying to repair. Canon cameras typically have their model printed on the camera body itself so you should be able to find it easily. You can also check the manual that came with the camera.

Step 6. Once your corrupted video has been fully uploaded, you’ll be asked to upload a healthy sample. Click Choose file.
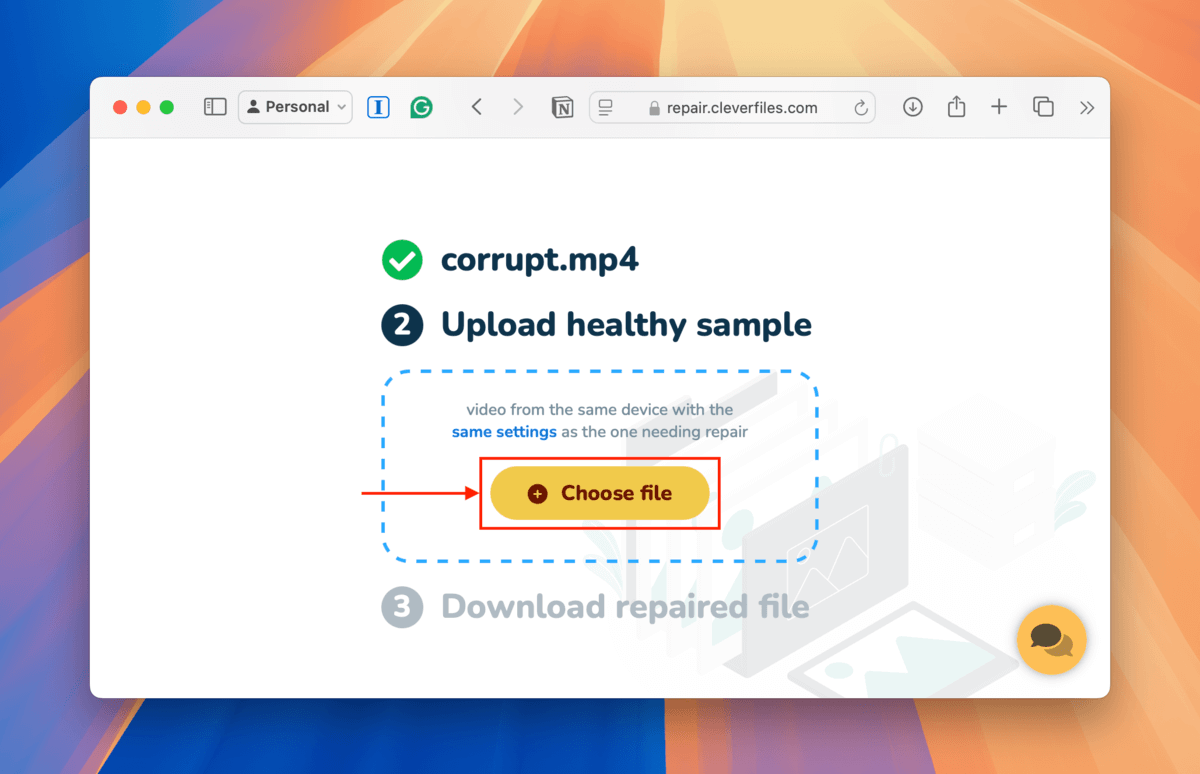
Step 7. Select your healthy video sample and click Upload.
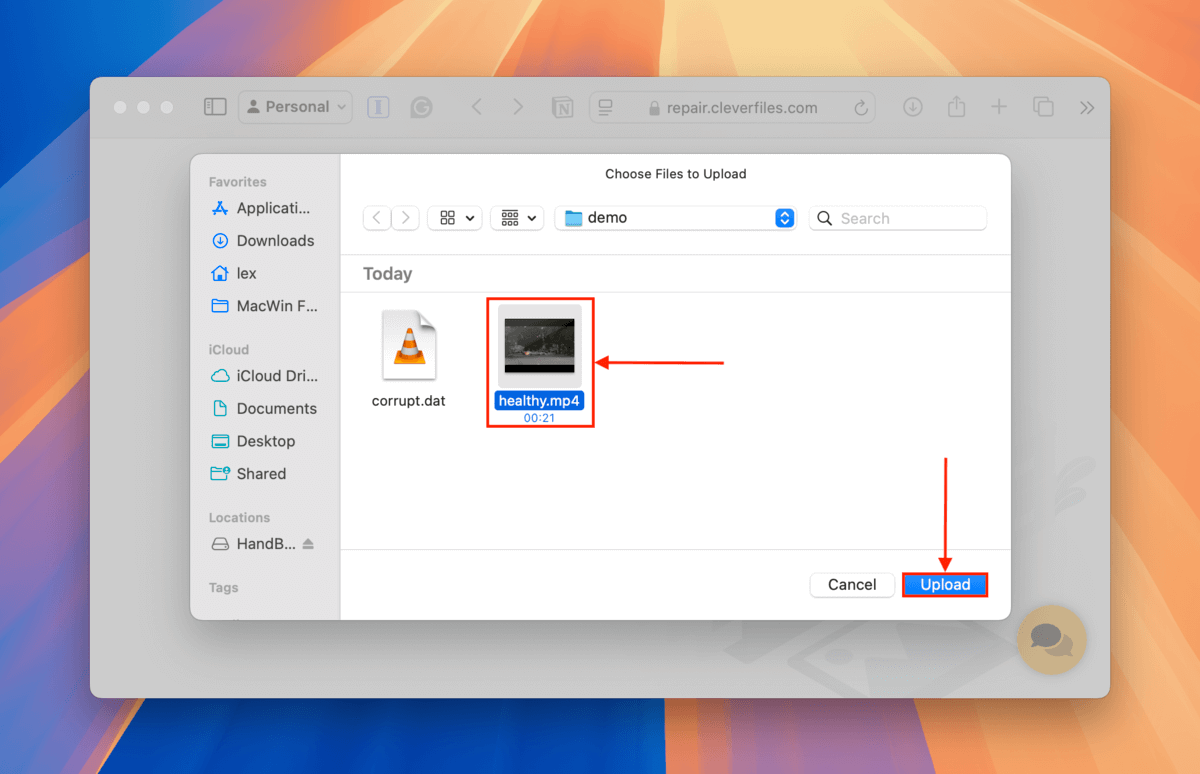
Step 8. Check the preview screenshots of the file to ensure that Clever Online Video Repair was able to recognize the clips. If successful, click Download.

After downloading your repaired video file, try opening it with a media player like QuickTime Player or VLC Media Player (featured next).
Fix 3: Utilize VLC Media Player’s AVI Repair Tool
VLC Media Player is a well-known, free, and open-source multimedia app. It has an auto-repair feature for AVI files that can be enabled via the app’s settings. Yes — it does only work for AVI files, but you can “trick” VLC Media Player into thinking that your .dat file has a .avi extension and treating it appropriately.
VLC’s AVI repair tool is not very robust and it can’t fix severe instances of corruption, but it can help fix a DAT file in case of minor damage to its container (which prevented it from being fully encoded into an MP4 file).
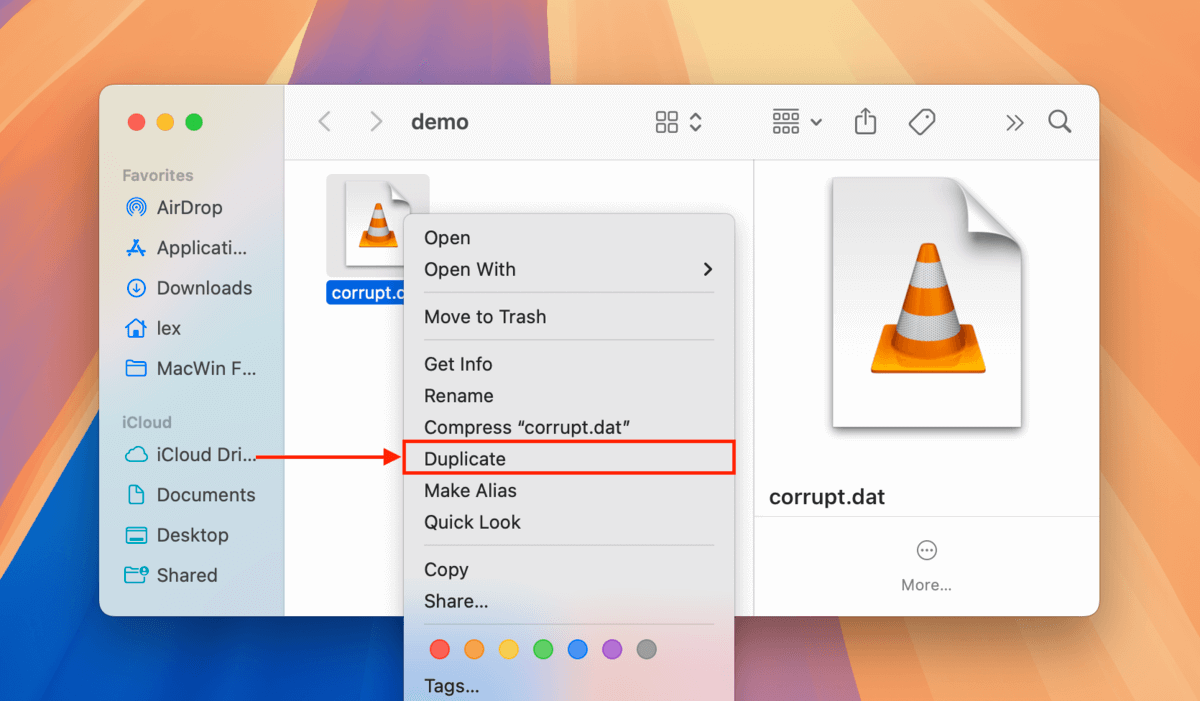
Step 1. In Finder, right-click your file and click Duplicate.
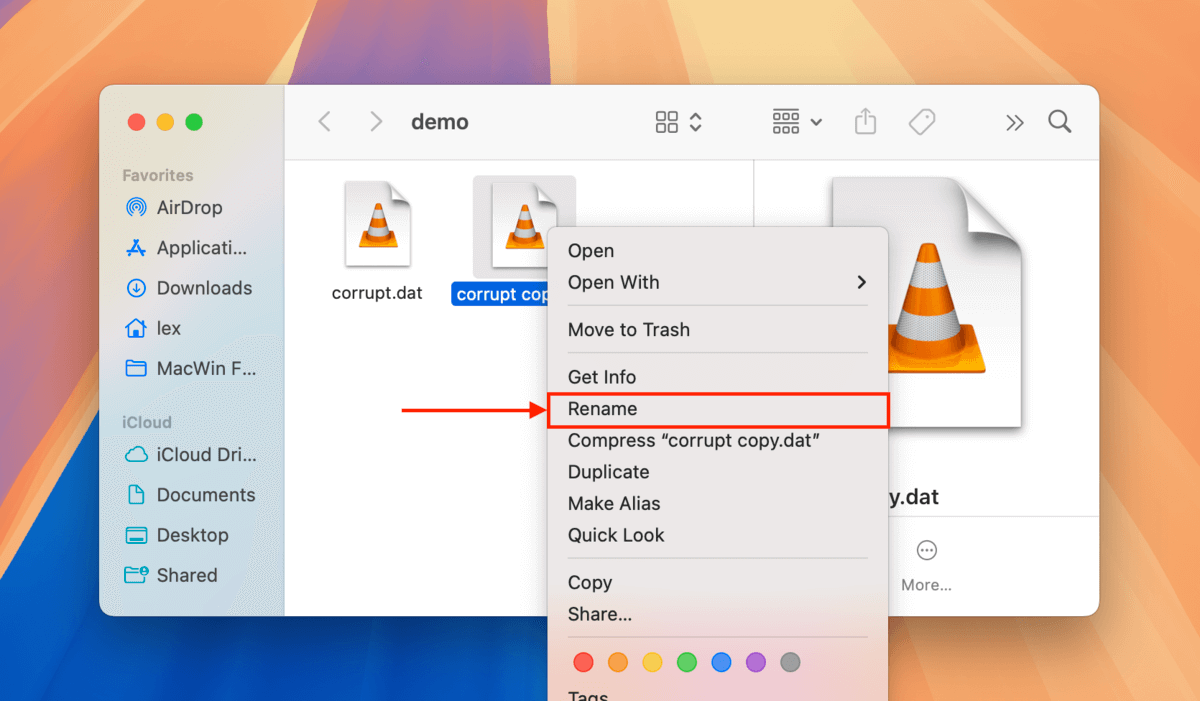
Step 2. Right-click your duplicate file and click Rename.
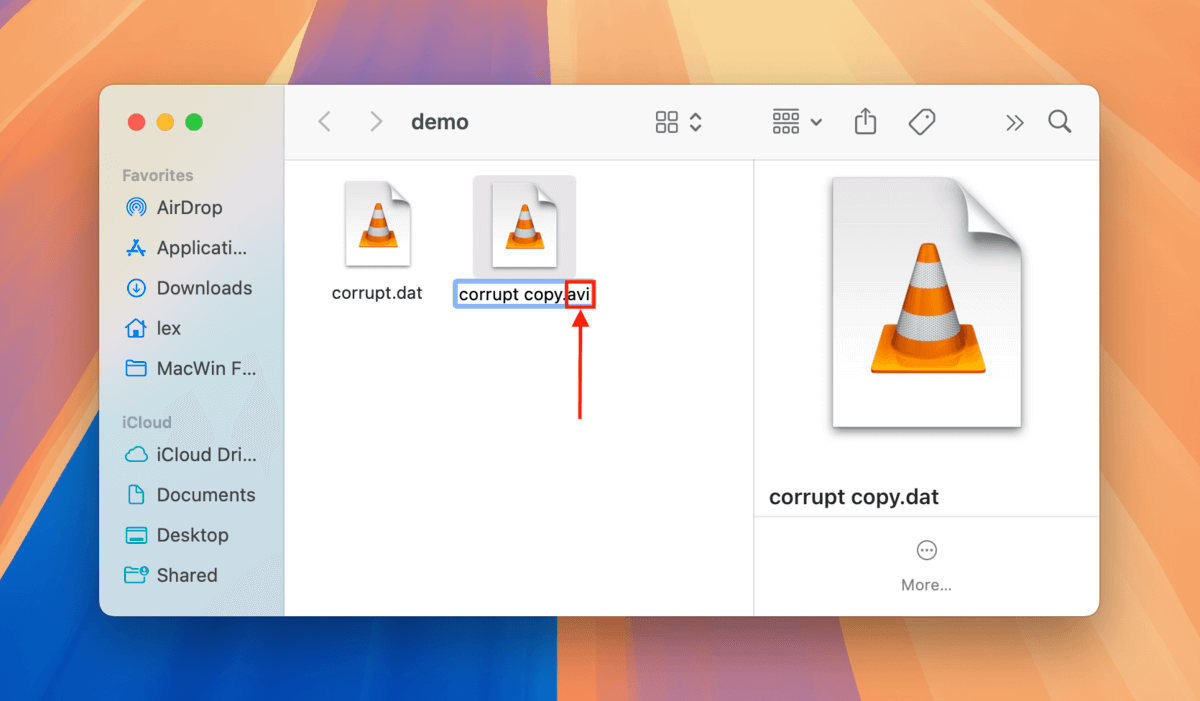
Step 3. Replace the file’s extension from .dat to .avi and press Return.
Step 4. When prompted, click Use .avi to confirm the rename.

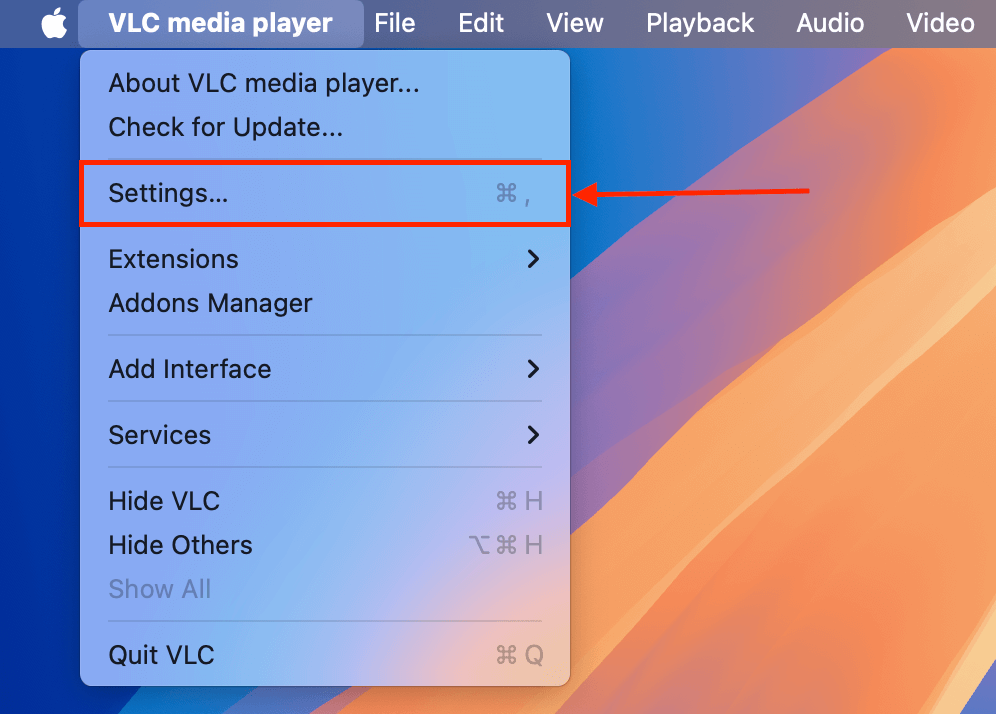
Step 5. Download VLC Media Player, then open the app. On the menu bar, click VLC Media Player > Settings…
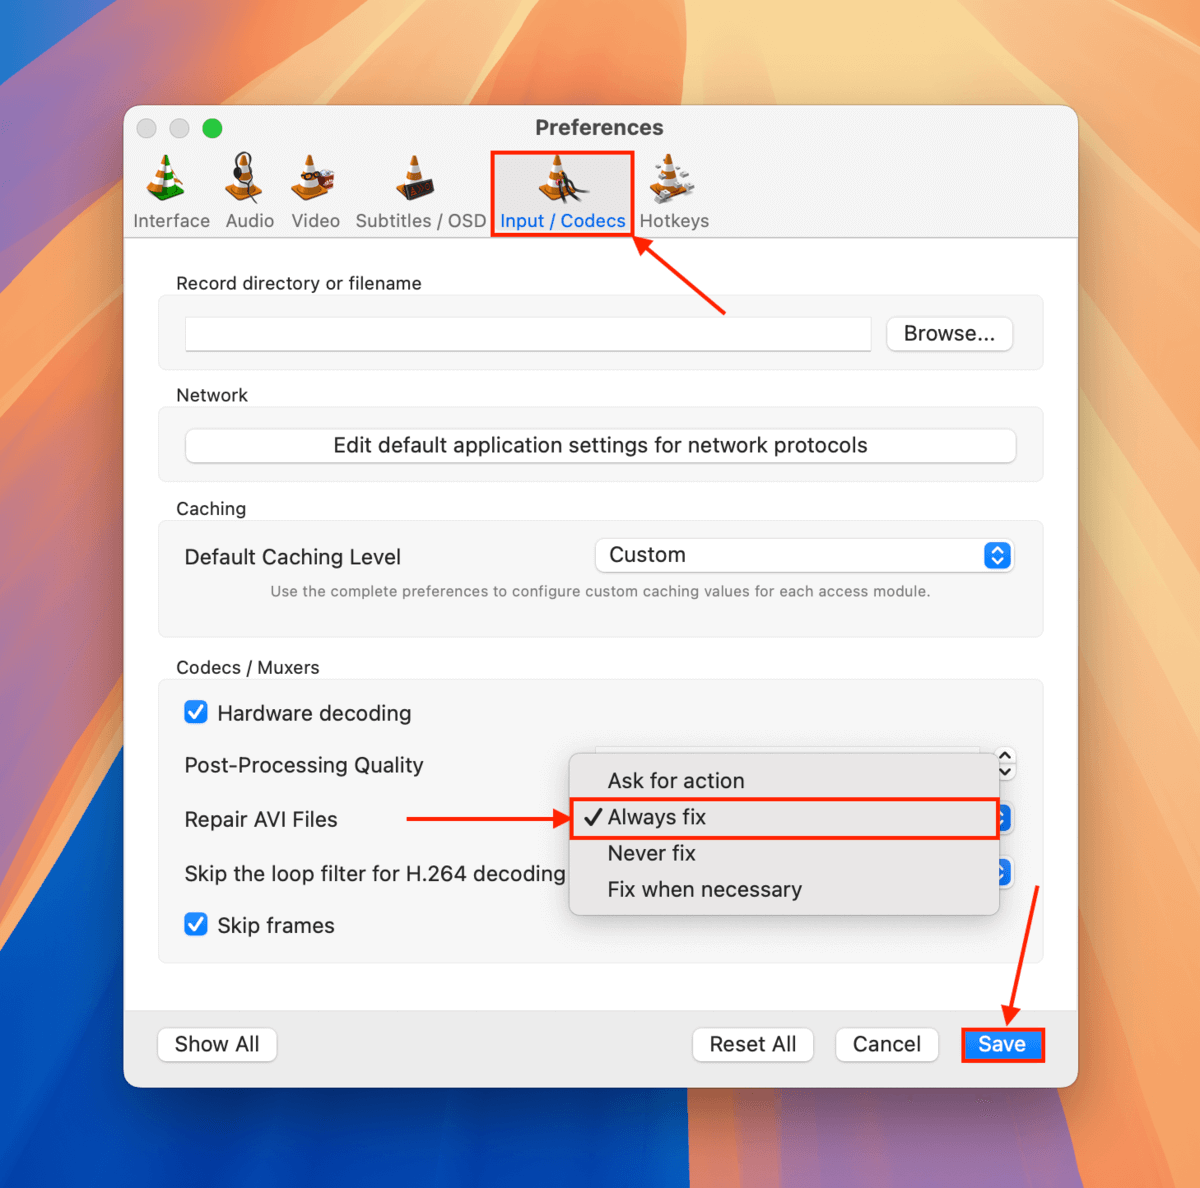
Step 6. Click Input / Codecs. Then, in the Codecs / Muxers section, click the dropdown menu button beside Repair AVI Files and select Always fix. Finally, click Save to apply the setting.
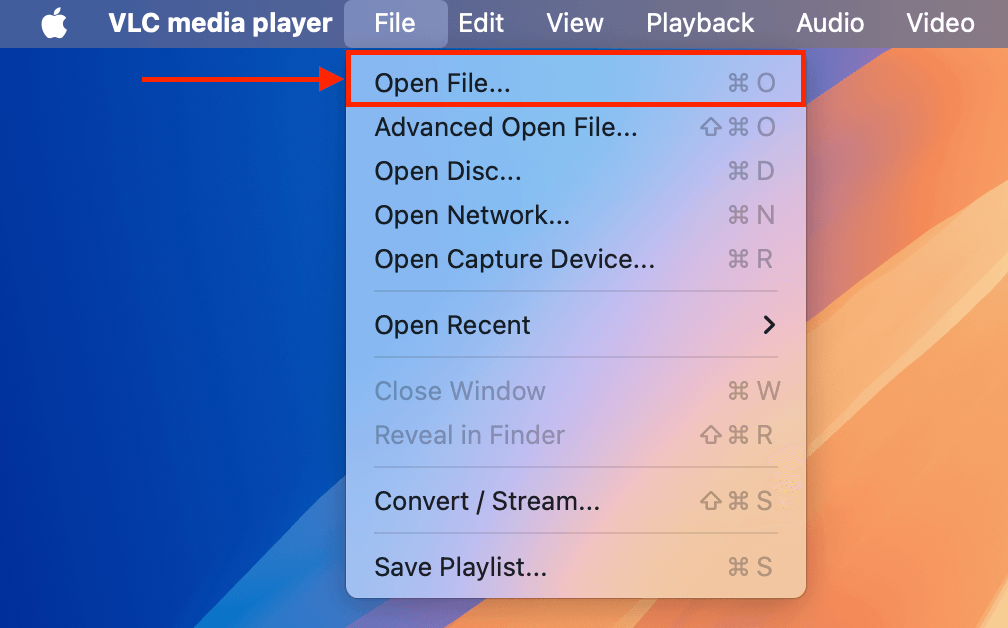
Step 7. On the menu bar, click File > Open File…
Step 8. Select your newly “converted” .avi file and click Open.
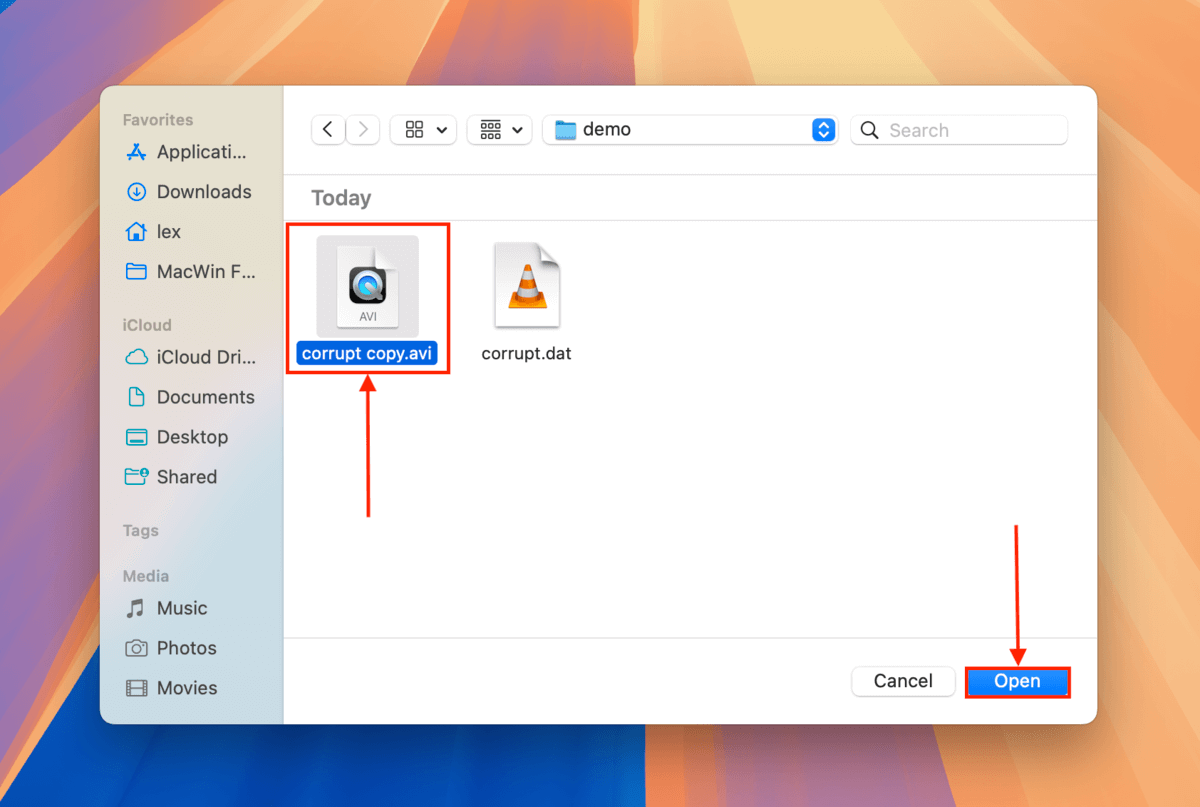
As you attempt to open the file, VLC Media Player will automatically try to repair it (thanks to the setting we enabled in step 4). See if it plays!
Fix 4: Copy Your DAT File’s Video Streams to a New File Using FFmpeg
FFmpeg is a free and open-source video manipulation software that can help you “repair” your .dat file by copying its video and audio streaming data into a new file. While this doesn’t fix the original file, it may be able to at least salvage the actual footage and audio data for viewing.
Note that FFmpeg does not have a graphical user interface — you need to operate it from the Terminal app. But this method only uses a total of two commands, so you won’t get lost if you follow along.
Step 1. The easiest way to install FFmpeg is by using Homebrew. You can install Homebrew by pasting the installation link from their website and running it as a command in the Terminal app.
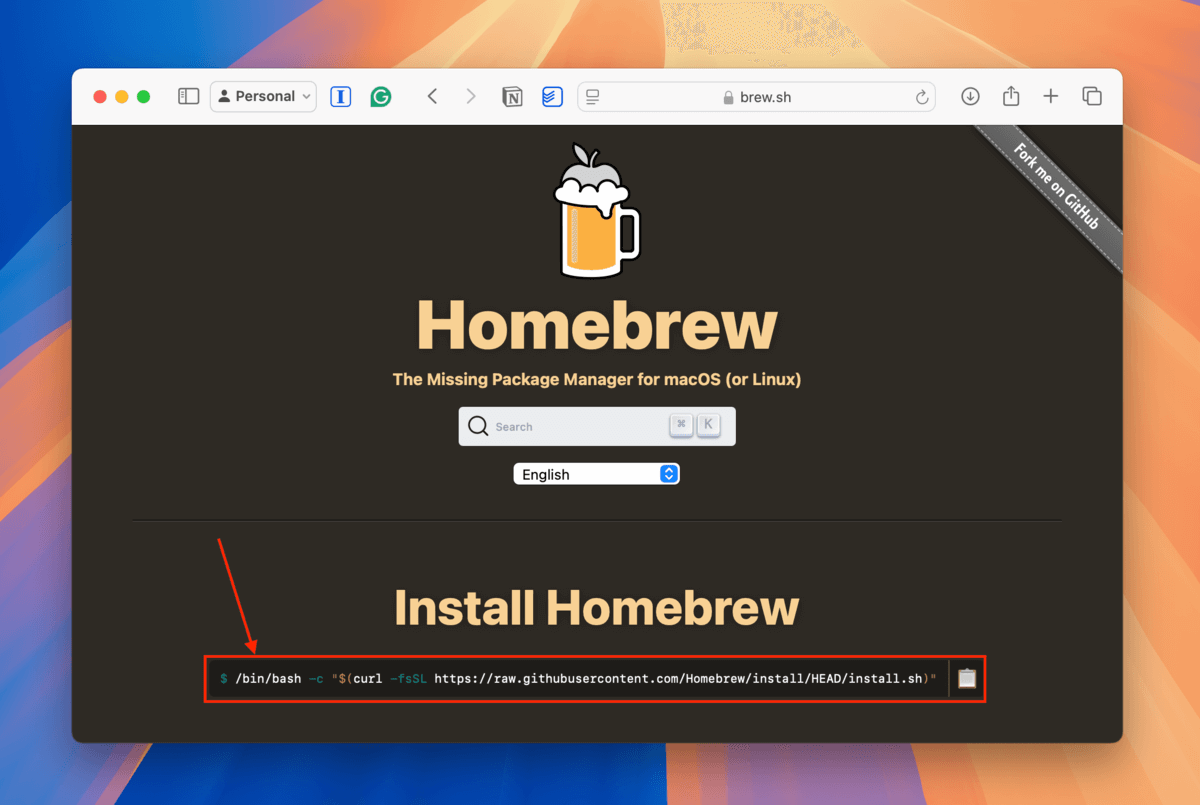
Step 2. Once Homebrew is installed, execute the following command to install FFmpeg.
brew install ffmpeg

Step 3. Open the Terminal app (Finder > Applications > Utilities). Then, execute the following command to point Terminal to the right directory:
cd desktop/demo
Replace desktop/demo based on where your corrupted video is stored.

Step 4. Once you’re in the right directory, run the appropriate FFmpeg command based on the codec of your DAT file to repackage the video stream into a .ts container. Try the H.264 version first; if it doesn’t work, try the H.265 version.
ffmpeg -i broken.dat -sn -dn -c:v copy -bsf:v h264_mp4toannexb fixed.ts
ffmpeg -i broken.dat -sn -dn -c:v copy -bsf:v hevc_mp4toannexb fixed.ts
Replace broken.dat with the actual name of your corrupted .dat file.

Step 5. The next command will repackage the .ts file into an .mp4 container:
ffmpeg -i fixed.ts -c:v copy -c:a copy fixed.mp4
Once FFmpeg is done creating the fixed.mp4 file, try opening it with a media app like QuickTime or VLC Media Player.

Is your memory card the culprit?
If errors are common on the memory card that you use with your Canon camera, then maybe it’s the problem. Corrupted memory cards are a common occurrence, especially if you read and write data often.
If you notice that more of your files get corrupted while using the same memory card – even if the recording completes uninterrupted – then we strongly recommend formatting it before using it again. If corruption still occurs after that, it’s time to invest in a new one.


