
Did you empty your Mac’s Trash folder by accident or permanently delete important files? We can help you recover your files with several different methods for any situation, like whether or not you have a backup, or cases where iCloud hasn’t synchronized your emptied Trash folder, and more.
We’ll also demonstrate both common and unique (but always useful) ways to restore files from the Trash folder, as well as how to prevent similar cases of data loss in the future.
Table of Contents
How Trash Works on Mac
When you “delete” a file on your Mac, its data doesn’t actually get erased. Instead, the file remains intact and gets moved to the Trash folder. Unlike regular folders, the Trash folder has special functions to help you manage unwanted files:
- Restore deleted files to their original locations (including on external storage devices)
- Permanently delete individual files or purge all deleted files at once using the Empty Trash feature
- Consolidate and store deleted files indefinitely
- Auto-delete files after 30 days if set by the user (available through Finder > Preferences > Advanced)
- Can be skipped if the user deletes a file with the Option + Command + Delete key combination
Files deleted from the Trash folder are still recoverable, as we’ll demonstrate in the rest of this guide. However, if you don’t have any backups to work with, we strongly recommend that you stop using your Mac until you’re ready to start the recovery operation. This is to avoid overwriting your files’ leftover data, which the other methods need for recovery.
How to Recover Files from Emptied Trash on Mac?
In this section, we’ll show you 4 different ways to restore files that you permanently deleted from the Trash folder, whether individually or using the Empty Trash function. We recommend reading through each method before proceeding to ensure that you utilize the most effective solution for your specific case.
Method 1: Use Data Recovery Software
If you don’t have any backups or online copies of your files, the most effective way to restore them is by using a tool called data recovery software. This type of software can scan your Mac drive or an external storage device for the leftover data of your deleted files–even if you’ve emptied the Trash folder.
There are many recovery apps you can choose from, but we’ll be using Disk Drill for this demonstration. You can download it completely for free, as well as scan your drive and preview your files (which allows you to verify if they’re recoverable). It’s compatible with system disks on M1-M5/T2 Macs, as well as external HDDs, SSDs, flash drives, etc. The app also supports nearly 400 file types, from documents to RAW photos, videos, project files, and more.
We’ll show you exactly how to use Disk Drill to restore deleted files, and you can follow along using the free download. However, note that you’ll need to buy the license to proceed with the recovery step (all the way at the end).
Step 1. Download and install Disk Drill. If you’re attempting to recover data from your system drive, make sure to install the app on an external storage device to avoid overwriting your data.
Step 2. Open the Disk Drill application (you’ll need to click Disk Drill (on the menu bar) > Enable recovery from system drives if you intend to scan your system drive).
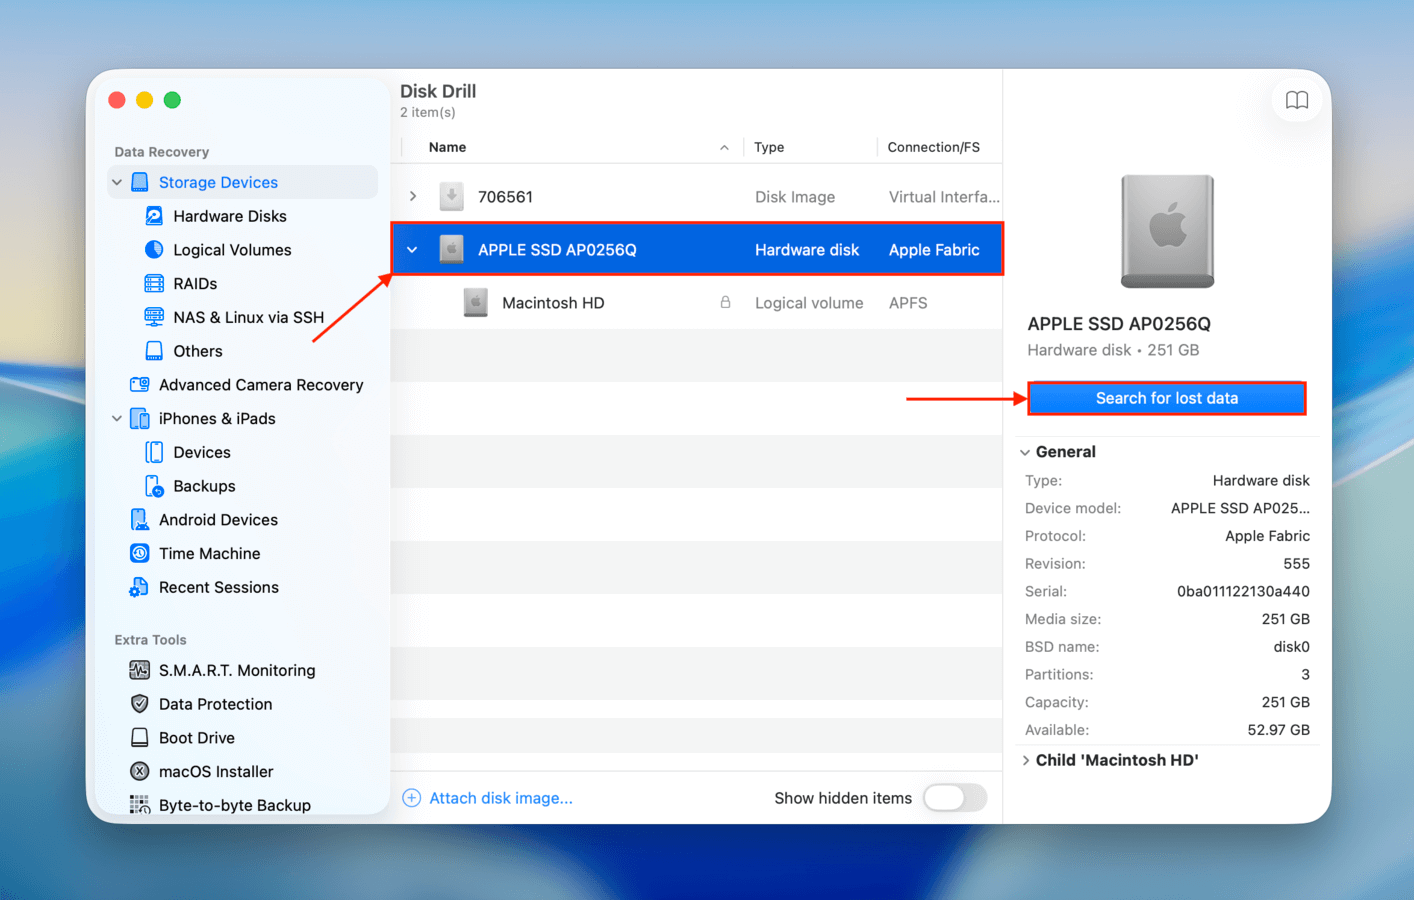
Step 3. Select the drive you want to scan and click Search for lost data. You may be asked to choose a scan type–select Universal scan.
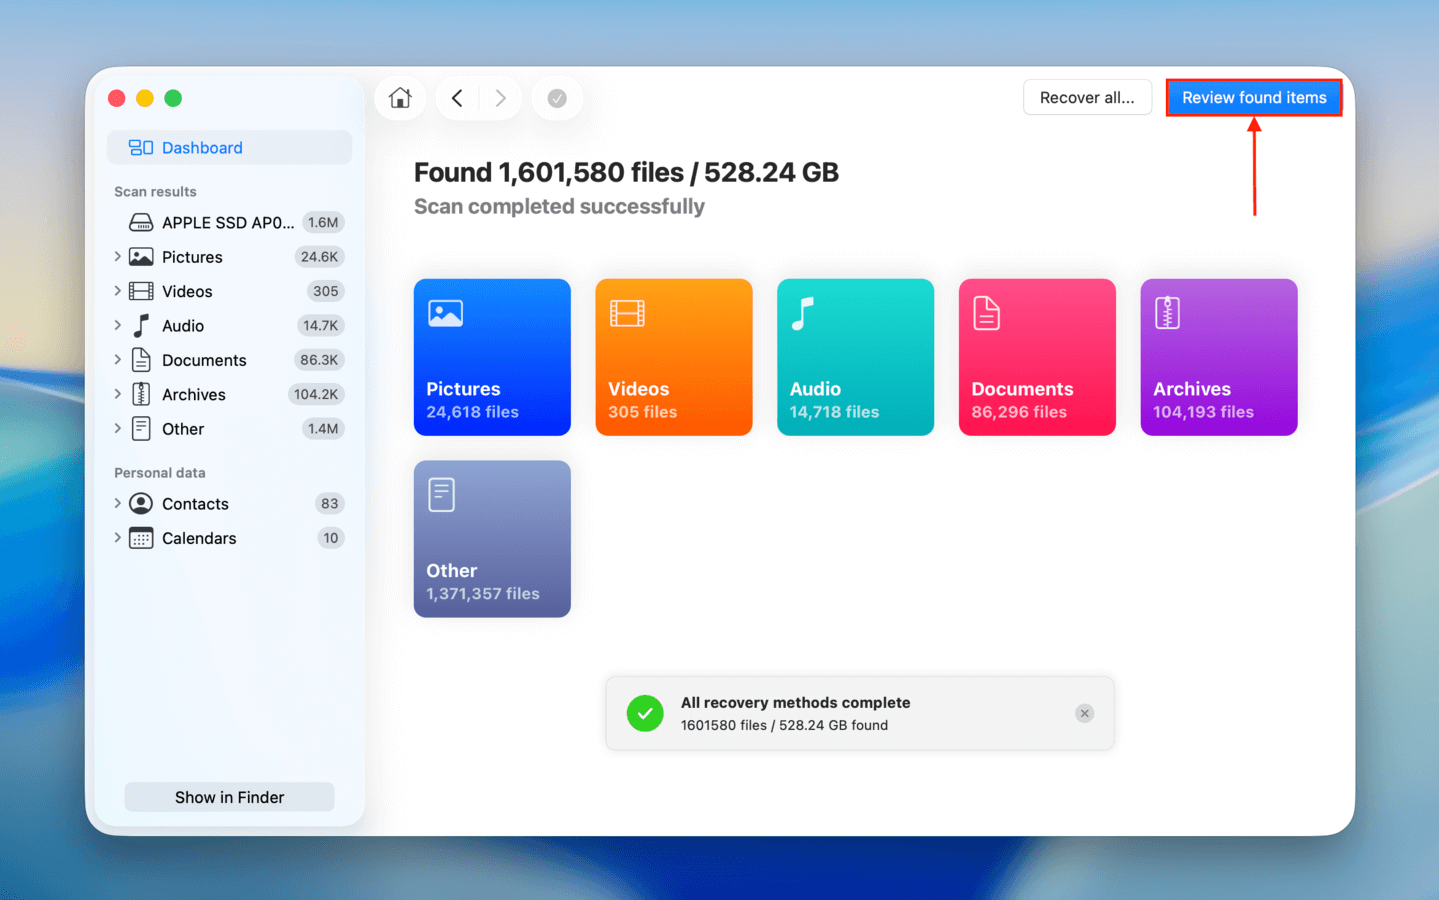
Step 4. Wait for Disk Drill to finish scanning your drive. Then, click Review found items.
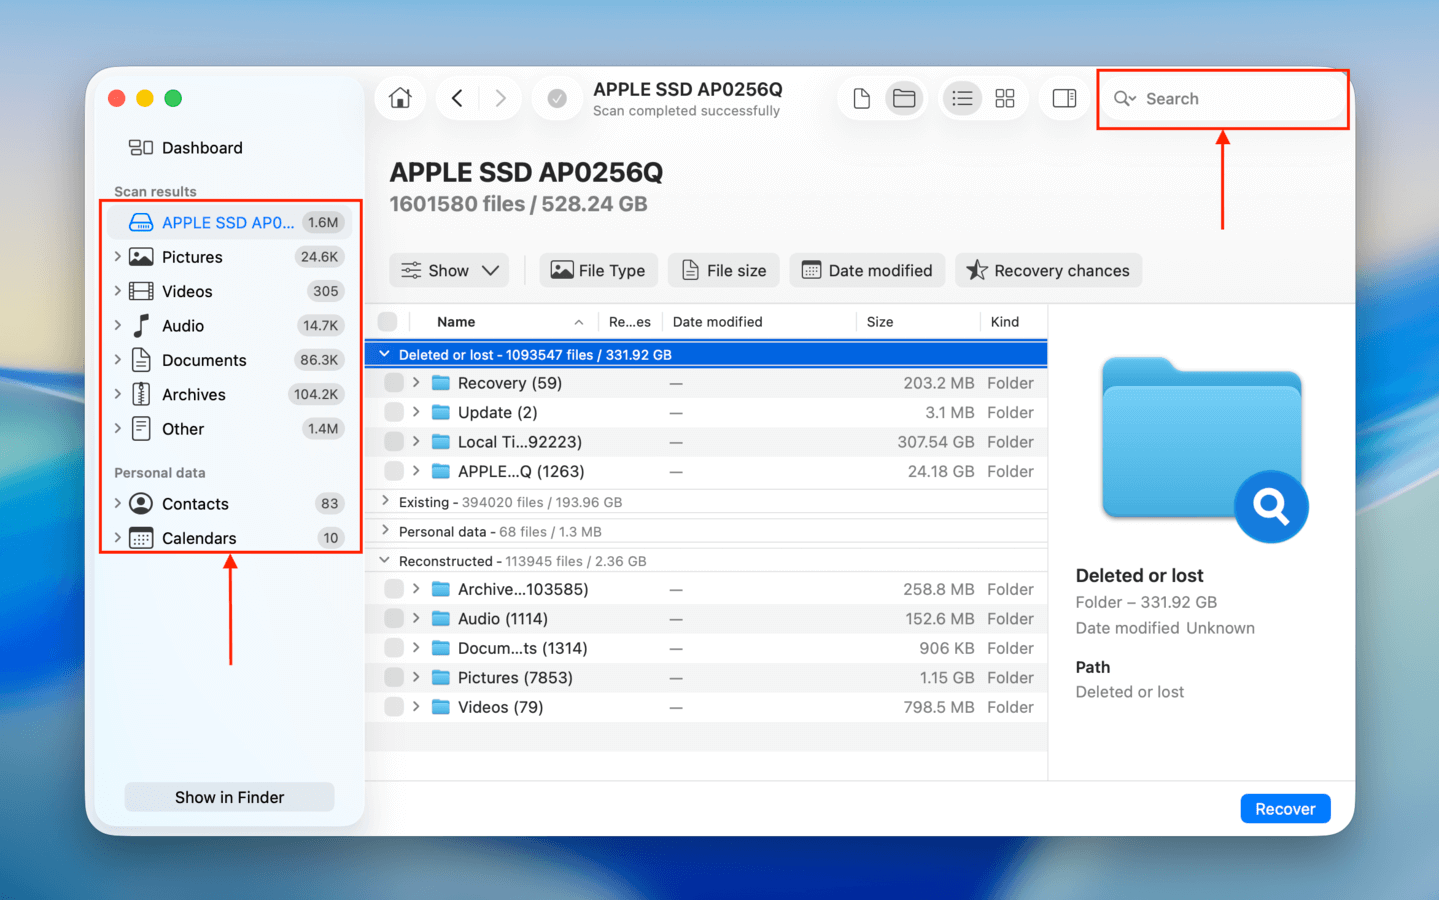
Step 5. If you want to restore all the data Disk Drill found, you can click the Recover button without anything selected, then proceed to step 7. But if you only want to restore specific files, you can use the filters in the left sidebar, as well as the search tool (top right corner) to narrow down the results.
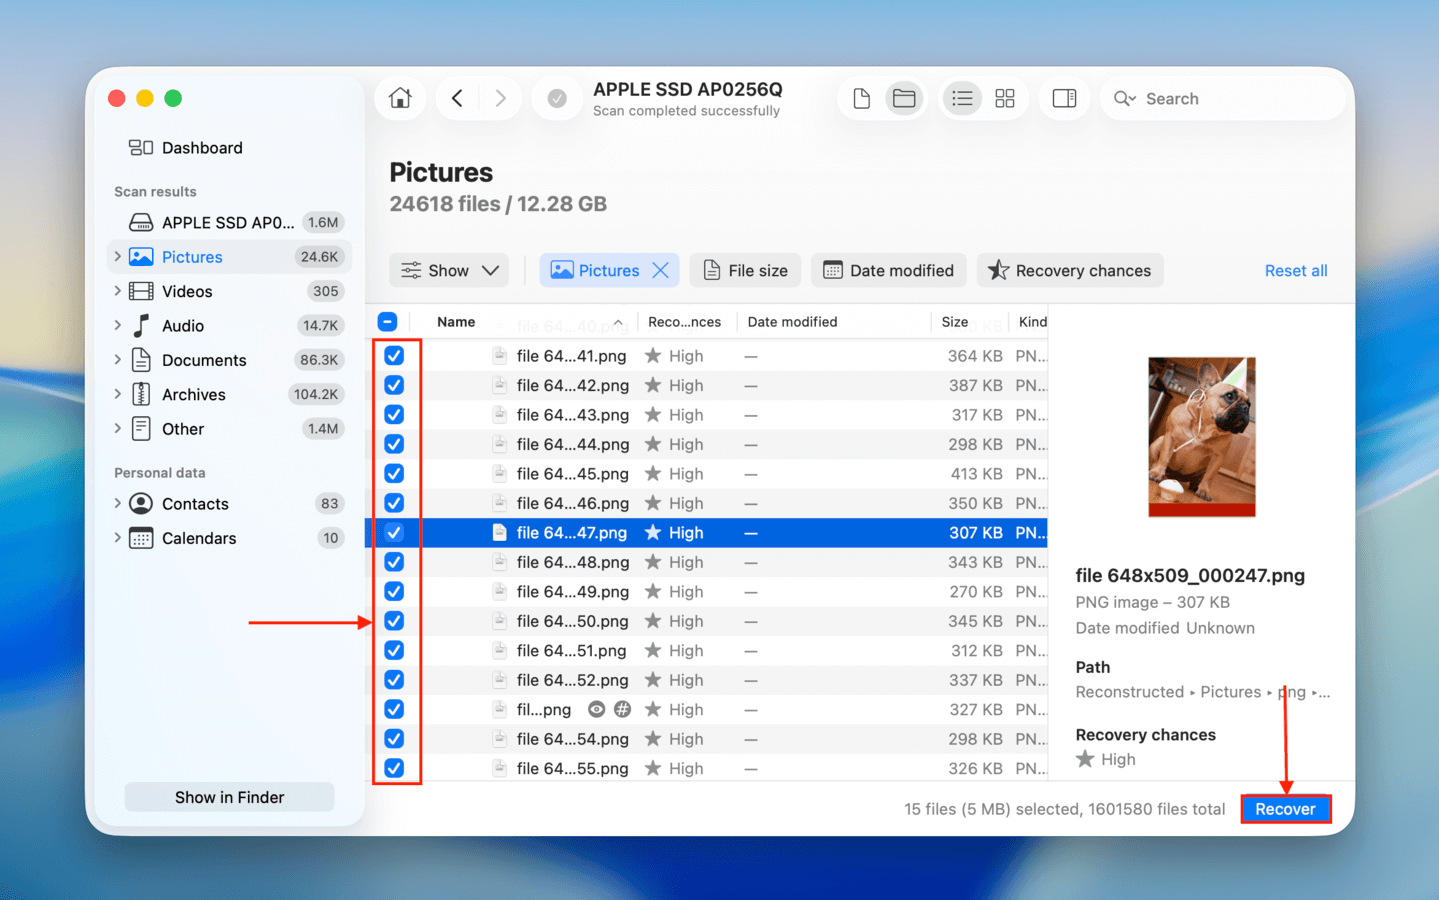
Step 6. We also recommend that you preview files before restoring them. To do so, simply click on a file once and ensure Disk Drill’s window is sufficiently large (if the preview feature isn’t compatible with your file, you can refer to the Recovery chances column instead). Then, select the files you want to restore using the boxes in the leftmost column, and click Recover.
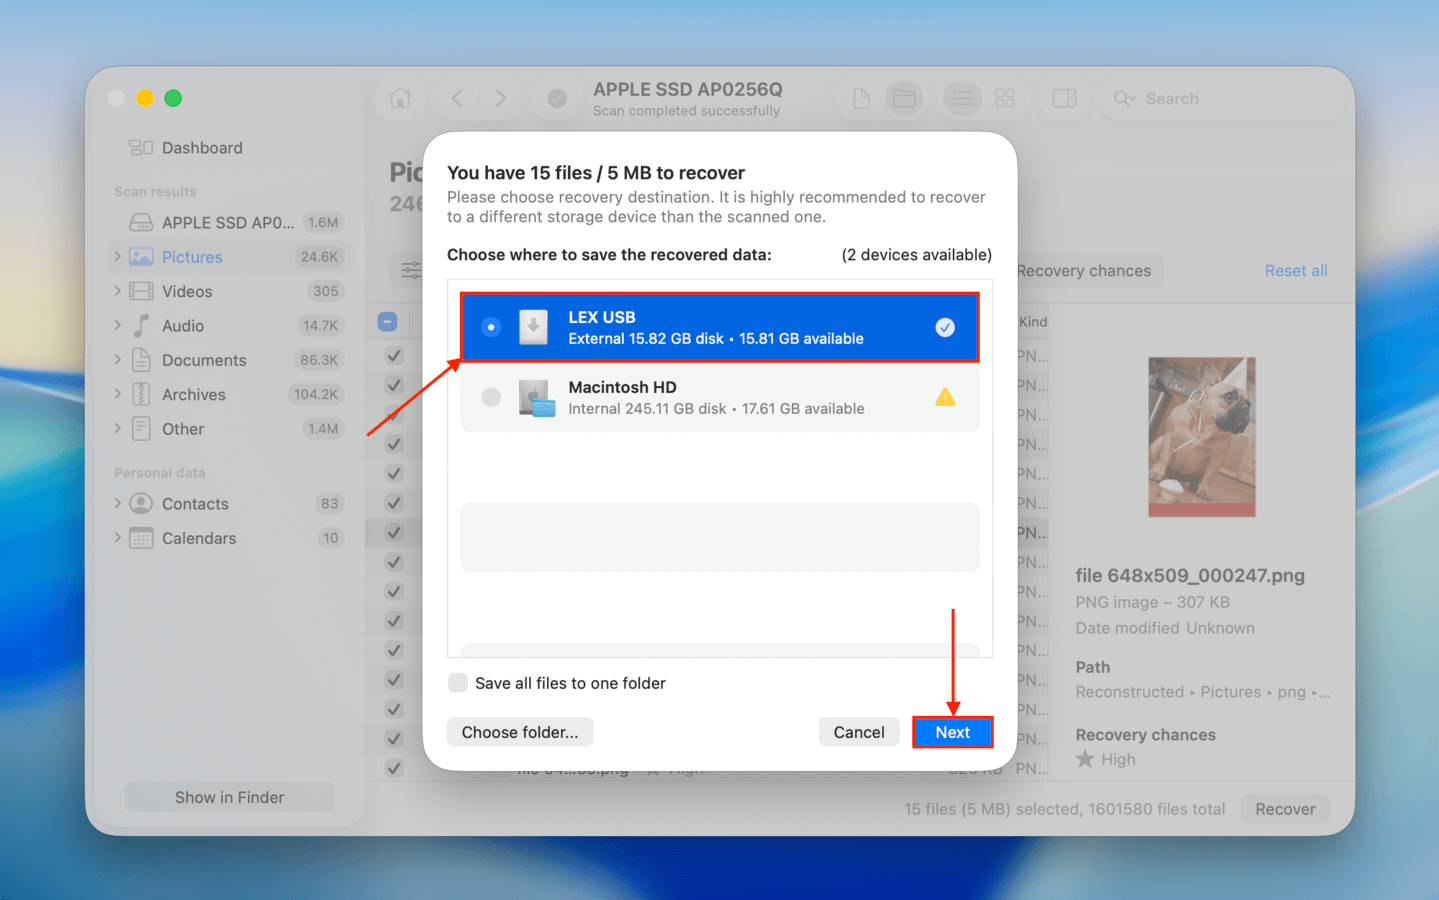
Step 7. Finally, select a folder where you want Disk Drill to save the restored files. Make sure to save your data on a different drive–not the drive you just scanned. Then, click Next.
Method 2: Restore Time Machine Backup
Time Machine is a pre-installed backup tool that continuously creates backups or “snapshots” of your data as they get updated. If you used Time Machine at least once before your “Trashed” files got deleted, there’s a chance that copies of your data were saved as snapshots.
If you have access to your Time Machine backup, you can view past snapshots of the location where your missing files were originally located. With luck, you’ll find a snapshot that contains your files, which you can download to your Mac.
Step 1. If you have it, connect your Time Machine drive to your Mac. If you don’t, move on to step 2.
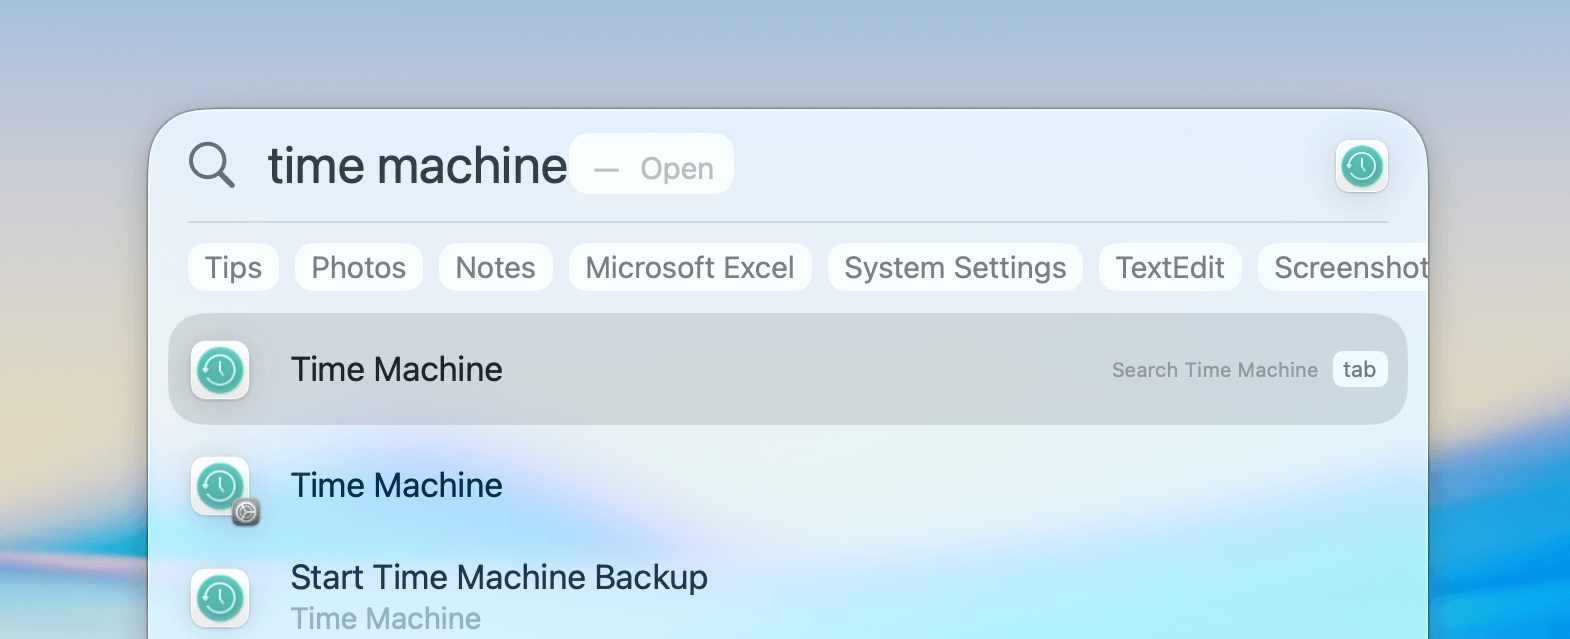
Step 2. Click the Time Machine button in your Apple menu bar, and select Browse Time Machine Backups. Alternatively, you can open Time Machine via Spotlight (Command + Space).
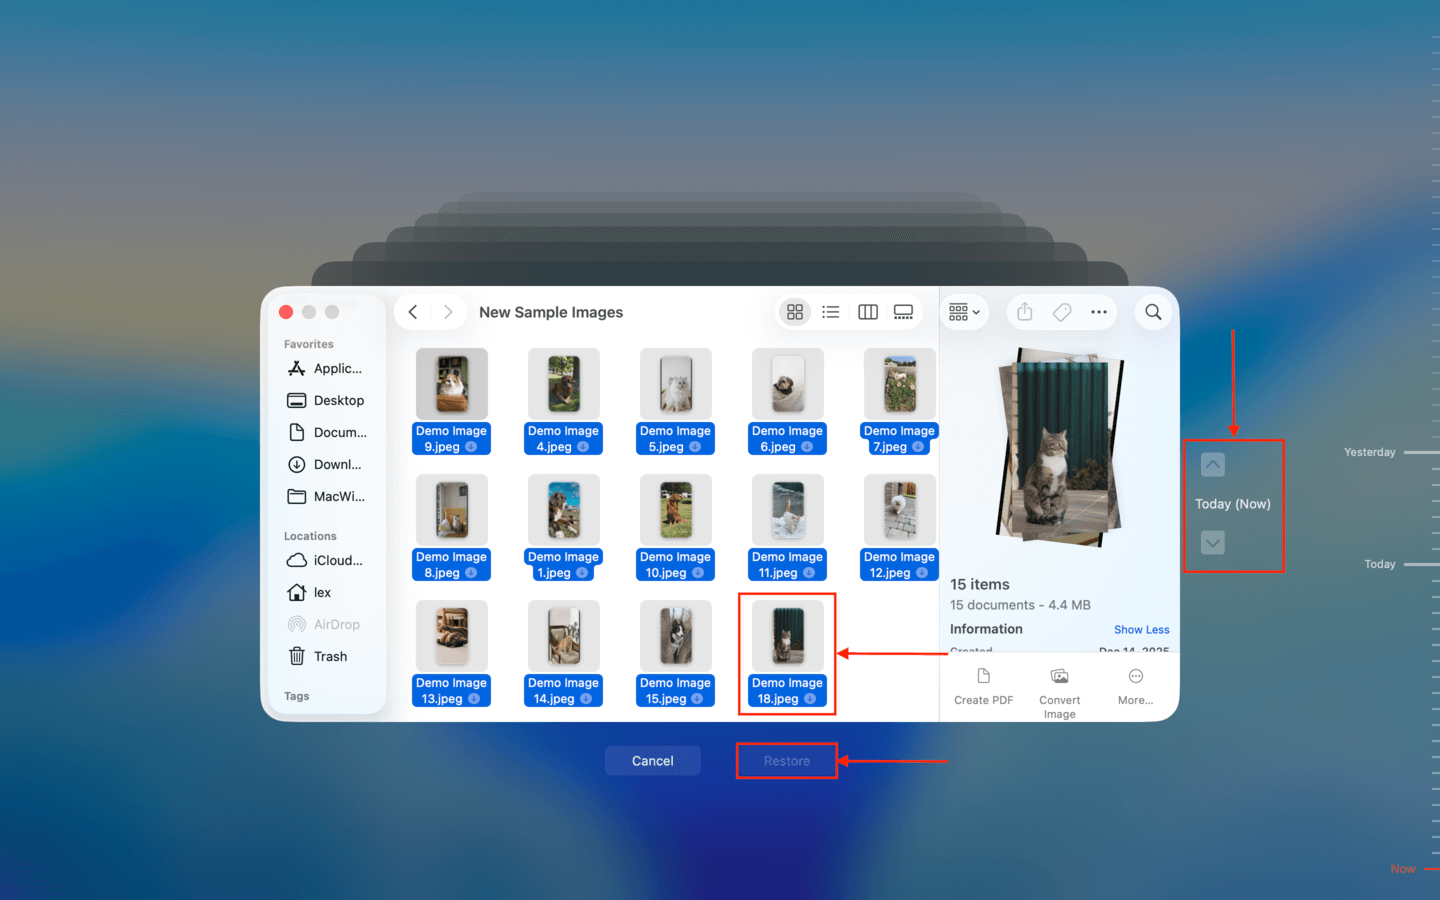
Step 3. Navigate to the folder where your deleted files were last stored (this could be the Trash folder or their original folder before deletion). Then, use the arrow buttons beside the Finder window to browse old snapshots–keep going until you find your deleted files. Then, select them and click Restore.
Method 3: Recover Files from iCloud
iCloud Drive and iCloud synchronization upload a copy of your files and folders to Apple’s servers, which you can access from any browser. Any changes to this data get reflected in iCloud, which keeps your library consistent across all your devices.
If your deleted files are part of the data you opted to sync with iCloud, and if the deletion event has not yet been reflected in Apple’s servers (e.g., your Mac isn’t connected to the internet), it’s possible that the copies of your files are still available online.
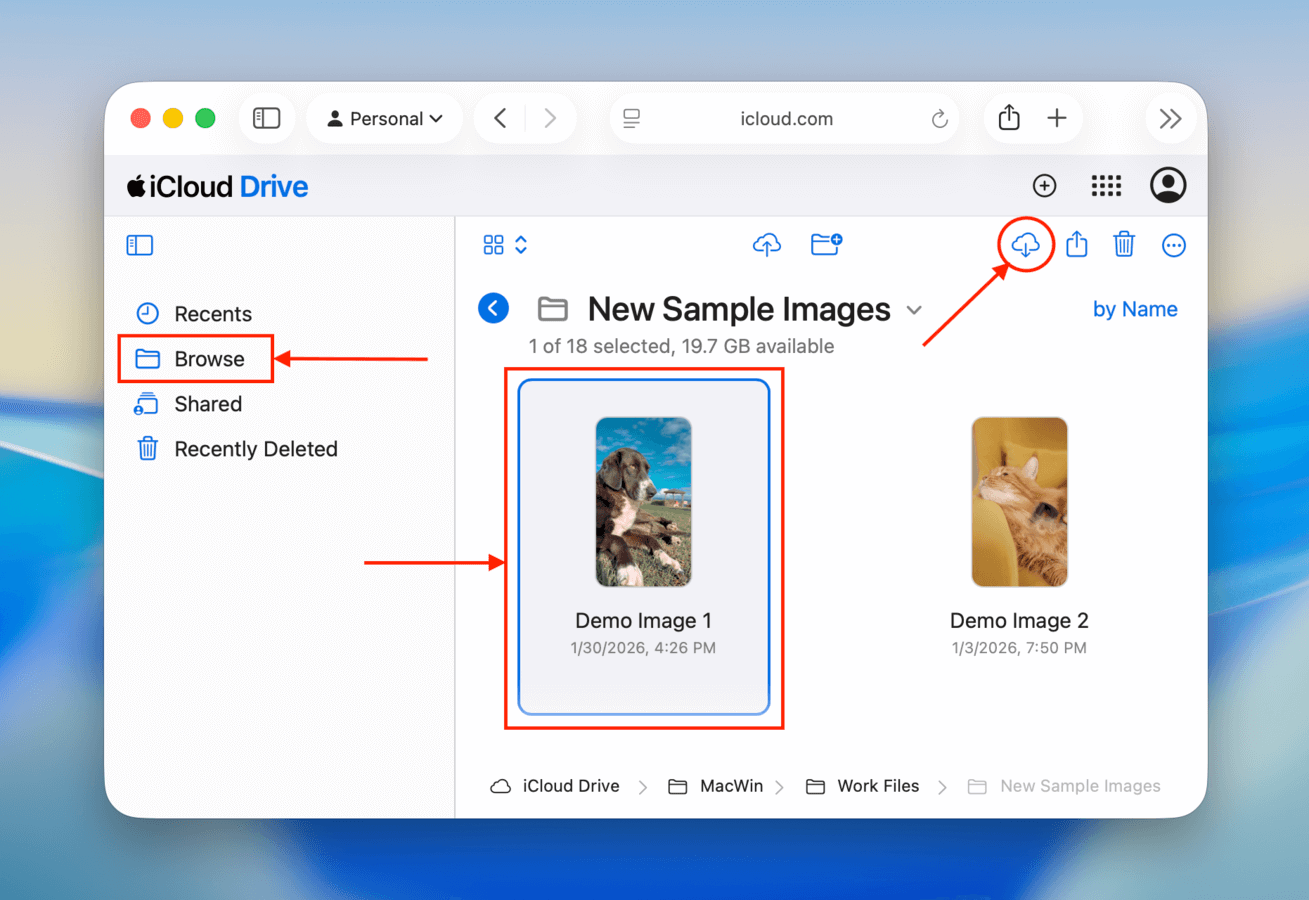
Step 1. Open any browser and log in to the iCloud website.
Step 2. Find and select Drive.
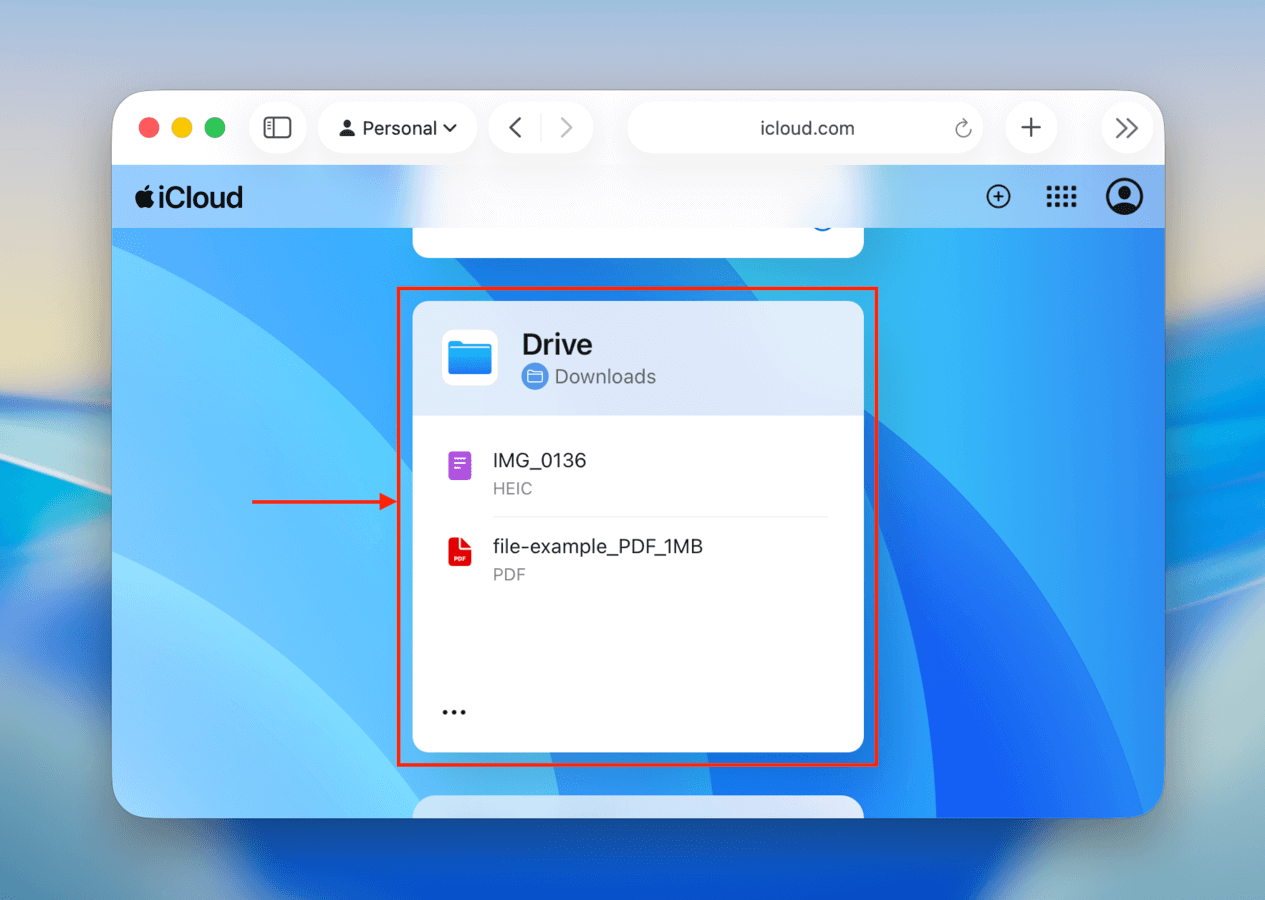
Step 3. On the left sidebar, click Browse. Then, navigate to the iCloud folder where your files were last saved. Finally, select your file and click the download button.
Method 4: Use Data Recovery Services
We can also use a data recovery service to recover data if the above methods haven’t worked for you. Cleverfiles offers a data recovery center where you can send in your Mac and get a free evaluation to see if the data can be recovered from it.
There are many hard drive recovery centers but I like this one for the following:
- If they can’t recover your data, there is no charge to you so it’s worth giving it a shot.
- Your hard drive warranty will not be voided.
- They have a very high success rate.
- The evaluation is free to see if your data can be recovered.
How to Recover Data From Trash That Hasn’t Been Emptied
If you haven’t deleted your files from the Trash folder or used the Empty Trash feature, restoring your files becomes extremely simple. We’re still going to show you several ways to restore Trashed files, because each method has a unique advantage that you may want to add to your mental toolbox.
Method 1: Run the Undo Command Immediately
If you haven’t taken any other action after deleting your file or emptying the Trash, running the Undo command right after (while you’re still in the folder) will reverse the action. In other words, running Undo immediately after sending the file to the Trash folder will return it to its original location.
Use this method to swiftly revert deletion without having to open Trash yourself. To use the Undo Command, press the Command + Z keys immediately after deleting a file (while the Trash folder window is in the foreground).
Method 2: Use the “Put Back” Feature
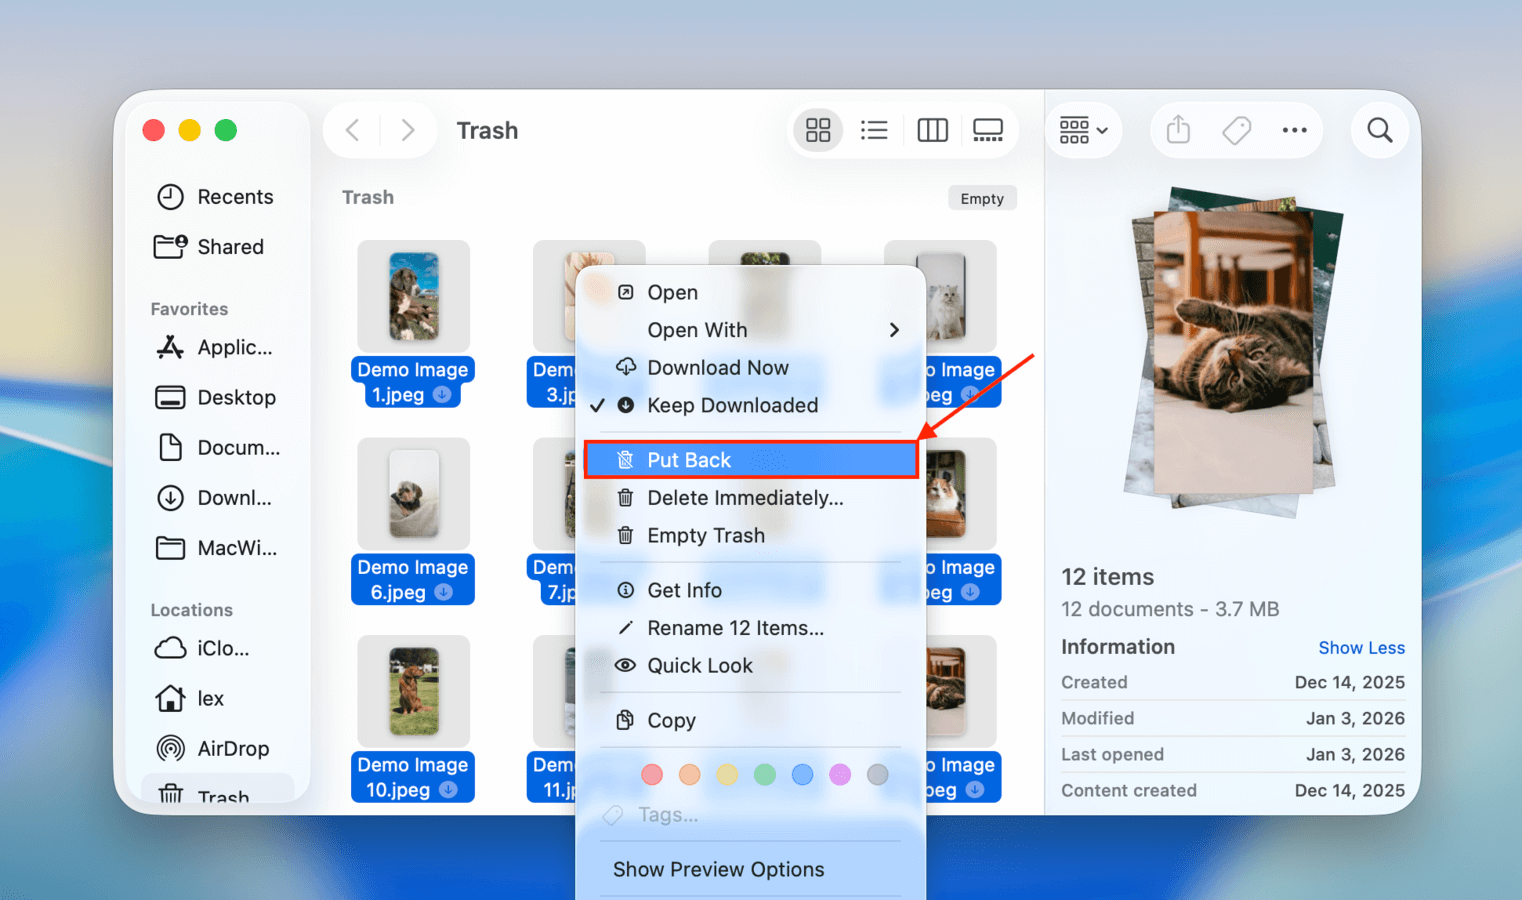
If the Undo command doesn’t work anymore, the next easiest way to restore deleted files is to use the Trash folder’s Put Back feature. If you right-click any file or folder in the Trash folder, you’ll find a special option called Put Back–choosing this option returns the selected file or folder to its original location. We’ll show you a quick demonstration.
Step 1. Open the Trash folder by clicking the rubbish bin icon on your Dock.
Step 2. Right-click the file you want to restore. Then, in the context menu, select Put Back.
Method 3: Utilize Terminal Commands
Terminal is a CLI (Command Line Interface) that allows you to use commands to directly control macOS. The command we’ll be teaching you in this section is the mv command–it moves files from one directory to another. In this case, we’ll show you how to move files from the Trash folder to another location.
The advantage of using this method is the ability to move multiple files with highly customizable parameters. For example, we’ll show you how to move files that have a specific word in their file name, as well as move all files with a specific extension. While you might face a bit of a learning curve, you can use this command for any folder–not just Trash.
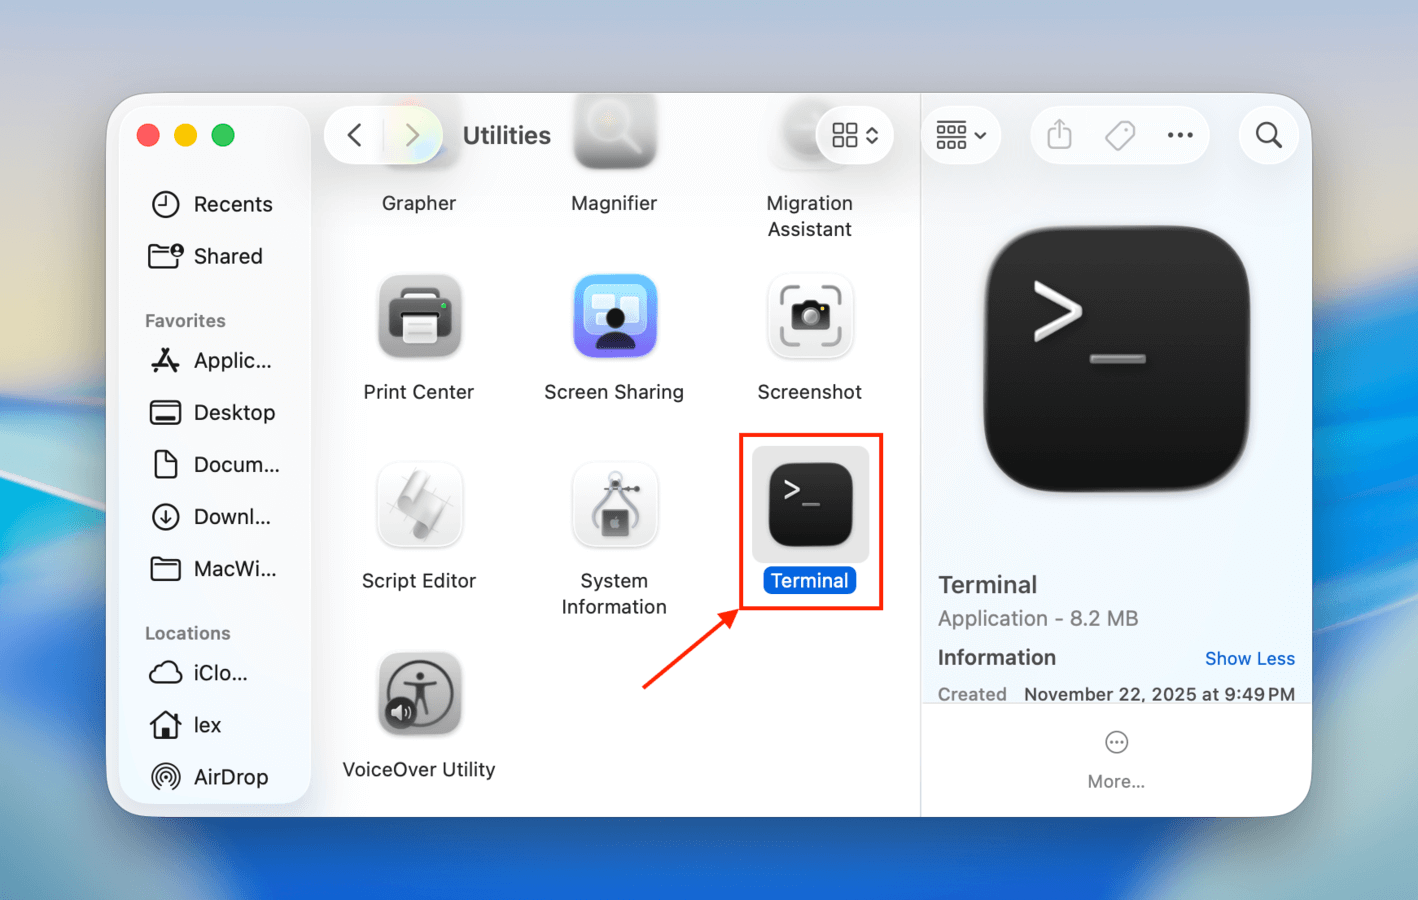
Step 1. Open the Terminal app (Finder > Applications > Utilities).
Step 2. First, navigate to the Trash folder by running the following command:
cd ~/.Trash
You can confirm if your files are there by using the ls command right after.
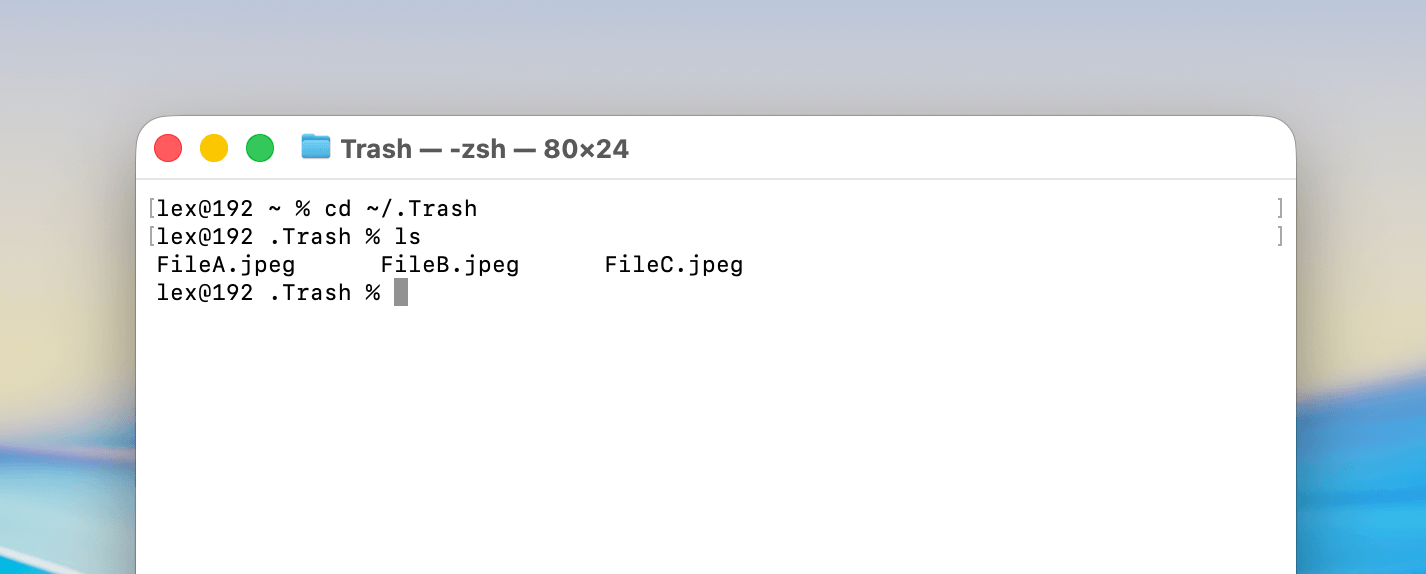
Step 3. We’ll show you several useful variations of mv commands–just make sure to swap out the destination folder and file names and extensions where appropriate.
Move multiple, specific files without having to manually select them:
mv {FileA.jpeg,FileB.jpeg,FileC.jpeg} ~/Desktop/"Demo Folder"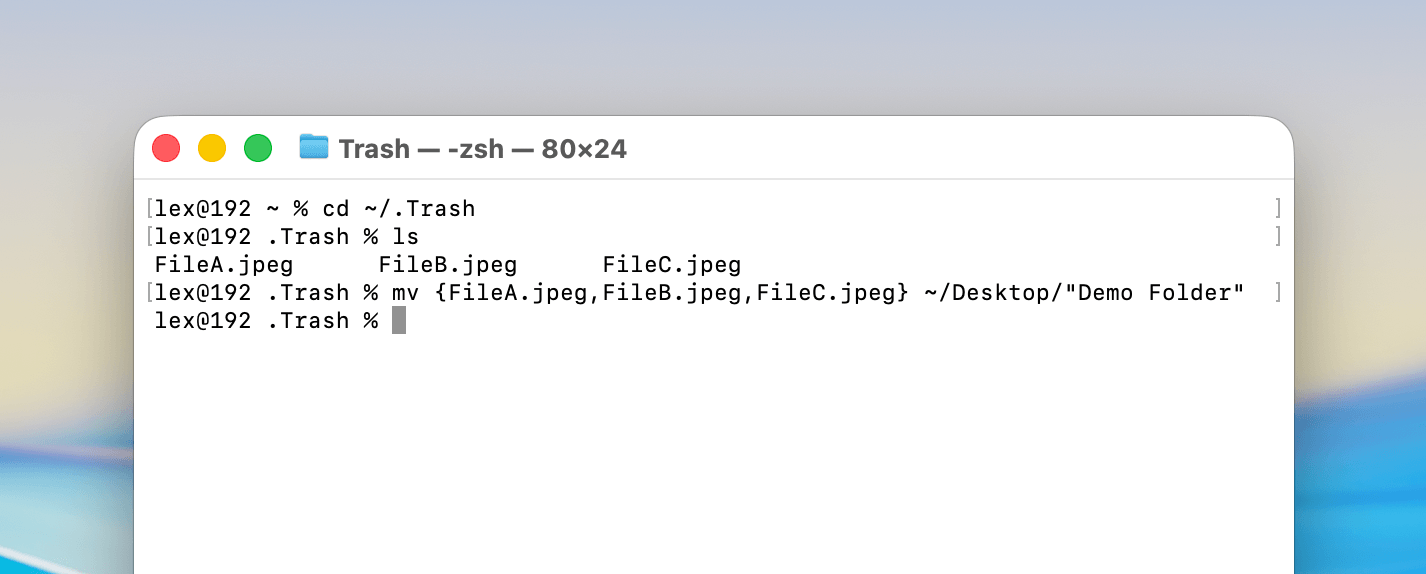
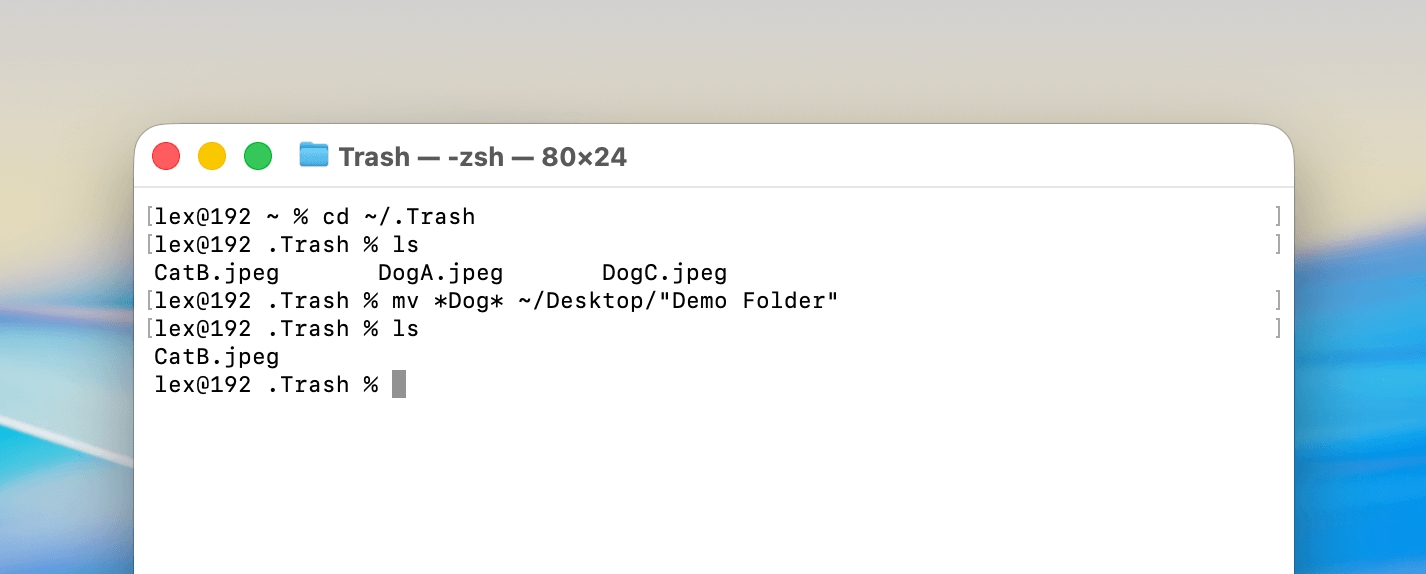
Move files with specific characters in their names:
mv *dog* ~/Desktop/"Demo Folder"
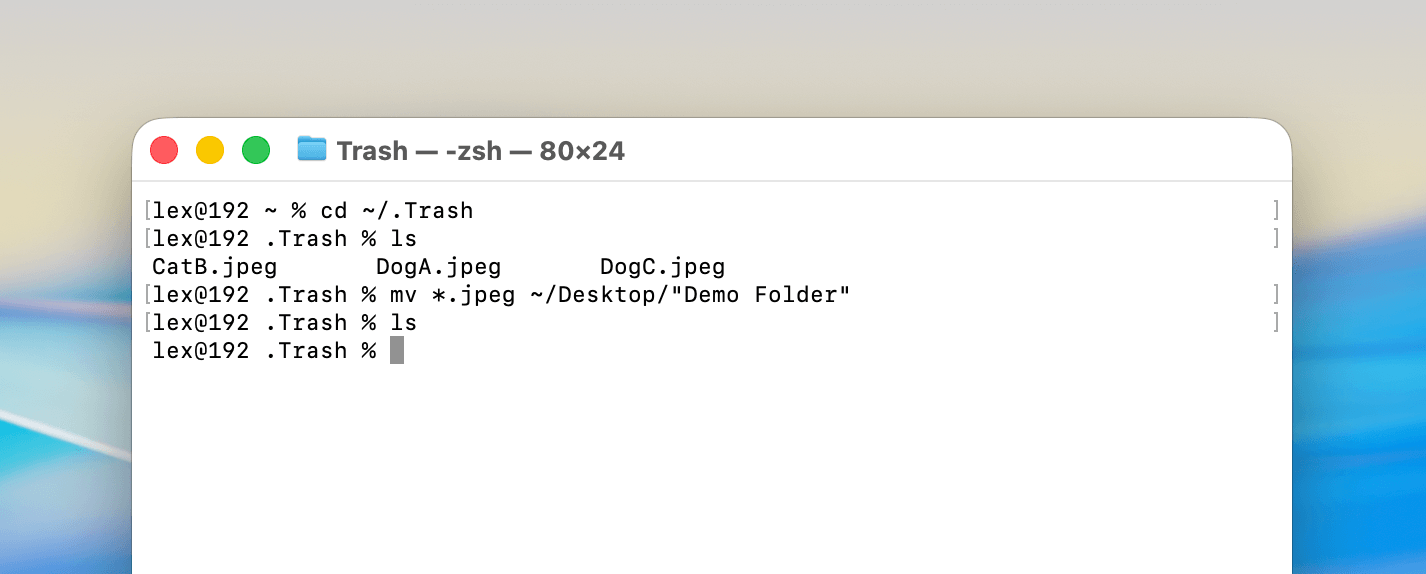
Move all files with a specific file extension:
mv *.jpeg ~/Desktop/"Demo Folder"
How to Prevent Accidental Data Loss from Trash
Now that we know how to recover data if we’ve emptied the trash, let’s talk about what are the best tips for protecting our data and ensuring that this doesn’t happen again in the future.
The below tips will help you be more aware of when your Trash is emptied and one of them also includes instructions on how to back up your data.
Tip 1: Turn off Automatic Trash Emptying if You Have It Turned On
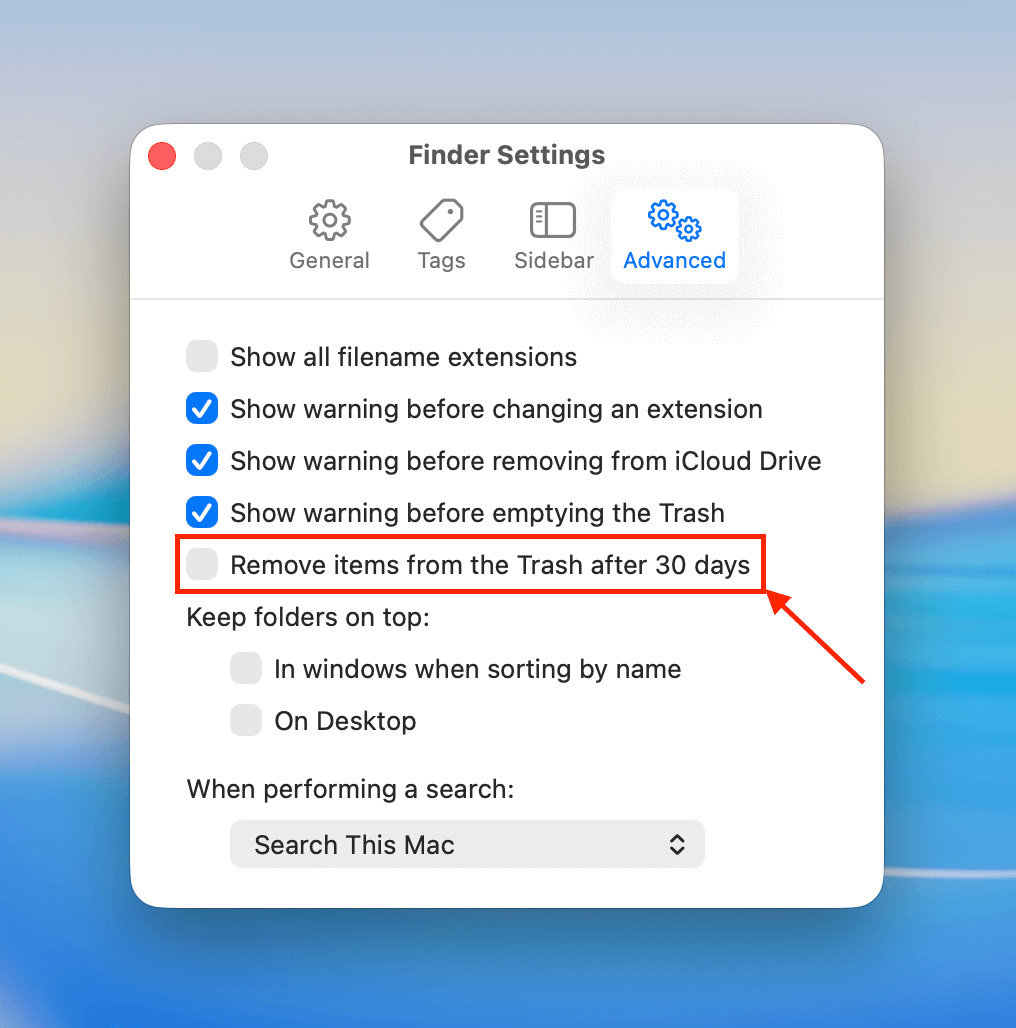
Within the Finder, you have the option to turn on automatic Trash deletion after 30 days. This setting is off by default, but if you do have it turned on and want to turn it off we can do so.
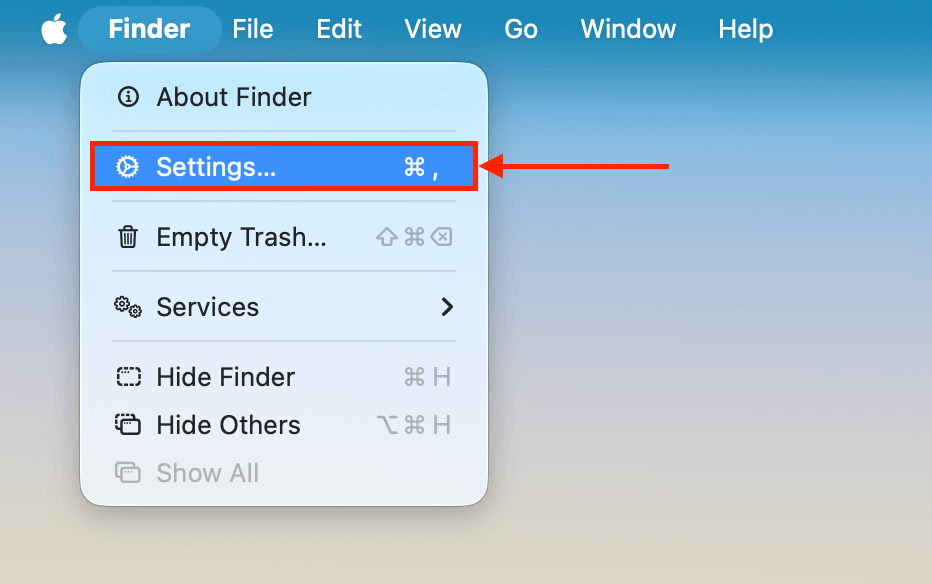
Step 1. Open Finder. Then, click Finder > Settings.
Step 2. Within your Finder Settings, go to the Advanced tab. You will then see the option to Remove items from the Trash after 30 days. If it’s on, you can turn it off by clicking on the checkbox.
That’s all that there is to it! Now your Trash won’t empty itself unless you go in and decide to do so.
Tip 2: Show Warning Message Before Emptying the Trash
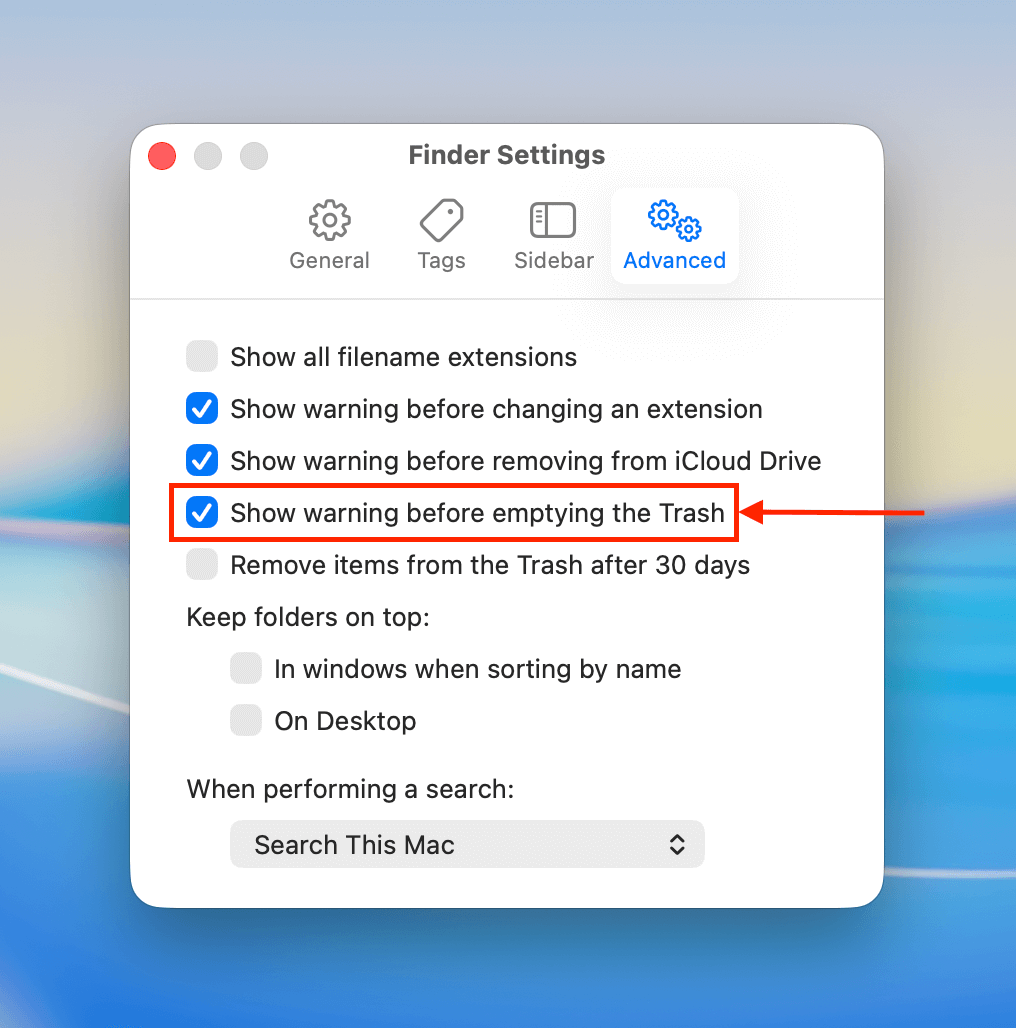
By default, there is a popup that comes up when either you click Empty within the trash or if you push the key command to do so. If this is turned off, we can turn it back on by following the steps below. I would recommend having this on just to make sure you really want to empty the Trash each time that you do so.
Step 1. Open Finder. Then, click Finder > Settings.
Step 2. Click on the Advanced tab and check to see if you have the option “Show warning before emptying the Trash” turned on or not. If you don’t have it on, I would recommend checking the box to turn it on.
Lastly, let’s talk about how to set up a backup and make sure that we always have another copy of our data in another location.
Tip 3: Set up a Backup Tool
Having a backup in place isn’t one of those things that you realize that you want to have until it’s too late. I’ve sent my Mac in for service and have experienced a software issue with it. Both times, I was super happy to have a backup and I know that if anything ever happens to my Mac, my data is saved in another location.
All that you need for a backup is an external hard drive. You don’t have to purchase a super expensive one, a cheaper slow one is fine but it will just take a little bit longer to back up your machine. Mine is a slower mechanical hard drive.
Once you have an external hard drive, you can back up using the steps below.
Step 1. Plug your external hard drive into your Mac.
Step 2. Launch System Settings > General > Time Machine.
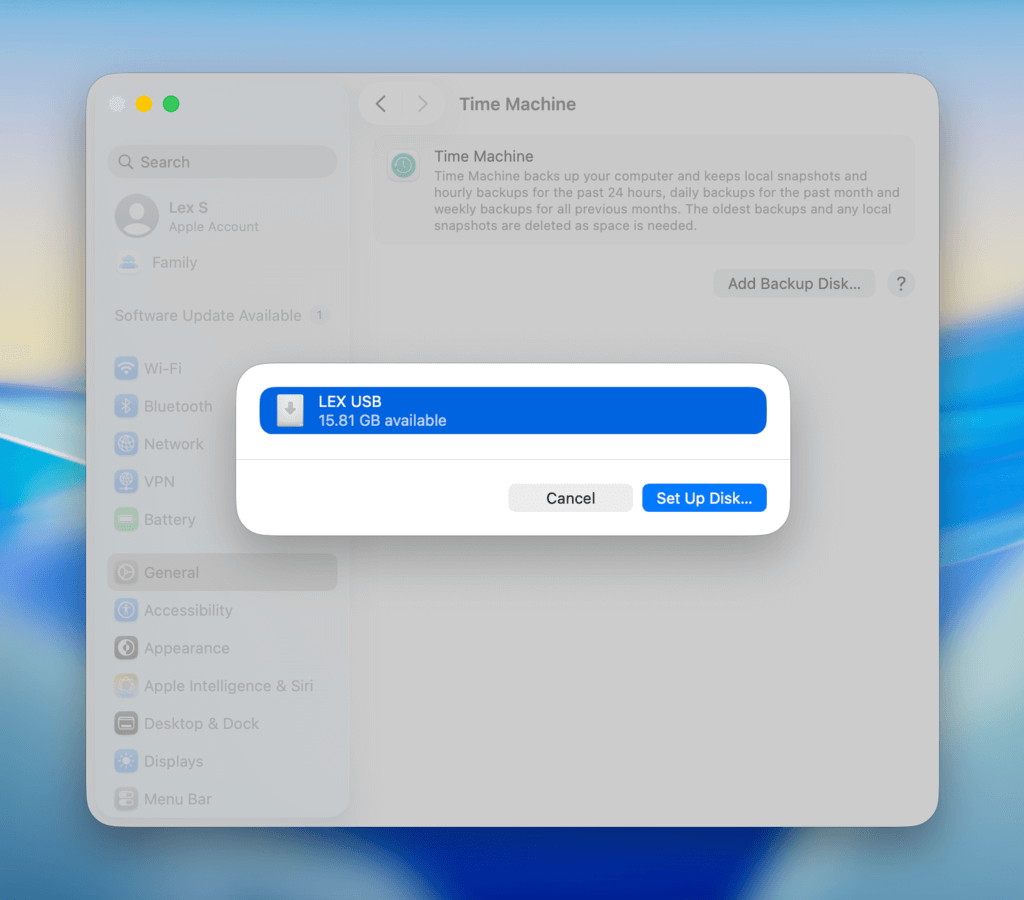
Step 3. Select the external hard drive and then back up to it.
Now you have a copy of your data on the external hard drive. It would be a good idea to back up every week or whenever you make a huge change to your data on your Mac.
Did You Delete Your Files From an External Storage Device?
While we briefly talked about needing to connect external drives for their files to show up in Trash, we didn’t show you how it worked. Check out our guide on recovering data from external hard drives, where we show you exactly how to restore “Trashed” files specifically from external drives.
We also show you how to recover data in case you emptied the Trash folder, as well as other data loss cases unique to external storage devices.
FAQ
Moving something out of the Trash is very easy to do with the following procedure.
- Open the Trash by clicking on its icon.
- Locate the item you wish to remove from the Trash.
- Right-click on the item and select Put Back to return it to its original location.
You can also drag a file or folder from the Trash to your desktop.


