
Can’t find the “Put Back” option when you right-click your files in the Trash folder? That means that its functionality is unavailable for those specific files. Fortunately, there are multiple ways around this problem that allow you to get your data back without having to “fix” the missing button.
Here’s a beginner-friendly guide on how to recover your data even with no Put Back option in the Trash folder. Read on!
Table of Contents
Why “Put Back” is Missing and What to Do About It
The Mac Trash’s Put Back goes missing usually because the file you’re trying to restore was deleted by an app – not through Finder.
Here’s the problem… The Put Back functionality is directly related to Finder’s system process of moving files to and from their original location and .Trash (the Trash folder). So if the Put Back option is missing on your Mac, there’s no way to “reactivate” it presumably because the process happened outside of Finder’s system.
However, there are ways we can extract the file from .Trash and move it to another location – effectively circumventing the need for Put Back at all.
We’ll cover each of them in detail in the next section.
4 Methods To Restore Files When “Put Back” is Missing From Trash
This is the guide section, where you can find step-by-step instructions on how to get your files back when the Mac Trash Put Back option is not working. Methods 1 and 2 require either an iCloud backup or a Time Machine backup. If you have neither of those, start with Method 3.
Method 1: Download from iCloud’s Recently Deleted Folder
If you (a) have iCloud enabled on your Mac and (b) stored the file in your iCloud Drive folders before you deleted it, the file should appear in the Recently Deleted folder in iCloud Web.
You can easily access this folder from any browser on any machine.
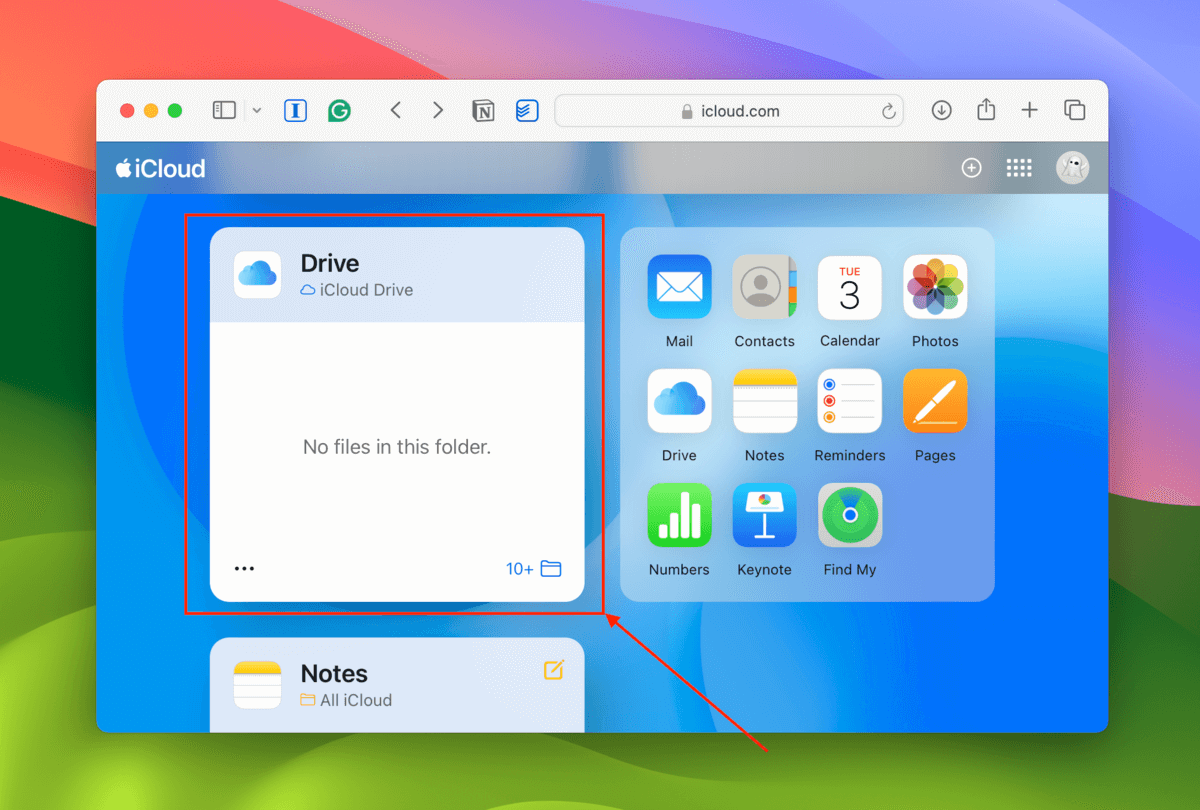
Step 1. Open any browser and login to iCloud.com. Then, scroll down and click on your Drive.
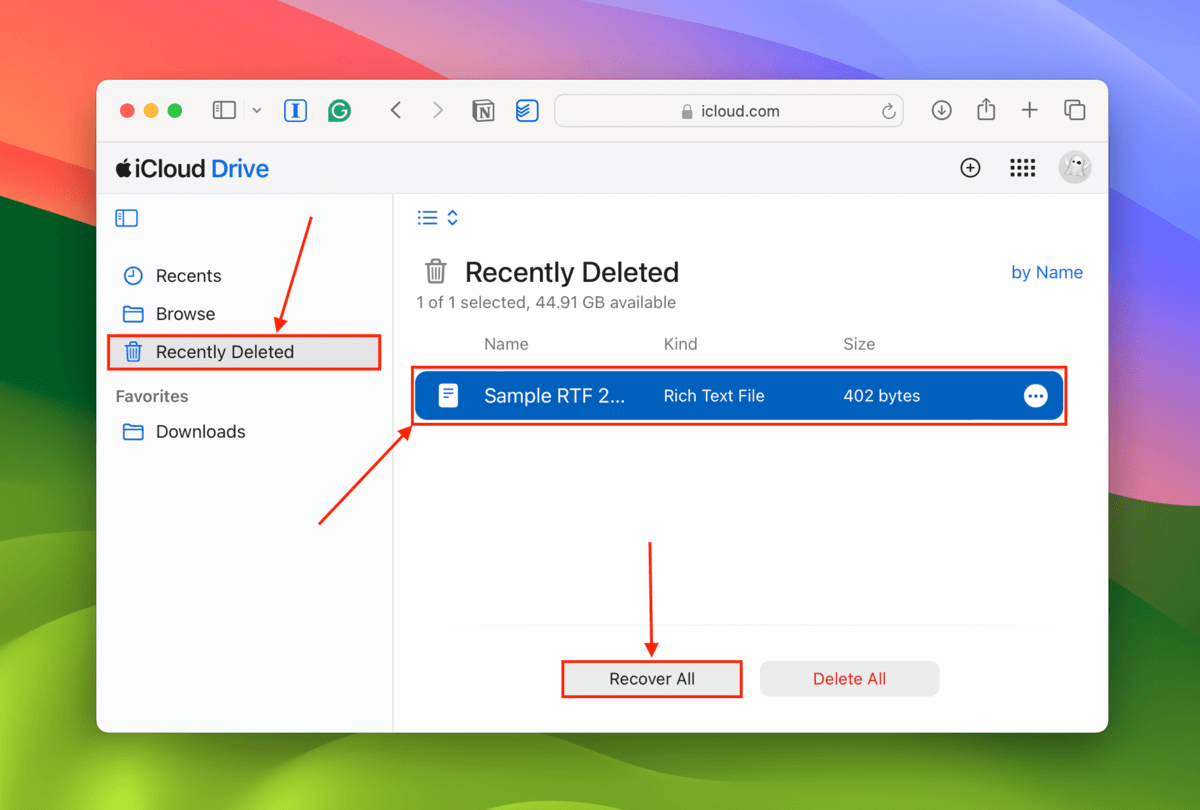
Step 2. On the left sidebar, click Recently Deleted. Then, select the file you want to restore and click the Recover or Recover All button.
Method 2: Restore Your Files From a Time Machine Backup
Did you enable Time Machine at least once before deleting the file? If so, there’s a good chance a version of it was backed up. Even without your backup drive connected, Time Machine continues to capture “snapshots” of your system over time.
Using Time Machine, you can travel backward on your system’s timeline and download a past version of the file (before it was moved to the Trash folder).
Step 1. Navigate to the original location of your file (before it was moved to the Trash folder).
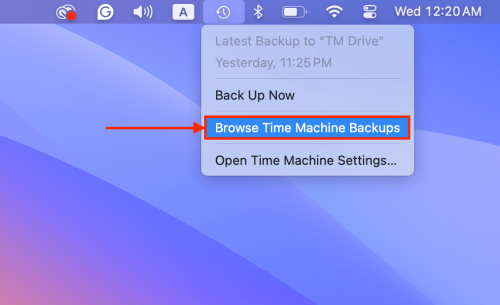
Step 2. Connect your Time Machine backup drive to your Mac. Then, click the Time Machine button > Browse Time Machine Backups.
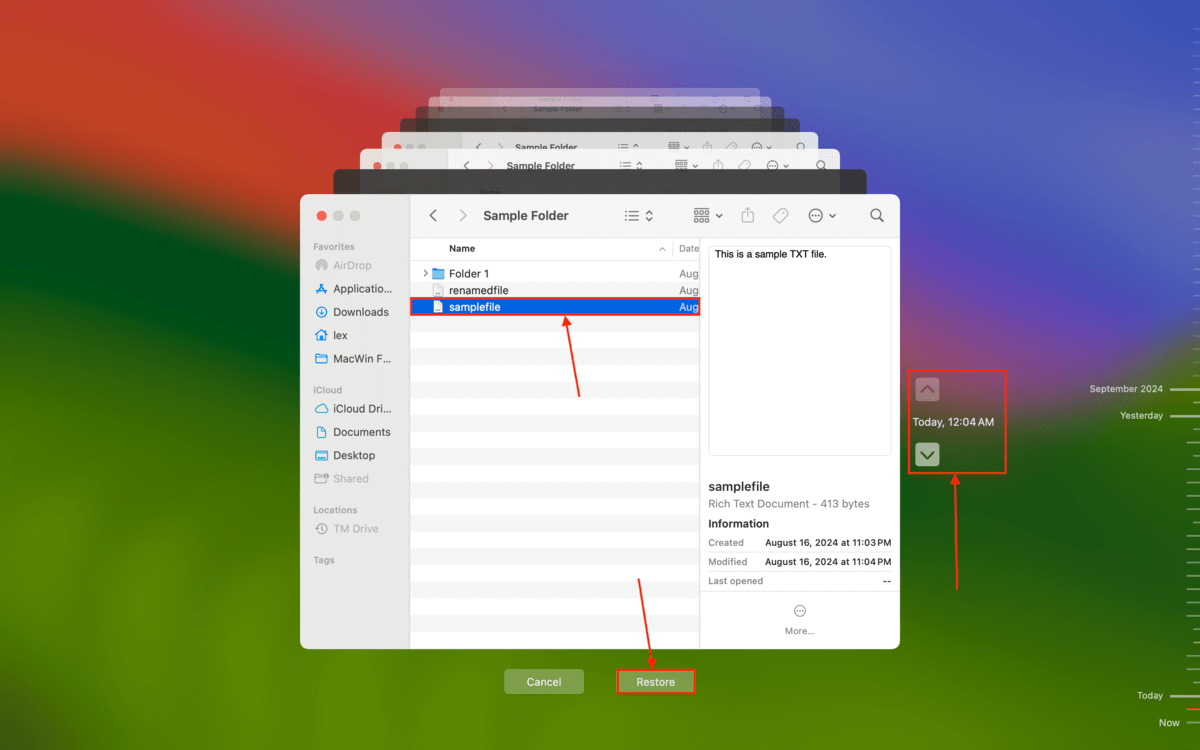
Step 3. Use the arrows on the right of the Finder window to move earlier in the folder’s timeline. Once your deleted file appears, click it and click Restore.
Method 3: Move Your Files Out of .Trash Using Terminal Commands
As long as you can see and click the file in the Trash folder, you can use the Terminal app to forcefully move it from the .Trash location (Trash folder) to another location. It’s just a bit tedious if you need to restore multiple files because you’ll need to move them one at a time.
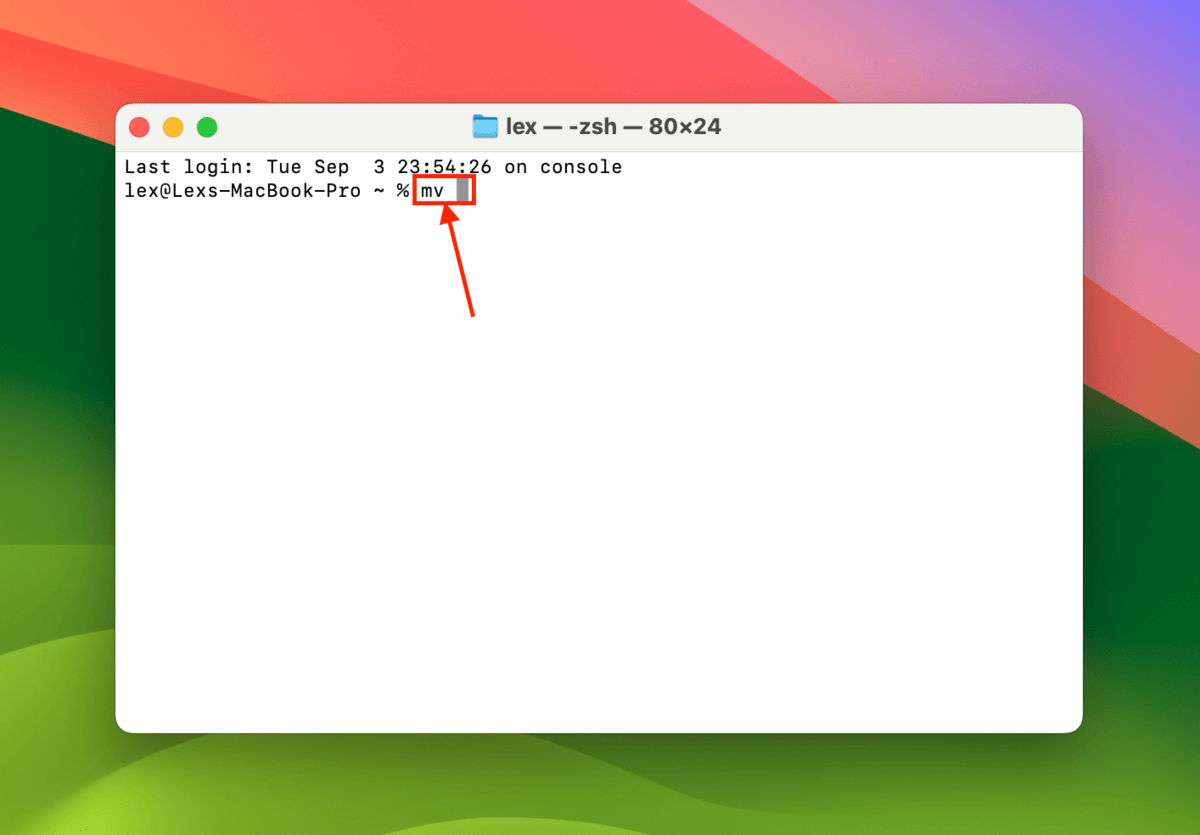
Step 1. Open the Terminal app.
Step 2. Type the following command followed by a space (press the space bar once) but DON’T hit Return yet:
mv
Step 3. Drag your file from the Trash folder into the Terminal window. This will input the file’s exact Pathname after the mv string. Again, don’t hit Return yet.
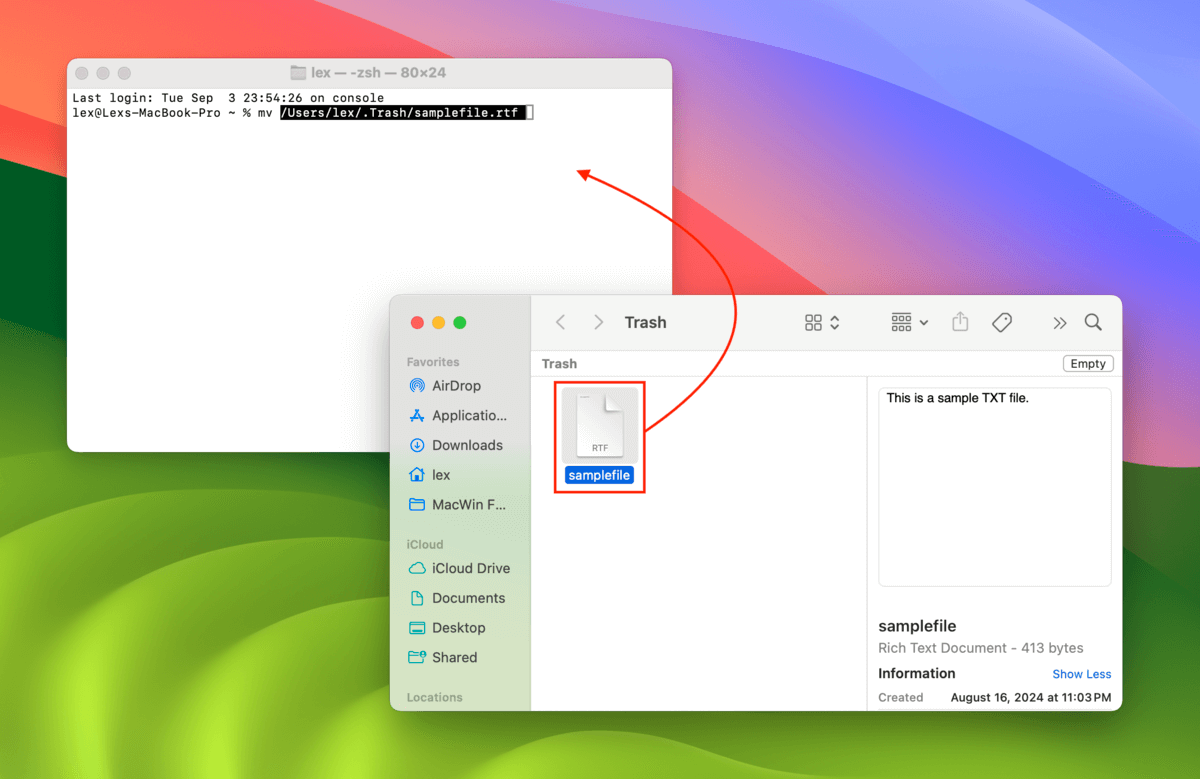
Step 4. Add a space after your file’s pathname. Then, add the following string to the command and hit Return:
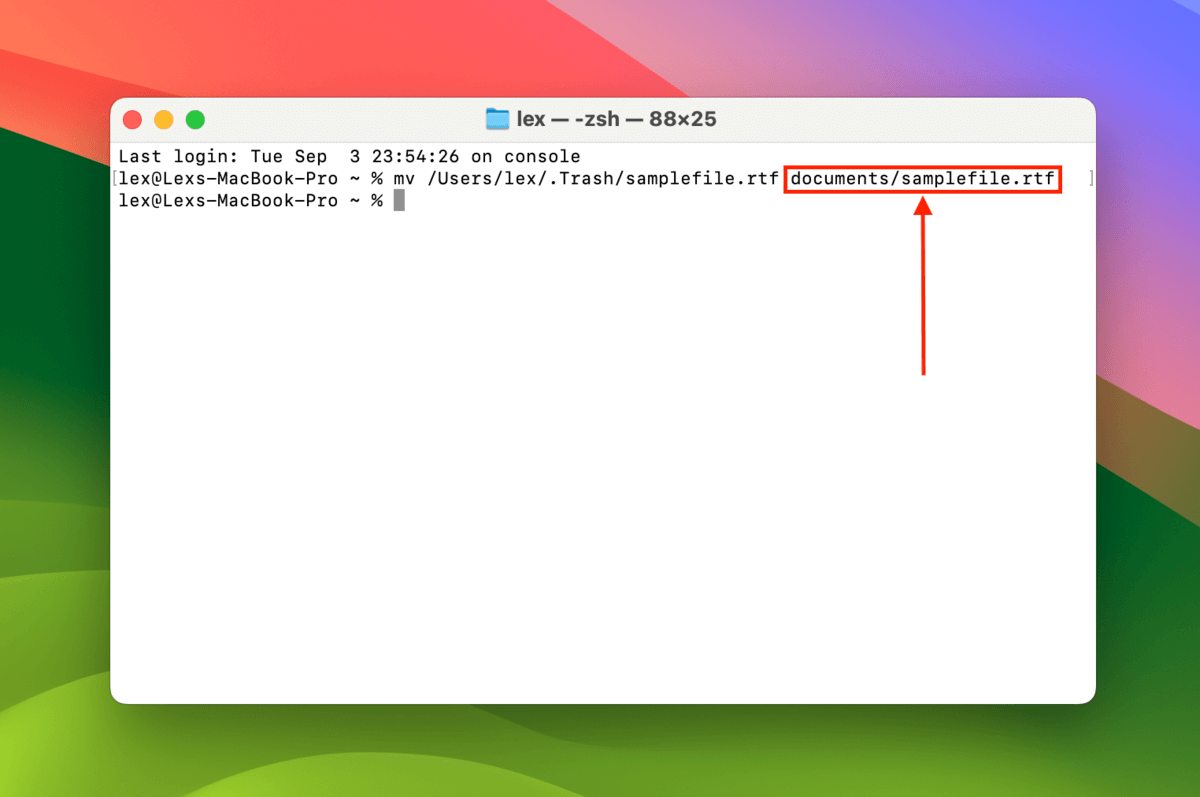
mv /Users/lex/.Trash/samplefile.rtf documents/samplefile.rtf
Replace documents/samplefile.rtf with the Pathname of your file after it’s moved to the new location. In the example below, I’m moving the file to the Documents folder on my Mac.
Method 4: Restore Your Trash Files Using Data Recovery Software
If you didn’t have iCloud or Time Machine enabled before you deleted the file and the mv command didn’t work, your next best option is to use data recovery software.
For this guide, we’ll be using Disk Drill. It has a massive database of file signatures (so most file types are covered) and it excels at scanning all standard file systems (HFS+, APFS, ExFAT, FAT32, NTFS).
Another reason we chose Disk Drill is because it also displays existing files alongside the deleted and reconstructed files. This gives you the option to recover the version of the file that is currently in your Trash folder.
However, note that Disk Drill doesn’t offer free data recovery in its trial. But you can scan and preview your data as much as you want, which reveals which files are truly recoverable.
Step 1. Connect an external storage device to your Mac, ensuring that it has enough storage space for your files.
Step 2. Download and install Disk Drill.
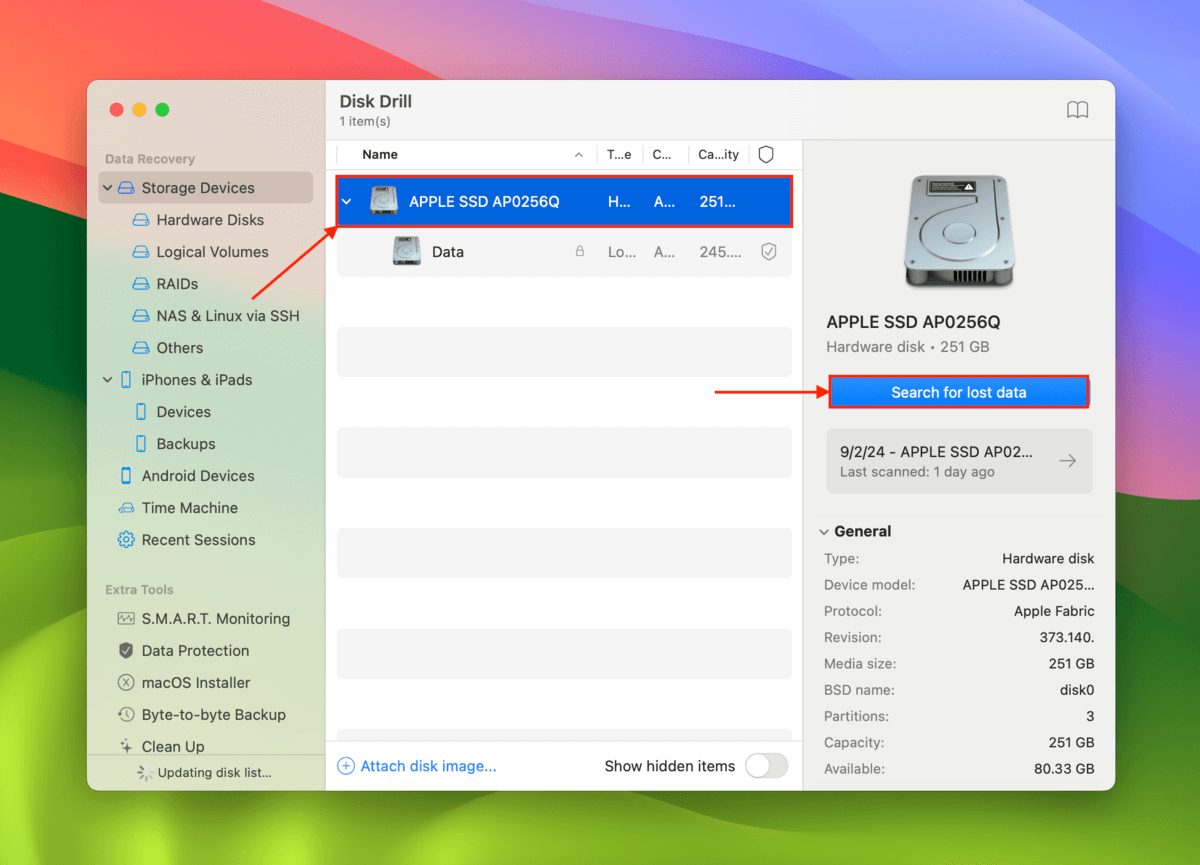
Step 3. Open Disk Drill. Select your Mac drive from the list of disks and click Search for lost data.
Step 4. After Disk Drill completes the scan, click Review found items.
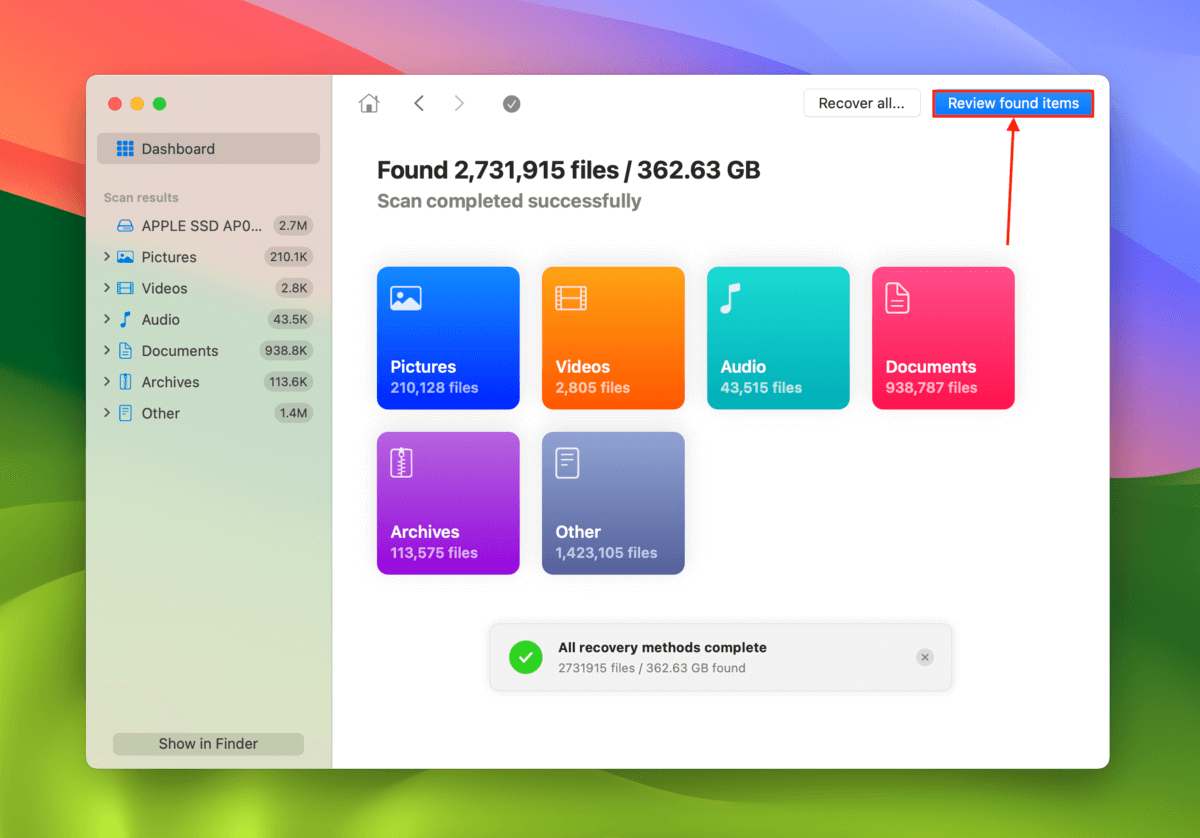
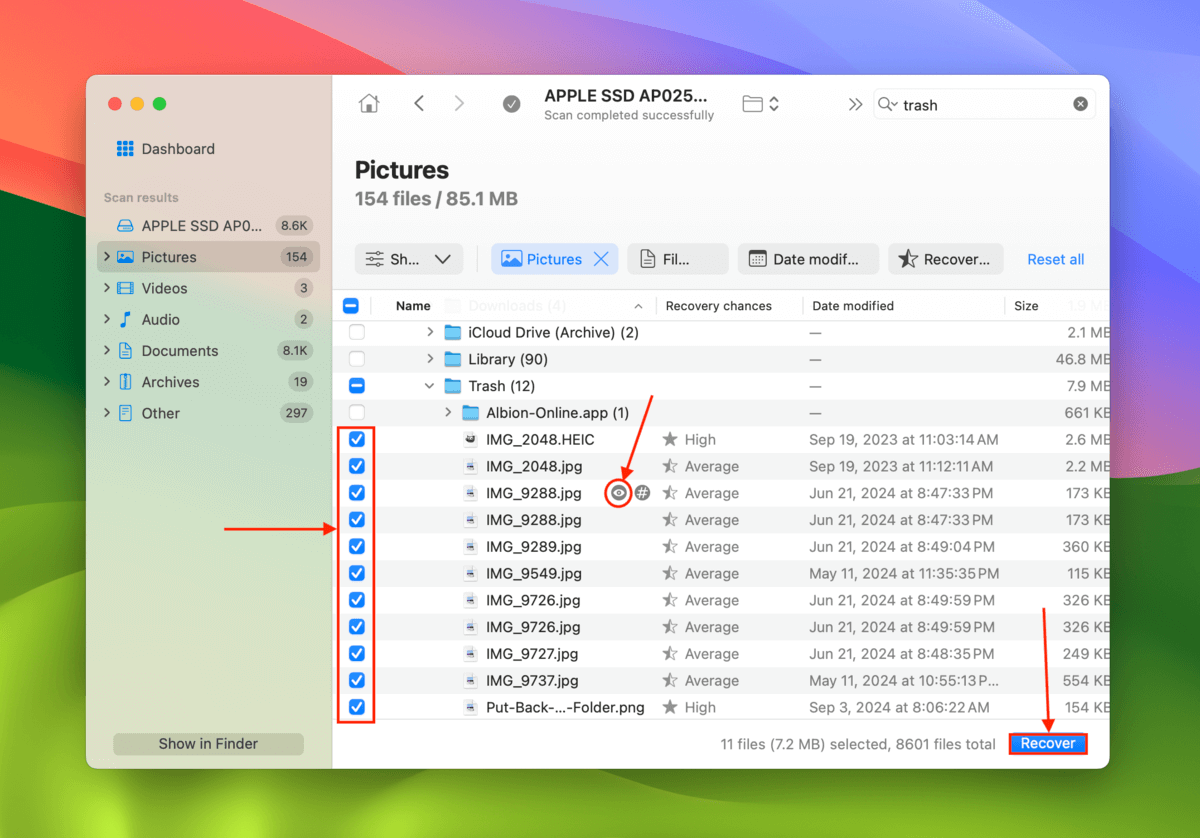
Step 5. Narrow down the results. Using the filters in the left sidebar, you can tell Disk Drill to only display specific file types. You can also use the search tool in the top-right corner to further narrow down the results. Make sure to preview your file by hovering your mouse pointer next to it and clicking the eye button that appears. This ensures that the recovered file will work. Then, mark the box beside it and click Recover.
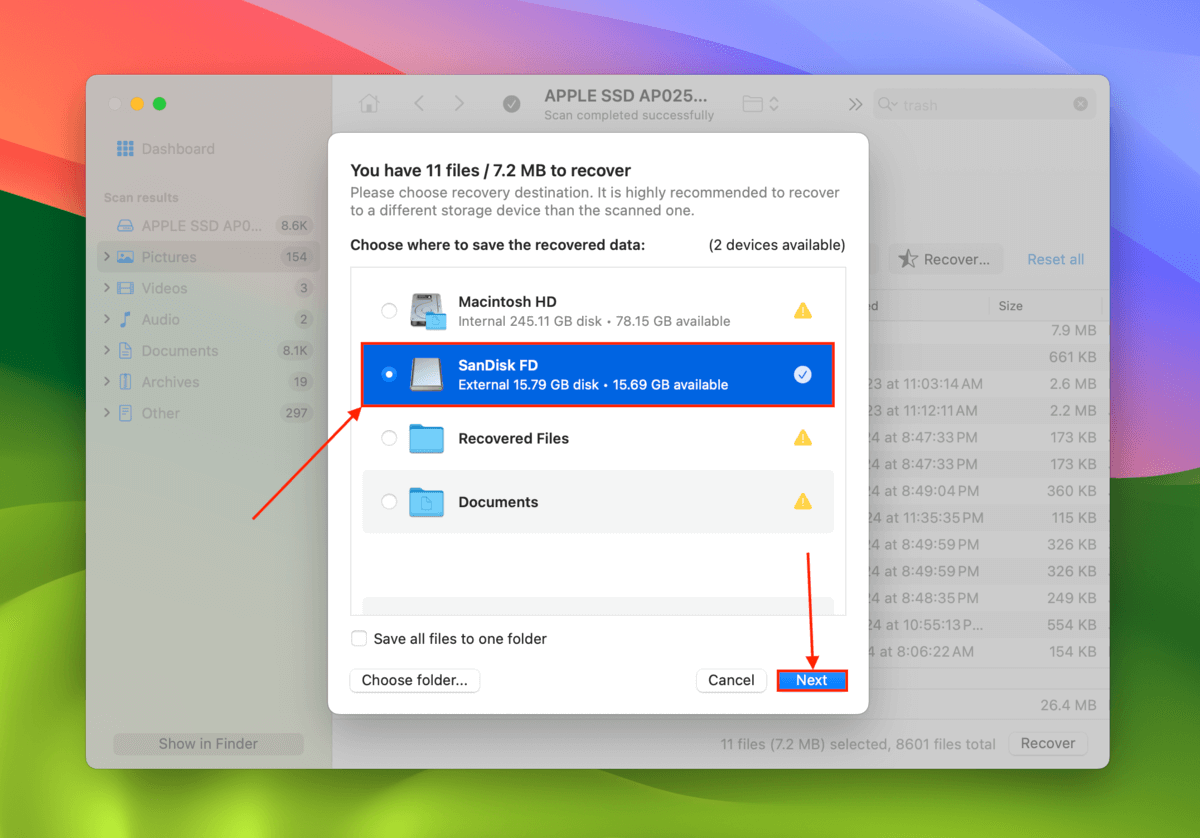
Step 6. Choose a location on the external storage device as the new destination for the restored files. Finally, click Next to start the recovery process.
Is Put Back ALWAYS missing?
If you notice that the Put Back option is missing not only for app-deleted files but also for files that you deleted through Finder, there might be something wrong with your Mac drive that is affecting the functionality of your Finder’s system.
If you’re positive that your Mac isn’t physically damaged, you can try repairing it by using our guide on how to fix corrupted Mac drives. If you detect physical damage, however, send your Mac to a professional data recovery service ASAP.


