
If the error “The Disk Macintosh HD Can’t Be Unlocked” keeps appearing on your Mac, tune in. This error is fixable, but its dialogue box is so vague that proper diagnosis and repair is harder than it needs to be.
So, we created this guide! In this article, we’ll break down the error and explain why it happens, demonstrate reliable fixes that actually work, and provide additional tools that help you secure your data and perform repair operations more efficiently.
Table of Contents
Why is My Macintosh HD Disk Locked and What is This Error?
“The Disk Macintosh HD Can’t Be Unlocked” error is an encryption-related issue where the user is unable to access their disk. It may also appear as “Macintosh HD is encrypted and must be unlocked.”
What grinds my gears about this error is that it’s hard to diagnose on the spot, especially when you can’t access your system drive.
Properly diagnosing your specific error instance can help you avoid repeating the same mistake and it can point you to the correct solutions. Instead of doom-searching the error on Google, use this guide instead:
- Incorrect password. You might just be entering the wrong password (it happens to the best of us). Solutions: Method 1 or try again carefully and remember that it’s case-sensitive!
- Locked duplicate drive. The error may occur after a major macOS update due to the creation of a locked duplicate drive (”Macintosh HD – Data – Data”). The update operation may have glitched and resulted in incomplete migrations, failure to merge volumes, or other bugs. This issue was commonly encountered in Big Sur. Solutions: Method 2, Method 4
- FileVault issues. FileVault is macOS’ main encryption system. Buggy macOS updates, interruptions during an ongoing encryption process, disk corruption, and other OS or disk-related issues may cause FileVault to act erratically (e.g. mismatch of password and stored encryption key, partial encryption due to interruption, etc.). Solutions: Method 3, Method 4
- File system errors. File system errors interfere with the system’s ability to read, write, and manage your data. They can make your disk’s encryption keys difficult or even impossible to access, preventing it from being unlocked and mounted. Are you noticing errors or performance drops during general usage? This might be why. Solutions: Method 3, Method 4
- Physical damage. Physical damage to a disk can cause a variety of different errors, including those related to encryption. In this case, we recommend sending your drive to a professional data recovery service to secure your important files (don’t try to DIY). Then, it’s time for a replacement.
Before You Proceed – A Warning About Your Personal Files
Any attempts to repair your drive may result in data loss either as part of the process or in case something doesn’t work as intended. Create a backup with Time Machine if you can.
If creating a Time Machine backup is not possible at this time, we recommend using data recovery software to restore your data and then saving it in a secure location first.
There are multiple data recovery tools online, but not all of them are capable of restoring a locked and potentially logically damaged drive. Here are our team’s top two recommendations:
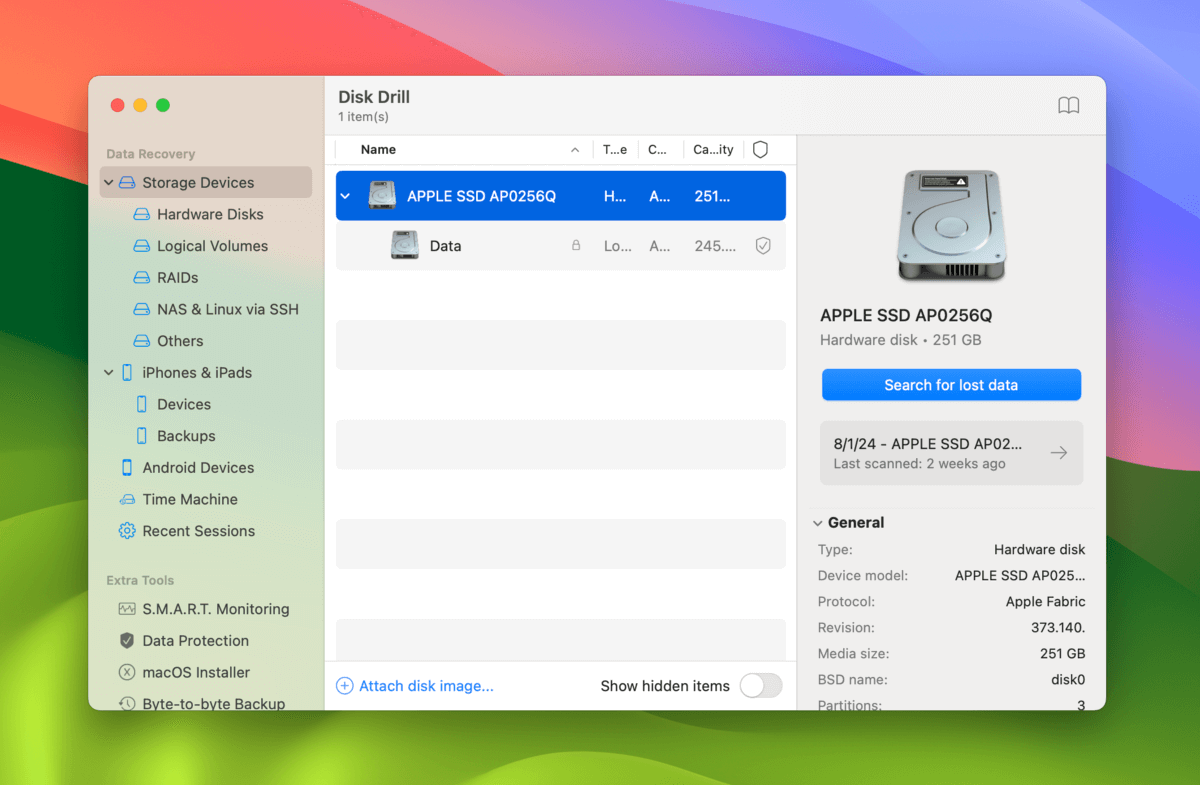
- Disk Drill. A beginner-friendly data recovery app with its own unlock mechanism for encrypted drives. It has an excellent file system scanner and signature scanner, which can dramatically improve your odds of successful recovery. Both APFS and HFS+ Mac drives are fully supported. You can even download Disk Drill via Terminal in Recovery Mode!
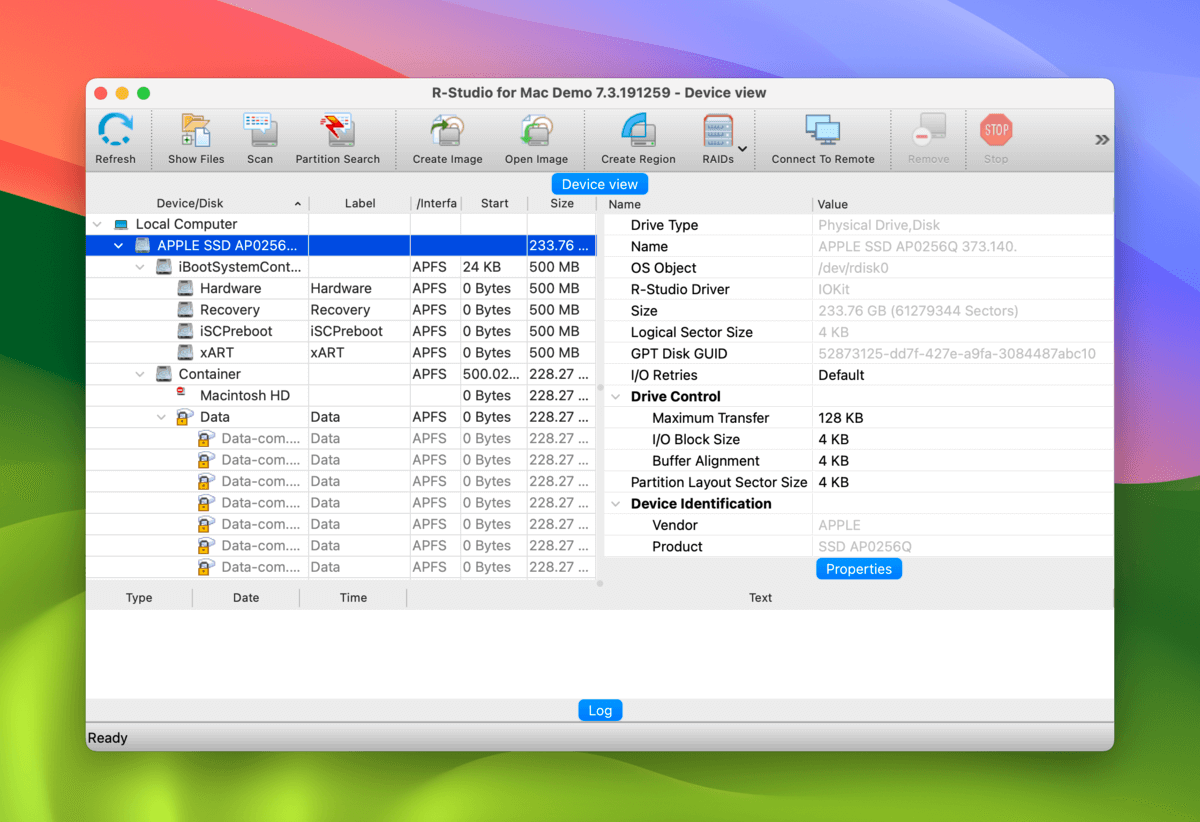
- R-Studio. An advanced recovery tool built for technicians. R-Studio also has its own unlock tool and powerful scanners that make it suitable for restoring data from problematic drives. It performs well with APFS and HFS+ file systems and can even “learn” custom file signatures using working files. R-Studio Emergency can be installed on a USB device if you can’t boot into your Mac.
How to Enter Recovery Mode (recoveryOS) on Your Mac
If you’re attempting to repair your system drive, you’ll have to use Recovery Mode (or recoveryOS) for a number of the fixes. Here’s an easy-to-follow guide that you can come back to (via jump links we provide) as a reference:
To enter Recovery Mode on an Apple Silicon Mac:
Step 1. Shut down your Mac.
Step 2. Turn on your Mac and hold the power button until you see the Apple logo.
Step 3. Select Options and click Continue.
Step 4. If prompted, select the disk you want to access and enter your password.
To enter Recovery Mode on an Intel-based Mac:
Step 1. Shut down your Mac.
Step 2. Turn on your Mac and immediately press and hold the Command + R Keys until you see Loading startup options…
Step 3. If prompted, select the disk and/or account you want to access and enter your password.
4 Ways to Fix “The Disk Macintosh HD Can’t Be Unlocked” Error
In this section, we’ll cover 4 ways to get rid of the error, “The Disk Macintosh HD Can’t Be Unlocked”. The first two methods solve very specific problems but Methods 3 and 4 can solve a variety of issues that lead to the error.
So even if the method you initially chose – based on your diagnosis – doesn’t work, feel free to try others.
Method 1: Use Your FileVault Recovery Key
FileVault automatically generates a recovery key whenever you encrypt a disk. If you forgot your password and can’t unlock the startup disk on your Mac, you can use this recovery key to reset your passkey.
Step 1. In the login menu, press the Option + Shift + Return keys.
Step 2. Enter your FileVault recovery key.
Step 3. Follow the wizard’s further instructions to set up a new password.
If your Macintosh HD password is not working – even after you triple-checked that it’s correct – the issue is likely deeper than an incorrect password. Try Methods 3 and 4.
Method 2: Delete the Duplicate “Macintosh HD – Data – Data” Drive Volume
If you’re getting the error and this duplicate (”Macintosh HD – Data – Data”) exists on your drive, the duplicate is likely causing that error.
Deleting the volume will get rid of the error as well.
Step 1. Open Recovery Mode (guide) and launch Disk Utility.
Step 2. Select Macintosh – HD – Data – Data from the left sidebar. Then, click Erase.
Step 3. Choose a Name, Format, and Scheme. For the latter two, we recommend APFS and GUID Partition Map. Finally, click Erase.
Method 3: Run Disk Utility’s First Aid Tool in Recovery Mode
First Aid is a built-in macOS tool that can repair file system errors and other disk issues (which may help you finally unlock your Mac HD).
However, you can’t run First Aid on your system drive while your Mac is running. Instead, you can access Disk Utility – where you can find the First Aid tool – in Recovery Mode.
Step 1. Open the Disk Utility app in Recovery Mode (guide).
Step 2. Select your Mac HD from the left sidebar. Then, click First Aid.
Step 3. Click Run when prompted to begin the operation.
Method 4: Factory Reset Your Mac and Reinstall (Latest) macOS
Unless your drive is physically damaged, reinstalling macOS will resolve every single issue you have – including the unlock error, if it’s caused by file system issues. Fortunately, you can reinstall macOS directly from Recovery Mode.
And if your last macOS update caused the error, one of the succeeding updates should have a fix for it.
Tip: Make sure you have a stable internet connection for the duration of this process.
Step 1. Enter Recovery Mode (guide) and open the Disk Utility app.
Step 2. Click the View button and click Show All Devices.
Step 3. Select your system drive from the left sidebar (usually labeled “APPLE SSD”). Then, click Erase.
Step 4. Choose a Name, Format, and Scheme. For the latter two, we recommend APFS and GUID Partition Map. Finally, click Erase.
Step 5. Once Disk Utility is done erasing your Mac drive, exit the app and return to the Recovery Mode menu.
Step 6. Select Reinstall macOS and click Continue. The macOS installation wizard will guide you through the rest of the process. You can opt to keep your original macOS with updates included or update to a new one if available (recommended).
You should have zero issues now unless your drive is physically damaged.
Once you’re done installing macOS, you can restore your Time Machine backup or return the files you got back using data recovery software.
Are you also getting other errors on your Mac?
If you’re getting other errors aside from “The Disk Macintosh HD Can’t Be Unlocked” and First Aid (Disk Utility) was unable to fix them, your drive may be severely corrupted. But even at this point, you can STILL fix your drive in some cases.
We wrote a big list of 8 fixes for drives that can’t be repaired by Disk Utility that you can try, which utilizes both built-in and third-party tools.


