OS X Mavericks lets you assign tags to your files through the Finder. If you’ve ever used Flickr, Tumblr, WordPress, or any site that includes a tags feature, you already know how to use them: Pop open the Tags box (select a file, then go to File > Tags…) and start typing, then press the Return key after each tag you enter. Easy, right? Now that you’ve got that down, here are a few tips for making the most of this handy new feature.
Table of Contents
Think of How You Organize Your Projects
No organizational tool is of any use unless you use it in a way that fits the way you work. So before you start tagging files, think for a moment how you organize stuff on your Mac. Do you organize by month? By project? By something else? Give it some thought and take your time. Sort through your Documents folder and see how things are arranged. Once you have a clearer idea of how you organize things, write down a list of relevant tags and keywords you know would fit your work style, and start assigning tags accordingly.
Assign The Same Color To Related Tags
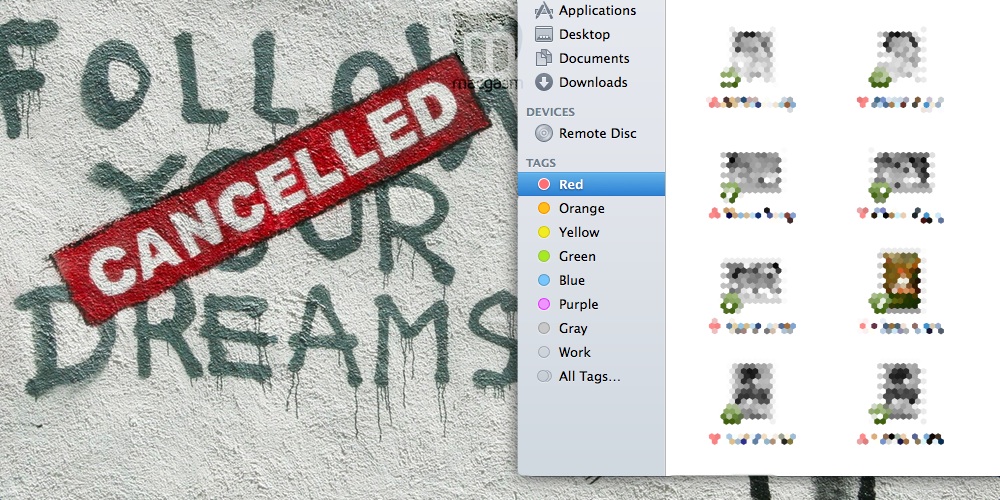
Mavericks’ Finder lets you choose from a mere seven colors to assign to various tags. With that in mind, to get the most mileage out of your limited choice of hues, assign the same color to several related tags. For example, you might assign tags “pets” and “cats” to red, while “work” and “projects” might be blue. It’s not an ideal solution, but it’ll let you stretch the limited palette a little further. To assign a color to a tag, open a Finder window and expand the Tags section in the sidebar if you haven’t already (if it’s hidden, mouse over the “TAGS” label and click “Show” once it appears). Right-click (or control-click) any of the tags, and select a color from the menu that appears.
Tag Items As You Open Or Save Them
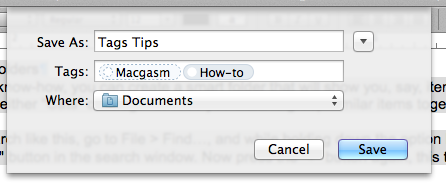
Get in the habit of assigning tags to new documents when you save them for the first time. If you’re working with older files that predate Mavericks, add tags as you open them. To do so, click the filename in the titlebar and start typing relevant tags.
Assign A Keyboard Shortcut
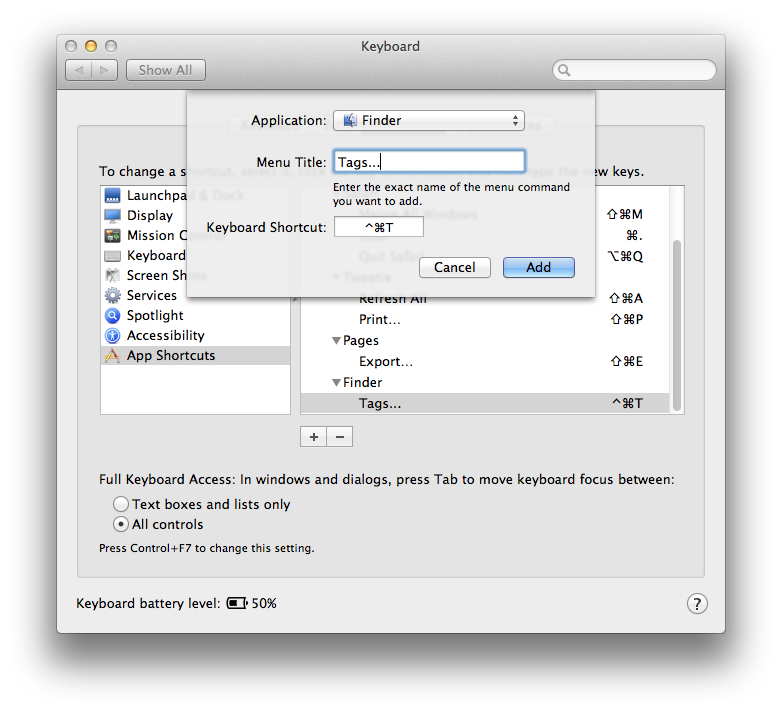
If you use your keyboard heavily to navigate the Finder, you might find it helpful to assign a custom keyboard shortcut to the Tags… item in the Finder’s File menu. Pop open System Preferences and open up Keyboard preferences. Select the Shortcuts tab then select App Shortcuts from the list on the left, then press the “+” button.
From the sheet that appears, select Finder from the Application drop-down menu. Next, type “Tags…” into the Menu Title field. Click the Keyboard Shortcut field and type the key combination you’d like to use to bring up the Tags panel. Once you’re all set, press Add and quit System Preferences.
The next time you want to assign a tag to a selected file, press your keyboard shortcut and start typing.
Make A Smart Folder
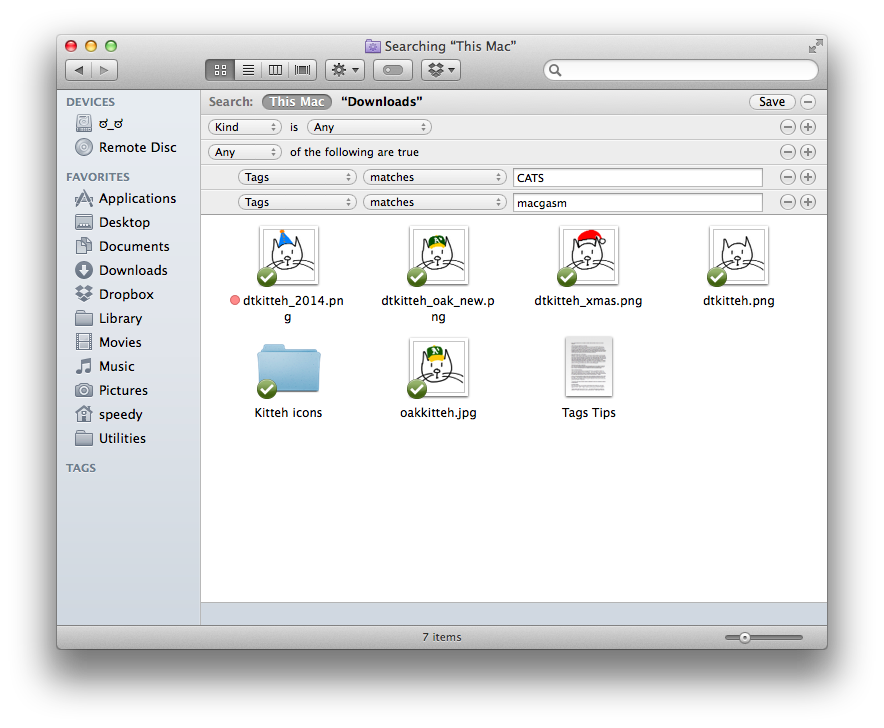
With a little know-how, you can create a smart folder that will show you, say, items tagged with either “Cats” or “Dogs” in case you want to group similar items together.
To get a search like this, go to File > Find…, and while holding down the option key, press the “+” button in the search window. Now press the “+” button again, this time without holding down the Option key. Next, from the Attributes drop-down menu (the one that lists items like “Kind” and “Name”), Select “Other…” and scroll down until you reach “Tags.” Select it, then press OK.
Now, enter the name of the tag you want to search by in the text field. Repeat the process until the search includes all the tags you want it to. Once you’re all set, press the Save button, give your smart folder a name and a location, then press Save.
Of course, this isn’t the only kind of smart folder you can make with tags: Play around some until you find a system that works for you—you won’t break anything.
Those are just a few ideas to get you started with Finder Tags. If you have any other tips to share, feel free to tell us.


