
Data stored on a formatted Mac hard drive can really be recovered, but only if several factors align and you take the right steps. In this article, I explain the factors that determine when it’s possible to recover formatted Mac hard drive data and provide you with step-by-step instructions that you can follow to maximize your chances of successful data recovery.
Table of Contents
Is it Possible to Recover Data from a Formatted Hard Drive?
Yes, it’s possible to recover data from a formatted hard drive. Due to how data deletion is handled, there’s a window of opportunity to restore almost any files lost to formatting. However, the following conditions must be true:
- Condition 1: Your files haven’t been overwritten. Formatted files remain on your drive until they get overwritten by new data. If you haven’t saved any new files to your drive, or those new files aren’t saved to the same data blocks, recovery might be possible.
- Condition 2 (SSD only): TRIM hasn’t been triggered. Solid-state drives have a built-in garbage collection function called TRIM, which speeds up the SSD’s performance, but makes recovery almost impossible. However, TRIM’s garbage collection process doesn’t occur immediately after deletion or formatting, so it may come down to timing.
- Condition 3 (Optional): You have a backup. If you saved your data to a Time Machine backup (or with a third-party app like Carbon Copy Cloner), recovery is very simple.
How to Recover Data from a Formatted Hard Drive
In this section, we’ll show you 3 different ways to recover data from a formatted hard drive using a Mac. All of them are viable, but if you’ve got a Time Machine backup, just do Method 2–it’s got the highest success rate among the methods. If you don’t, the other 2 methods are still very reliable with the right conditions (your data hasn’t been overwritten or nuked by TRIM).
Method 1: Use Data Recovery Software
If you don’t have any backups, and you want to try recovering your data yourself, you can use data recovery software. When you format a drive, your files aren’t actually “erased”—they just become “invisible” to the file system. Data recovery software can restore them from that state, as long as they haven’t been overwritten by new data (since the file system thinks their data blocks are empty).
For this guide, we’ll be using an app called Disk Drill. It’s very easy to use, even for beginners, but its most important feature for this specific task is its native support for nearly 400 file signatures (across documents, videos, photos, and other file types) and file system formats (including ExFAT, HFS+, APFS, and others). For an HDD with an eclectic variety of files, compatibility is going to be very important.
Disk Drill has a free mode that lets you scan and preview your files as much as you want without a subscription. You can even view the contents of your files to ensure that they aren’t corrupted, and the recovery attempt will be worth it. You’ll only need to get Disk Drill Pro during the recovery phase.
Step 1. Download and install Disk Drill on your Mac. Do not install it on the hard drive you’re trying to restore, as you may overwrite your files.
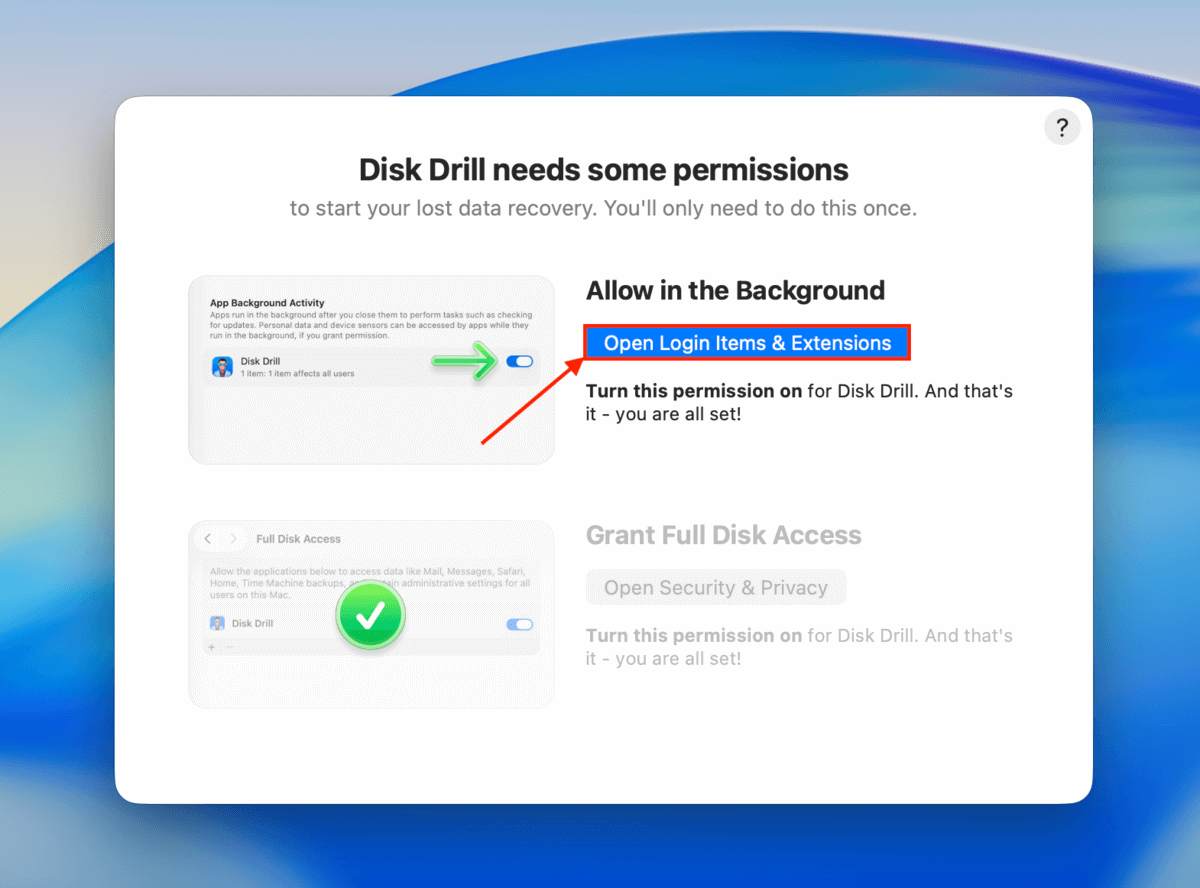
Step 2. When you launch Disk Drill for the first time, a wizard will help you grant the necessary permissions for the app to run properly–don’t worry, it’s safe!
Step 3. Disk Drill’s main menu should appear onscreen. If you’re trying to recover data from a system drive from an Apple Silicon or T2 Mac, click Disk Drill on the menu bar and select Enable recovery from system drives. Otherwise, proceed to step 4.
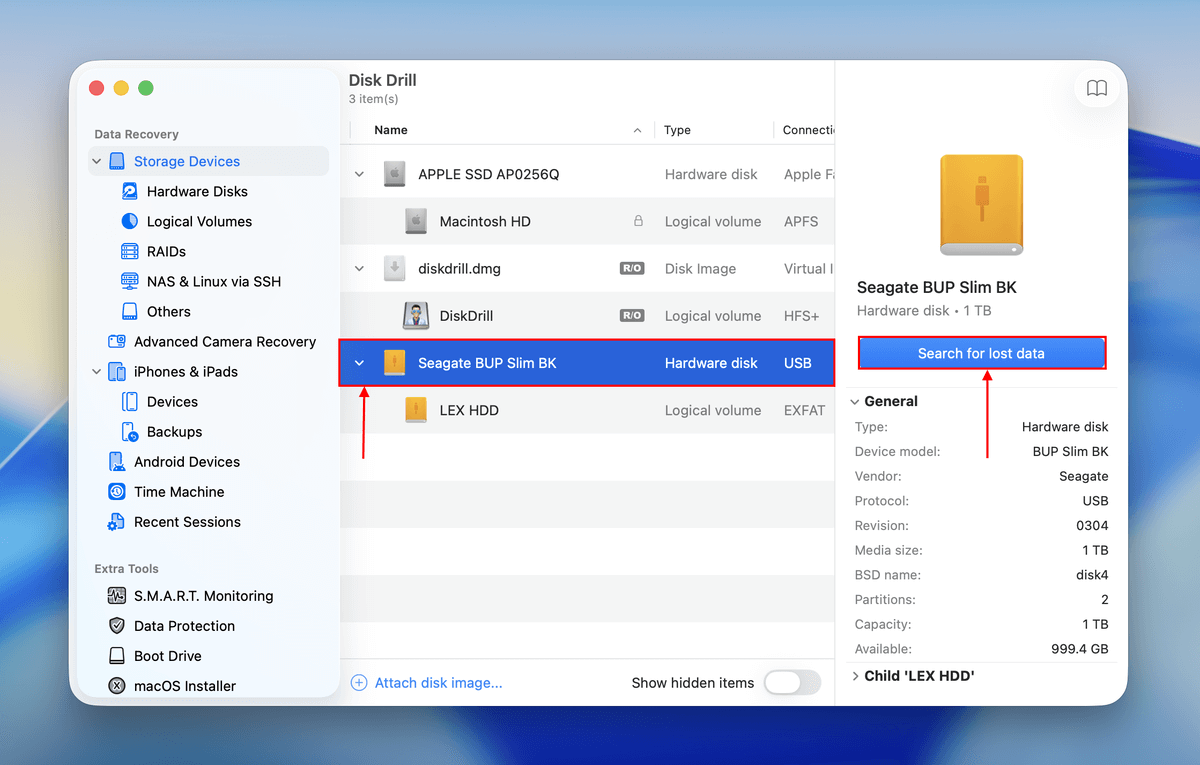
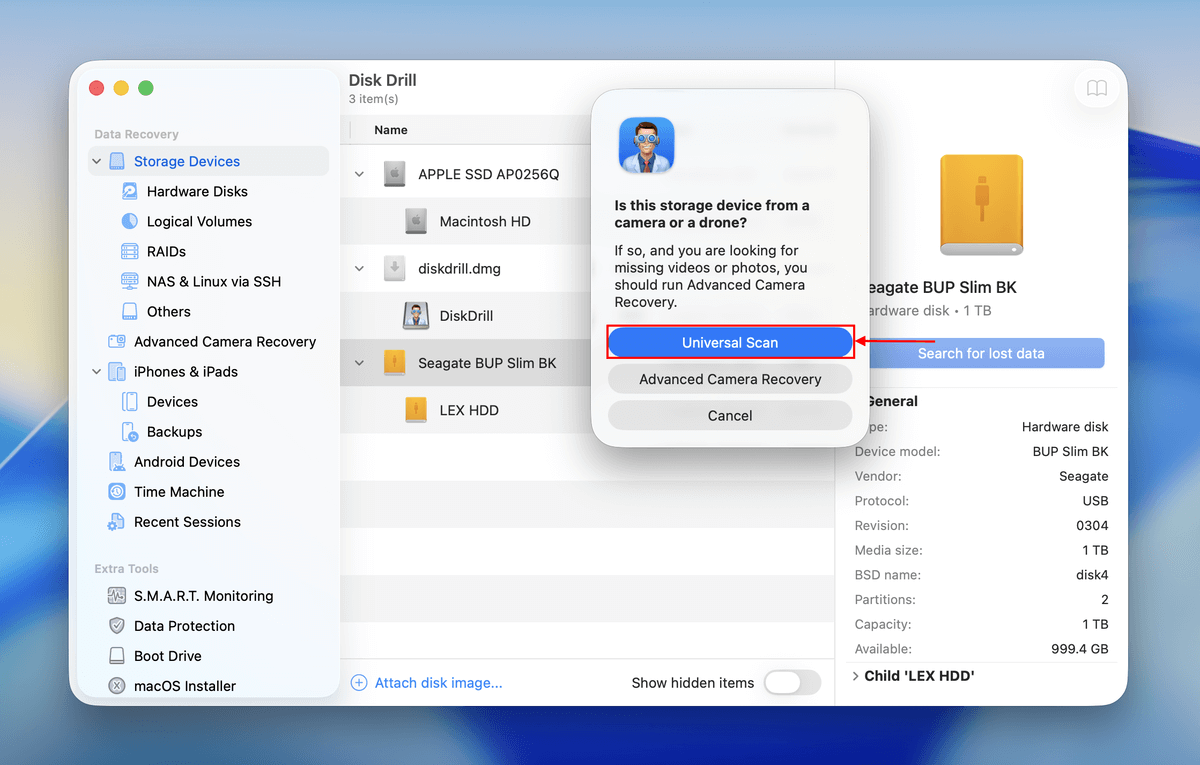
Step 4. Select your formatted hard drive and click Search for lost data. If prompted to select a scan type, choose Universal scan.
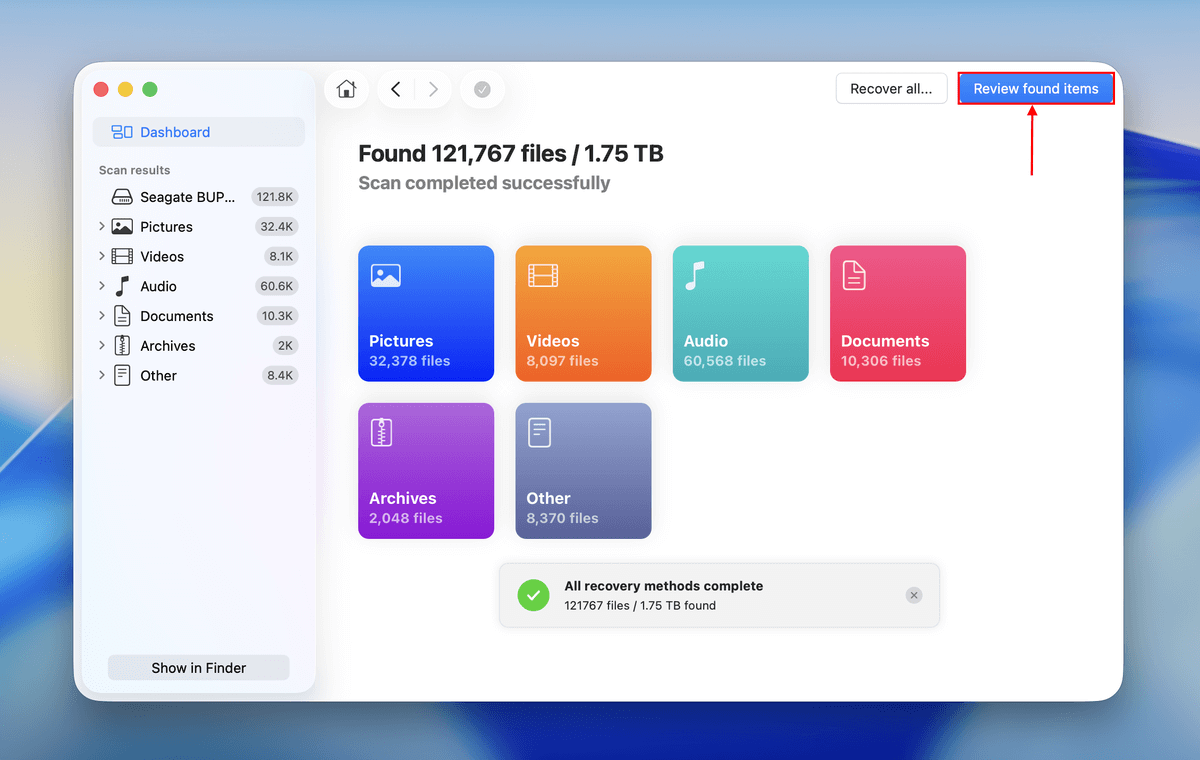
Step 5. Wait for Disk Drill to fully complete the scan. To restore all the files Disk Drill found on your drive, click Recover All and move to step 7. But if you only want to restore specific files and folders, click Review found items instead.
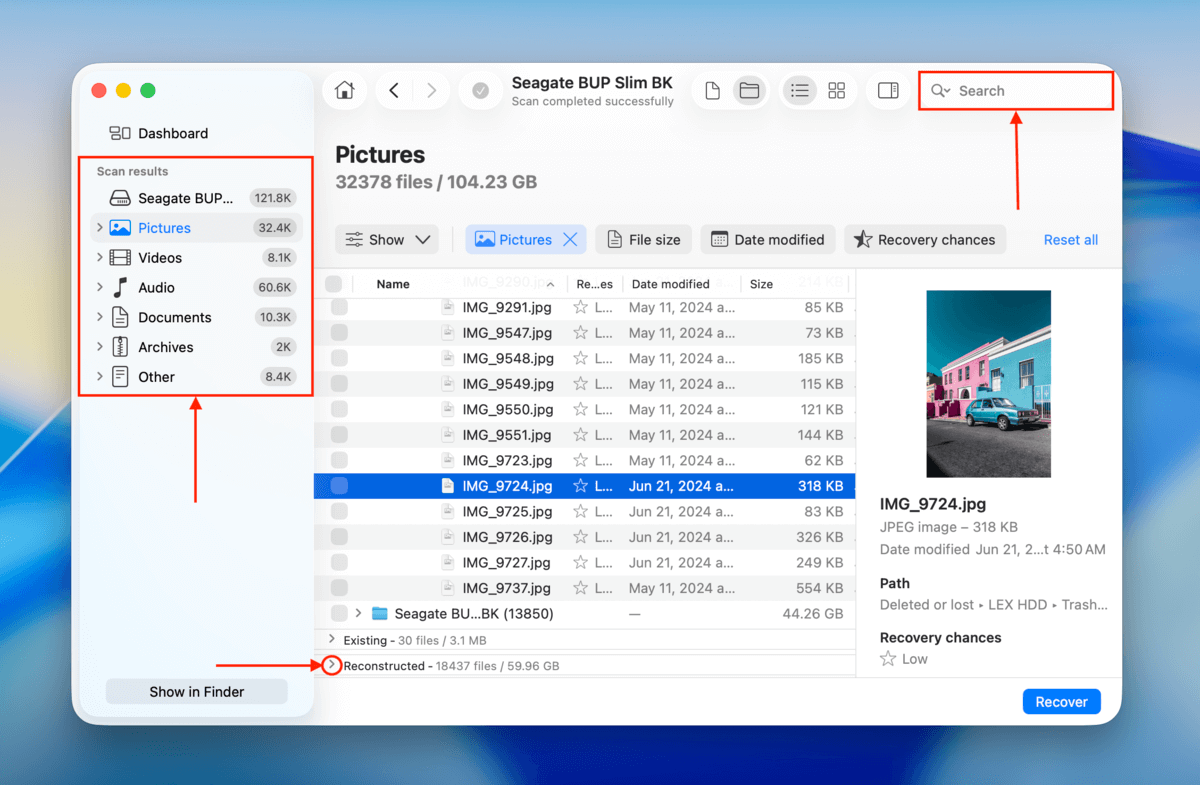
Step 6. Check the Deleted or Lost and Reconstructed sections for your formatted data. You can use the search tool (top right corner) and the filtering tool (left sidebar) to narrow down the search results.
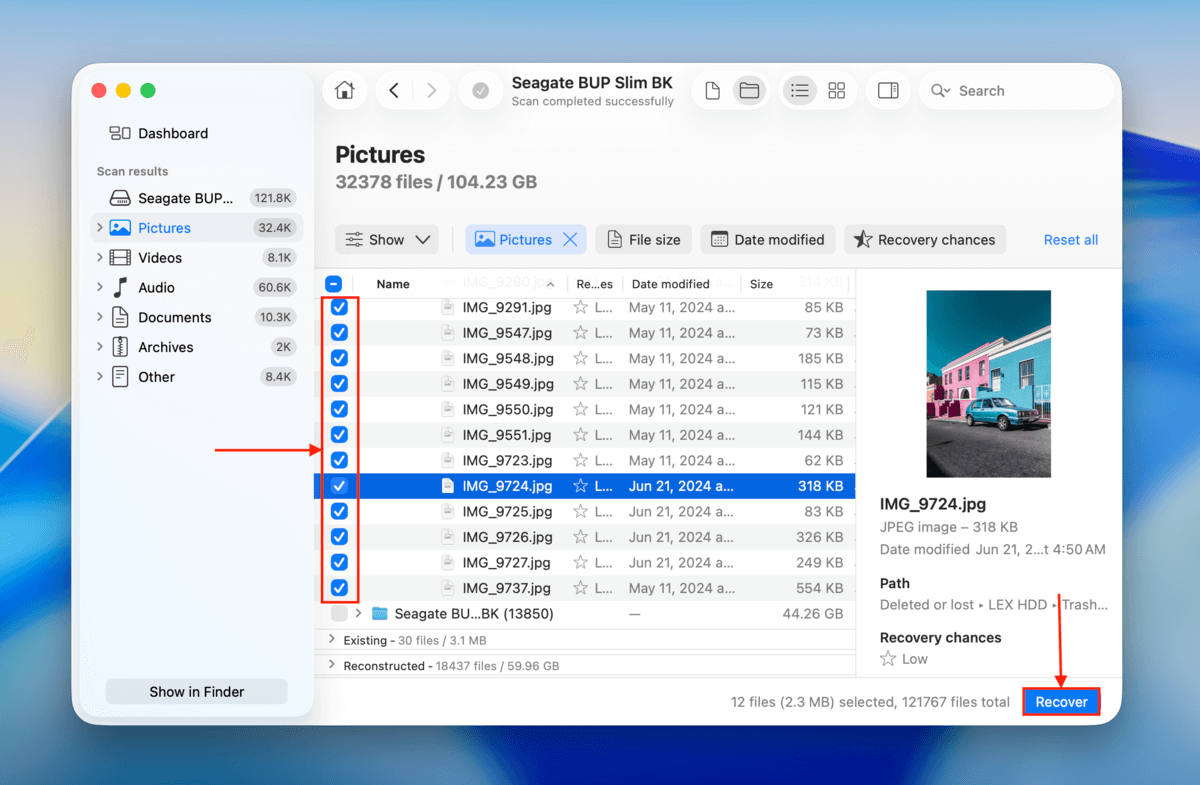
Step 7. Once you locate your files, click each of them once to open a preview in the right sidebar (you might need to expand the window size). Then, use the boxes in the left column to select the files you want to restore and click Recover.
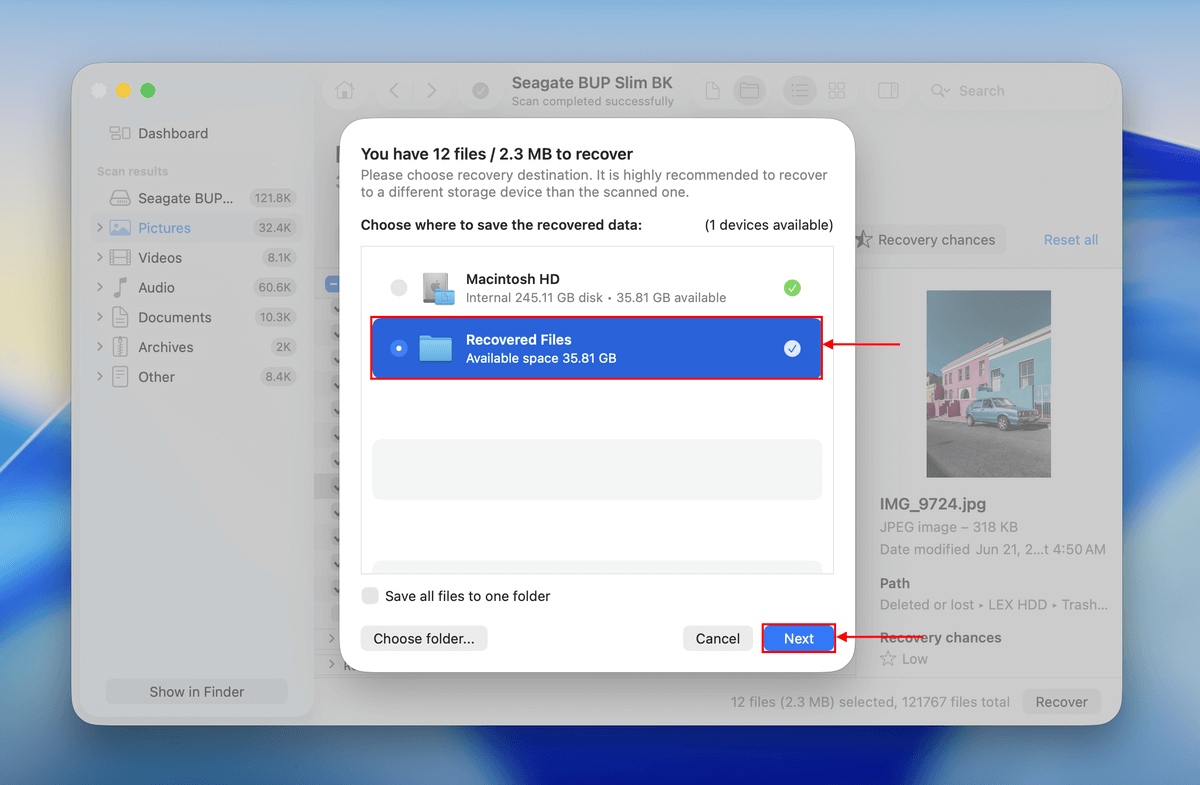
Step 8. Finally, select a location other than your formatted hard drive as the destination for the recovered files (saving it to the formatted drive will cause overwriting). Then, click Next.
Once the files are saved to your chosen location, you can safely use your formatted hard drive for new data. That said, we do recommend creating a backup of your recovered files at this point.
Method 2: Use a Time Machine Backup
Time Machine periodically creates backups of your files, including all data only your system drive, applications, and even settings. If you had Time Machine enabled before formatting your drive, you can easily restore your files by following these steps:
Step 1. If you have it, connect your Time Machine backup drive to your Mac.
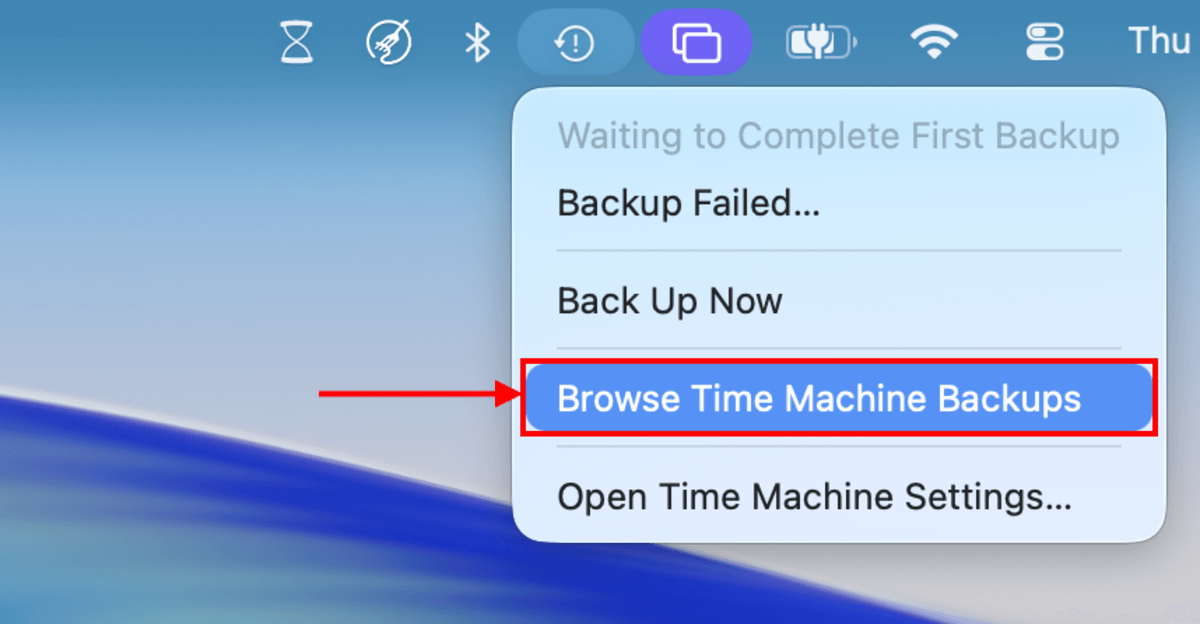
Step 2. On the menu bar, click the Time Machine button and select Browse Time Machine Backups from the context menu.
Step 3. Cycle through the backups until you find one that contains the desired files. Then, select the files you want to recover and click Restore.
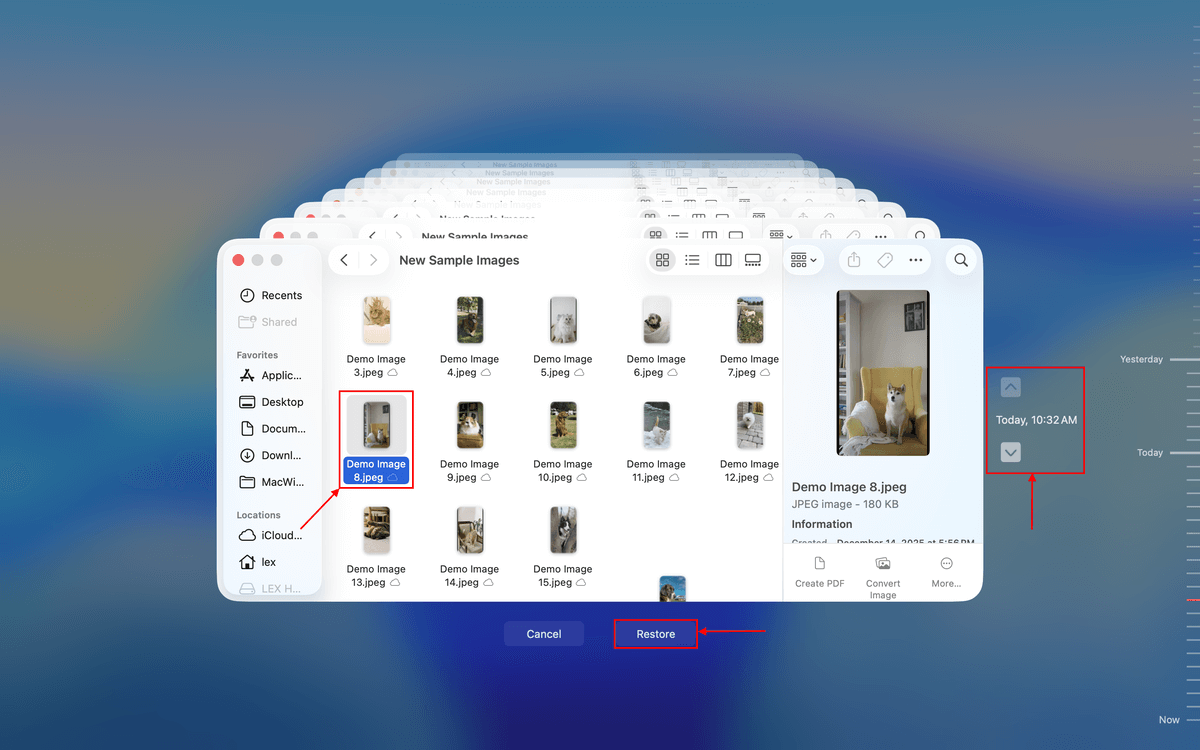
Once you click Restore, the selected files will immediately be returned to their original location. Make sure that there are no files in that location with the same file names!
Method 3: Contact a Professional Data Recovery Service
Professional data recovery services are companies that recover data from storage devices for a fee. Once you send your Mac for recovery, a technician is assigned to your machine, and they use advanced tools and techniques to operate with the highest possible success rate. This is a great option if your drive happens to be physically damaged, or you simply don’t feel confident about recovering your data yourself.
If you haven’t used a data recovery service before, here’s what to expect:
Step 1. Contact the data recovery company using phone or email. Most companies have an emergency hotline.
Step 2. Explain your data loss scenario in detail.
Step 3. Ship the drive to the data recovery company.
Step 4. The data recovery service will analyze the drive and get back to you with a quote.
Step 5. You can then choose to proceed with the data recovery process or not.
Conclusion
The recovery of lost data from a formatted Mac hard drive isn’t rocket science. As long as several important factors are on your side (with the method of formatting being the most important one) and you’re equipped with capable data recovery software, you stand a good chance of retrieving your valuable files. Of course, there’s always the option to recover your formatted data from a backup, but the backup must exist in the first place.


