
The Moov Atom is a critical part of a video file that media players need in order to properly load the streaming data (a.k.a. play the video). Unfortunately, not only is this error becoming more and more common because of how the Moov Atom is created, which we’ll discuss in more detail, but it’s also one of the few types of video corruption that requires very specific solutions.
General video repair advice won’t work. So we tested and compiled 4 reliable ways to fix the error “Moov Atom is Not Found” using the appropriate tools on your Mac.
Table of Contents
What is the Moov Atom and is This Error Fixable?
The Moov Atom is the part of your video file that stores important “metadata” (or data about the file), such as indexing information, timestamps, etc.
It’s typically created and saved at the end of a recording session in order to process and save all the information from the video stream.
The Moov Atom is important because it tells apps and devices how to interact with the file. There are two situations where the “MOOV Atom Not Found” error appears:
- Scenario 1: The Moov Atom is corrupted or misplaced within the file, which makes it hard for certain media players and streaming services to find it and play the video.
- Scenario 2: The Moov Atom is completely missing — this is the likely scenario if the recording of your corrupted video was interrupted due to something like a drone crash, dead batteries, improper ejection of a memory card or hard drive, etc. This is because the Moov Atom had not been generated at this point (remember, the Moov Atom is created last).
We provided solutions for both scenarios in the guide section coming next.
4 Ways to Fix “Moov Atom Not Found” Error
In this section, we’ll cover 4 proven fixes to repair a video with the error “Moov Atom Not Found.” The first two methods help with videos whose Moov Atom is missing entirely, while the last two methods can fix videos with corrupted or misplaced Moov Atom data.
Fix 1: Fix “Moov Atom Not Found” Using Clever Online Video Repair
Clever Online Video Repair is an online file repair app that can fix corrupted videos entirely from their website. While there are other repair sites available, Clever Online Video Repair is one of the few web apps that can fix videos with a completely missing Moov Atom.
As long as you have a healthy file sample, Clever Online Video Repair can generate a new Moov Atom for your corrupted video to make it playable again. It’s also 100% free for videos up to 5 GB in file size.
Step 1. In any browser, open repair.cleverfiles.com.
Step 2. Click the Choose file button.
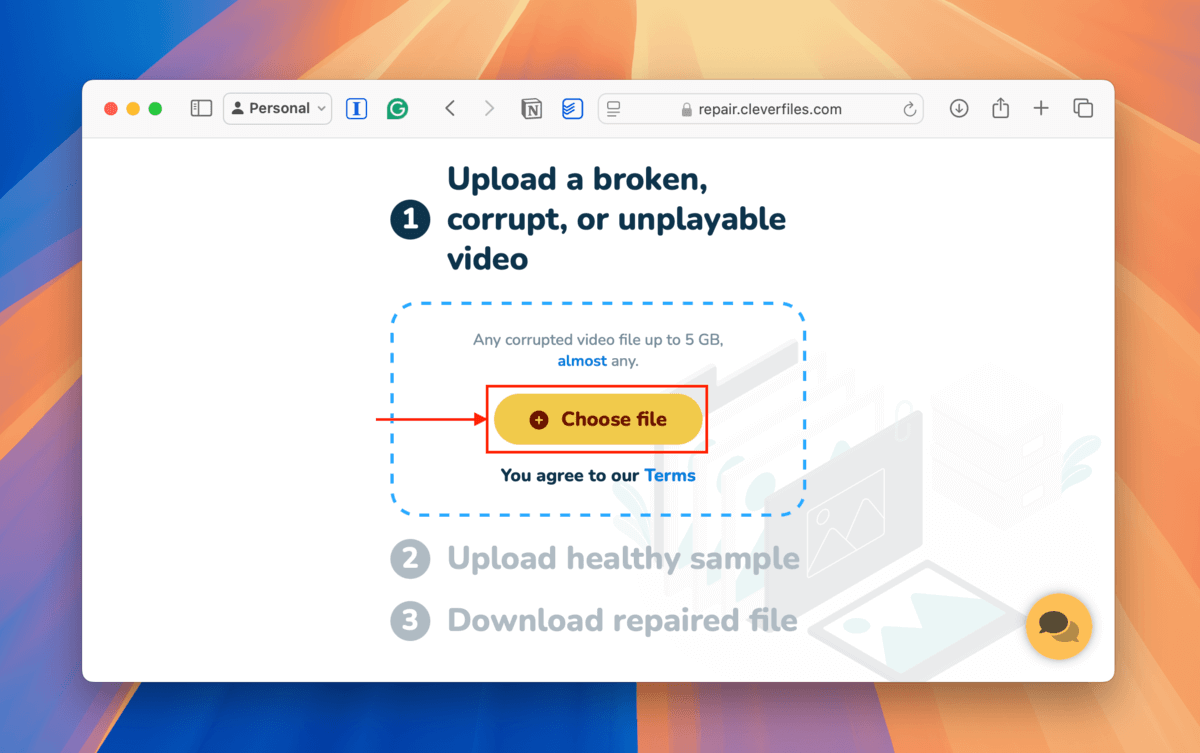
Step 3. Navigate to and select your file. Then, click the Upload button.
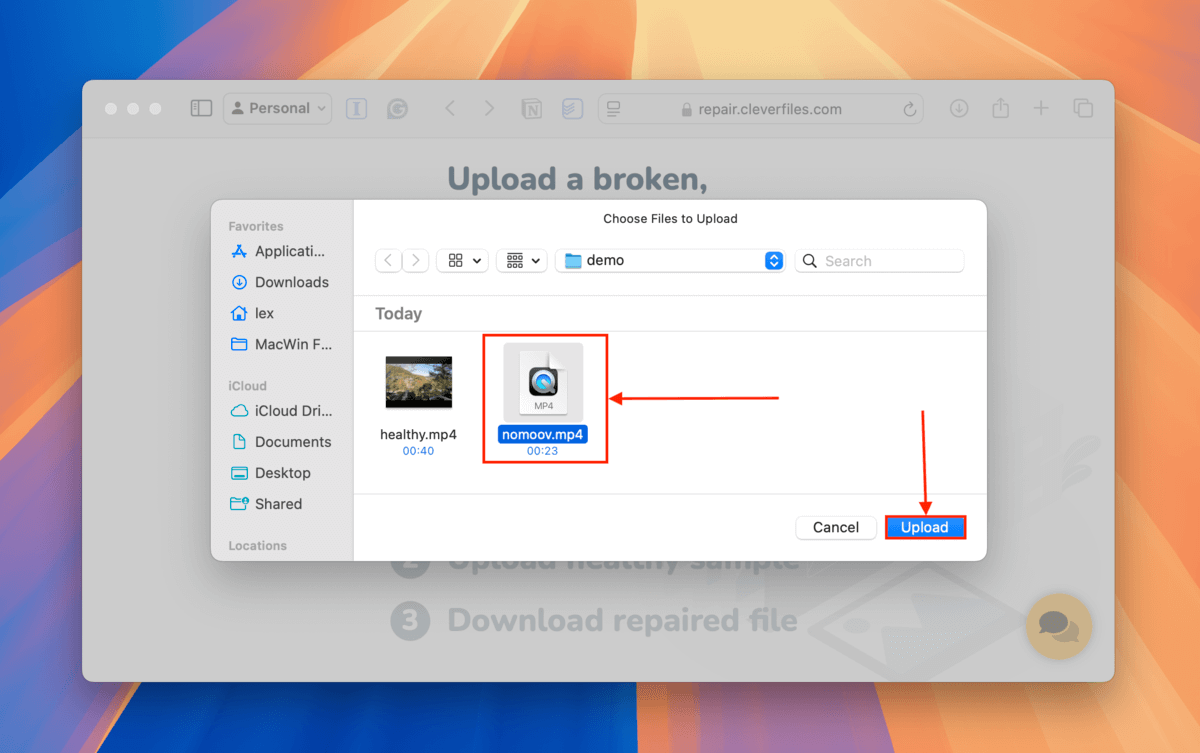
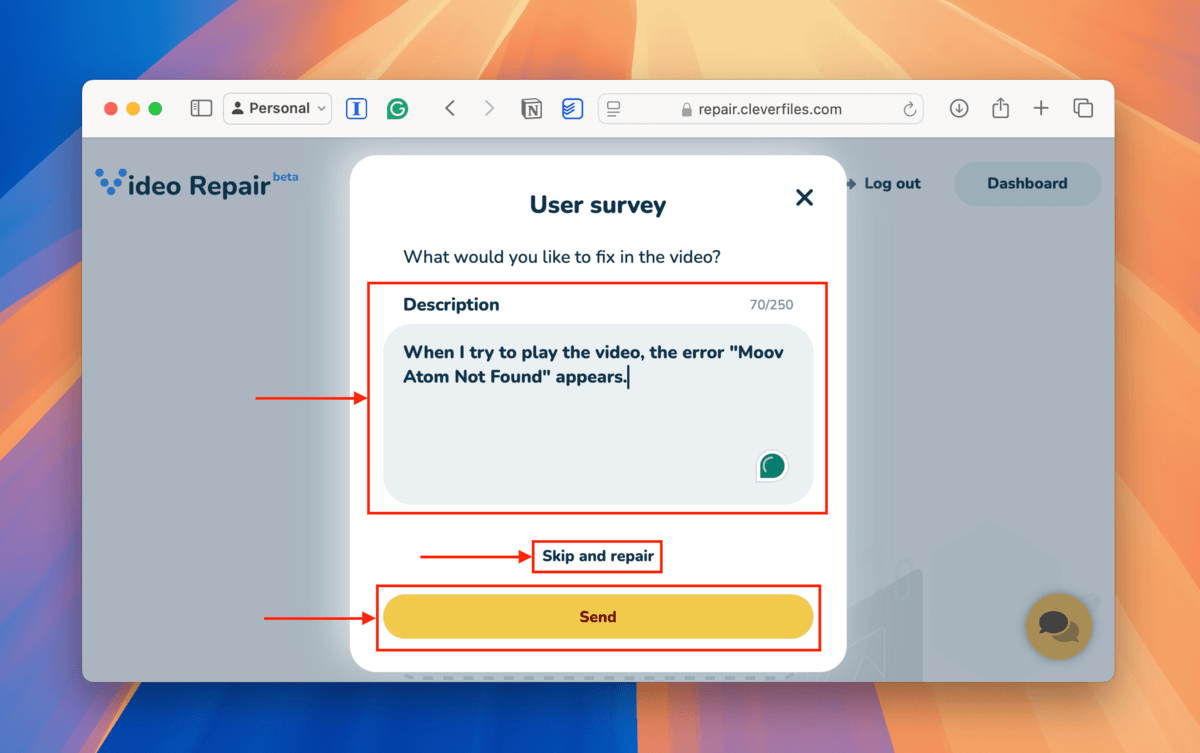
Step 4. If Clever Online Video Repair can fix your video, you’ll be asked to answer an optional survey. In the Description box, describe the issue with your video. Then, click Send. If you don’t want to share any details, click Skip and repair.
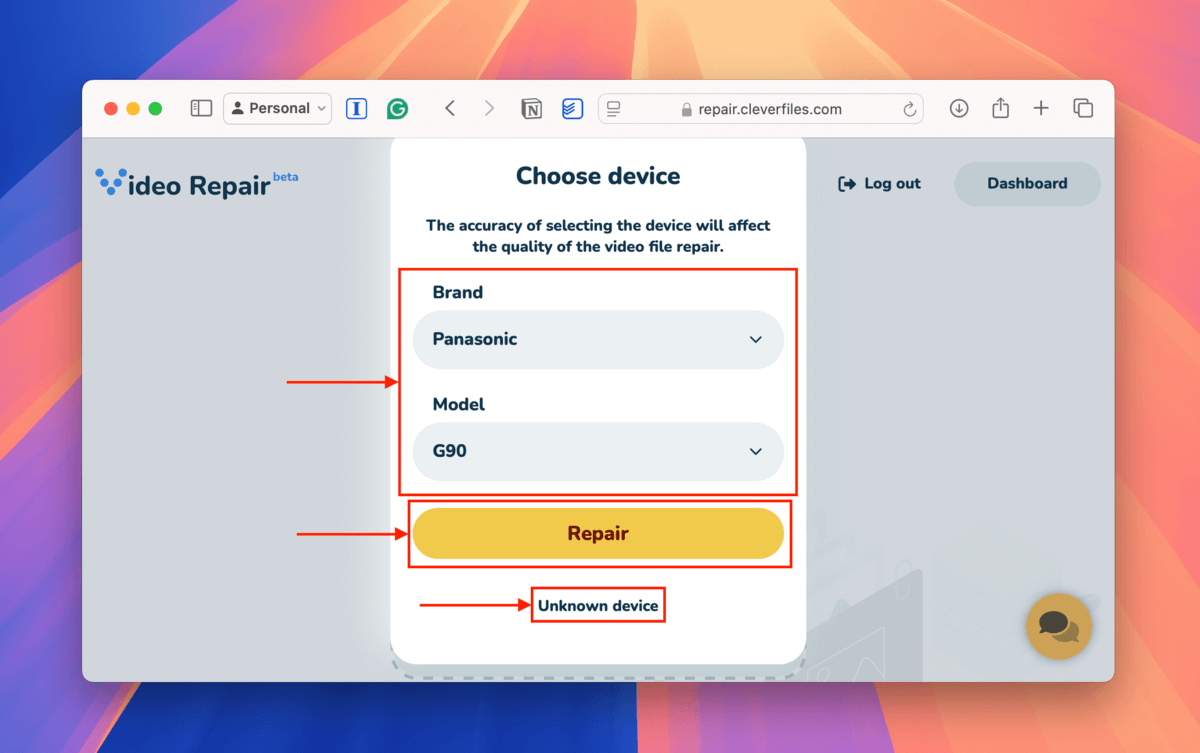
Step 5. Use the dropdown menus to select the Brand and Model of the device used to capture the corrupted video. You can usually find this information on the device body, its manual, or on the manufacturer’s website. If you can’t find it, click Unknown device.
Step 6. Click the new Choose file button.
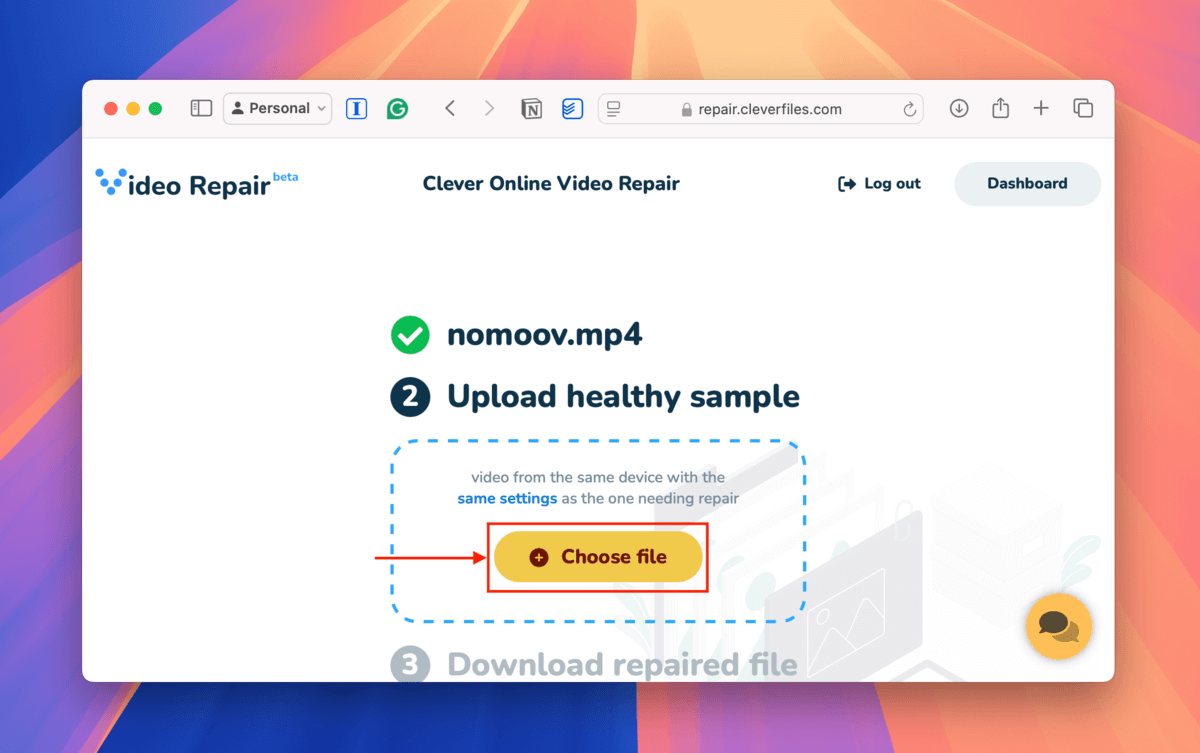
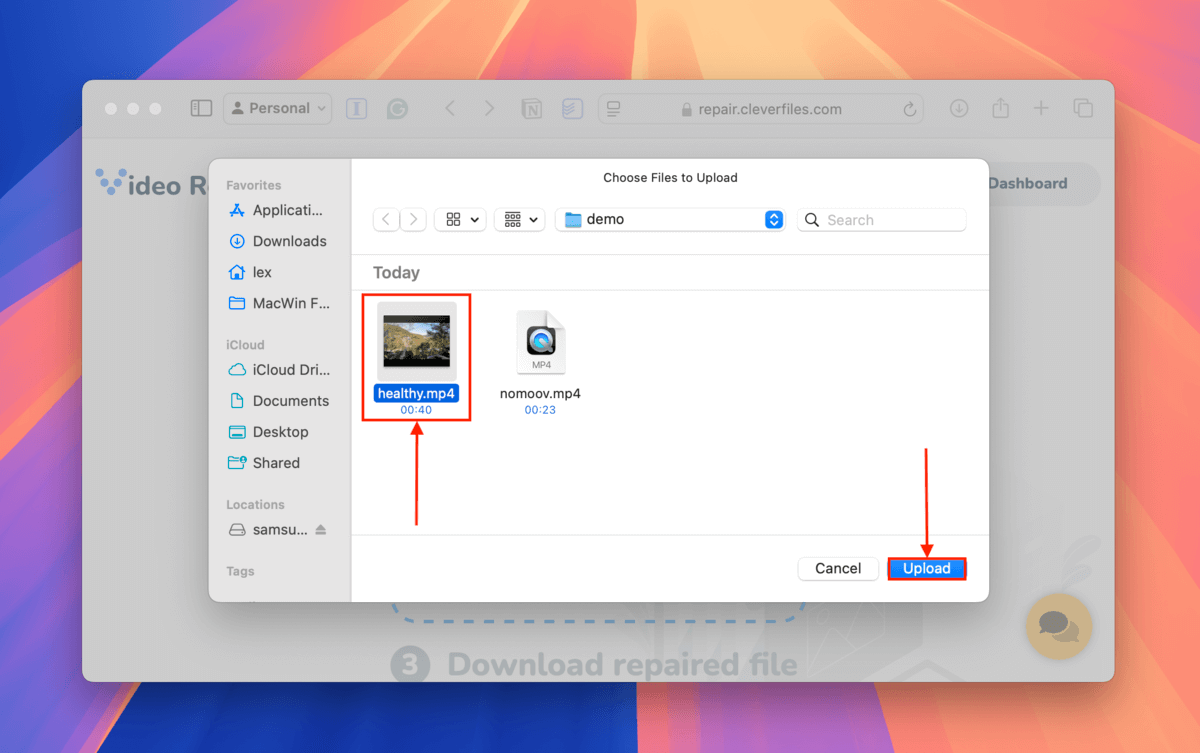
Step 7. Select your healthy file sample and click the Upload button.
Step 8. You can preview the screenshots that Clever Online Video Repair took of your video during the repair process to ensure that the file is fixed. Finally, click the Download button.

After the download is complete, you’ll find your repaired video in your Downloads folder with _repaired appended to its file name. Try opening it with a media player.
Fix 2: Manually Copy a Moov Atom From a Healthy File Using a Hex Editor
A manual and less refined alternative to Clever Online Video Repair’s technique is copying the Moov Atom from your healthy file sample by yourself.
Using a hex editor, you can find the actual hex string that makes up the Moov Atom. You can copy the existing Moov Atom from a healthy file and paste it into the corrupted file’s hex data.
Note that doing this manually is less effective than using Clever Online Video Repair, which has other underlying features that support this technique (such as technologically analyzing the existing Moov Atom).
Step 1. Download and install Hex Fiend, which is free and open-source.
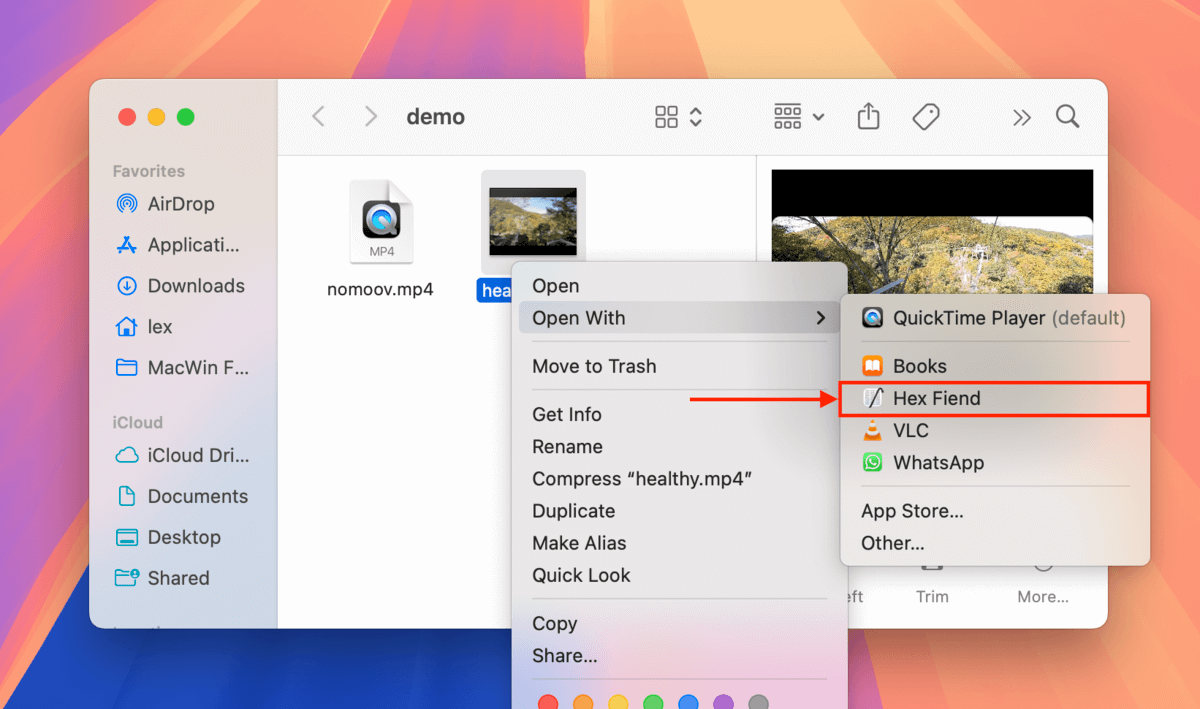
Step 2. Open Finder and navigate to your healthy video. Right-click your file and select Open With > Hex Fiend.
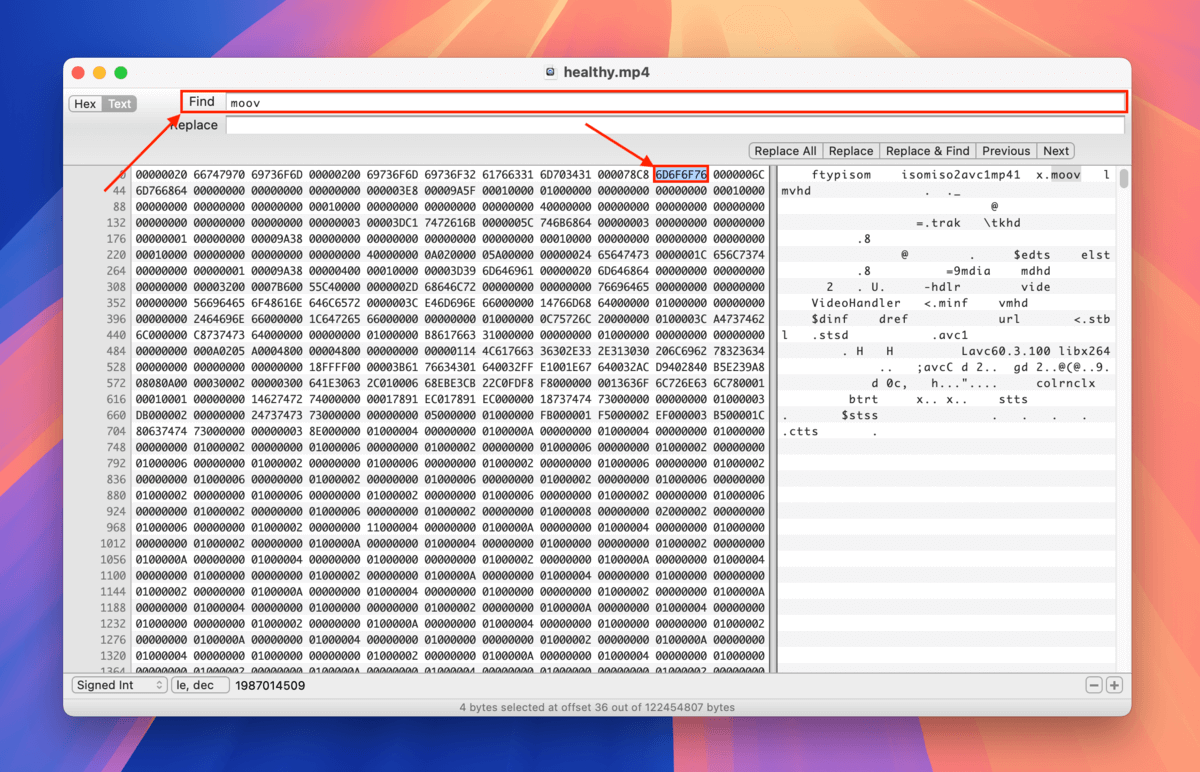
Step 3. Press the Command + F keys to pull up the Find tool and type moov. Hex Fiend will highlight the string of characters that make up the Moov Atom. Press Command + C keys to copy the string.
Step 4. Now, open your corrupted video with Hex Fiend (using the same instructions in step 2). Place your courser at the very end of the file and press the Command + V keys to paste the Moov Atom you copied from your healthy file sample.
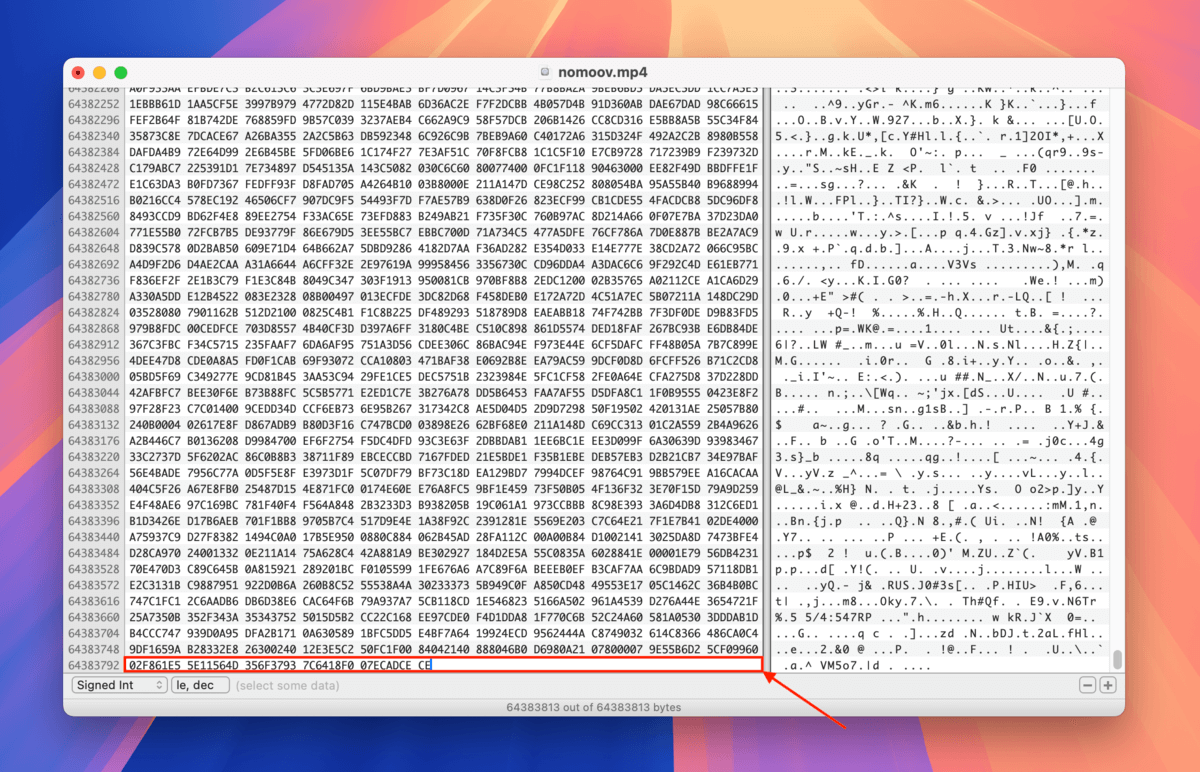
Step 5. If you created a duplicate of this file earlier, go ahead and click File > Save. If you did NOT create a duplicate, please use Save As… and create a new file instead.
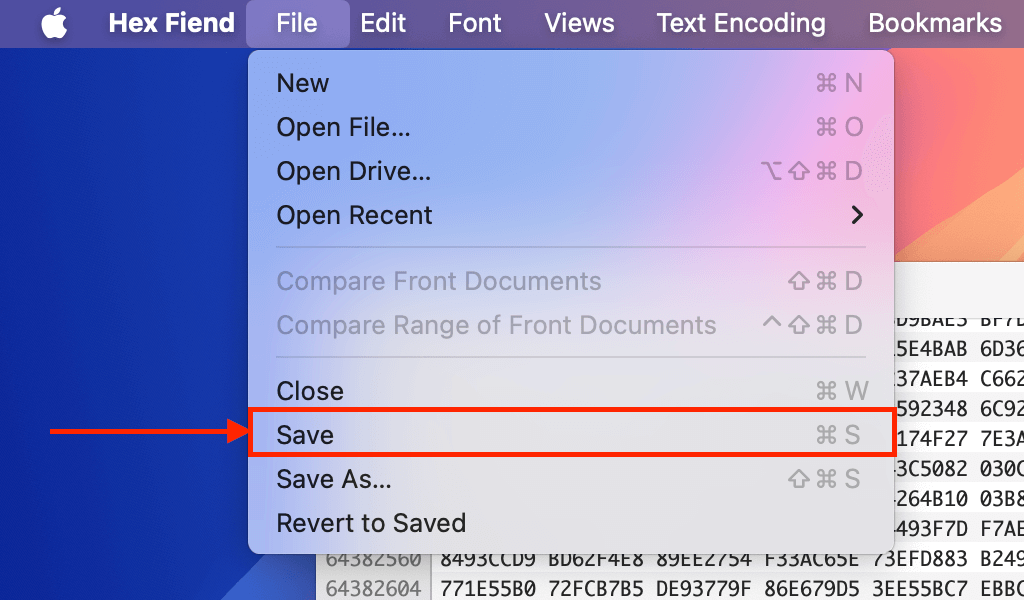
Once you save your file, the Moov Atom you pasted will have been appended to its data. You can try opening it with a media player.
Fix 3: Use FFmpeg to Fix “Moov Atom Not Found” by Relocating It
FFmpeg is a well-respected, free, and open-source video repair and manipulation tool that you can use to find and relocate the Moov Atom to the very start of your file’s data.
This can fix instances of the error “Moov Atom Not Found” that occurred due to media players and streaming services looking in the wrong place. This also increases the file’s general compatibility, which should help you avoid other errors down the line.
Info: FFmpeg is a Unix executable file, which means you’ll be operating it via the Terminal app. Don’t worry! The actual steps are easy as long as you follow along.
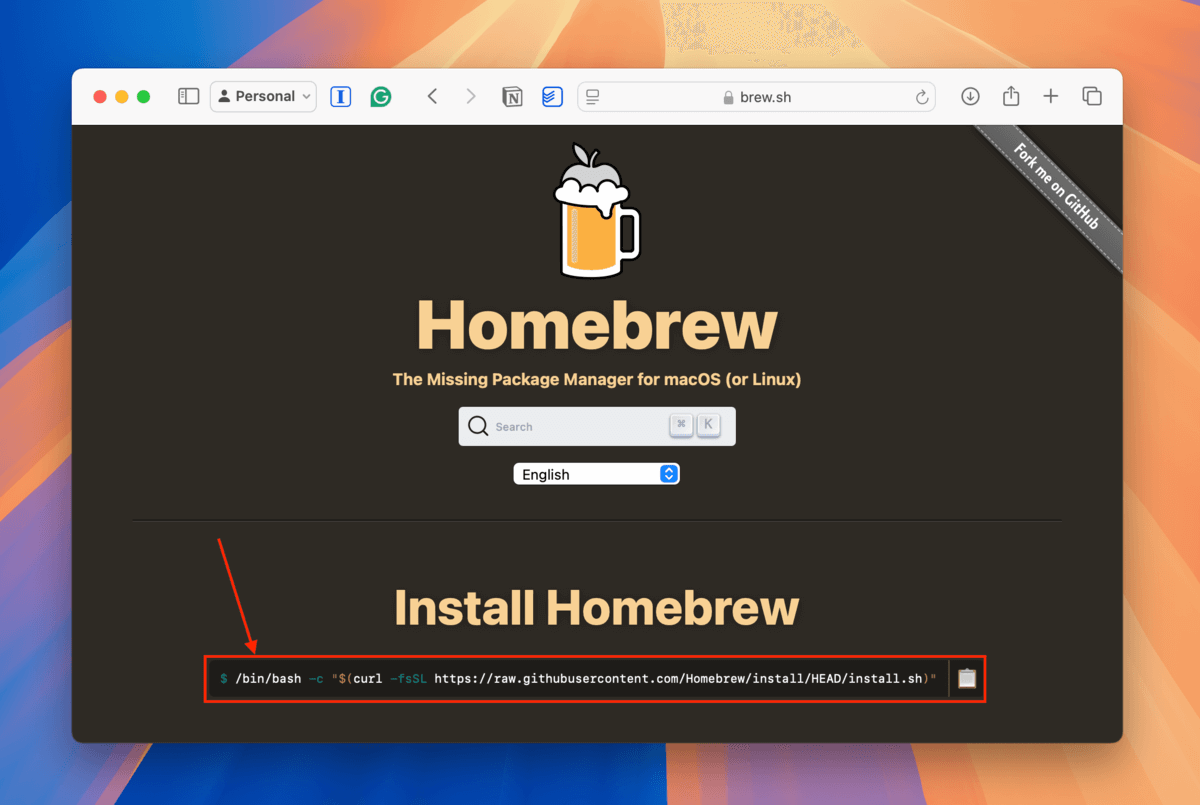
Step 1. Install Homebrew by executing the code from their website to the command line in your Terminal app.
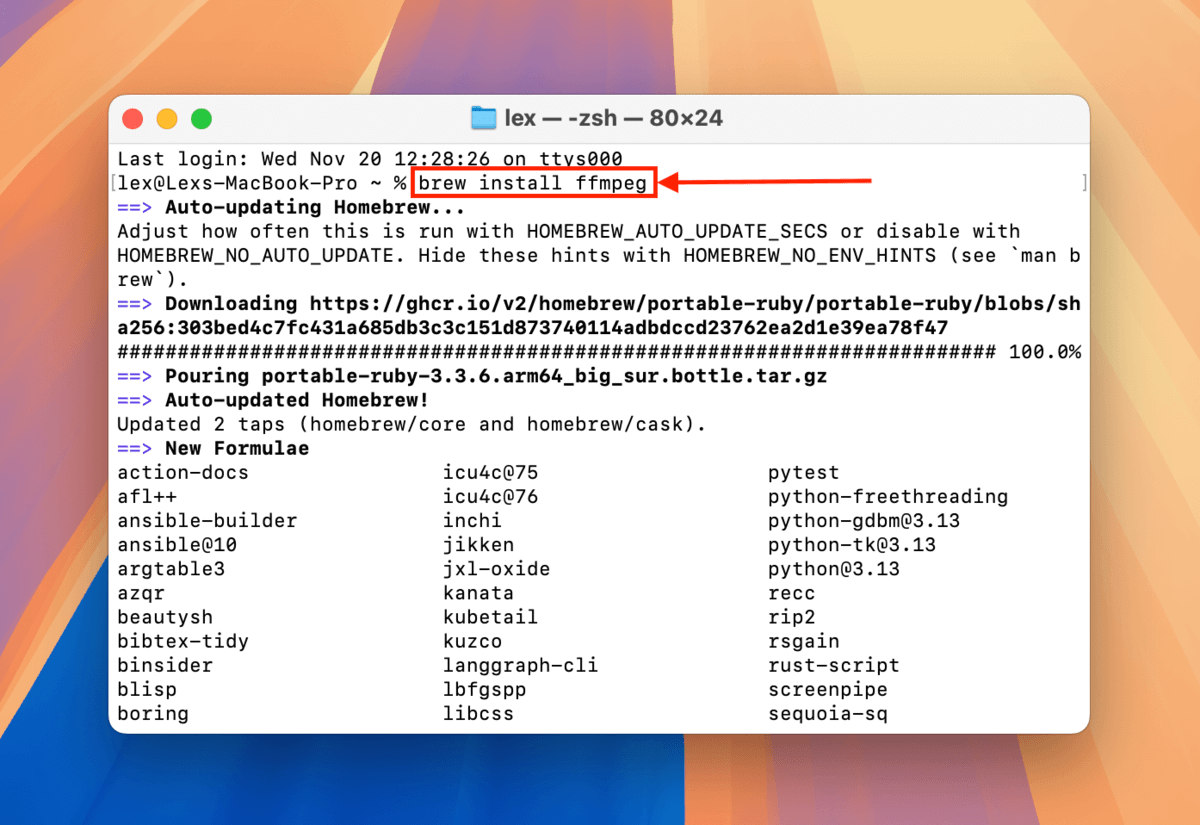
Step 2. Open the Terminal app and run the following code to use Homebrew to install FFmpeg:
brew install ffmpeg
Step 3. Open Terminal (Finder > Applications > Utilities) and type the following command:
cd desktop/demo
Replace desktop/demo with your own folder’s pathname. This command points the Terminal app to the folder where your corrupted video is stored.
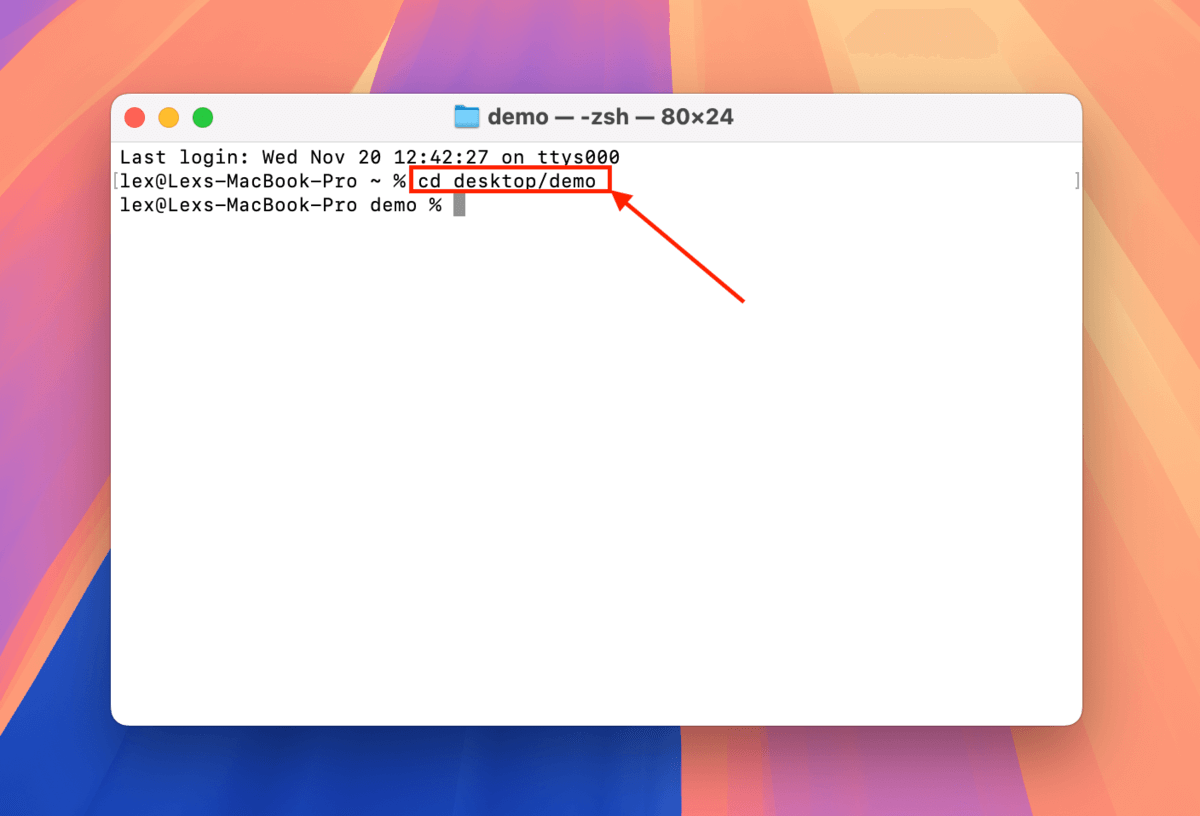
Step 4. We can now invoke FFmpeg operations and apply them to the corrupted video. Type the following command to locate and move the Moov atom to the start of the file (where it’s supposed to be):
ffmpeg -i nomoov.mp4 -c copy -movflags faststart fixed.mp4
Replace nomoov.mp4 with your corrupted video’s file name and fixed.mp4 with the file name you want FFmpeg to output.
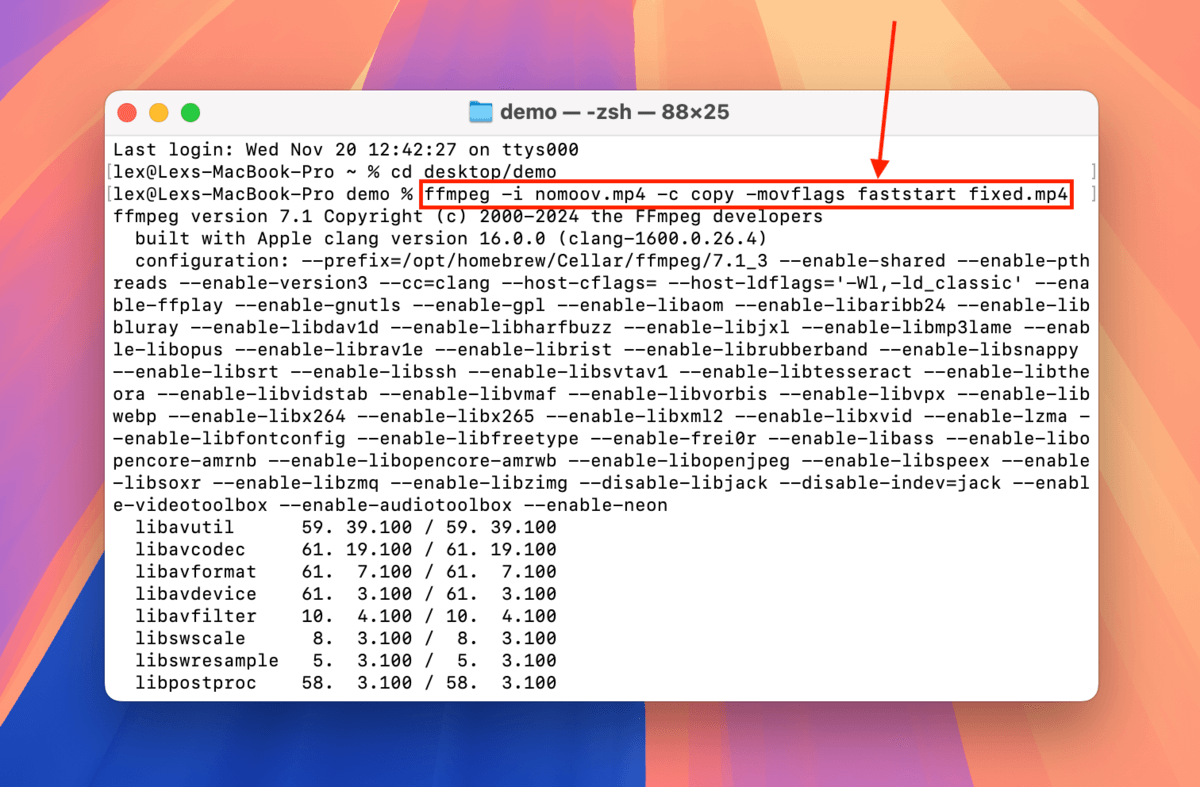
Once FFmpeg is done with the operation, you’ll find fixed.mp4 (or whatever file name you chose) in the folder where FFmpeg and your corrupted video are stored. Try opening it.
Fix 4: Re-encode Your Video Using Handbrake
Re-encoding your video can potentially fix the “Moov Atom Not Found” error because it uses the data of the old file to generate a new one. However, it will only work if the Moov Atom is corrupted, misplaced, or only partially corrupted because video converters and transcoders rely on the data in the Moov Atom.
For this method, you can use the free and open-source Mac tool called Handbrake, which is what we’ll use for this demonstration.
Step 1. Download and install Handbrake.
Step 2. Open Handbrake and it should automatically allow you to select a video (or you can click Open Source). Select your corrupted video and click open.
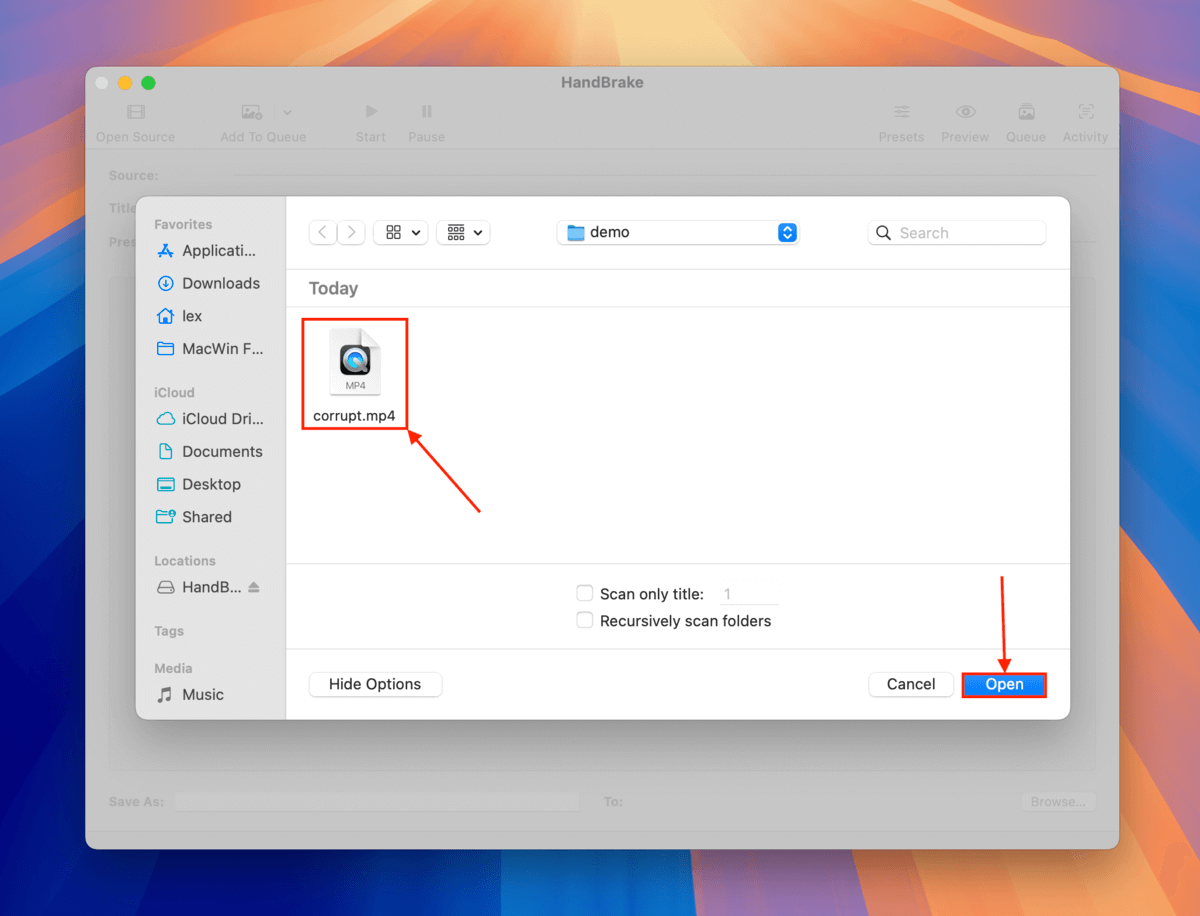
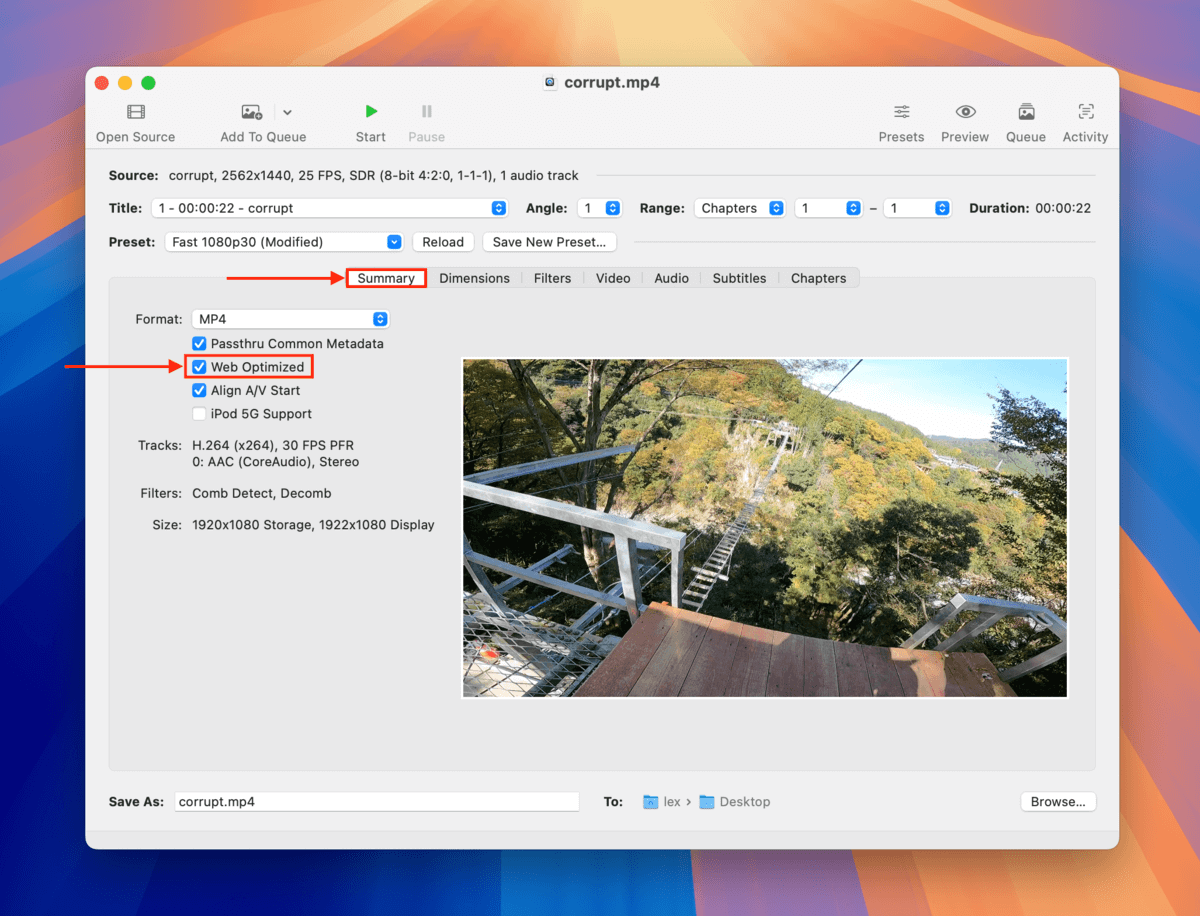
Step 3. In the Summary menu in the Format section, mark the box beside Web Optimized.
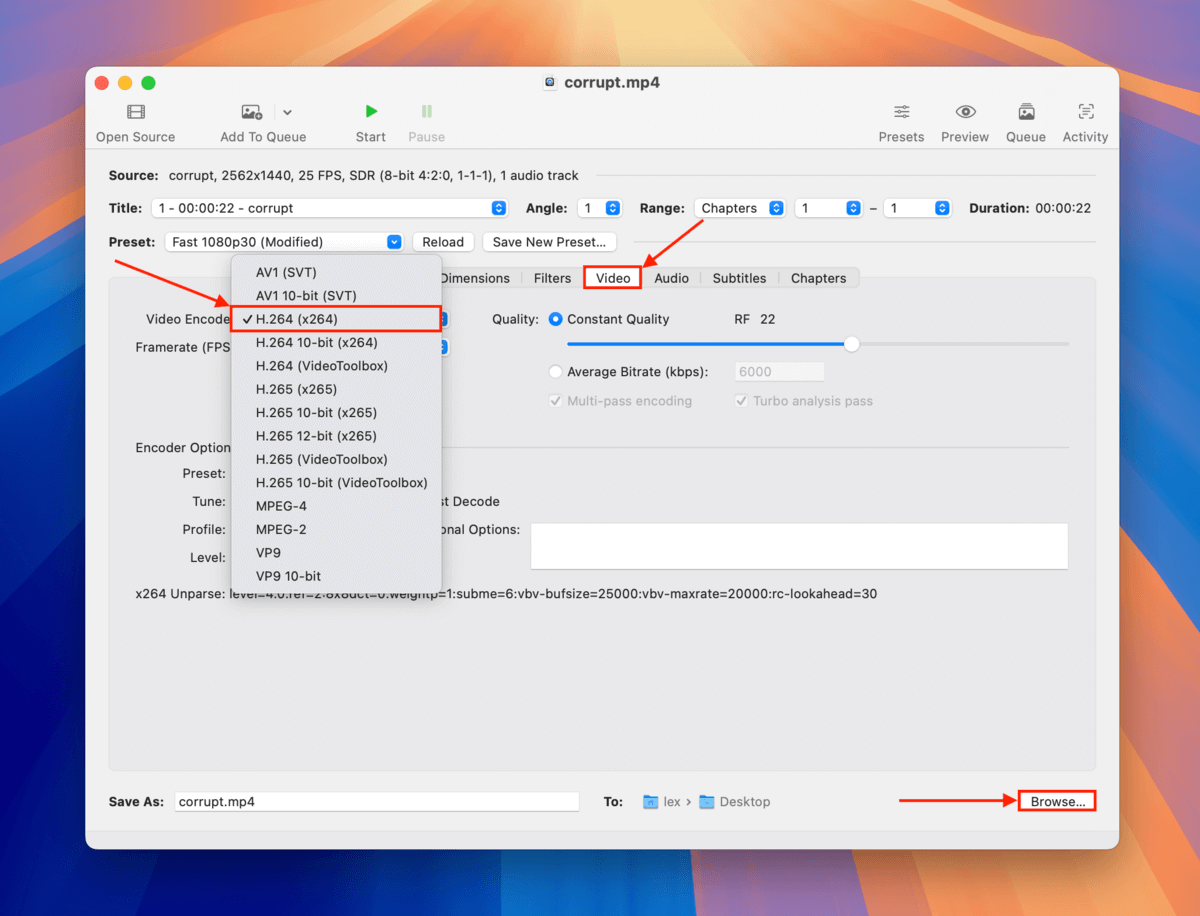
Step 4. In the Video section, click the dropdown menu beside Video Encoder and select H.264. Then, click Browse… at the bottom-right corner of the window.
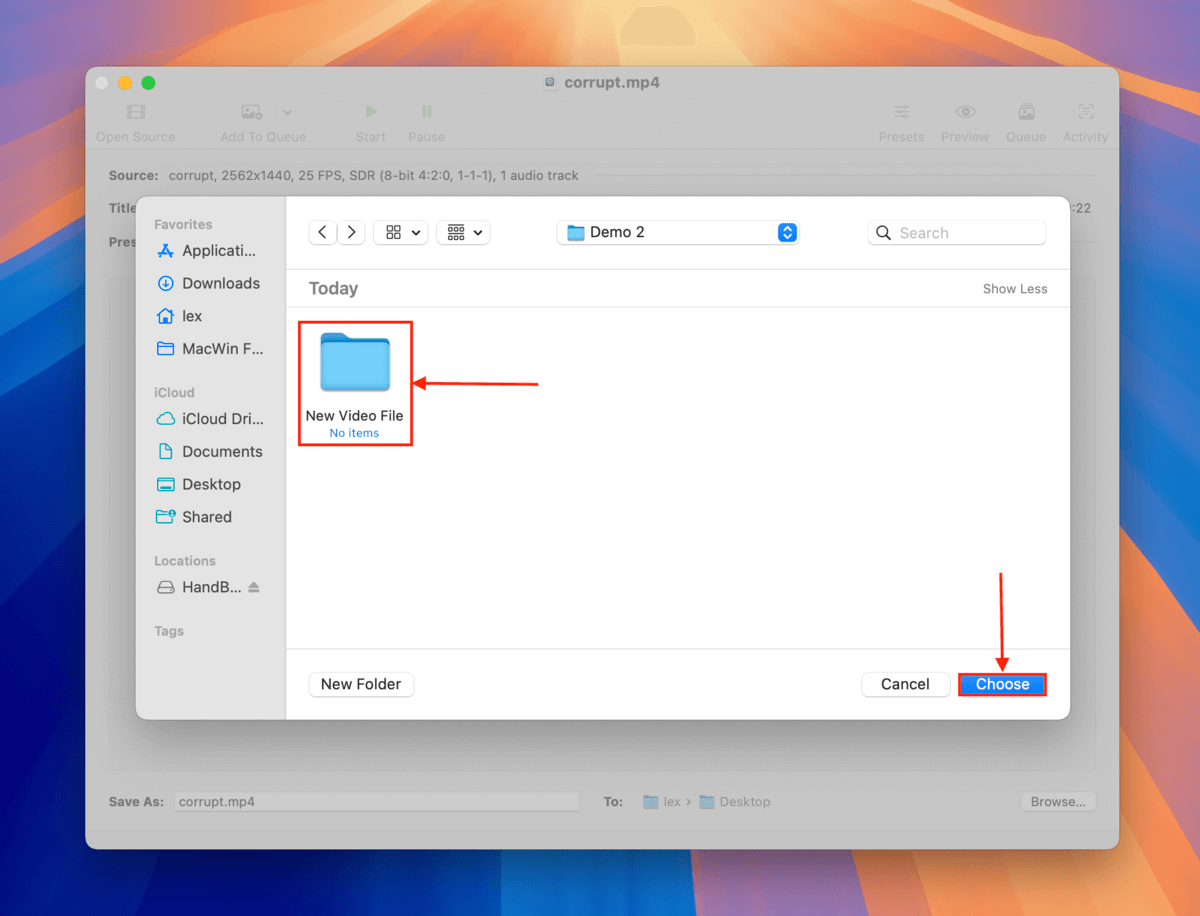
Step 5. Select a location where you want Handbrake to save your re-encoded video. Then, click Choose. Note that Handbrake won’t let you save it in the same folder as your corrupted video.
Step 6.Finally, click the Start button to begin the encoding process.
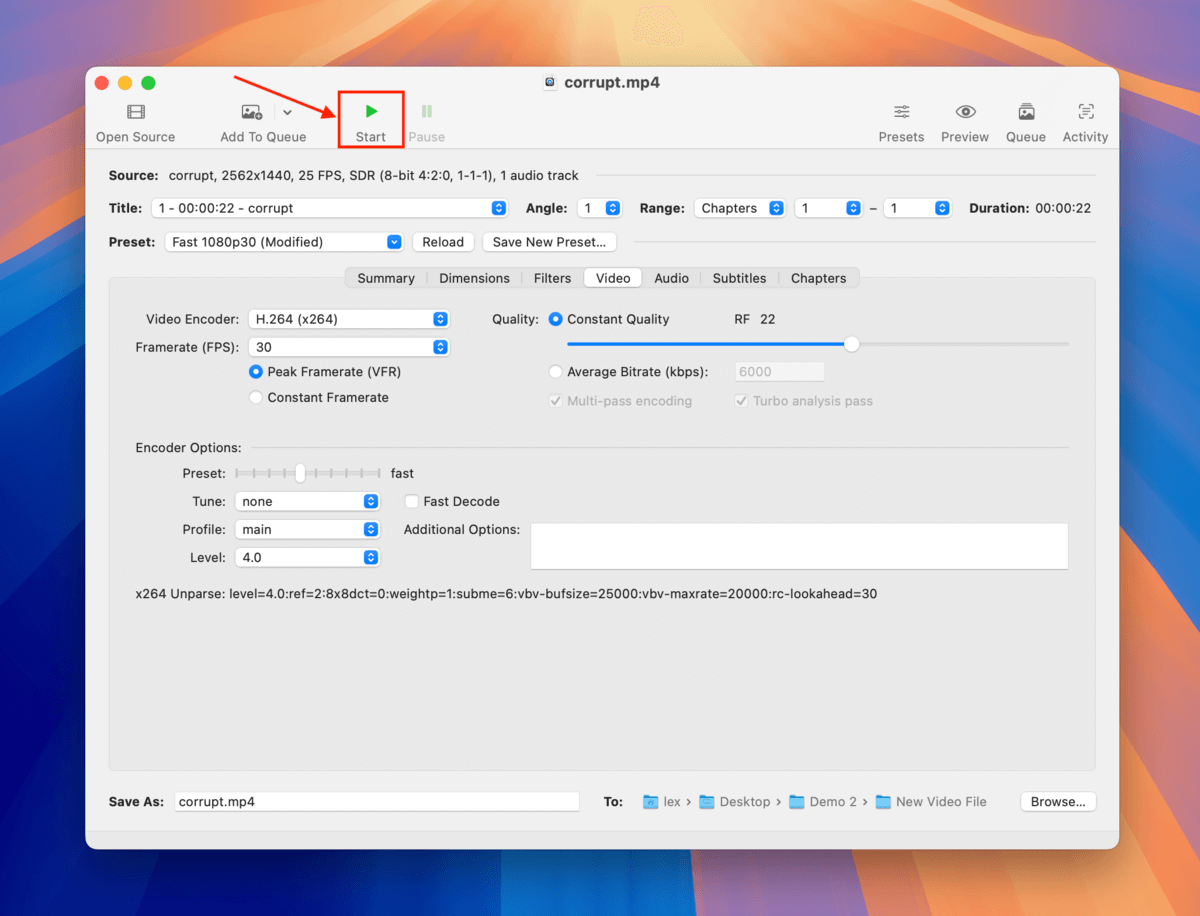
Handbrake will show you its progress at the bottom of the window. Once it disappears, the process is complete. You’ll find your video in the folder you selected in step 6. Try opening it.
To conclude, here’s the best way to avoid this error…
There are limited options for repairing videos with the error “Moov Atom Not Found” and many standard media players are very reliant on its data. The best way to avoid losing the Moov Atom is to ensure that your videos don’t get interrupted during the recording process, which should be allowed to conclude properly.
That means ensuring that your device has a charged battery and is functioning normally, your memory card has enough storage space to accommodate your video (and then some), and that you try to avoid situations where your device falls or crashes. Finally, make sure that you purchase memory cards from trusted vendors – fake memory cards not only lie about storage space, but they are also far more prone to corruption.


