
Accidentally erasing your hard drive, even your startup disk, doesn’t automatically mean catastrophe. Because of how file storage and deletion work, you have a small window of opportunity to get most or even all your data back (as long as it hasn’t been overwritten yet).
In this guide, we’ll show you different ways to restore data from an erased hard drive–whether it’s an internal storage device or your Mac’s startup disk (which means you can’t boot into macOS). We’ll also briefly discuss how disk erasure works to give you a better idea of what conditions make successful recovery more likely.
Table of Contents
How Does Disk Utility Erase Data?
Disk Utility is the main disk management application on macOS, and it can assist you with various tasks related to your disks, including erasing them completely. The application has four levels of security when it comes to erasing data:
- Fastest,
- Fast,
- Secure,
- Most Secure.
If you’ve used anything above “Fastest” to erase your data, you’re not going to get it back. Luckily, “Fastest” is the default setting, so if you didn’t change it, you still have a good chance of recovering what you’ve lost.
Data erased with the “Fastest” setting isn’t actually physically gone from the disk. Instead, a new file system is created that is “unaware” of the old files. As that file system stores new data, your old files eventually get overwritten. But as long as no other applications or data have been saved to the data blocks your files were stored in, your files still exist and are recoverable–they’re just not immediately accessible through your operating system’s interface.
How to Recover Data from an Erased External Hard Drive on a Mac
If you’ve got no backups for your data, the only way to restore files from an erased external hard drive is to use data recovery software. This is a type of tool that can scan storage devices for any remaining data–even if your drive’s contents are completely inaccessible through Finder.
There are many different recovery software apps that you can try, but we’ll be using a tool called Disk Drill for this guide. It has a great interface that beginners can immediately pick up, it supports file types commonly used with external hard drives (ExFAT, HFS+, APFS, and more), and it’s compatible with more file formats (including RAW photos, videos, and various documents) than most recovery software.
You can also download Disk Drill for free, scan your drive as many times as you want, and preview all your files–so you can follow along with this guide all the way through. You’ll only need to purchase a license at the actual recovery phase, but you’ll at least figure out which files are actually recoverable.
Step 1. Before connecting your external hard drive to your Mac, download and install Disk Drill.
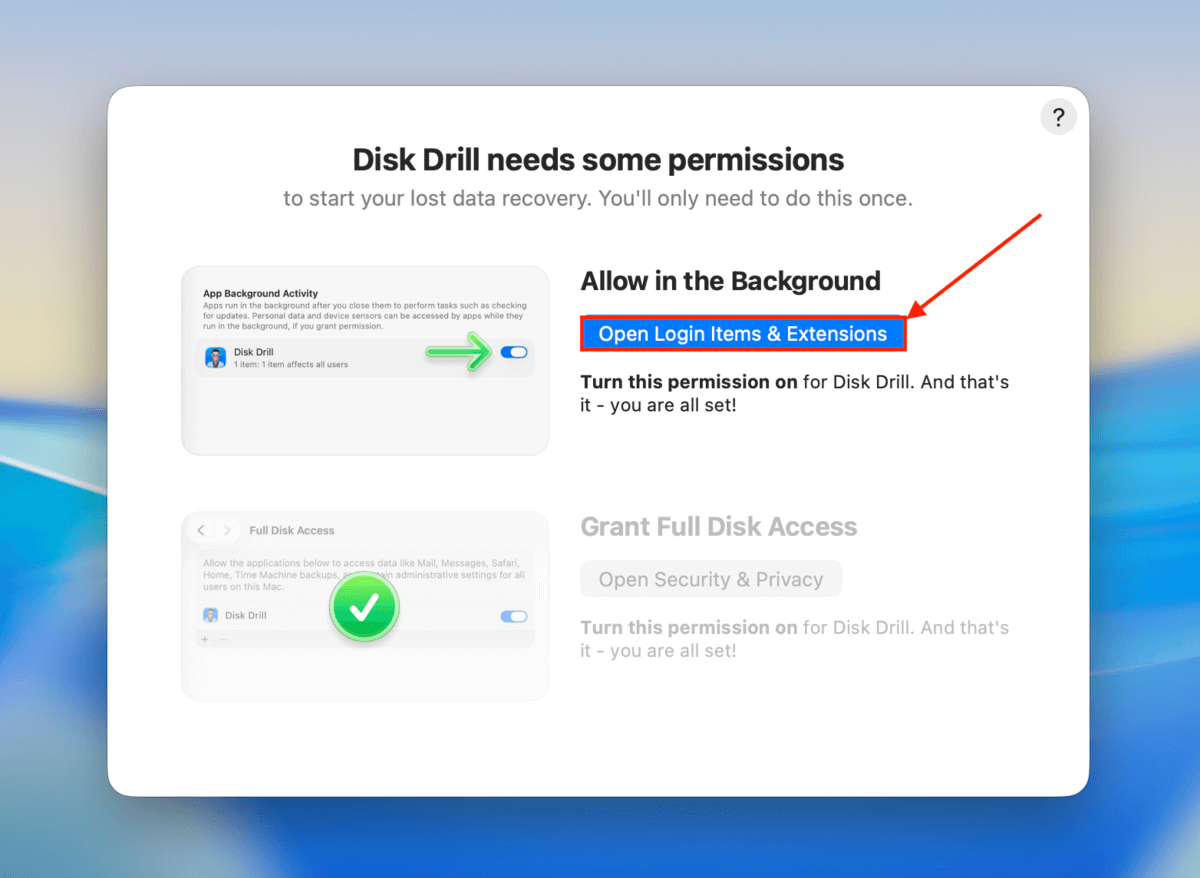
Step 2. Open Disk Drill and grant all necessary permissions, as demonstrated by the wizard.
Step 3. Once Disk Drill’s interface appears, connect your hard drive to your Mac. Then, select your drive from the list and click Search for lost data. If the app asks you to choose a scan type, select Universal scan.

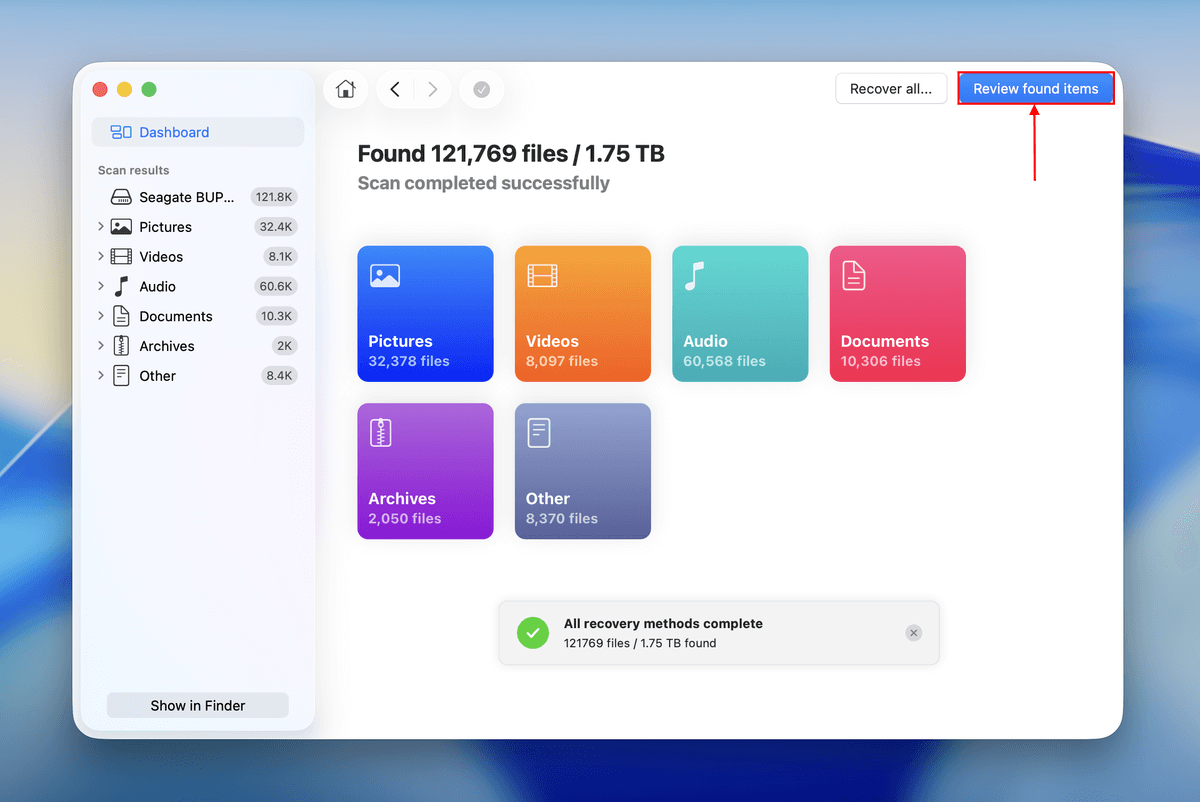
Step 4. Wait for Disk Drill to finish scanning your external hard drive. Once it tells you the scan is complete, you can click Recover All to restore all the data Disk Drill found. Then, jump to step 7. If you want to restore specific files and folders only, click Review found items.
Step 5. Expand the Deleted or lost and Reconstructed sections to find your erased files. You can use the search bar and the filters in the sidebar if you’re only interested in restoring specific files.
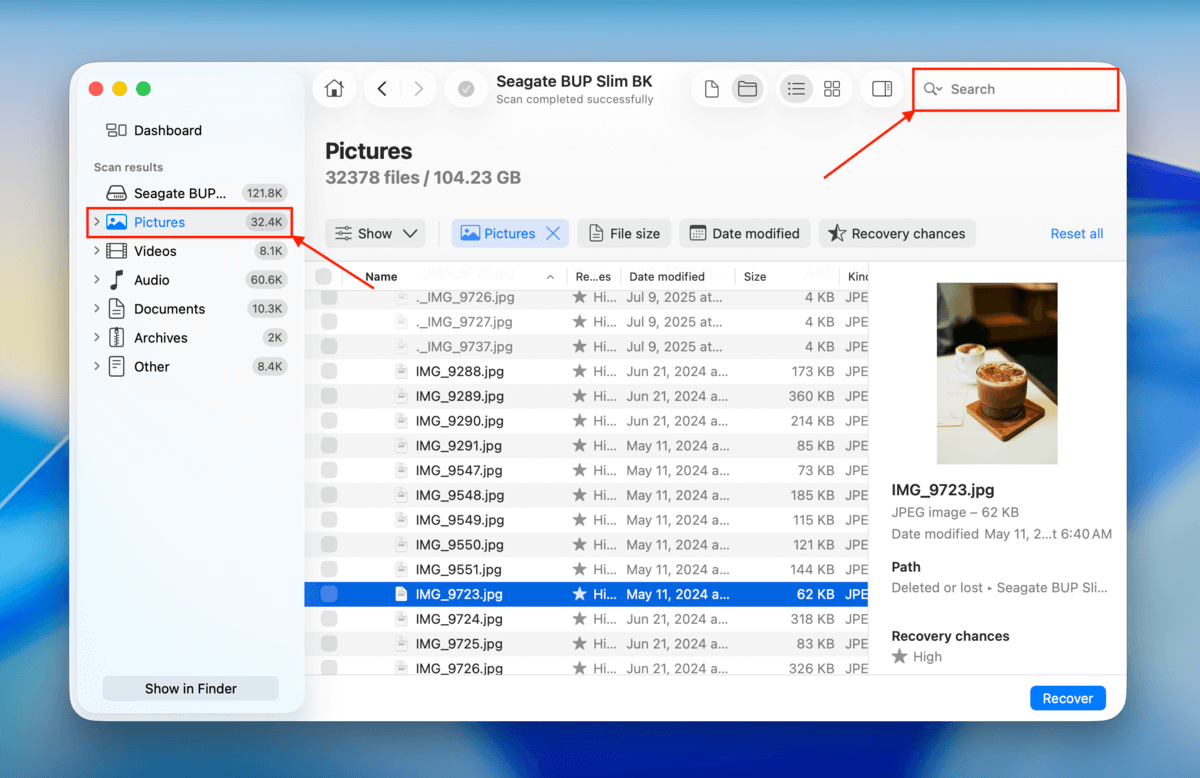
Step 6. When you locate the files you want to restore, we recommend clicking each of them once to open a preview–this allows you to verify its recoverability. Then, select the files you want to restore (using the boxes in the left column) and click Recover.

Step 7. Finally, select a destination folder on your Mac for the recovered files. Do not save the files to the erased external hard drive (to prevent overwriting). Then, click Next.

Make sure that your drive doesn’t get disconnected or lose power while the recovery process is ongoing, to make sure that the files don’t get corrupted along the way.
What to Do if You’ve Accidentally Erased Your Startup Disk on Your Mac
Erasing your Mac’s startup disk means that both your user data and macOS have been wiped out. If you attempt to reinstall macOS and recover your data afterward, the new operating system files may overwrite your data. In this case, the safest way to restore data from an erased startup disk is to attempt recovery without reinstalling macOS. Below, we’ll guide you through 5 different methods to do this.
Method 1: Use Disk Drill in Recovery Mode
In the previous section, we covered using Disk Drill to restore files from an external hard drive. But it’s also capable of scanning internal drives, and it has a feature that allows you to run it even if macOS has been completely erased.
When you erase a Mac, Recovery Mode remains intact. Through Recovery Mode, you can access the Terminal to run a special command that temporarily downloads and runs Disk Drill (including its graphical user interface) without ever booting into macOS.
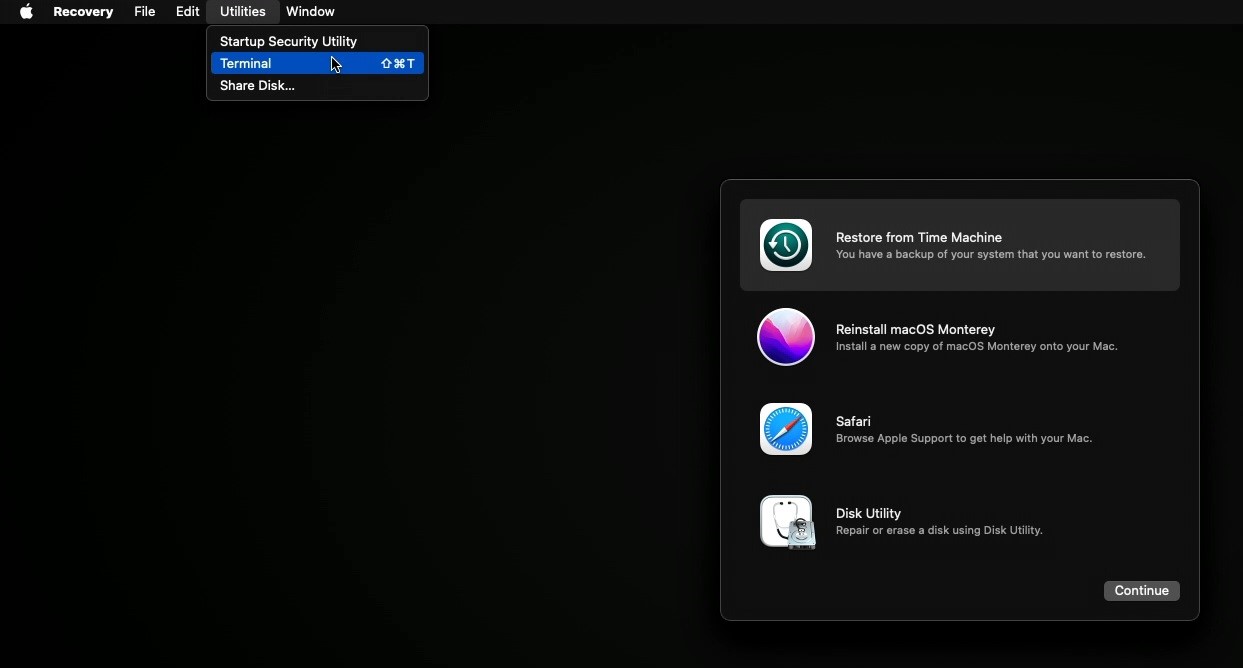
- Hold down Command + R while your Mac is turning on to start it in Recovery Mode.
- Once you’re in, start Terminal from the Utilities menu.
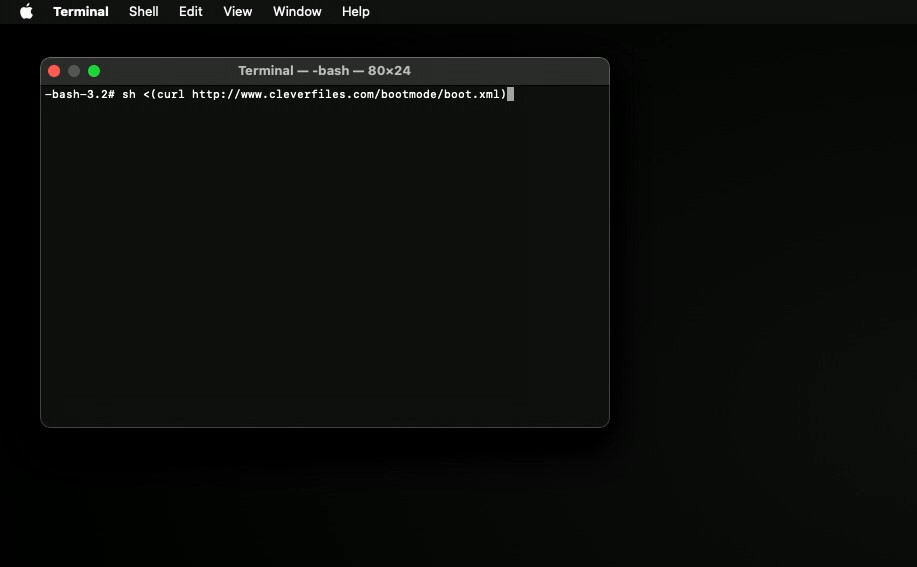
- Once in the Terminal window, you’ll need to run one of several commands, depending on your macOS version:For macOS 11.7.10-26.x:
sh <(curl http://www.cleverfiles.com/bootmode/boot.xml)
For macOS 10.15.7-15.x:
sh <(curl http://www.cleverfiles.com/bootmode/boot5.xml)
For macOS X 10.11.6–macOS 12.6:
sh <(curl http://www.cleverfiles.com/bootmode/boot4.xml)
4. Disk Drill should now be downloading. Once that’s done, simply start it, and follow the steps we outlined in the previous section to recover your files. Keep in mind that previews will be disabled when you’re in Recovery Mode. 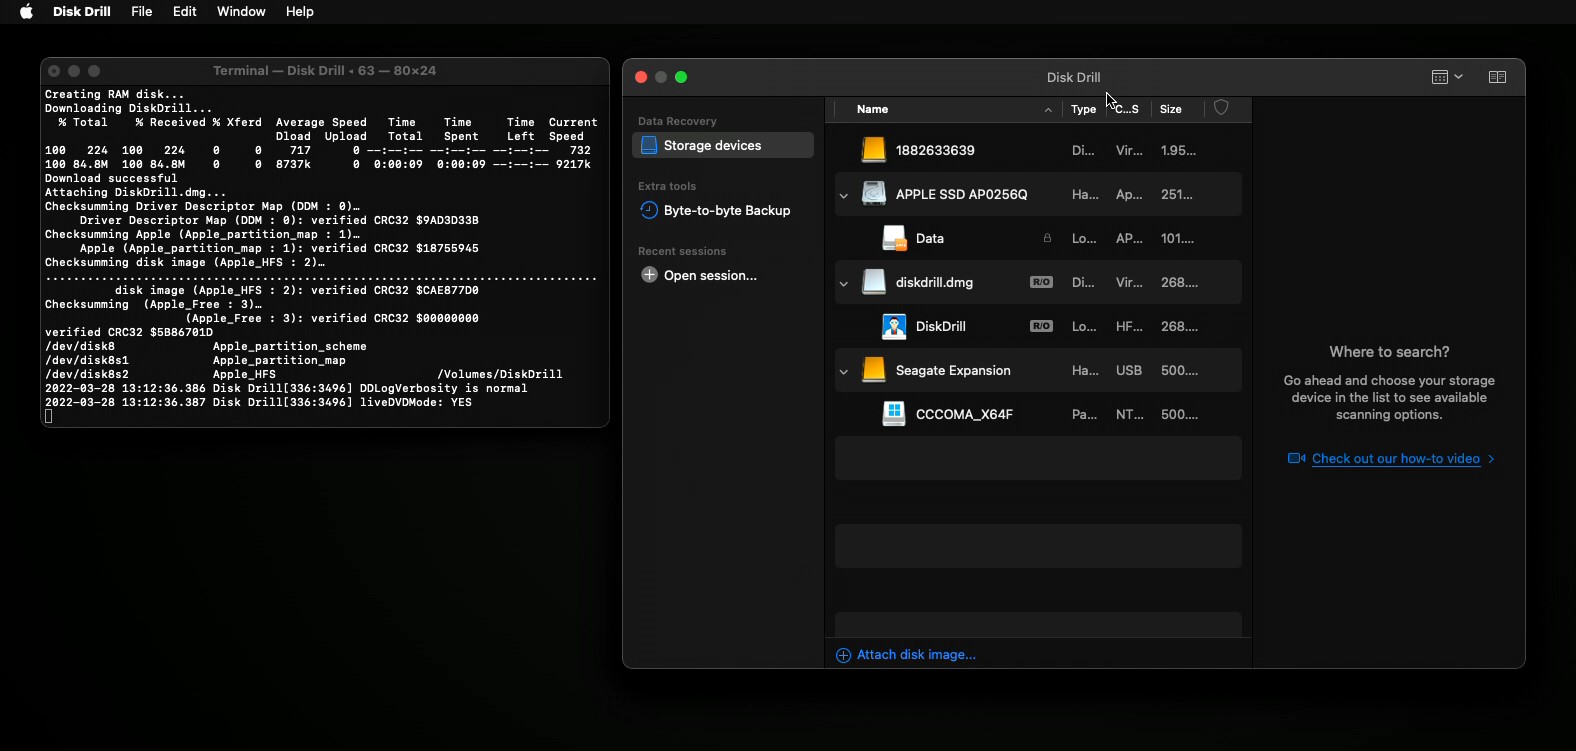
Once you hit Return and run the command, Disk Drill’s main menu will eventually appear on-screen. From there, follow our instructions in the data recovery section to proceed. You should be able to choose your startup disk and scan it as you would an external storage device. Just make sure to save recovered files to an external storage device, not your Mac (to avoid overwriting data).
Method 2: Scan Your Mac in Target Disk Mode (Intel-Based Macs Only)
Target Disk Mode is a feature that turns your Intel-based Mac into a readable external storage drive. If you have another Mac that actually works and can boot, you can connect your Mac (with the erased disk) while in Target Disk Mode and scan it with data recovery software.
Step 1. Connect your Mac to a working Mac (the “host” Mac) with the appropriate cable.
Step 2. On your Mac with the erased drive, press the power button and quickly press and hold the T key.
Step 3. When you see the Thunderbolt or FireWire icon on your Mac’s screen, release the T key. Your Mac drive should appear on the host Mac as an external drive (check Finder).
Once the host Mac recognizes your Mac as an external drive, you can use data recovery to scan it for files, as if it were any other external storage device. Follow our instructions in the data recovery section–just make sure to install the recovery software on the host Mac, and to correctly identify your Mac (with the erased disk) during the source selection step.
Method 3: Use a Time Machine Backup
Restoring a backup from Time Machine a good option for those who want to recover their data with minimal hassle, but is a bit limited in terms of control over the recovery process compared to the other options we outlined above. If you want to restore an entire disk from a Time Machine backup you need to follow these steps:
- Connect the external hard drive with a Time Machine Backup to your Mac.
- Restart your Mac, and hold down Command + R. If you’re using an M1 Mac hold down the power button.
- Once you’re at the macOS Utilities screen, select Restore from Time Machine Backup.
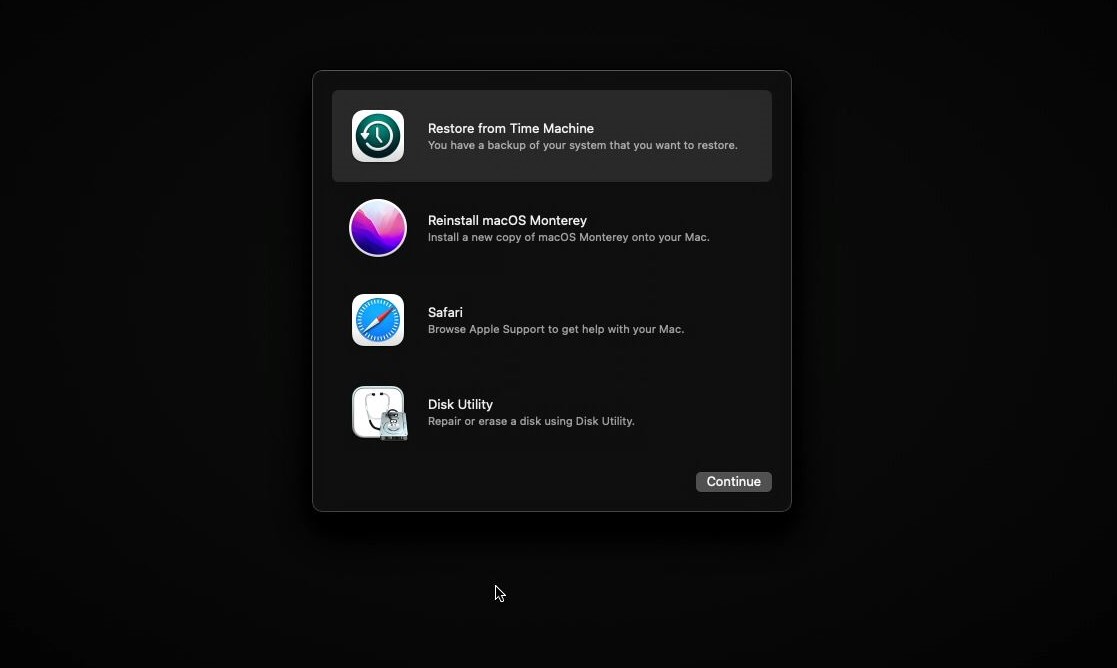
- Select the backup you want to restore, and click Continue. Your Mac will start recovering the selected backup and will then restart.
Method 4: Download or Recover User Data From iCloud
If you enabled iCloud synchronization on your Mac, that means that any of your files stored in iCloud-synced folders would have been uploaded to Apple’s servers. Fortunately, wiping your Mac doesn’t delete those files from iCloud. You can simply download them from the iCloud website to any computer with a browser and an internet connection.
Step 1. Open a browser on your Mac.
Step 2. Navigate to iCloud.com and log in.
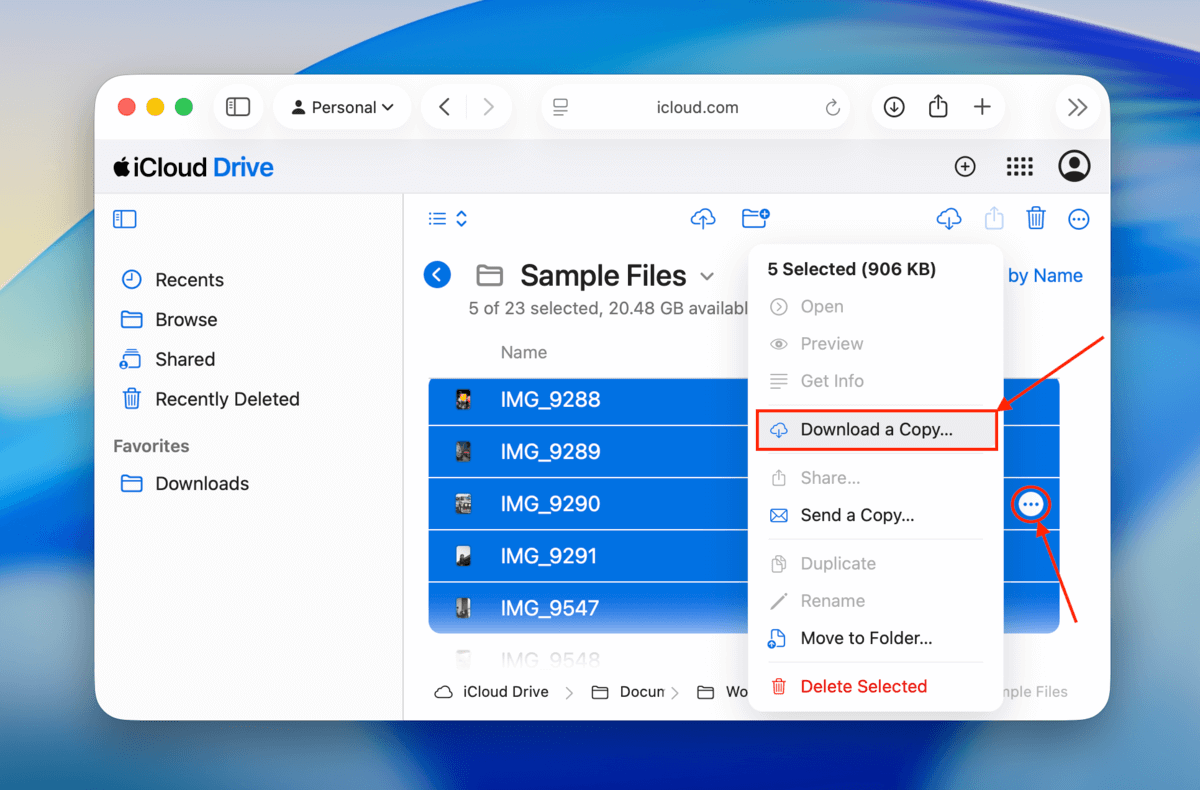
Step 3. Locate the Drive section and click it.

Step 4. Click on a file or folder to select it (you can hold the Shift or CTRL button to select multiple items). Then, click the meatball menu beside one of the selected files and click Download a Copy…
Method 5: Send Your Mac to a Professional Data Recovery Service
If none of the solutions worked for you, or you prefer entrusting your data to specialists, consider sending your Mac to a professional data recovery service. A data recovery service is a company of technicians with special training and equipment for restoring data from different types of devices.
The best data recovery services can vary based on where you’re located, but here are some common features to look for:
- Free estimate: Certain data recovery services can give you a free estimate over the phone after you explain what caused the data loss. However, make sure that you verify the final cost before proceeding.
- Recovery fee guarantee: Most reputable data recovery services offer a “No data – no charge guarantee.” This means you only get charged if they successfully restore the data you originally asked for (not just a bunch of random files).
- Cleanroom: Most big shops have a Class 100 Cleanroom–a special facility that keeps tiny particles away from the sensitive internal parts of the storage devices, which need to be disassembled for more complex recovery operations. You don’t really need a cleanroom for restoring erased drives, but in case your Mac is damaged, this is an important factor to consider.
- Shipping discounts: Depending on where you live, you may be offered free or discounted inbound shipping. However, outbound shipping is almost never free, even if you don’t push through with the recovery.
Conclusion
As long as you know what you’re doing and have taken the time to prepare yourself with the right resources in advance, accidentally erasing a drive on your Mac is something that can potentially be undone with minimal long-term damage. The most important thing is to stop using the drive immediately, and have at least one recovery tool available and ready to use.
FAQ
There are different steps to restart your Mac after erasing your hard drive, and it depends on the Mac that you have. Before restarting, make sure that you are connected to the internet and plug in the power adapter. Reinstalling macOS needs an internet connection.
For Macs with Apple T2 Security Chip:
- Click the Apple menu, select Shut Down, then press and hold the power button until Loading startup options appear.
- Select Options and click Continue, then follow the instructions that appear on the screen.
- On the Recovery app window, select the Reinstall option for your macOS release, click Continue, and then follow the onscreen instructions to complete the reinstallation process.
For Intel-based Mac that doesn’t have the Apple T2 Security Chip:
- Click on the Apple menu and select Restart.
- Immediately press and hold the Command-R keys. This will bring up the Recovery app window. From there, select Disk Utility and click Continue.
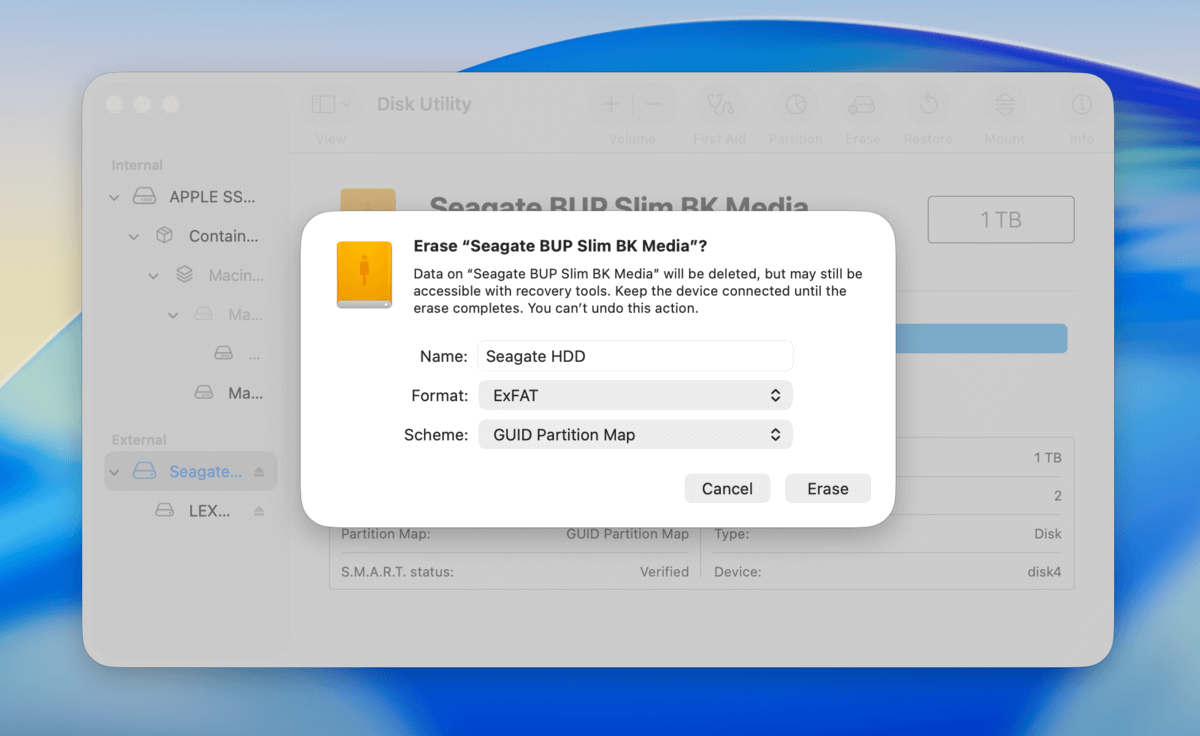
- In Disk Utility, locate the volume you wish to erase from the sidebar and click on it. Then, click on Erase in the toolbar.
- On the Name field, give a name to the volume and select APFS from the format pop-up menu.
- Click on Erase Volume Group to proceed with the erasing process.
- Once the process is complete, click Done and then choose Disk Utility > Quit Disk Utility.
- On the Recovery app window, select Reinstall for your macOS release, click Continue, and then follow the instructions on the screen.
It is possible to retrieve the data previously stored on a hard drive by using data recovery tools. However, the success of data recovery is not guaranteed, and it depends on various factors. If a hard drive has been wiped using a secure erase method, the data is unlikely to be recovered.
In addition, the physical condition of the hard drive can also impact the recovery process. If your hard drive is already damaged or has already experienced a failure, this may reduce the success of your data recovery.


