
Action-camera brands already fill the market, but the GoPro name sticks so tightly that people often call any action cam a “GoPro,” even when it isn’t one. These cameras usually record anything that happens in open space – scenery, bike races, open-water swims and all the other things you later see on YouTube. But recording the footage is only the first step, the next question is how to download GoPro videos to your Mac so you can edit the footage or share it with friends for feedback?
GoPro offers its own player, but not everyone feels satisfied with it. Because of that, many users still need another reliable way to download GoPro videos to Mac. And that is exactly what this guide covers. Below, we show you the methods that actually work, and we also include a section on how to recover deleted GoPro files if you find some or all of your data missing along the way.
Table of Contents
How to Transfer GoPro Videos to Mac
When you connect your GoPro camera via the USB port, MacOS will not allow you to access videos on Mac there and then. You will either need to upload GoPro videos to Mac via an app or use a card reader to transfer files directly from your memory card. We’ll show you how to do each method below.
Do not remove or eject your GoPro or MicroSD card during the import process. It may result in potential data loss.
Method #1: Connect SD card to Mac
The simplest way to transfer GoPro videos to a Mac is to connect the SD card from your camera to your computer using a card reader. The reader can be any type (a microSD adapter, a full-size SD card reader, or a universal multi-slot device). If your Mac doesn’t have a built-in SD card slot, you may also need a USB-C adapter that includes an SD or microSD port.
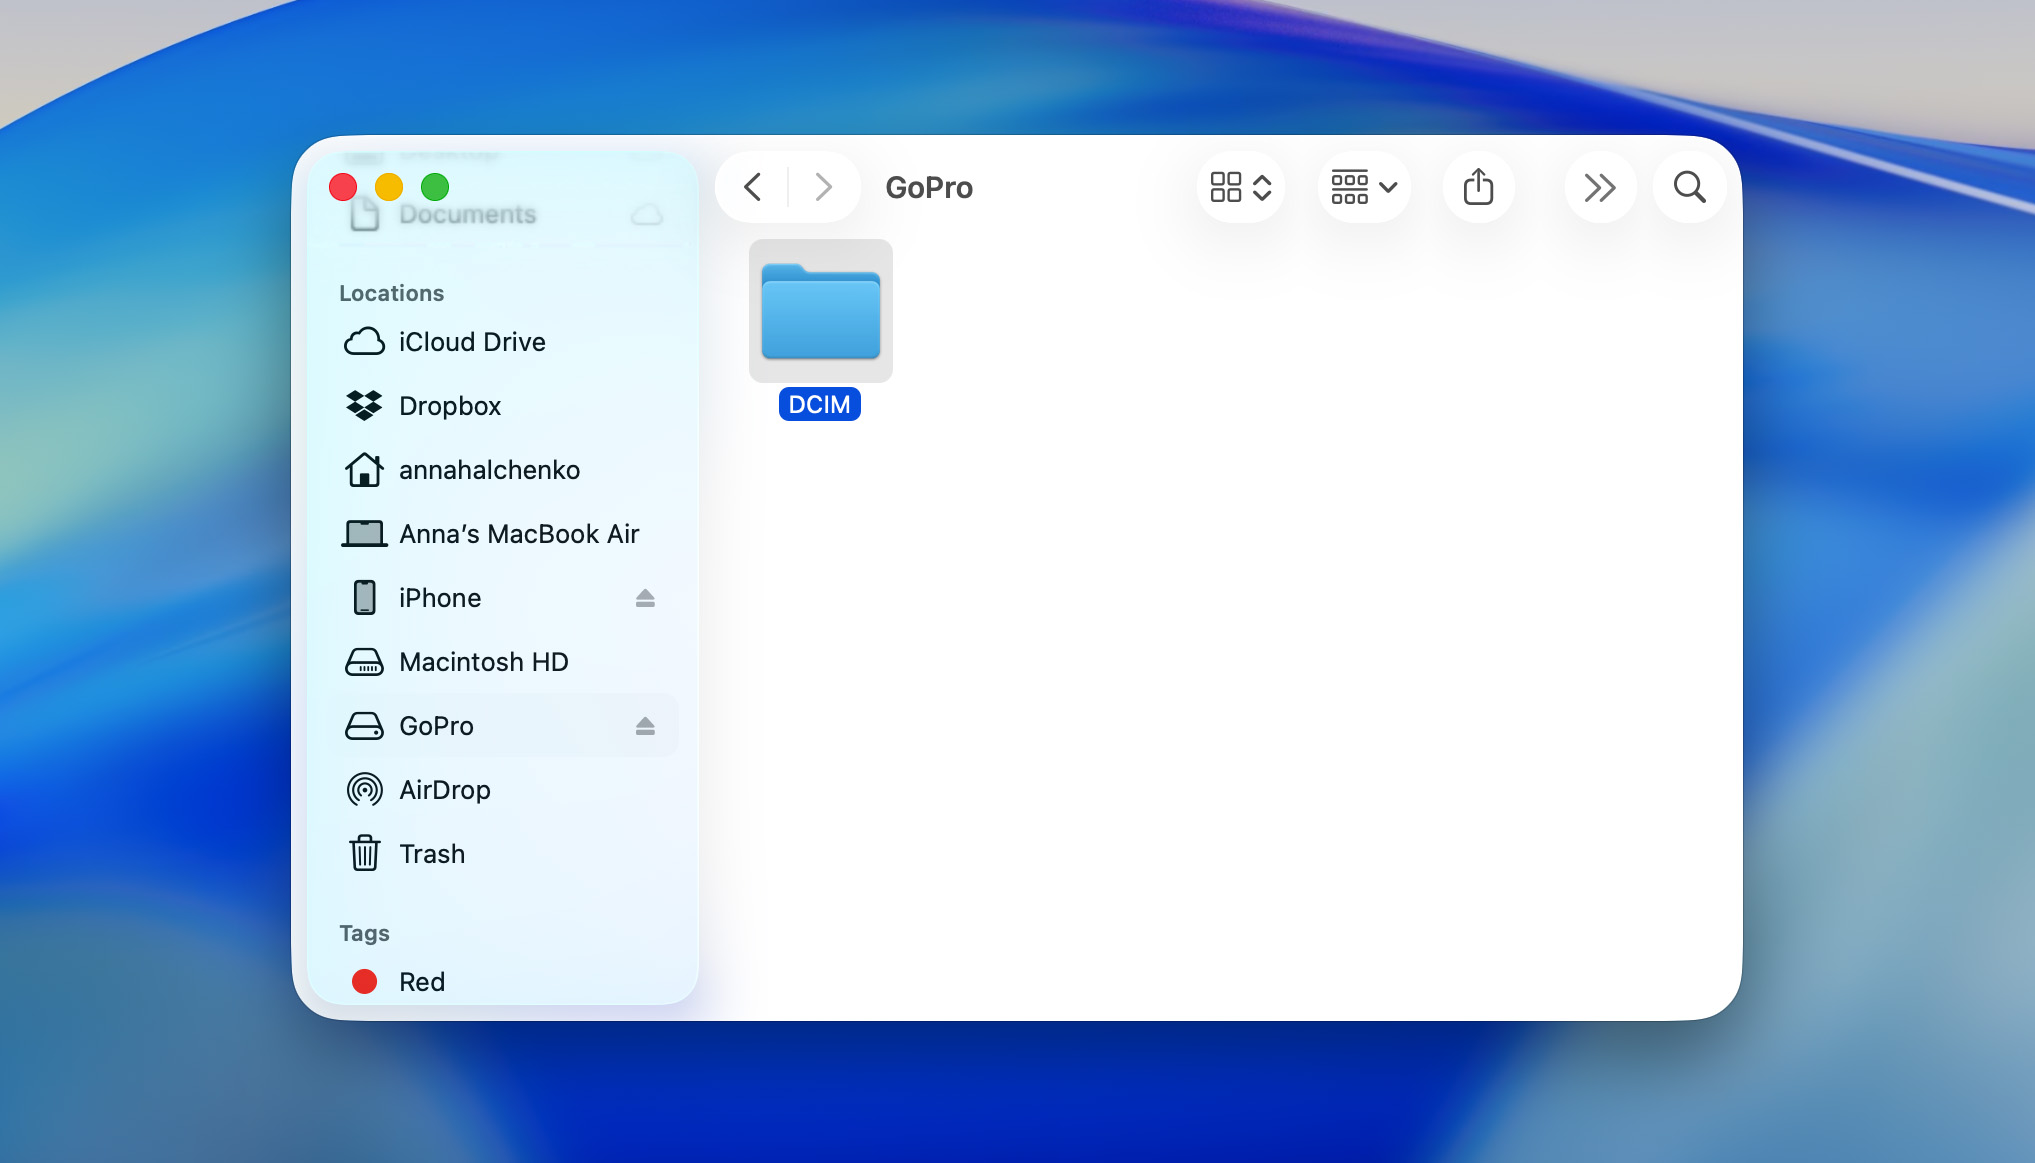
All you need to do is remove your memory card from your GoPro, insert it into the card reader you have, and connect it to your Mac. Then open Finder and select your SD card from the left sidebar. You’ll find your GoPro files in the DCIM folder, where you can copy and paste them to any location on your computer.
Method #2: Transfer Your GoPro Videos to Mac with MacDroid
If you don’t have a card reader (whether you haven’t bought one yet or simply can’t find yours), a convenient alternative way to import GoPro videos to Mac is to use an app like MacDroid. It works primarily as a Mac–Android file-transfer tool, but it also supports GoPro cameras. You only need your Mac, your GoPro, and a USB cable, no SD card reader required.
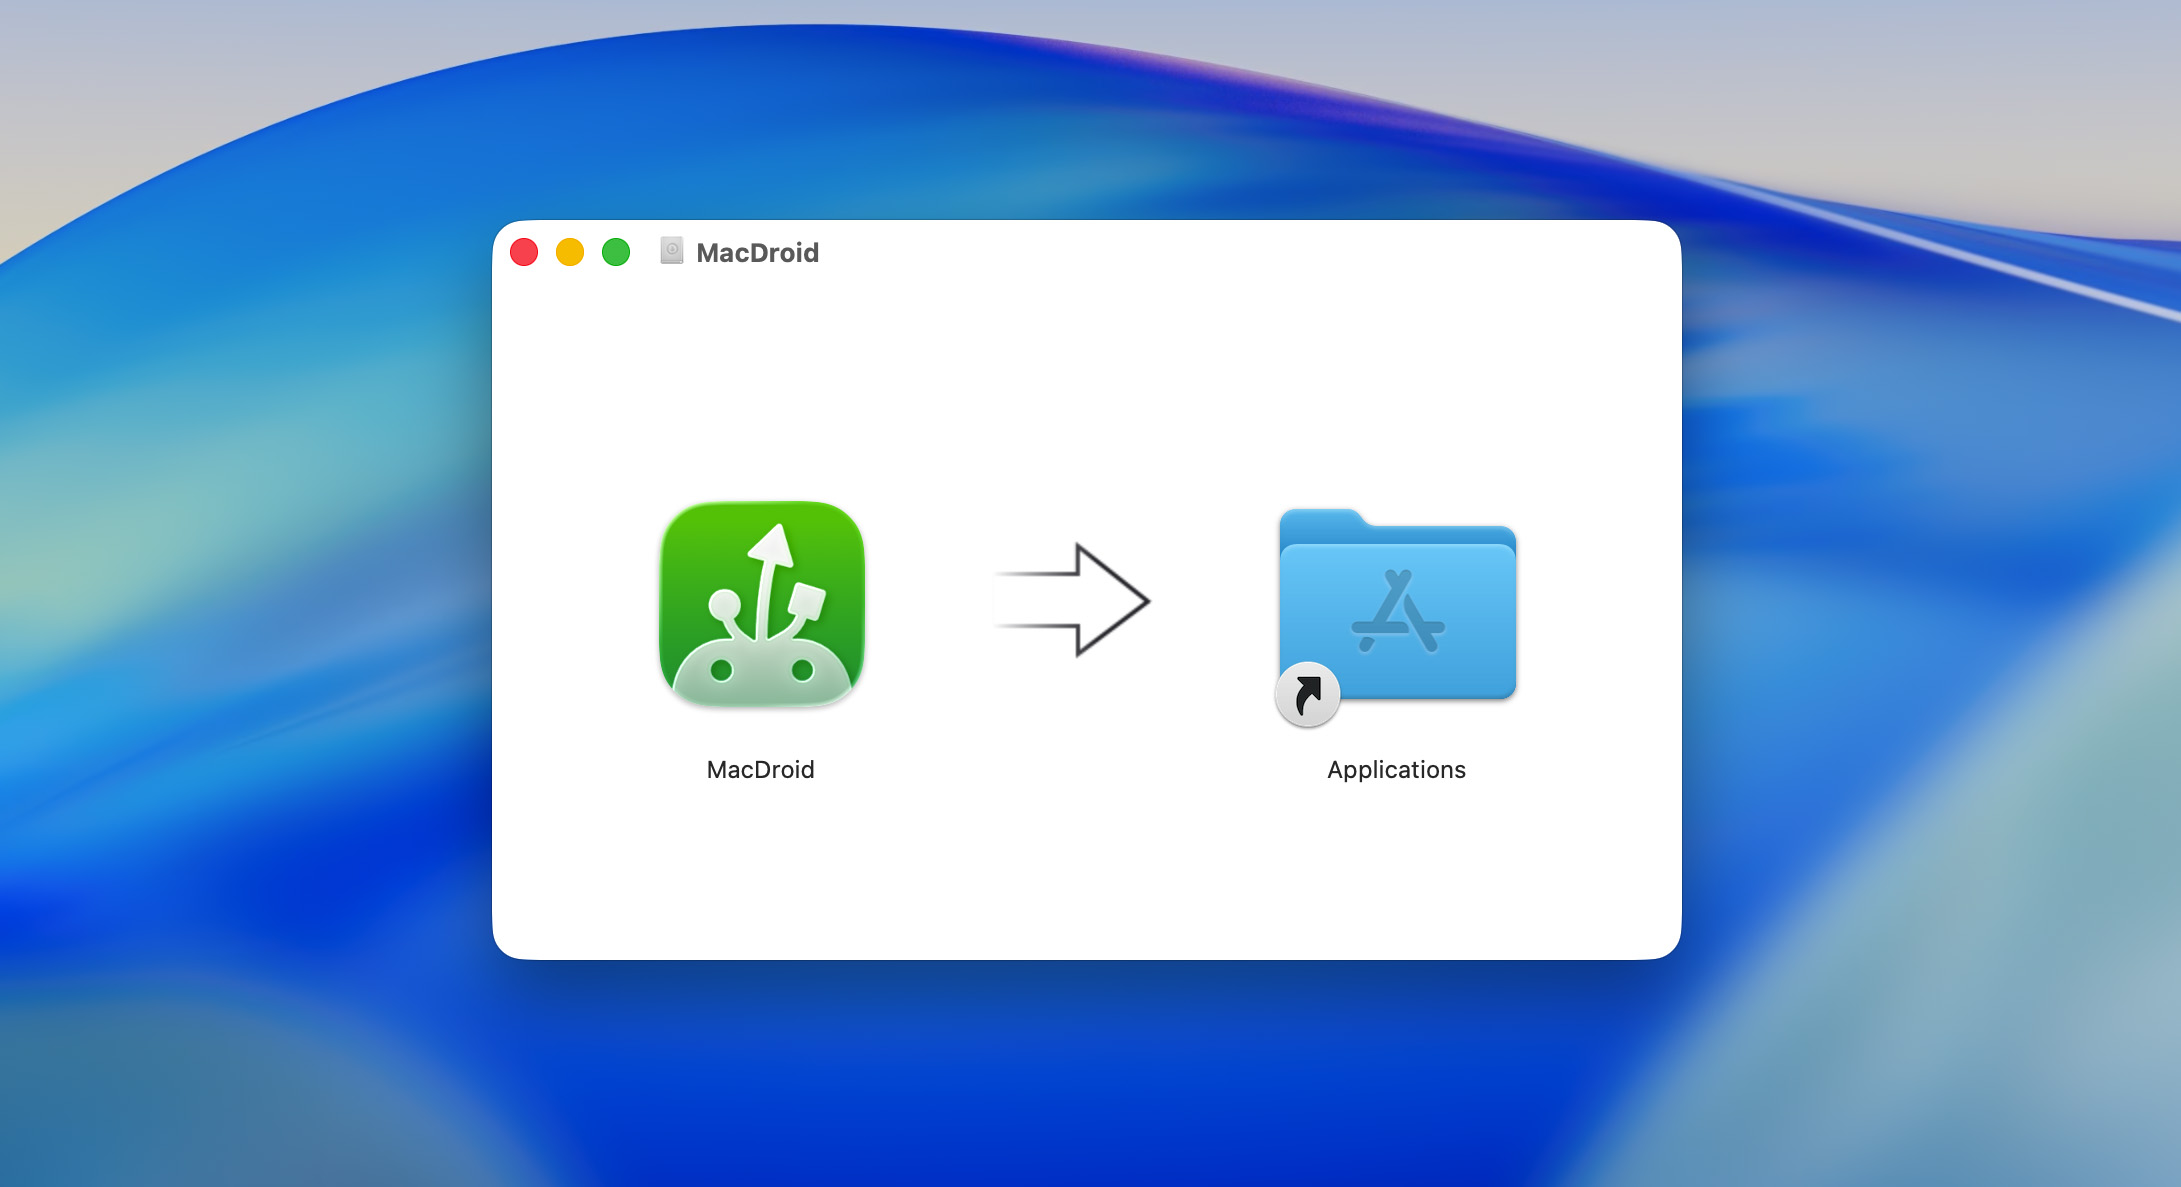
Step 1. Download MacDroid from the official website and install it on your Mac.
Step 2. Connect your GoPro to your Mac using a USB cable.
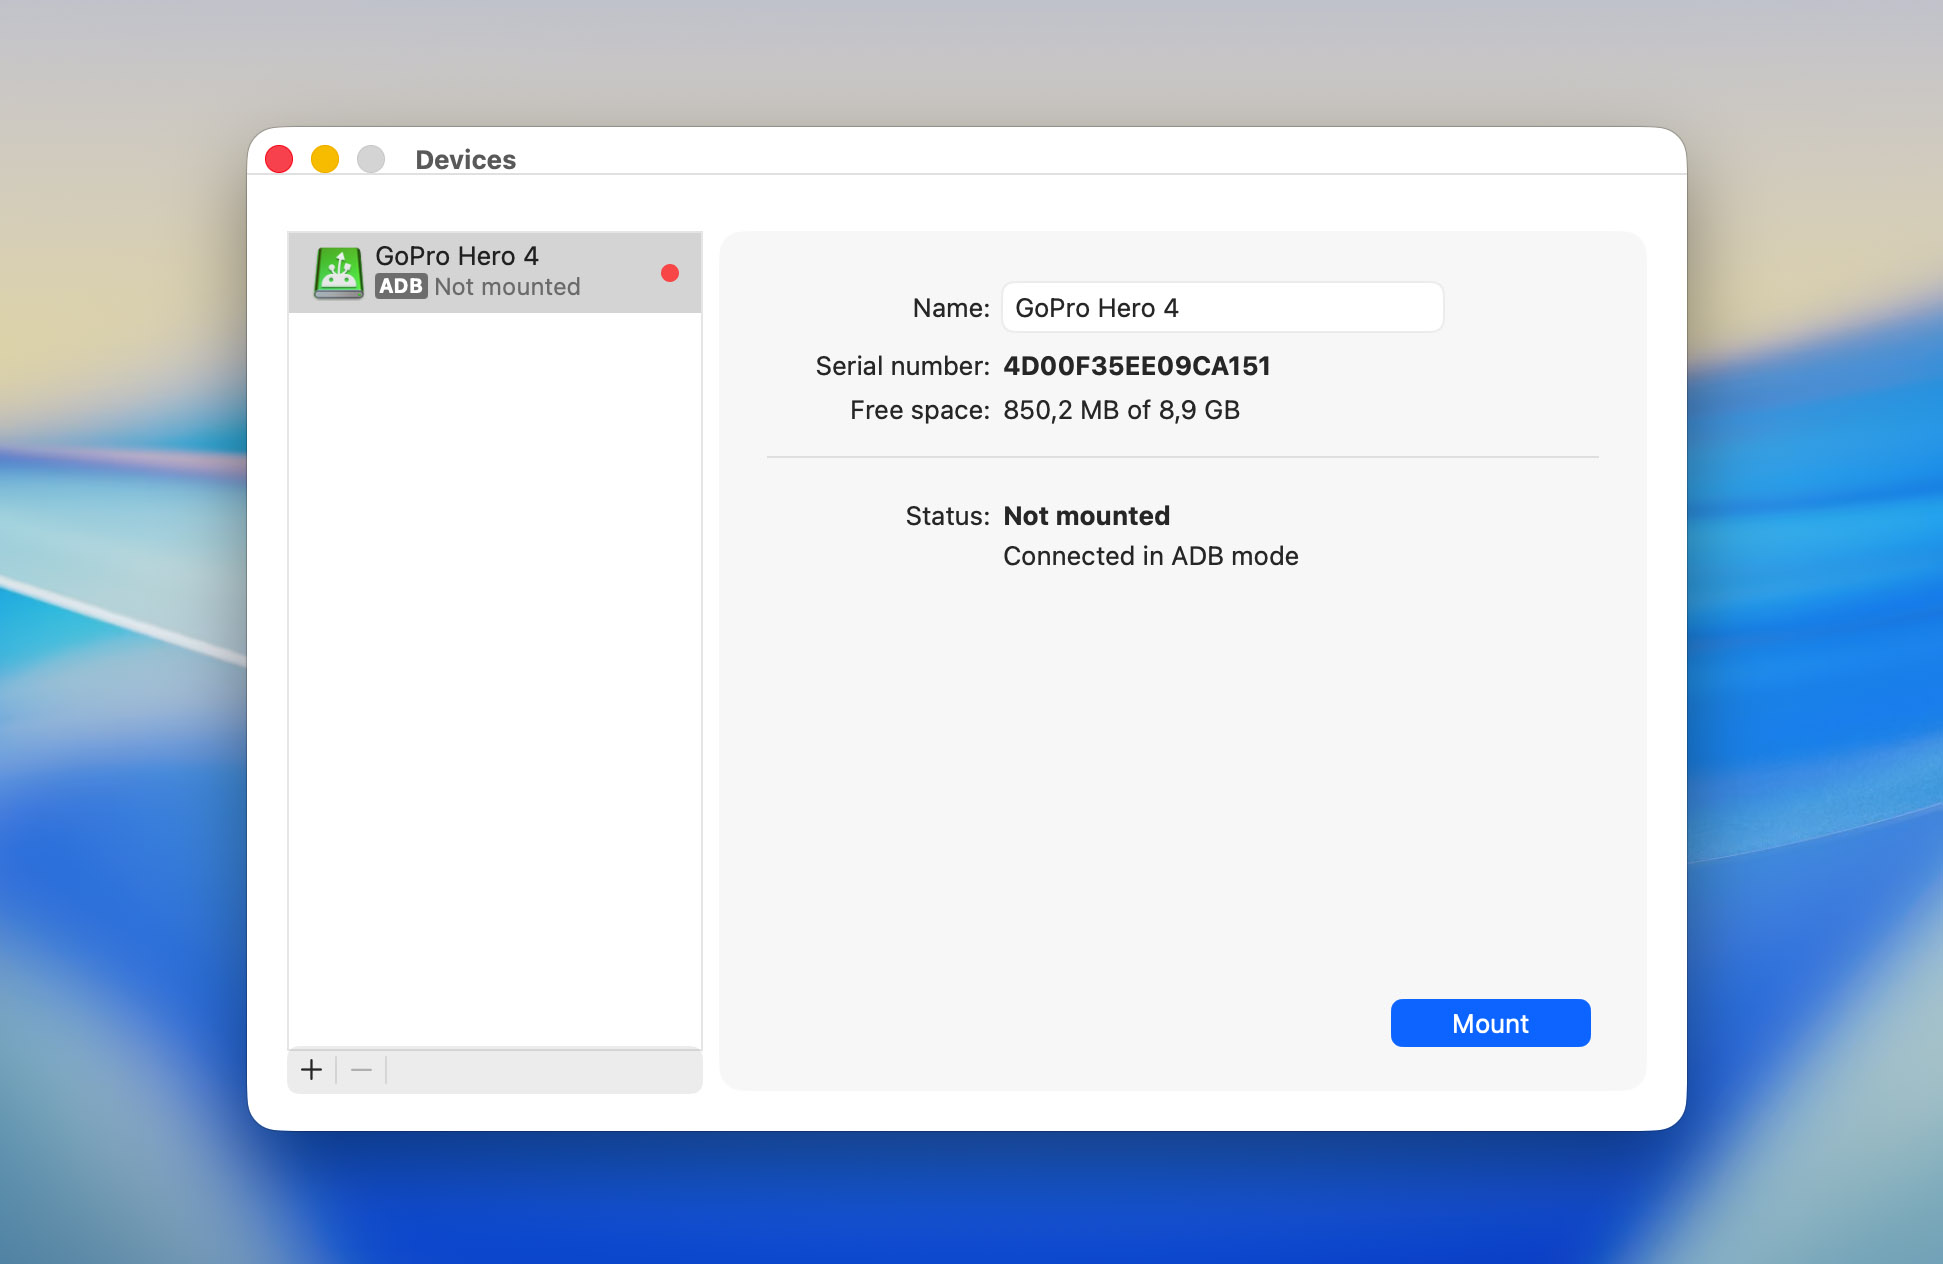
Step 3. Open MacDroid and choose the MTP connection option. Then select your GoPro from the list on the left and click Mount.
Step 4. Once you establish the connection, open Finder – your GoPro will appear in the sidebar. From there, you can access your DCIM folder and transfer video files from GoPro just like from any external device.

Method #3: Import Your GoPro Videos Using the Image Capture App
If you prefer not to use any third-party apps, macOS includes a built-in utility called Image Capture. This method takes a few more steps compared to MacDroid, but the core idea is similar – you connect your GoPro to your Mac and try to access its media through the app.
Step 1. Turn on your GoPro and connect it to your Mac using a USB cable.
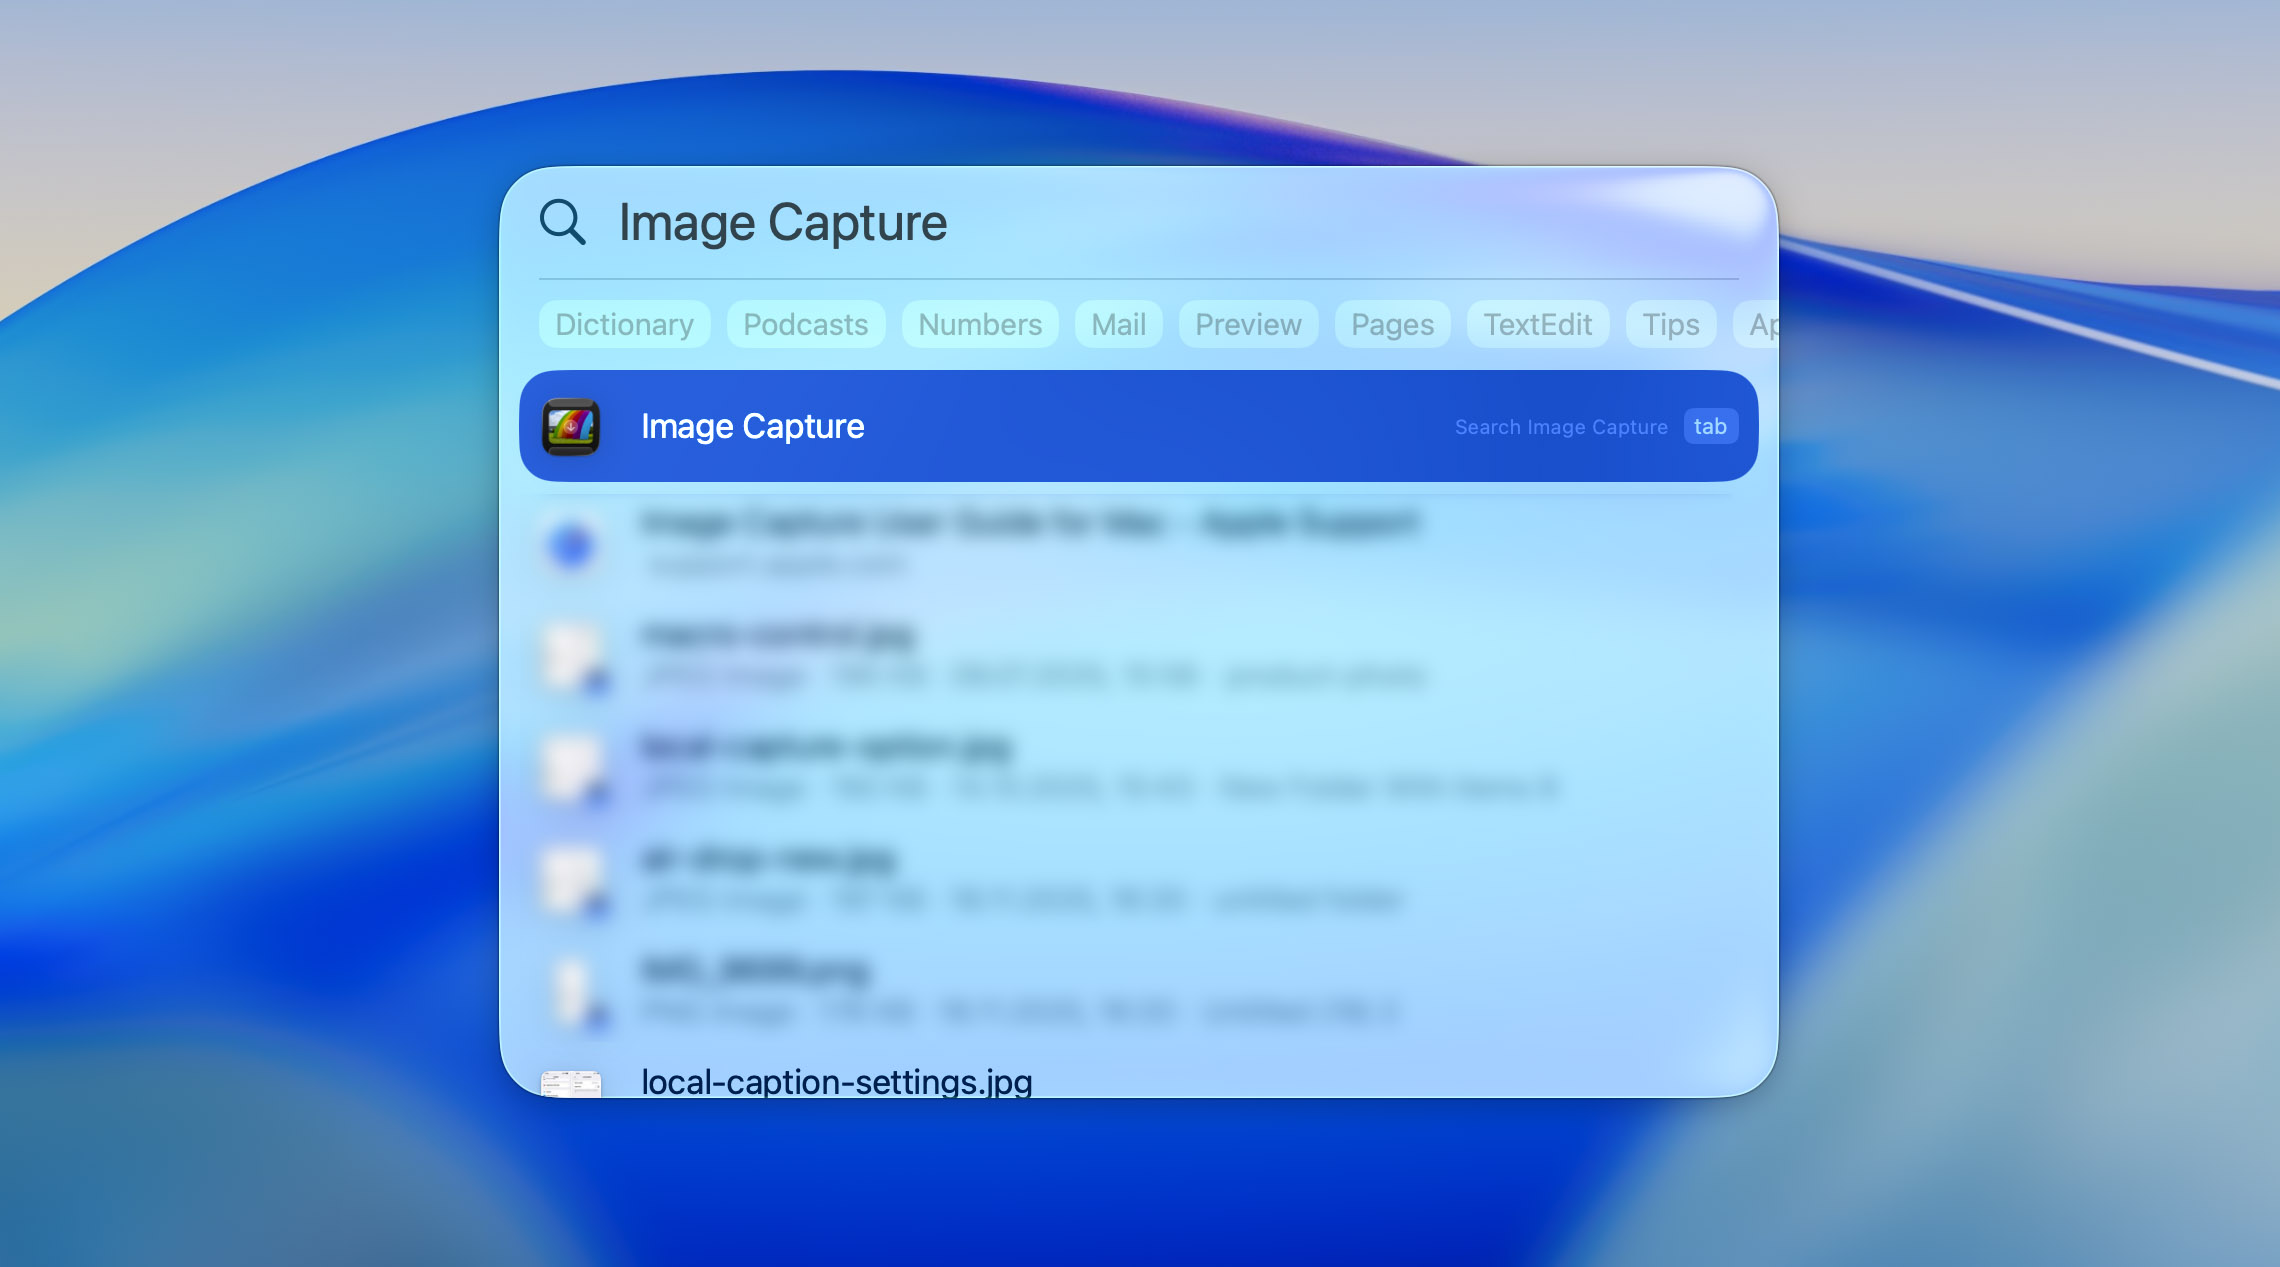
Step 2. Open Image Capture by searching for it via Spotlight Search (press ⌘ + Space and type Image Capture).
Step 3. Select your GoPro from the left sidebar under Devices. If the connection is successful, Image Capture will display the media stored on your camera.
Step 4. Select a destination folder on your Mac, choose the files you want to transfer, and click Download.
Method #4: Download GoPro Videos to Mac from GoPro Cloud
If you use a GoPro Subscription, your camera or the Quik app on your phone (phone and tablet versions still exist) can automatically upload your videos to GoPro Cloud. This makes it easy to access your footage from any device, including your Mac, even if the cable or SD card isn’t with you or you forgot the card reader at home.
Here’s how to download your GoPro videos from GoPro Cloud to your Mac:
Step 1. Open your browser on your Mac.
Step 2. Go to GoPro.com and sign in to your GoPro account.
Step 3. Open the Media Library section, select the clips you want to download, and click Download to save them to your Mac.
How to Recover Files Lost During Transfer
No matter which method you choose to transfer your GoPro files to Mac, unexpected issues can happen during the import process. Interrupted or incomplete transfers may cause your footage to disappear, and the same applies to corruption caused by viruses, power outages, improper ejection, or even accidental deletion. But you don’t need to give up immediately, уou still have a chance to get those files back.
If the files aren’t in Trash, or if the reason for data loss bypasses the Trash entirely (for example, SD card formatting, corruption, or failed transfer), you’ll need data recovery software. These tools scan the memory card’s file system and attempt to find any files that still physically exist on the drive. Before you start, you must stop using your memory card to avoid overwriting recoverable data.
When it comes to choosing recovery software, we consistently recommend Disk Drill. It offers a high recovery rate across all common data-loss scenarios and supports every GoPro file type. More importantly, Disk Drill can recover fragmented video files – a frequent issue with GoPro cameras and a feature that many other recovery programs simply don’t support.
Step 1. Download Disk Drill from the official website and install it on your Mac.
Step 2. Launch Disk Drill (Finder > Applications) and connect your SD card if the deletion happened on the memory card.
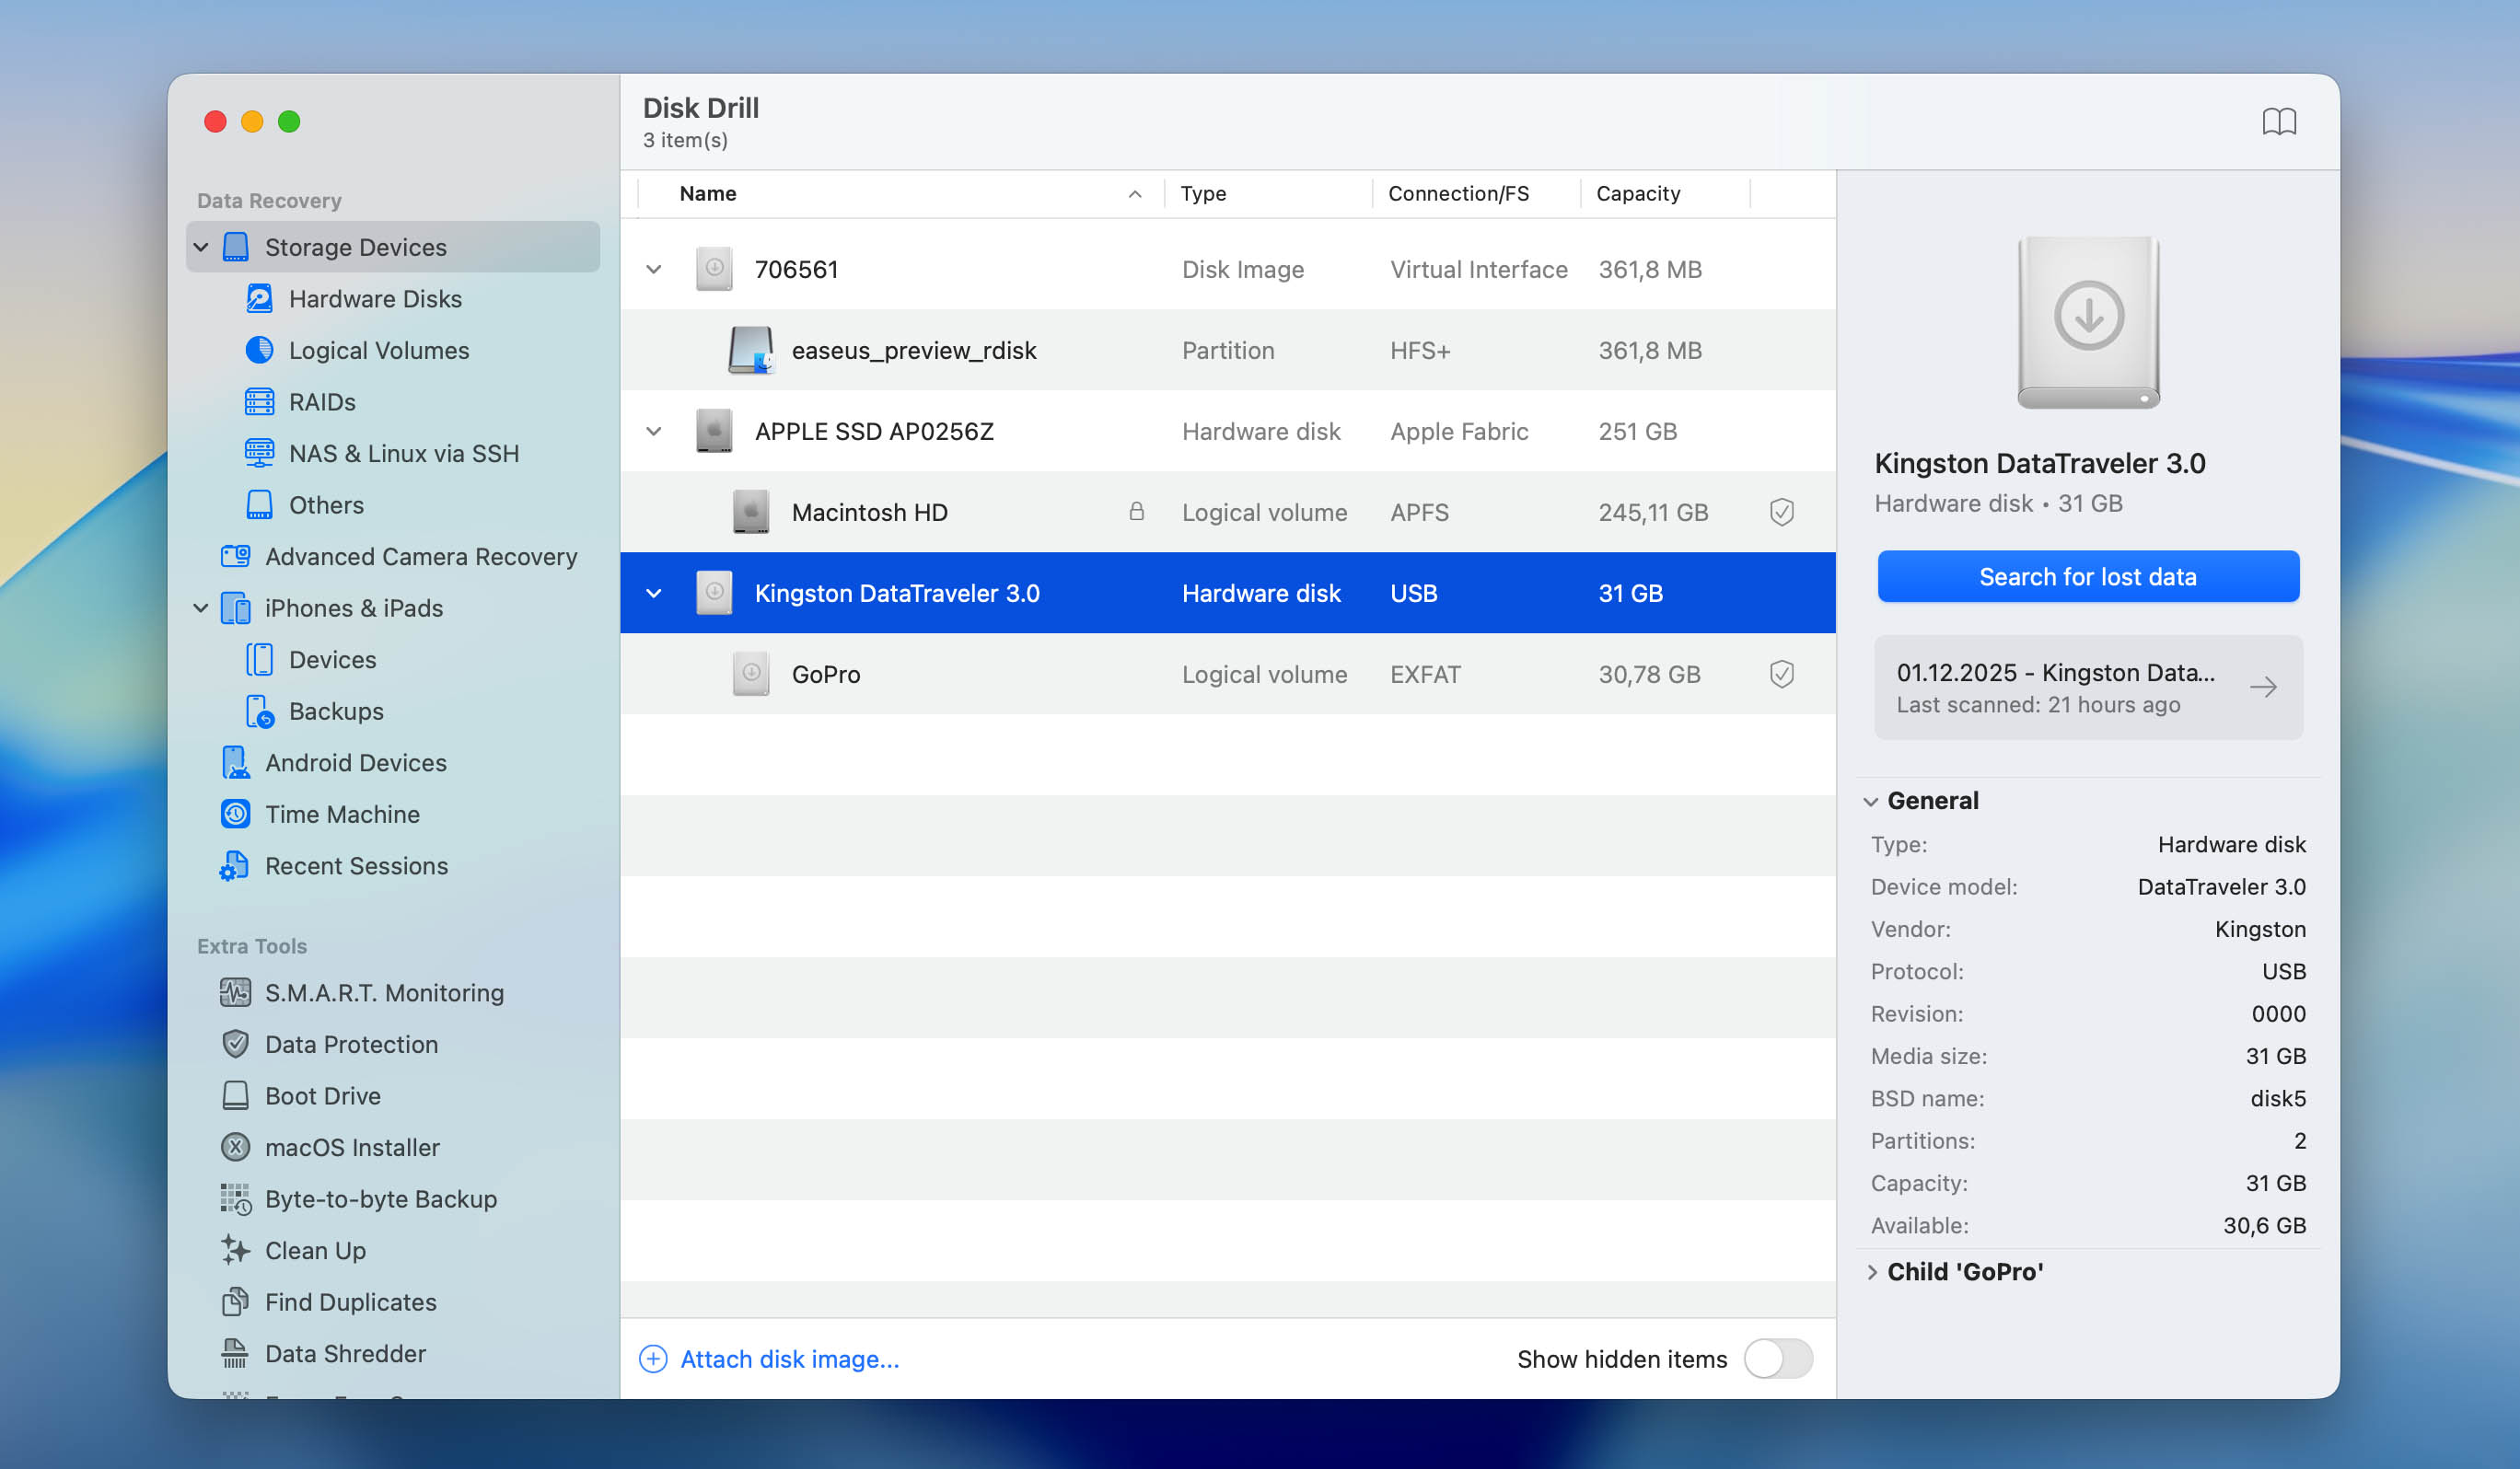
Step 3. Select your SD card or storage device in the middle pane (It may appear as “Generic Storage Device” when using a card reader). Click Search for lost data.
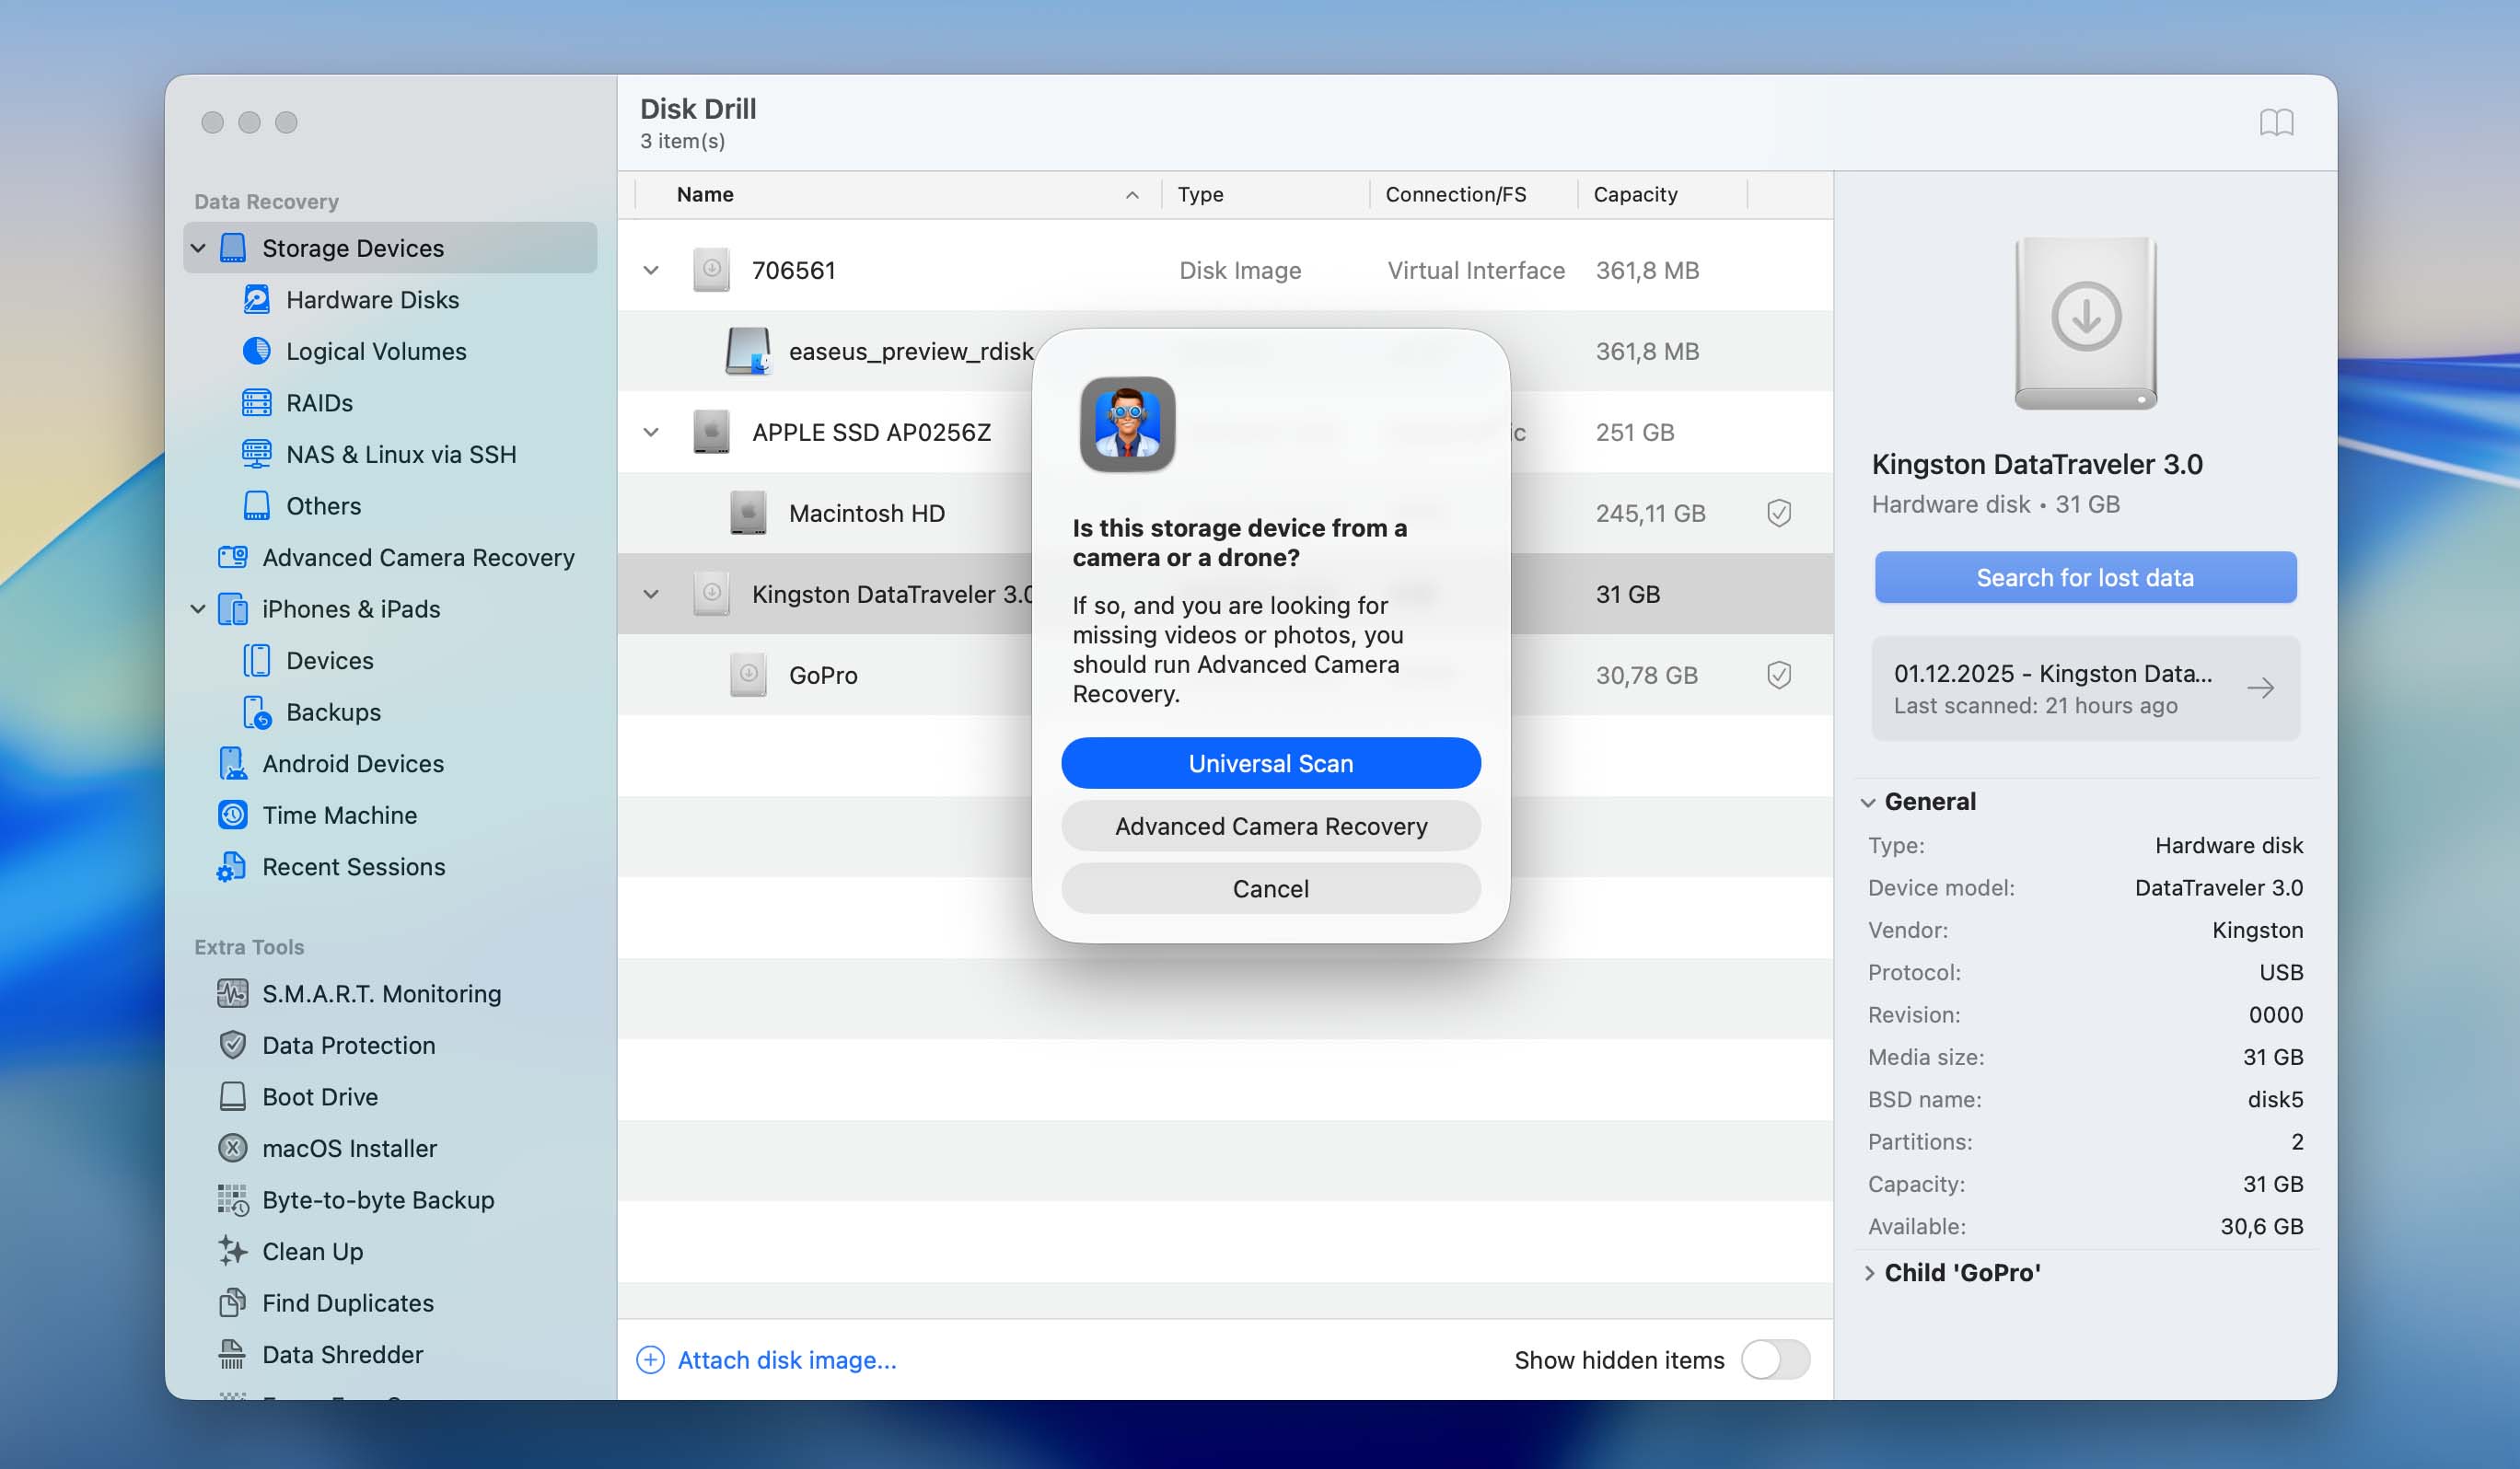
Step 4. Disk Drill will offer two scan types: Universal Scan and Advanced Camera Recovery. We recommend starting with Universal Scan. If it doesn’t deliver the results you expect, run Advanced Camera Recovery as a second scan.
Step 5. Wait for the scan to finish, then click Review found items.
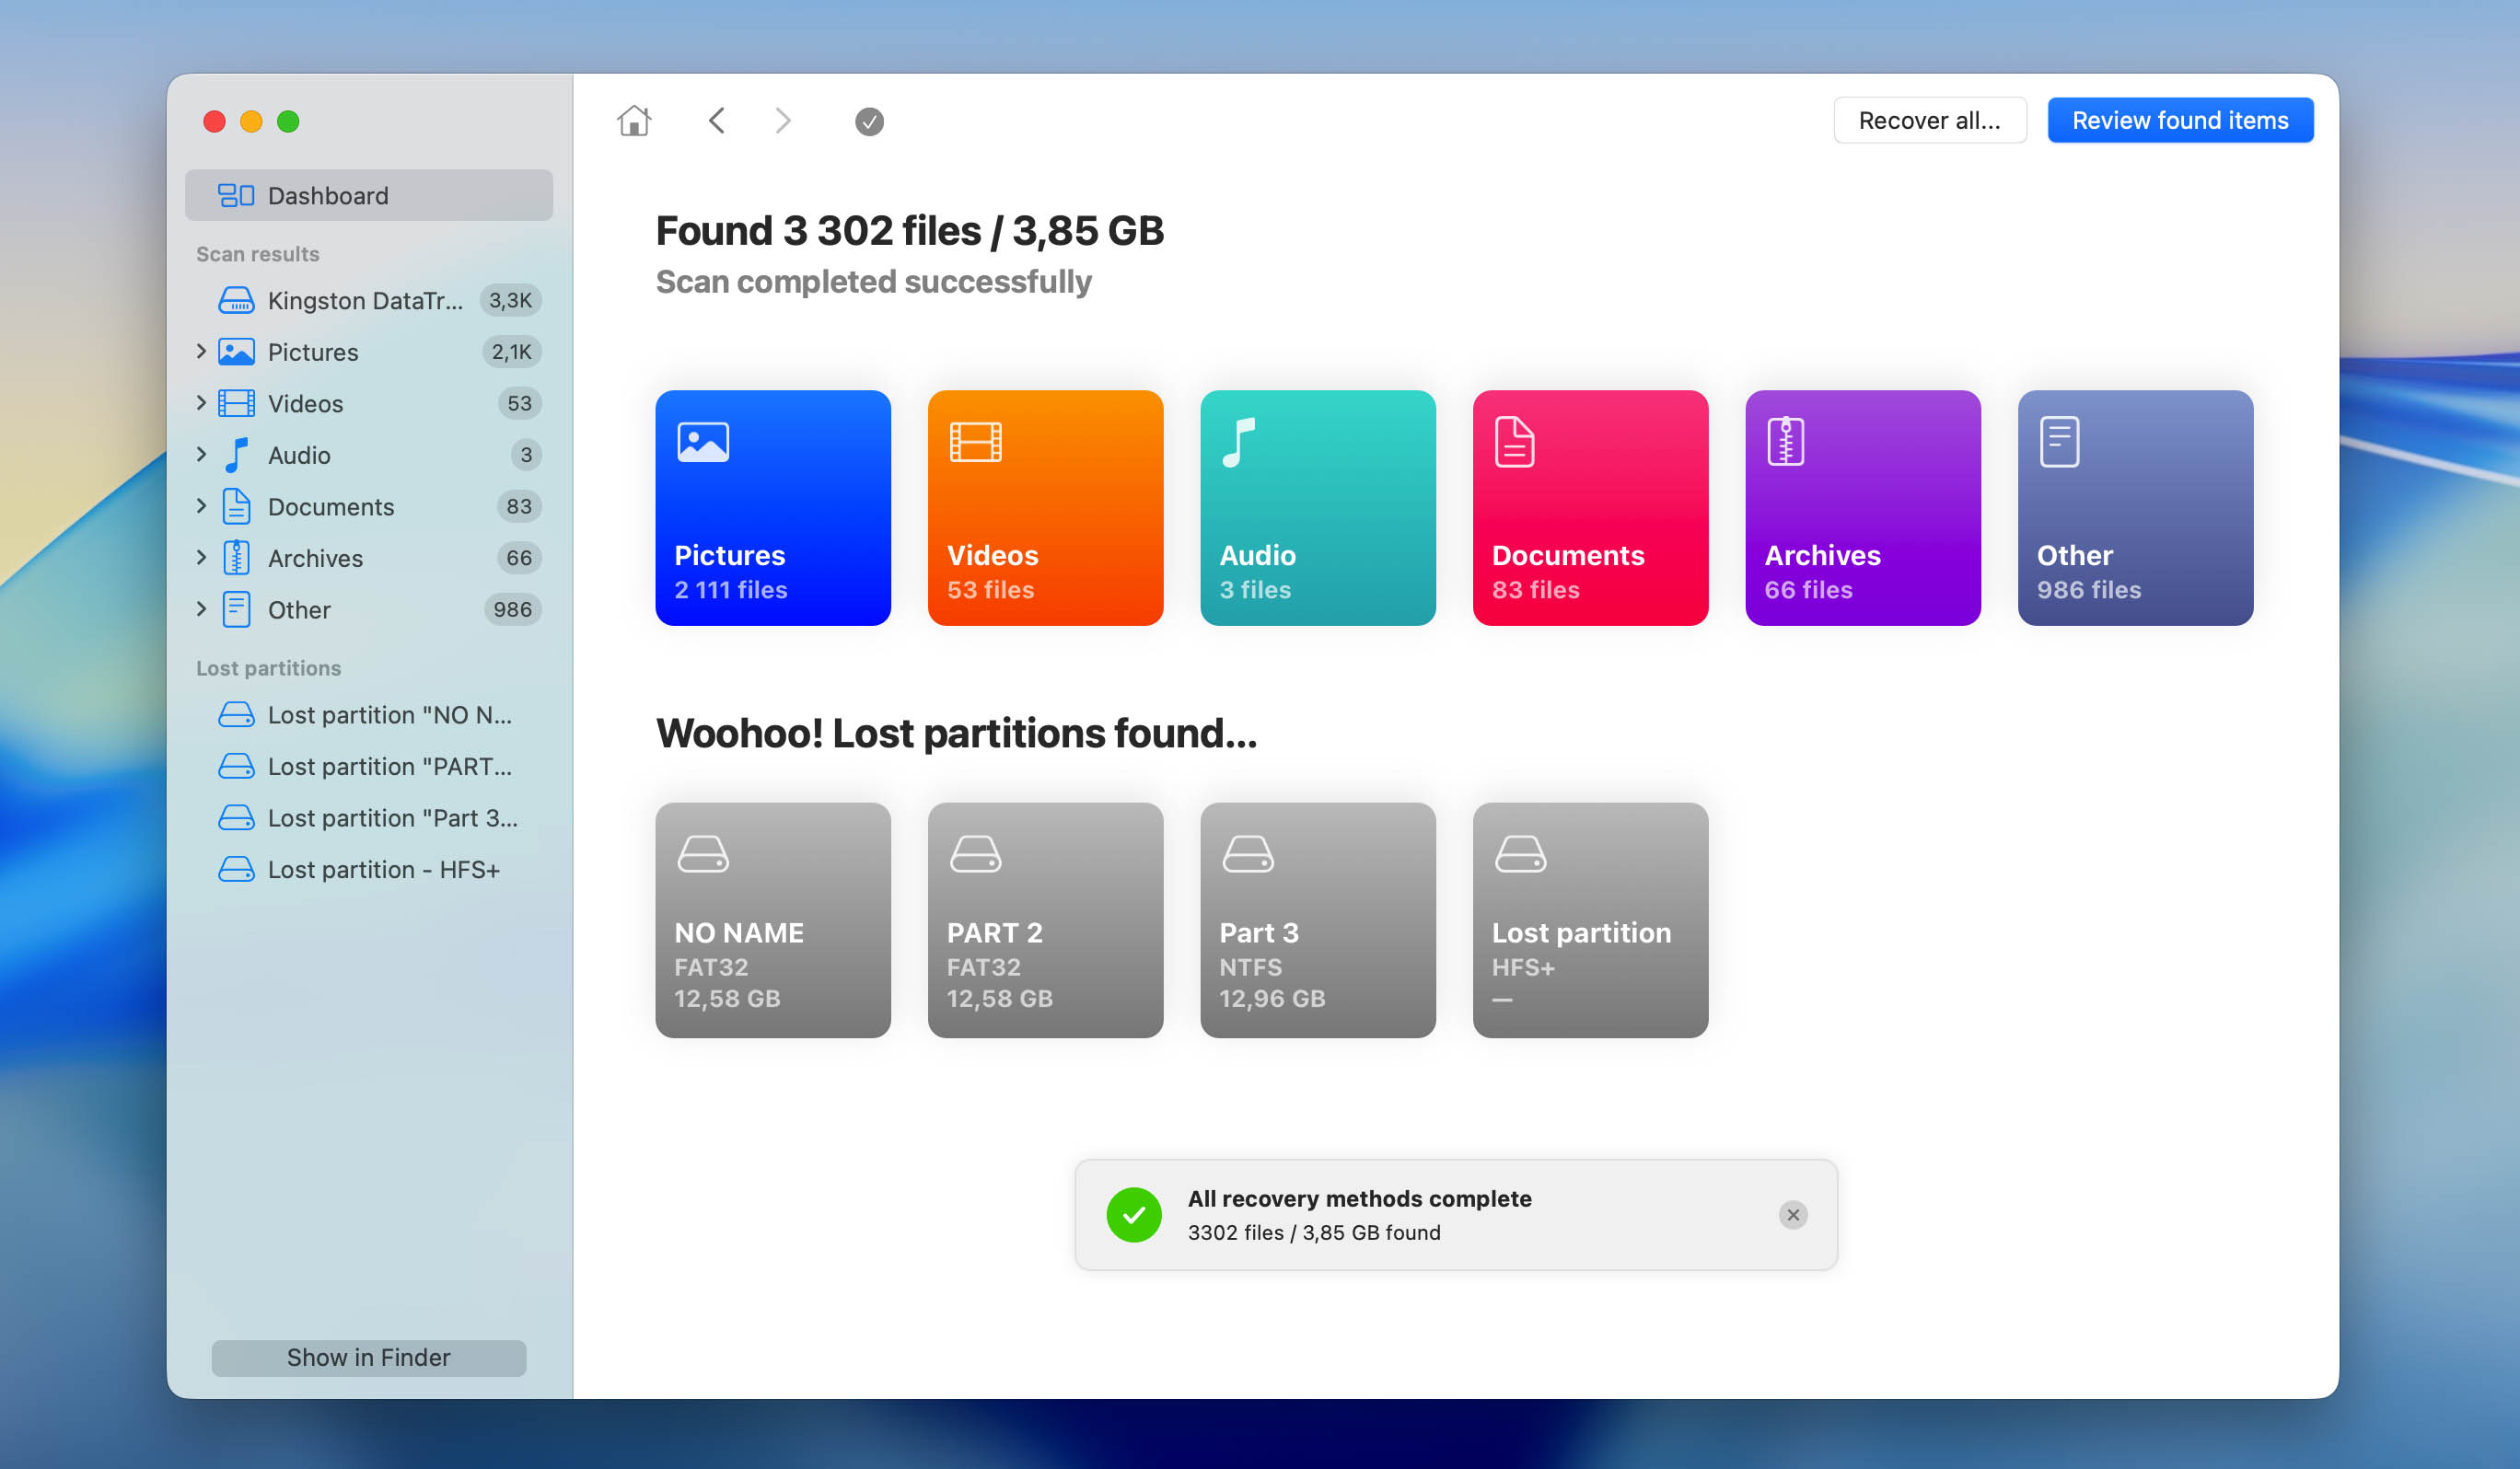
Step 6. Disk Drill may display a large number of old or system files. Use the search bar and the sidebar filters to locate your GoPro videos faster. You can also preview files by hovering your cursor to the right of the filename and clicking the eye icon.

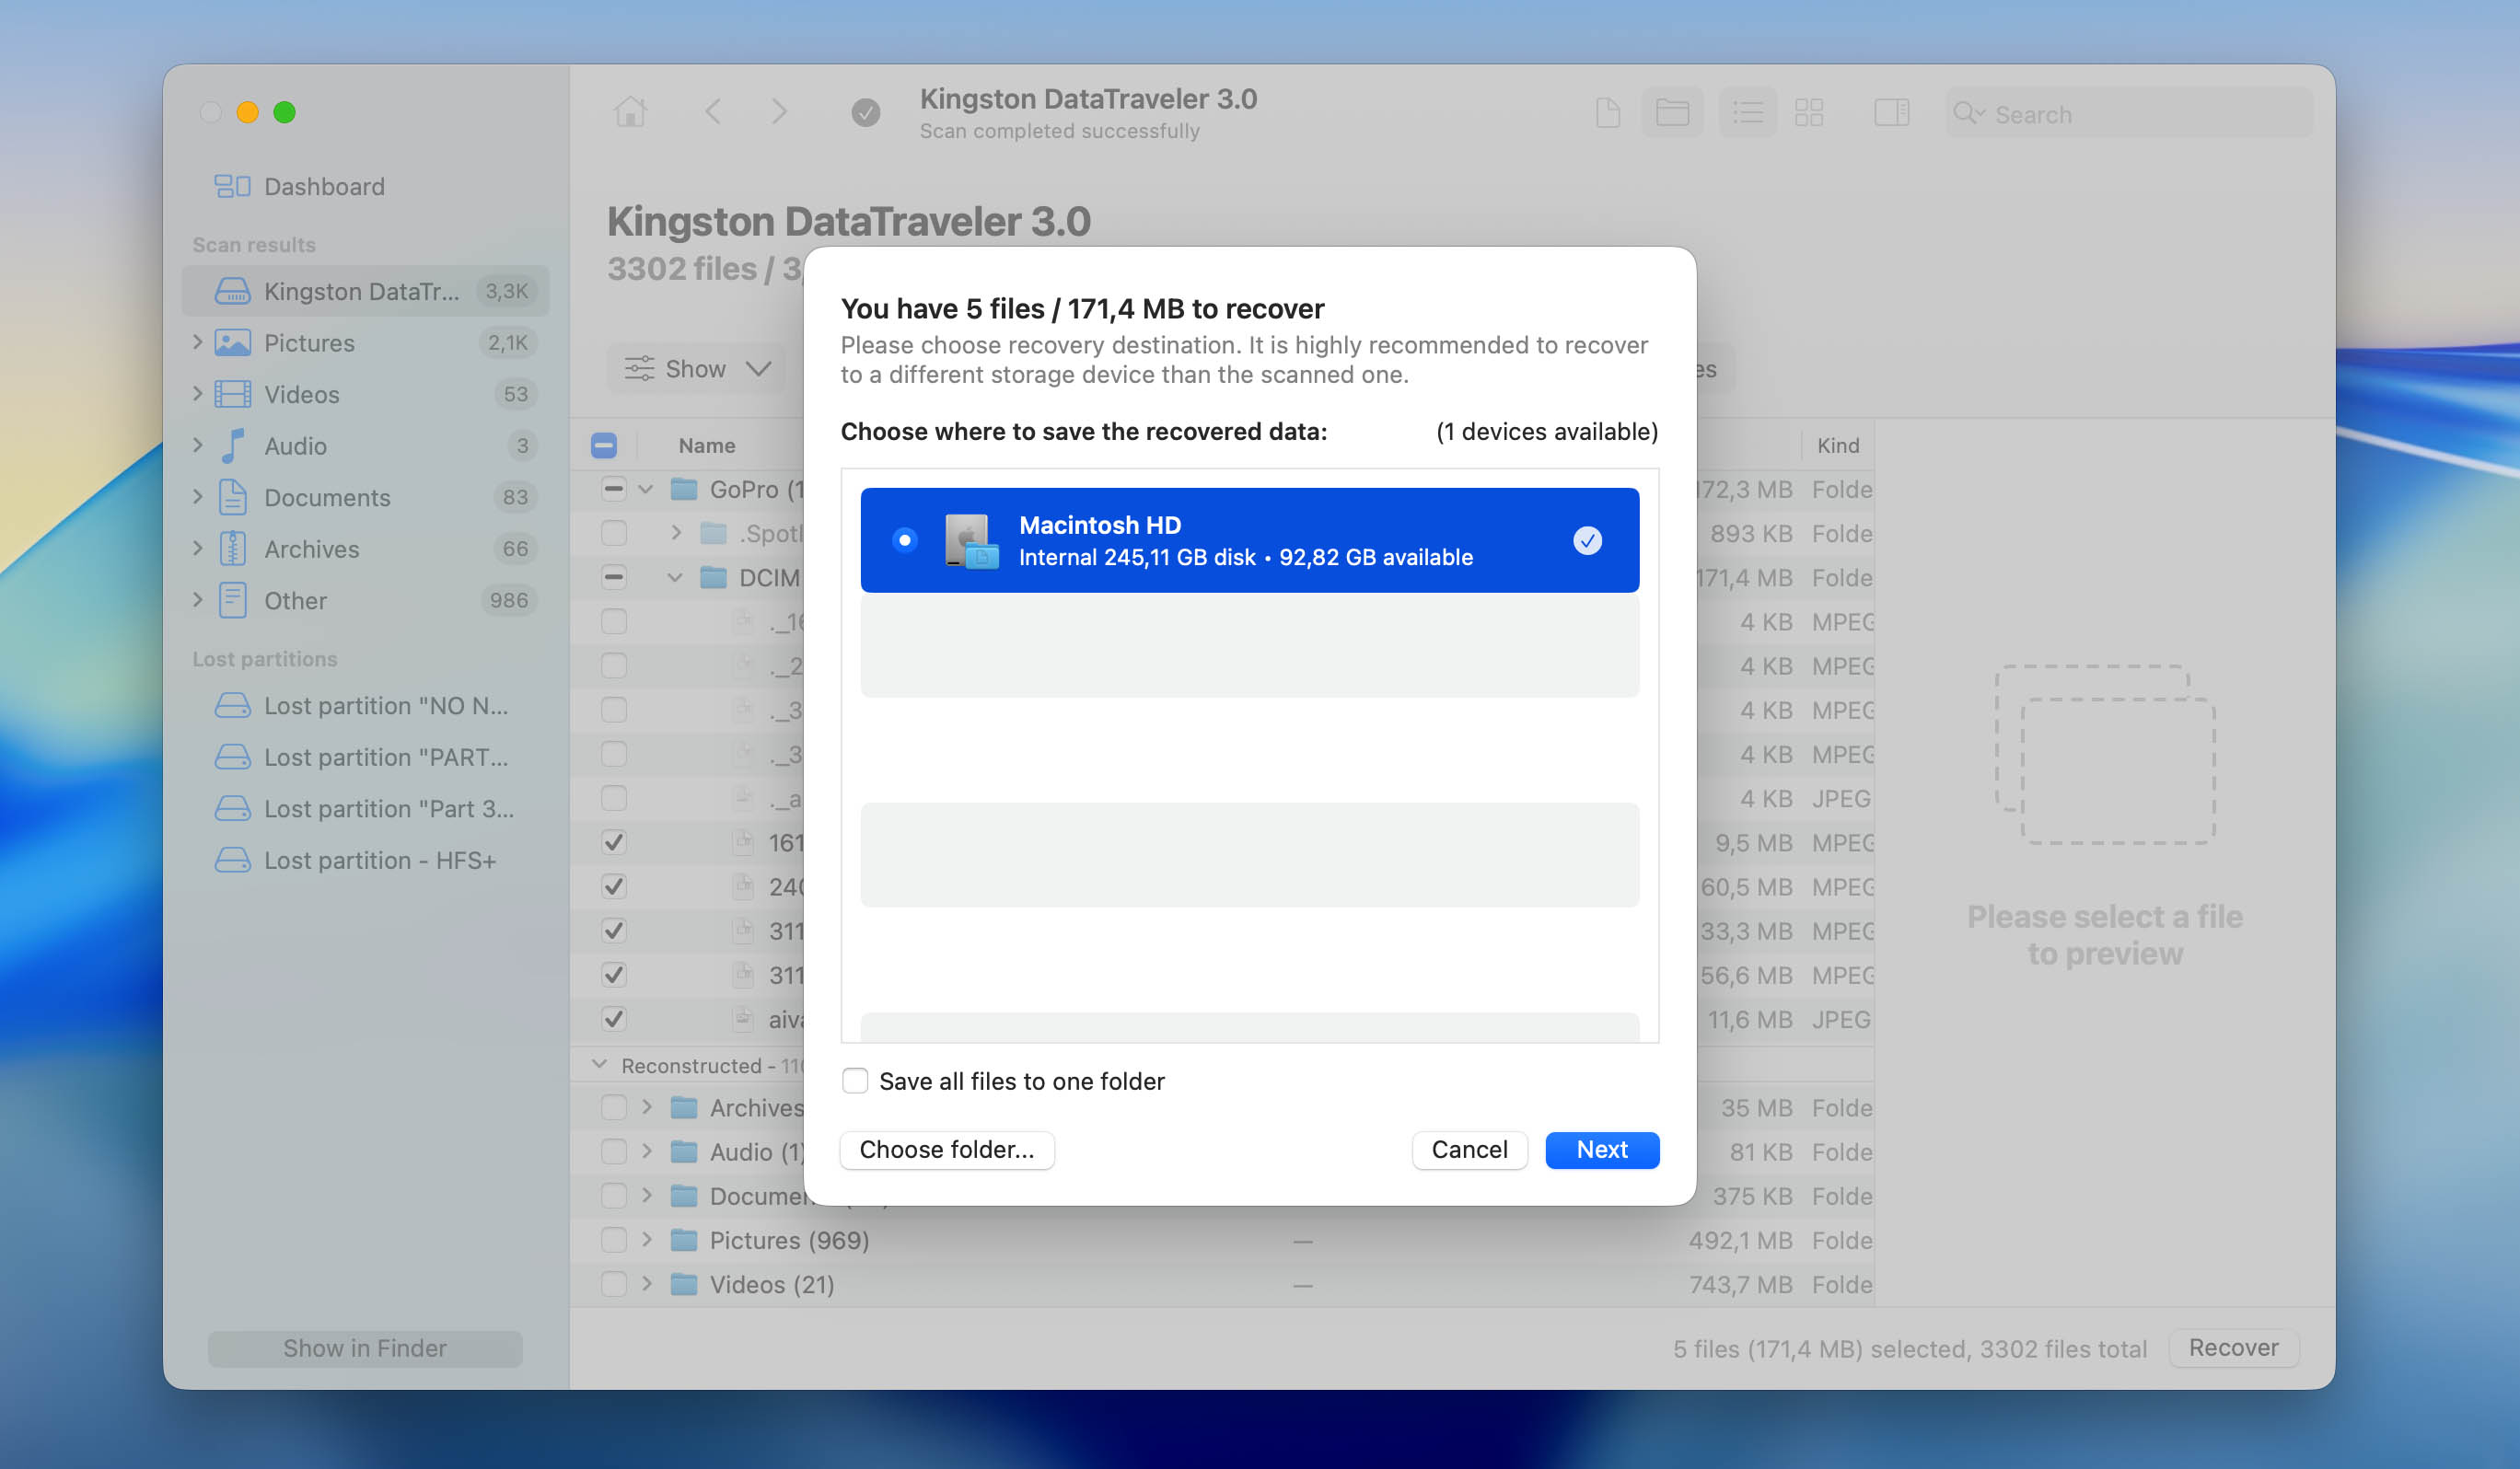
Step 7. Mark the files you want to recover by checking the boxes in the left column. Then click Recover.
Step 8. Choose a folder on your Mac where the restored videos will be saved and click Next to begin recovery. Once Disk Drill completes the process, you may close the application.
Conclusion
90% of the time, it should be straightforward to import videos from GoPro to Mac. However, certain issues may arise that affect the camera, your Mac, or your memory card. Your data is never 100% safe unless you regularly create a backup. We highly suggest using Time Machine and/or investing in Disk Drill’s lifetime license to make sure you never have to face the consequences of data loss.
FAQ
There are several ways you can get GoPro footage onto Mac.
- The easiest way to get video from a GoPro to your computer is to remove the microSD card from the camera and connect it using an SD card reader. Once the card appears on your desktop, open Finder, go to the DCIM folder, and copy the video files to any location on your computer.
- If you don’t have a card reader, you can connect your GoPro directly with a USB cable and use tools like MacDroid (Mac) or the built-in File Explorer (Windows), depending on how your device is detected.
- Users with GoPro Subscription can also download their footage from GoPro Cloud by signing in at GoPro.com and using the Media section.
- Regardless of the method, copying the files is safer than moving them – you can always delete the extra copy later.
You can view GoPro videos on your Mac without importing them by opening the files directly from the SD card.
- Remove the microSD card from your GoPro, connect it to your Mac using an SD card reader, and open Finder. Select your SD card in the sidebar, go to the DCIM folder, and double-click any video to play it. macOS will open the clip in QuickTime or your default media player without copying anything to your computer.
- If you don’t have a card reader, you can connect your GoPro with a USB cable and use an app like MacDroid. Your camera will appear in Finder, and you can open and view videos directly from the device without importing them.
To take out the SD card from your GoPro, follow the steps below:
- Pull down the latch on the right-side corner of your GoPro camera. Then lift it up to see the battery and microSD card. If you’re using Hero 7 or older, you will find the latch at the bottom of your GoPro. To access it, press the rectangular button, then slide the compartment door.
- Take out the battery. Then, gently press down on the microSD card. It should pop out when you release your hold. Gently pull it out.


