Whether you’ve made an error when managing your files/partitions or something else caused your data to disappear from your WD My Passport drive, recovery is often possible. However, you need to act quickly and use the right tools to maximize your chances of success. In this guide, I’ll show you proven methods to recover lost files from your WD My Passport drive on Mac.
Table of Contents
Is It Possible to Recover Data from WD My Passport?
Yes, data recovery from a WD My Passport drive is possible in most cases, but success depends primarily on whether the missing data is still physically present on the drive.
What I mean by data still being physically present is that all files are stored as sequences of ones and zeros on your drive’s magnetic surface or flash memory chip. When you delete files or format a drive, the operating system simply removes the references to where these sequences are located, but the actual data remains until new files overwrite the same physical space. The data also remains in place when the references to it become corrupted or damaged by malware.
While your data is still physically present on the drive, its recovery is possible (not guaranteed, but definitely possible).
It’s only when the data gets overwritten by new files that recovery becomes impossible. This is why you should stop using the drive immediately after discovering data loss and why successful recovery often depends on how quickly you take action.
How to Retrieve Files from My Passport on Mac
Okay, so we’ve established that the recovery of lost or missing data from your WD My Passport is possible if the data is physically present on the drive—but how do you actually get it back since you can’t see it in Finder? The answer is data recovery software (or professional data recovery services, but I’ll get to that in a moment).
Method 1: Use Data Recovery Software
Data recovery software works by directly scanning your drive’s storage space and looking for traces of lost files. It then makes it possible to recover all found files to a safe destination.
Among the many solutions available to Mac users, Disk Drill is by far my favorite choice for recovering data from WD My Passport drives, and there are many reasons for it, including:
- Comprehensive support for all file systems commonly found on WD drives, including HFS+, APFS, FAT32, exFAT, and NTFS.
- The ability to recover data from RAW drives that have lost their file system entirely.
- Combines file system analysis with signature-based scanning that recognizes over 400 different file types.
In addition to recovery performance, Disk Drill excels in the usability department. Its interface is clean and intuitive, guiding you through the recovery process step by step. You can preview recoverable files before committing to recovery, and the smart file organization system automatically categorizes found files for easier browsing. You can also take advantage of built-in search and filtering options to locate specific files among hundreds or thousands of recovery results.
Here’s how to recover lost data using Disk Drill from a WD My Passport drive:
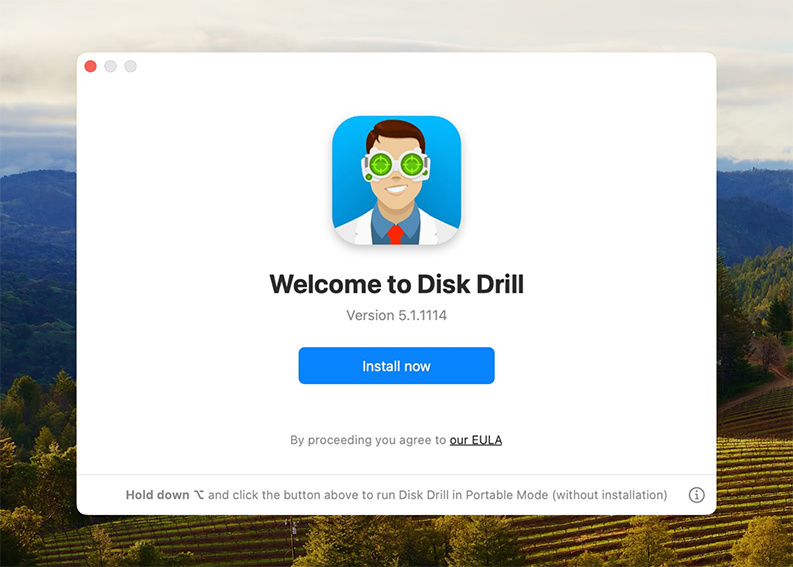
- Download Disk Drill from its website. You then need to install it on your computer. The installation process is straightforward. Simply double-click the downloaded .dmg file and then follow the installation wizard.
- Connect your WD My Passport drive to your Mac using the original cable or a high-quality replacement. Make sure the connection is stable as a loose connection can interrupt the scanning process. Wait for your Mac to recognize the drive. If the drive isn’t showing up in Disk Utility, try a different USB port or check our troubleshooting guide.
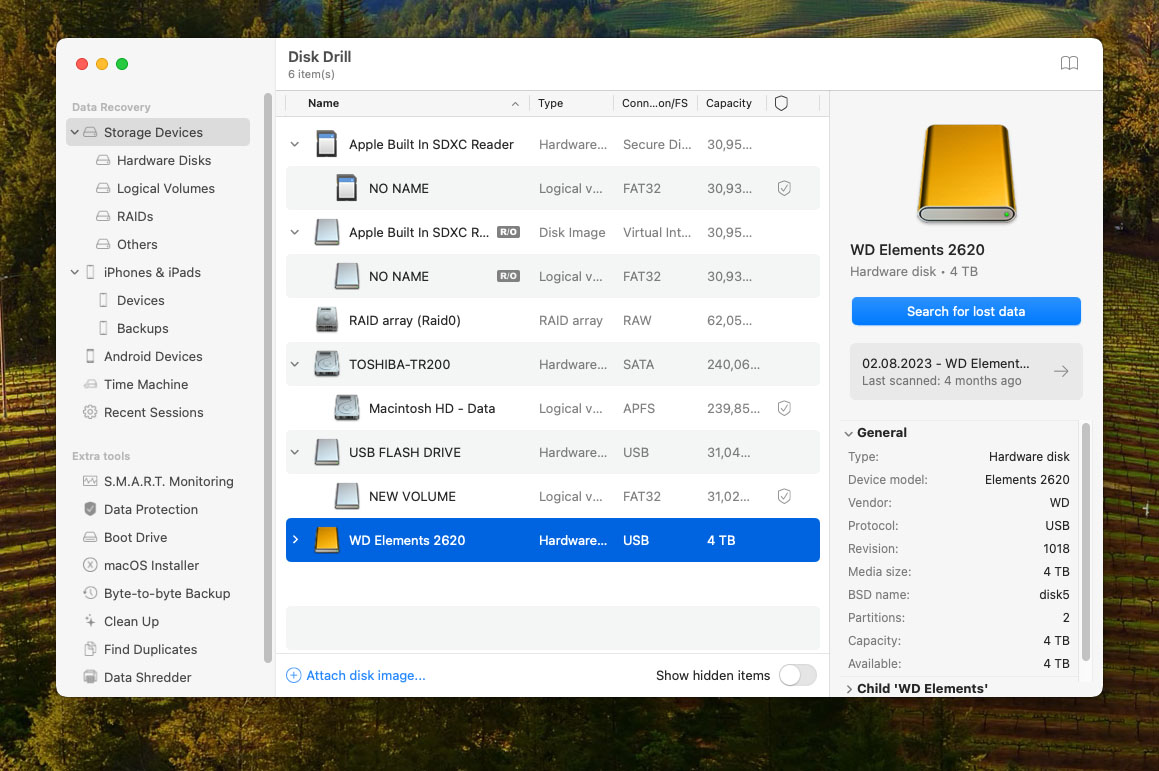
- Launch Disk Drill and locate your WD My Passport drive in the main window. You’ll see both the drive itself and any partitions it contains. For the most thorough scan, select the physical drive (usually listed with its exact capacity) rather than individual partitions. Click the Search for lost data button to begin scanning.
- After the scan, you’ll see a list of files you can recover. Select all important files by clicking the checkboxes next to them. You can use the file type filters on the left to focus on specific categories and the search bar to find specific files by name or extension. Many file formats (especially multimedia ones) can be previewed directly inside Disk Drill to visually confirm their integrity.
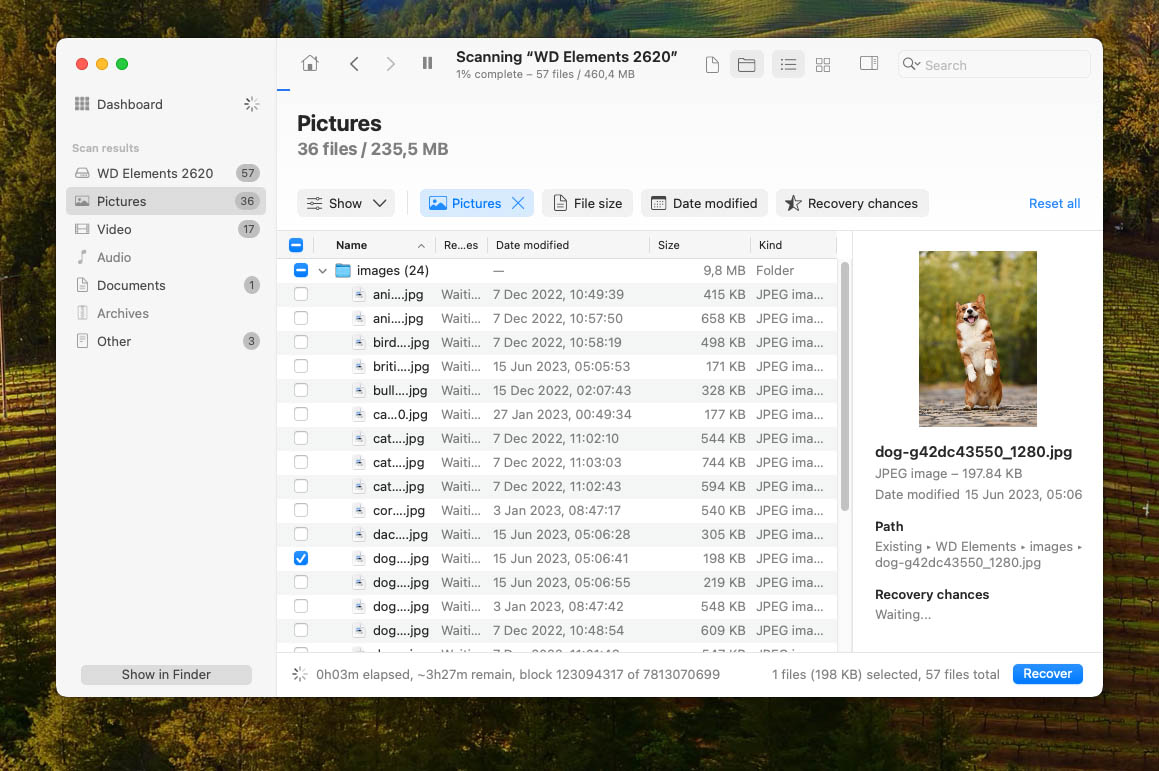
- After selecting the files you want to recover, click the Recover button and choose a recovery destination on a different drive. Recovering files back to the same drive you’re recovering from could overwrite other recoverable files and make them permanently unrecoverable, so don’t do that—ever.
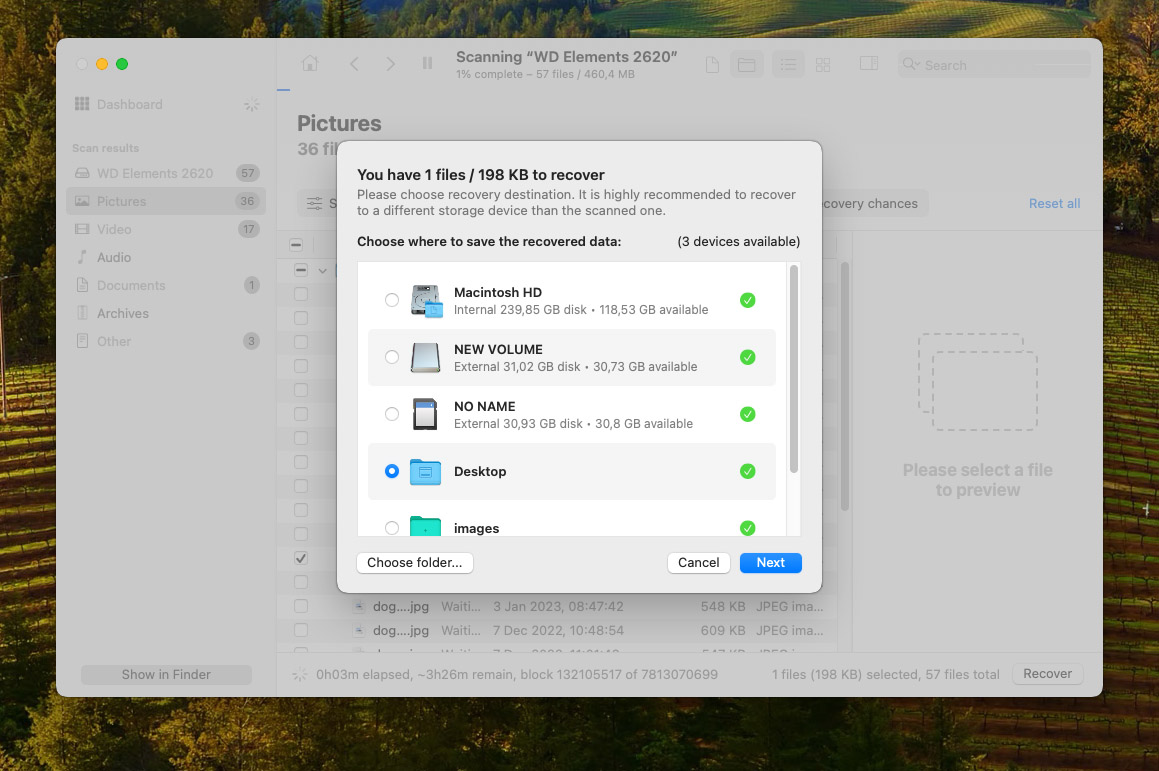
The free version of Disk Drill allows you to perform complete scans and preview all recoverable files. To actually recover the files, you’ll need to upgrade to Disk Drill PRO. It’s a one-time purchase that gives you unlimited recovery capabilities and free updates within your version.
Method 2: Use a Data Recovery Service
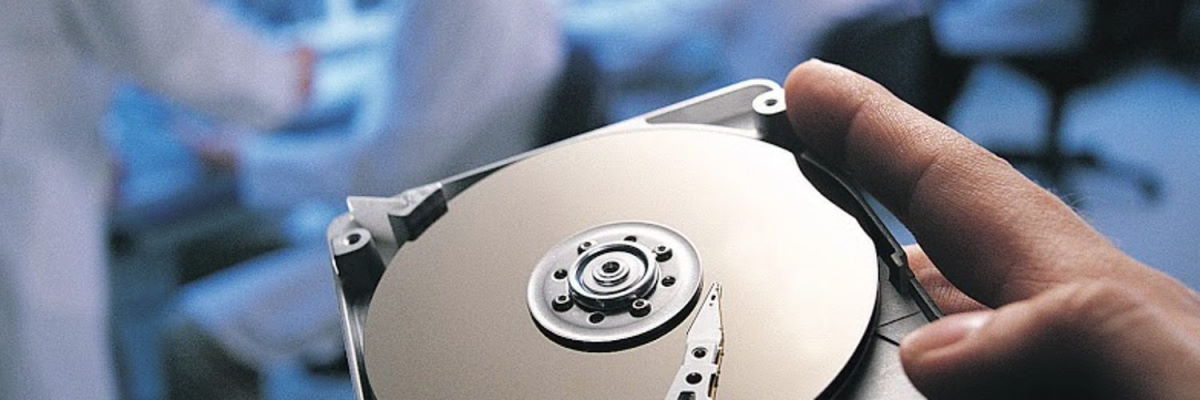
While recovering data from WD My Passport drives at home using Disk Drill is straightforward enough that even inexperienced users can attempt it safely, there are situations when professional data recovery services make more sense:
- Physical damage: If your drive is making clicking or grinding sounds, won’t spin up, or has been exposed to water/fire, attempting DIY recovery could cause further damage. Professional services have specialized equipment and clean rooms for safely handling damaged drives.
- Company data: If you’re dealing with a work-provided storage device, attempting DIY recovery might not be the best choice. While most employers understand occasional data loss (especially when caused by factors like malware rather than carelessness), making recovery impossible through failed DIY attempts could have serious consequences.
As a Western Digital customer, you can retain the warranty status of your drive if your data recovery service of choice provides you with written verification of the data recovery job on its company letterhead, as explained on Western Digital’s support page.
Western Digital has several data recovery partners around the world:
- Americas: Secure Data Recovery Services, DriveSavers Data Recovery, Datarecovery.com, Ontrack Data Recovery
- Europe, Middle East, and Africa: Datarecovery.com, Secure Data Recovery Services, DriveSavers Data Recovery, Ontrack Data Recovery
- Asia, Pacific, and Japan: DriveSavers Data Recovery, Datarecovery.com, Secure Data Recovery Services, Ontrack Data Recovery
Just remember that data recovery services come at a cost, and that cost can be quite substantial. If the lost data is very valuable to you (or your employer), then spending a larger sum of money to get it back might be a good deal. If not, then data recovery software alone is your most cost-effective solution.
How to Avoid Losing Data on WD My Passport Drives in the Future
Whether or not you were able to recover your files this time (I really hope you were), you should take concrete steps to prevent future data loss. Here are my top tips to help protect your data on WD My Passport and other drives:
- 💿 Back up regularly: This is your best defense against any type of data loss. Set up automatic backups using Time Machine or another backup solution. Having multiple copies of important files means you’ll never have to worry about recovery.
- ⏏️ Always eject properly: Never disconnect your drive while files are being transferred otherwise file system corruption might occur. Right-click the drive in Finder and select “Eject” before unplugging. This simple step guarantees all write operations will be able to complete.
- 📁 Organize your files: Keep your drive well-organized with a clear folder structure to reduce the chances of accidentally deleting important files. Good file management will also make it easier to notice when something goes missing.
- 🔒 Be careful with disk utilities: Exercise caution when using disk management tools. Double-check your selections when formatting, partitioning, or performing other disk operations—a single mistake can lead to data loss.
- ⚠️ Handle with care: Protect your WP My Passport drive from physical damage by avoiding drops and strong impacts, keeping it away from extreme temperatures and moisture, and storing it in a protective case when not in use.
By following these tips, the chance of you encountering data loss issues with your WD My Passport drive will be significantly reduced.
Conclusion
Recovering data from your WD My Passport drive on your Mac doesn’t have to be a nightmare. With easy-to-use data recovery software like Disk Drill, it can be a matter of a few simple steps. And if that fails, then you can always contact a data recovery service and pay experienced professionals to have a go at it.
FAQ
To save files stored on your Mac to your WD My Passport drive:
- Connect your WD My Passport to your Mac using a USB cable.
- Open Finder on your Mac and locate the WD My Passport drive.
- Drag and drop files directly to the drive or copy (Command+C) files and paste (Command+V) them instead.
- Wait for the transfer to complete (you’ll see the progress bar disappear).
- Always eject the drive safely before disconnecting by right-clicking it in Finder and selecting Eject.
Follow these steps to install WD Discovery on your Mac:
- Download the latest version of WD Discovery for Mac from the official website of Western Digital.
- Open the downloaded installer file.
- Follow the on-screen instructions to install the software.
- Launch the WD Discovery application from your Applications folder.
- When prompted, allow the software to access your drive
To restore deleted or lost files from your WD My Passport drive:
- Download and install Disk Drill on your Mac.
- Connect your WD My Passport to your Mac using a USB cable. Then, Launch Disk Drill and select your WD My Passport from the list of available drives.
- Click Search for lost data and wait for the scan to finish.
- Choose the files you want to recover and click the Recover button.
- Select a recovery destination on your Mac or another drive—never recover files back to the WD My Passport you’re recovering from.
There are several potential problems that could cause your WD external hard drive to not show up on your Mac, including:
- Connection issues: To fix them, you can try a different USB port or cable, check the cable for damage and replace it if needed, or connect the drive directly to your Mac (not through a hub).
- Logical problems: The drive might be using an incompatible file system (like EXT4), might be corrupted, or might need formatting. Check Disk Utility to see if the drive appears there and if it needs repair or reformatting. If visible in Disk Utility but not Finder, the drive might just need to be mounted.
- Physical damage: If you hear clicking or grinding sounds, if the drive isn’t spinning up, or if it’s been exposed to water or extreme temperatures, the drive might be physically damaged. In such cases, stop using the drive immediately and consider professional data recovery services to prevent further damage.
To access your WD Password on Mac:
- Connect your WD Passport to your Mac using a USB cable.
- Launch Finder.
- Select your WD Passport from the list of available locations.
If you don’t see it in Finder, then you can launch the Disk Utility tool from Applications > Utilities and check if your drive appears there. If it does show up in Disk Utility but not in Finder, you might need to mount the drive, format it, or repair its file system using First Aid.


