
If your GoPro video is corrupted, don’t panic. In many cases, the problem is fixable using free and simple tools, even if you don’t have much tech knowledge. Most users will even be able to repair their corrupted footage to 100% of its original state – however, some will have to settle for a modified (a.k.a. converted) video file as a result of the repair.
This article covers all 4 methods that you can use to fix corrupted GoPro videos at different levels of severity. Read on!
Table of Contents
Before Trying to Fix Your GoPro Videos, Do These FIRST!
Successful repair isn’t always guaranteed and it heavily depends on the nature and severity of the corruption. However, there are a few things you can do to improve your chances, or at least prevent irreparable consequences (such as data loss):
- Safely eject your SD card from your GoPro – ASAP! If you find out about the corruption by trying to play back footage on your GoPro, immediately stop any playback and recording activities and safely eject your SD card from your camera. Do not use your SD card for any new footage until after you’ve repaired it.
- Back up your GoPro SD card. Use free apps like SuperDuper! or Carbon Copy Cloner to create a clone or an image backup of your SD card. Repairing corrupted files and corrupted disks always runs the risk of data loss. By backing up your data, you can freely attempt any repair methods.
Why are my GoPro videos corrupted? Corruption typically occurs if your GoPro or your SD card is interrupted while reading or writing data – in other words, something happened while you were recording footage or transferring files to and from your SD card.
4 Ways to Fix Corrupted GoPro Videos
In this section, we go over 4 distinct and reliable methods to fix corrupted GoPro video files on your Mac. Since it’s really tough to eyeball how badly your video is corrupted, we recommend going through all methods (starting with the easiest, Method 1).
Tip: We recommend downloading your GoPro video to your Mac instead of attempting to repair it directly on your SD card.
Method 1: Utilize the GoPro SOS Feature
GoPro SOS is a GoPro video repair tool that comes built into your GoPro itself. Unlike traditional repair tools, not much input or control is required from the user (if at all).
Step 1. Connect your SD card to your GoPro and turn it on.
Step 2. If you see “SOS”, “REPAIRING FILE”, a bicycle icon, or a bandage icon, it means that your GoPro detected and will try to repair the file. Press any button to trigger the repair action.
Method 2: Fix Your Corrupted GoPro Video Online
Clever Online Video Repair is one of a few known powerful web applications designed to fix moderate to severe cases of video corruption. If GoPro SOS can’t fix your footage, there’s a good chance that Clever Online Video Repair can do it.
We chose this tool because it’s much easier to use than other repair tools and techniques as you don’t need to manually convert anything or download any software. You just need to upload your file to their website, add some simple (optional) specifications, and click a few clearly labeled buttons – no tech knowledge needed. It’s also 100% free, unlike most other online video repair tools.
It also fully supports videos that use MP4 containers and HVEC (H.265) codecs, which make up the primary video output of GoPro cameras (it also supports H.264 codecs if needed).
To fix your corrupted GoPro video online using Clever Online Video Repair:
Step 1. On any browser, open the repair.cleverfiles.com website.
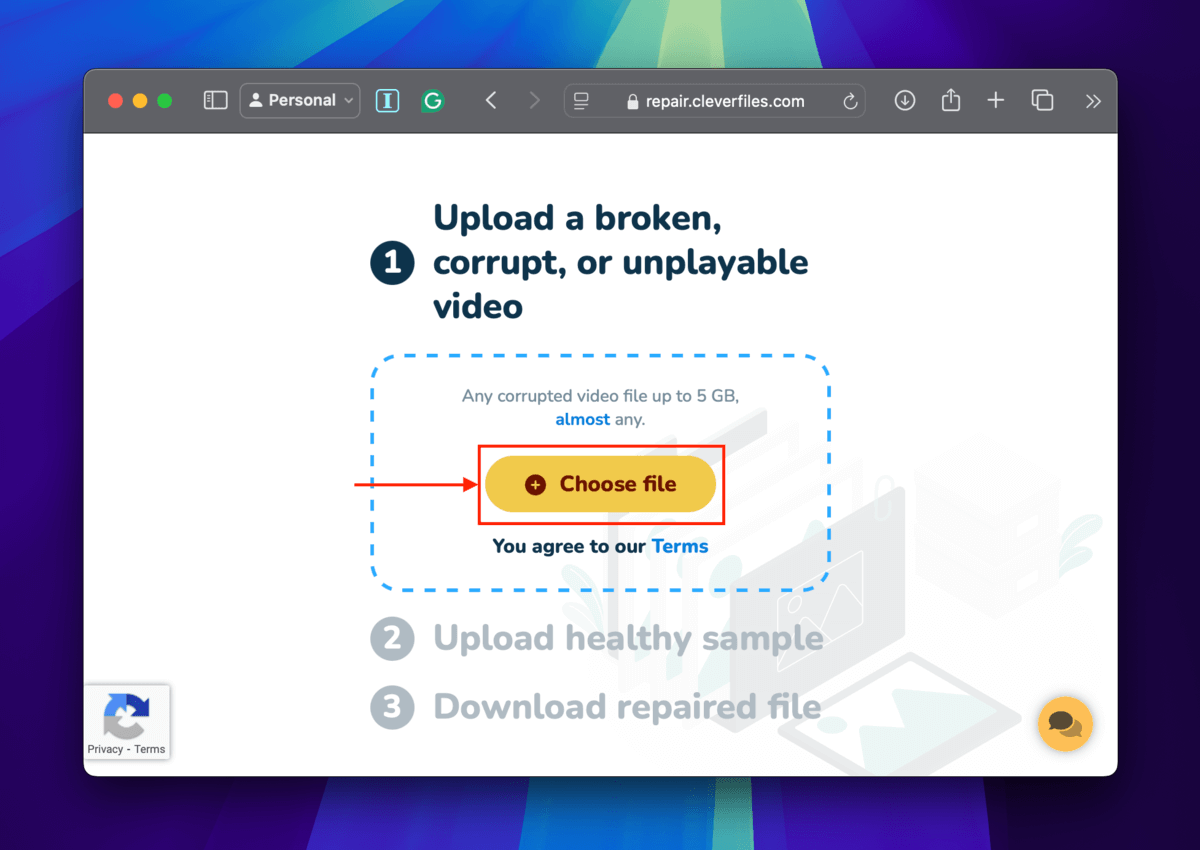
Step 2. Click the Choose file button.
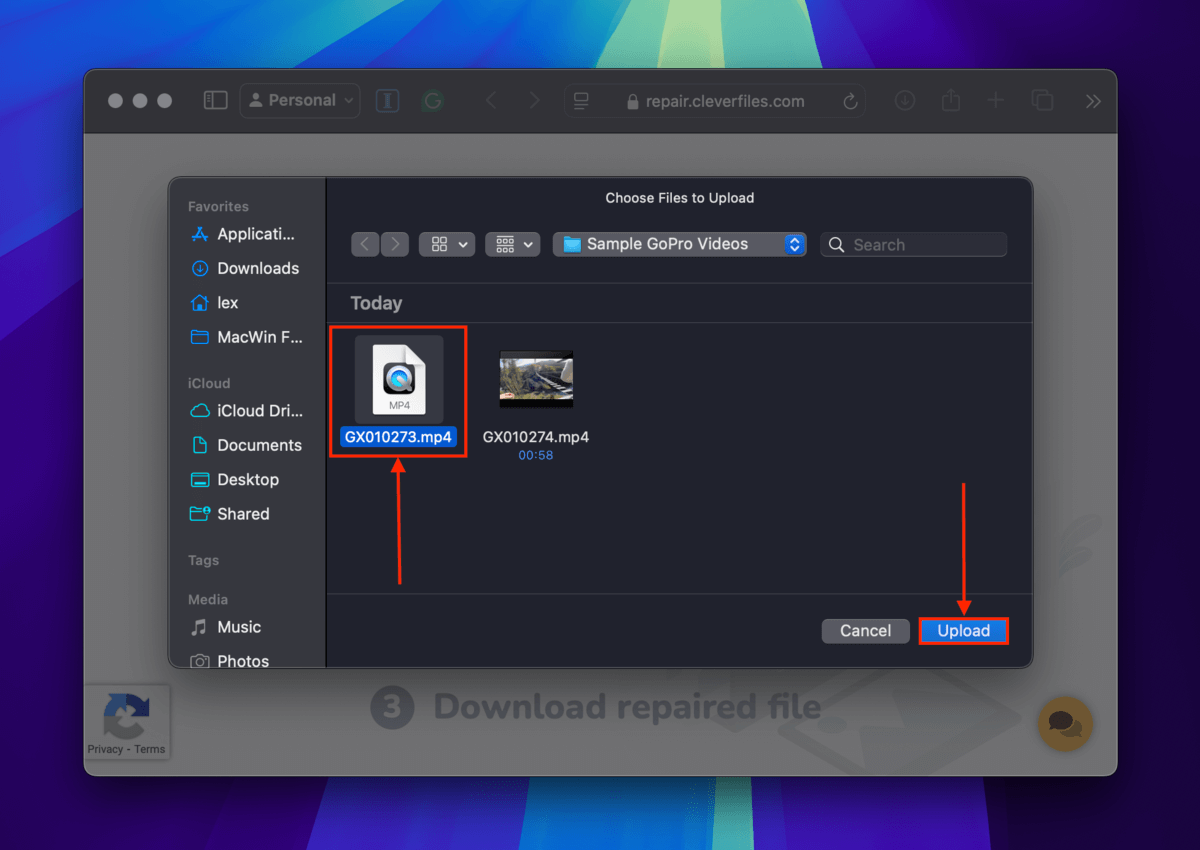
Step 3. In the dialogue menu, click your MP4 video file and click Upload.
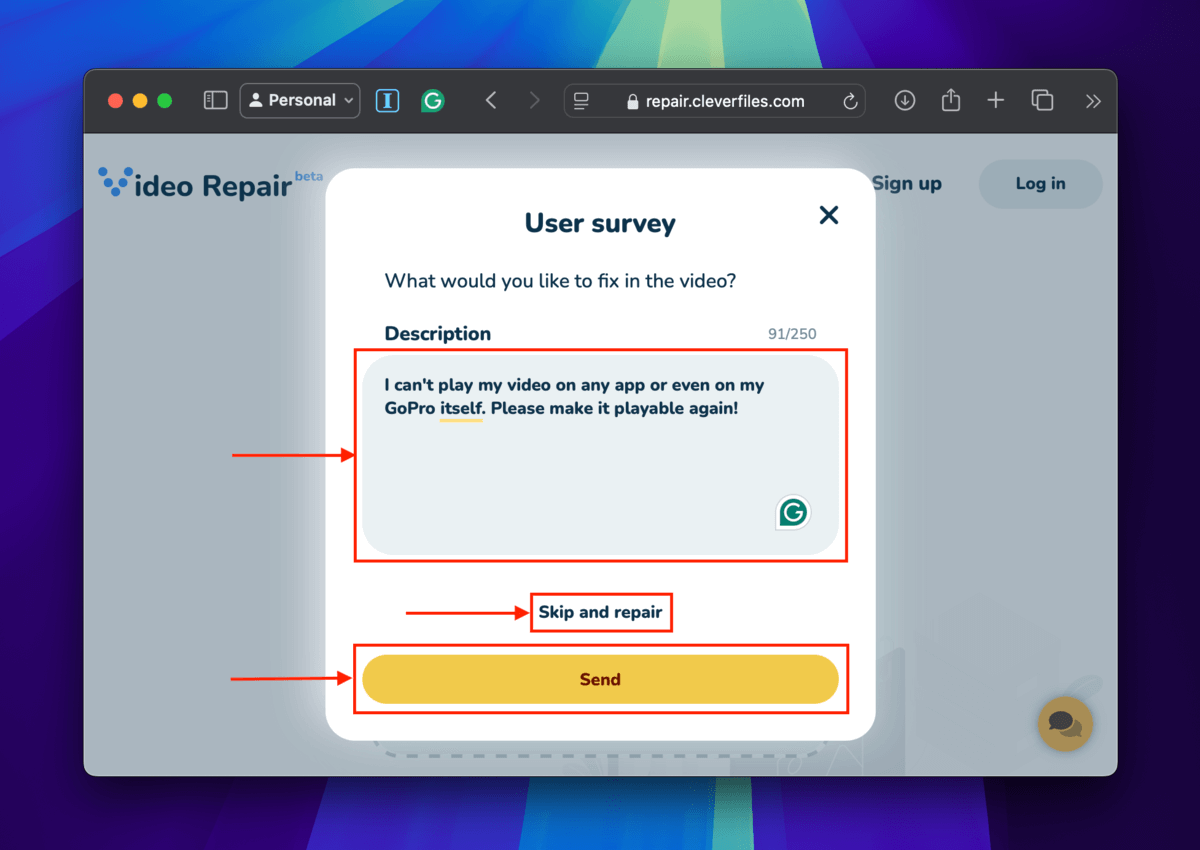
Step 4. You can fill in the optional User survey to help the CleverFiles team improve their tool. Simply describe the issue you’re experiencing and click Send. If you don’t want to answer the survey, click Skip and repair.
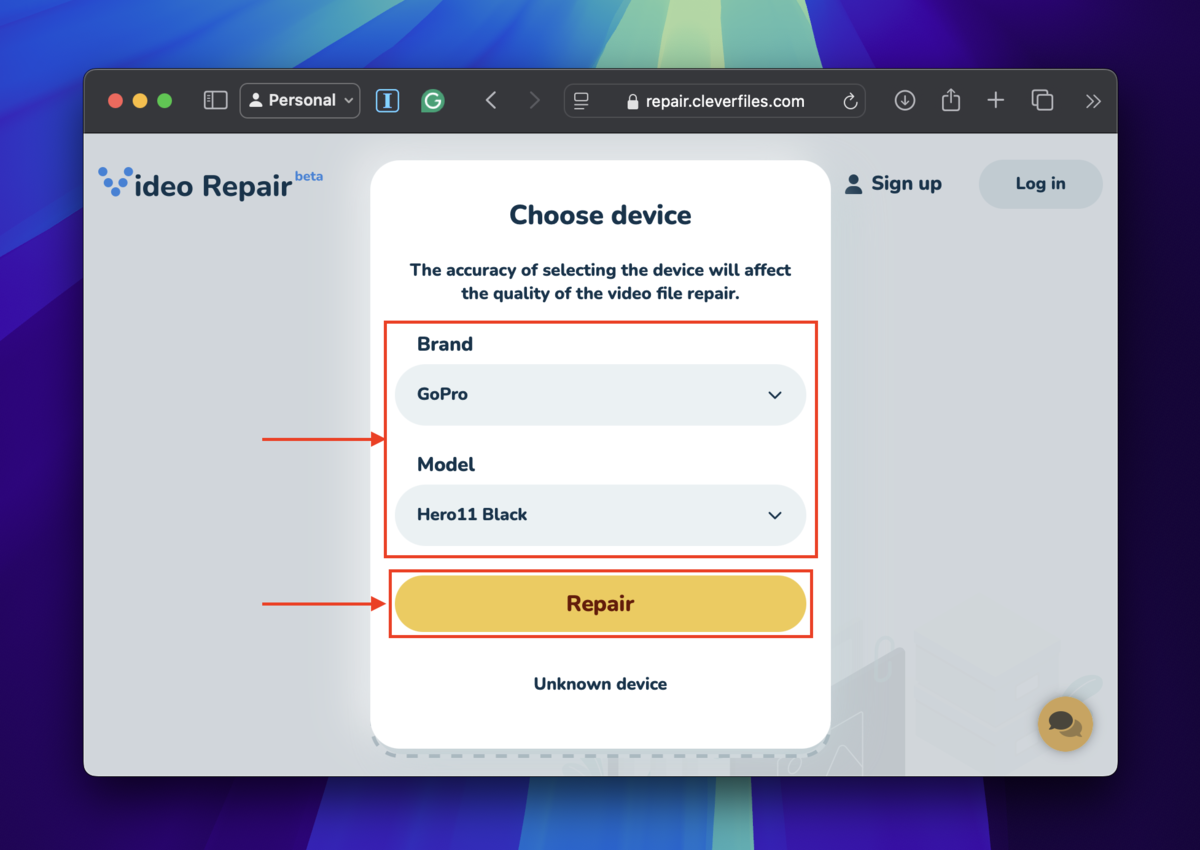
Step 5. Select your GoPro camera’s brand and model (you can find it in the manual or in your GoPro > Preferences > About > Camera Info). Then, click Repair.
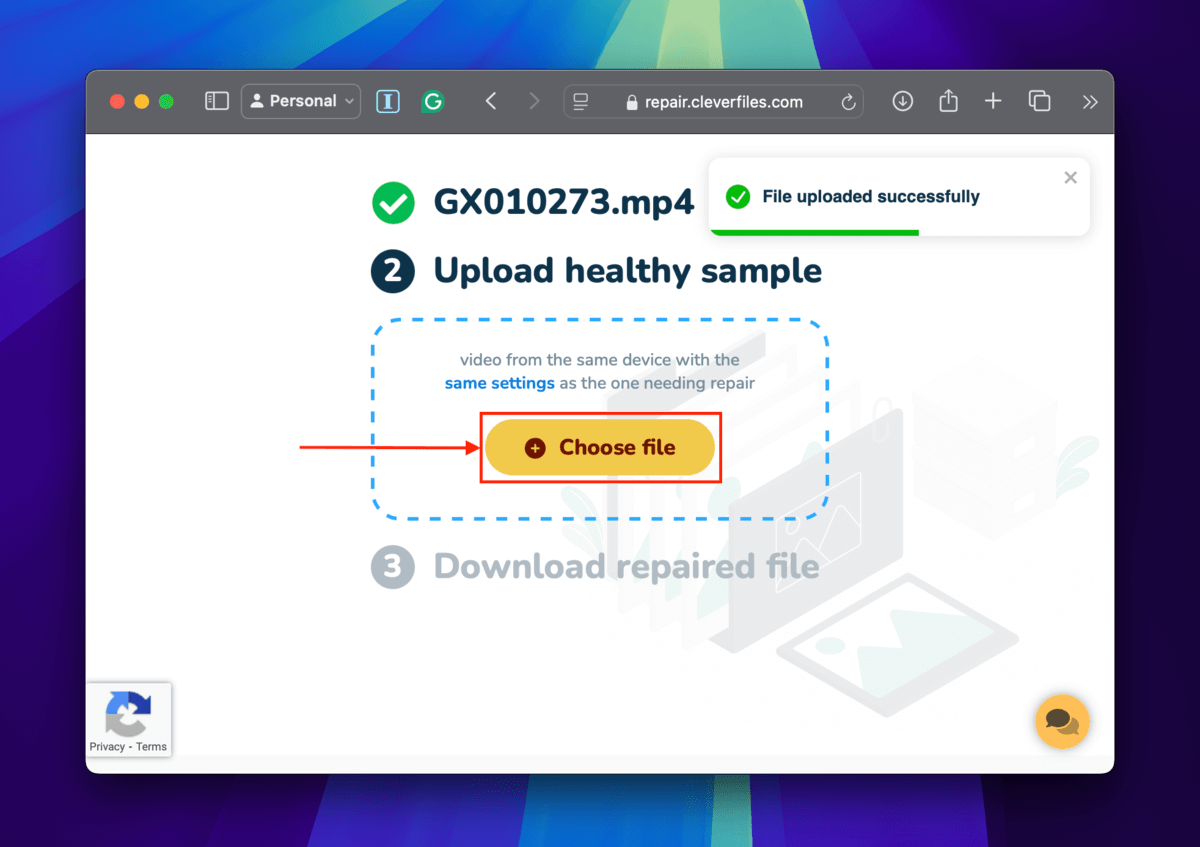
Step 6. Under Upload healthy sample, click Choose file.
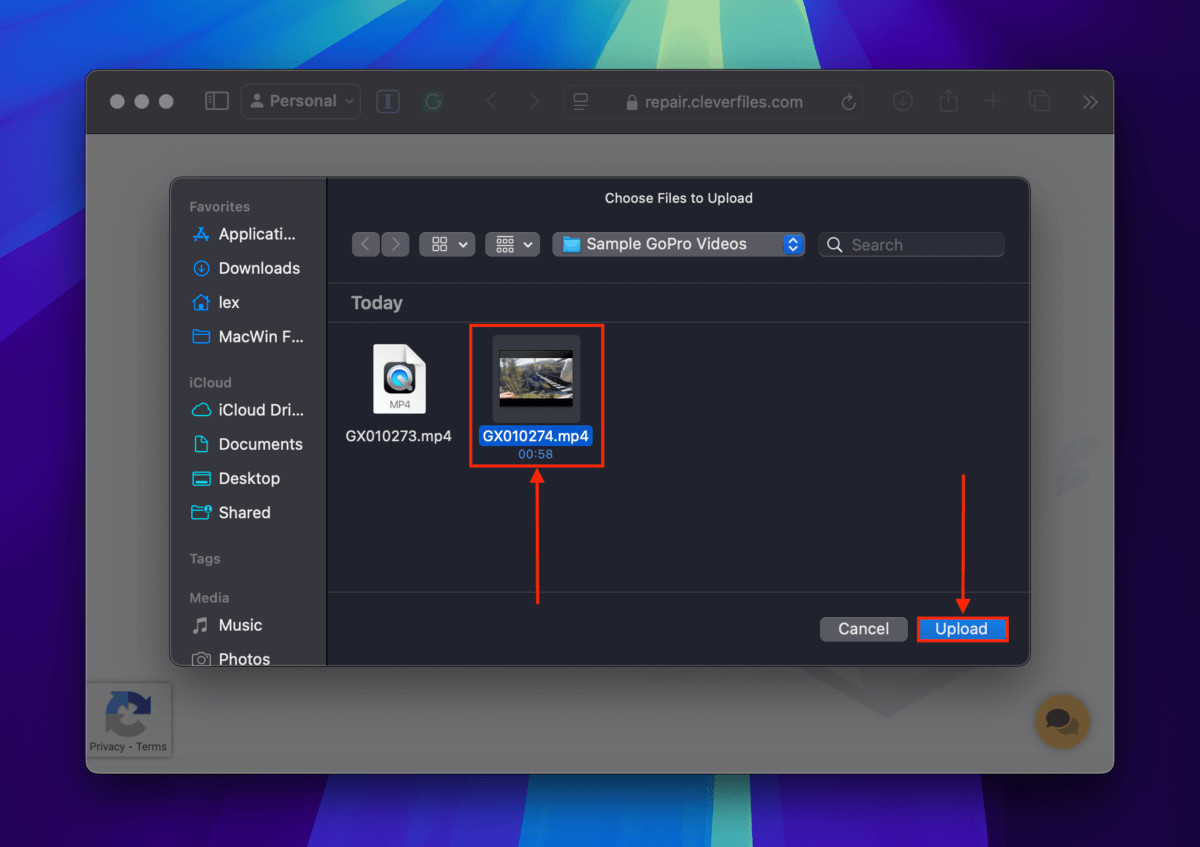
Step 7. Select a healthy video file that was taken adjacent to the corrupt footage. Then, click Upload.
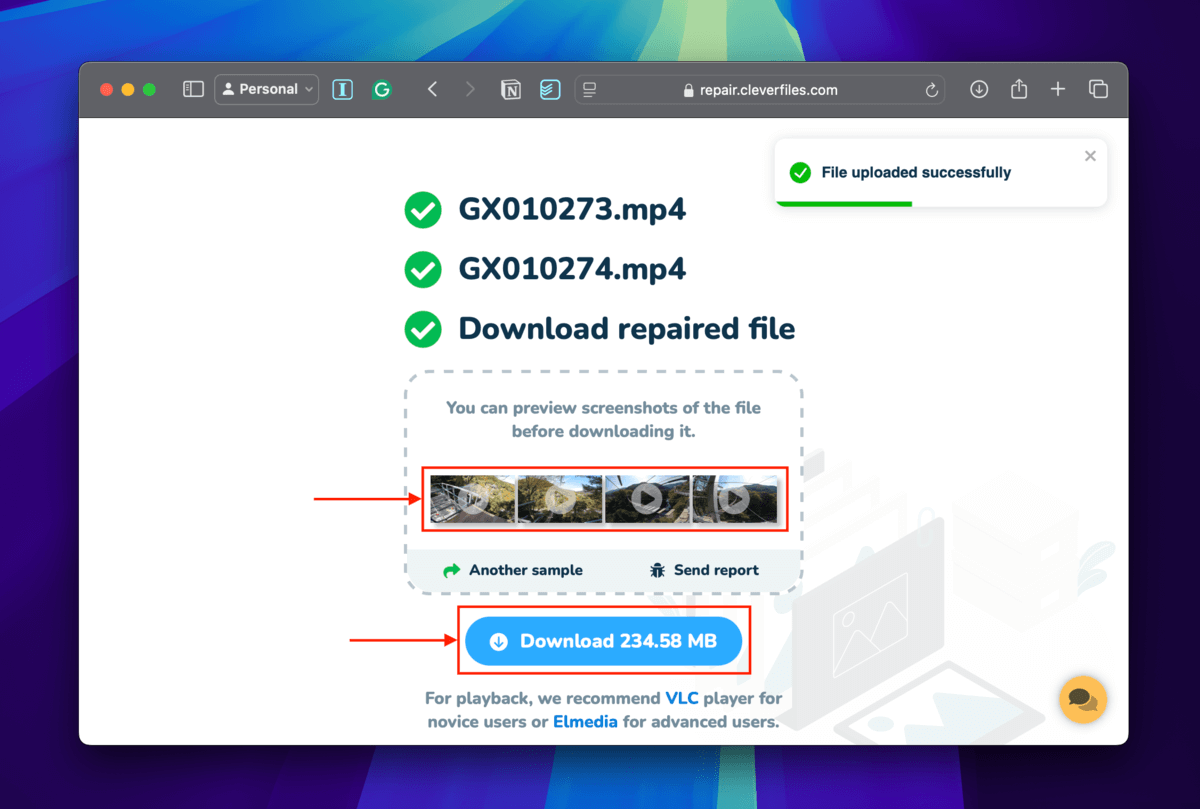
Step 8. Preview screenshots of the repair output to make sure that your video works. Then, click Download. Try playing the newly repaired video.
Method 3: Convert Your GoPro Video’s Codec From HVEC to H.264
As previously mentioned, GoPro outputs videos with the MP4 container and HVEC or H.265 codec, which supports up to 8K resolution at 300 fps. You can try converting your video’s codec to H.264.
It only supports up to 4K so expect some quality degradation, but this conversion may enable tools like VLC Media Player or FFmpeg to rebuild any damaged metadata and file headers or re-index your video’s frames if needed. These processes may be enough to fix your corrupted video file.
For this demonstration, we’ll be using VLC Media Player – it’s free and it has another tool we’ll use in the next method (in case this one doesn’t work).
Step 1. Download and install VLC Media Player on your Mac.
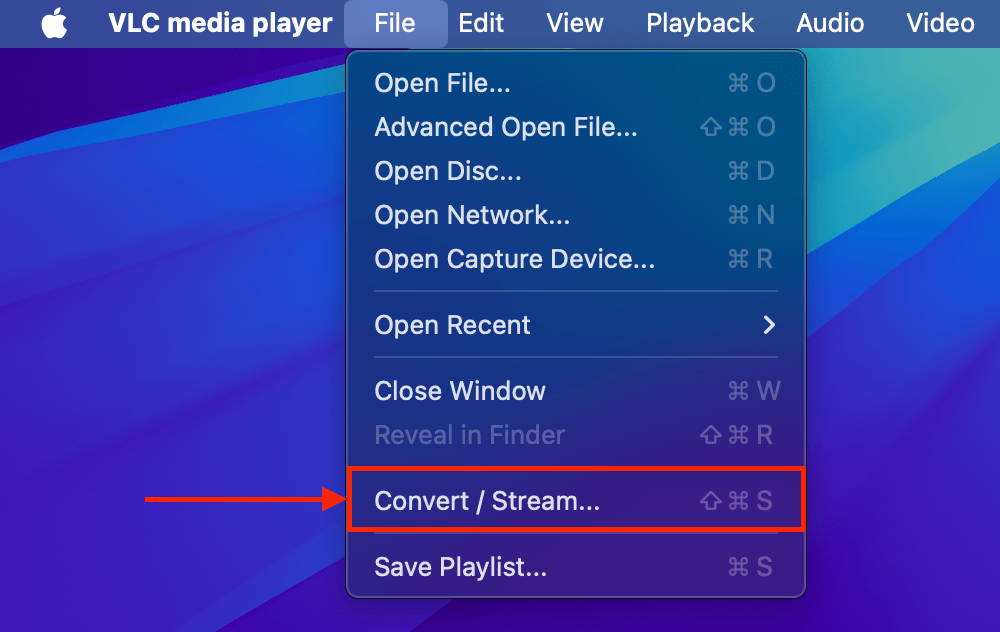
Step 2. Open VLC Media Player and click File > Convert / Stream…
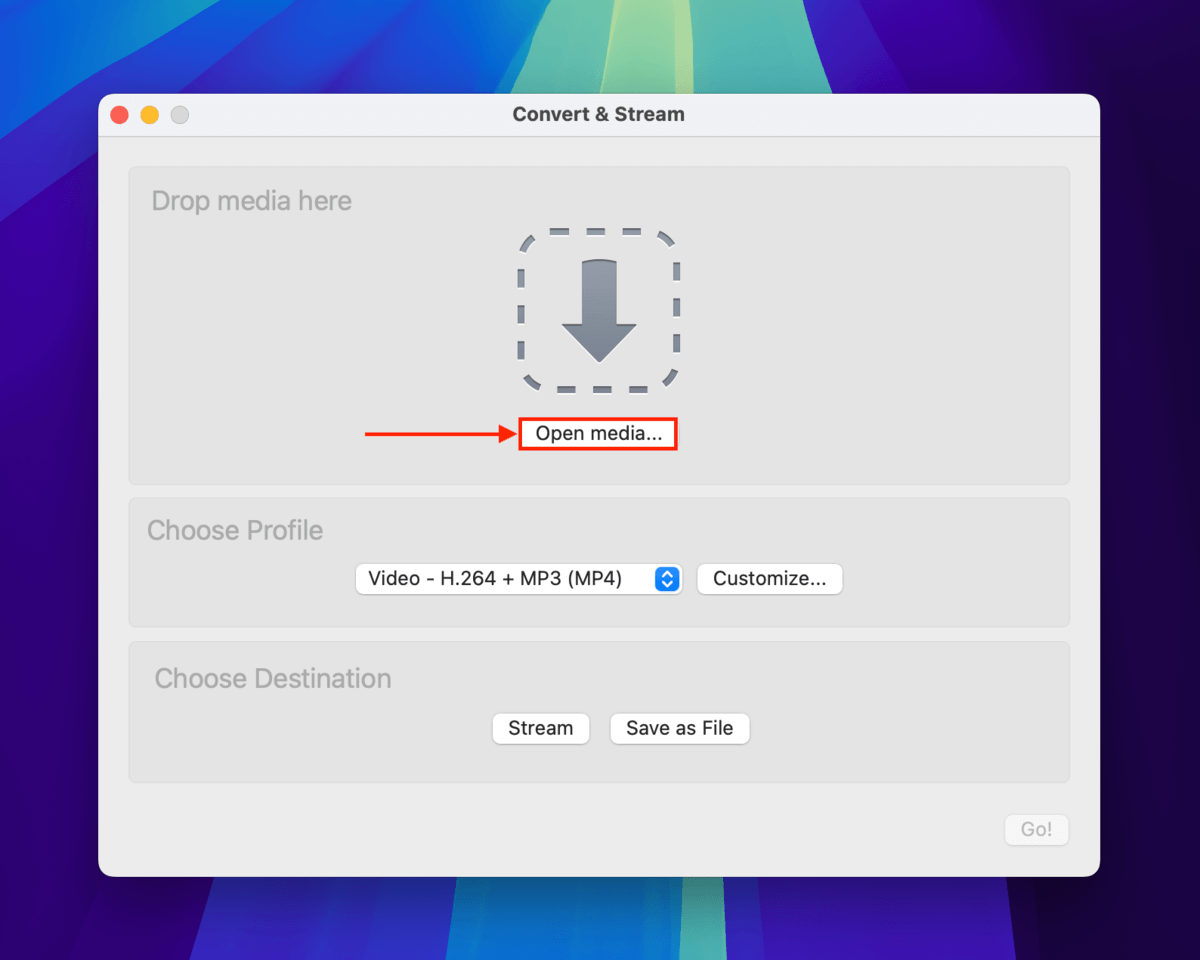
Step 3. Click Open media…
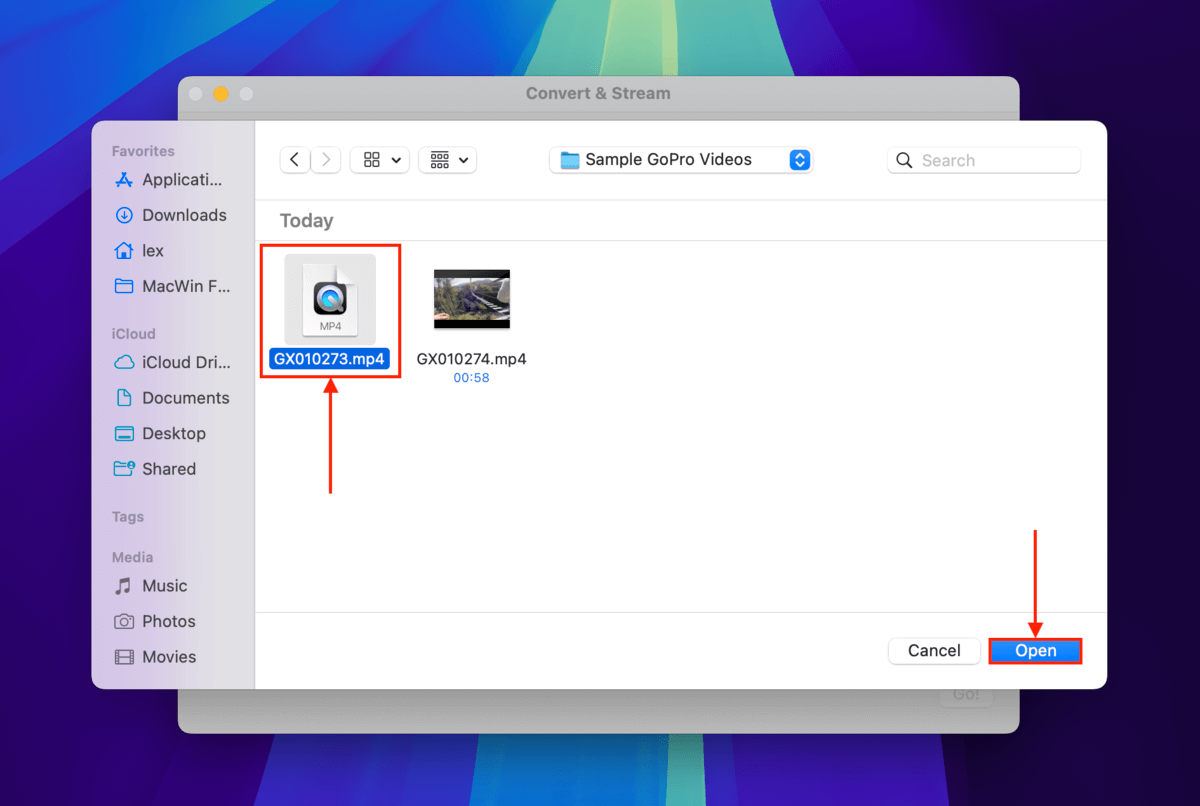
Step 4. Select your corrupted video and click Open.
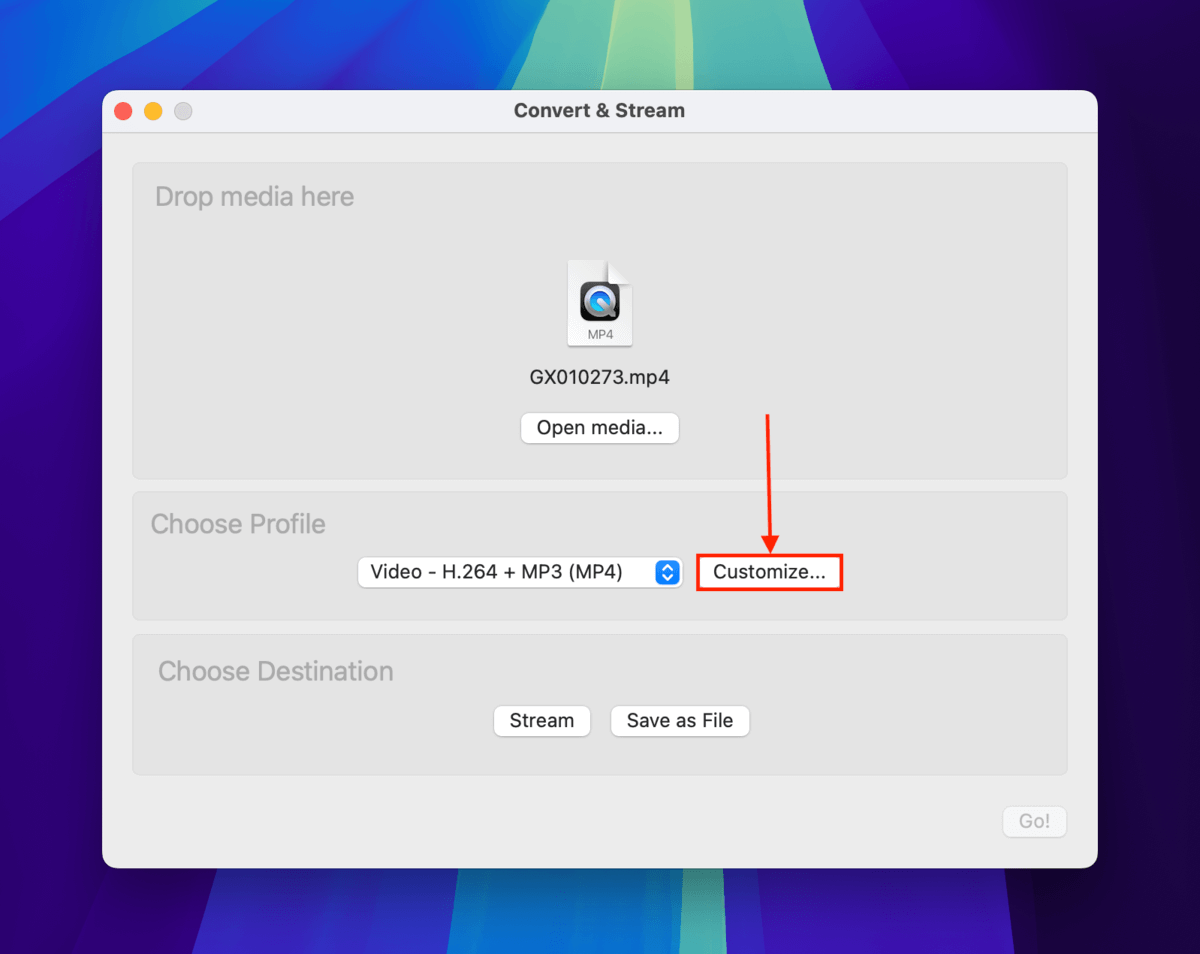
Step 5. Under the Choose Profile section, click Customize…
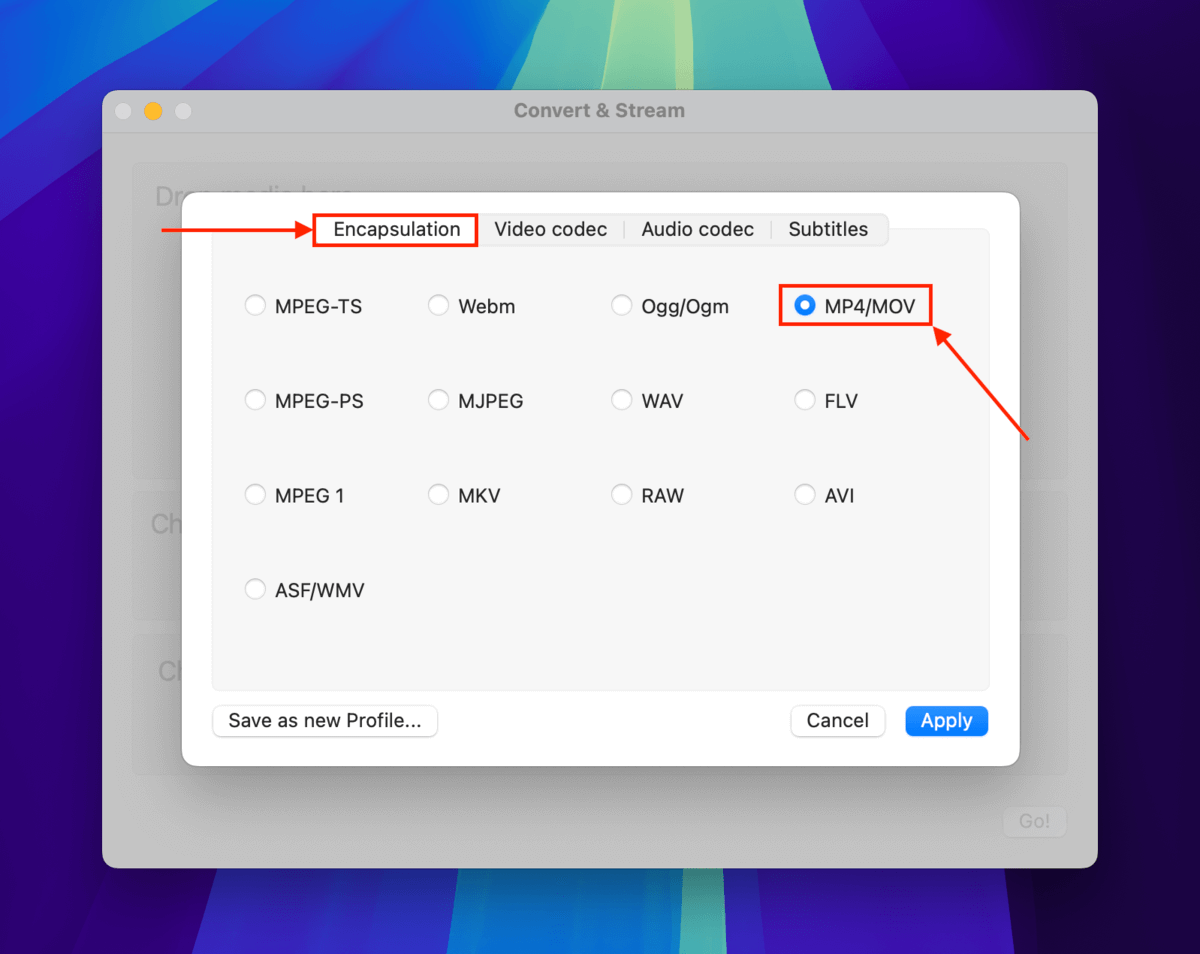
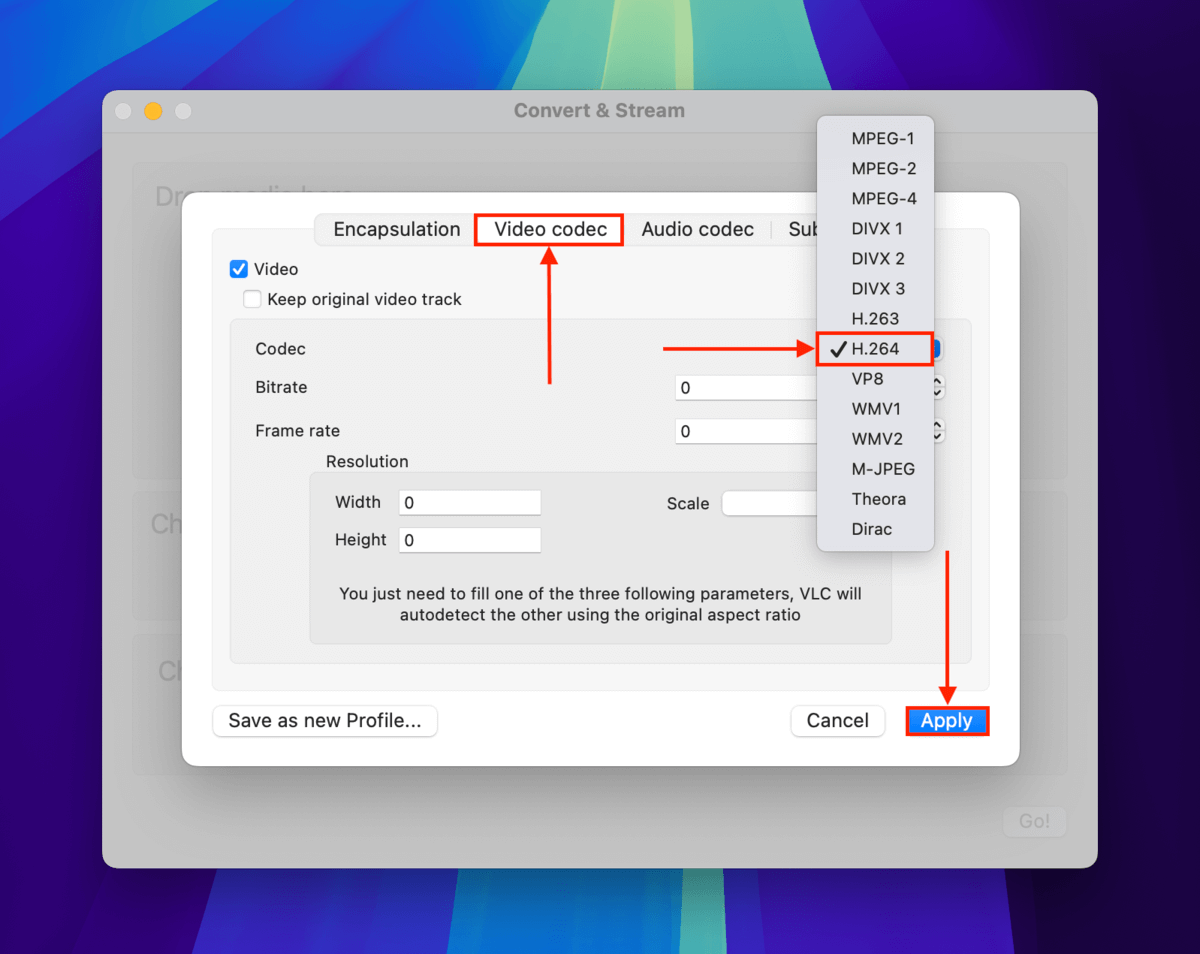
Step 6. In the Encapsulation menu, select MP4/MOV.
Step 7. In the Video codec menu, click the dropdown menu beside Codec and select H.264. Then, click Apply.
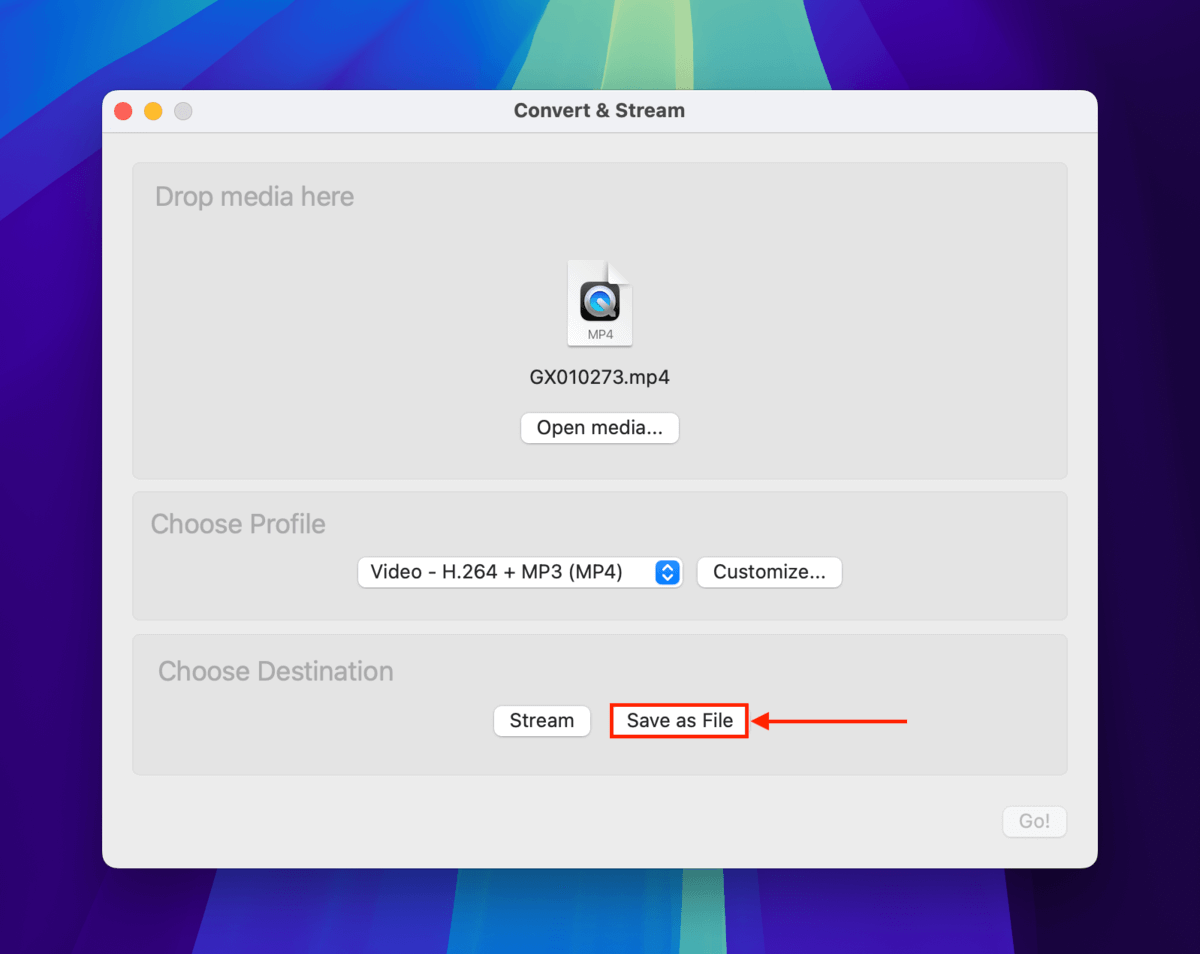
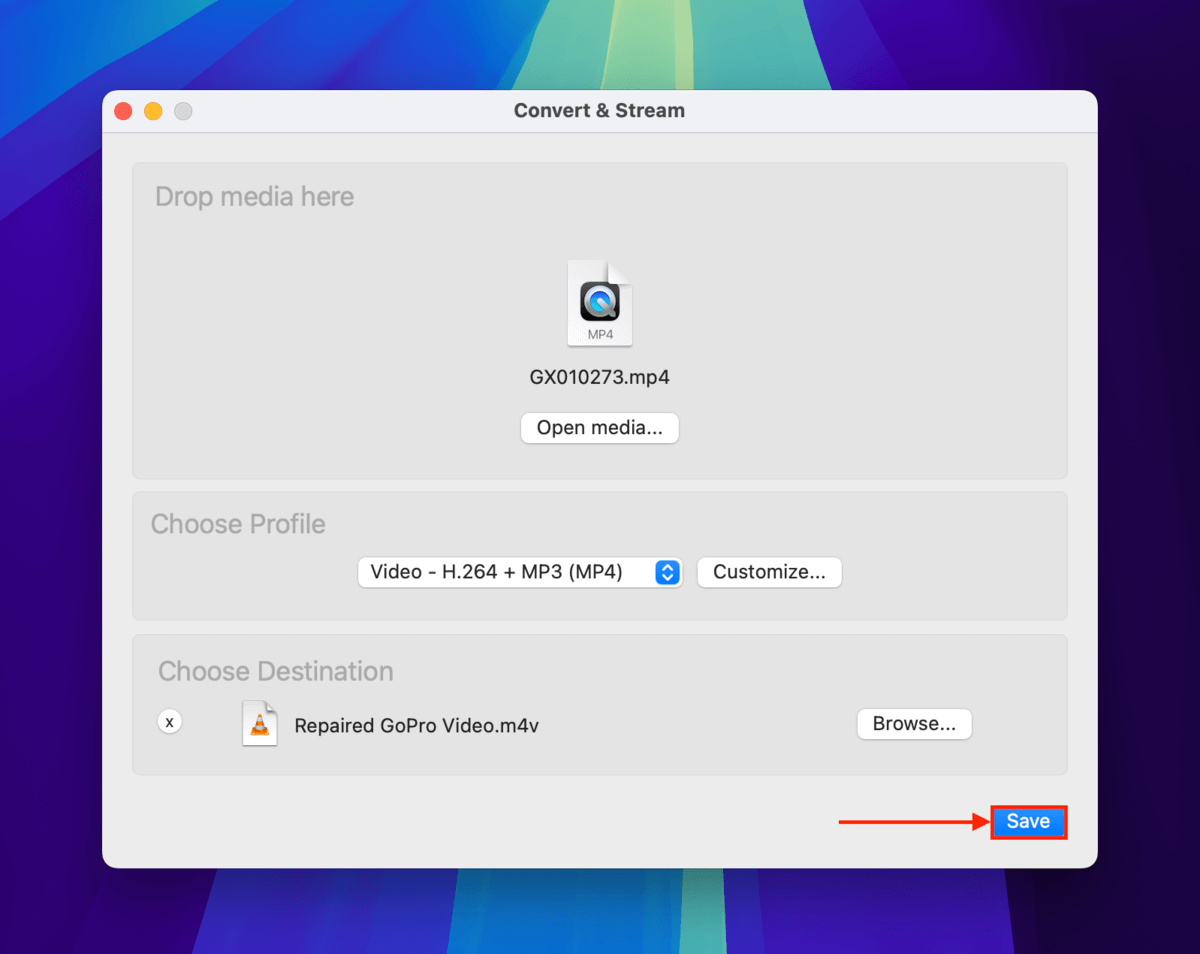
Step 8. Click Save as File.
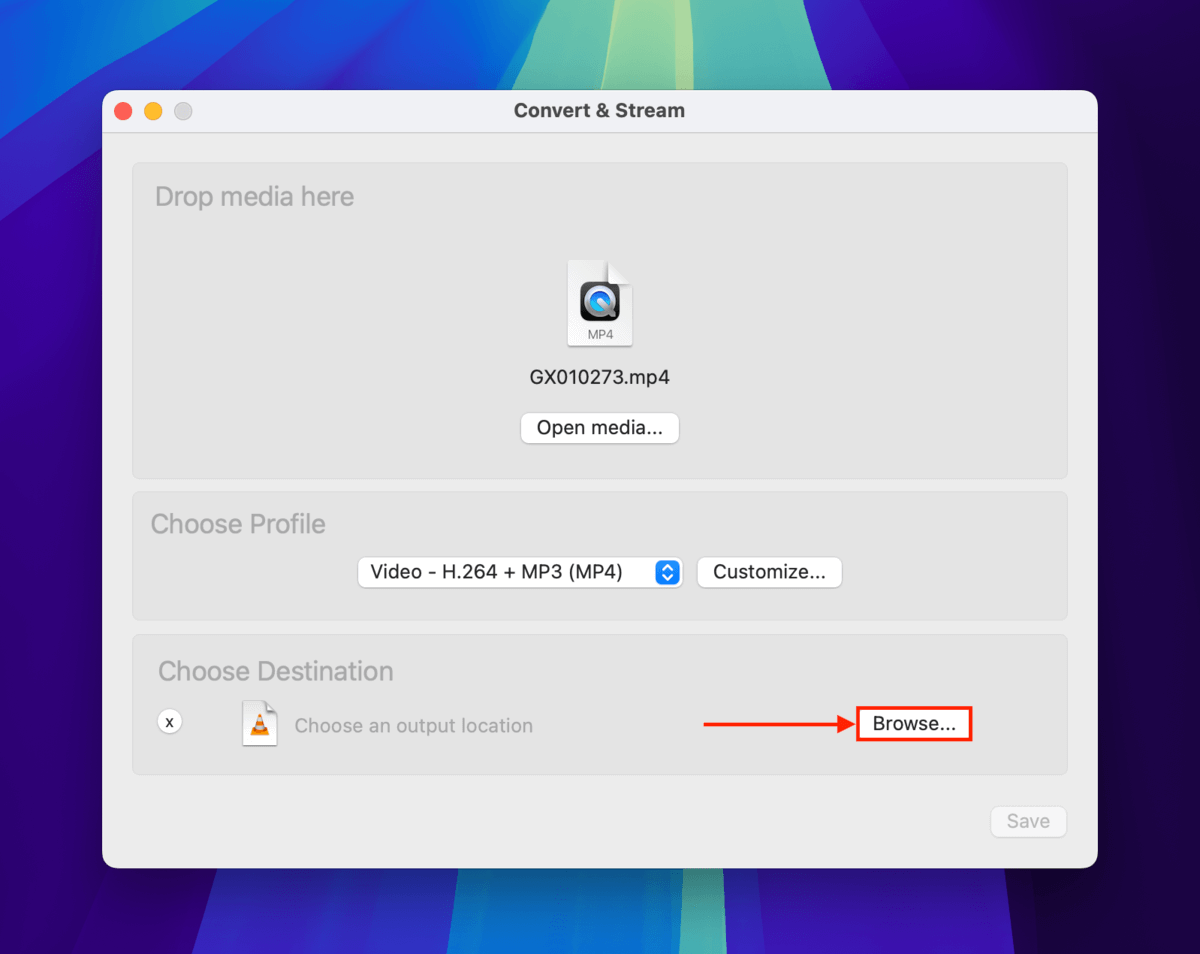
Step 9. Click Browse…
Step 10. Choose the name, tags, and save location for the converted video file and click Save.
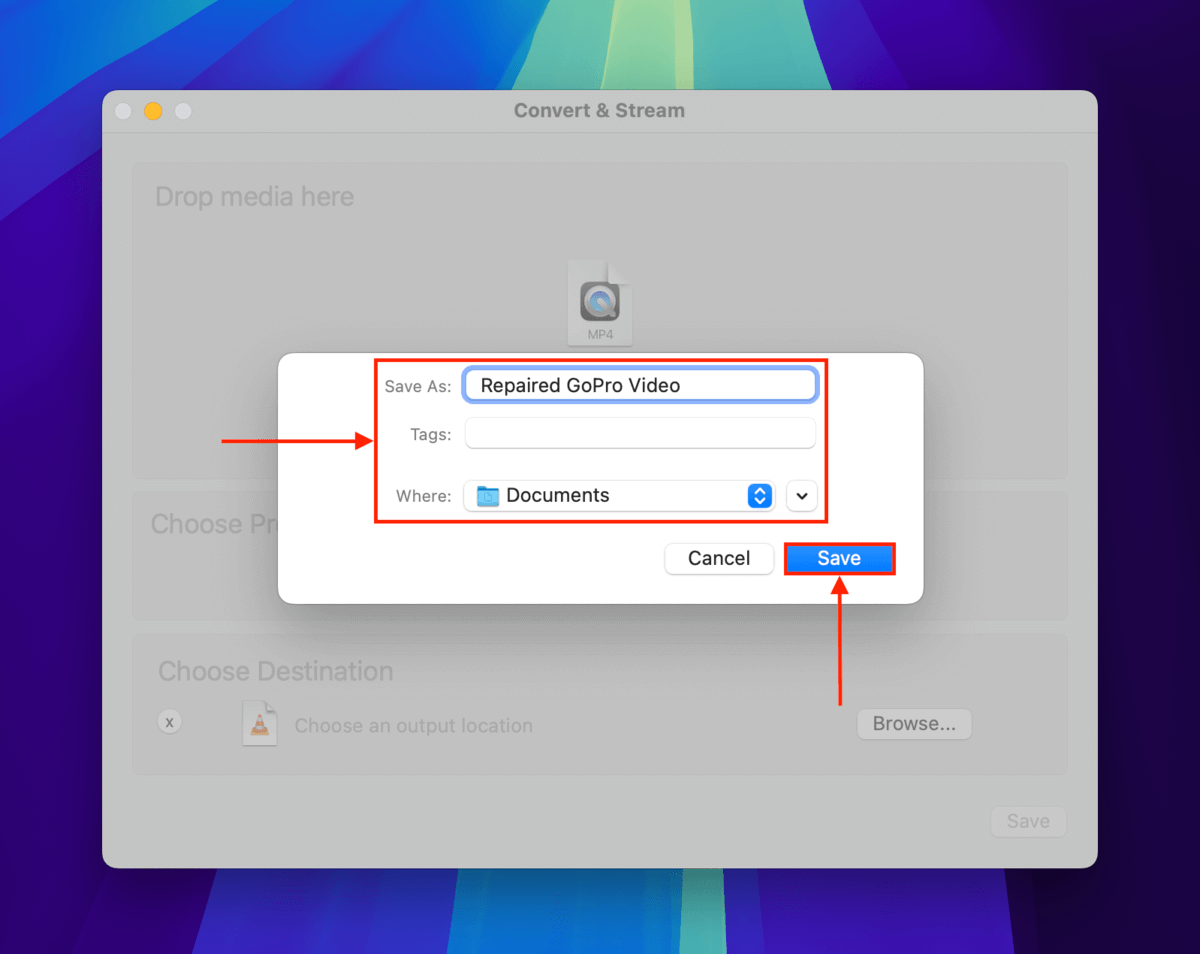
Step 11. Finally, click Save again. The repaired video should appear in the location you selected in step 10. Try opening it with VLC Media Player.
Method 4: Convert Your GoPro Video to AVI and Repair It Using VLC
VLC Media Player has a built-in repair tool for AVI videos. Once you enable it via the app’s settings, it will automatically run every time you try to open an AVI file.
But because this tool was specifically designed for AVI videos – not MP4 videos – you need to convert your GoPro footage first.
We’ll show you how to do the entire process step by step in the guide below.
Step 1. Follow steps 1-6 in method 3.
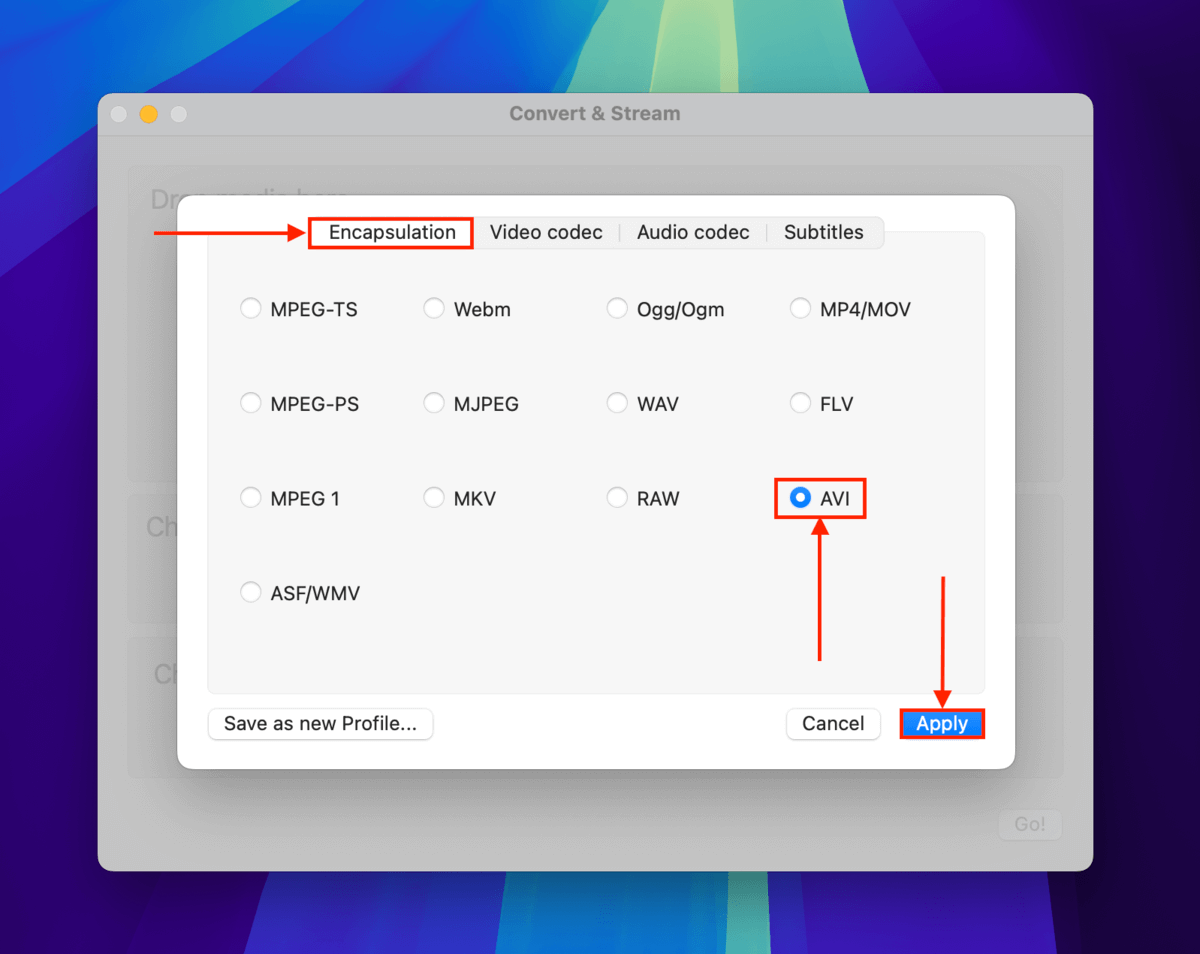
Step 2. In the Encapsulation menu, select AVI. Then, click Apply.
Step 3. Click Save as File.

Step 4. Click Browse.

Step 5. Choose a name for the converted video file and select its save location. Click Save.

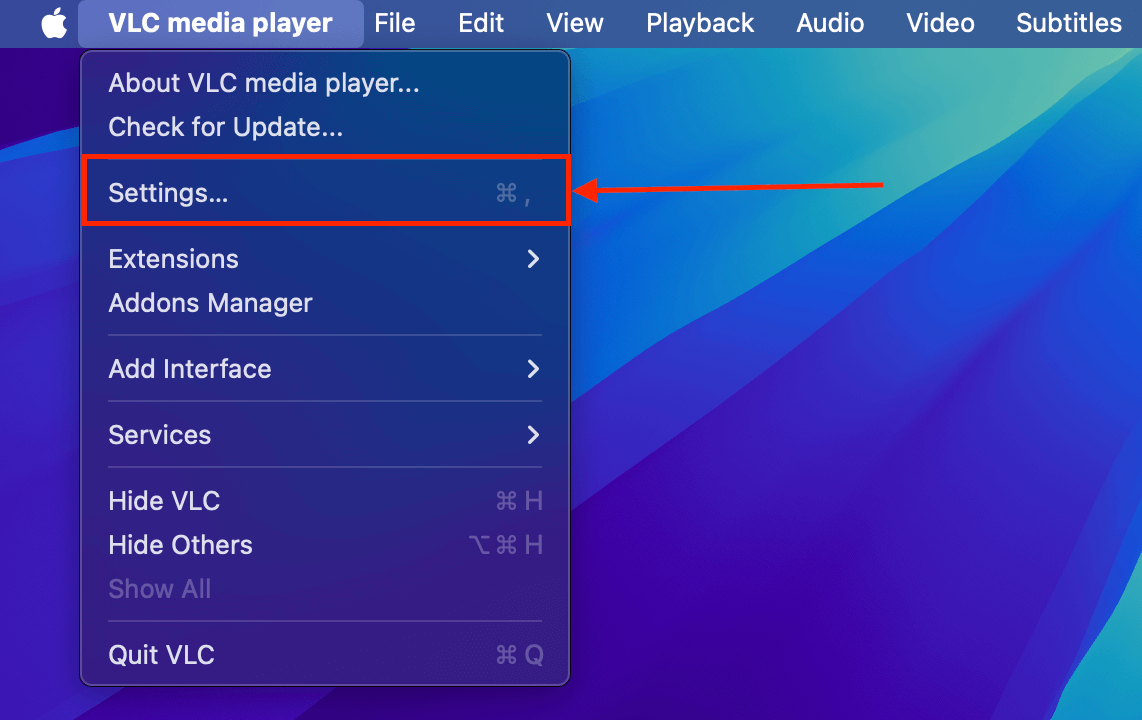
Step 6. On the menu bar, click VLC media player > Settings…
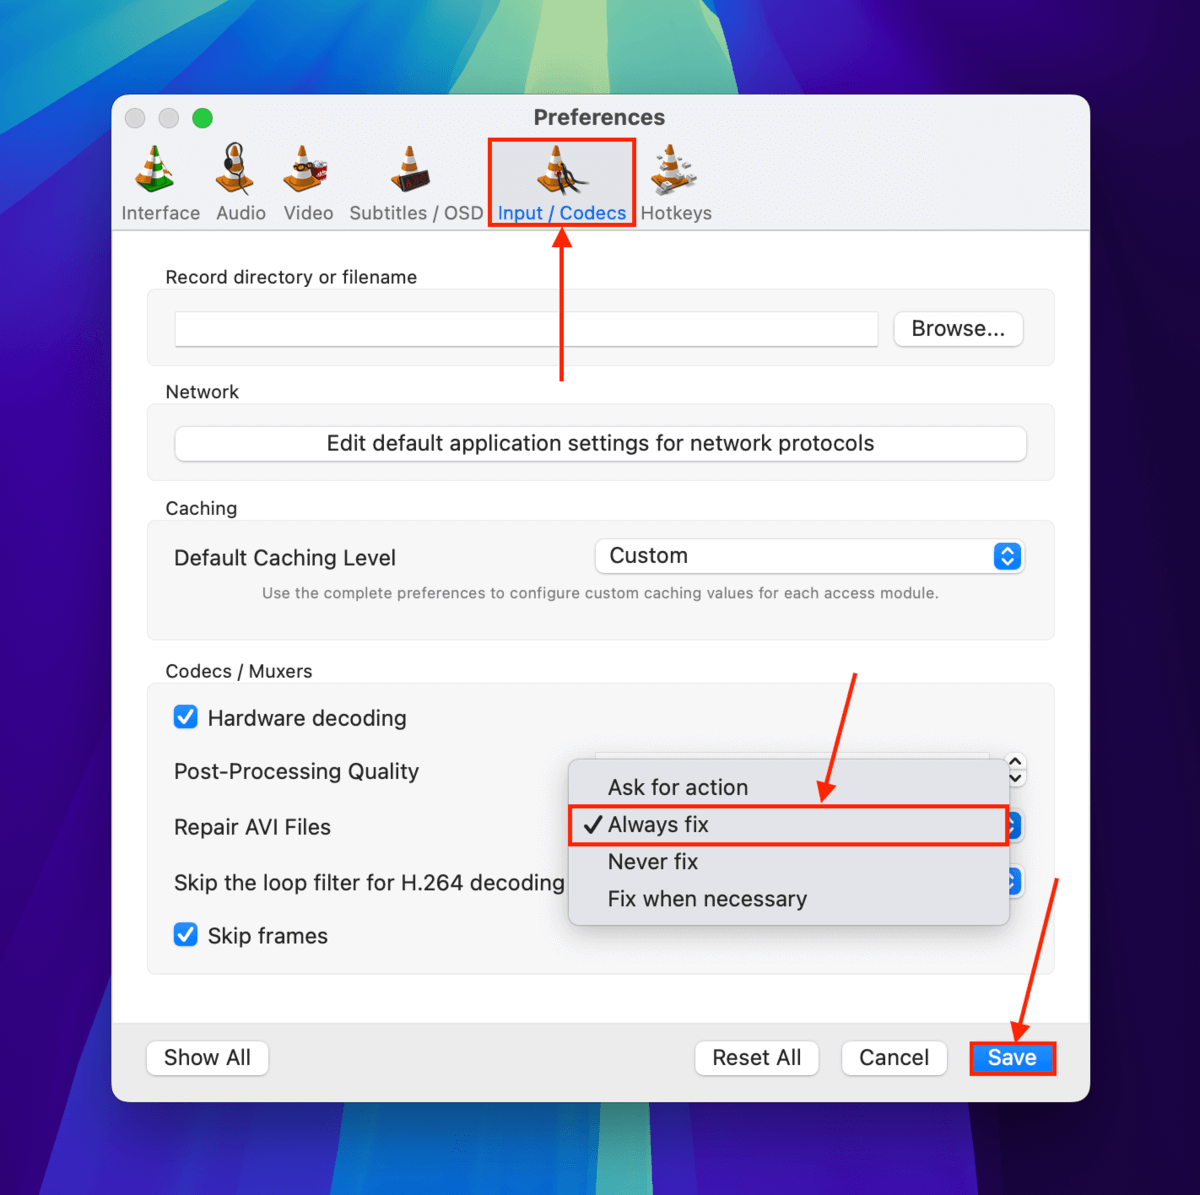
Step 7. In the Input / Codecs menu, click the dropdown menu beside Repair AVI Files > Always fix. Click Save.
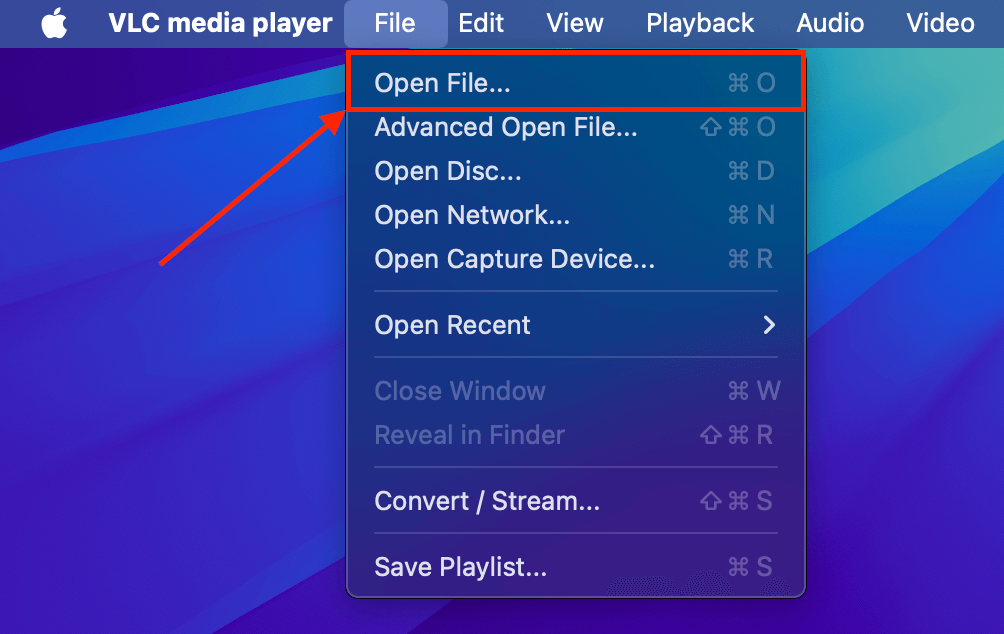
Step 8. Once your video file has been converted and saved as an AVI file, try opening it with VLC Media Player (File > Open File…).
Are multiple of your GoPro videos corrupted?
If multiple videos on your GoPro’s SD card are corrupted OR if your videos get corrupted often, your SD card might actually be the culprit. Check out the repair section of our guide on how to recover corrupted SD cards on your Mac.
And if you notice that any of your footage was deleted, follow our guide on how to recover deleted GoPro files on your Mac ASAP – the longer you wait, the lower your chances of getting the videos back.
On the other hand, you might also be practicing some bad habits that result in corruption. To avoid corruption due to user error, make sure that you safely eject your SD card before removing it and that you don’t let your GoPro shut off during recording (e.g. running out of battery).


