
Losing your iMessages is way too easy. You might accidentally delete them (which is more common than you think). Maybe they’re set to be automatically deleted. Or, most confusing of all, maybe you have iCloud enabled for iMessages and you deleted a conversation on an entirely different device… Likely to clean up your inbox or free up local storage space.
Here’s the good news: as long as your iMessage data hasn’t been overwritten, you can still recover them. Even better, there are multiple ways to do it – I’ll demonstrate all 3 of them in the sections below.
| Method | When It’s Most Useful |
| 🖥️ Data Recovery Software | When there is no backup available |
| 🕓 Time Machine | When the iMessages have been overwritten |
| 📱 Use Your iPhone | When the data was synchronized with iCloud |
Table of Contents
Try to Find Deleted iMessages
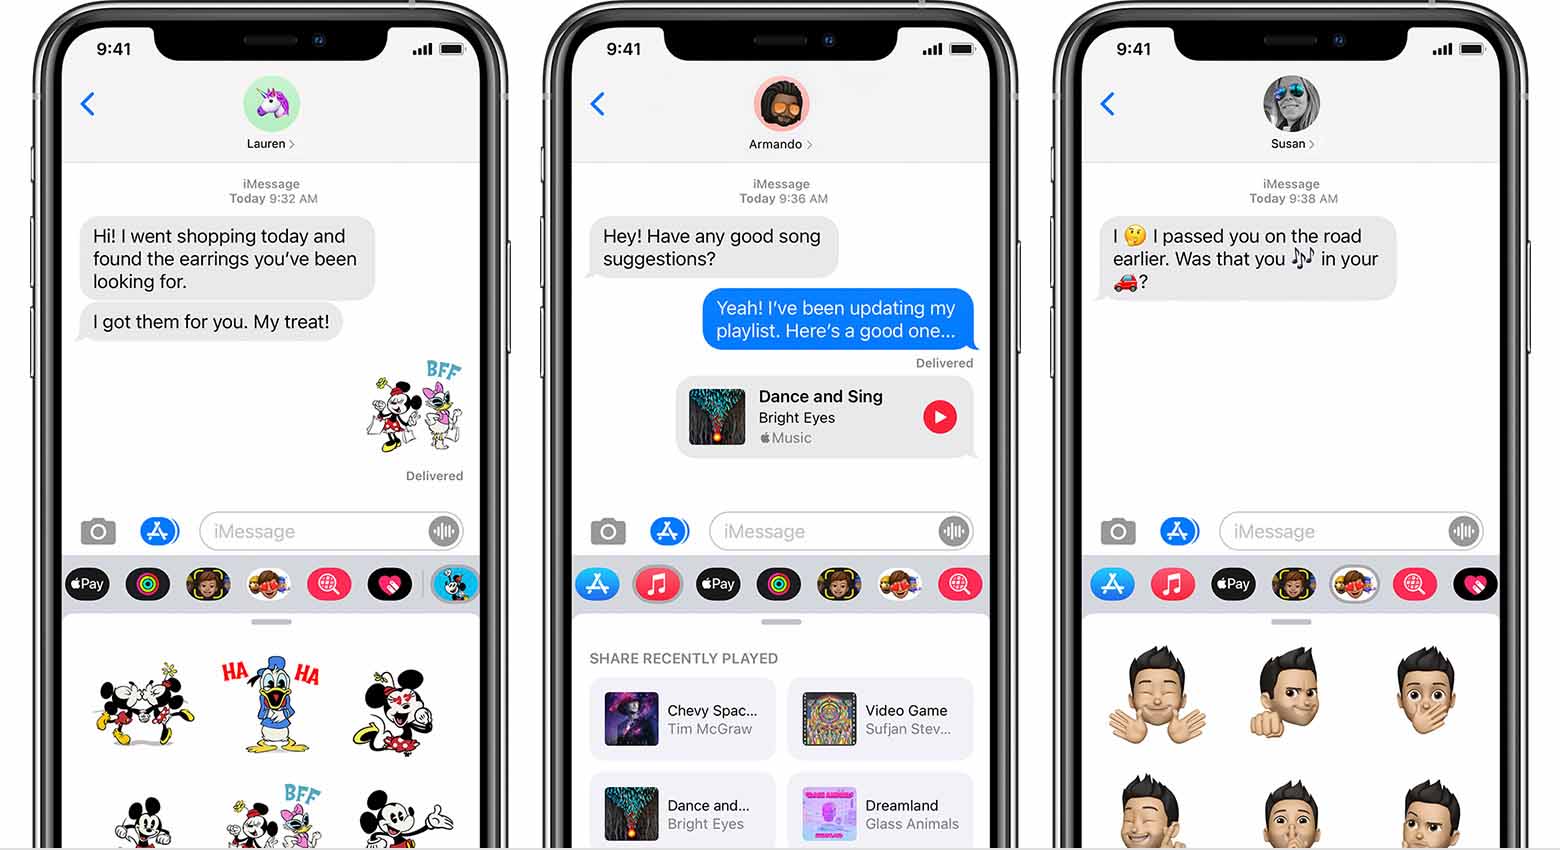
It’s much easier to find deleted or lost messages once you understand how iMessages and its settings work. Specifically, we want to focus on the iCloud for Messages setting.
When you enable iCloud for Messages, all your conversation threads are synced to the cloud and mirrored to your other devices. So if you delete a message on your Mac with iCloud for Messages enabled, that message will also disappear from your other devices with the same settings.
However, if iCloud for Messages isn’t enabled on your other devices, the changes are NOT reflected to them. So even if you deleted a message from your Mac, it should still be on your devices that do not have iCloud for Messages enabled.
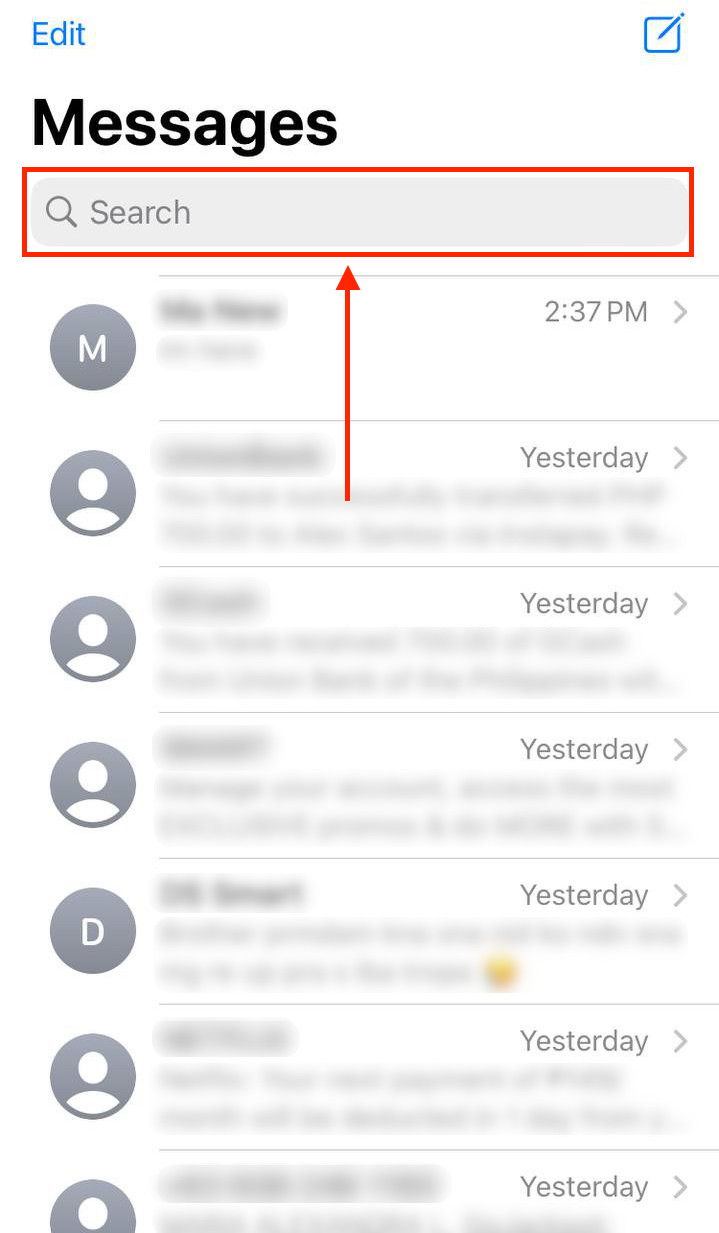
So if you have devices that don’t use iCloud for Messages, check those devices’ Messages app! You can swipe down to easily search messages by contact or content:
Where Are iMessages Stored on Mac?
iMessages are stored inside the Messages app that comes installed as part of macOS. They’re locally stored and don’t require an internet connection, so if you need to reference an iMessage conversation you can do so without the internet.
If you want to know the actual path for where your messages are stored, you can get to it by following the steps below. This will allow us to find our iMessage archive, and we can try to restore iMessages this way.
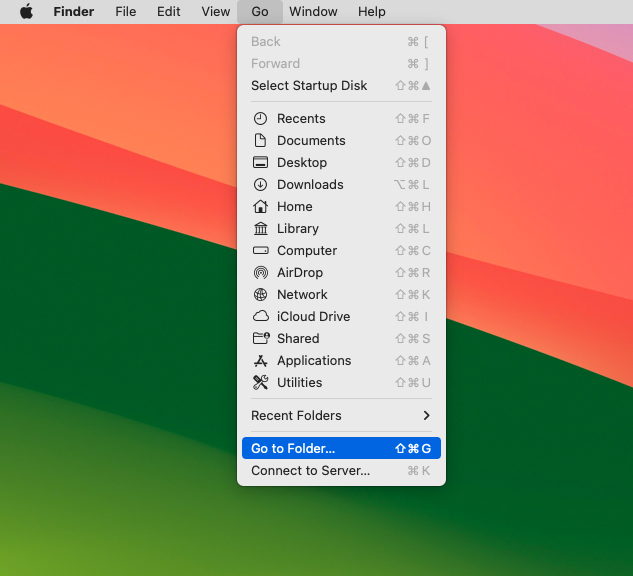
- Launch Finder. In the navbar, find “Go” and then from the contextual menu find “Go to Folder…” and select that option. This will allow us to go to the location where our iMessages are stored on our mac.
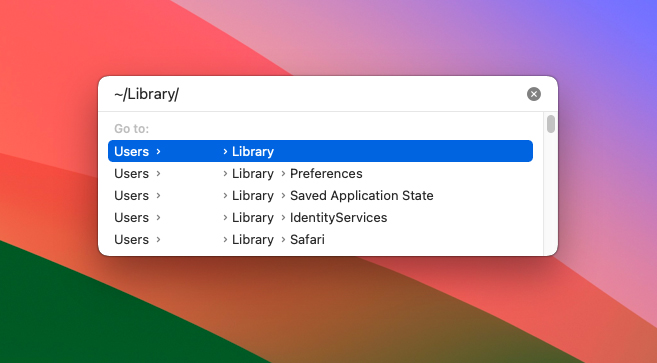
- Look for the Go option at the top and type in ~Library.
- Look for the folder called Messages and open it.
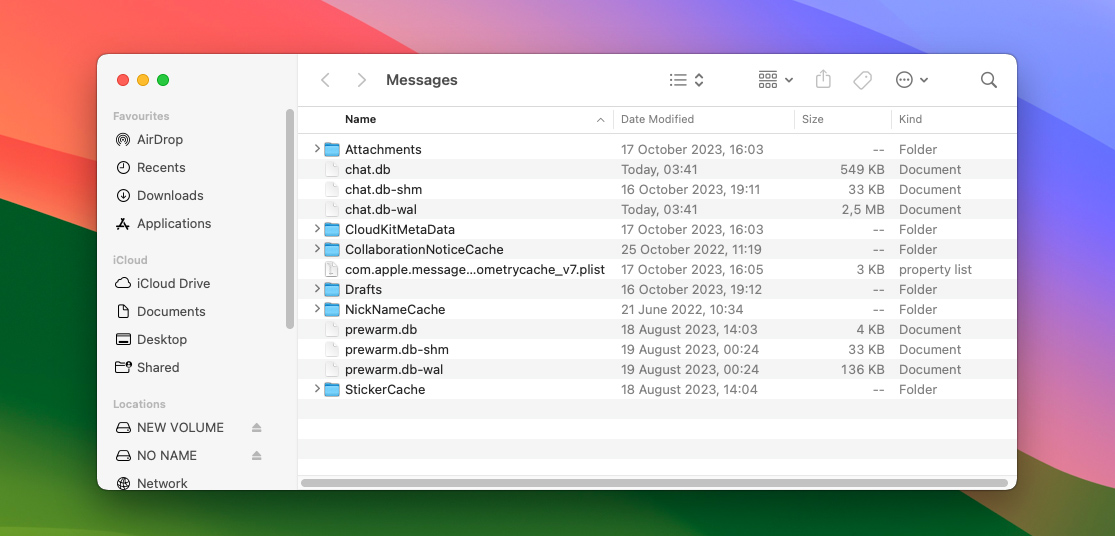
Once inside the Messages folder, you can view your attachments by clicking on the Attachments folder. This will allow you to view all of the pictures that have been sent between you and everyone else that you have had conversations with.
Some of the information that is stored within it can be read, but a lot of it is unreadable as it’s only supposed to be read by the built-in Messages client.
How to Recover Deleted iMesages on Mac
If your iMessages aren’t on your other Apple devices and you can’t find them, then it’s time to look into how to recover deleted iMessages. One of these methods involves you already having a backup of your Mac. Others will allow you to get back deleted iMessages with no prior backup.
Method 1: Restore From Recently Deleted
If you deleted your message within the last 30 days, there’s a good chance it’s in the Recently Deleted folder. The Recently Deleted folder keeps all deleted messages for 30 days from the time of deletion. After the time limit, they’re deleted for good.
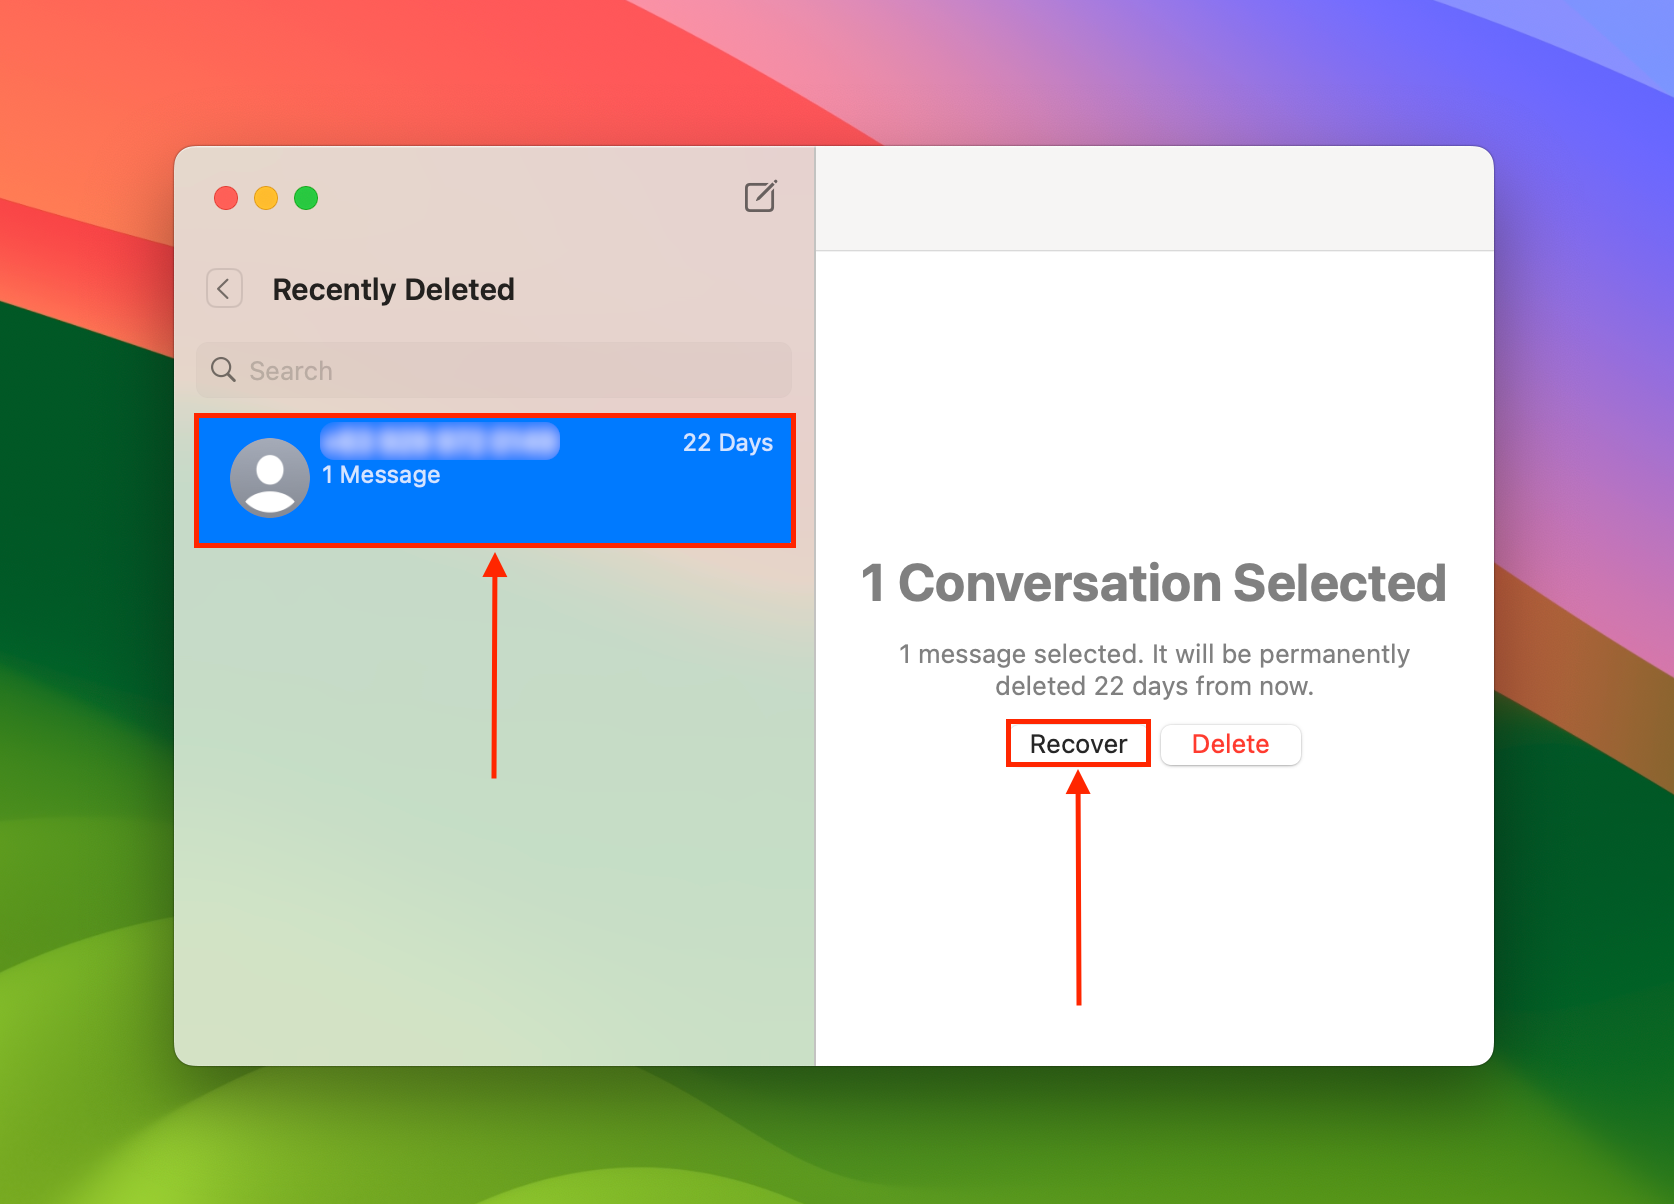
From this menu, you can either permanently delete the message or restore it.
To recover deleted iMessages from the Recently Deleted folder:
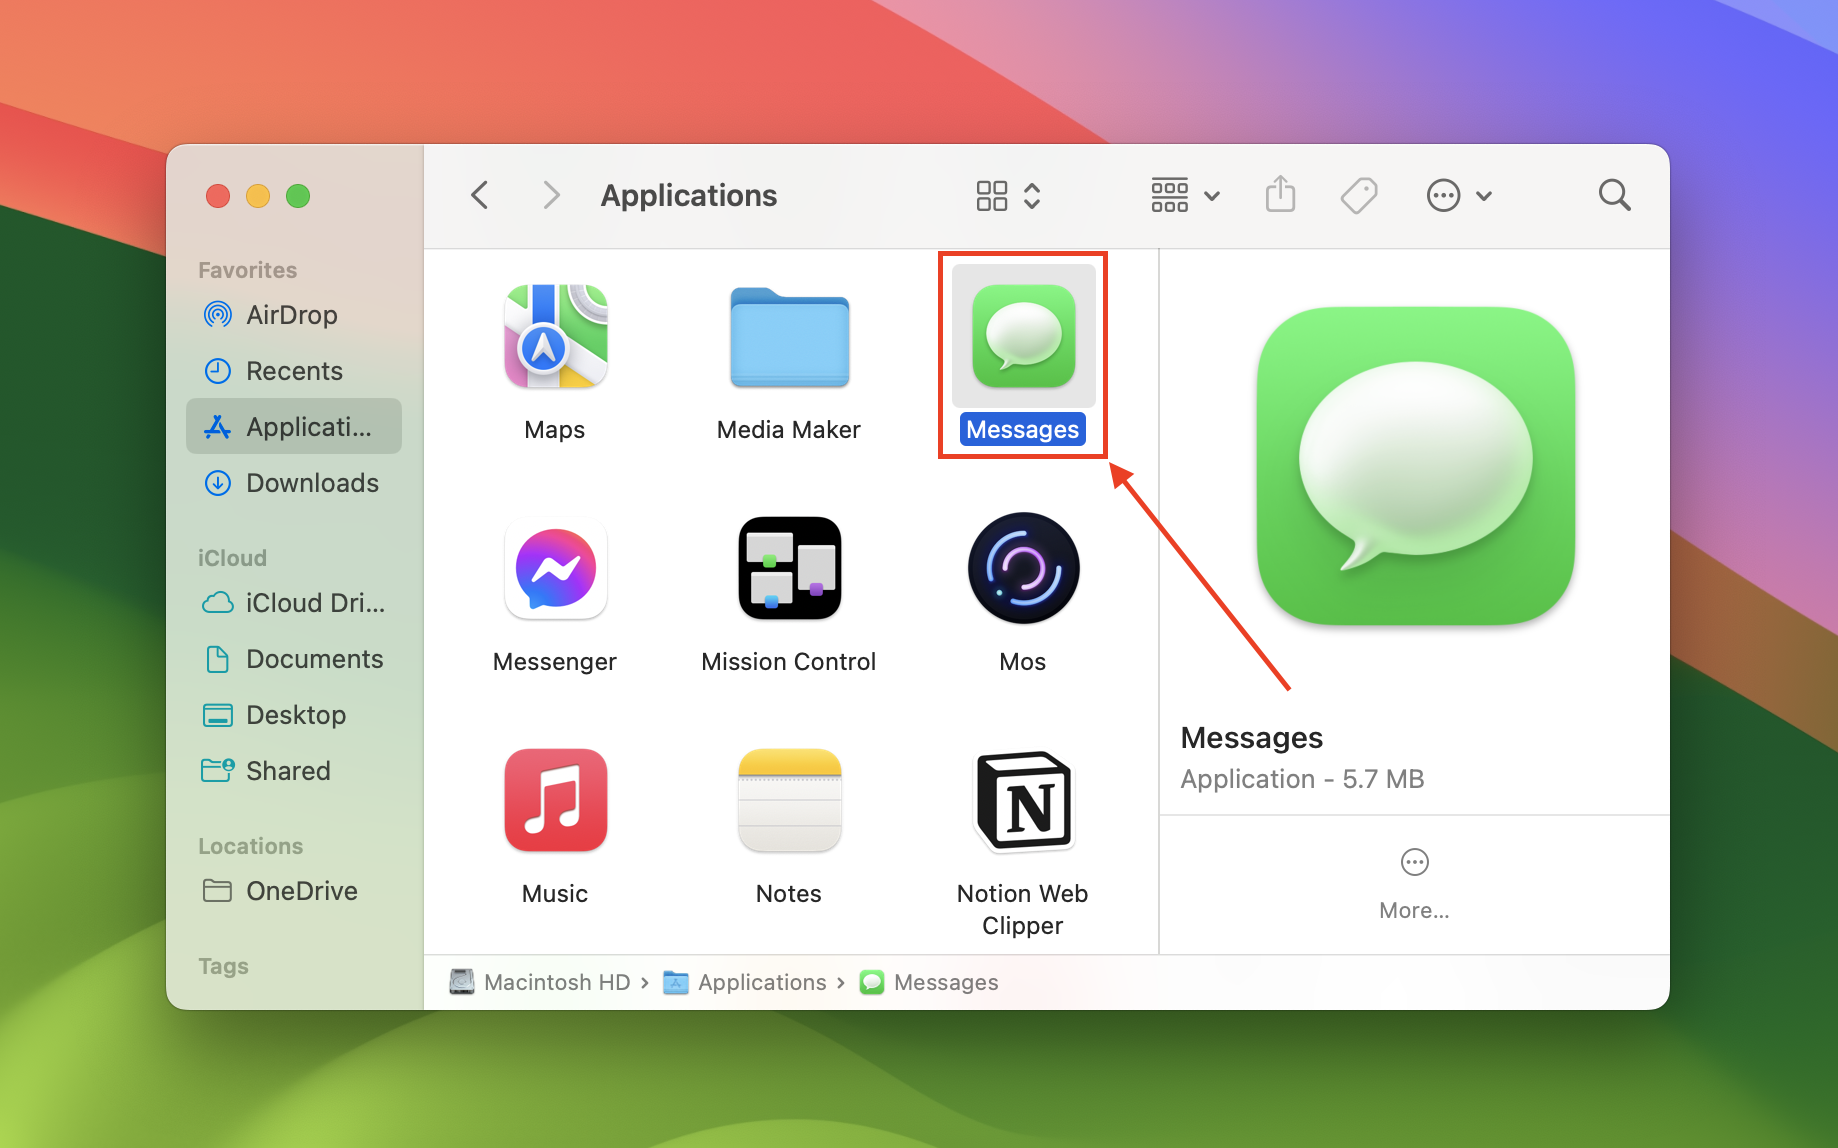
- Open the Messages app on your Mac (Finder > Applications).
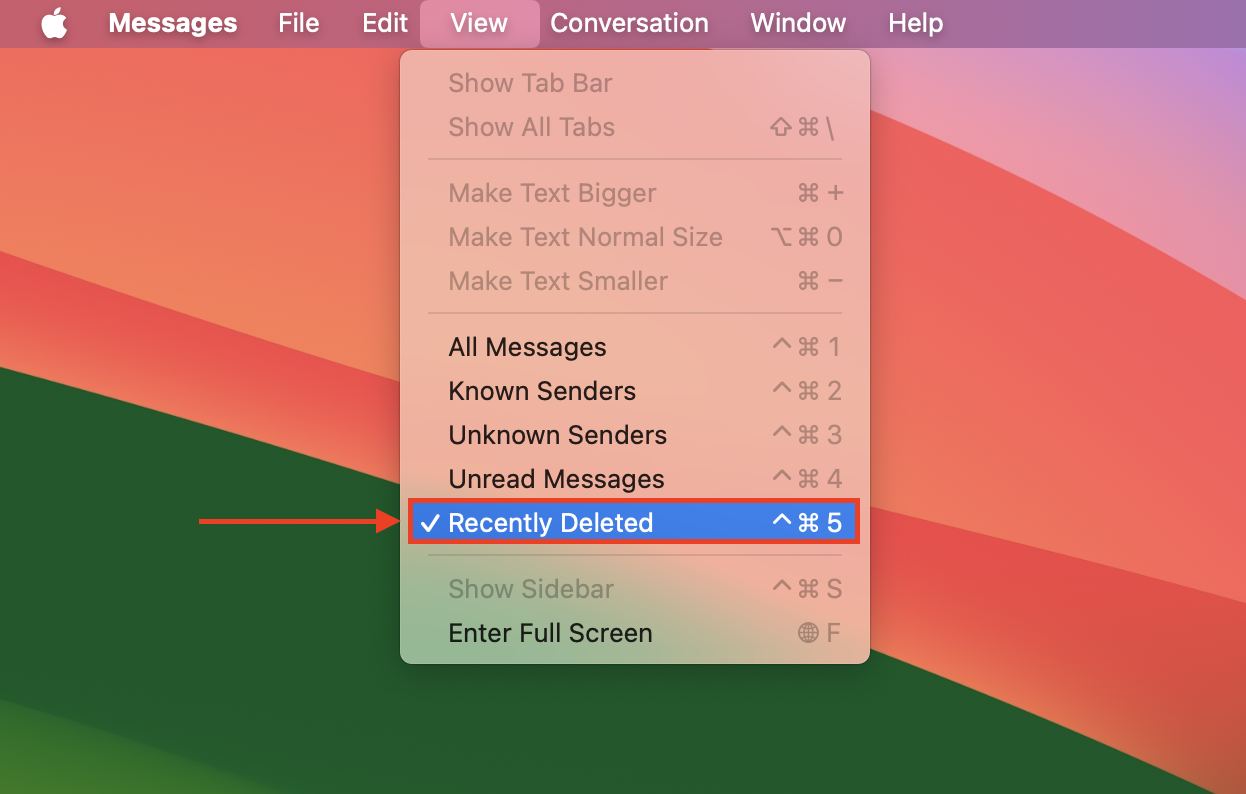
- On the Apple menu bar, click View > Recently Deleted.
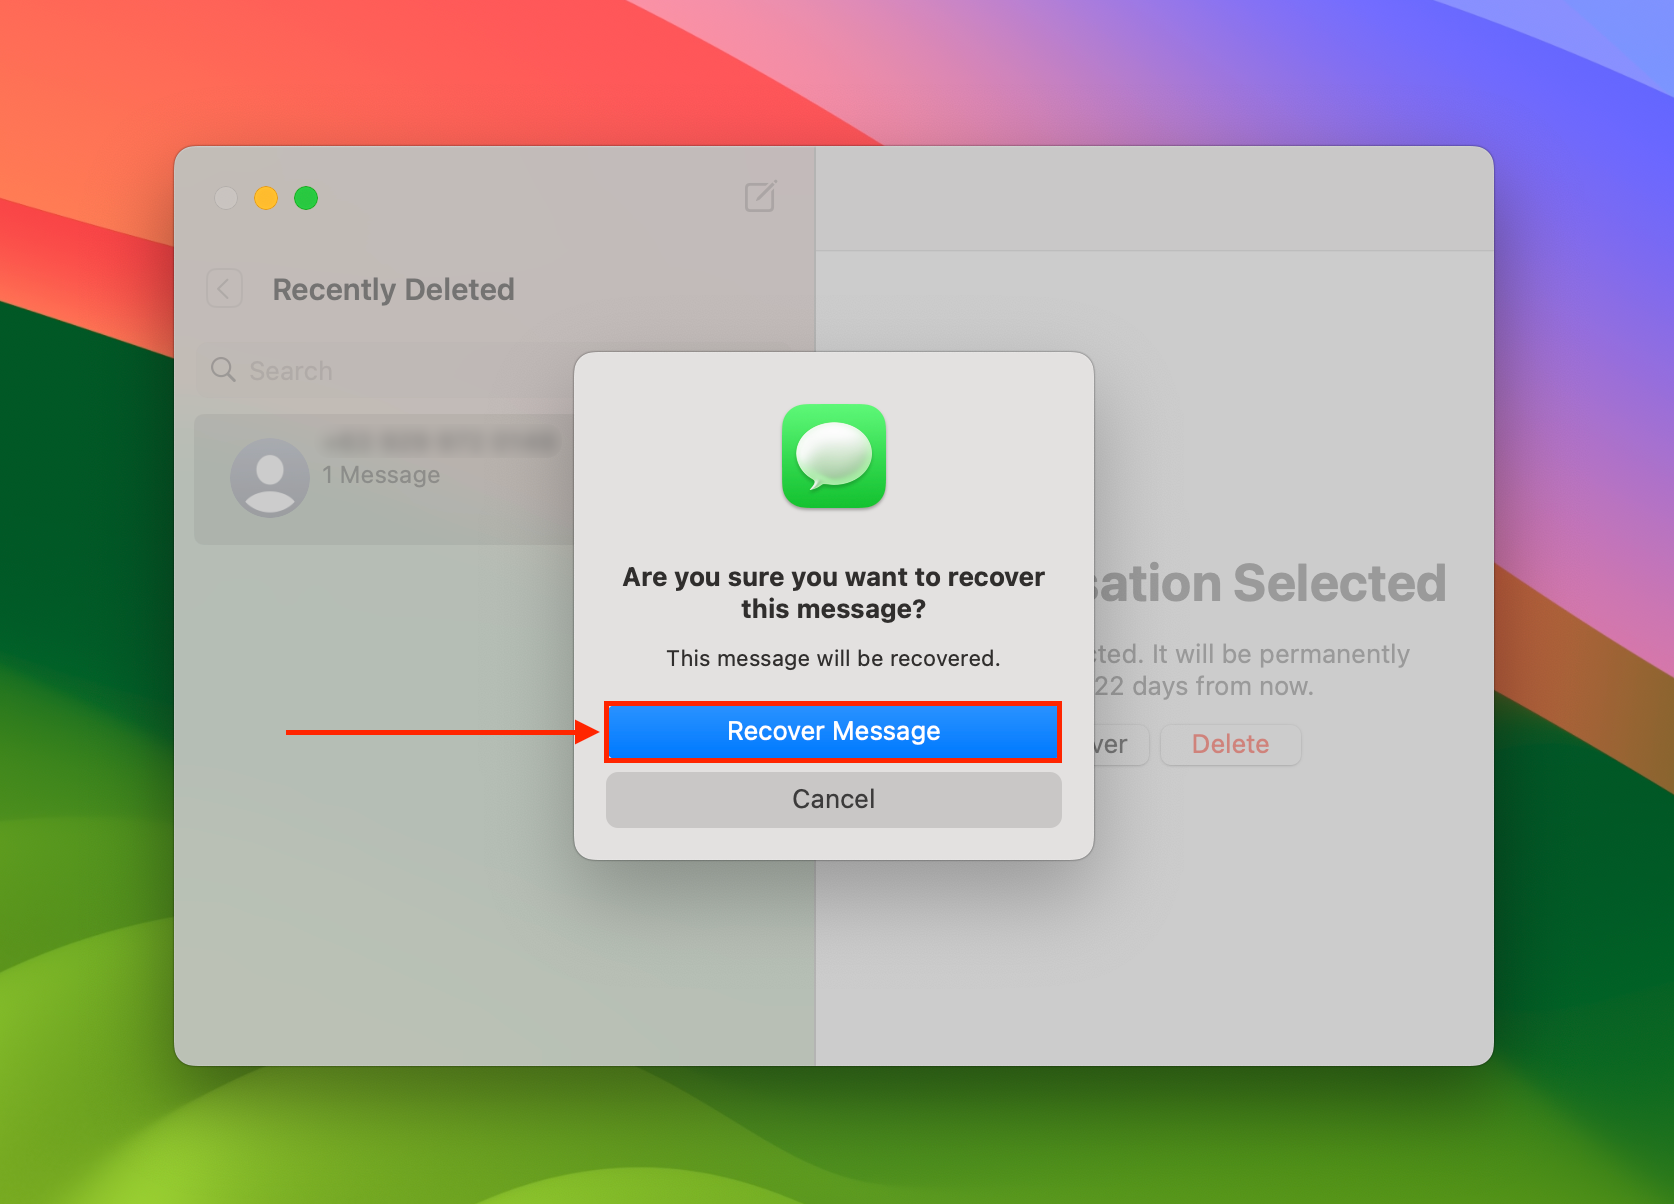
- On the left sidebar, click on the message you want to restore. Then, click Recover.
- Click Recover Message to confirm the action.
Method 2: Recovering iMessages Using Data Recovery Software
Data recovery software is a special tool that can extract and reconstruct deleted files directly from your Mac drive’s file system. It’s the only way to restore files without a backup.
For this article, we’ll be using an app called Disk Drill. It’s a well-known data recovery software that is fully optimized for macOS and native Mac file types, including those related to the Messages app.
Info: Prepare an external drive for this process. We’ll be installing Disk Drill to that location instead of locally on your Mac to avoid overwriting the Messages data with the installation file.
To recover iMessages with data recovery software:
- Connect an external drive to your Mac. Then, download and start the installation process. When prompted to drag the icon to the Applications folder, drag it to your external drive’s icon (on the desktop) instead.
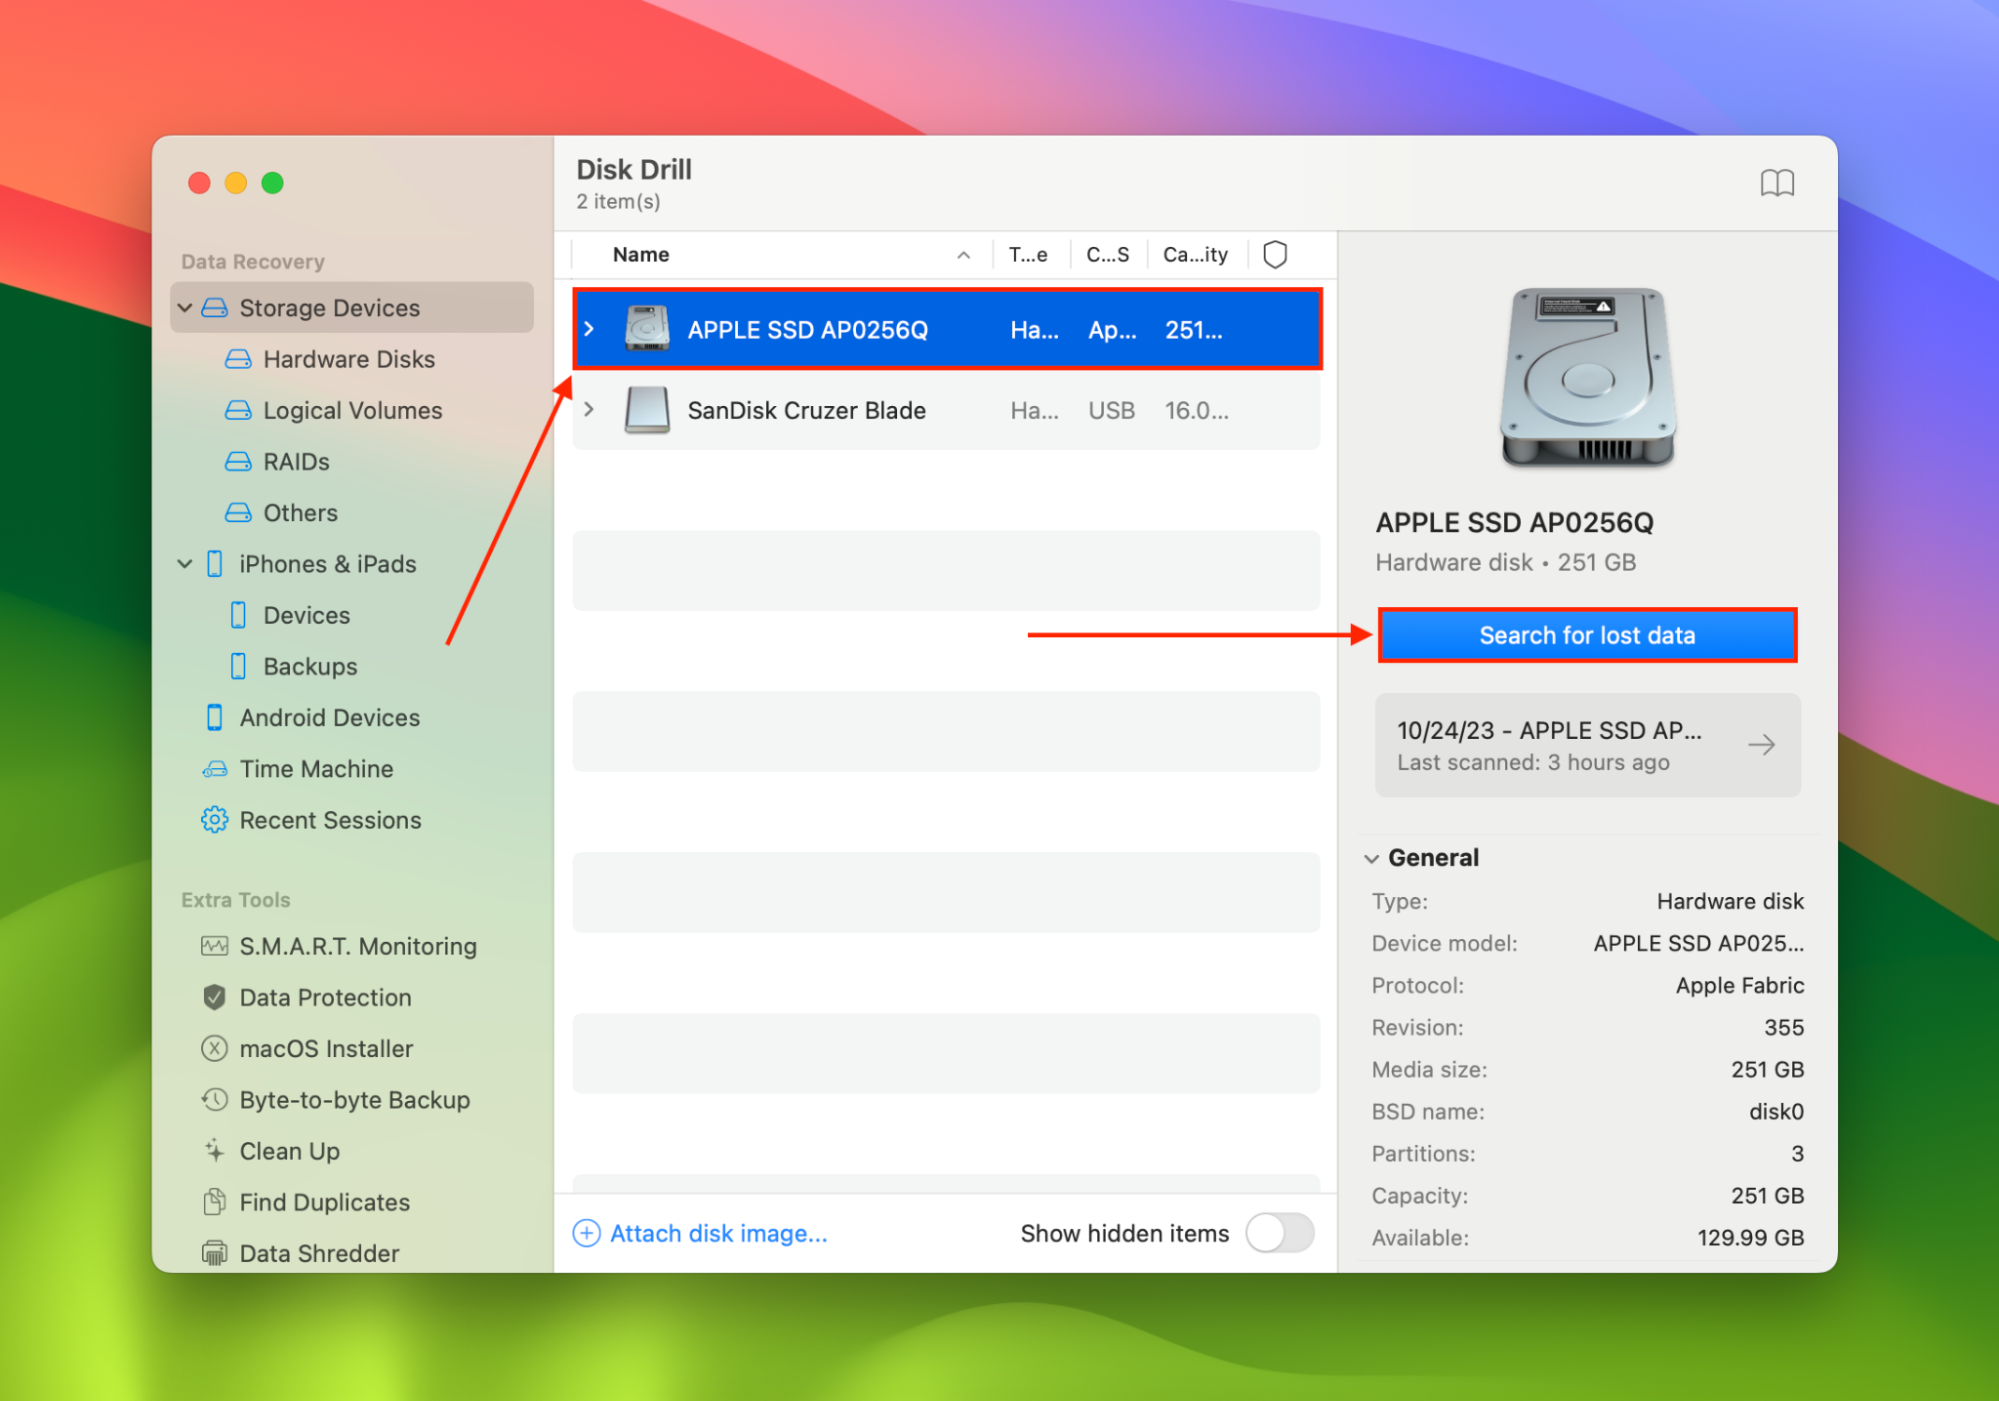
- Launch Disk Drill from your external drive by double-clicking its icon. Then, select your boot drive (usually labeled “APPLE SSD”) and click Search for lost data.
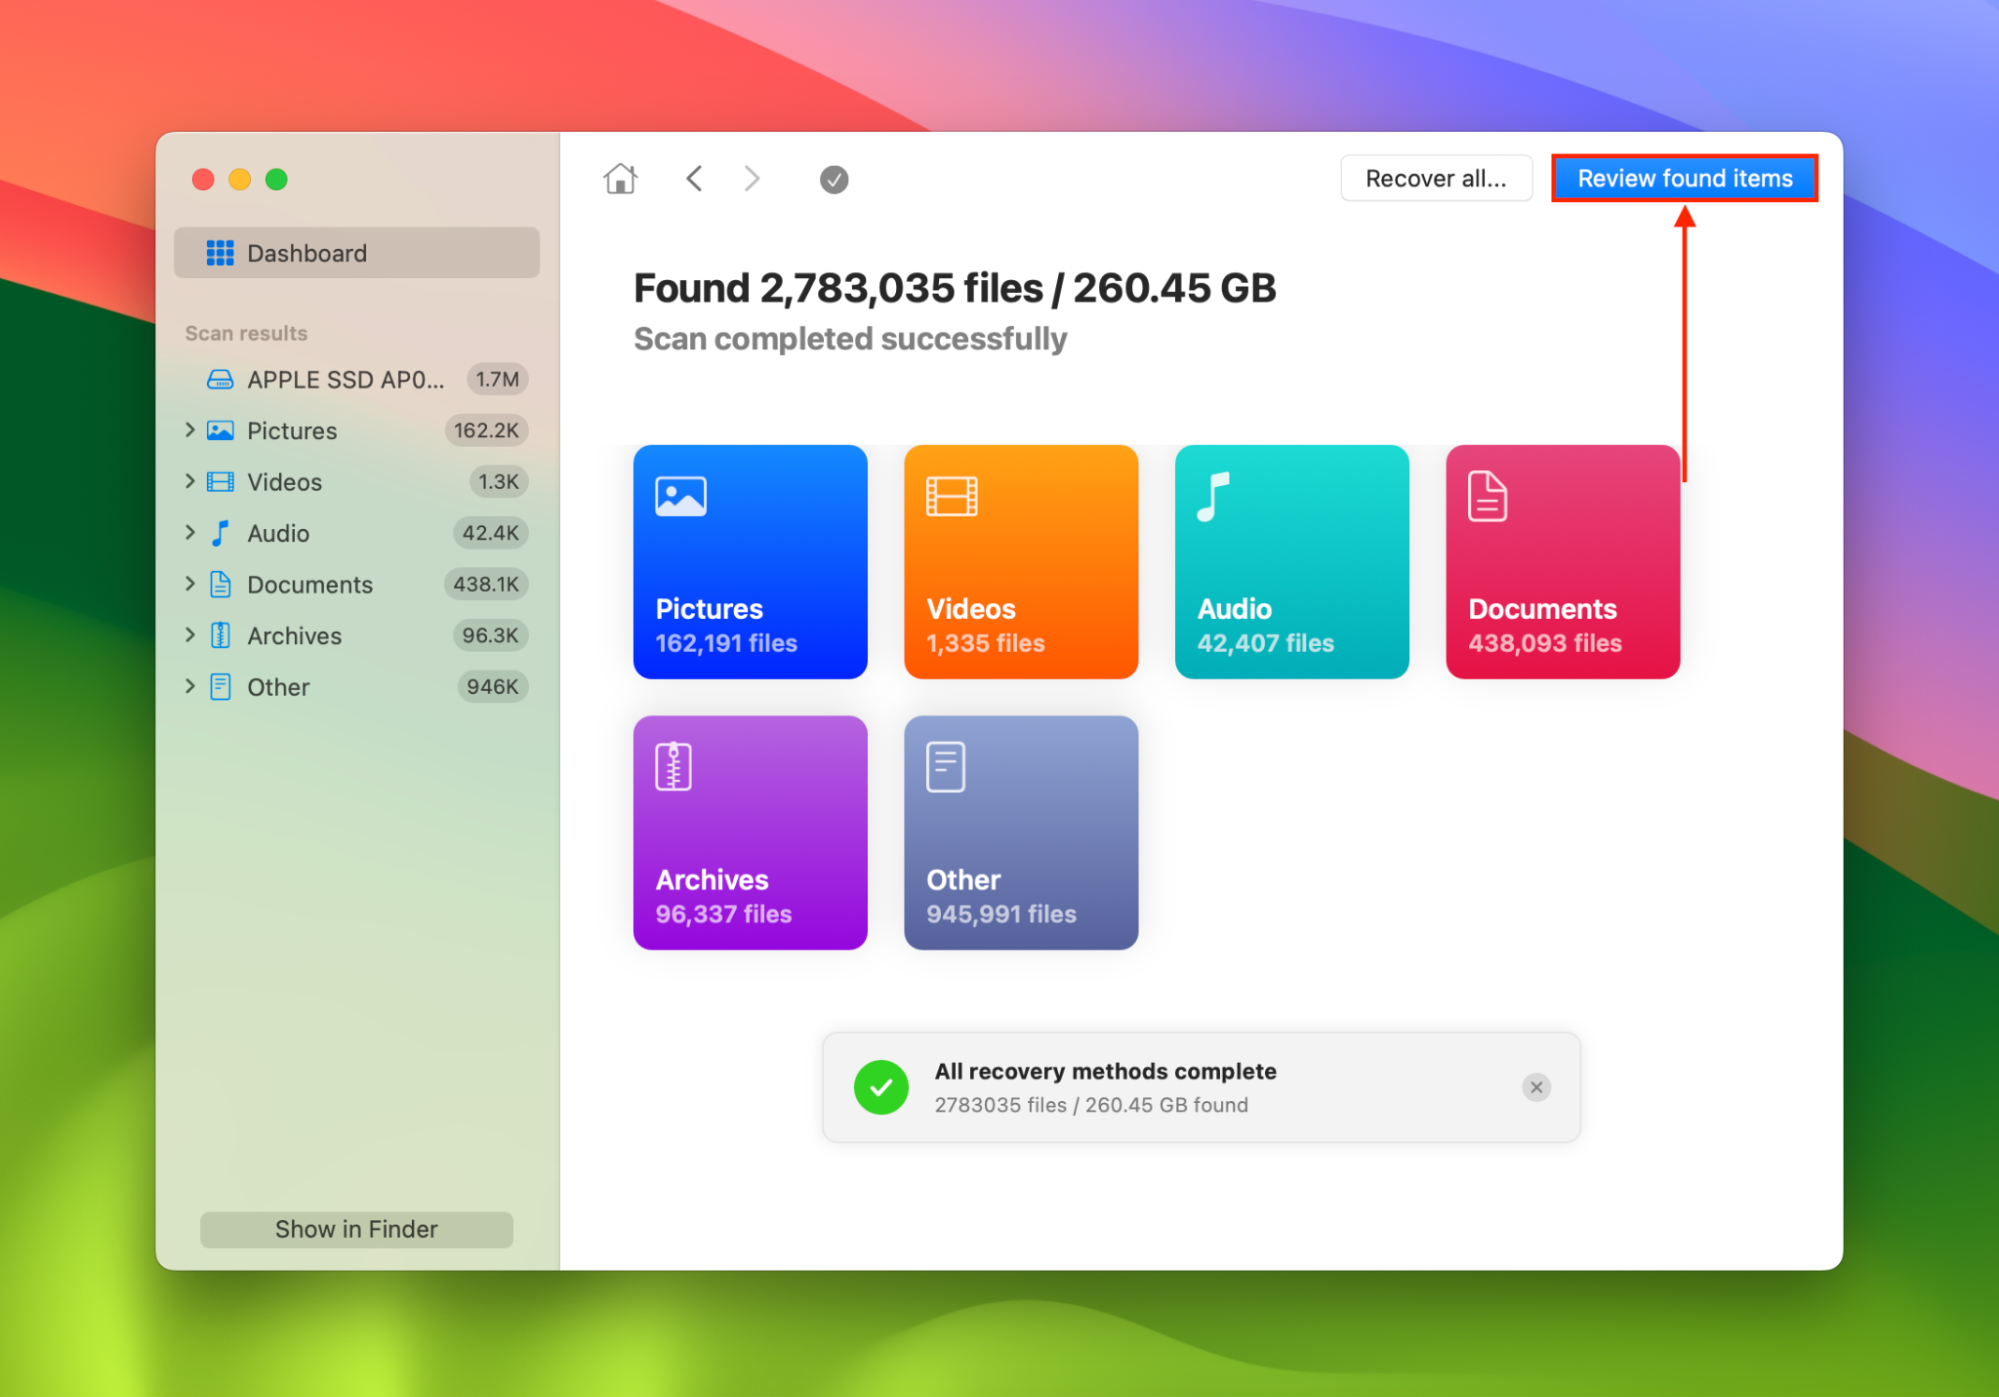
- Wait for Disk Drill to finish scanning your Mac. Then, click Review found items.
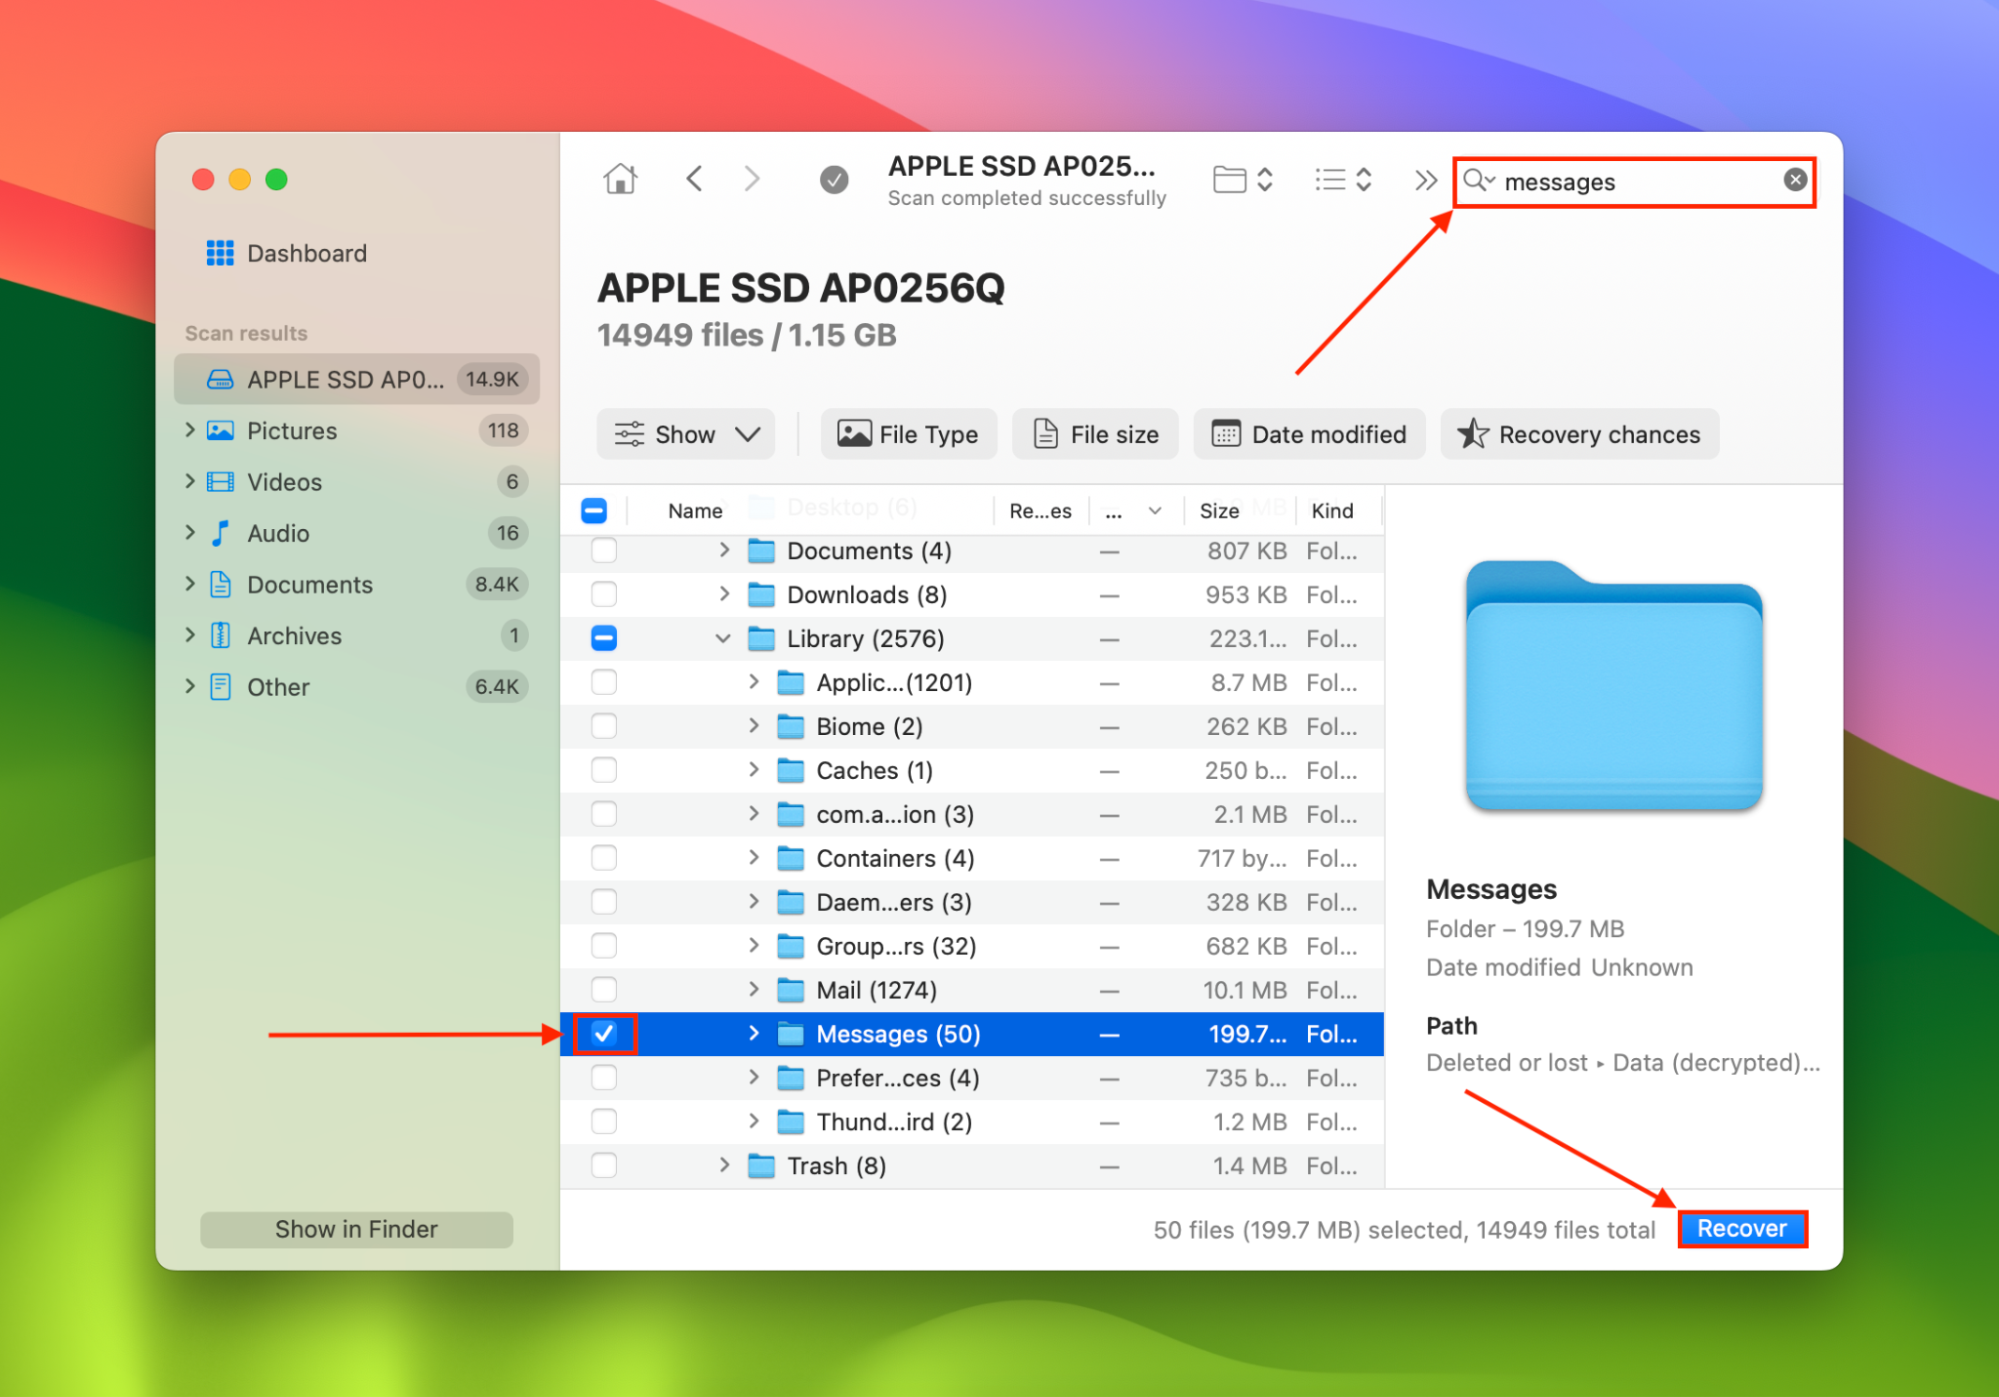
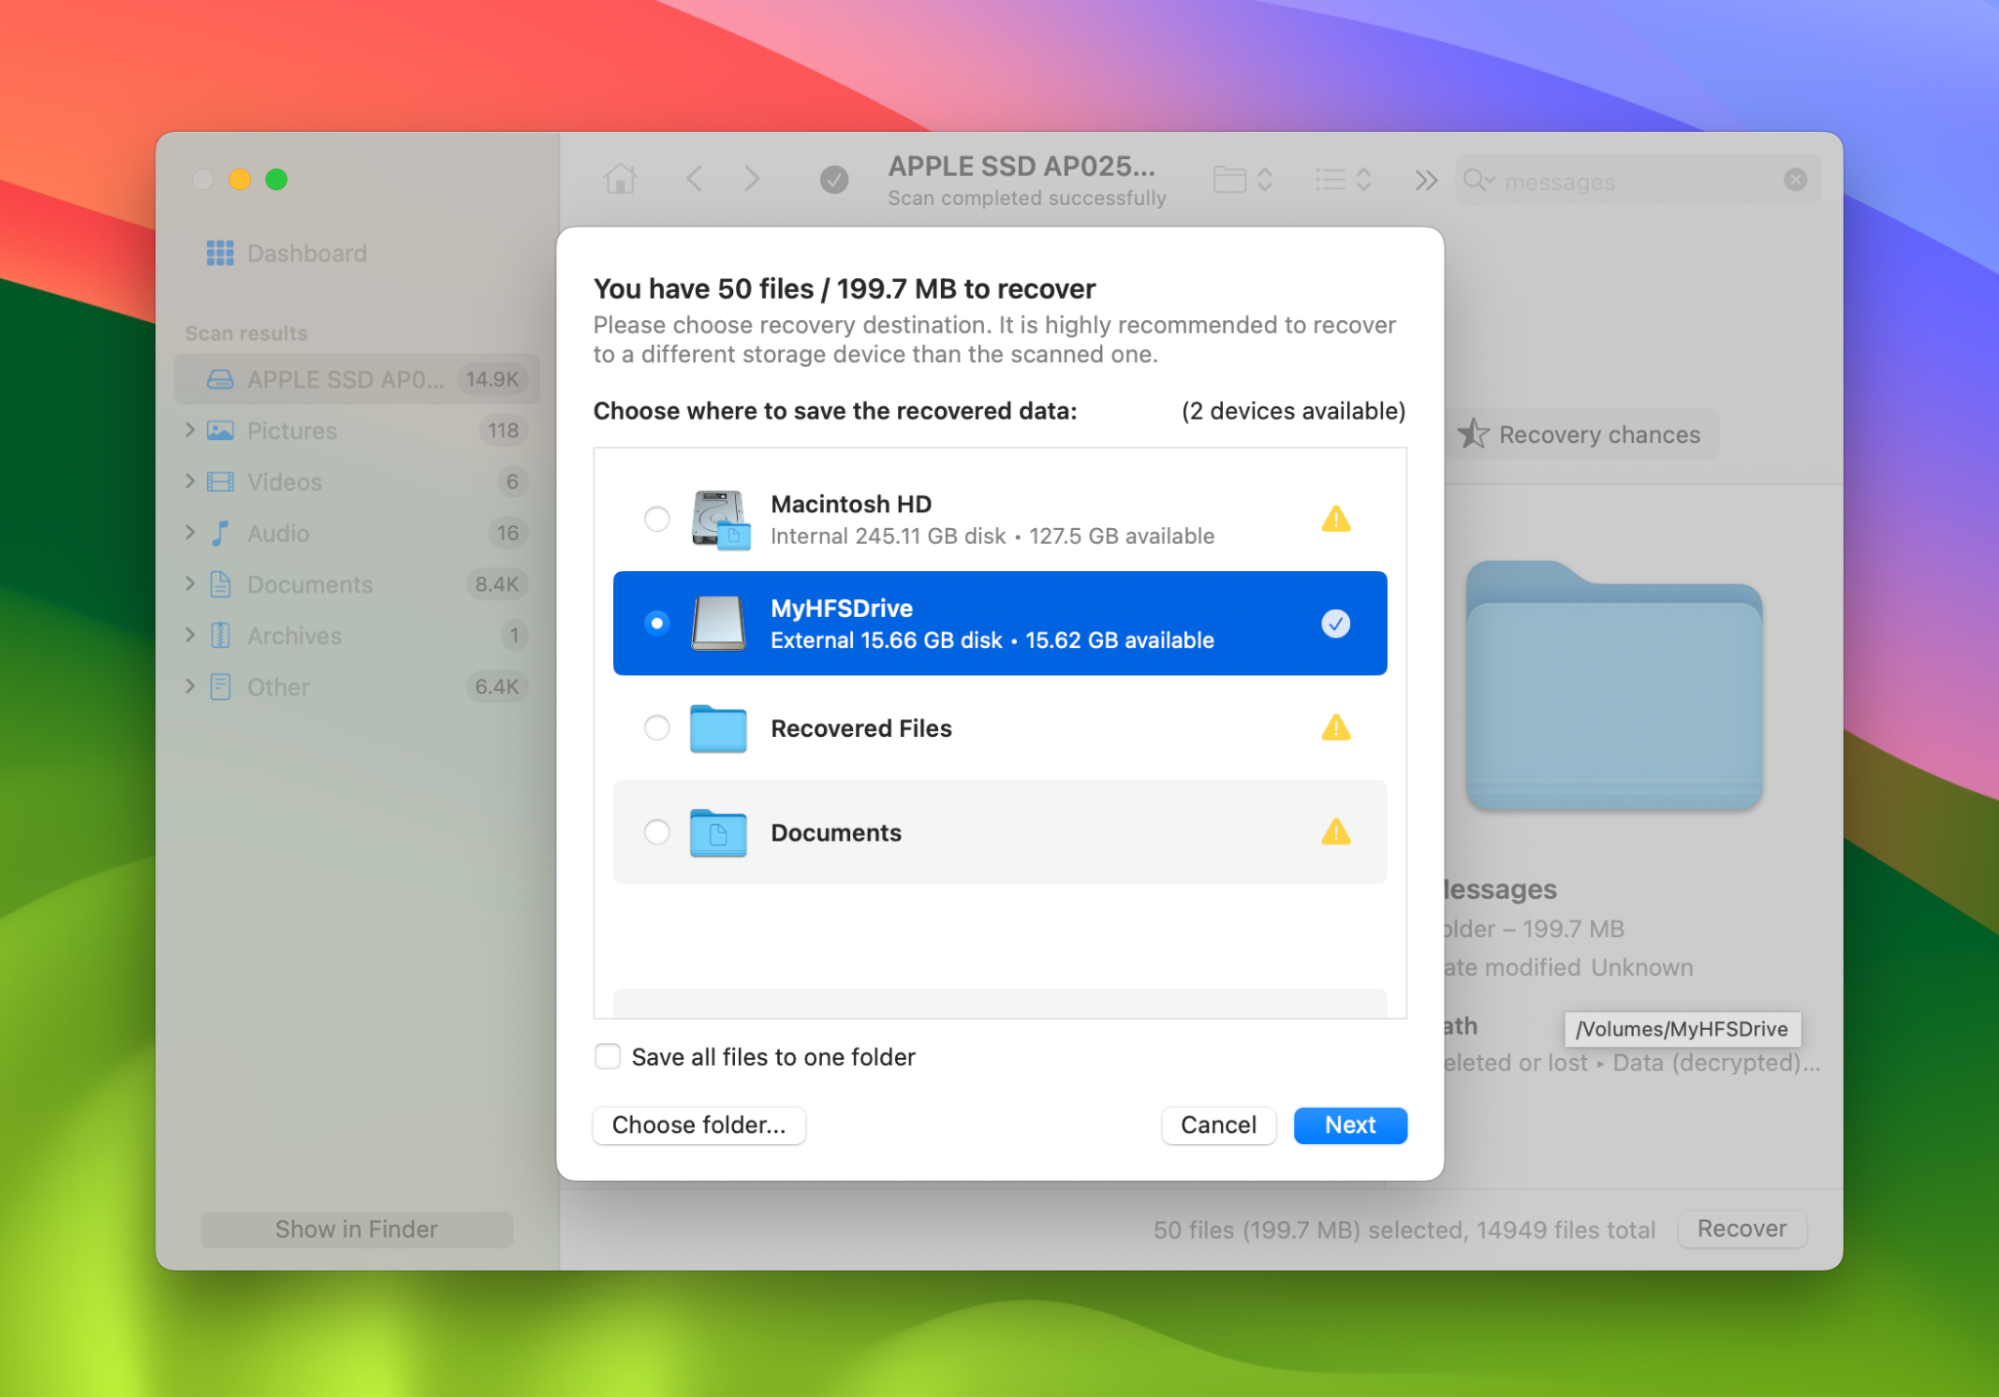
- On the top-right corner of the Disk Drill window, click on the search bar. Then, type “Messages” and hit Return. Locate the Messages folder (usually found in Data > Users > Your Username > Library) and mark the box beside it. Click Recover.
- Select the external drive that you connected in step 1 as the destination for the recovered files. This is to avoid overwriting the messages in the recovery queue. Then, click Next to start the recovery process.
Method 3: Time Machine Backup
Every Mac comes with a built-in backup assistant called Time Machine. This will create backups of everything on your Mac and it allows you to recover old iMessages should you accidentally delete one and need it back.
Time Machine backs up your Mac with 24 hour backups, daily backups over the course of the last month, and weekly backups for all previous months. This means that you can go down to the hour when it comes to recovering lost iMessages.
In my opinion, this is one of the best ways to view your iMessages history on your Mac and then have the ability to recover them should something happen. Recovering from a Time Machine backup is simple and easy to do.
- Plug-in your external hard drive that you back your Mac up with.
- Launch Time Machine.
- You then will have the ability to scroll on the lower right-hand side and select a date for which you would like to restore your Mac back to.
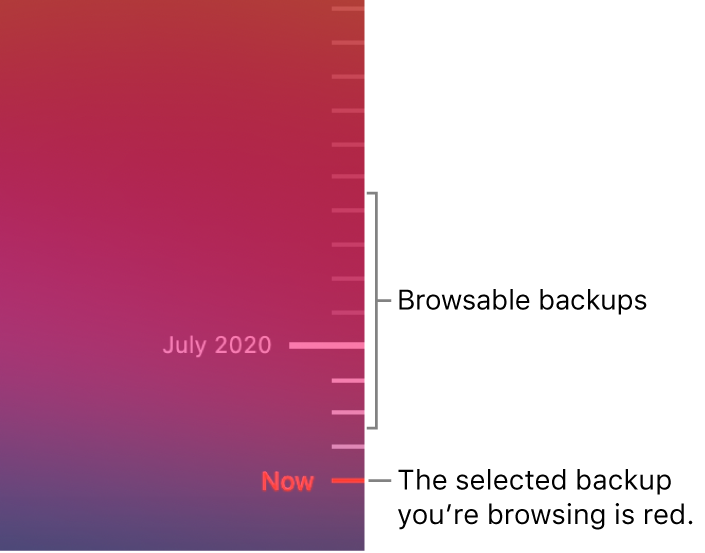
- After you have found the date where you believe that you last had the deleted iMessages, click Restore and your Mac will show all of the data as it did on that day.
Method 4: Recovering iMessages by Using Your iPhone
Our Macs do not backup to iCloud like other iOS devices. Due to this, restoring from an iCloud backup to retrieve deleted iMessages is not an option.
This will allow us to recover the iMessages if you deleted them from your Mac as they’re stored in another location.
Grab your iPhone and follow the steps below to recover the deleted iMessages.
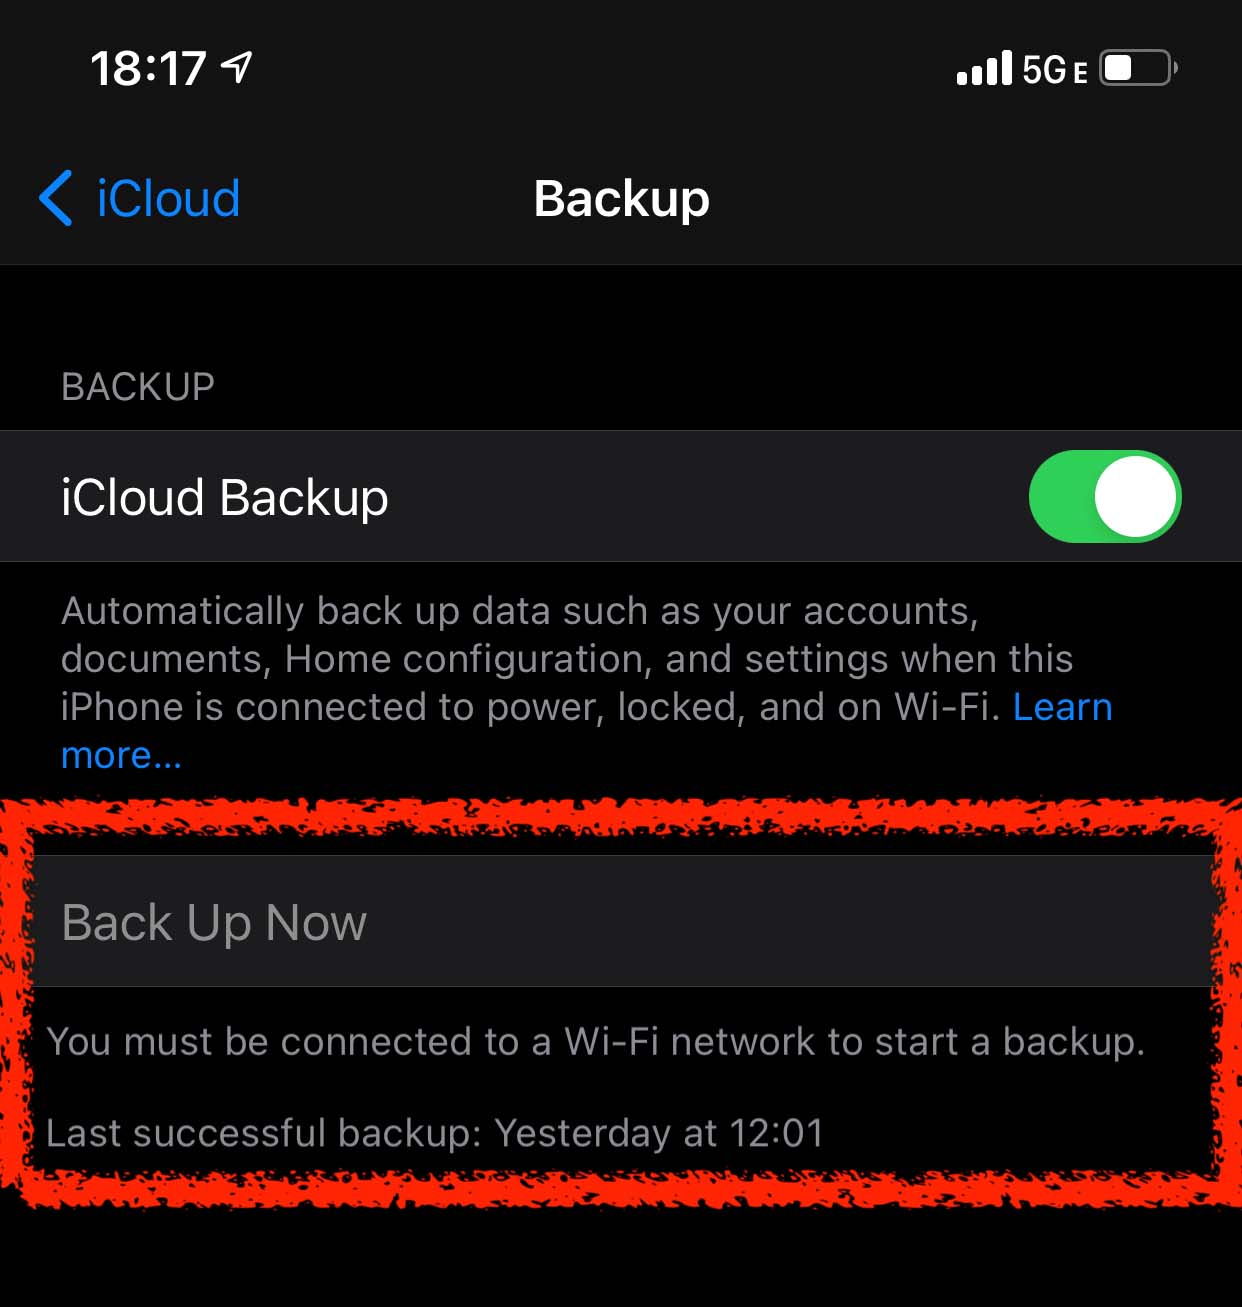
- Create a backup of your iPhone before going forward to recover from an iCloud backup. We have to set up our iPhone as new to be able to access the restore iMessages feature from iCloud. Apple has a support article that walks you through how to backup your iPhone here.
- Factory reset your iPhone. To initiate the reset, go to Settings > General > Reset > Erase All Content and Settings. Your iPhone will then reset and you will be greeted by the setup screen once the process has finished.

- Now you will have to go through the setup process. You will be greeted by a screen that asks if you want to restore data and you want to choose Restore from an iCloud backup.
- Look for a backup that was around the date that you last remember having the iMessages.
- Allow the restore to complete and then look and see if the iMessages are there.
That’s it! If the messages were deleted from our Mac we can use our iPhone to get them back.
Pro Tip: Adjust Autocleanup for Messages
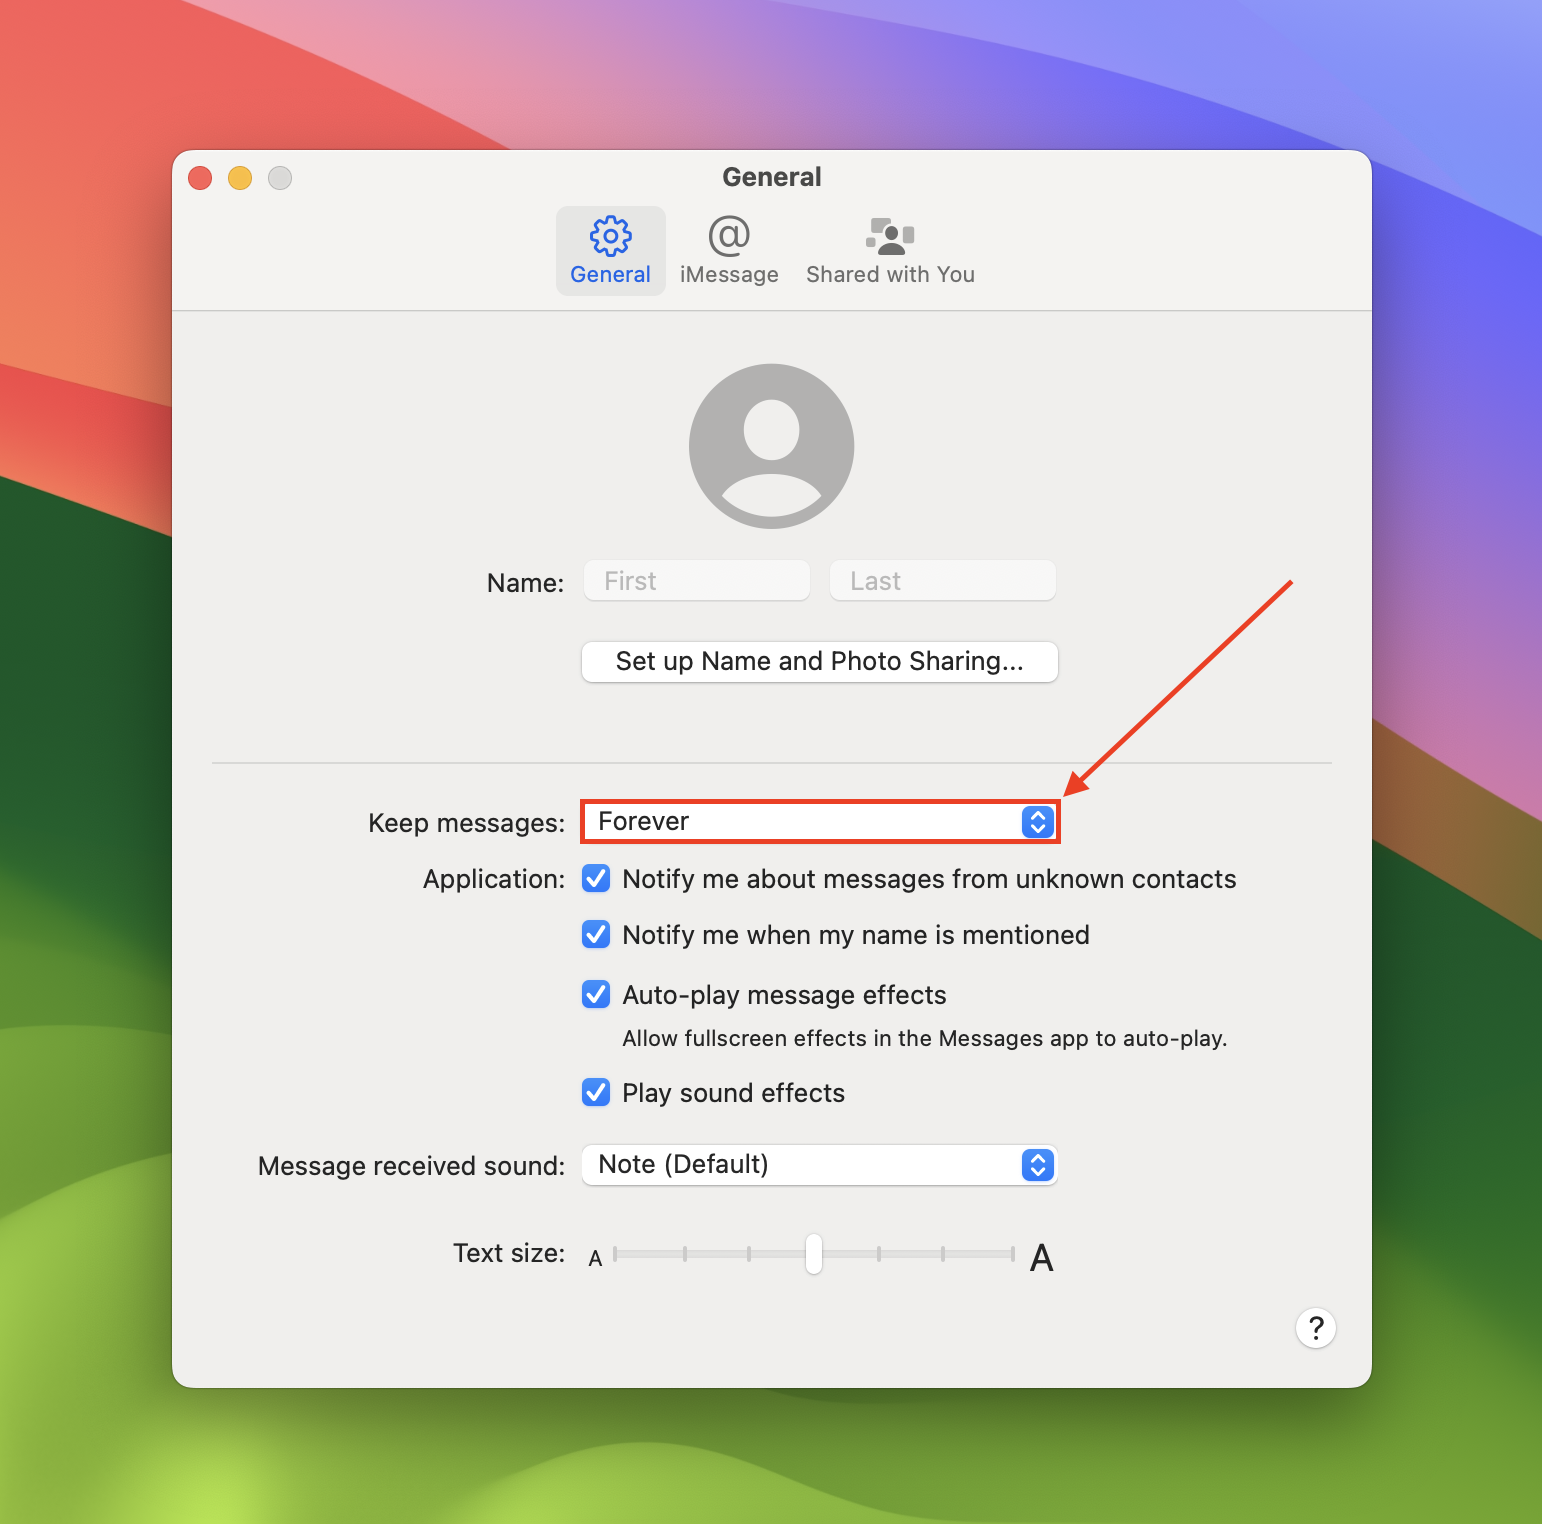
Even if you don’t intentionally delete your messages, the Messages app has an auto-delete feature that permanently deletes messages after a certain duration. Fortunately, you can adjust this setting and opt to keep your messages for longer than 30 days (or even forever!).
To adjust the auto-delete settings for iPhone Messages:
- Open the Messages app (Finder > Applications).

- On the Apple menu bar, click Messages > Settings…
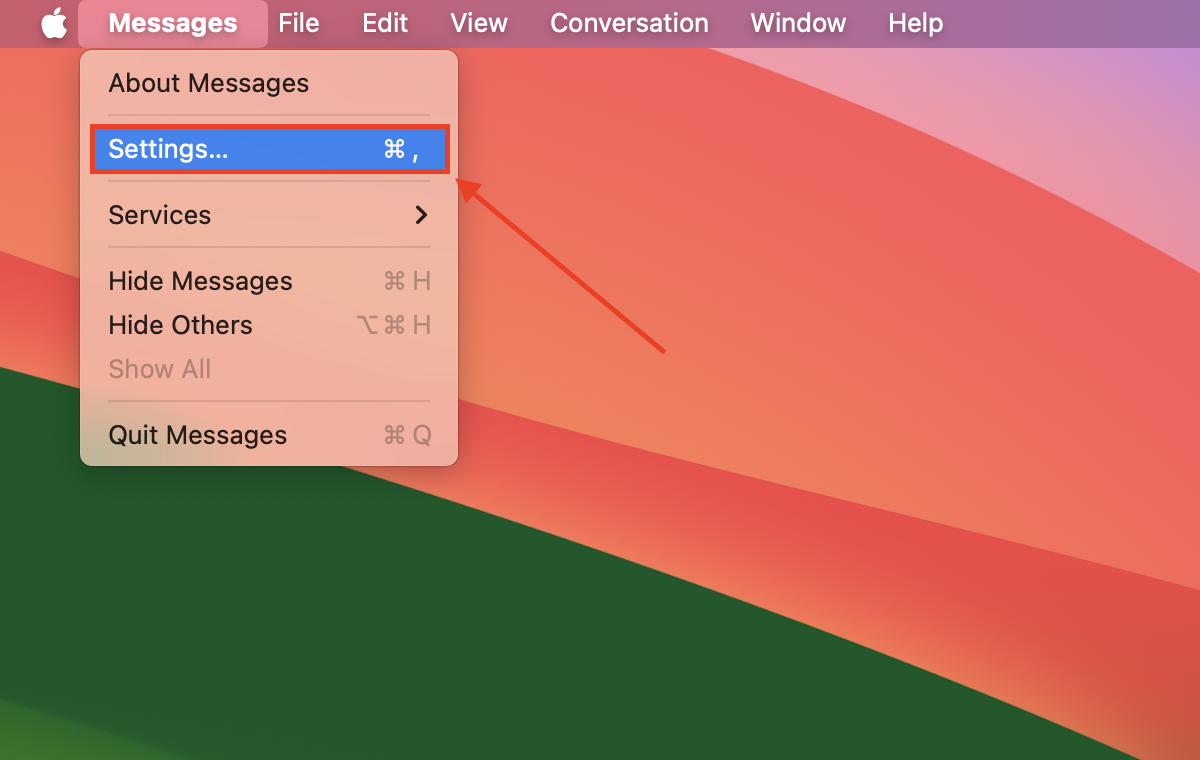
- Click the dropdown menu beside the Keep messages setting and choose how long you want to keep your messages.
Conclusion
Losing iMessages on your Mac can be frustrating but there are many ways to recover them as seen above. The best practice is to have an external hard drive and backup your computer or use iCloud on your iPhone to ensure that your iMessages are always being saved.
You can see though that even if you didn’t have a backup in place, there are ways to restore deleted iMessages and get them back onto your Mac.


