If you’re fairly new to the Mac, you might not know everything that the Finder’s search feature can do. After all, aside from the ubiquitous Spotlight search field and the search box in every Finder window, Apple does a pretty good job at keeping more advanced search features hidden. Here’s a quick run-through of some of the Finder’s search features you might not know about.
Table of Contents
AND, OR, NOT
Want to do a quick search for files that mention cats and pandas but not dogs? Type the following into the search bar:
cats AND pandas NOT dogs
If you want to look for files that mention cats or pandas, use “OR” in place of “AND.” Using “AND,” “OR,” and “NOT” makes it easy to expand or narrow your searches, and it’s fairly straightforward to understand despite its computer-science roots. Just be sure to use these terms in all caps; otherwise, the Finder will interpret your search differently—it’ll think you’re looking for documents that contain the phrase “cats and pandas not dogs” instead.
Narrow Down Searches
Of course, that isn’t the only way to refine what you’re searching for. When you start a search, you’ll notice a bar with a couple drop-down menus and “+” and “-“ buttons on the right-hand side. Use the drop-downs to narrow down what sort of things you’re searching for by adding additional filters. For example, you can limit your search to certain kinds of files, or limit your search to files you created in the past week (useful if you forgot where you put that presentation you made on Monday).
If you want to add attributes to search by, press the “+” button. To remove a search filter, press the “-“ button next to it.
Harness The Power Of Nested Boolean Searches
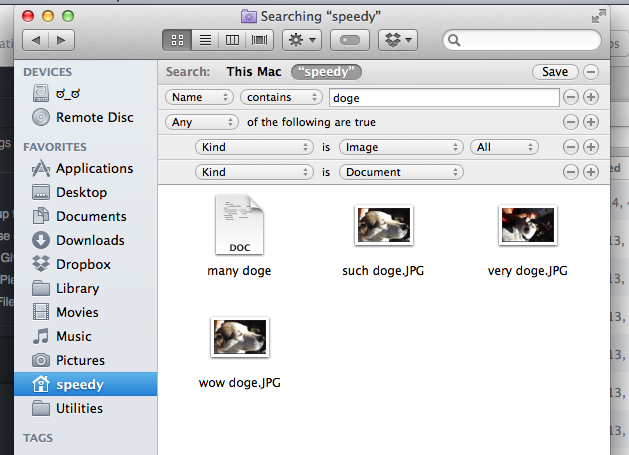
With a little know-how, you run a search that will look for either images or Word documents that contain “doge” in the title using a feature called “nested boolean” searches. Without getting too in depth, this is basically a more sophisticated version of the “AND,” “OR,” or “NOT” search method I mentioned earlier.
To get a search like this, go to File > Find…, and change the first line to look like this:
Next, while holding down the option key, press the “+” button in the search window—the plus sign will change to an ellipsis (“…”). Now press the “+” button again, this time without holding down the Option key. Next, narrow your search by kind. Add more rows by pressing the “+” button to limit your search as you please. For this example, you should get something like this:
Don’t be afraid to play around with the search filters! You won’t break anything, and it’s probably the easiest way to get a feel for how the search filters work.
Search by obscure attributes
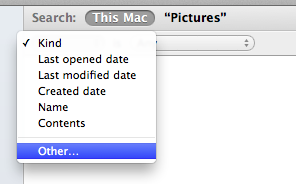
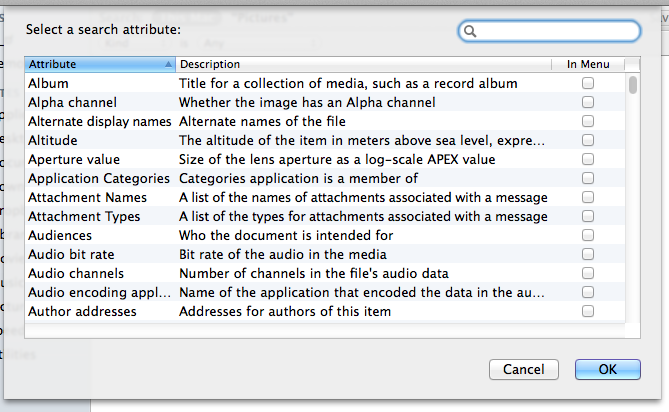
You aren’t limited to searching by the attributes that appear int he filter drop-down menus. Click the attributes drop-dowm menu for any filter (it’ll be the left-most one in any of the filter bars) and select Other… located at the bottom of the menu: You’ll be presented with a dialog box that lists all sorts of attributes you can search on, with descriptions of each. If you want to add any of the attributes to the drop-down menu, click the checkbox next to that attribute. Select the attribute you want to search on, then press OK.
Make a smart folder
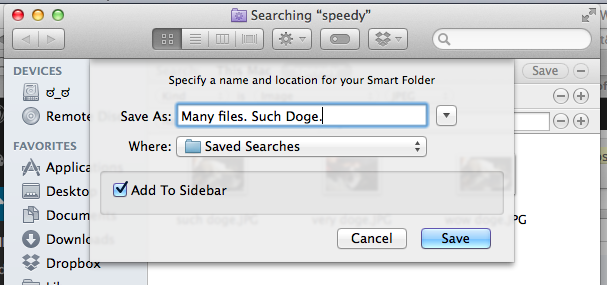
Now that you’ve got your search the way you want it, you can save it for future use. Press the Save button and you’ll get a smart folder that contains the items you searched for. Creating a smart folder doesn’t move the items from their original locations; it just lists items that meet certain search terms. As you add or delete items that fit the search criteria, your smart folder will be updated accordingly.
Got more search tips? Shoot us an email, and if we like it, we’ll add it to our list (and credit you, of course).


