
RAIDs are used to increase computer performance and reliability. While not used as much in a personal setting, they can create extremely fast server setups and allow businesses to function without missing a beat if a hard drive happens to fail. In places where data must be accessible at all times, RAIDs are great for redundancy but also they allow for fast read and write speeds.
However, everything is susceptible to hardware failure and while it most likely won’t happen, there is always a possibility as hardware can fail. In this article, we’re going to take a look at how to recover data from RAID hard drives on Mac.
Table of Contents
5 Tools to Recover Data from Raid Array
In this section, we’ll introduce 5 reliable tools for RAID data recovery. We provide a short breakdown for each tool, covering its features, pros and cons, user experience, performance, and compatibility with different RAID levels.
And while we started this list with the strongest (in our opinion) option and made our way down the “top 5”, your final choice ultimately depends on your specific needs. So make sure to pay attention to what each tool offers, aside from the order we wrote them in.
1. R-Studio
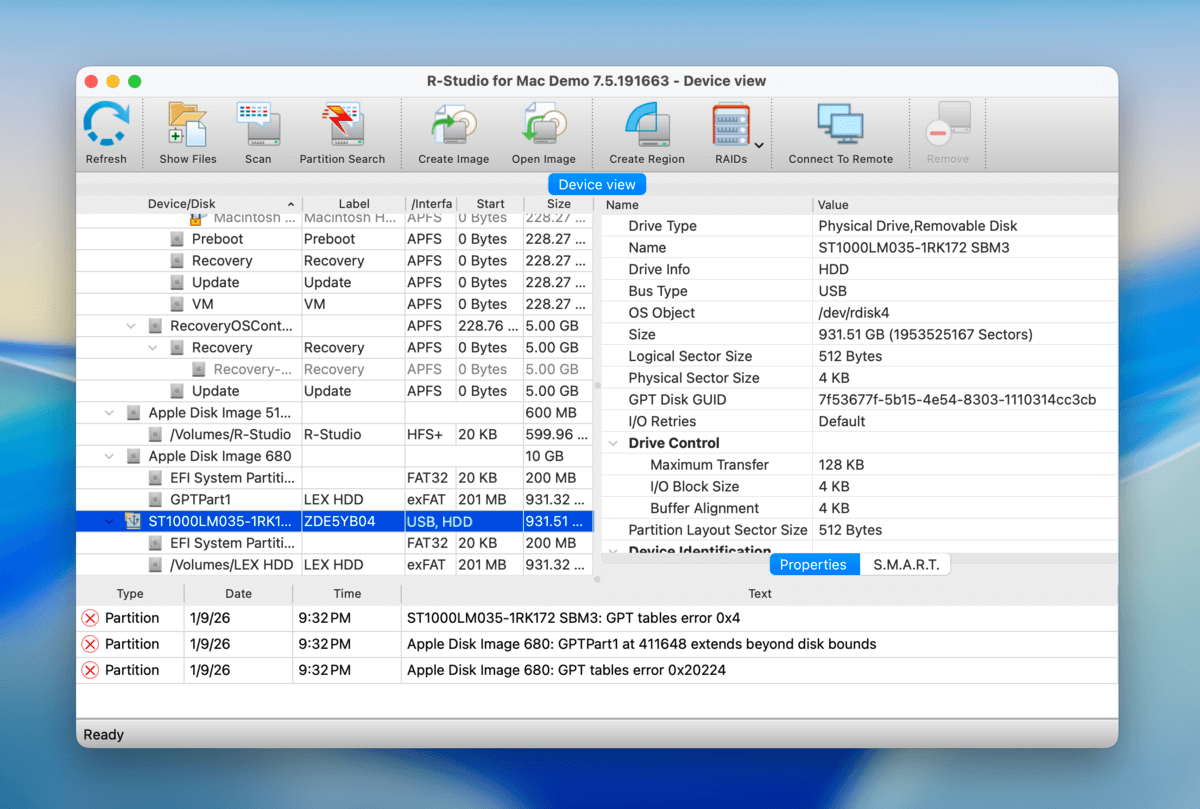
With both a Windows and Mac version available, R-Studio is a solid choice when it comes to RAID data recovery on your computer. The Windows, Mac and Linux versions are specifically designed for each operating system which makes them more reliable and powerful. They aren’t just ports that were put onto either of the operating systems.
R-Studio is one of our team’s favorite tools for RAID recovery operations because it has one of the widest and most advanced coverage for different RAID configurations compared to other consumer-level applications on the market (and of course, on this list). Aside from the standard RAID levels, it supports nested RAIDs, non-standard RAID levels like RAID 50, RAID 60, RAID 1E, RAID 5E, RAID 6E, and many more. R-Studio also has a powerful RAID management module that allows you to configure them through the application.
2. Disk Drill
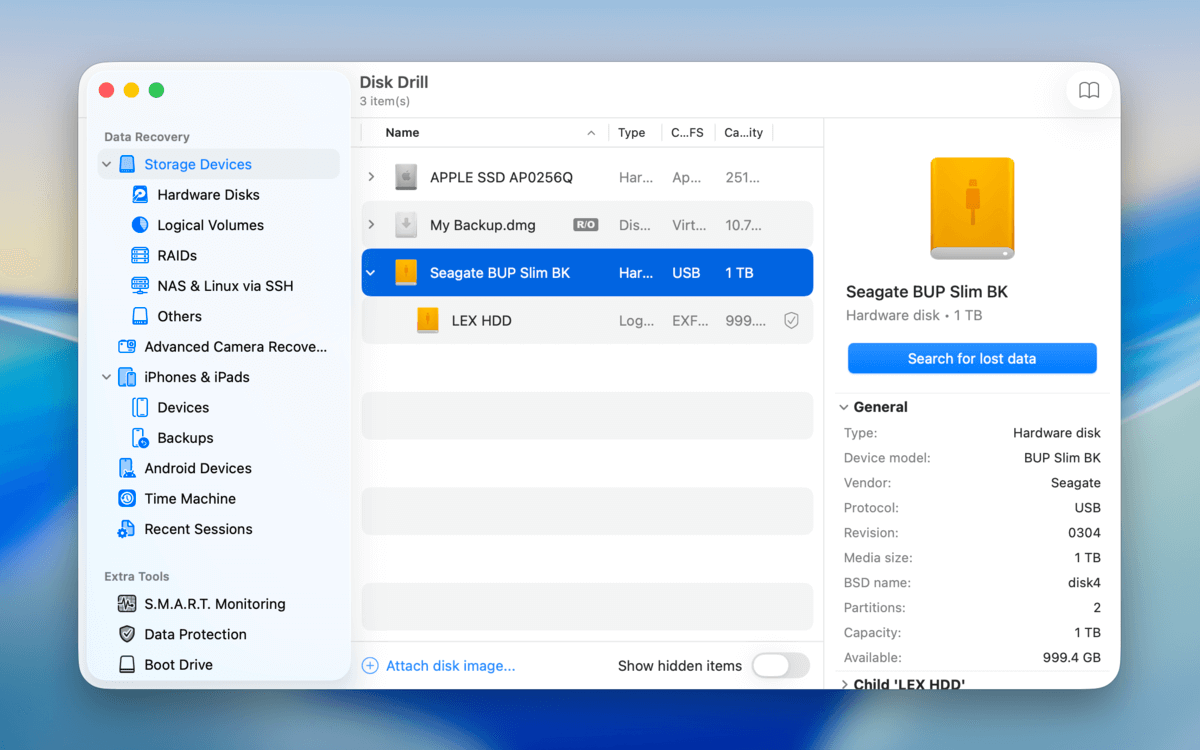
Disk Drill is a highly versatile and incredibly easy-to-use data recovery application, especially when compared with R-Studio, whose busy user interface and countless advanced options make it intimidating for anyone but the most advanced users.
Disk Drill is excellent at scanning RAID drives in most standard configurations, even if the array itself is no longer working as a whole. What makes this app a top choice for RAID recovery is that it wraps up an otherwise complex process into just a few clicks. Disk Drill has one of the best interface designs among most recovery apps, and its user experience is pretty much unmatched. Even a total beginner can successfully recover data from RAID arrays with Disk Drill. As a bonus, it also supports NAS (Network Attached Storage) by scanning them via SSH.
The free version of Disk Drill can be used to preview an unlimited number of recoverable files, so you can know for sure if it’s capable of recovering your files before you spend money on a license.
3. UFS Explorer RAID Recovery
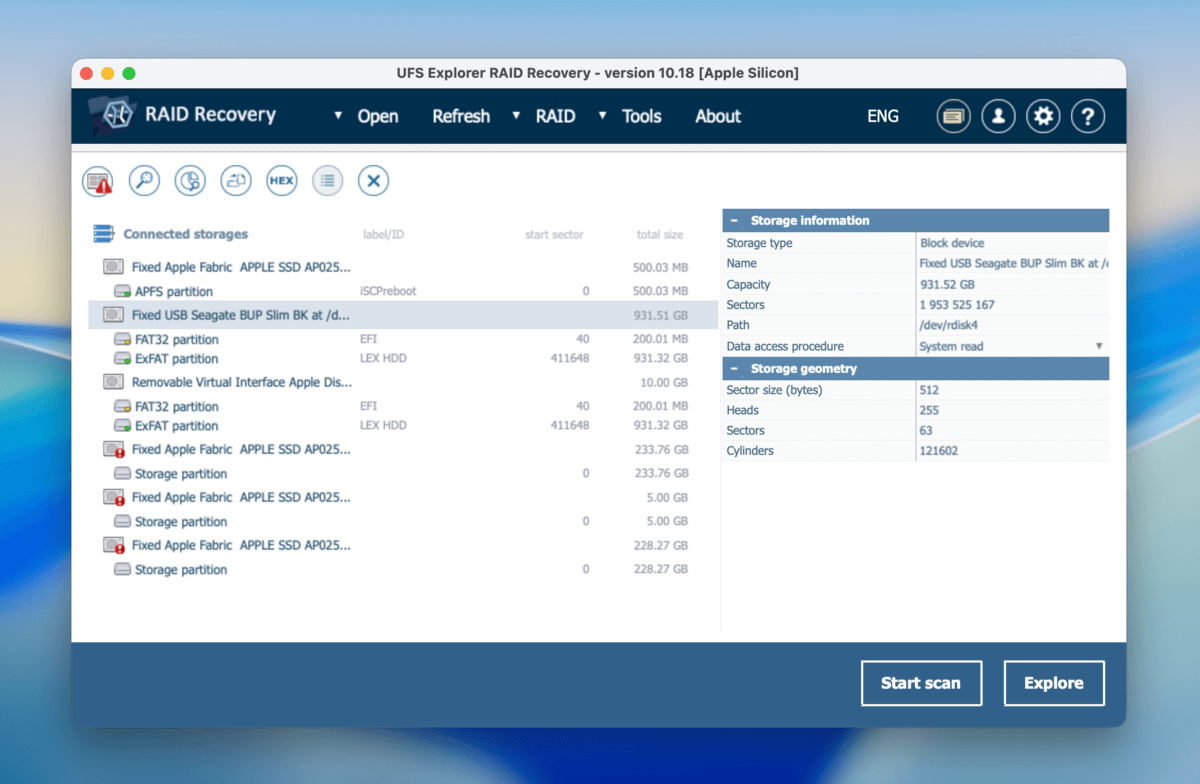
UFS Explorer supports Windows, Mac, and Linux. While it is a pricier option than some of the others, you do get a very nice RAID-based data recovery option here because the application is designed specifically to address RAID-related data loss. However, this app’s major weakness is its interface. Not only is it highly outdated (making the app look pixelated on high-resolution monitors), but it has a cluttered design that requires users to take extra time learning how to navigate through the application before even getting to the recovery part.
UFS Explorer boasts support for the largest number of RAID types, and its file system support is similarly impressive. While it can automatically detect RAID parameters, RAID configurations need to be defined manually. Another downside worth mentioning is the fact that its scanning algorithms are a bit weaker compared with the two above-recommended tools.
4. TestDisk
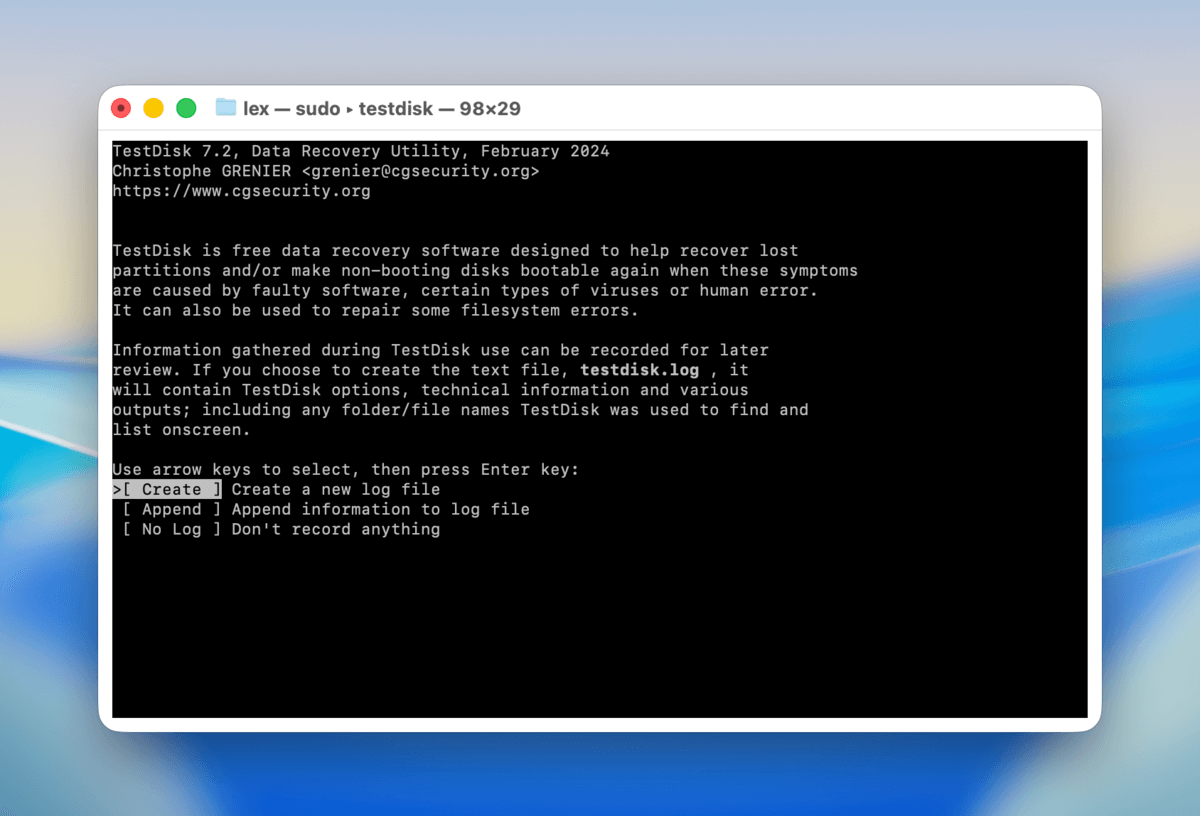
TestDisk is a completely free and open-source data recovery tool that can be used to get back lost data from Linux RAID md 0.9/1.0/1.1/1.2 (RAID 1, RAID 4, RAID 5, and RAID 6) arrays. In terms of recovery performance, it stands out with its ability to find lost partitions on a RAID array.
As you can tell by looking at the screenshot above, TestDisk doesn’t have a graphical user interface, and that’s easily its biggest downside. The only method of navigating through the application is your keyboard. Another major drawback is that it only supports Linux RAID–it does not officially support AppleRAID.
5. MiniTool Power Data Recovery
MiniTool Power Data Recovery is a file recovery app from the developers of (the highly popular) MiniTool Partition Wizard. It supports over 100 file formats, including the most popular photo, video, audio, and document formats, including JPG, PNG, TIF, MP4, MP3, AVI, DOC, XLS, PDF, etc., and many more.
Most importantly, the app supports recovery from software RAID arrays – specifically: spanned volumes, striped volumes (RAID 0), mirrored volumes (RAID 1), and RAID-5 volumes.
While we prefer the GUI design of other apps on this list, MiniTool’s visual interface makes RAID recovery easy enough for beginners. It also has decent file browsing features, such as thumbnail view (which makes it easier to browse photos and videos) and search and filter tools to narrow down the list of files.
Overall, MiniTool is a decent recovery tool for beginner users that works best for restoring common files from software RAID setups. It also offers 1MB of free data recovery, which should be enough to check if the app will work for you. However, note that it only applies to scenarios involving file deletion, because the app can scan RAIDs that are mounted as logical volumes. However, if the RAID itself is damaged, this option becomes useless.
How to Recover Data from RAID Hard Drives
Depending on how you lost your RAID drive data, we present two options you can choose from moving forward. Option A is to use data recovery software to scan your RAID drives for the missing data. This is a good choice for most scenarios, like accidental deletion or formatting, corruption, virus infections, etc. This option is also a lot easier.
Option B is to use partition recovery software to restore any missing or lost partitions within your array; this will help you regain access to a RAID drive that was previously inaccessible (due to corruption or damage to the array). This option is more difficult, specific, but free.
Option A: Recover Your RAID Drive’s Files
The most reliable way to restore data from your RAID drives is to use RAID-compatible data recovery software. Data recovery software is a tool that can pull files directly from a storage disk, even if it’s inaccessible through Finder (as long as macOS recognizes it). We briefly covered our favorite RAID recovery software in an earlier section of this article, but for this guide, we’ll be using Disk Drill.
Disk Drill is the most beginner-friendly tool on the list, and it’s compatible with the most common RAID configurations used by our readers. You can check out the apps section (linked above) for more details about Disk Drill and other RAID recovery software our team recommends.
Step 1. Connect your RAID array to your Mac with the appropriate configuration. For example, RAID 1 arrays only require you to connect 1 disk, while RAID 0 requires all disks to be connected.
Step 2. Download and install Disk Drill on your Mac (NOT on any of your RAID disks).
Step 3. Open Disk Drill. Then, select your RAID array from the list of drives, and click Search for lost data.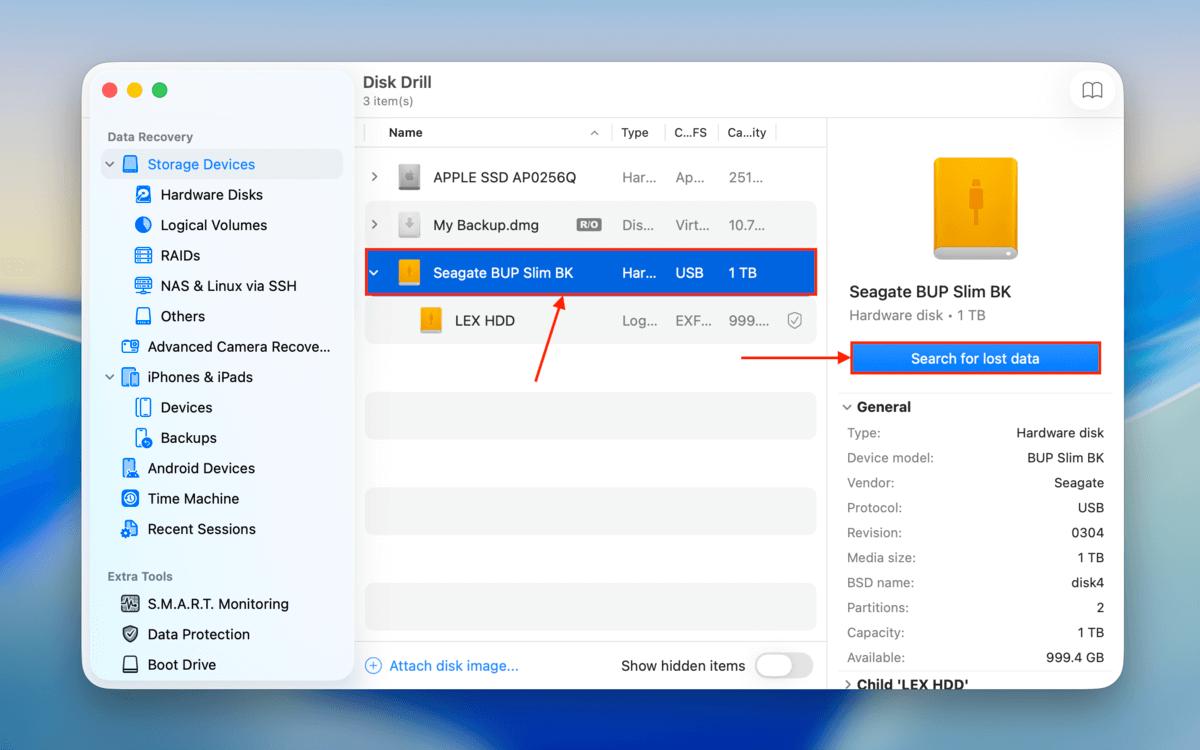
Step 4. You’ll be asked to choose a scan type. Select Universal scan.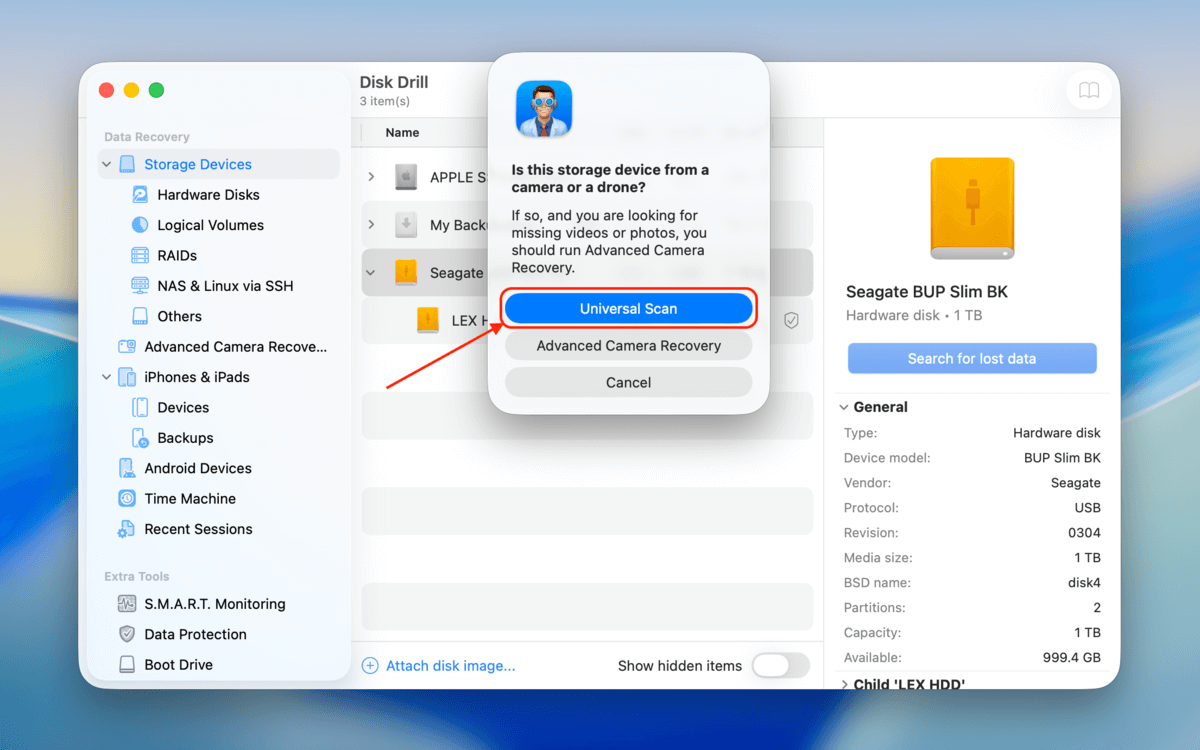
Step 5. Wait for Disk Drill to finish scanning your RAID array. Then, click Review found items.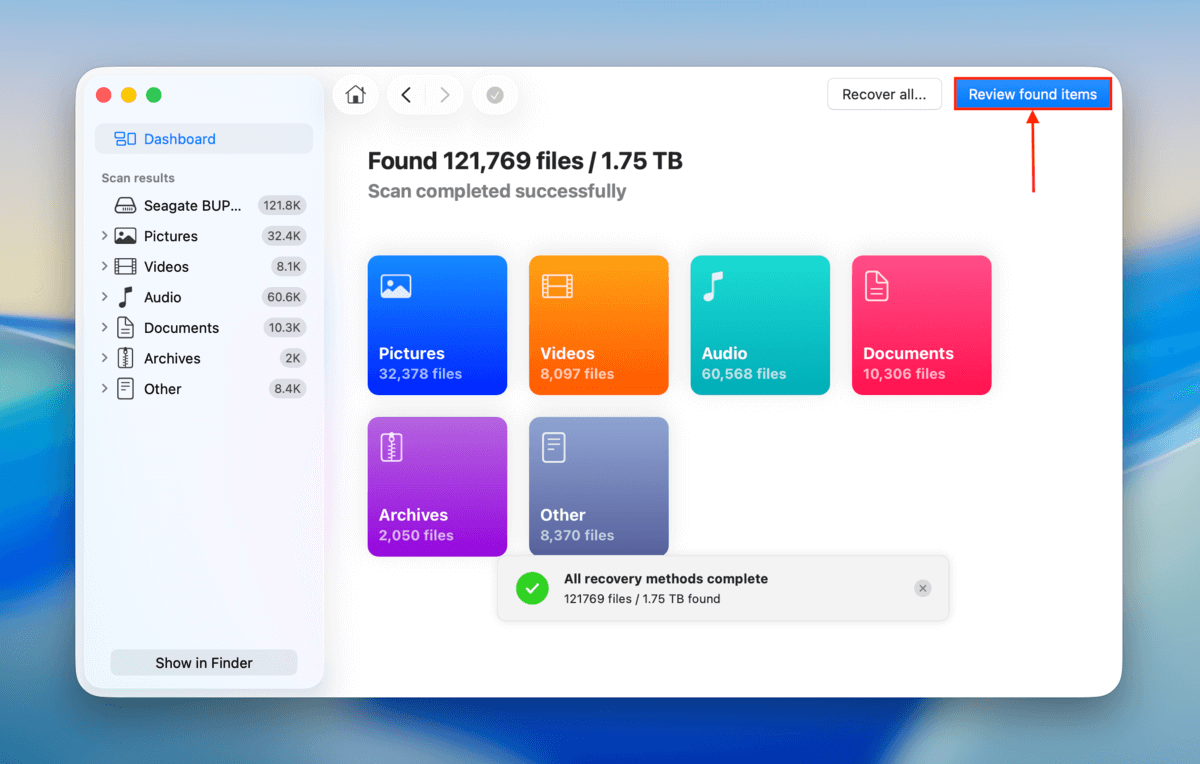
Step 6. If your RAID drive data had simply been inaccessible, you can access your files in the Existing recovery tab. If you don’t find them there, check the Deleted or lost and Reconstructed sections.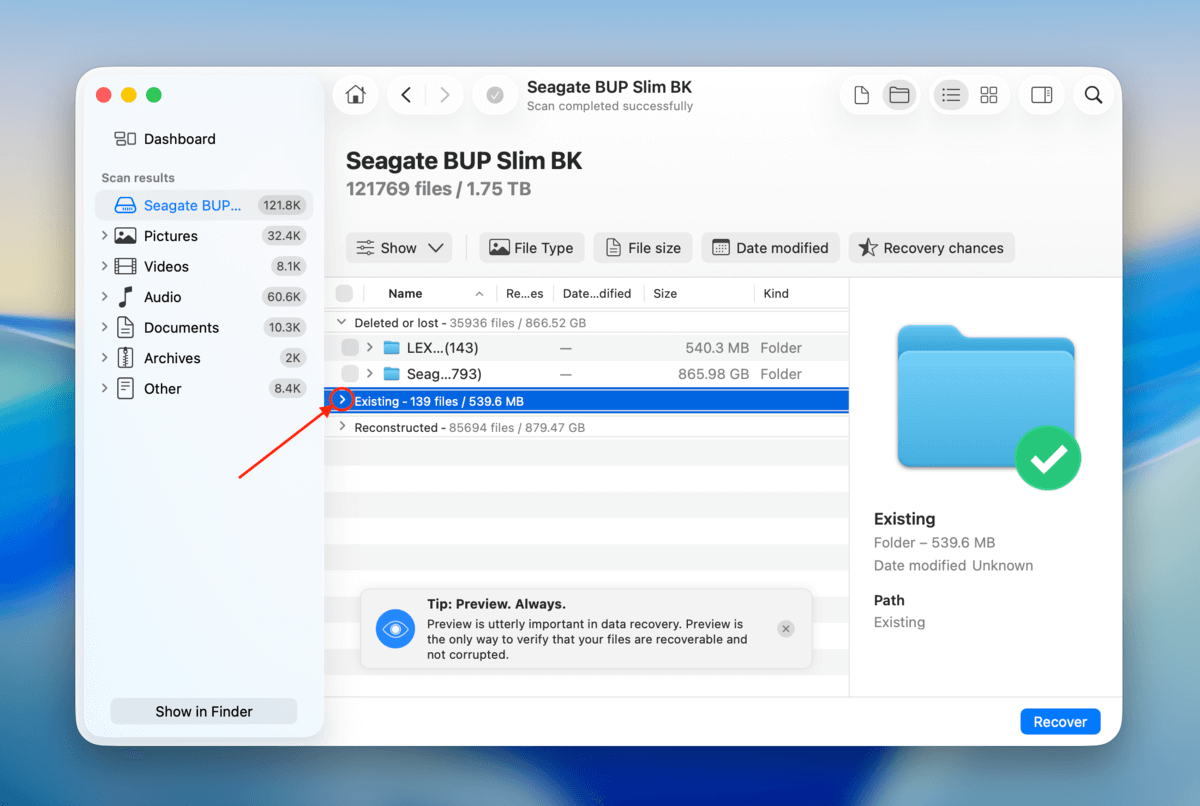
Step 7. You can use the search tool (top right corner) and the filters in the sidebar to narrow down the scan results to specific file names, keywords, or file formats. We recommend previewing your files by clicking each file once–this displays its contents in a small window in the right sidebar. This helps you determine which files are actually recoverable.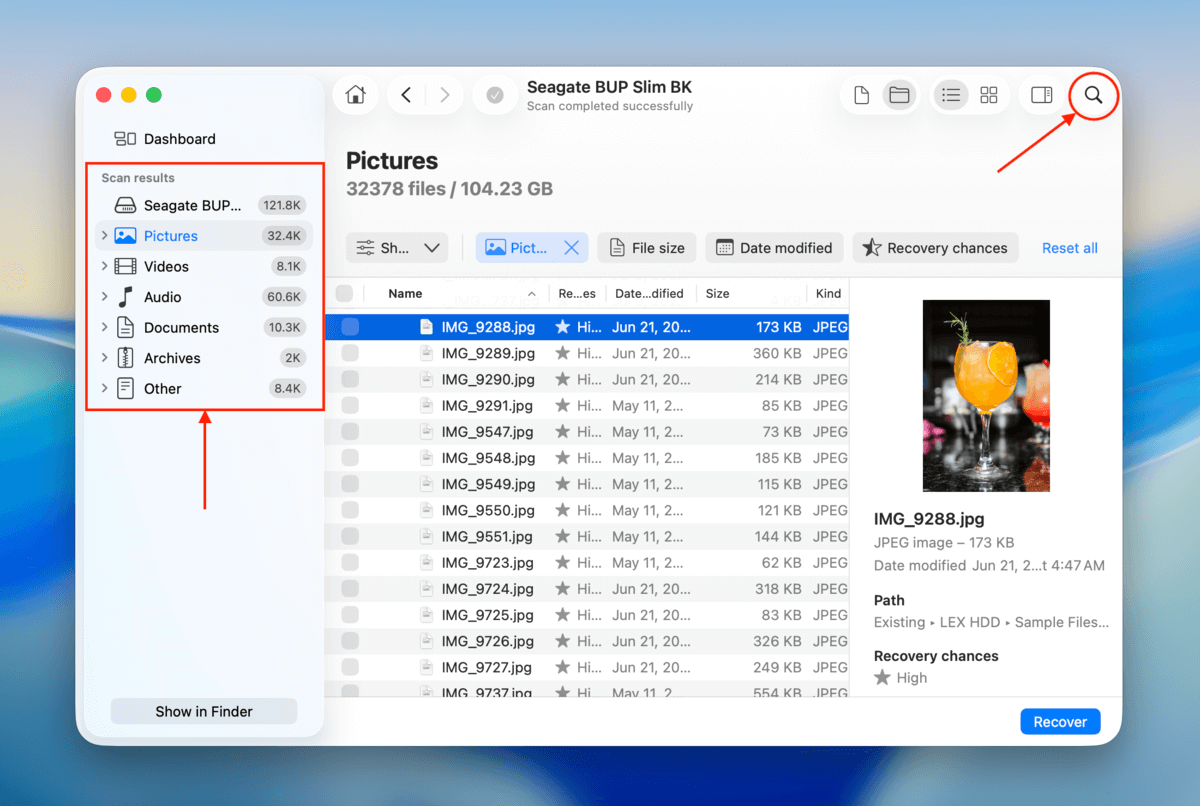
Step 8. Mark the boxes beside the files you want to restore. Then, click Recover.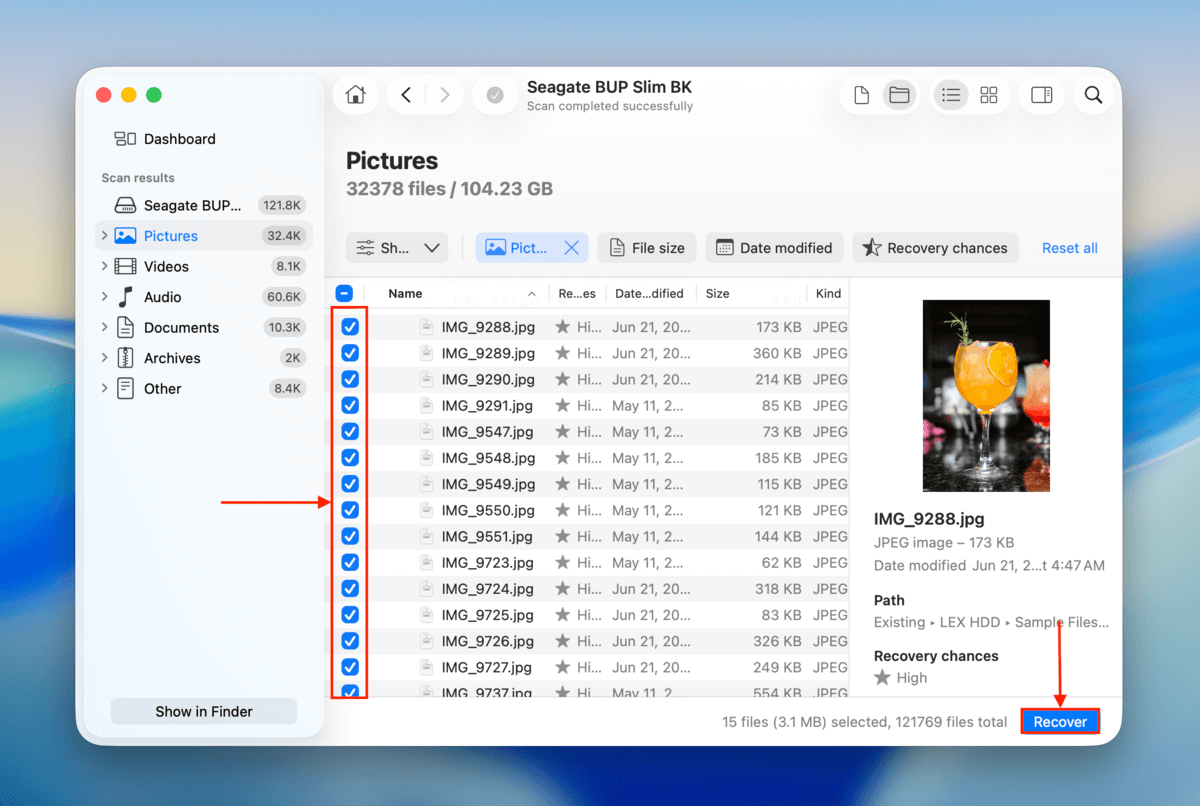
Step 9. Choose a location on your Mac (not on any of your RAID disks) where you want Disk Drill to save the restored files. Finally, click Next.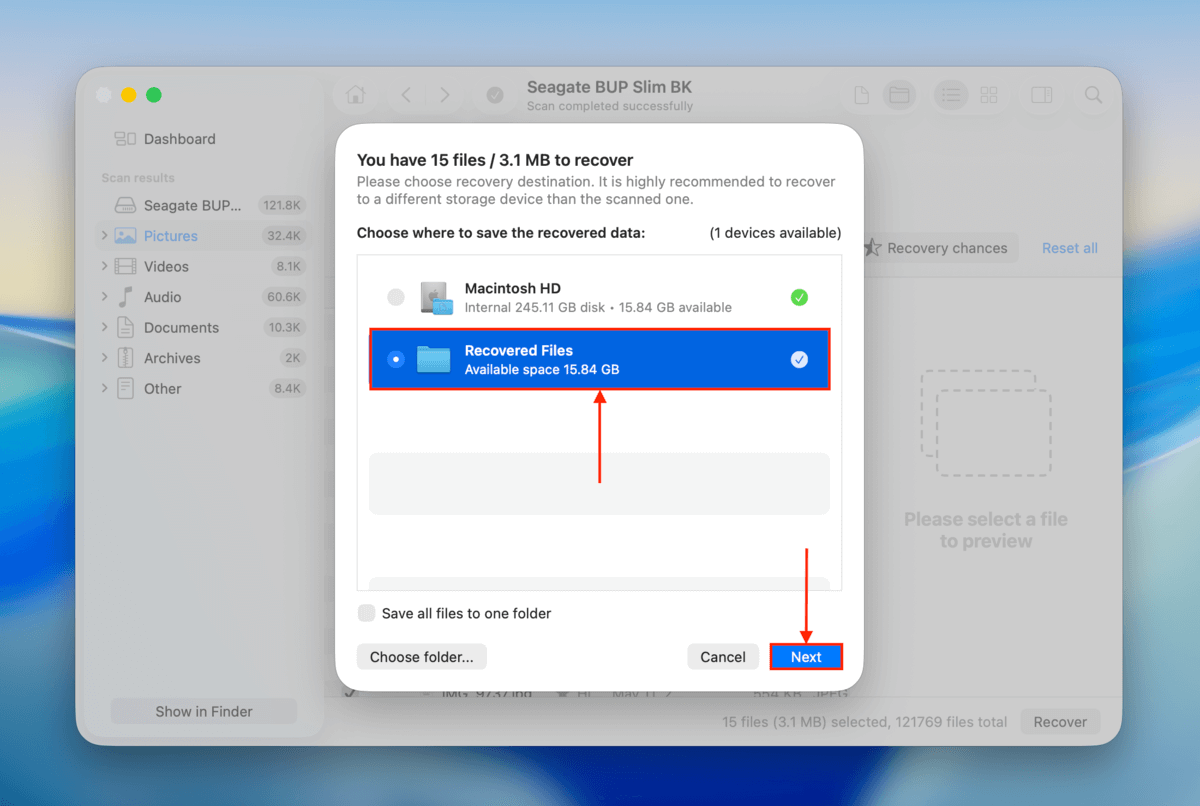
Once your RAID files are secure, you can freely format, reconfigure, and repair your array without worrying about data loss.
Option B: Restore Your RAID Drive’s Lost or Damaged Partitions
In case your RAID array itself isn’t broken, but one of the partitions inside the array has become damaged or inaccessible (due to a power surge, improper shutdown, etc.), another option is to use TestDisk to restore that partition. We cover TestDisk in more detail in the top RAID recovery apps section of this article; in summary, you can use TestDisk to scan your RAID drives for missing partitions and write them back to the appropriate disks (which should restore access to your data).
The problem with TestDisk is that it lacks a modern graphical interface–it looks like the Terminal app, and you can only navigate it using your keyboard. It’s also just one solution for a very specific problem (damaged or lost partitions), so manage your expectations with this option.
Step 1. Connect your RAID array to your Mac with the appropriate configuration. For example, RAID 1 arrays only require you to connect 1 disk, while RAID 0 requires all disks to be connected.
Step 2. Open a browser and navigate to brew.sh. Then, click the notepad icon beside the long string of characters (which will copy that string).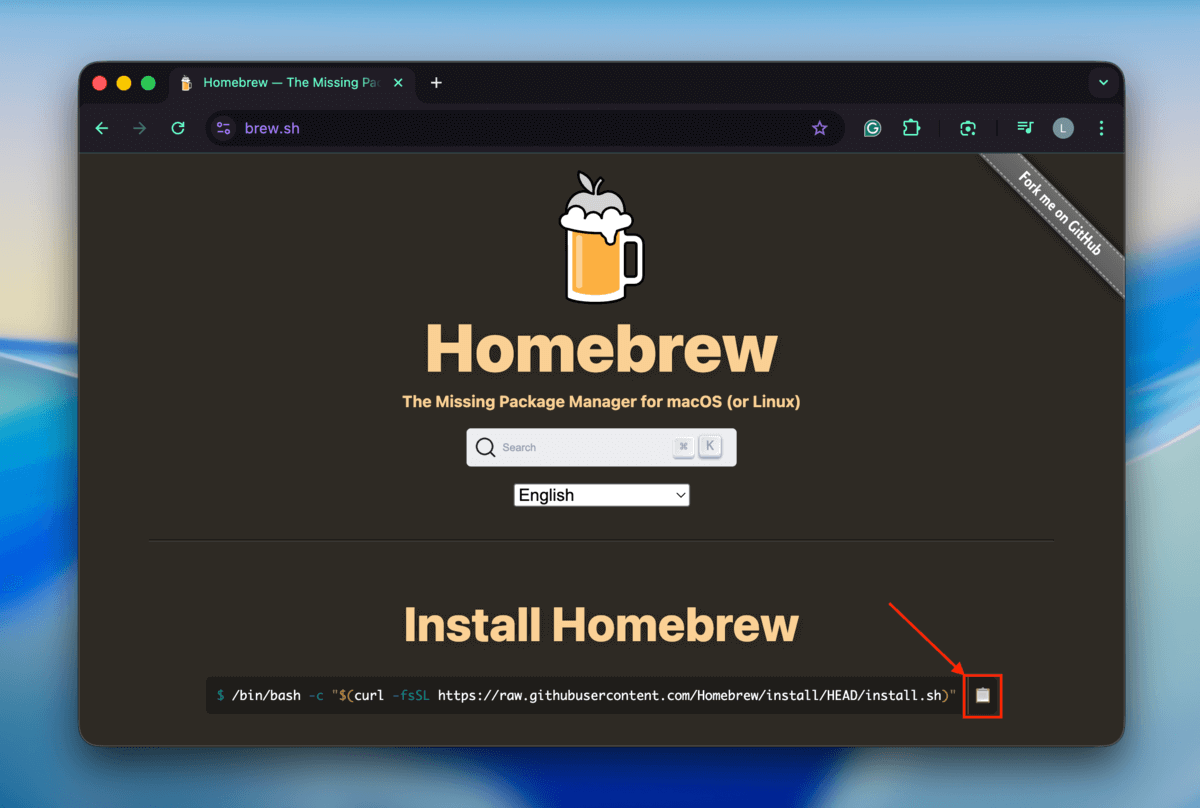
Step 3. Close your browser and open the Terminal app (Finder > Applications > Utilities). Then, paste the string you copied in step 2 and press Return. This will install Homebrew on your Mac.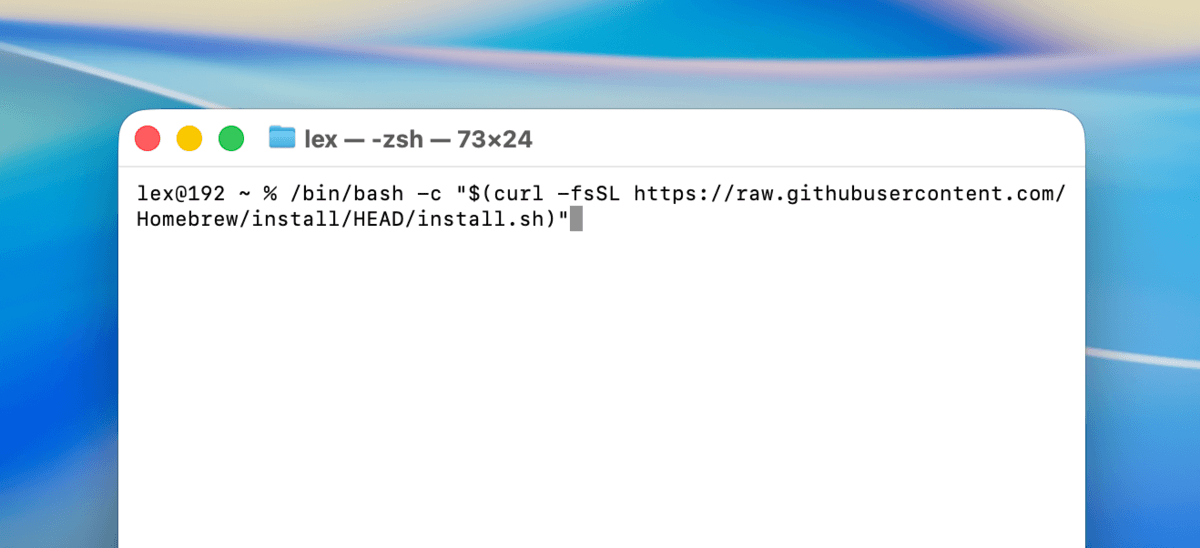
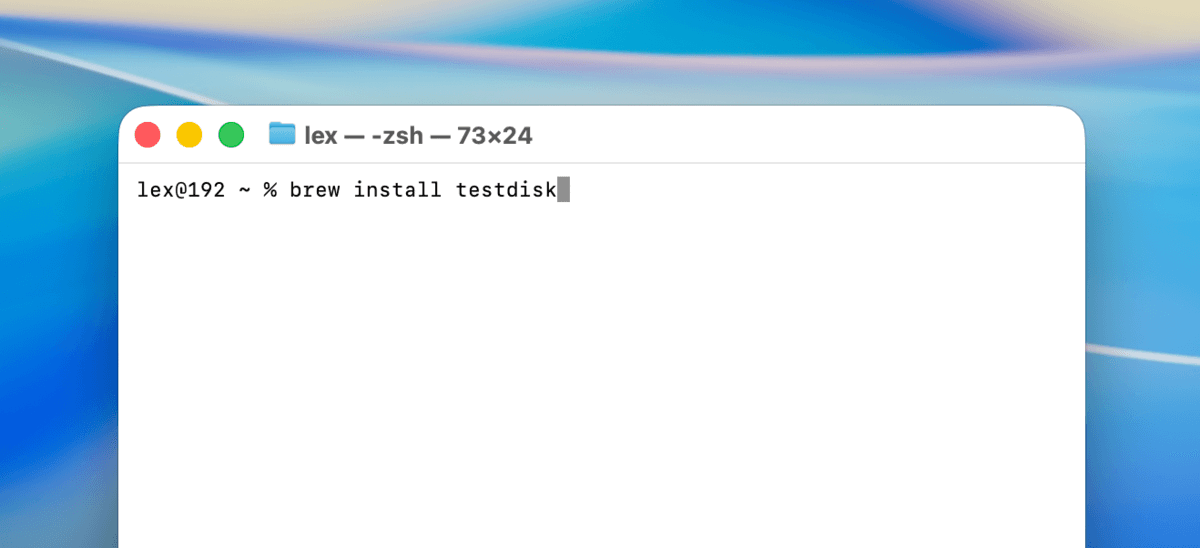
Step 4. Once Homebrew is fully installed (Terminal will let you know), run the following command to install TestDisk using Homebrew:
brew install testdisk
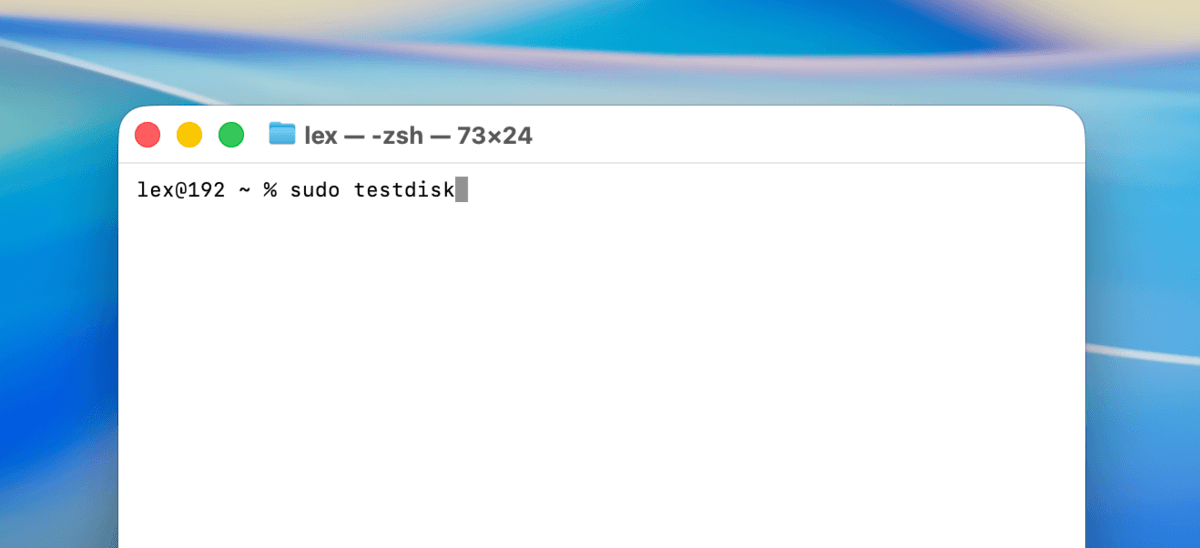
Step 5. Terminal will again let you know once TestDisk is fully installed. Next, run this command to launch TestDisk:
sudo testdisk
Step 6. In the very first menu that TestDisk shows you, select the Create option using your arrow keys. Then, press Return. This is basically what navigating TestDisk is like.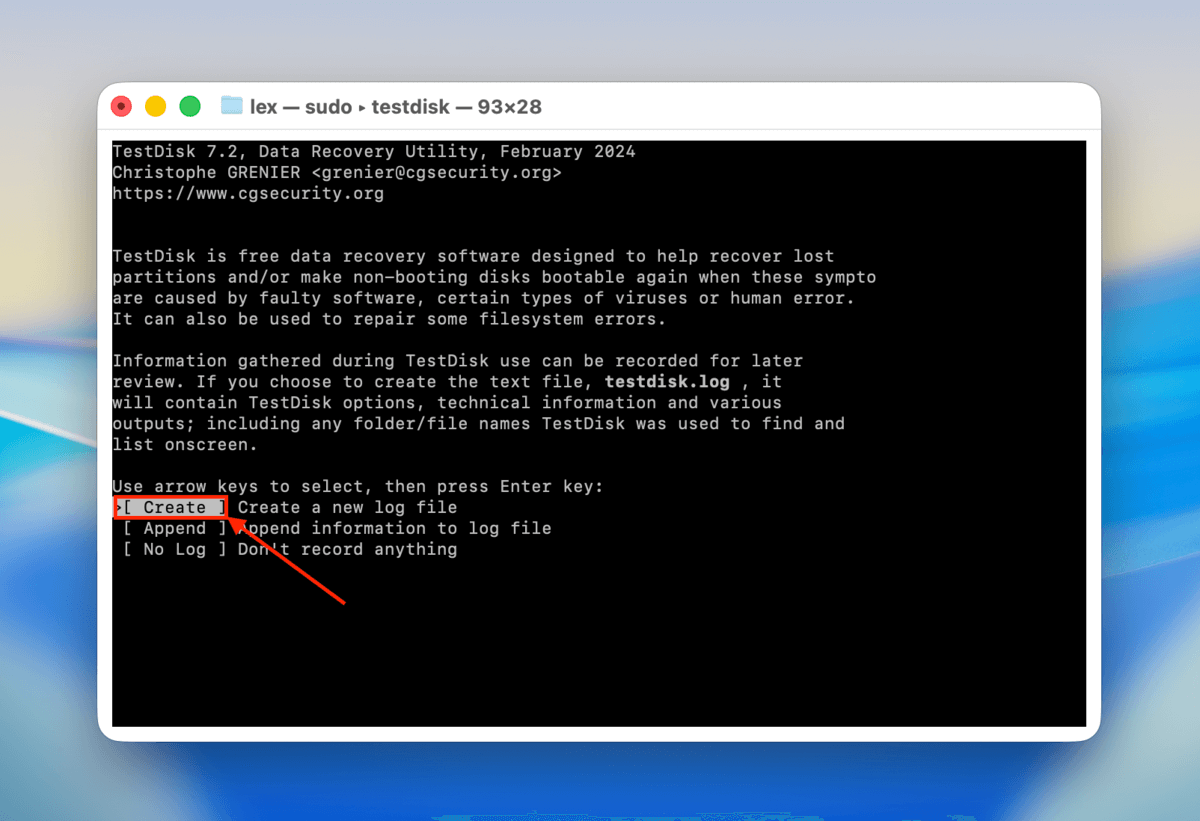
Step 7. Select your RAID disk from the list, then select the Proceed option and press Return.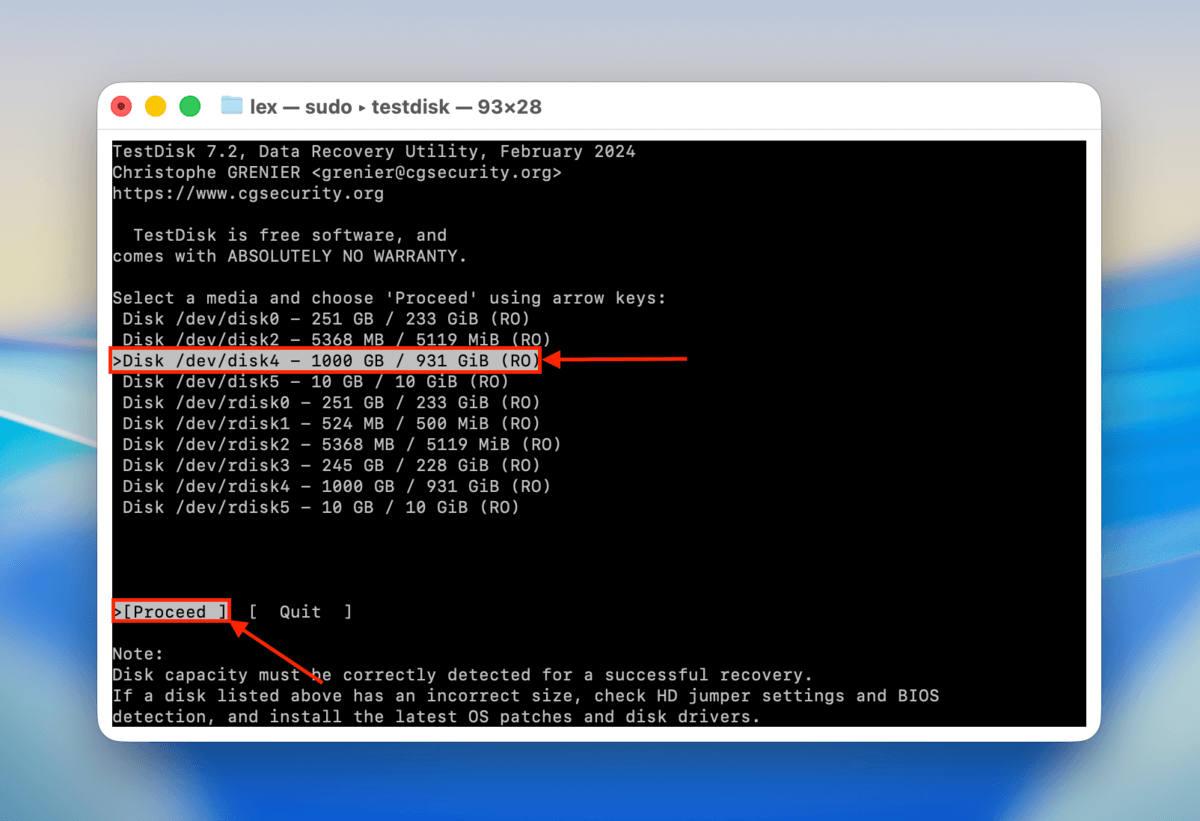
Step 8. Choose your disk’s partition table (TestDisk will try to select it automatically for you). Then, press Return.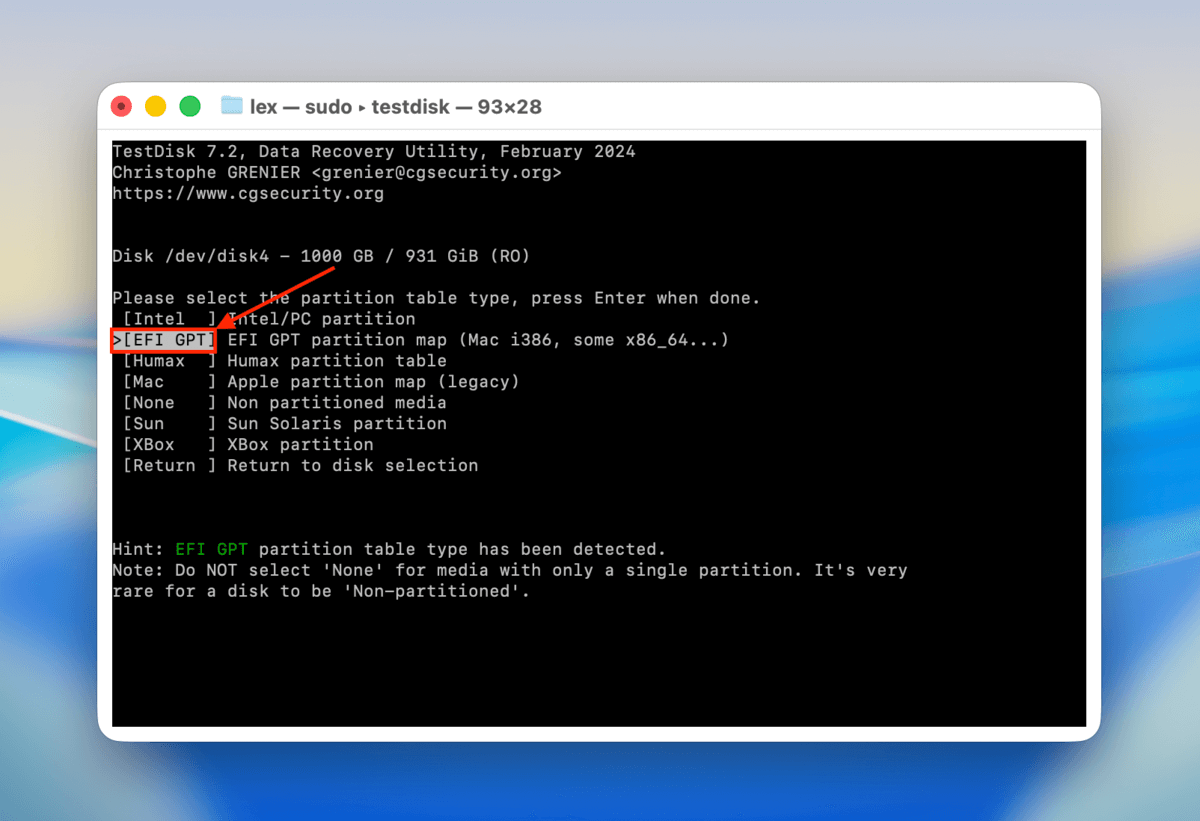
Step 9. Select the Analyse option. Then, press Return.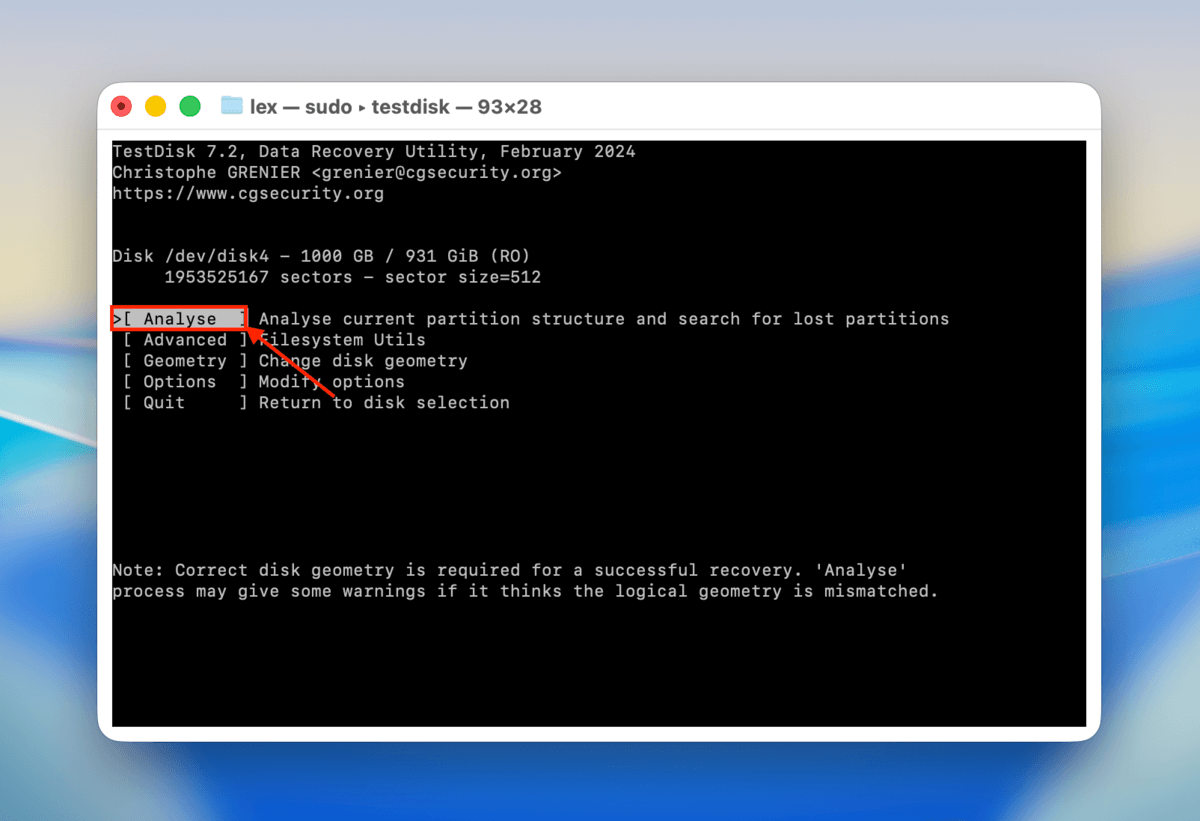
Step 10. Select the Quick Search option. Then, press Return.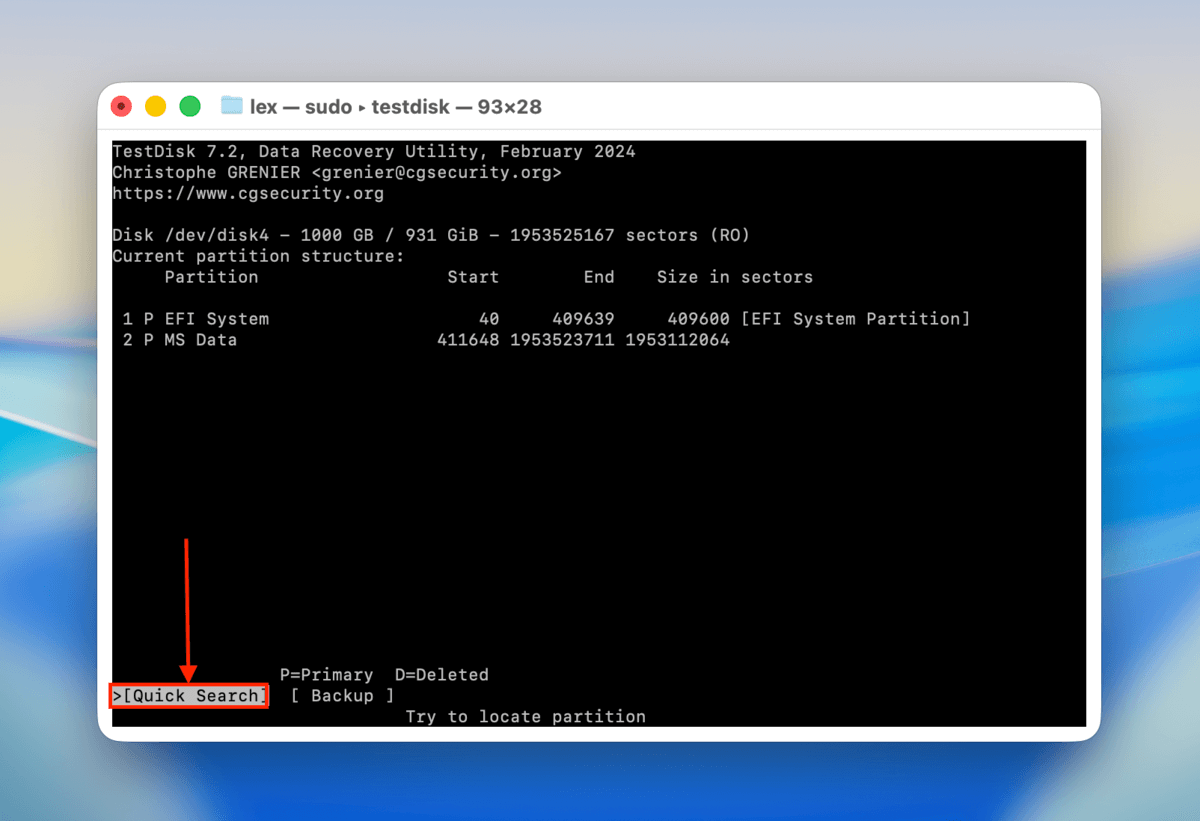
Step 11. Review the partitions TestDisk found. You can press the P key to show you all the files stored on that partition, which should help you verify if it’s the right one. Then, use your arrow keys to select the partition you want to restore and press Return.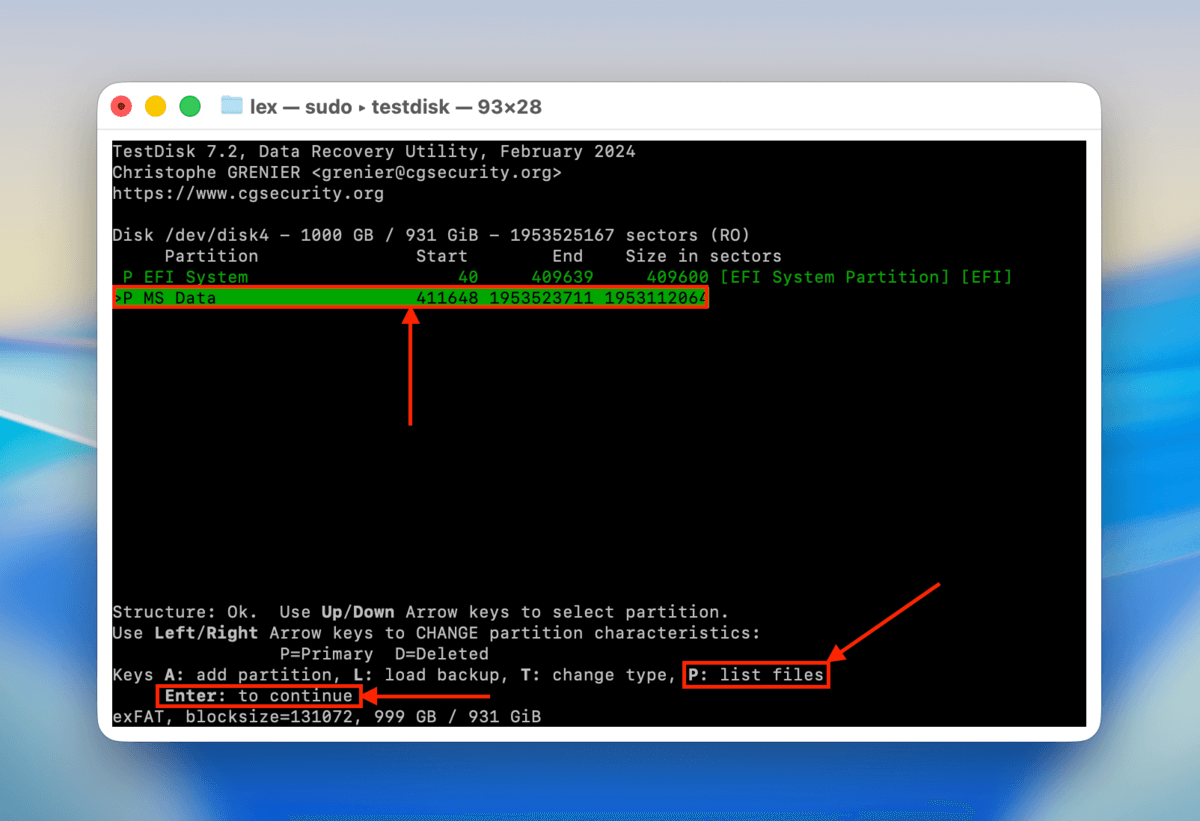
Step 12. To finalize the partition recovery, highlight the Write option and press Return. You can also choose the Deeper Search option if TestDisk didn’t find the right partition.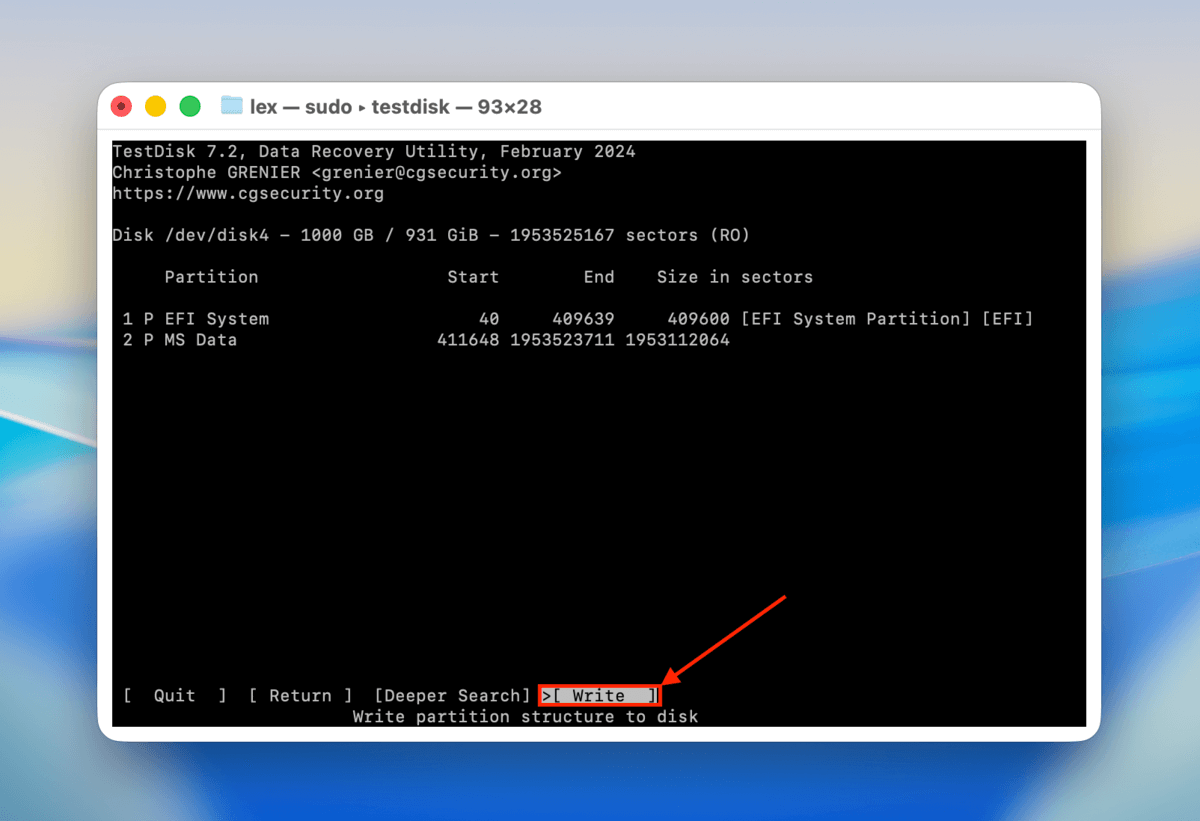
After writing the lost partition to your RAID disk, we recommend safely ejecting your array from your Mac. Then, reconnect it to your Mac and try to access it. If this doesn’t help, we recommend recovering your RAID files directly using the guide in Option A.
What Are the Different Types of Raids?
Need a refresher on different RAID types (also known as “RAID levels”)? If you want to make sure you’ve identified your RAID array correctly, or if you’re interested in upgrading your existing setup, here’s a brief summary of the most commonly used RAID levels and how each of them handles data redundancy and performance.
RAID 0 – Striping
Known as a stripe set or striped volume. This is great for users who are seeking high capacities and faster performance. Usually, RAID 0 is not recommended for those seeking data security due to its lack of redundancy. Repairing RAID 0 can be done at the individual drive level.

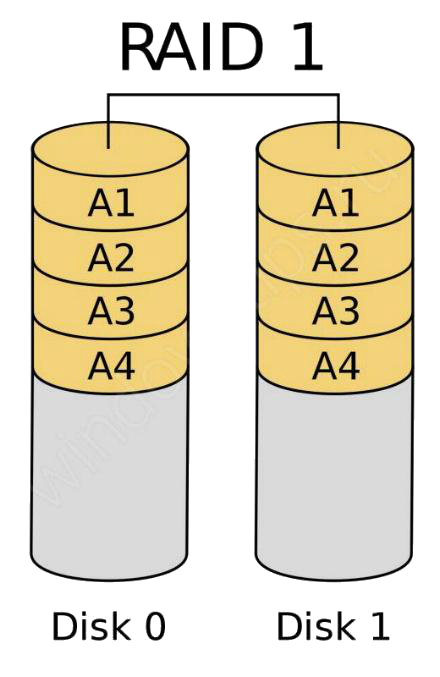
RAID 1 – Mirroring
Known as mirroring, this RAID achieves redundancy and data security by continuously replicating or cloning data across two hard drives. This creates a complete backup down to the last bit of data. This is a handy setup to have if you can’t have your computer go down for any reason. If one hard drive fails, most of the time you can take it out and replace it with a new one. This sets up the RAID again without losing data in most cases.
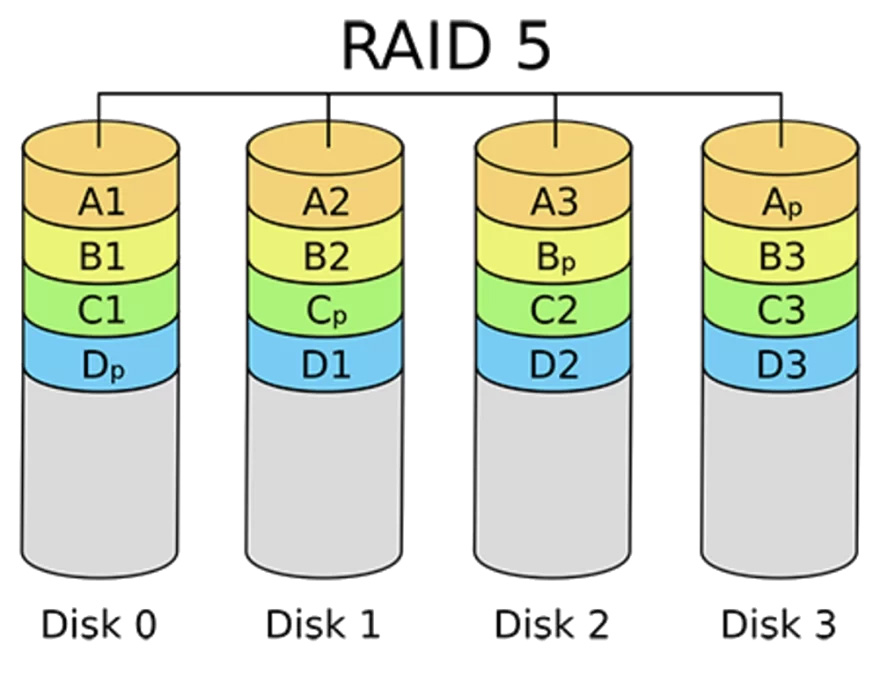
RAID 5 – Striping With Parity
One of the most popular RAID types. It’s much more effective in achieving optimal capacity and redundancy. RAID 5 encompasses block-level striping with distributed parity. It has a checksum implemented into it called parity. It requires 4 hard drives and if one fails, it can read the data from the other 3 that are still operational. Recovering data from RAID 5 normally isn’t necessary as you can replace the failed hard drive and continue operation.
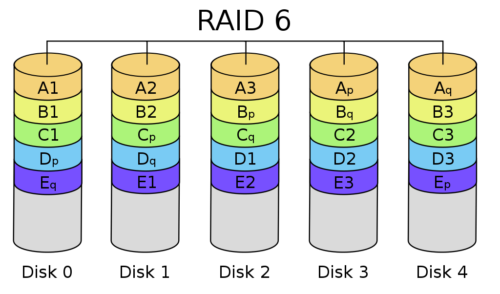
RAID 6 – Double-Parity RAID
This RAID type is similar to RAID 5, but it uses two drives’ worth of storage for parity data instead of one to provide data redundancy in case of two drive failures. To implement RAID 6, at least four hard drives are necessary, and this makes it too expensive for most regular home users. What’s more, the extra level of protection provided compared to RAID 5 is outweighed by a slightly lower write performance.
RAID 10 – Combining Mirroring and Striping
This type of RAID array combines the pros of both RAID 1 and RAID 0. It combines increased capacity and fault tolerance into a single solution. You achieve double the performance and capacity. It’s great when performance and space are concerns while maintaining a budget. Recovering your data from this RAID is normally pretty successful as long as multiple hard drives haven’t failed.

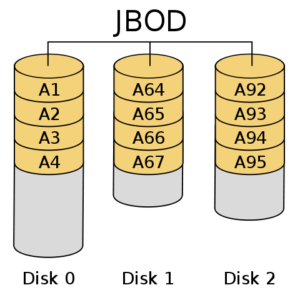
JBOD – Just a Bunch Of Disks
This RAID type stands for “Just a Bunch Of Disks,” a name that perfectly describes its nature. Unlike other RAID types, JBOD doesn’t use any RAID-specific data protection or performance enhancement techniques. Instead, all hard drives retain their independence, but the user can access them as if they were just one large drive. Because of how simple JBOD is to set up and use, it’s often implemented by home users who don’t care much about data protection.
Conclusion
RAID recovery isn’t difficult as some may think. You’re essentially recovering data from a hard drive and saving it should the RAID that you have implemented start to not work correctly.
Even if you don’t have a RAID setup, the recovery methods in this article will help you with just normal data recovery as well if you ever experience data loss.


