
Urgently need data from a Mac with a broken screen? If the Mac’s drive and other internal components are still working, you have a few options to get back your files. But since you can’t see anything, you’ll need to use one or a combination of highly specific methods that aren’t often mentioned in general data recovery articles.
This guide has all the information and resources you need to get it done. Keep reading to learn how to get files off a MacBook with a broken screen using built-in and third-party utilities. Read on!
Table of Contents
What You’ll Need to Get Data Off a Macbook With a Broken Screen
It’s harder to recover data from a Mac with a broken screen for one single reason: there’s no interface. Fortunately, there are several ways to get around this problem as long as you have the appropriate tools. Here’s a short list of gear you might need for the recovery process.
- External monitor. An external monitor or display will allow you to boot and visually navigate your Mac, granting you access to your files and system directly.
- Another Mac. If you have another Mac available, you can access your broken Mac as an external storage device. This also grants direct access to your files (but not your system).
- External storage device. Make sure you have an external storage device that has enough space for all of your Mac files.
5 Methods to Recover Data From a Mac With a Broken Screen
In this section, we cover 5 methods to recover data from a Mac with a broken screen. Some methods require additional tools to work, so make sure that you read each section’s introduction carefully.
Method 1: Connect Your Mac to an External Display
If you have one, you can connect your broken MacBook screen to a monitor or external display. Once both your display and your Mac are powered on, your computer should detect the display automatically.
As long as your system drive and ports are working, you should be able to copy your data to an external storage device as you normally would.
And if you’re an Apple Silicon user, you should now be able to access Share Disk, which is the updated equivalent of Target Disk Mode. This is useful if you want to transfer your files directly to another Mac.
Method 2: Transfer Your Data to Another Mac Using Target Disk Mode
Target Disk Mode is a feature on Mac that turns it into a readable external storage device. When enabled, you can connect your Mac to another Mac and copy its data as you would with an external HDD.
Info: Target Disk Mode isn’t available for M1 Macs and later models due to newly implemented security measures. Its Apple Silicon equivalent, Share Disk, requires visually navigating Recovery Mode in order to access it. Try other solutions instead or use Share Disk in combination with Method 1.
What makes Target Disk Mode extra useful for Macs with broken screens is that you don’t need the interface to access it. You just need your keyboard. Here’s how:
Step 1. Connect the broken Mac to a working Mac.
Step 2. Press and hold the T key, then turn on the broken Mac.
Step 3. Once your broken Mac has successfully booted into Target Disk Mode, a disk icon will appear on the Desktop of the working Mac (and in Finder’s sidebar). Open it and start copying your files to a secure location on the working Mac.
Once you’re done transferring your files, drag the disk icon to your Trash folder’s icon – it’s usually on the right-most side of your dock. Then, press the power button on your broken Mac to shut it off.
Method 3: Download Your Files From iCloud
If you enabled iCloud on your Mac, you should have a copy of your iCloud Drive directory – as well as any files and folders it contains – online. You can access them via iCloud web on any browser and, most importantly, on any device.
Step 1. Open any browser on another Mac or PC.
Step 2. Login to iCloud.com.
Step 3. Explore the page to access your photos, videos, mail, notes, iCloud Drive files, reminders, and everything else synced to iCloud. For this demo, we’ll open iCloud Drive.
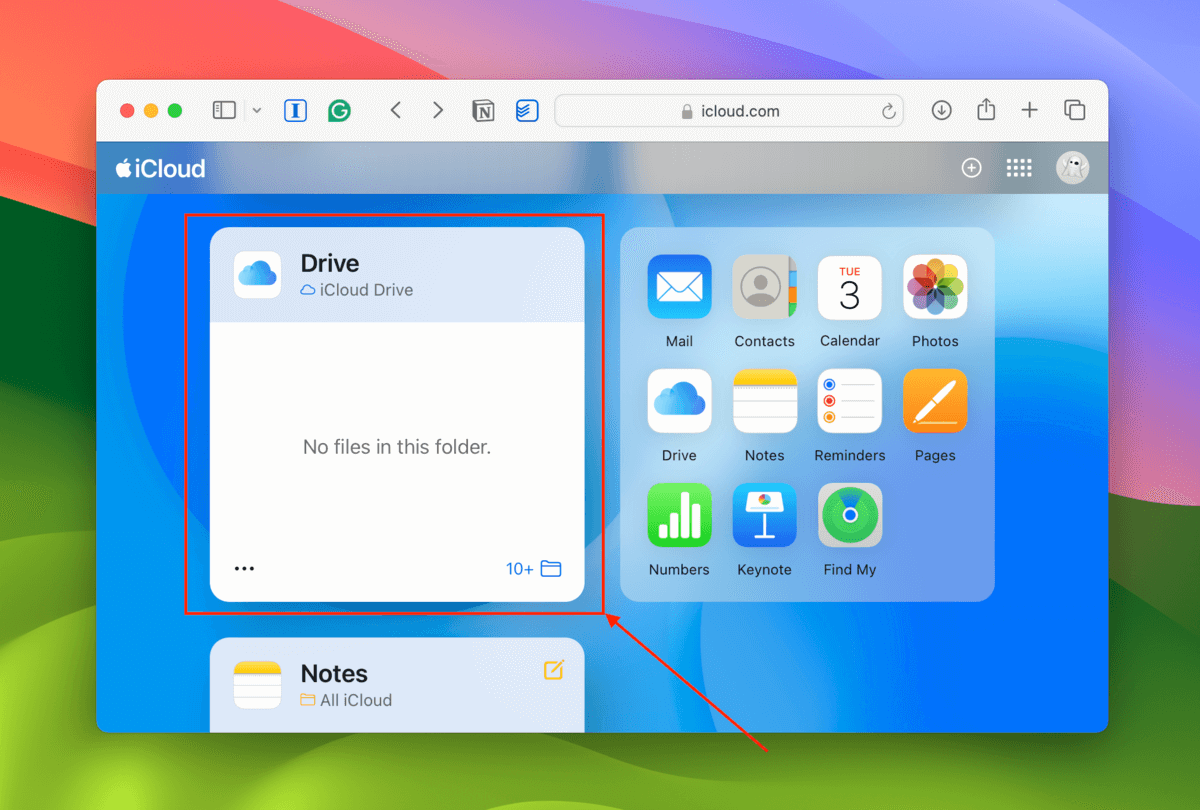
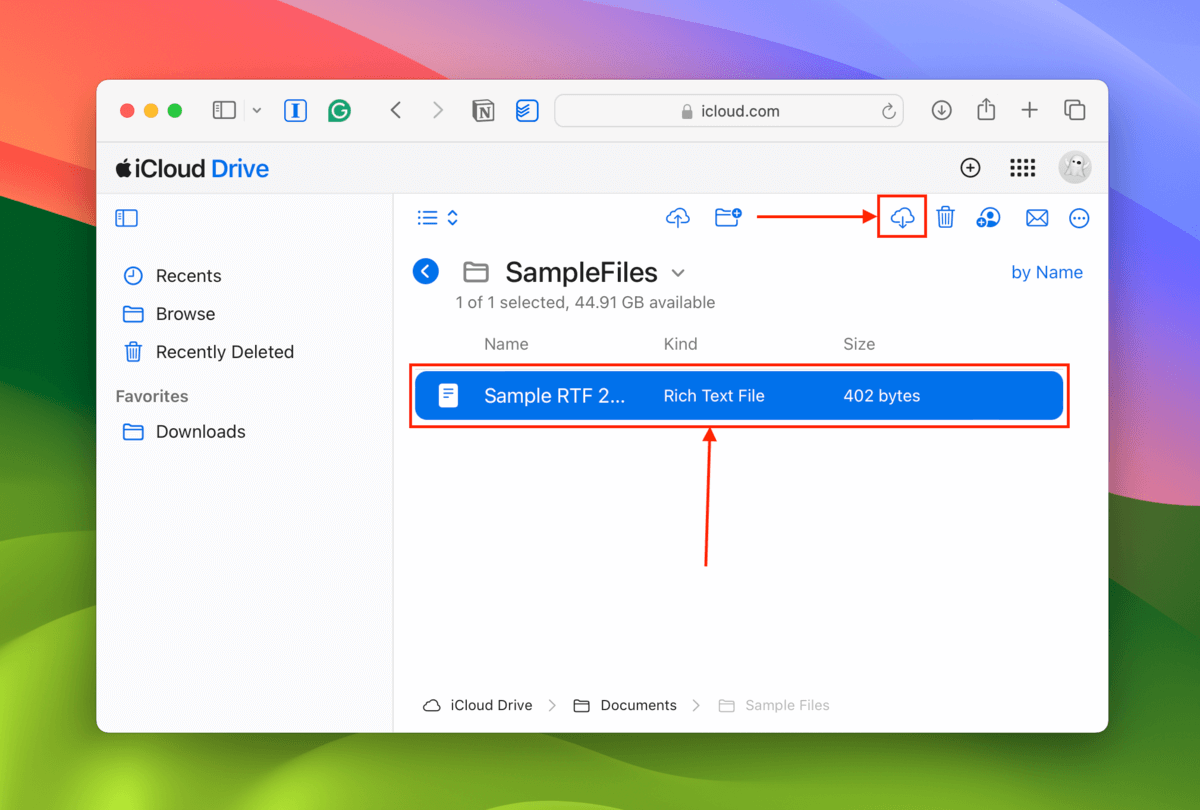
Step 4. Click on the file or folder you want to download. Then, click the Download button (cloud icon). To select multiple items, hold down the Shift key (multi-select by batch) or the Command key (multi-select by individual file) while clicking each item.
Method 4: Scan Your Time Machine Drive With Data Recovery Software
If you backed up your Mac with Time Machine, you can use data recovery software to scan the drive and extract the backup data directly.
For this demonstration, we’ll use a data recovery app called Disk Drill because it provides a scanning tool specially designed for Time Machine drives – which isn’t a feature that many data recovery apps offer. It also has a free trial that lets you preview your files as much as you want to make sure they work before purchasing the software license.
Step 1. Connect Your Time Machine drive to a working Mac.
Step 2. Download and install Disk Drill on the working Mac.
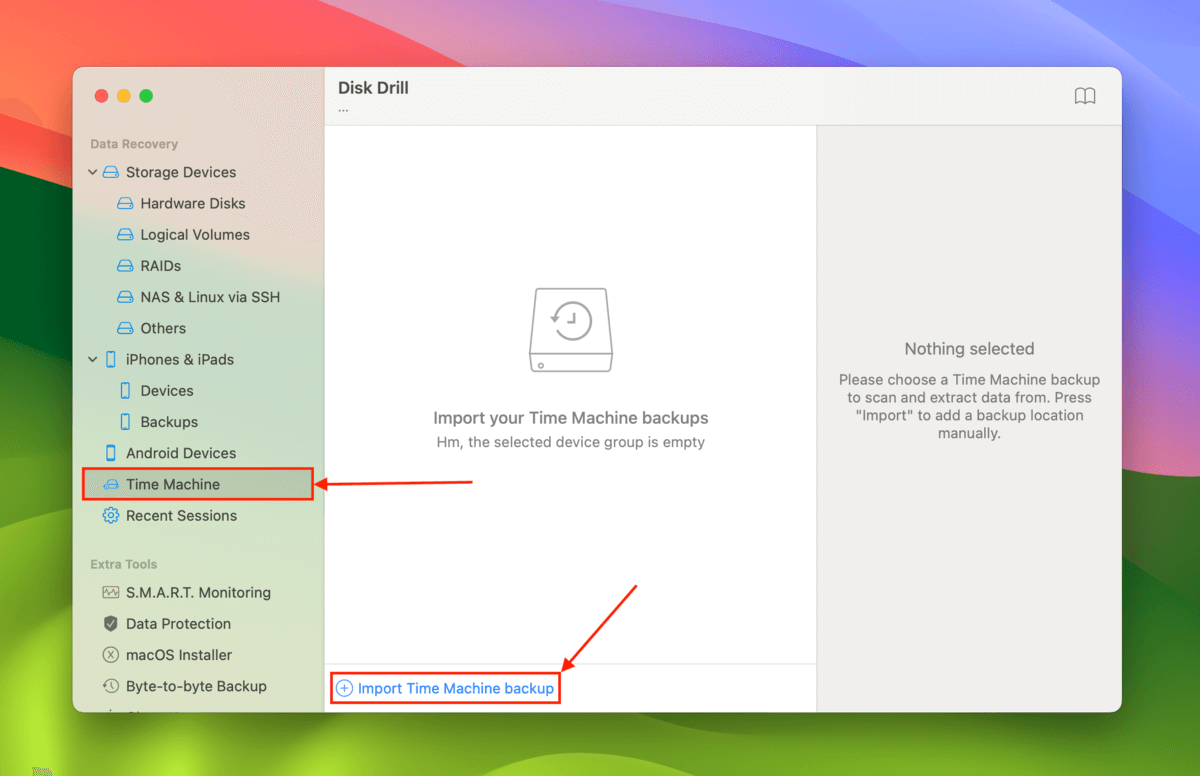
Step 3. On the left sidebar, click Time Machine. Then, click Import Time Machine backup and select the backup you want to restore from your Time Machine drive.
Step 4. Select your Time Machine backup and click Search for lost data and click Review found items once it’s done.

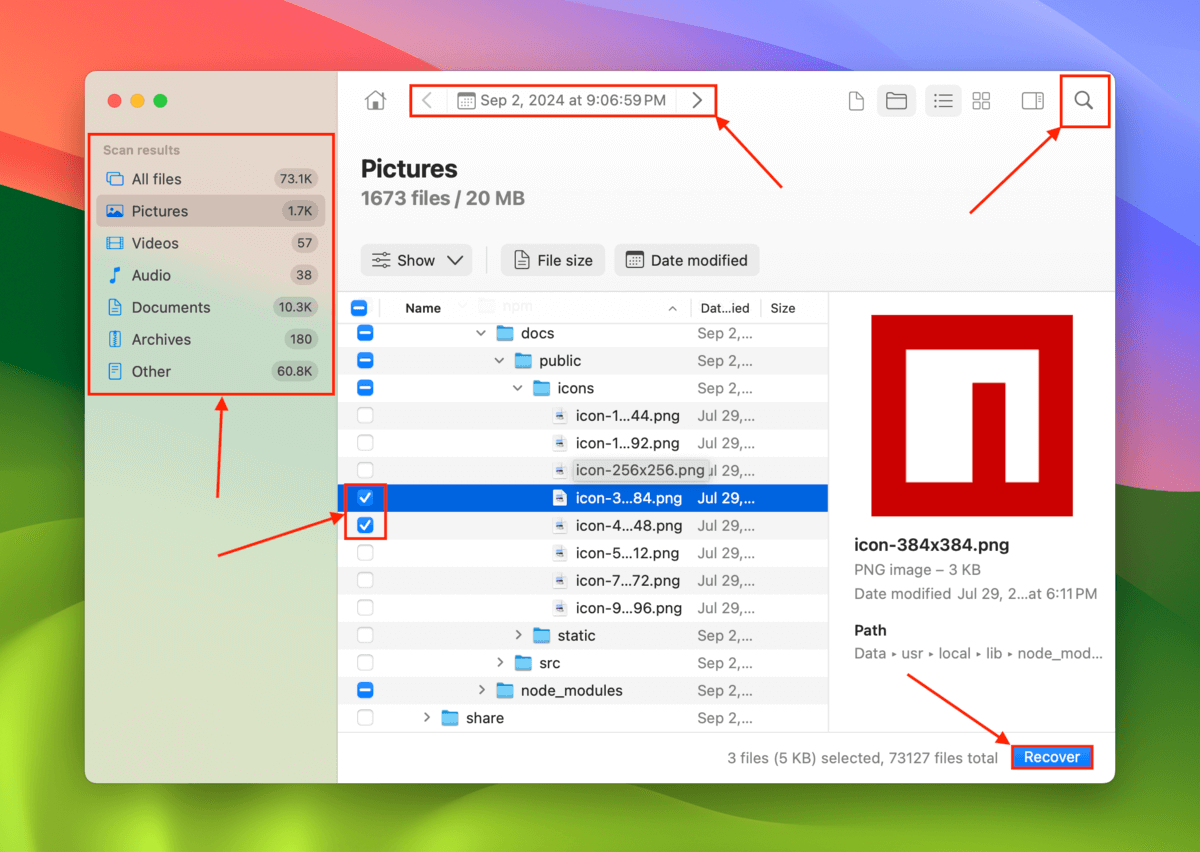
Step 5. You can use the filters in the left sidebar as well as the search tool to find specific files and folders – clicking on a file will display its preview on the right. You can even browse different backups by using the backup selection tool at the top of the window. Finally, mark the boxes beside the files and folders you want to restore and click Recover.
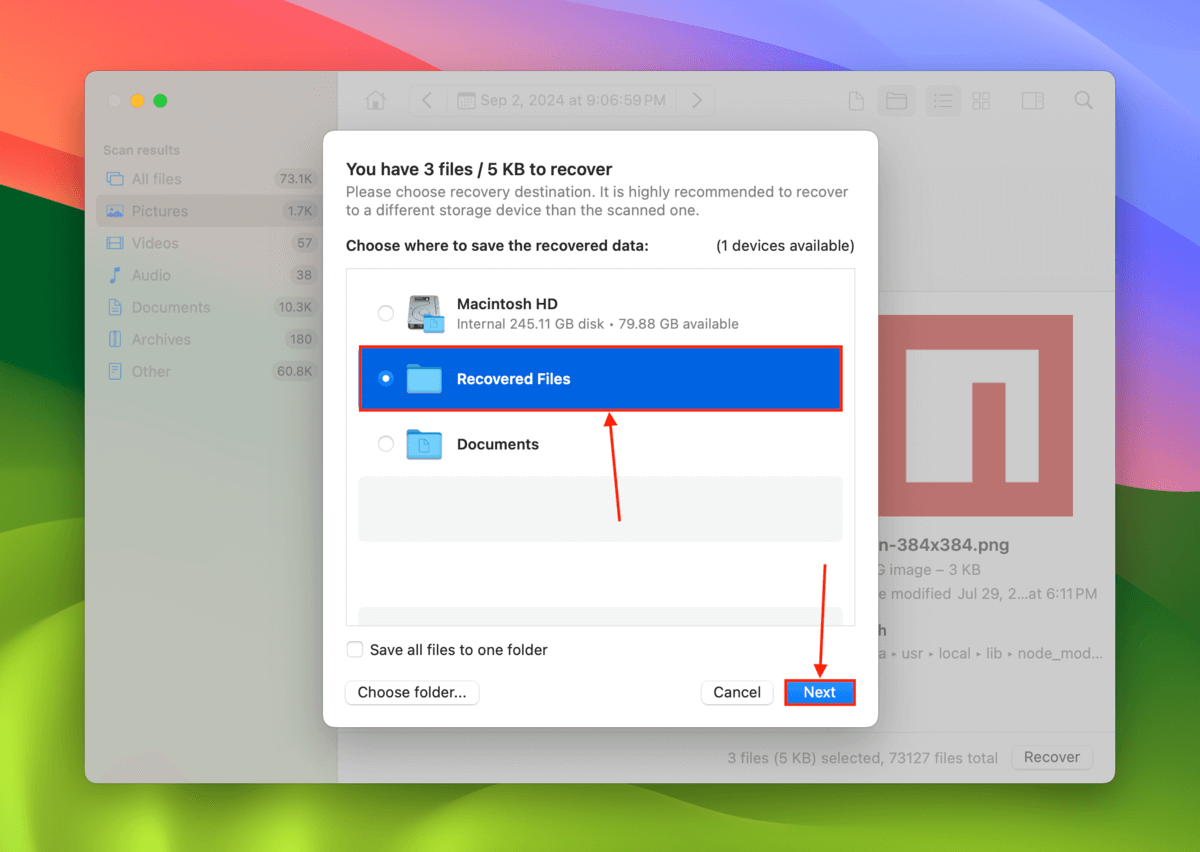
Step 6. Choose a location on the working Mac where you want Disk Drill to save the recovered files. Finally, click Next.
Method 5: Send Your Mac to a Professional Data Recovery Service
If Methods 1-4 didn’t work or you prefer to have a professional help you get your files back, consider sending your Mac to a professional data recovery service.
Professional data recovery services are companies that restore your data for free. Although they can’t repair your Mac, they are equipped to perform advanced recovery operations on your Mac drive without causing further damage.
They are also the ONLY viable solution if your Mac drive was also physically damaged when the screen broke. If you’ve never tried using a professional data recovery service in the past, here’s what to look for:
- No data – no charge Choose a shop that offers a “No Data – No Charge Guarantee”, which means that you only pay their fee if they restore the data you originally asked for. You typically have to approve a file list before they proceed with the recovery operation.
- Class 100 cleanroom (required) A cleanroom is a facility that filters out tiny particles that can damage a storage device’s internal components. We’d normally say this is optional, but there’s a chance that the shop will open up your Mac to access your drive – especially if they detect internal damage.
- Shipping discounts Many shops offer free shipping (inbound only) as well as a free storage device for the recovered data. Big shops like ACE Data Recovery also provide free replacement parts in case your Mac’s drive is physically damaged.
- Recent authentic reviews Check Google, TrustPilot, Yelp, and other feedback platforms for customer reviews. Make sure they are specific to the branch you’re considering to send your Mac to.
- Apple authorization Some data recovery services are directly authorized by Apple, which can come with perks (like shipping discounts).
Is more than just your screen broken?
If your Mac doesn’t just have a broken screen but is also suffering from logical damage, there are other ways to restore your data. We have guides on recovering data from Macs that are stuck on the Apple logo and even from dead MacBook hard drives. However, you’ll probably need to use an external monitor to perform the recommended recovery methods.


