
Gone are the days of using pen and paper to take notes. With our iPhones, we can take as many notes as we want and never run out of ink or space to put them, and this can all be done from within the notes app.
The notes app is used by many for project ideas, passwords, and personal data such as your banking information. Losing such valuable information can be a huge setback. To help you avoid it, we will look at multiple ways on how to recover deleted notes on iPhone.
Table of Contents
Why Would my Notes No Longer Be on My iPhone and Where Do They Go?
There are many reasons that we could have lost notes on iPhone.
- Sometimes things don’t save or an app can crash causing the notes that we took to not save.
- You may delete a note and then realize that you didn’t want to delete it.
- You set up a new device and didn’t transfer your notes over to it.
When notes are deleted, they’re still on our iPhone but marked as free space for something new to write over. We will talk later in the article about how data recovery software can still find the notes even after they have been deleted. The thing to note (pun intended) is that even if your notes have been deleted, there are multiple ways to put them back onto your iPhone, and iPhone note recovery is possible.
Method 1: Recover Deleted Notes Using the Recently Deleted Folder
When you delete a note on your iPhone, it isn’t deleted right away. It actually goes into the recently deleted folder and can be recovered from there for about 40 days.
You can recover notes from the recently deleted folder by following the steps below.
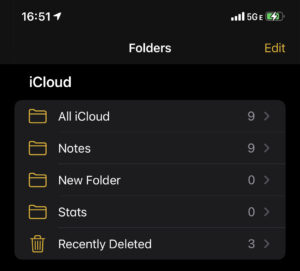
- Go to your notes and select the recently deleted folder.
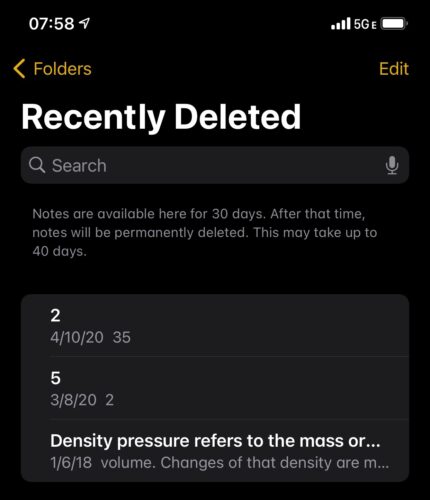
- Once you have selected the recently deleted folder, you will see all of your notes that have been deleted within the last 30 days.
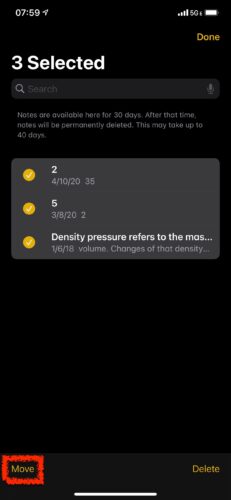
- Select the notes that you would like to recover and tap on the Move button to put them back into a folder that you would like to recover them to.
- Go to your notes and select the recently deleted folder.
That’s it! If the notes aren’t in the recently deleted folder, then it’s time to move to restoring them from a backup.
Method 2: Recover Deleted Notes from an iTunes Backup
iTunes is a great way to back up your iPhone, and you can get the software for free. This software is available on both Mac and Windows and helps us get back deleted notes on iPhone. On newer Macs, it is called the Music app while on older machines and Windows we would want to look for iTunes. On Windows, you can download iTunes for free by going to Apple’s website. If you have lost my notes on iPhone, this is a great way to get them back.
If you have a Mac, the software comes preinstalled when you purchase the computer meaning your iPhone should be backing up when you connect the device to your computer to charge. If you have had iTunes on your computer for some time, then when you plug your iPhone into it, your phone should be backing up automatically.
No matter if you’re using iTunes or the Music app, the steps below will allow us to recover deleted iPhone notes.
- Plug your iPhone into your Mac or Windows machine.
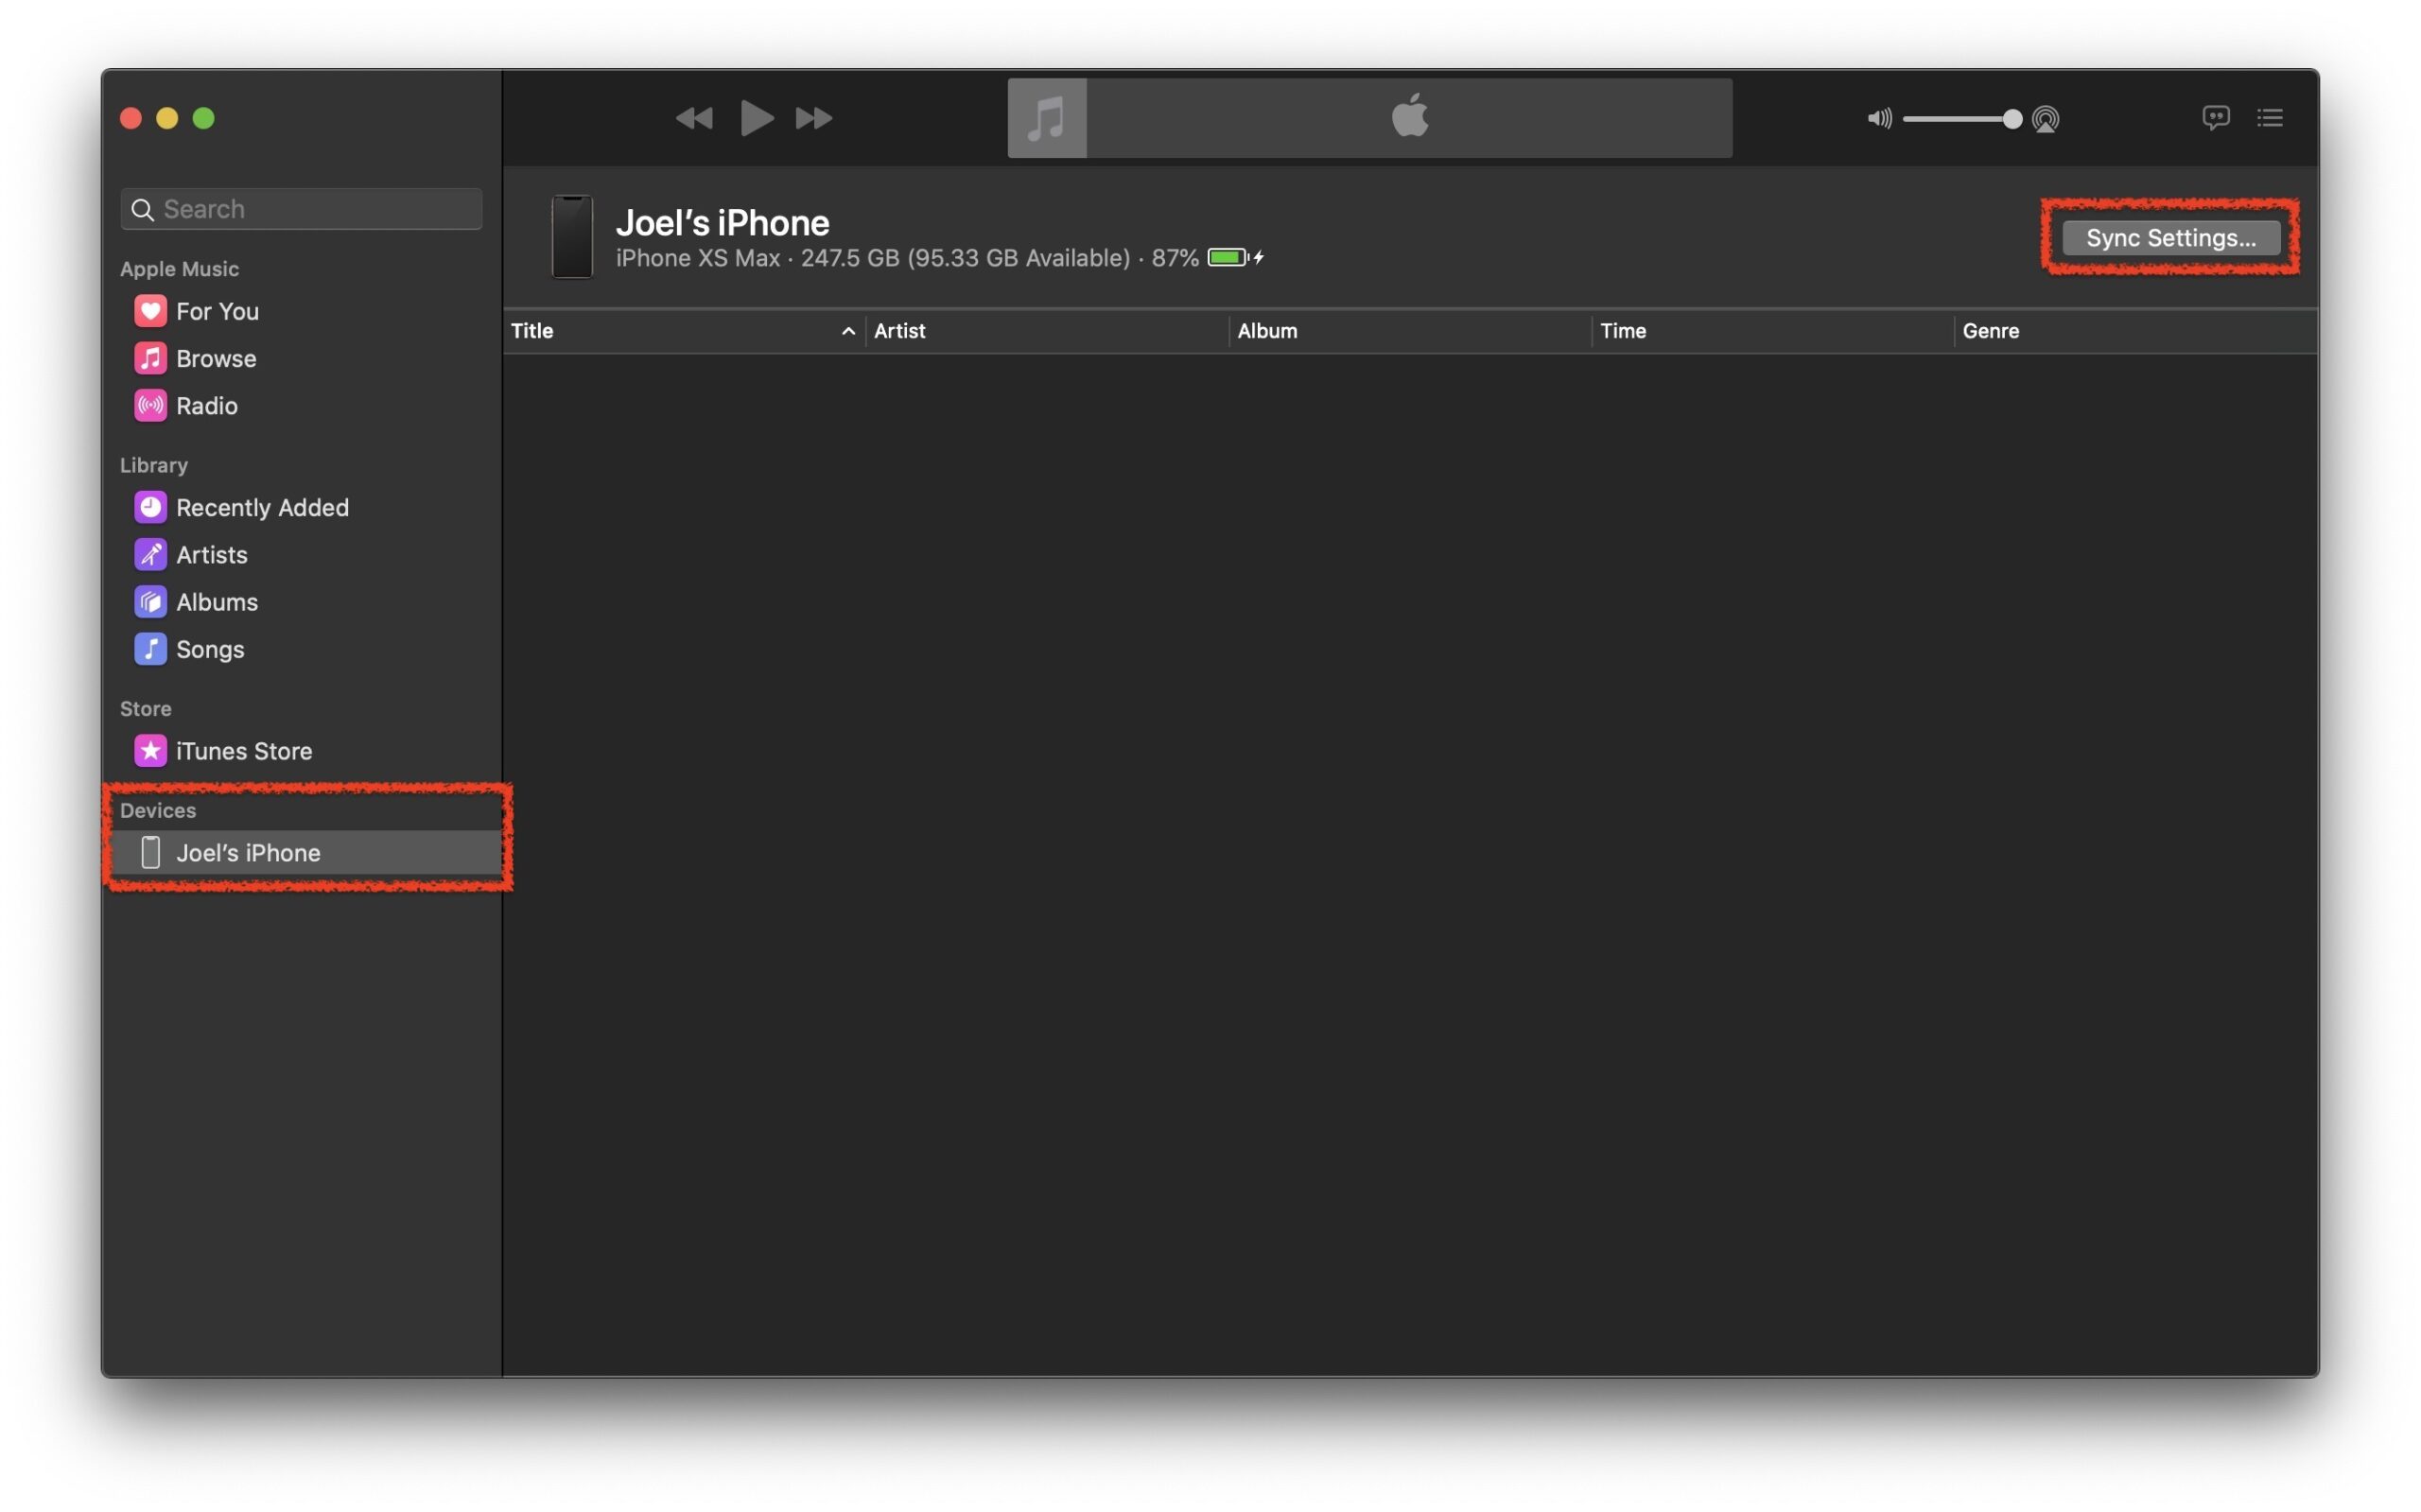
- Select your iPhone from the drop-down menu on the left-hand side and then click on “Sync Settings…”. This will allow us to see if we have a backup stored on our computer.
- Once on the Summary page, select “Restore Backup…”. This can be found from within the General tab. If you have more than one backup, choose the one that you think you last had the photos on.
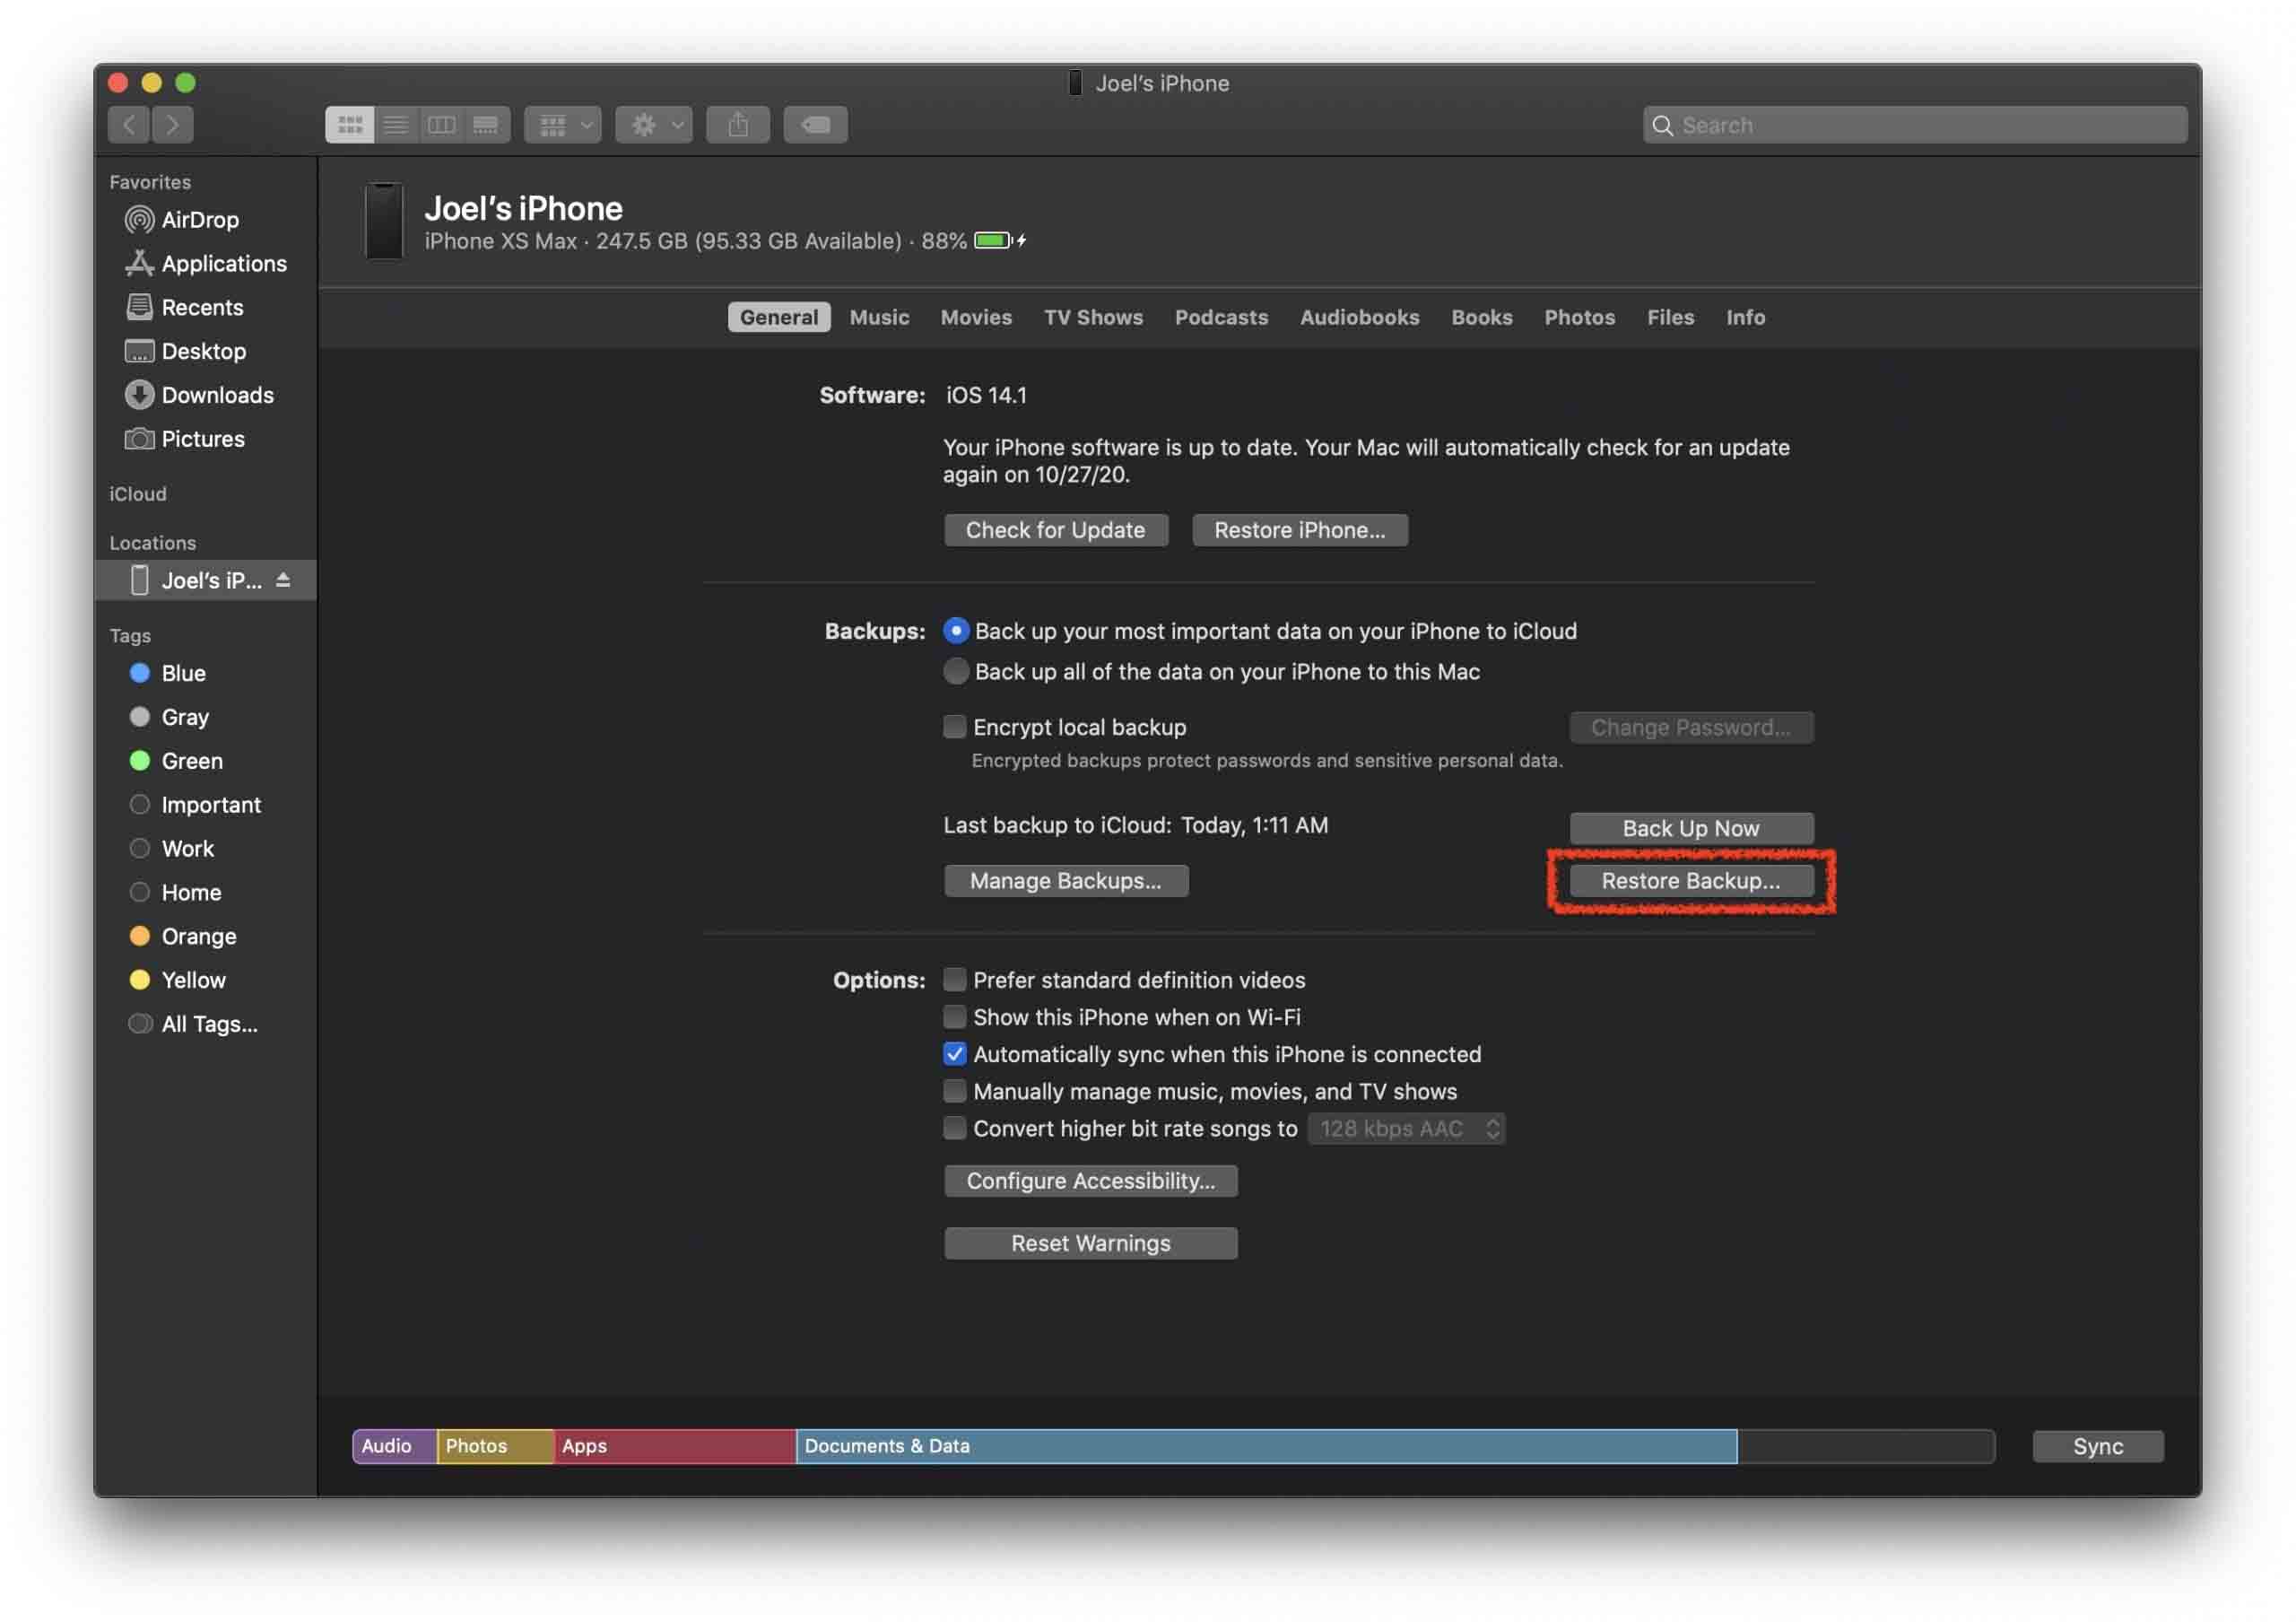
- After clicking the Restore Backup… option, your iPhone will restore back to the backup that you selected and your recently deleted notes will go back onto your iPhone. This can take some time as it’s not just going to restore your notes but put your entire phone back to the way it looked on the date that you choose to restore from.
Method 3: Restore Notes from iCloud
Notes are stored on the storage that is built into our iPhone. While this storage is very reliable, it means that if something happens to our phone that they will no longer be there for us.
iCloud is a great way to not only sync our data, but it will also back up our notes to the cloud. Think of this as an iPhone notes backup. It will help us restore your notes even if you lost all notes on iPhone or the iPhone deleted notes by itself.
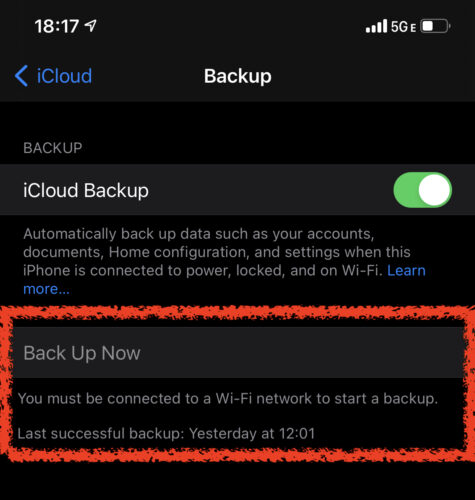
Step 1. Backup your iPhone in Case You Restore to an Older Backup and the Messages aren’t there
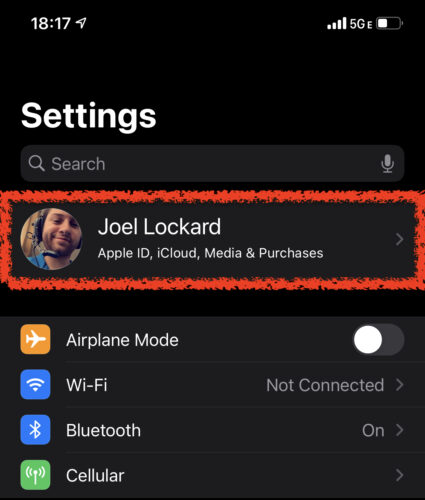
- Go to your settings and then tap on your name at the top of the screen.
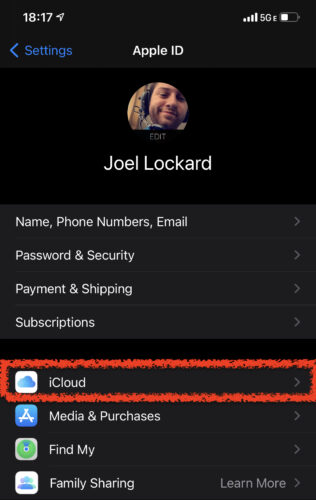
- Select iCloud from the list of options.
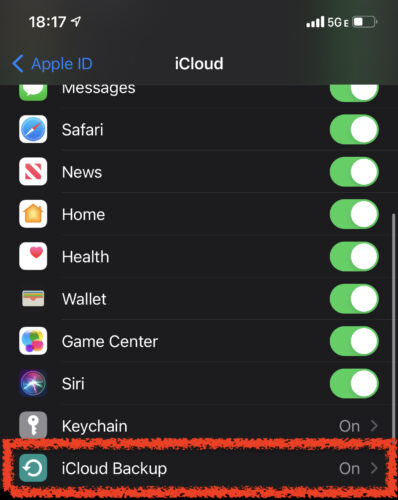
- Scroll down and click on iCloud Backup.
- If you don’t have a recent backup, click on Backup Now with your iPhone connected to Wi-Fi and plugged into power.
Step 2. Factory reset your iPhone
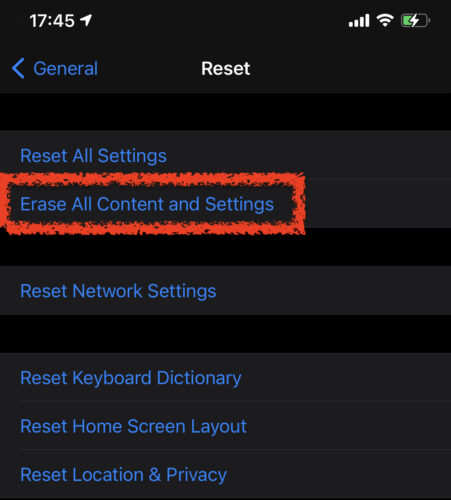
Now that your iPhone is backed up, it is time to factory reset it and go through the setup process that will allow us to recover deleted iPhone notes from a backup. Make sure that you have backed up your iPhone in step 1 just in case we don’t find the recently deleted notes in the iCloud backup.
To initiate the reset, go to Settings > General > Reset > Erase All Content and Settings. Your iPhone will then reset and you will be greeted by the setup screen once the process has finished, allowing us to restore notes from iCloud.
Step 3. Restore Notes from an iCloud Backup
Now that we have restored our phone to factory settings, we can start restoring notes on iPhone.
- Go through the iPhone setup process and choose Restore from an iCloud backup. If you have more than one iCloud backup, try to find the one that is nearest to the date you last remember having the notes stored on your iPhone. After selecting a backup, we can restore notes from iCloud.
- After our iPhone has completed the restore, we should then have access to old notes on iPhone. Just as a reminder, the iPhone notes recovery can take some time and your phone needs to be connected to Wi-Fi the entire time.
Method 4: Recover Notes on iPhone Using Data Recovery Software
If you tried recovering your notes using iTunes and iCloud and neither worked, then it’s time to use data recovery software to retrieve notes on iPhone. We can retrieve deleted notes on iPhone without a backup by using third-party data recovery software.
Disk Drill gives us the ability to restore accidentally deleted notes on iPhone. It will scan our device and locate the notes even though we don’t see them in the notes app anymore.
- To recover notes on iPhone using data recovery software:
- Download and install Disk Drill for your computer.
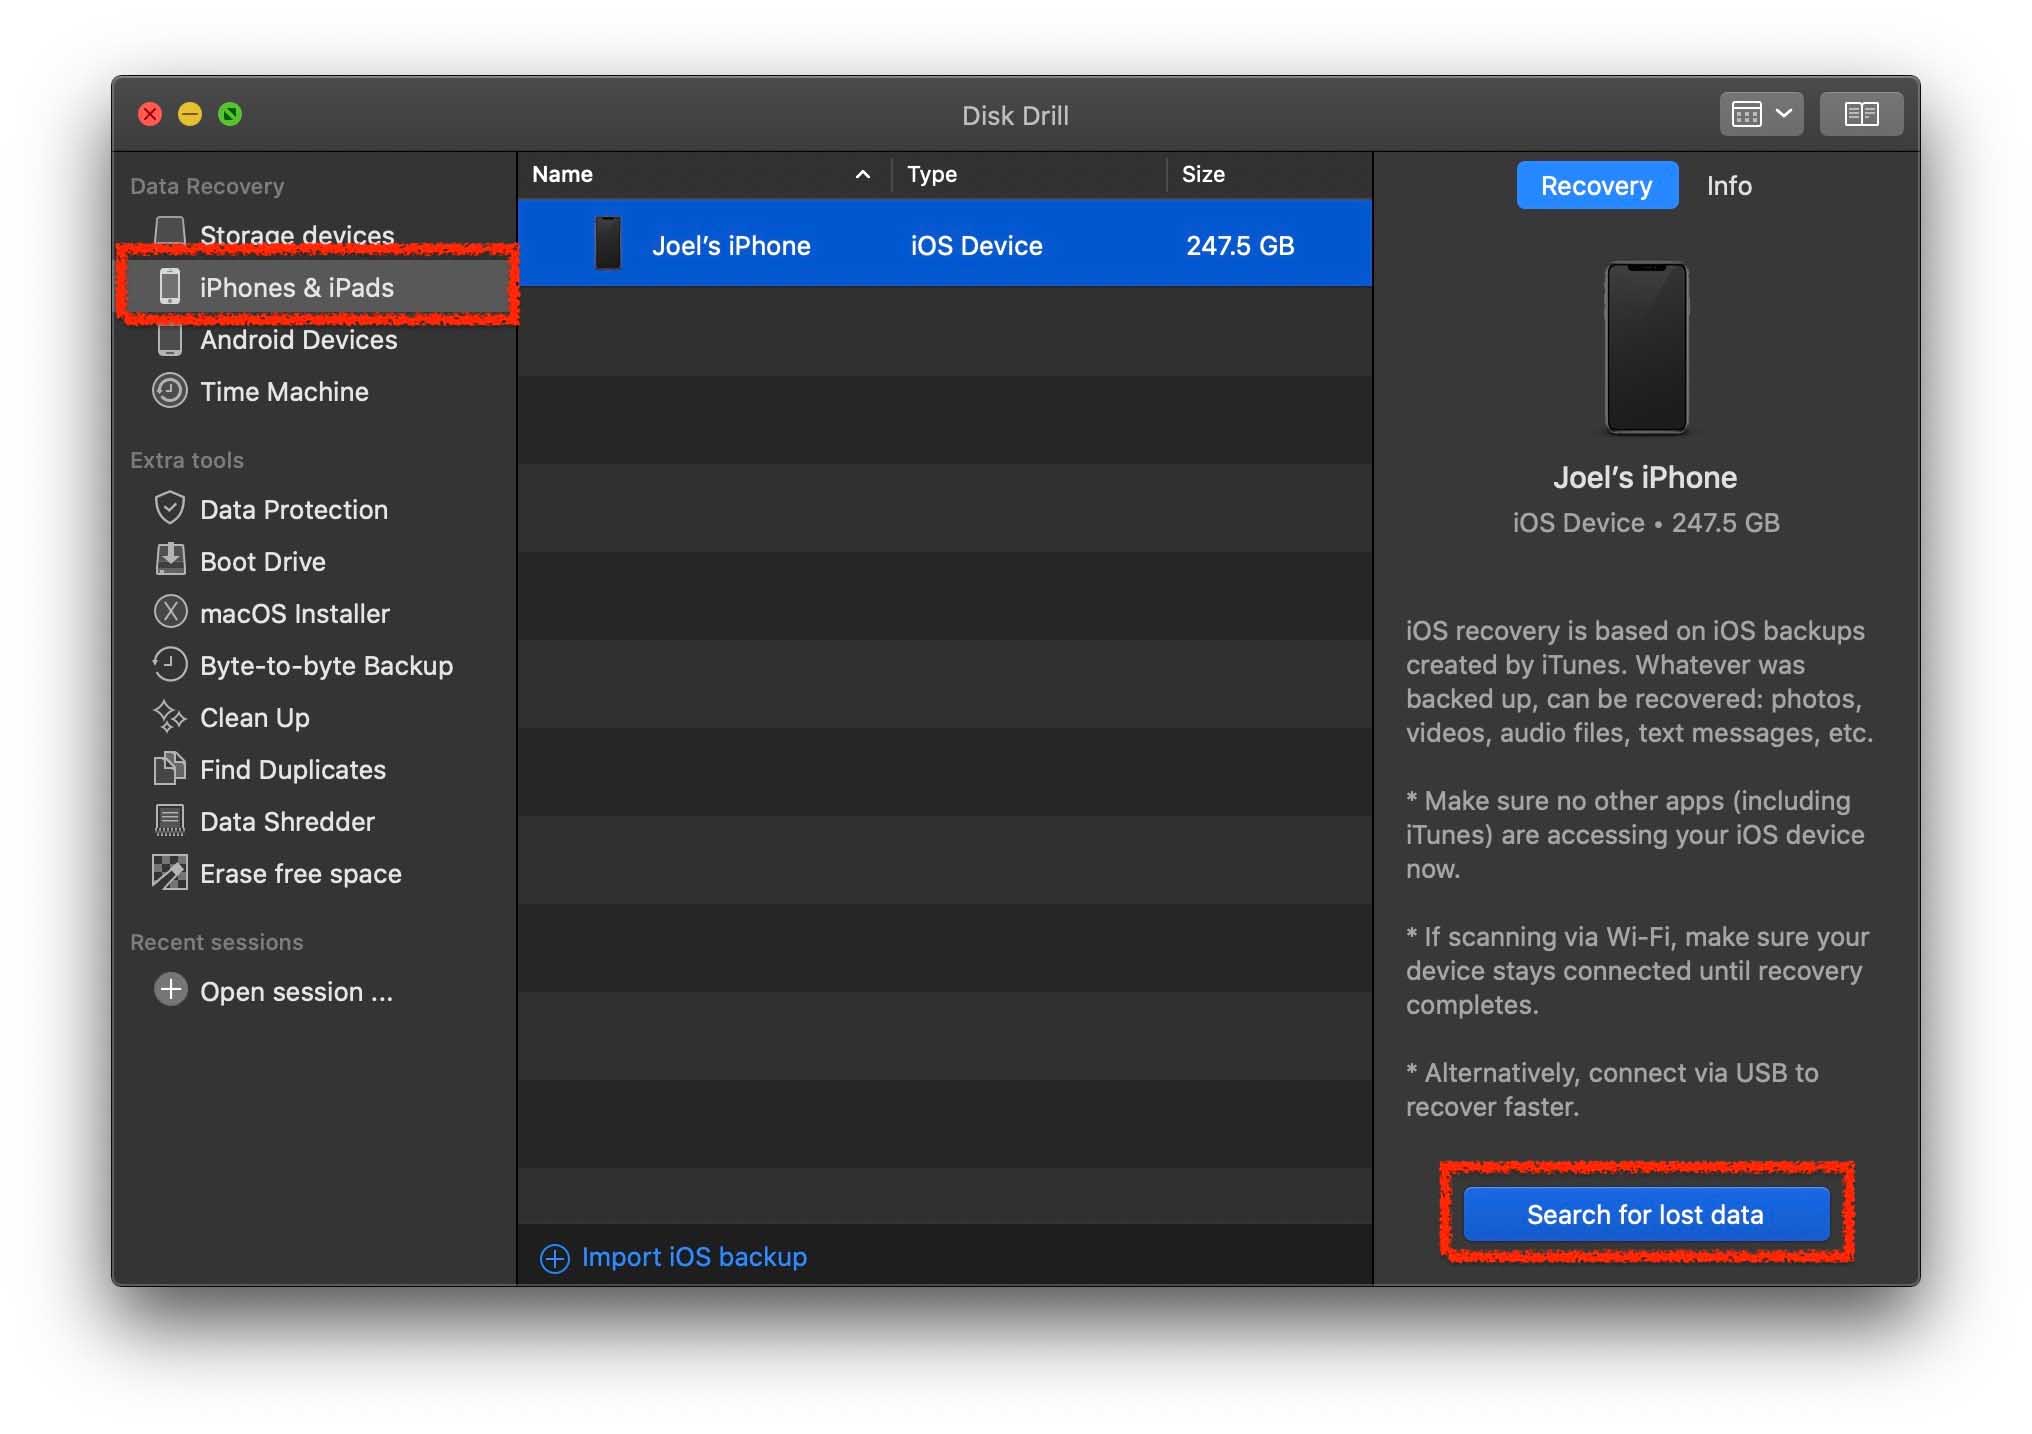
- Initiate a scan by plugging your iPhone into your computer and selecting it as the device to search through.
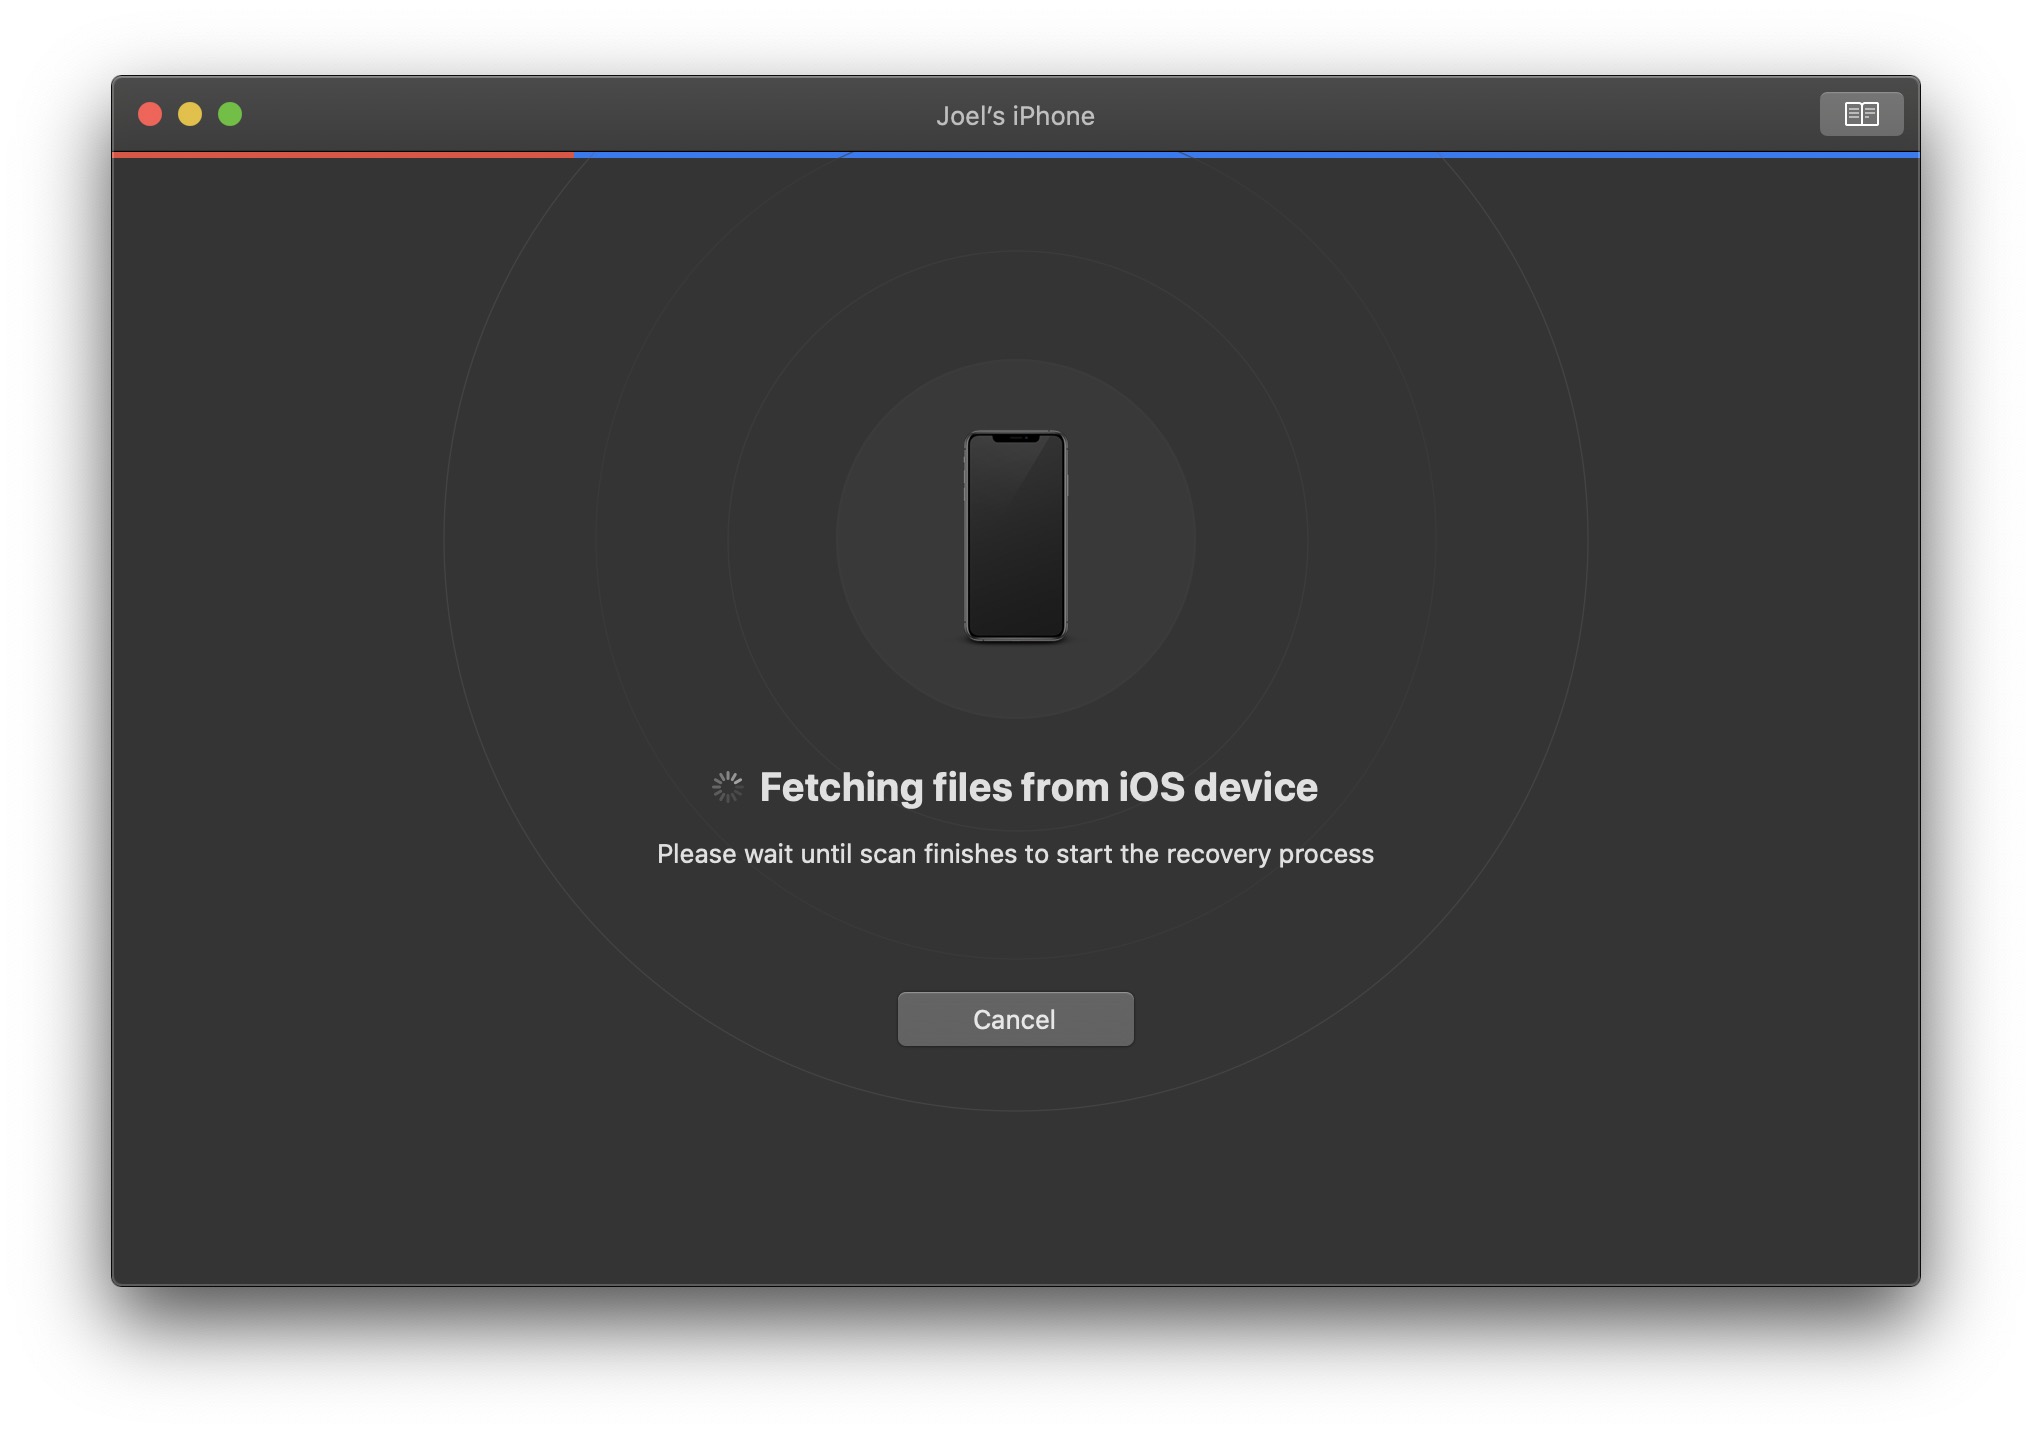
- Wait for the scanning process to complete. This shouldn’t take long but will vary depending on how much data you have on your iPhone. Your iPhone will need to be plugged into your computer for this whole process.
- After the scan has completed, you will be shown a screen that will display all of the data that Disk Drill was able to recover from your iPhone. Click on notes to view the lost notes that Disk Drill was able to recover. We’re only looking at deleted notes in this example, but you can also retrieve lost contacts, calendar appointments, bookmarks, videos, and many other things.
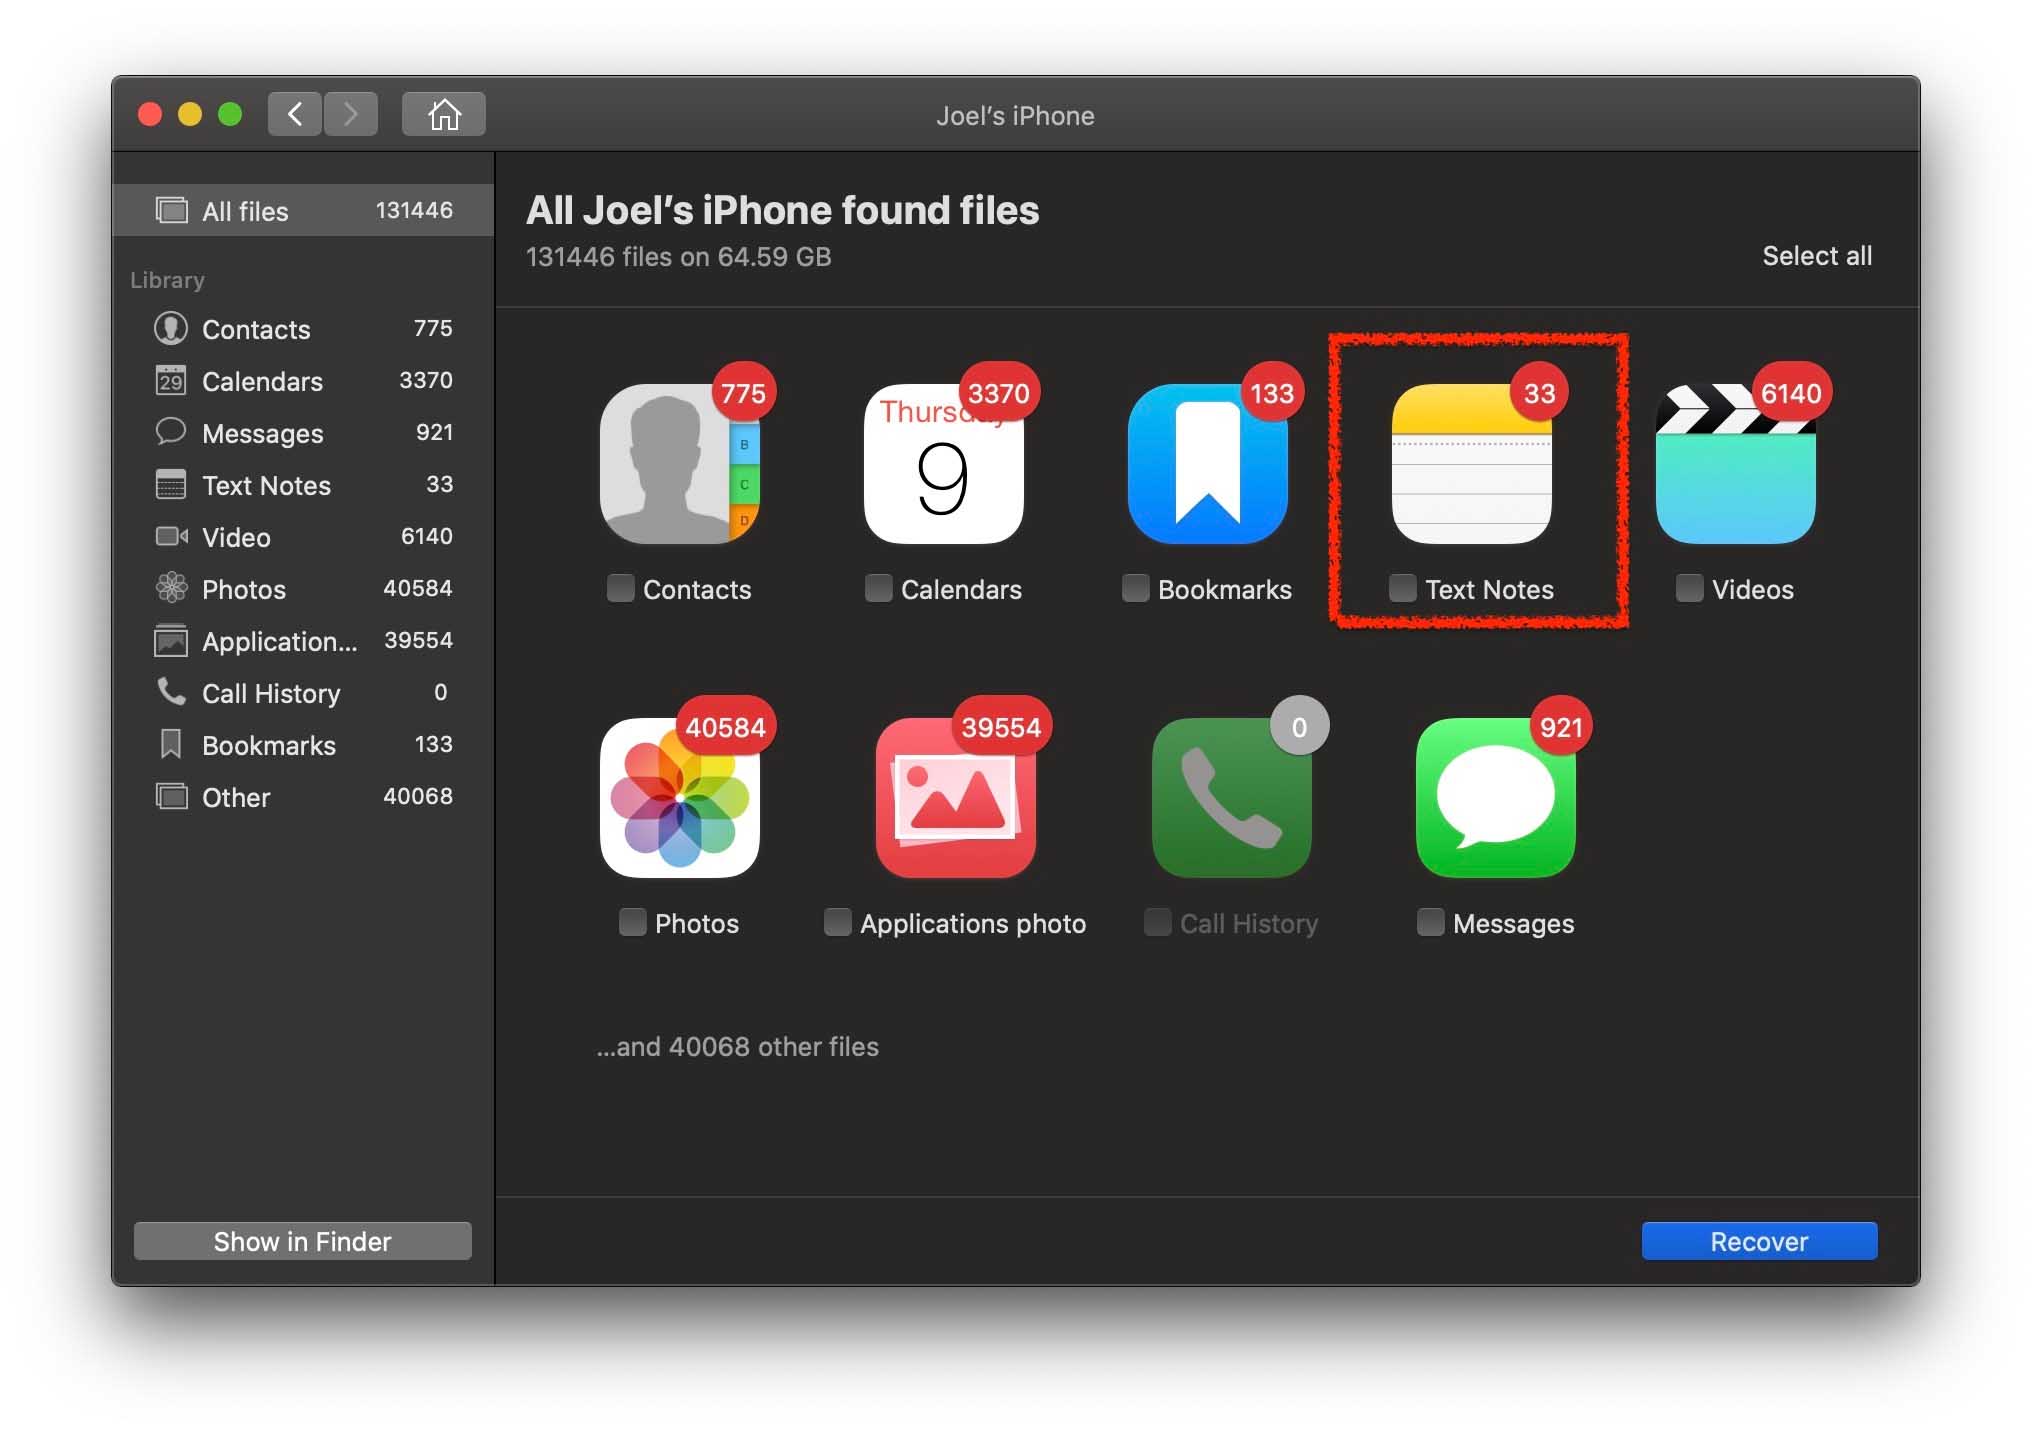
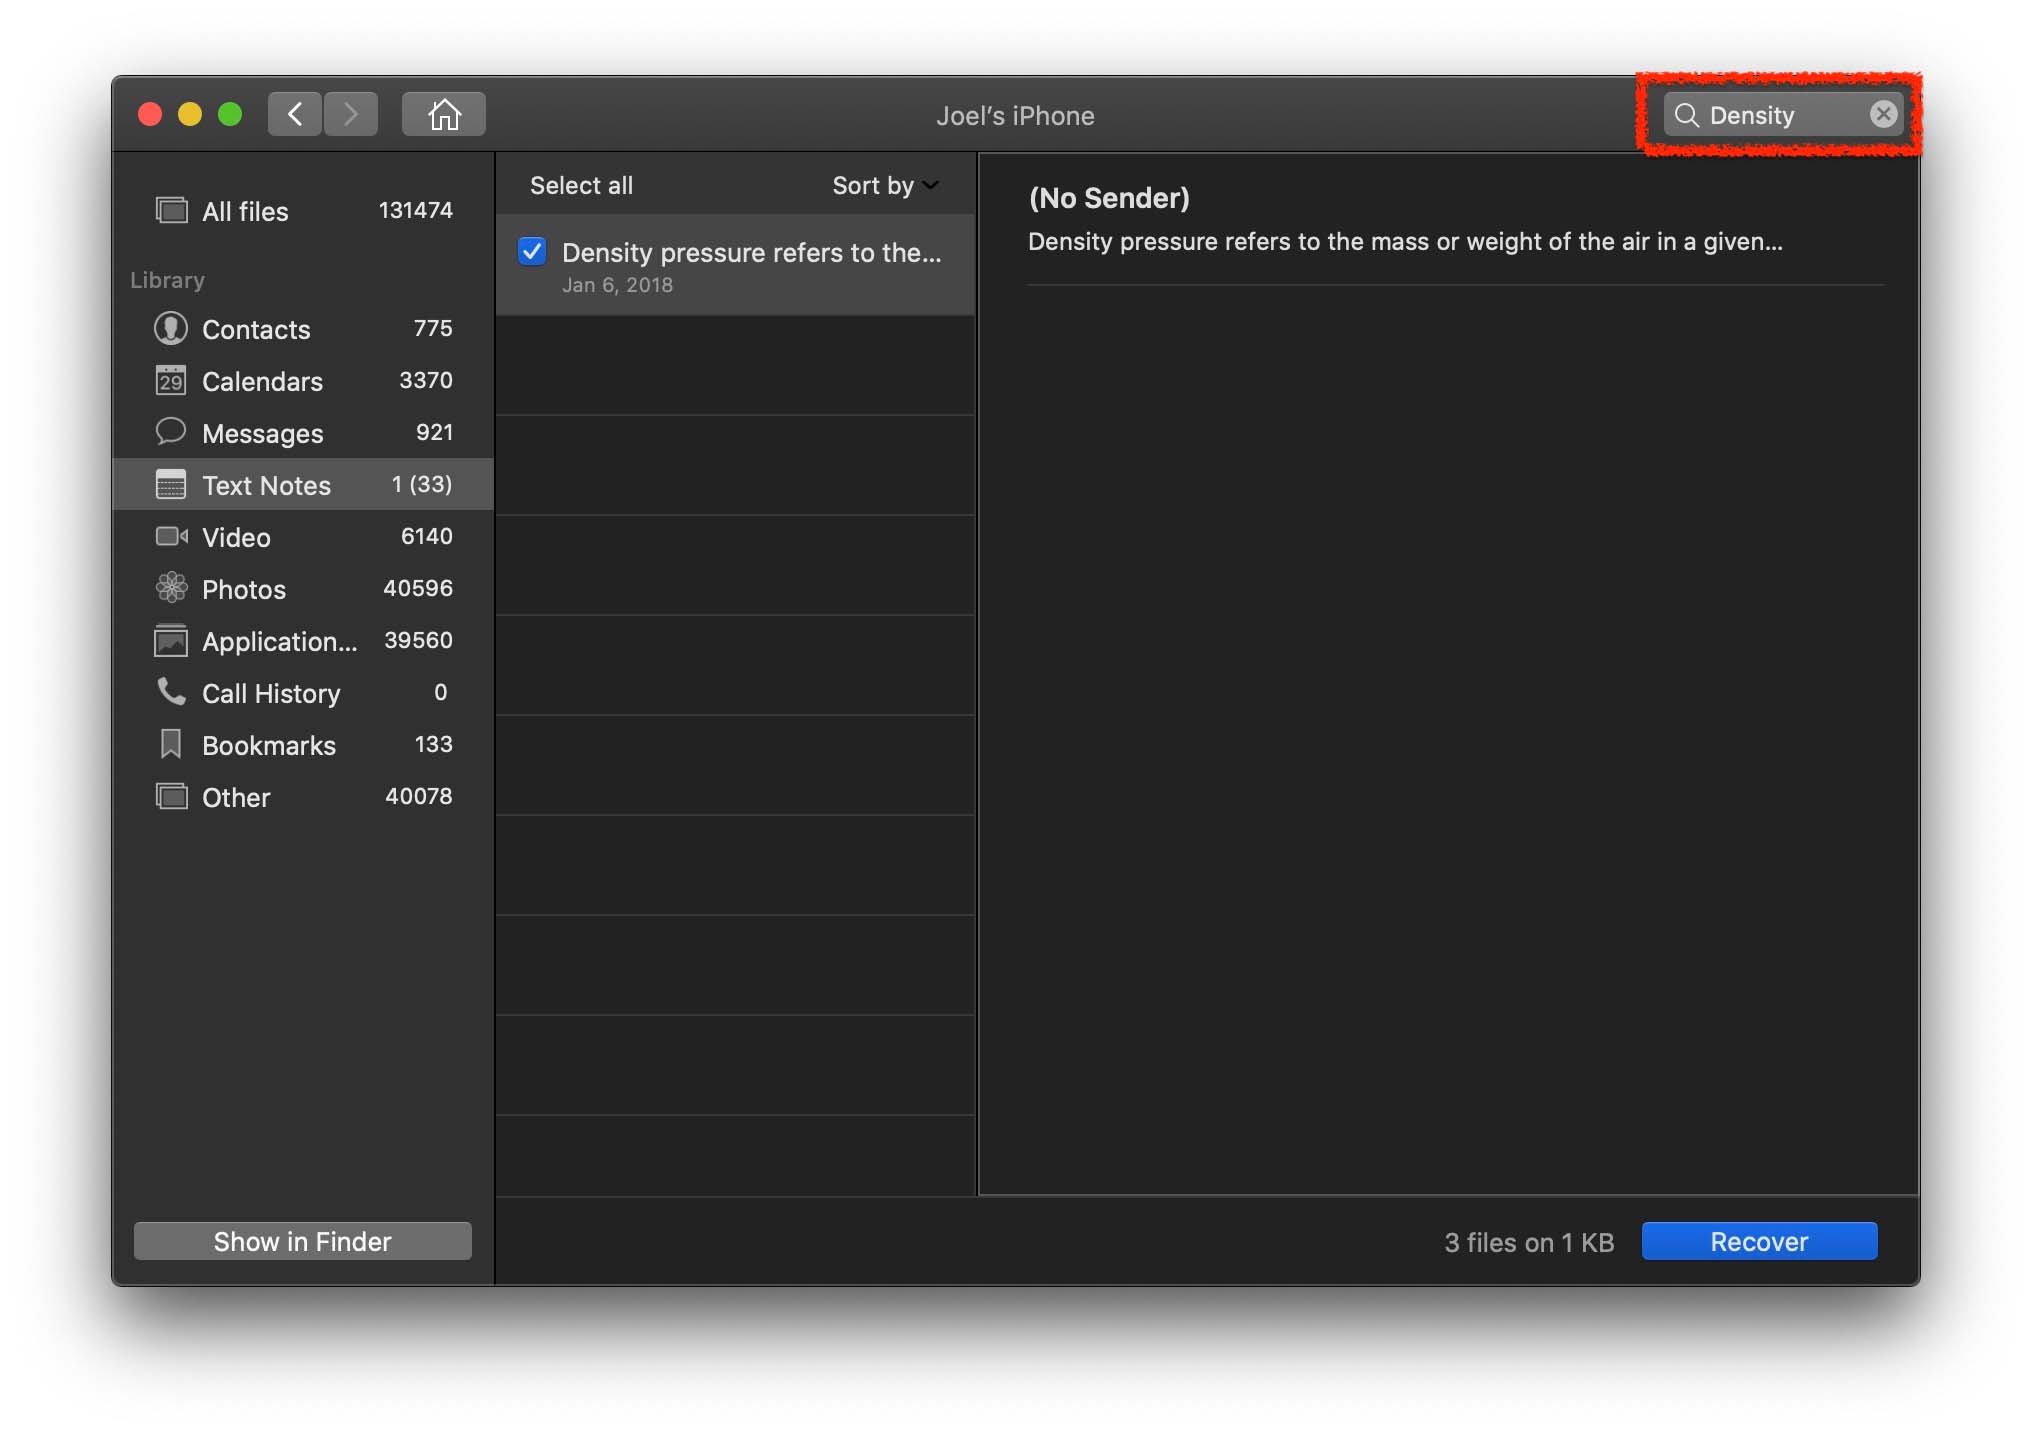
- Once on the recovered notes screen, we can find deleted notes on iPhone. There is one note that I want to search for by name which I can do by using the search box in the upper right-hand corner of the screen.
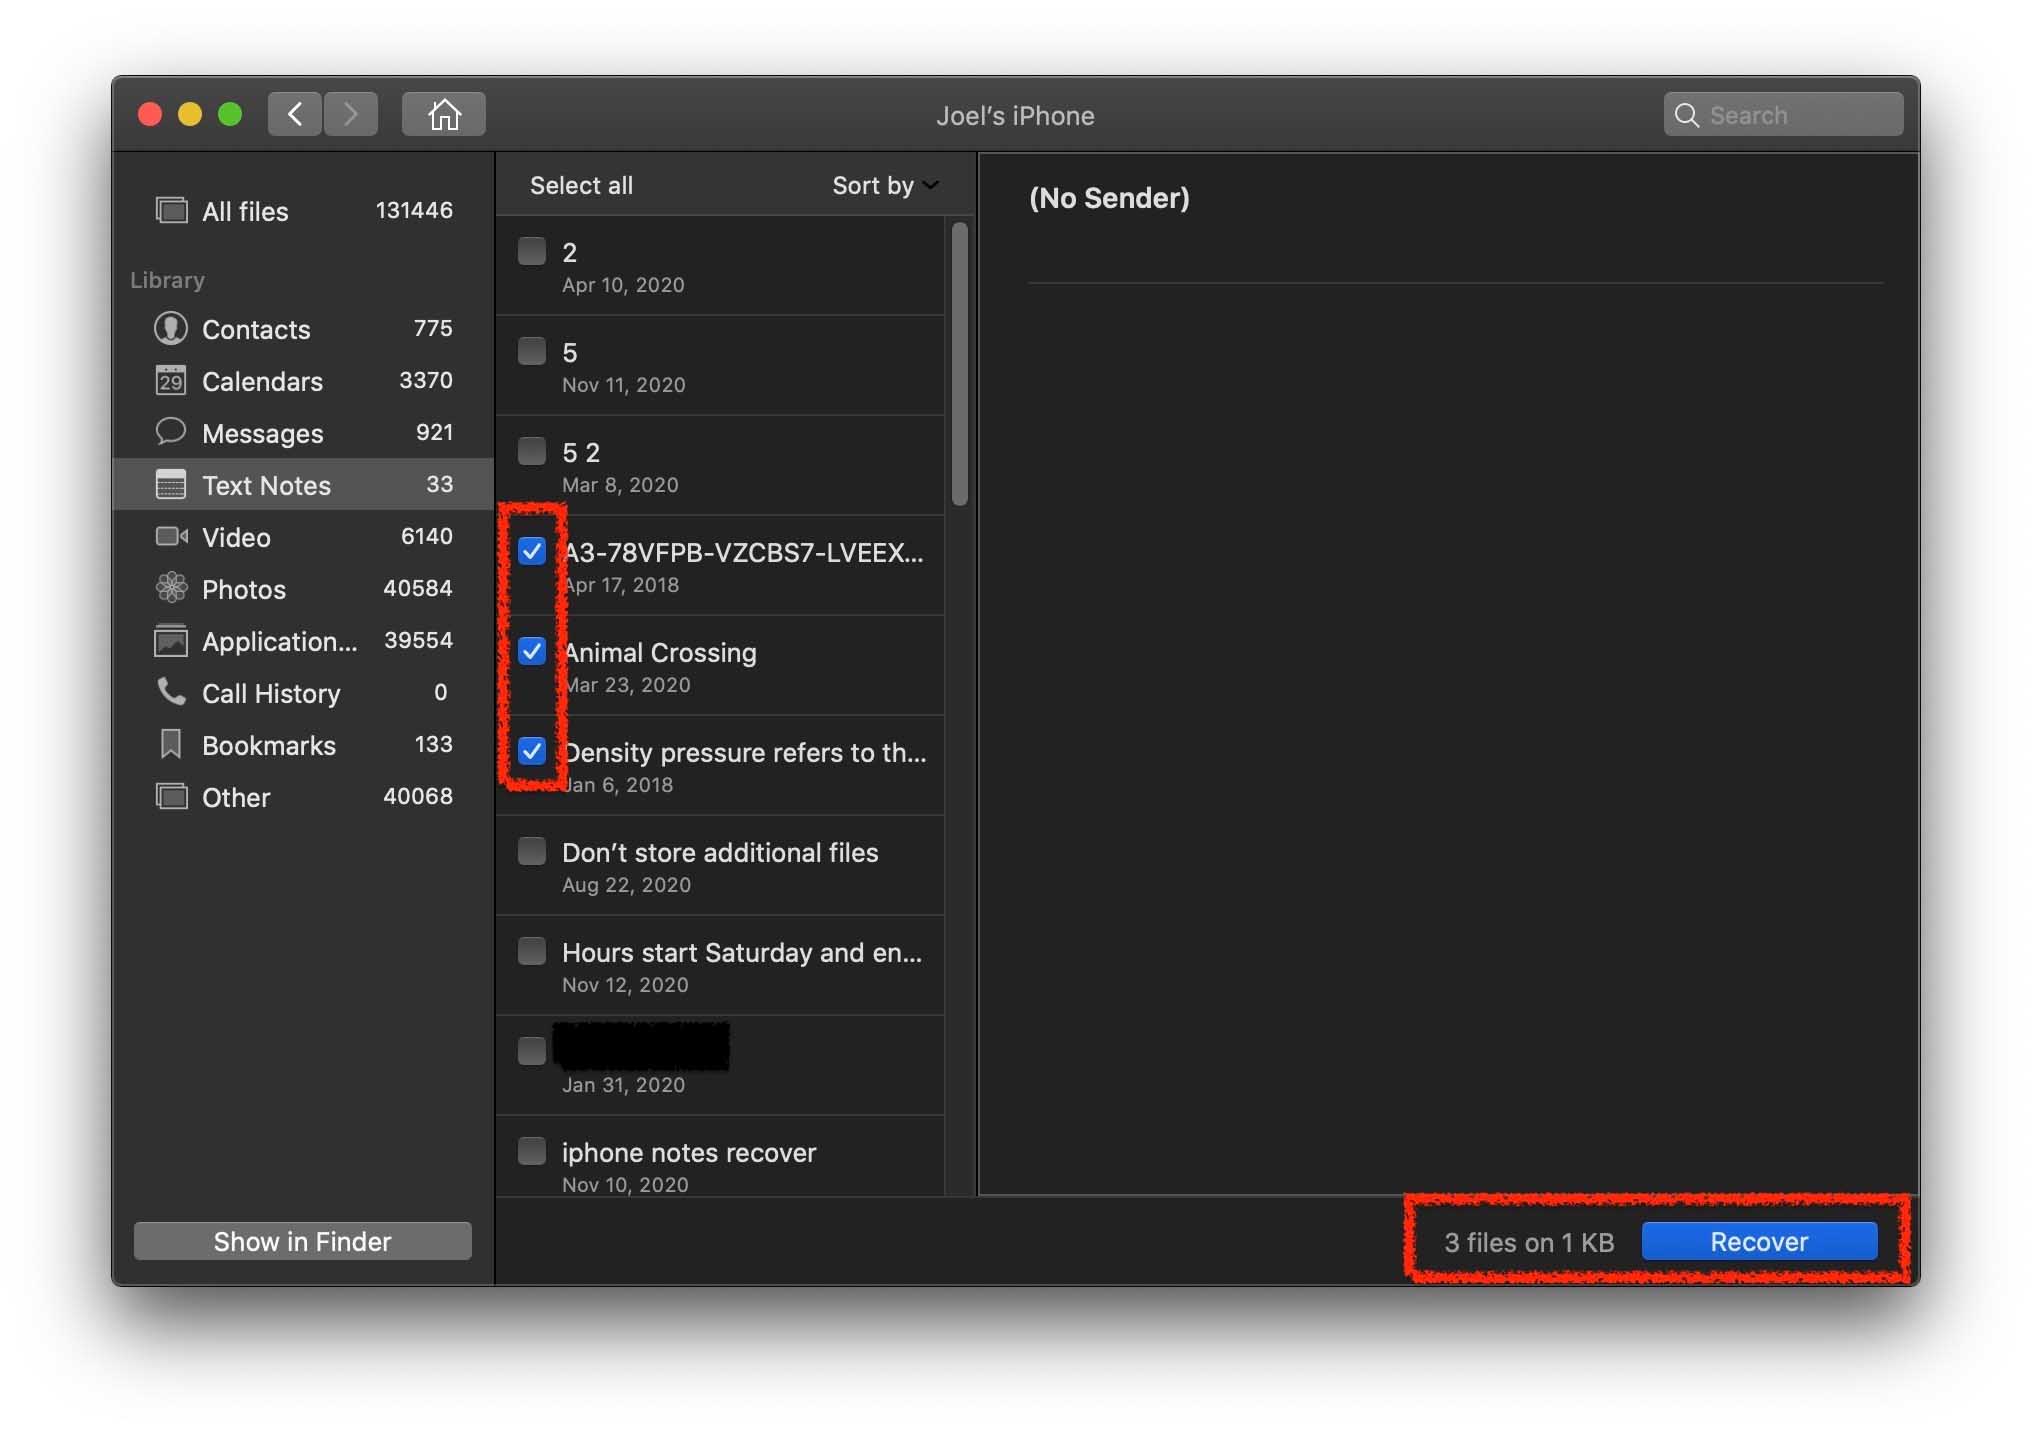
- Select the notes that you would like to recover and then click the blue Recover button in the lower right-hand corner of the screen. This will allow us to retrieve notes from iPhone on our computer.
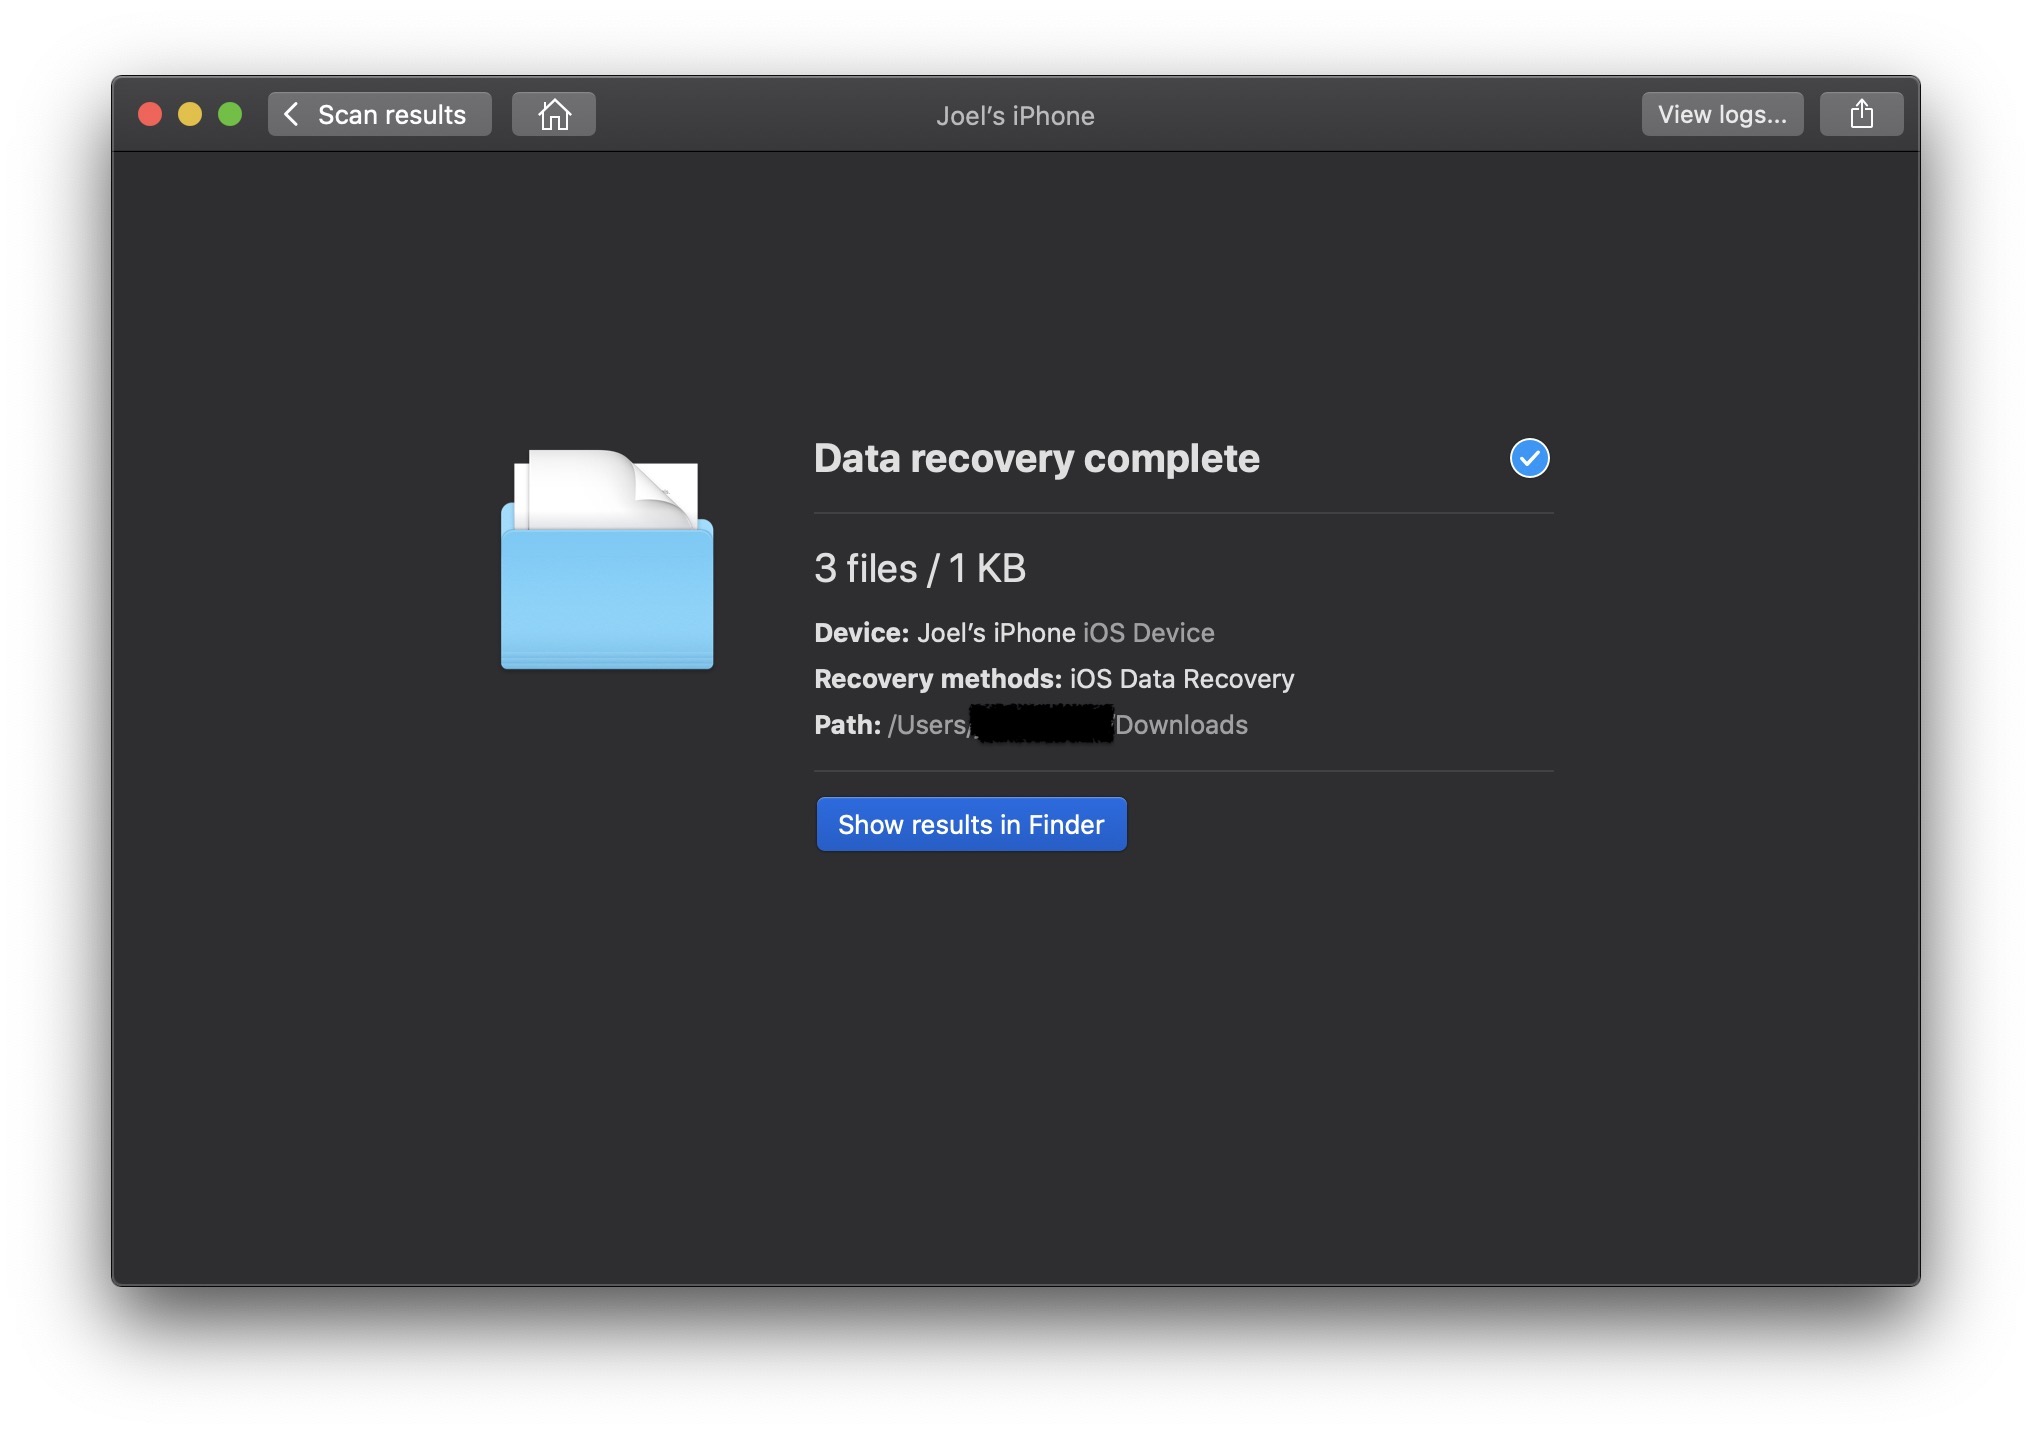
- Recover deleted notes on iPhone by selecting a path for Disk Drill to recover them to.

- After you have successfully recovered the deleted notes, you will receive a confirmation message that the recovery was complete and you can view the notes where you choose to save them to.
Losing notes on our iPhone is something that can set us back and cause frustration. With important things such as ideas, project lists, banking information, or passwords being stored there, we don’t want to lose this important data.
Using iTunes, iCloud, and data recovery software ensures that if we do lose access to our notes, we know how to get them back onto our device and not being interrupted.


