So I had this idea… What if we could replace the installer on your Macbook Air restore drive with the Lion installer?
I got pretty excited at the idea and started messing around. I was able to get it done and can present to you now: How to Hack your MacBook Air Software Reinstall Drive to install Lion!!!
First we’ll need to grab a few things:
- A Legally acquired Copy of Lion
- Apple Macbook Air Recovery Thumb Drive (Or else what’s the point?)
- Our Handy Dandy Zip File (Link)
- Windows Machine (Virtual or Physical)
Once you’ve collected the above, it’s time to get started.
The first thing we need to do is unlock the USB drive. Apple has locked down the drive to prevent exactly what we’re trying to do here. Since they’ve gone to such lengths to do so, this is probably a good time to warn you that things can go wrong. If this is your only method of restoring your MackBook Air, you might want to consider not doing this.
Unzip the Zip file we linked above on your Mac, and you’ll find a folder called This Goes To Windows. You can drag that whole folder into your virtual machine, or get it to your Windows computer one way or another.
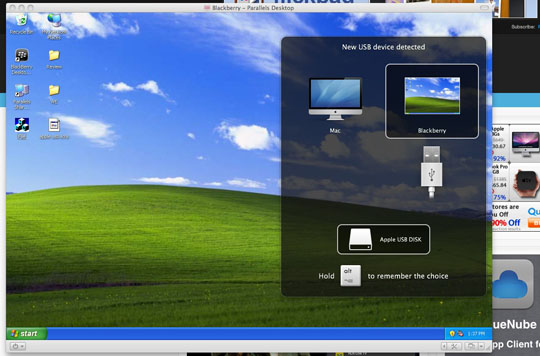
Plug your USB Drive into your Windows computer, or if you’re using a virtual copy, into your Mac, and tell your virtualization software of choice to point Windows at the drive.
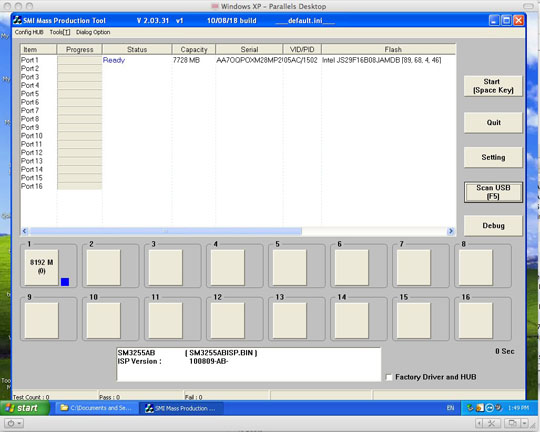
Once Windows has finished its hardware install process, launch sm32Xtest.exe from the above folder. If it doesn’t detect the drive simply click Scan USB and it should show up in the next available Port. My virtual copy of Windows didn’t have any other USB devices so it showed on Port 1.
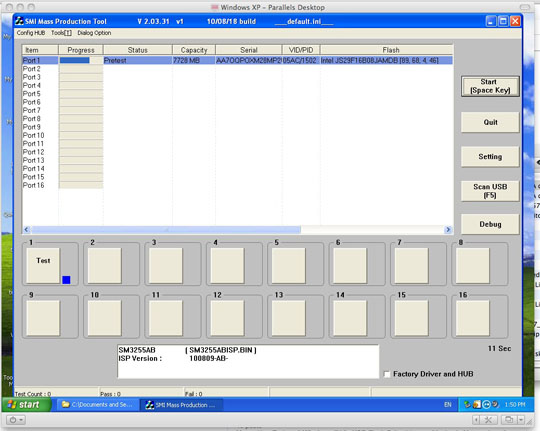
Highlight the port it was detected on, and click Start. The software will run through a quick testing and unlocking process and when it’s finished, you are done with Windows. You can shut it down as everything else will be performed on your Mac.
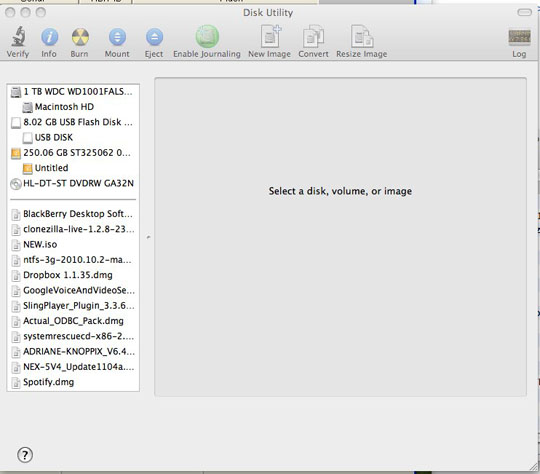
Open up Disk Utility and click on the USB Drive on the left hand pane. Once selected, you can go to the Partition tab on the right. This is where we will partition the drive to be bootable. Under Volume Scheme select 1 Partition. Then choose options. You want to make sure that GUID Partition Table is selected so that the drive will be bootable on a Mac.
Click OK, and now you can click Apply.
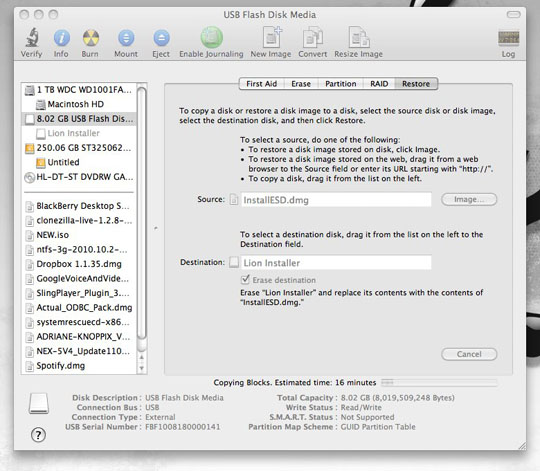
Once it is finished partitioning, click on the Restore tab. Drag your new partition (the item under the drive, not the drive itself) to the Destination field.
The Source field will be populated with your Lion DMG. Now, since Lion is distributed through the App Store, you’ll need to do a little digging to get at the dmg. Simple right click on the Install Mac OS X Lion application and click Show Package Contents.
The file we are looking for is under Contents / SharedSupport. You’ll notice a file in there called InstallESD.dmg. You can simply drag this file while holding option to copy it to your desktop or anywhere else you’d like to put it.
Once done copying, you can drag it to the Source field in Disk Utility, and you are ready to restore your drive! Click Restore and sit back!
Once the drive is finished restoring, you are pretty much ready to go. You can boot this drive by holding option during boot and selecting it when prompted, but you’ll notice your pretty MBA Stick icon is missing and replaced by a default USB drive icon. We’ve got you covered on this as well.
Inside the Zip we linked you to, is a file called USB Icon. Open this file in Preview and you’ll see 5 images. Hit Command+A to select them all and then Command+C to copy them.
Open up Finder and right click to Get Info on the new drive you created. In the top left corner, you’ll see the default icon. Highlight this icon by clicking on it and then hit Command+V to paste the new images.
You are all set now, and have a bootable Lion installer on your Macbook Air Key!!

