
Let’s talk about losing Photo Booth data. Even though Photo Booth outputs photos and videos, data loss and data recovery of its files look a bit different compared to recovering photos and videos stored in Finder or in the Photos app.
We created this guide specifically to teach you how Photo Booth stores its files and how to recover Photo Booth photos and videos using native and third-party tools on your Mac. Read on!
Table of Contents
Where are Photo Booth Videos and Photos stored?
Photos and videos taken with Photo Booth are stored in a file called a Photo Booth Library. Your Photo Booth Libraries are stored in the Pictures folder on your Mac.
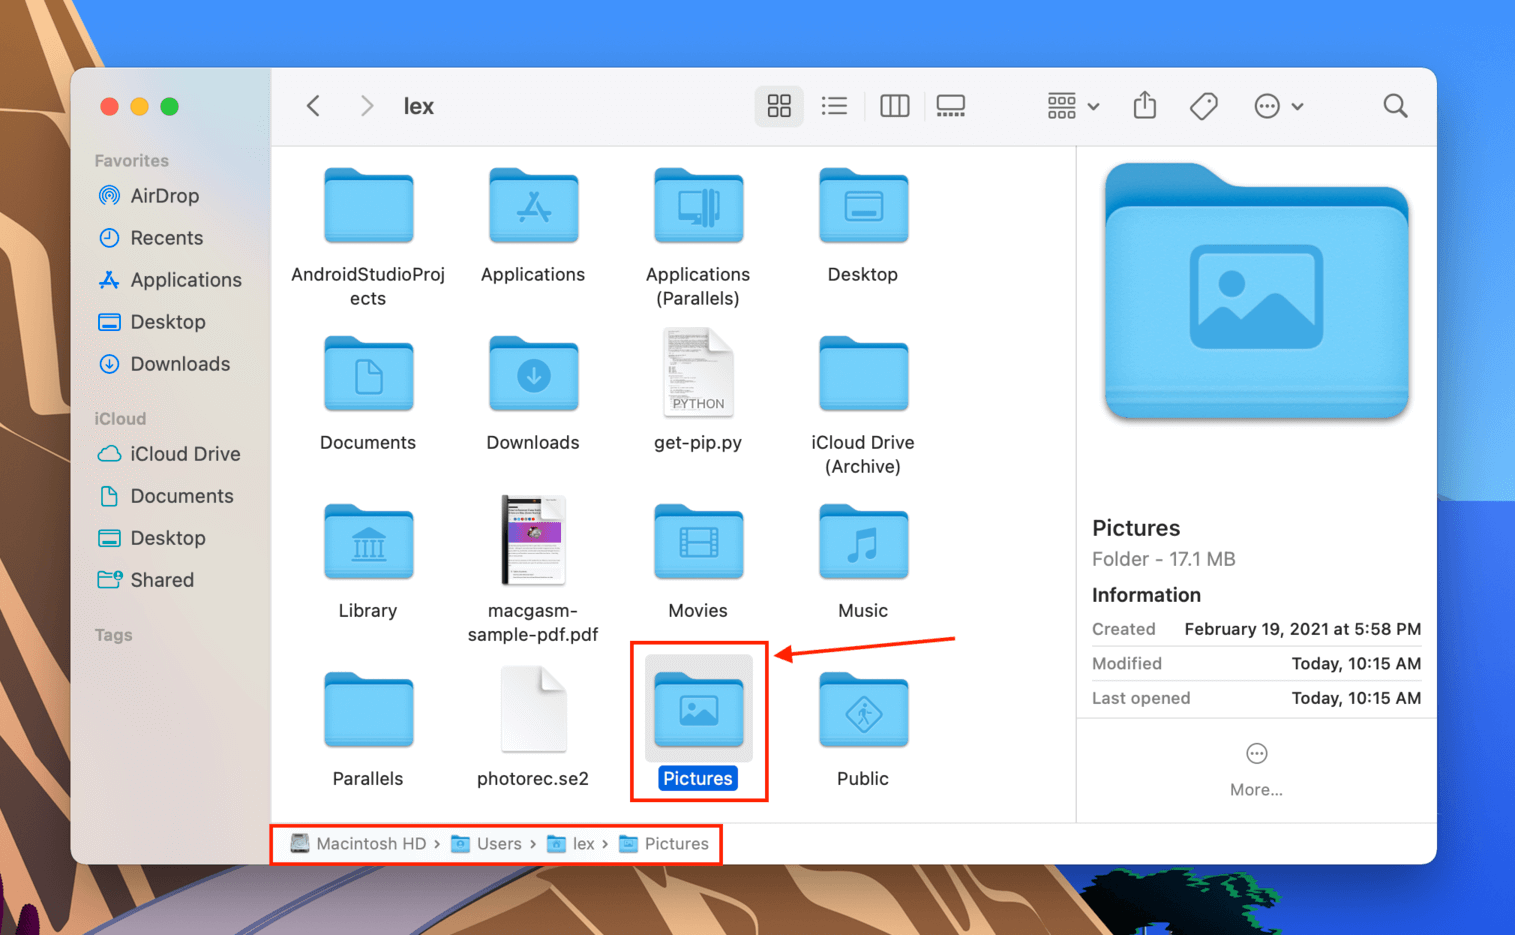
To access the Pictures folder, open Finder and click Go > Home.
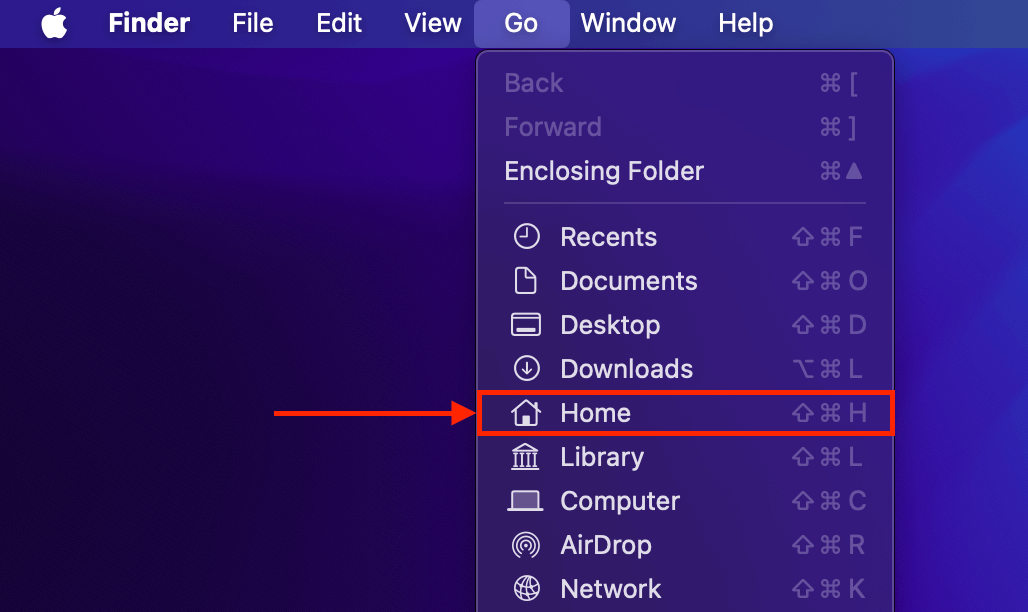
You can’t interact with Photo Booth photos and videos as individual files unless you export them from the Photo Booth app. For this reason, the only way to back up Photo Booth files to something like iCloud is to export your photos and videos from Photo Booth and upload them manually to the cloud.
Despite the limitations imposed by the Photo Booth app, any photos and videos you delete are actually sent to your Mac’s Trash folder, just like any other file. More on this in the next section.
Can You Recover Deleted Files from Photo Booth?
Yes, you can recover deleted files from Photo Booth — in many cases. Truthfully, not every case is resolvable and it can be tough to gauge the probability of success on your own. Here’s a general rule of thumb you can refer to. Photo Booth recovery is possible as long as at least one of the following conditions are met:
- You didn’t empty your Trash folder. Deleted macOS files are usually sent to the Trash folder first — they aren’t erased from your system until you explicitly “empty” the Trash folder or you delete the Photo Booth files again from within the Trash folder. If you haven’t done so, you can easily restore your deleted files from the Trash folder to their original locations (Method 1).
- The Photo Booth file data hasn’t been overwritten. When files are deleted, their data still exists physically on your Mac’s disk. As long as that data hasn’t been overwritten by new file data, recovery using third-party tools is still possible (Method 2).
- You created a backup Time Machine backup before deletion occurred. If you created a Time Machine backup at least once before your Photo Booth files were deleted, you can recover snapshots of their data at an earlier point of their timeline (Method 3).
How to Recover Deleted Photo Booth Files
In this section, we’ll demonstrate 3 ways to restore Photo Booth photos and videos. The success of each method is dependent on different factors, so make sure to try or at least read through them all. Some methods that don’t work for others may work for you.
Method 1: Restore Photo Booth Files From the Trash Folder
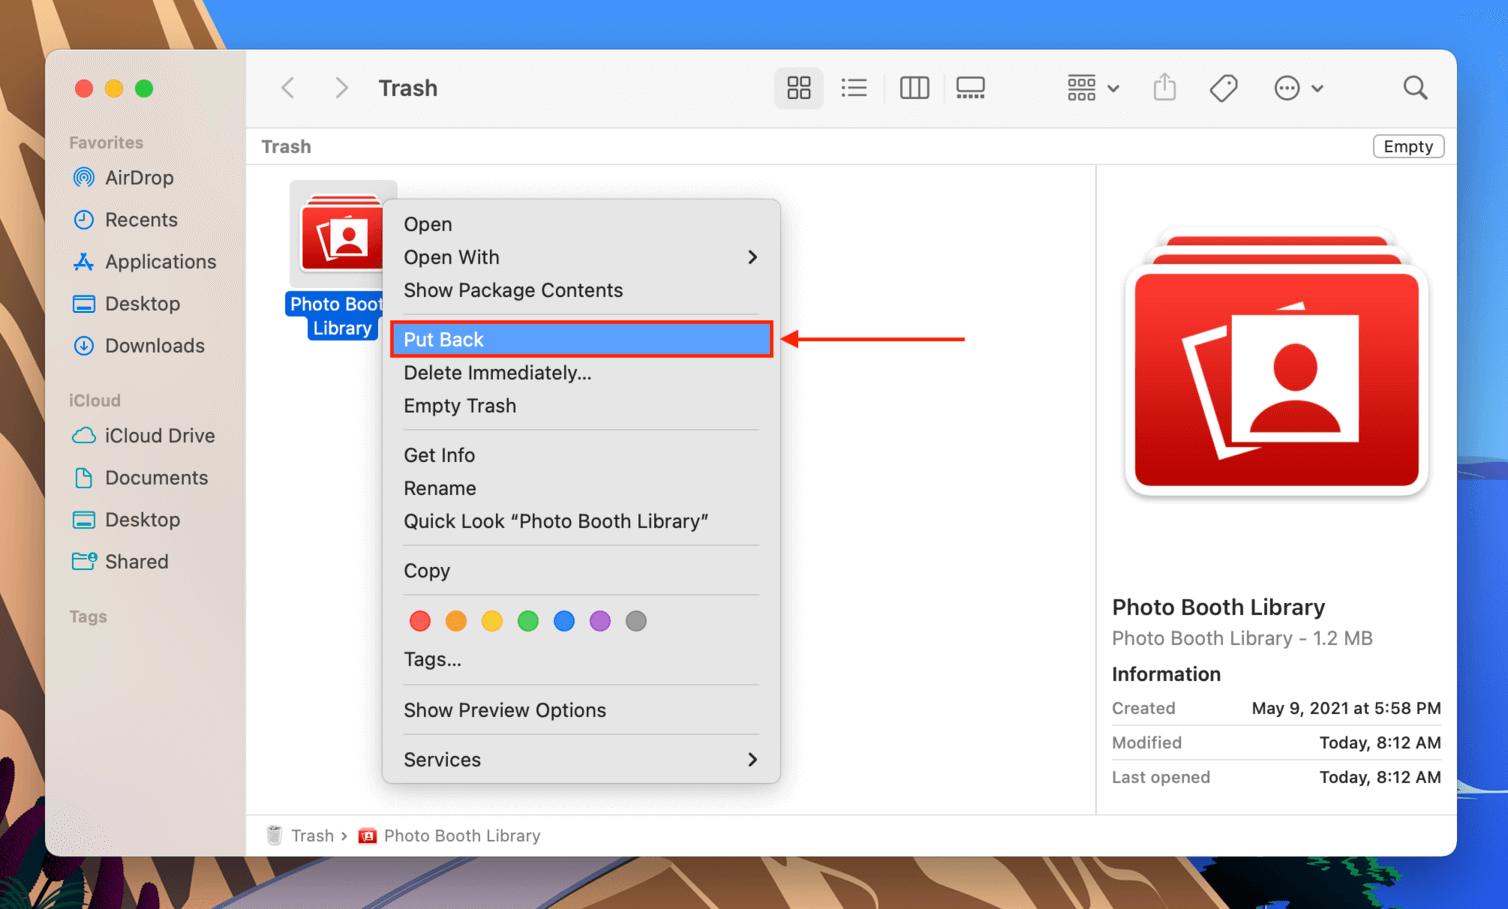
When you delete a Photo Booth file, it gets sent straight to the Trash folder. By default, it stays there until you delete it once more from inside the folder or you empty your Trash. Restoring a file from the Trash folder is very simple:
Step 1. Click the Trash icon on your dock to open it.
![]()
Step 2. Right-click your Photo Booth file, then click “Put Back.”
Method 2: Restore Photo Booth Files Using Data Recovery Software
Data recovery software is a tool that you can install on your Mac and use to scan your drive for deleted files. It’s capable of finding the data left behind by the deleted files, which can be utilized to restore the files as they were.
For this guide, we’ll be using an app called Disk Drill. It’s been updated to support macOS Sequoia and it recognizes Photo Booth files. One particular feature we like is that Disk Drill can access Photo Booth photos and videos as individual files – not as components of a library.
This gives you the ability to preview your Photo Booth photos and videos from within the app to make sure they are recoverable in the first place. It also makes them easier to find using Disk Drill’s filters and you can often follow the same folder trail as you would in Finder.
Step 1. Connect a storage device to your Mac, ensuring it has enough space for your Photo Booth files, plus an additional 200-300 MB for Disk Drill installation files.
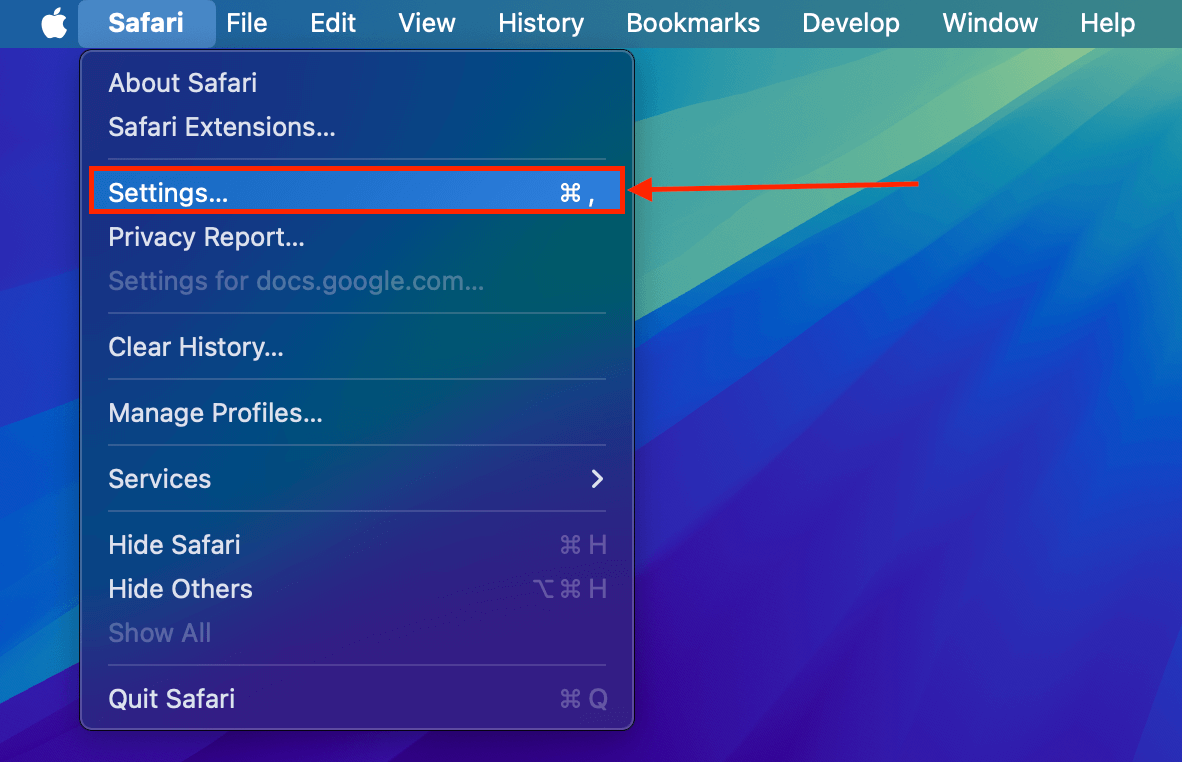
Step 2. Next, we want to make sure that downloading Disk Drill doesn’t result in overwriting the Photo Booth files. Open Safari, then click Safari > Settings…
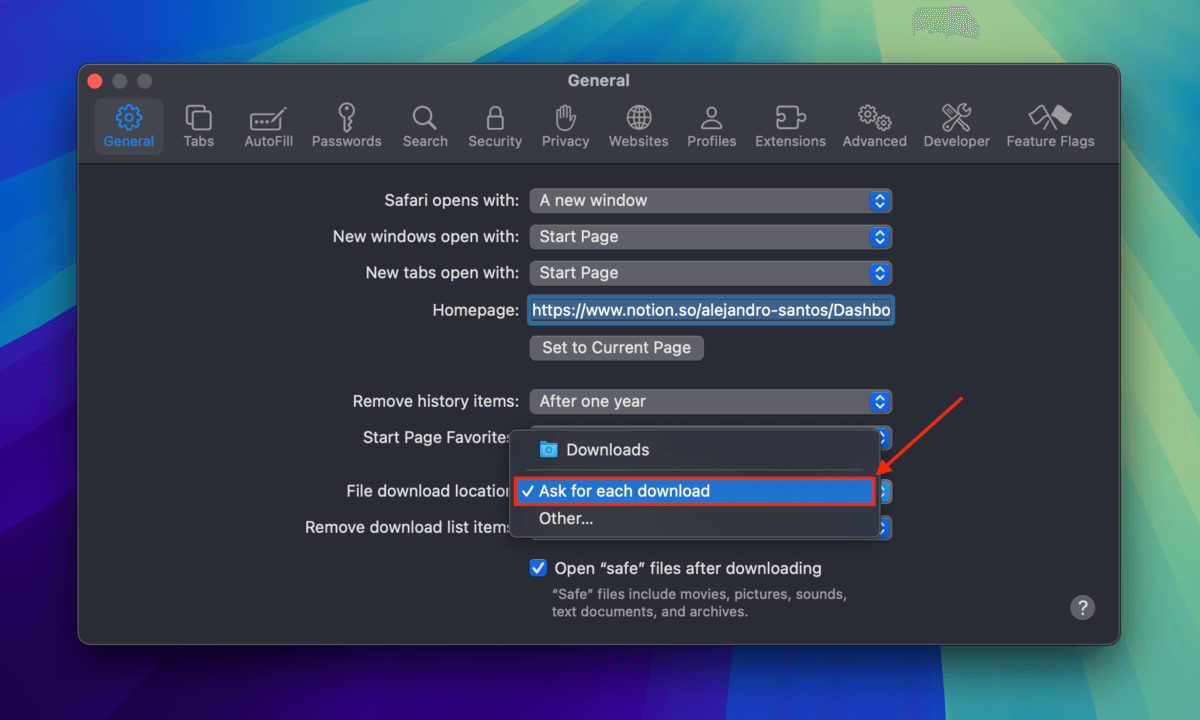
Step 3. In the General menu, click the dropdown button beside File download location and select Ask for each download.
Step 4. Download Disk Drill from the CleverFiles website. When prompted, make sure to select your external storage device as the save location for the installer file.
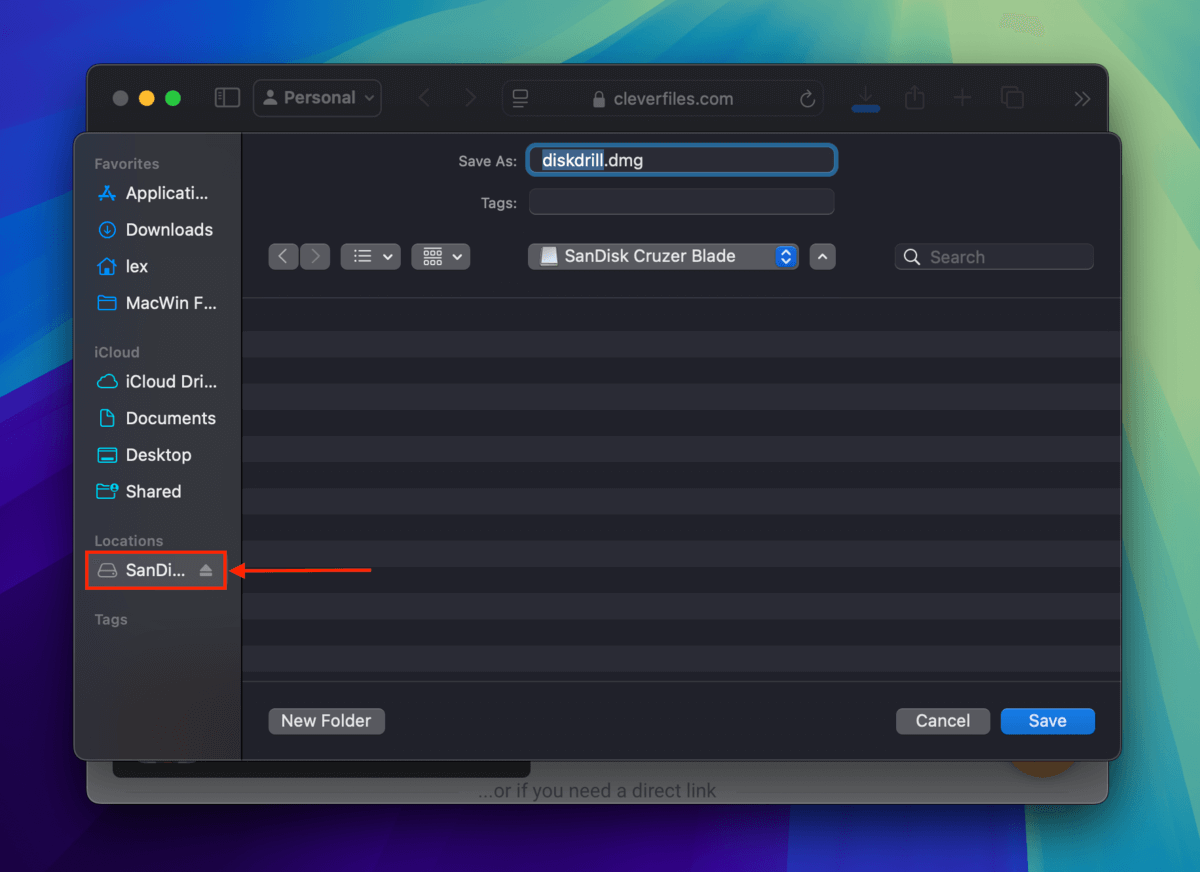
Step 5. Download Disk Drill from the CleverFiles website. When prompted, make sure to select your external storage device as the save location for the installer file.
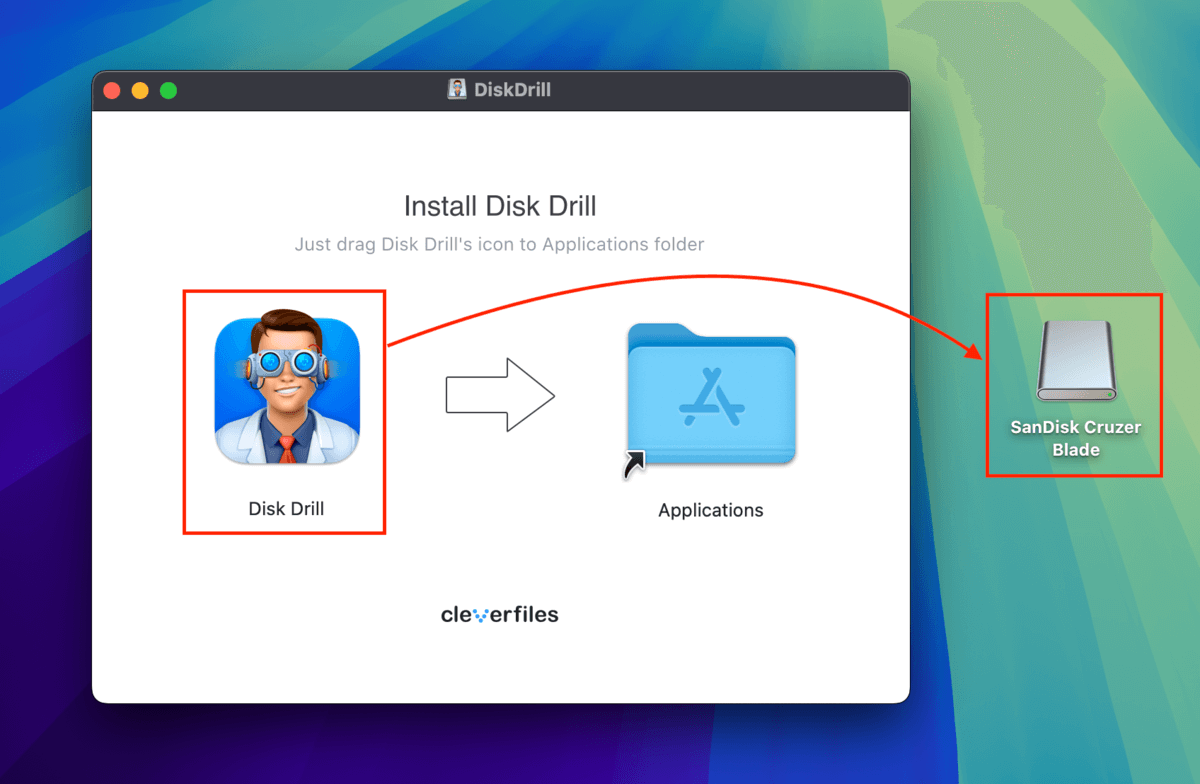
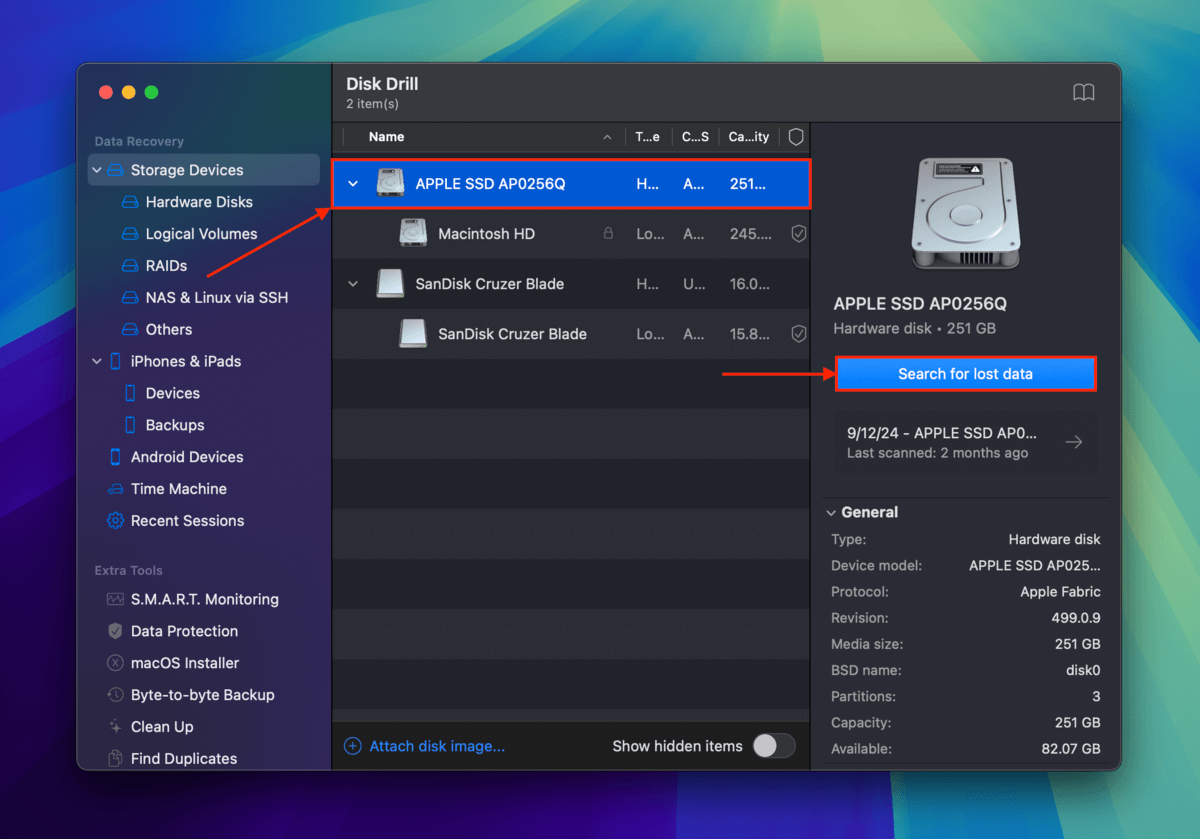
Step 6. Double-click Disk Drill’s program icon to open it. Then, select your Mac drive (usually labeled something like “APPLE SSD”) and click Search for lost data.
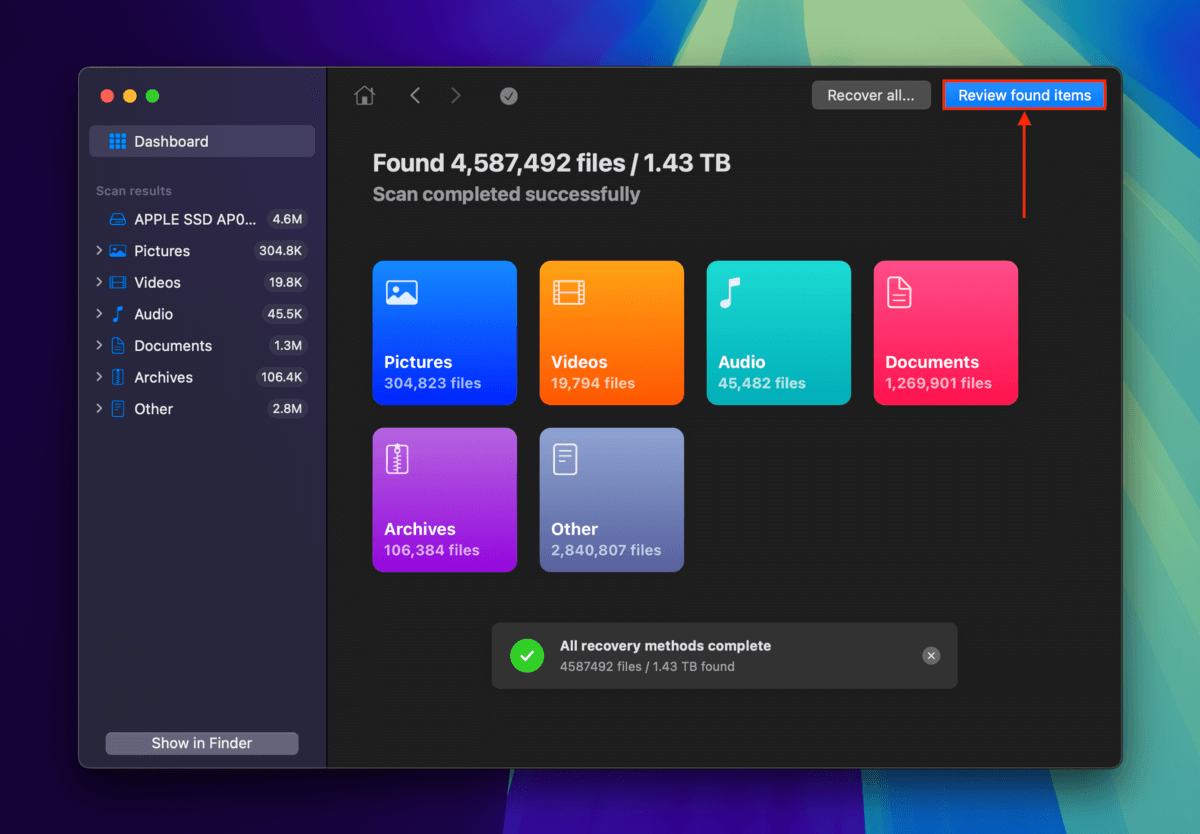
Step 7. Once Disk Drill is done scanning your Mac drive, click Review found items.
Step 8. Click the magnifying glass on the top-right corner of the window to open the search tool. Type Photo Booth. You can also filter search results even more by selecting Pictures or Video on the left sidebar.
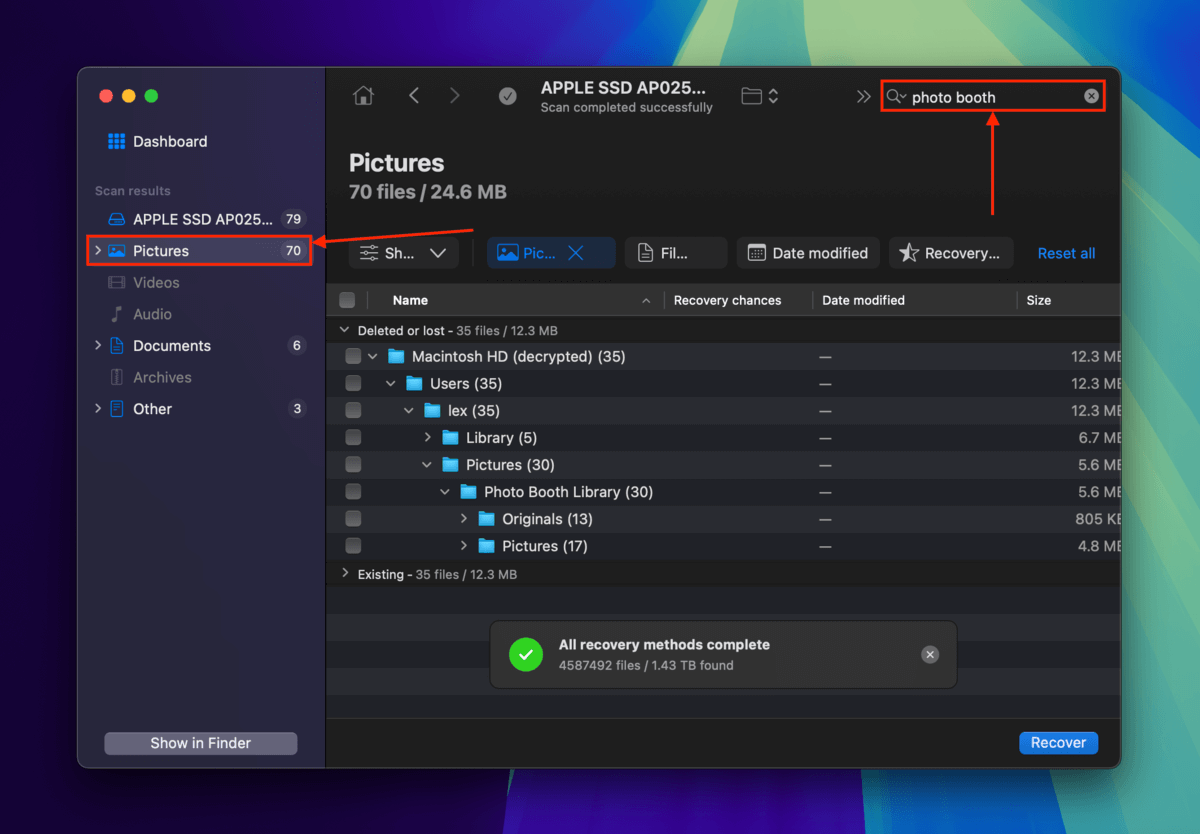
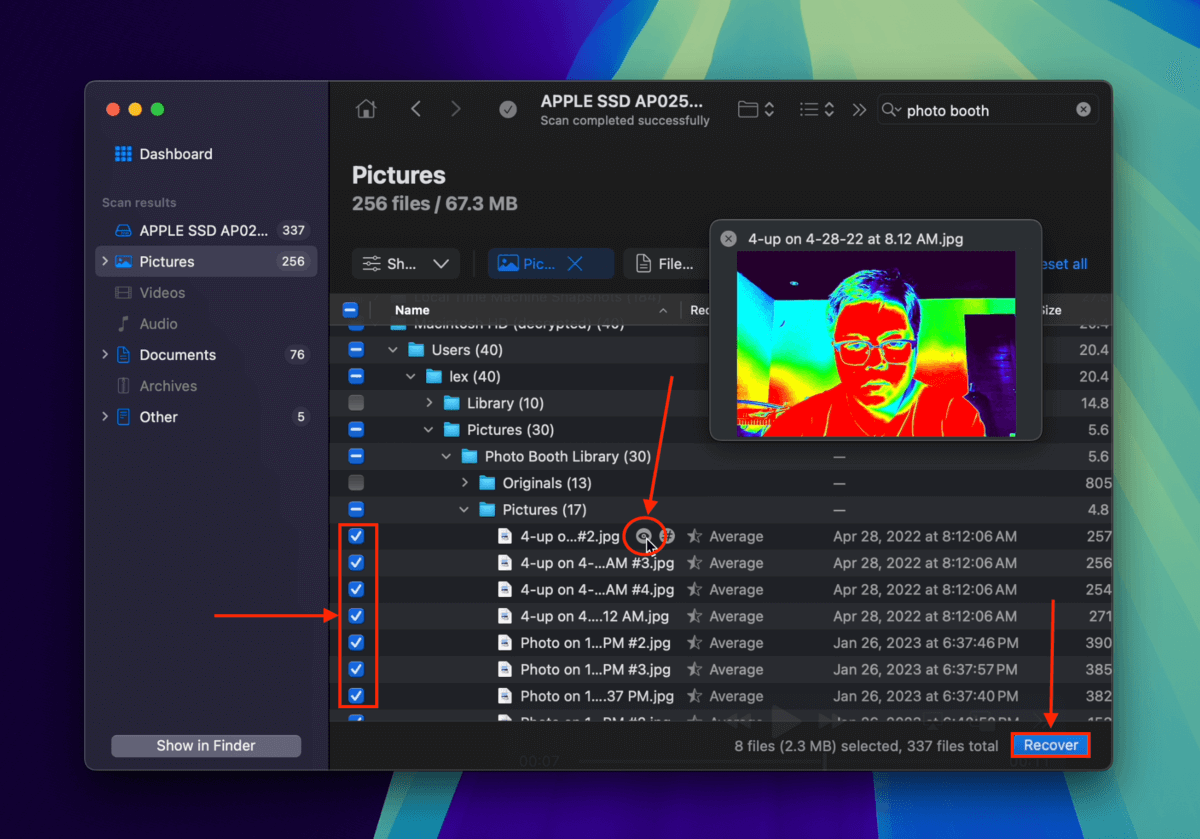
Step 9. At this point, all the files and folders displayed in the Disk Drill window are related to Photo Booth. Browse and locate your files! And don’t forget to preview them (hover your mouse beside the file and click the eye button). Then, mark the boxes beside the files you want to restore and click Recover.
Step 10. Select the external storage device you connected in step 1 as the save location for the restored files. Finally, click Done.
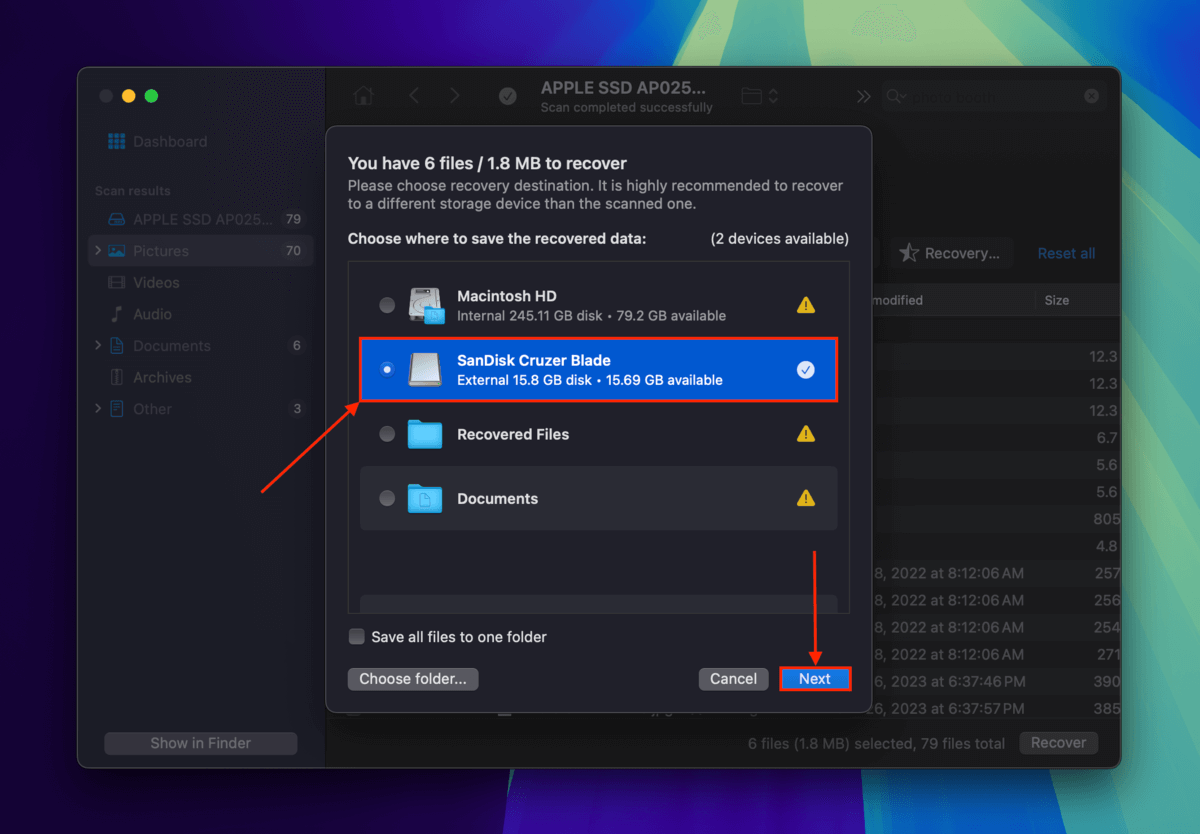
Disk Drill will let you know once it’s done restoring your files. You’ll find them in the folder you specified in step 10.
Method 3: Recover Photo Booth Files From a Time Machine Backup
Time Machine is a powerful macOS backup utility that automatically captures versions of folders and files at different points in their timeline. In this case, we can access a snapshot of your Pictures folder and restore a version of it where your Photo Booth files haven’t been deleted. Here’s how:
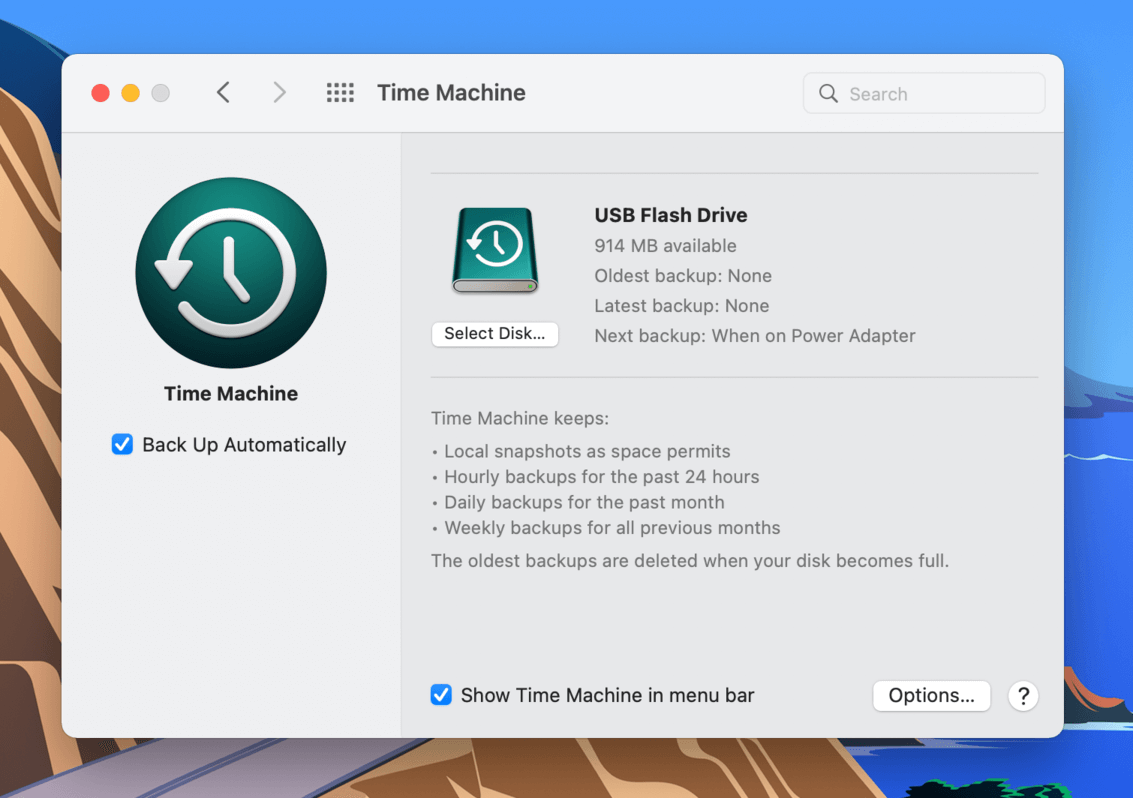
Step 1. First, enable the Time Machine button on the menu bar. Open System Preferences > Time Machine.
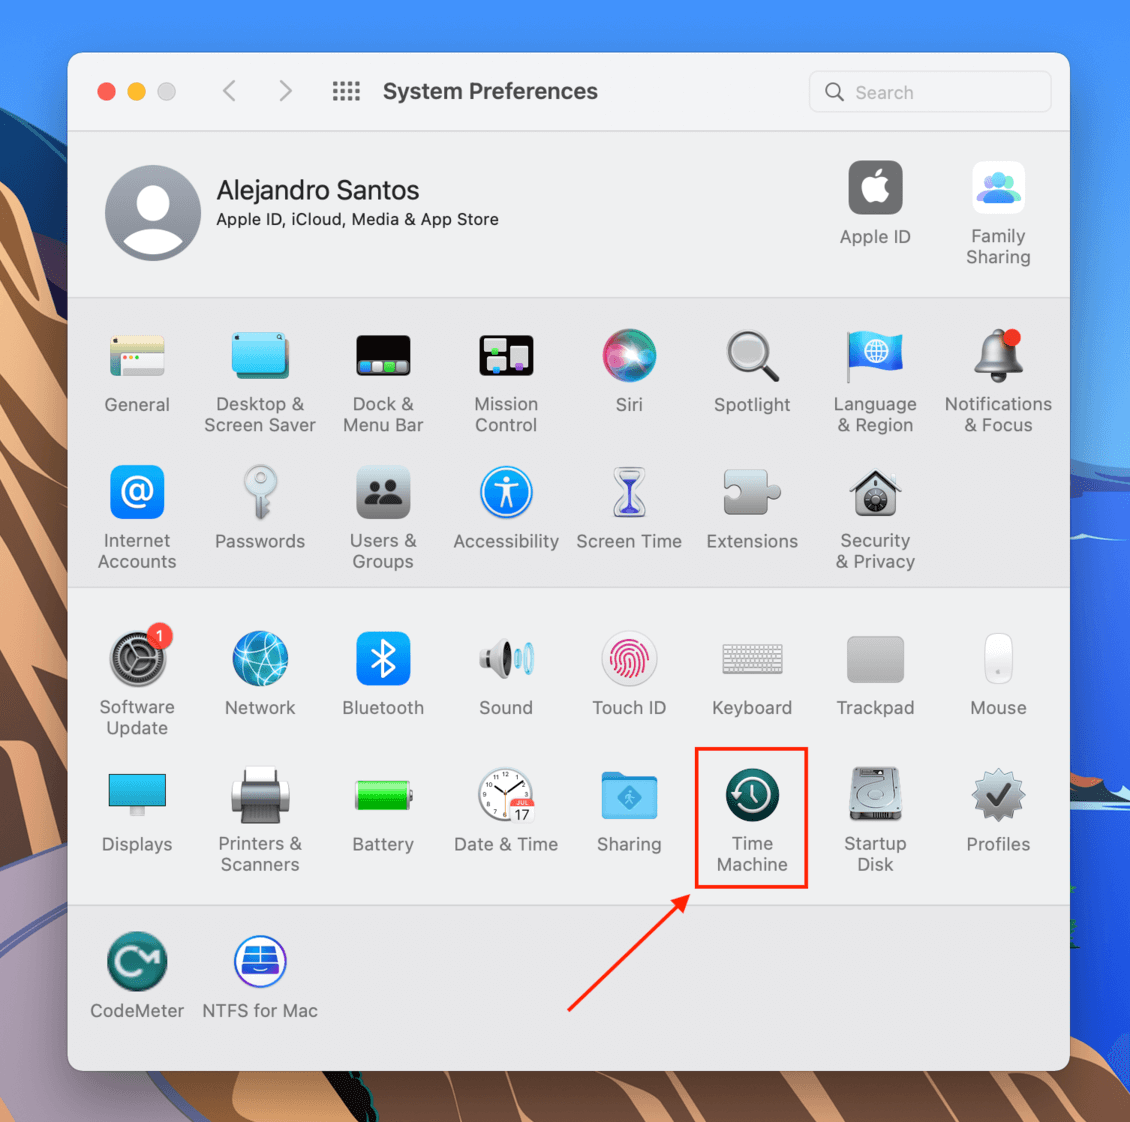
Step 2. Tick the box beside “Enable Time Machine in menu bar” to enable this setting. Then, close the window.
Step 3. Open Finder, then navigate to your Pictures folder (Finder > Go > Home).
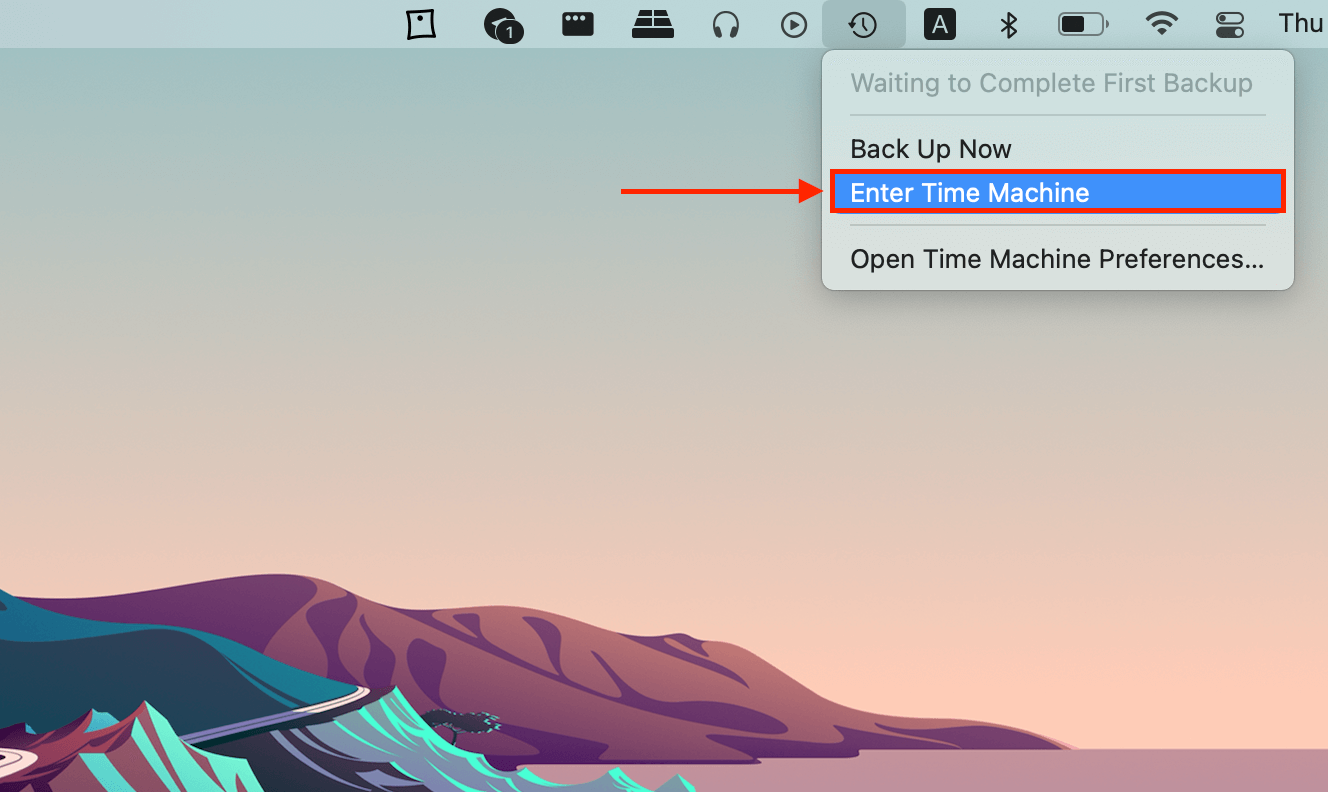
Step 4. Click the Time Machine button in the menu bar, then click “Enter Time Machine.”
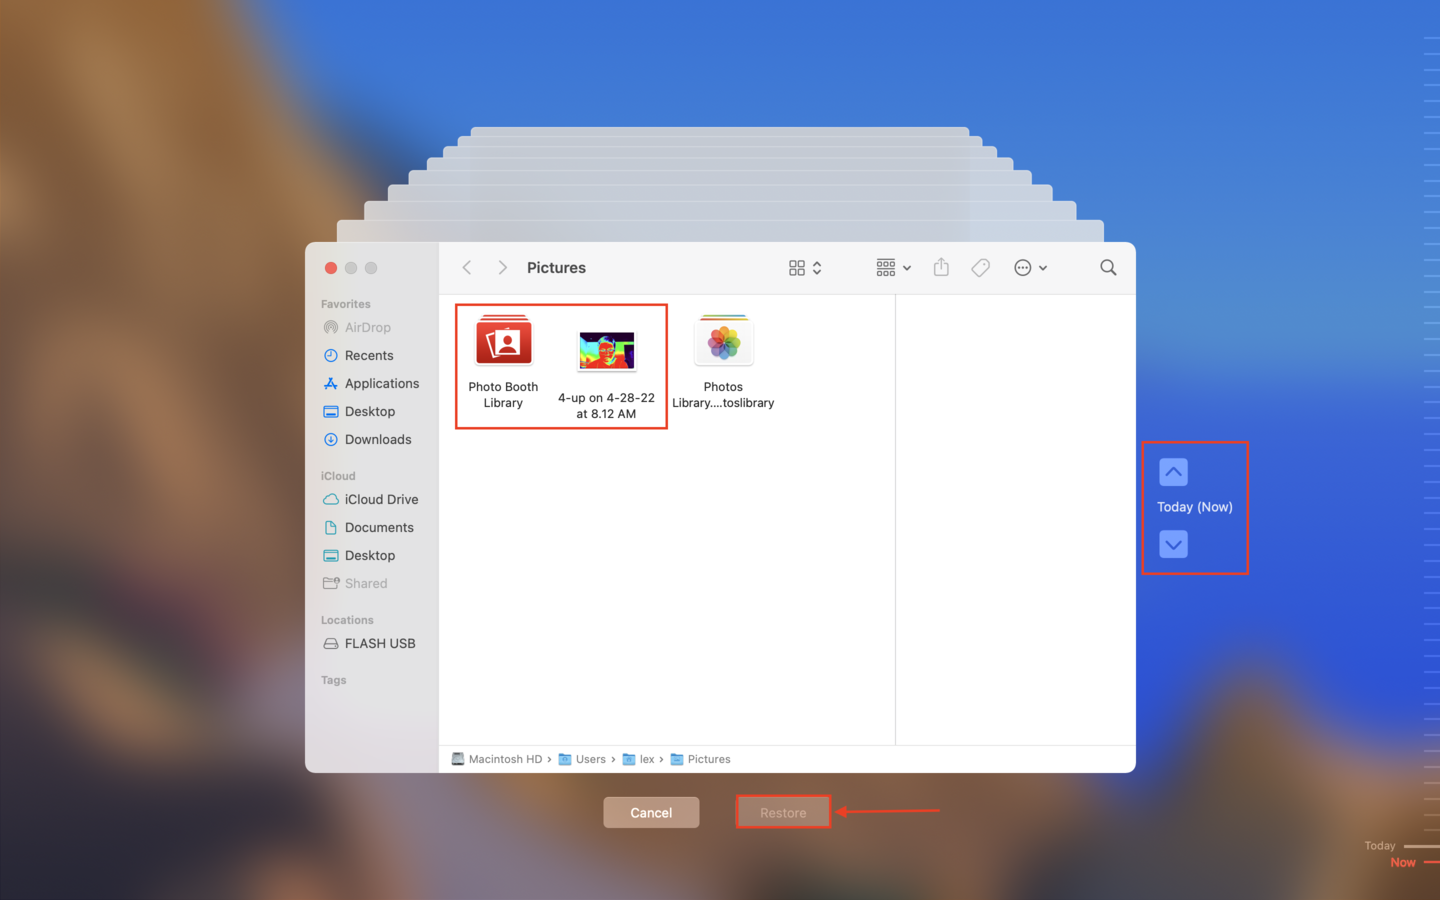
Step 5. Use the arrows to browse through snapshots of your Pictures folder. Once you find your files, highlight them and click “Restore.”
Need to recover other photos and videos on your Mac?
If you need to recover photos and videos on your Mac that have nothing to do with Photo Booth, you’ll have a different set of solutions to work with.
Check out our guides on how to recover deleted photos and recover deleted videos from your Mac for step-by-step guides like this one!


